Read FAQ
NEW
Bitrix24 Support
Registration and Authentication
How to start
My Profile
Feed
Chats and Calls
Calendar
Bitrix24.Docs
Bitrix24.Drive
Bitrix24.Mail
Workgroups
Tasks and Projects
CRM
CoPilot - AI in Bitrix24
Contact Center
Sales Center
CRM Analytics (beta)
BI Builder
Sales Intelligence
Inventory Management
Marketing
Sites
Online Store (beta)
CRM + Online Store
CRM Store (beta)
Bitrix24.Sign
Company
Knowledge base (beta)
Automation
Workflows
Telephony
Market
Subscription
Settings
Enterprise
Mobile App
Desktop App
General questions
Bitrix24 On-Premise
Log In
Your Bitrix24
Authorize to enter
your company's Bitrix24.
Enter

Bitrix24Care

Stripe integration app

Integrate Stripe payment processor to accept payments from your Bitrix24 account. No limits or hassle, available free of charge on any Bitrix24 commercial plan. To install the app, just follow the standard procedure for Bitrix24.Market apps, no additional setup is required.

Accept payments via cards, wallets, instant bank transfers, cash payments and other alternative payment methods, all via a single integration. The list of options will differ depending on the country your customers are located in. 

Some of the available methods (for Europe, as an example) are card payments (Visa, Mastercard), iDeal bank transfers, WeChat Pay, EPS, Giropay, SEPA debit, Alipay and more.

Stripe account
Authorization
Payment methods

   
If you already have an active Stripe account, skip this step.

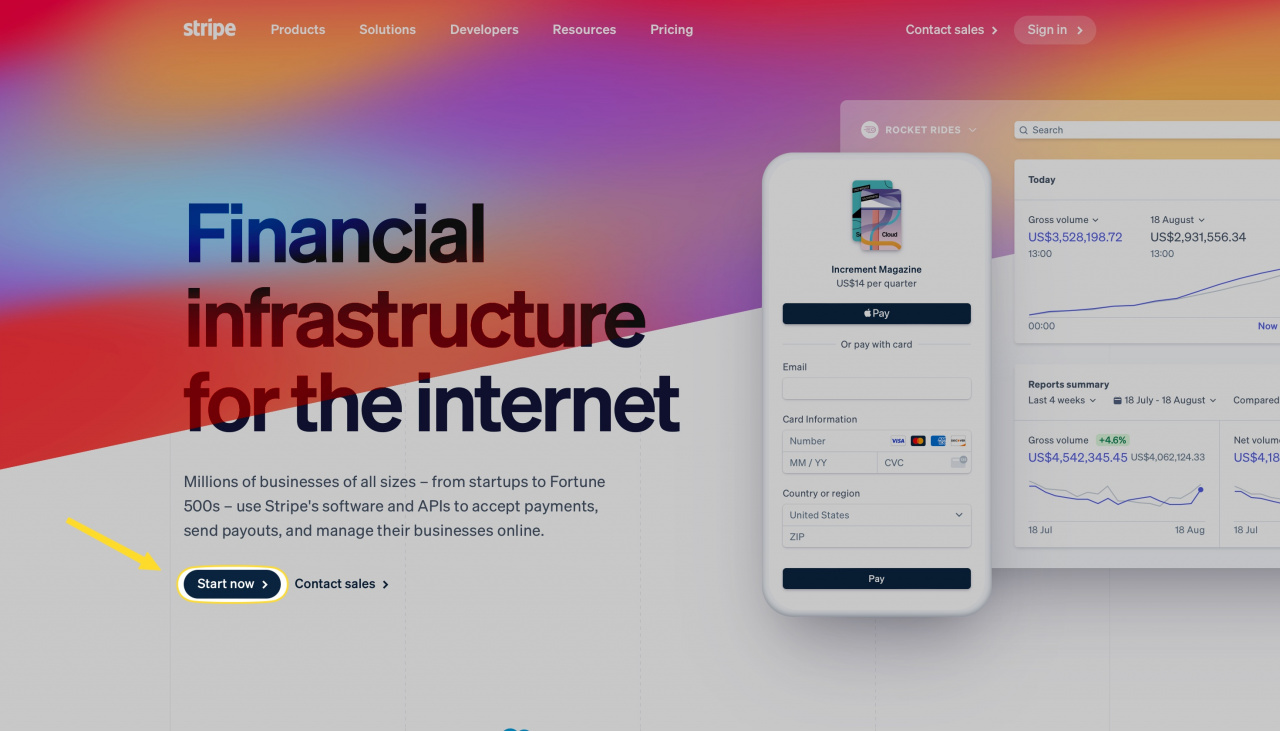
Go to the Stripe website and click unto Start now button to sign up a merchant account.

Stripe. Start now.jpeg

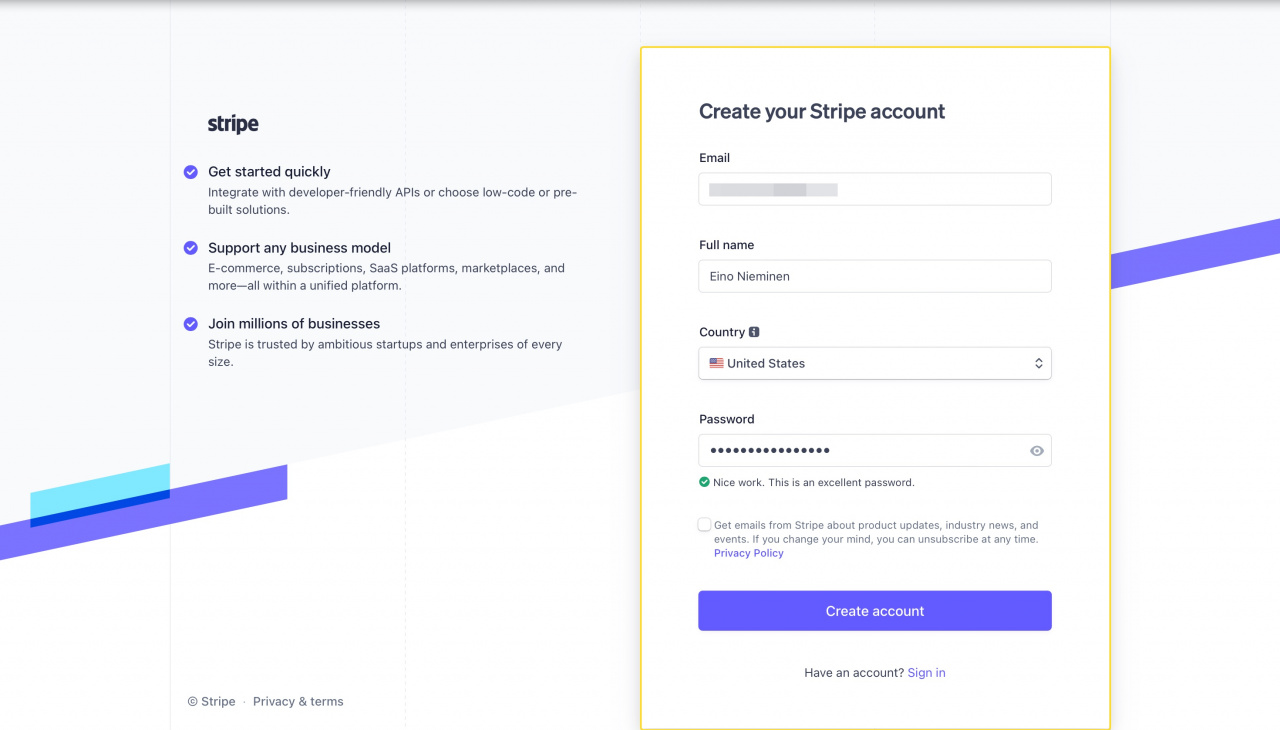
Complete the registration form and click unto Create account button once you are ready.

Stripe signup form.jpeg
You'll need to verify your email first to proceed to your newly created merchant account.
You may need to switch to your mailbox right from the verification page or to check it manually, depending on your mail service provider.

Verify your email in Stripe.jpeg
Verification email (Stripe).jpeg

Your next step is to activate your account to get access to live (production) API keys. Once you are in, you'll see that the test mode (aka sandbox) is enabled by default.

You may use these API credentials to try basic functions out, however you won't be able to process real-time payments from your customers with this set of keys. 
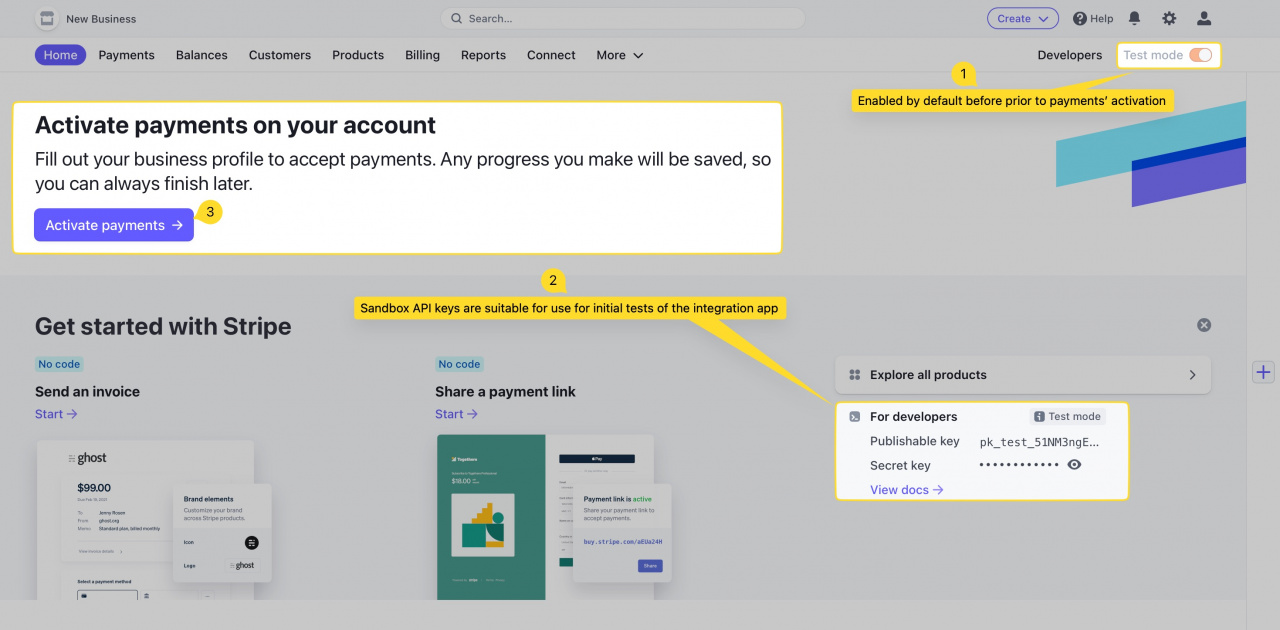
Stripe Home page. API keys.jpeg

You'll need to fill out a compliance form sharing some more details on your business to activate your account for live payments' processing. 

As part of your account setup, Stripe will ask you to upload specific business and identity documents for verification. 
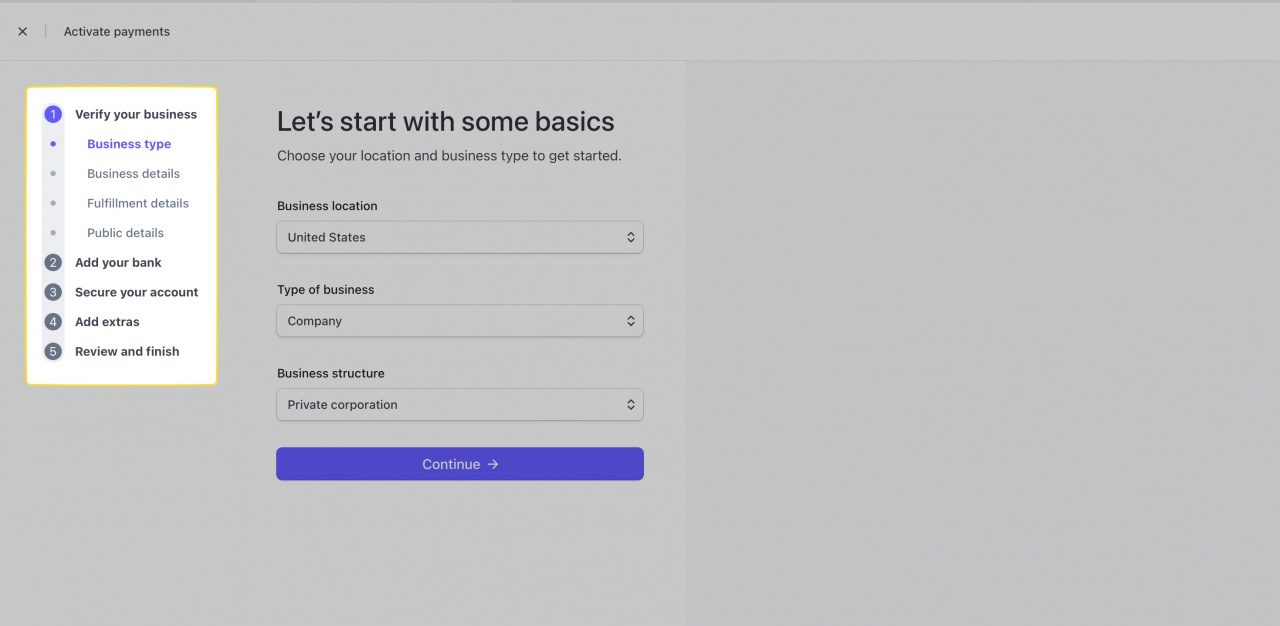
All required documents must be uploaded via your Stripe Dashboard and verified by Stripe before your account can begin to process payments. It may take up to several days to activate the account.
 
Compliance form.jpeg

More information on business verification can be found here.


It's highly recommended to test your integration setup with sandbox keys (obtained in test mode) first. We advise to use test cards provided by Stripe to simulate and go through the payment process.

To process the actual payments, you will need to verify your Stripe account and use the live API keys instead. You may change the keys anytime by filling out corresponding fields once more (Authorization tab in an active app) and saving the changes.

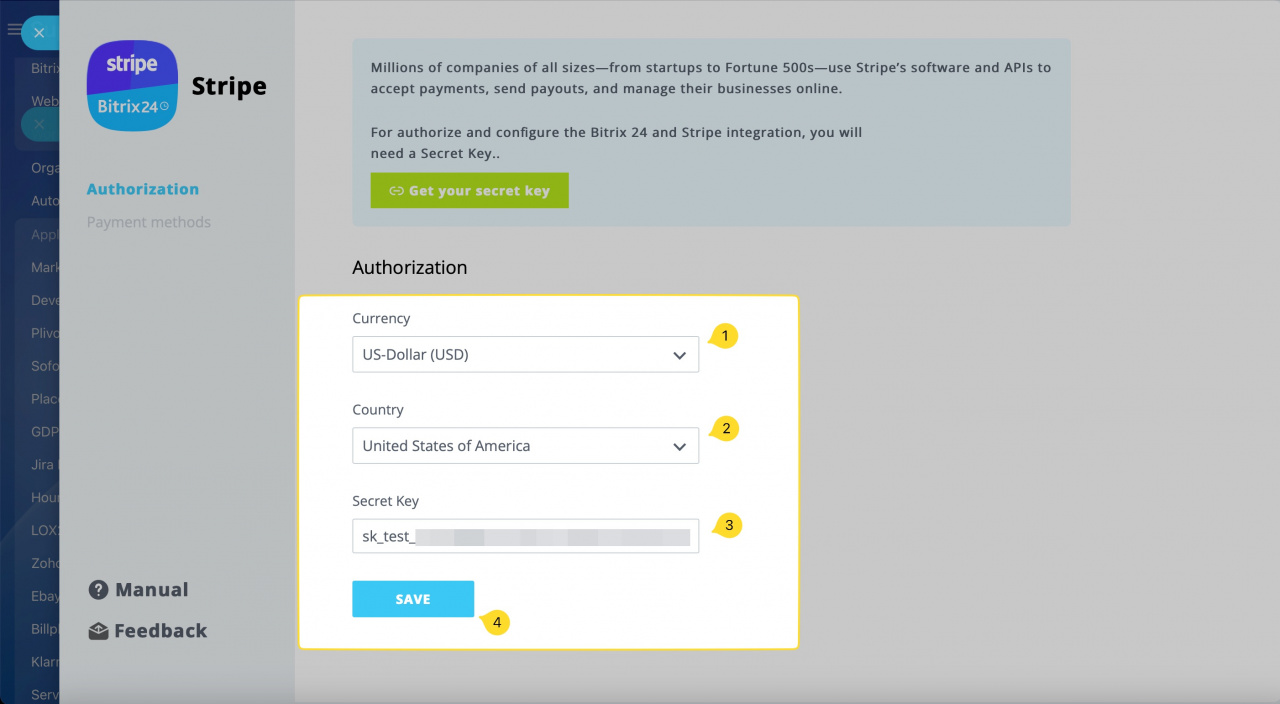
Copy and paste the Secret key from your Stripe dashboard, select a payment currency from the list and your region. Click unto Save to apply changes and enable sync.

Stripe authorization setup.jpeg

Done! The integration is successfully configured and is ready for use.
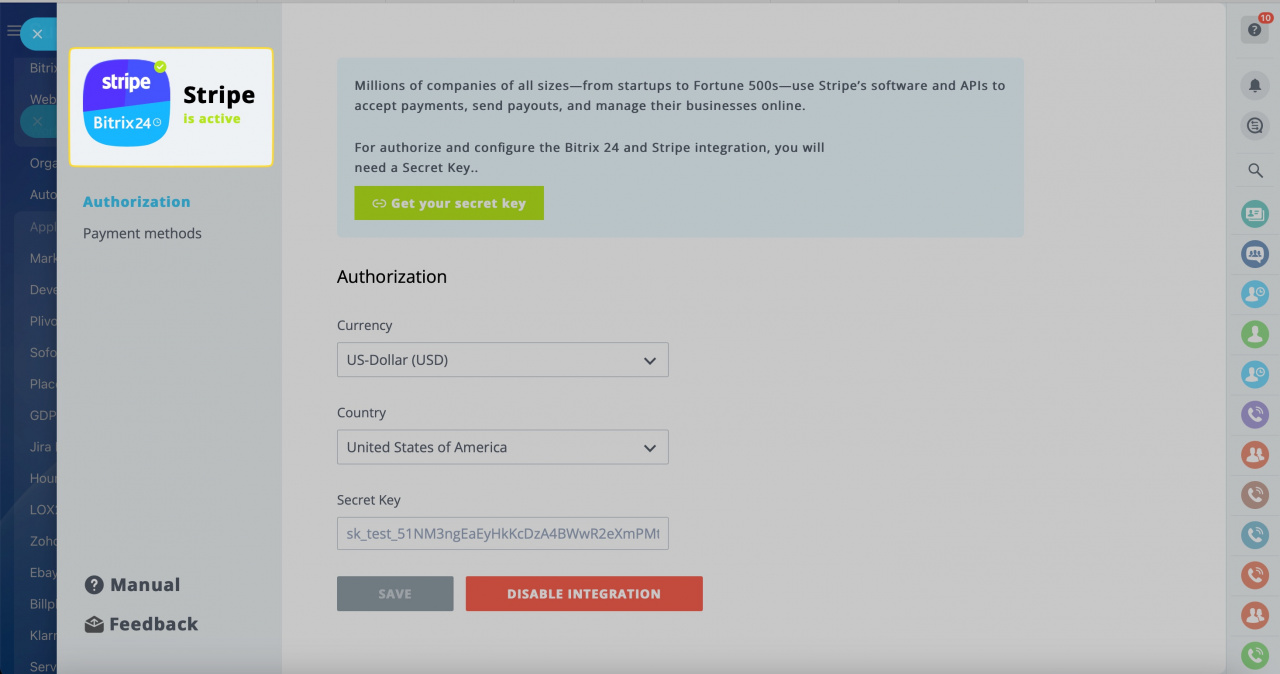
Stripe integration active.jpeg


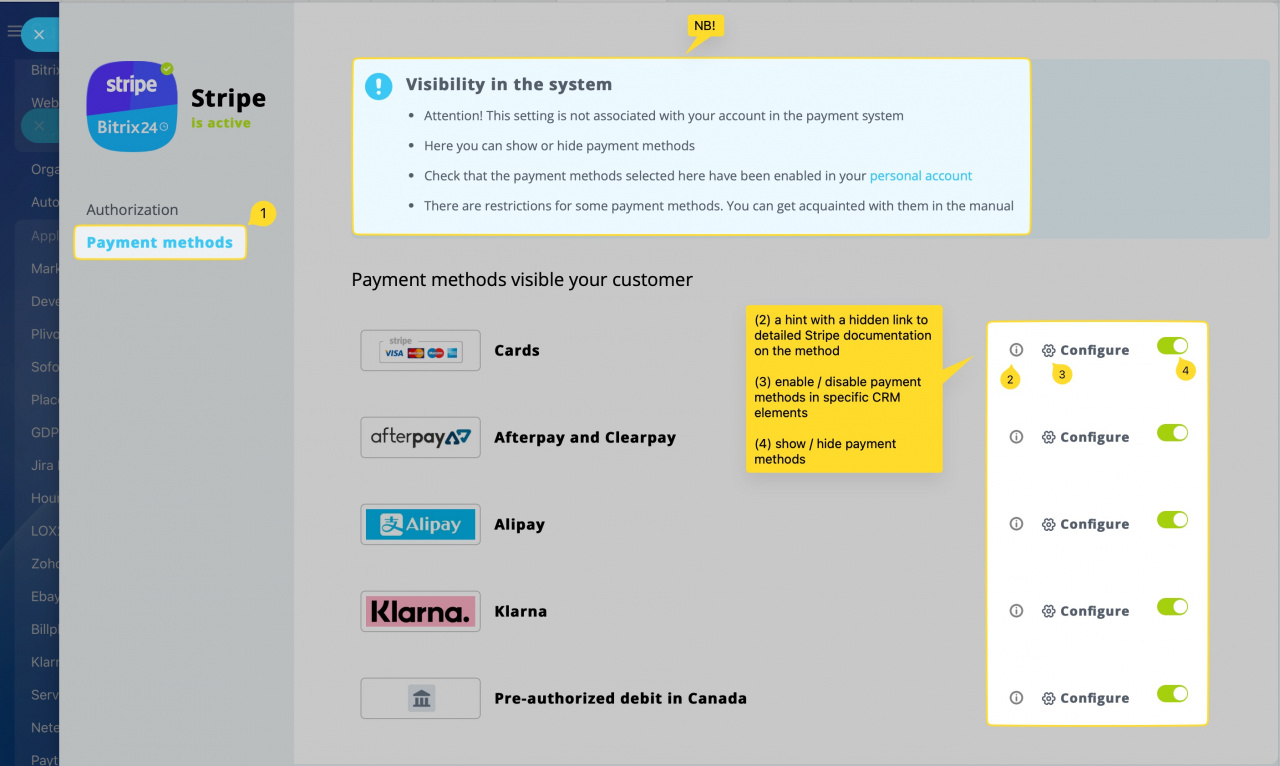
All available payment methods become visible once you enter and save your API keys. You may disable and enable particular methods as you like, depending on which payment methods are the most relevant for you and your clients. 

Disabled methods will be hidden from your customers regardless of the payment option used (invoices, forms, etc.).

Stripe payment methods explained.jpeg

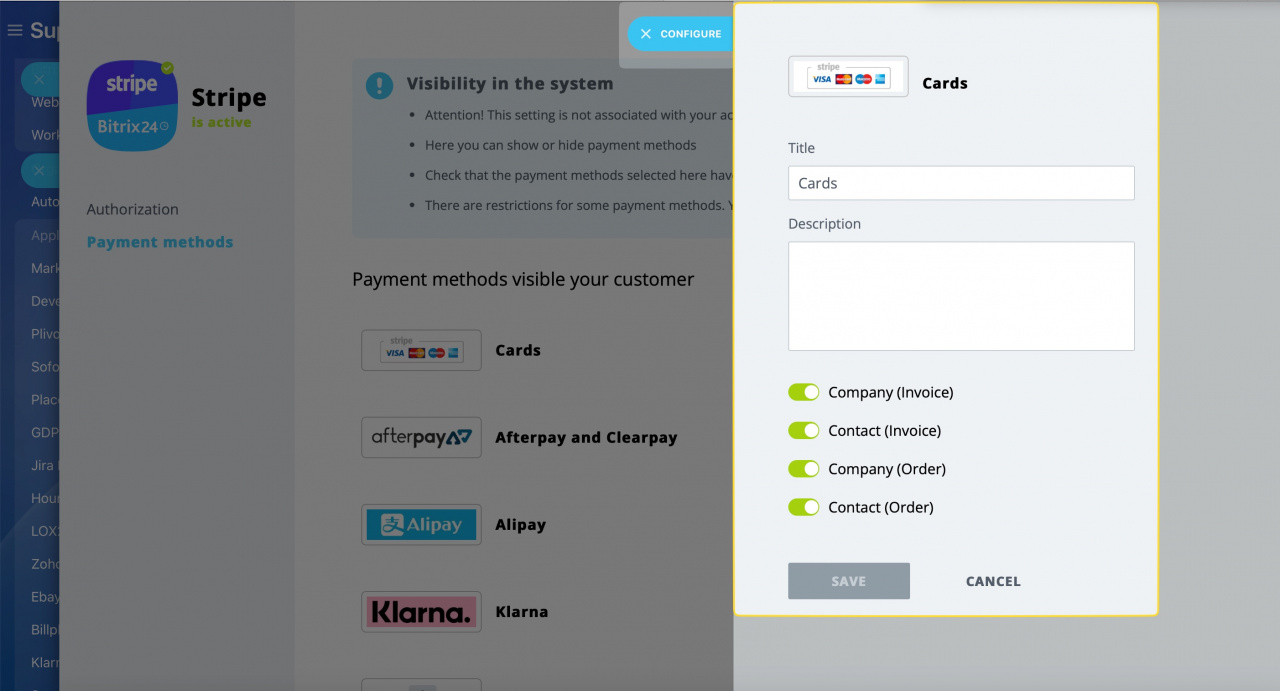
If you click unto Configure button, you'll be able to enable or disable specific payment options for the selected method.

Stripe. Configure button options.jpeg

Contact (Invoice) and Company (Invoice) are used exclusively in the legacy invoice types for contacts and companies respectively. 

Contact (Order) and Company (Order) will be used in contacts and companies, respectively, for the new invoice types (issued from deals) as well as for online orders at your online stores.

At this page, you can also edit the Title and Description for all four payment method subtypes. Click the Save button to save your changes or Cancel button otherwise.


Important note: we follow all of the Stripe security guidelines both in development and maintenance of the integration app. If you would like to have some more information on safety measures, kindly check the following page or contact Stripe support directly.

See also
Was this information helpful?
Integration specialist assistance
That's not what I'm looking for
Complicated and incomprehensible text
The information is outdated
It's too short. I need more information
I don't like the way this tool works
Go to Bitrix24
Don't have an account? Create for free
Related articles
Payment system integrations in Bitrix24 Skrill Integration app Braintree Integration app Squareup Integration Technical issues with a payment service integration. Data to provide to Integrations support