
Adding products to a CRM item form helps you track what you're selling to a client and automatically calculate the total amount.
You can add products to the following CRM item forms:
- Lead
- Deal
- Estimate
- Invoice
- SPA
Bitrix24 automatically recalculates the total based on quantities, discounts, and taxes. For example, if you want to offer a client a special discount, enter the discount amount in the CRM item form.
In this article:
Add a product to an item form
To specify which products or services you're selling to a client, add them to the Products tab of the CRM item form.
Let's use a deal as an example. You can follow the same steps for other CRM items.
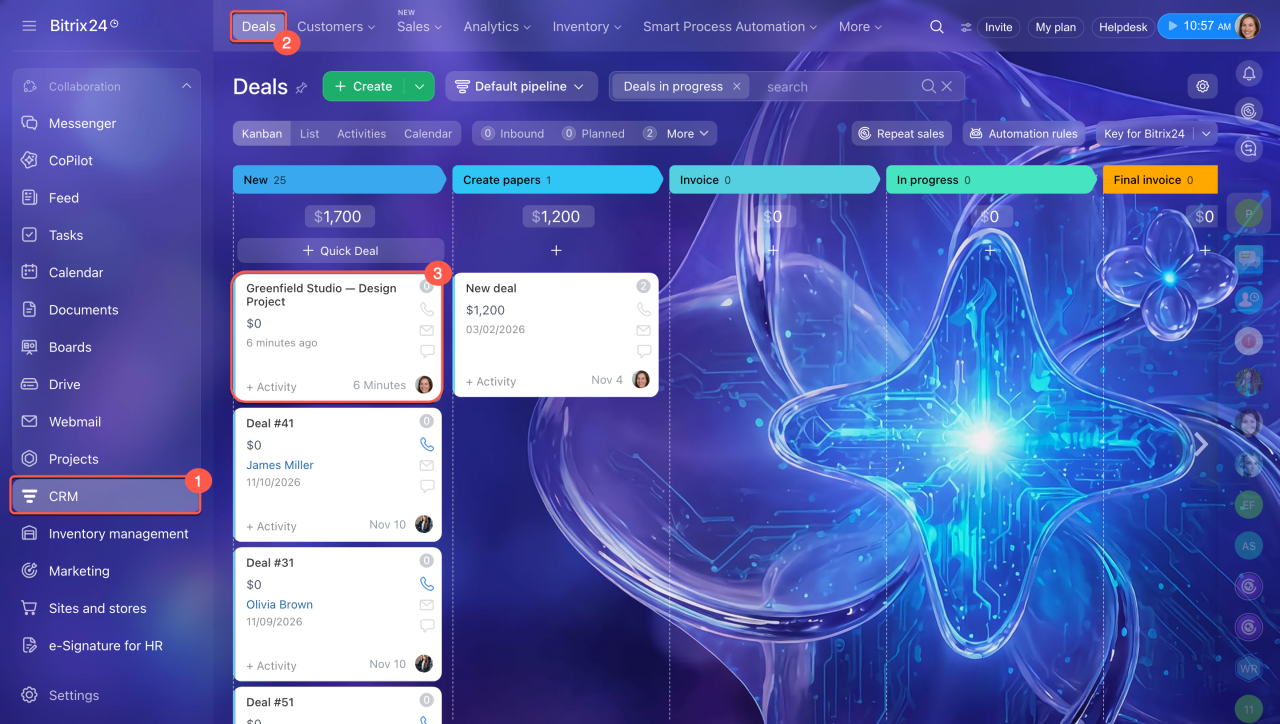
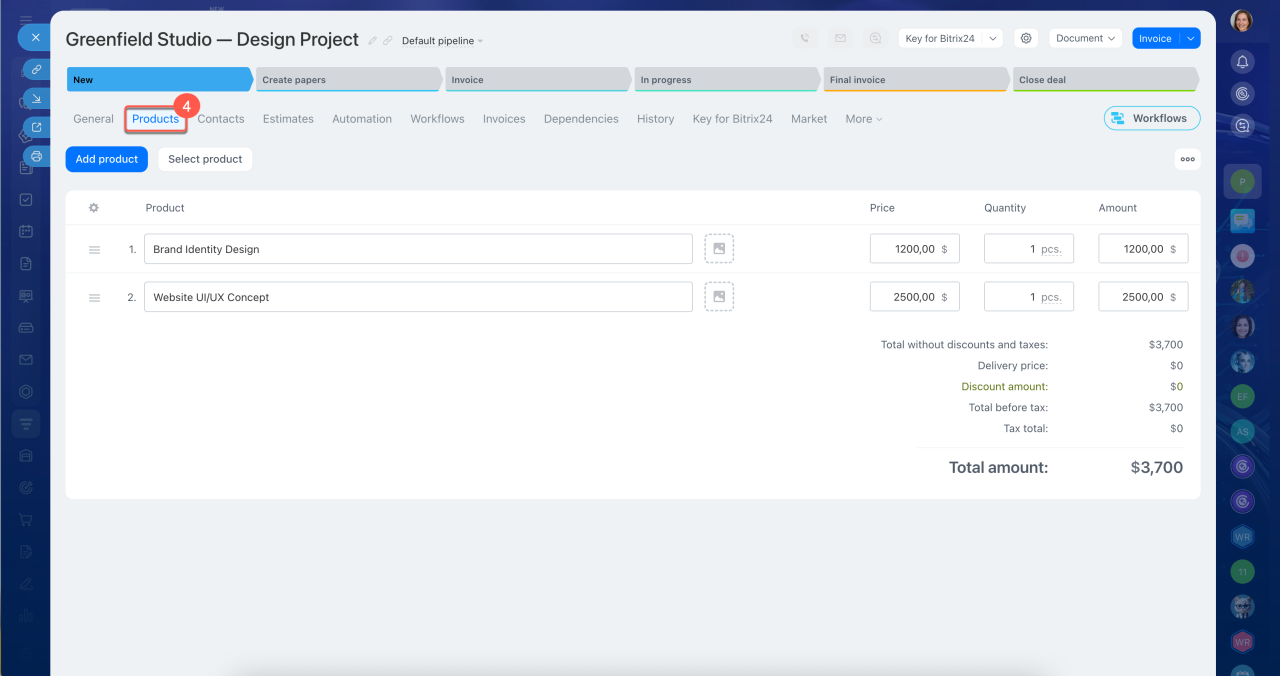
Go to CRM > Deals, open the deal you need, and select the Products tab.
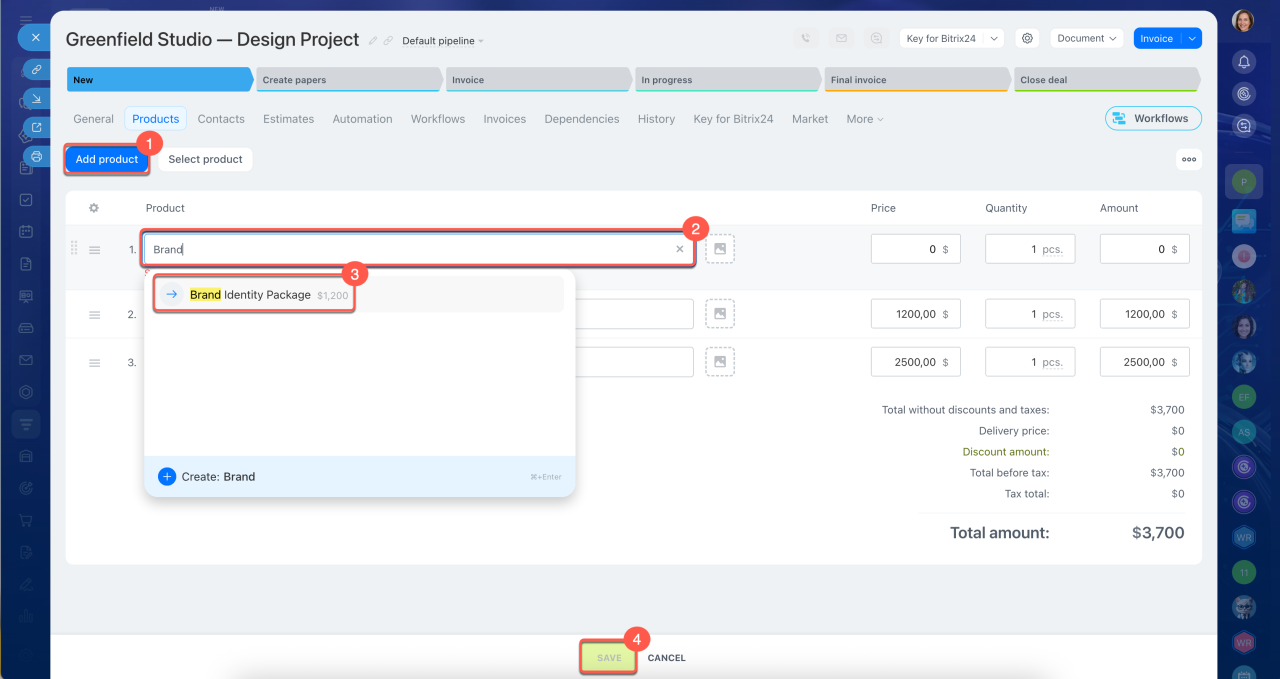
Add a product by name. Use this method if you know the exact product name and don't need to browse the catalog.
1. Click Add product.
2. Start typing the product name.
3. Select the product from the list.
4. Save your changes.
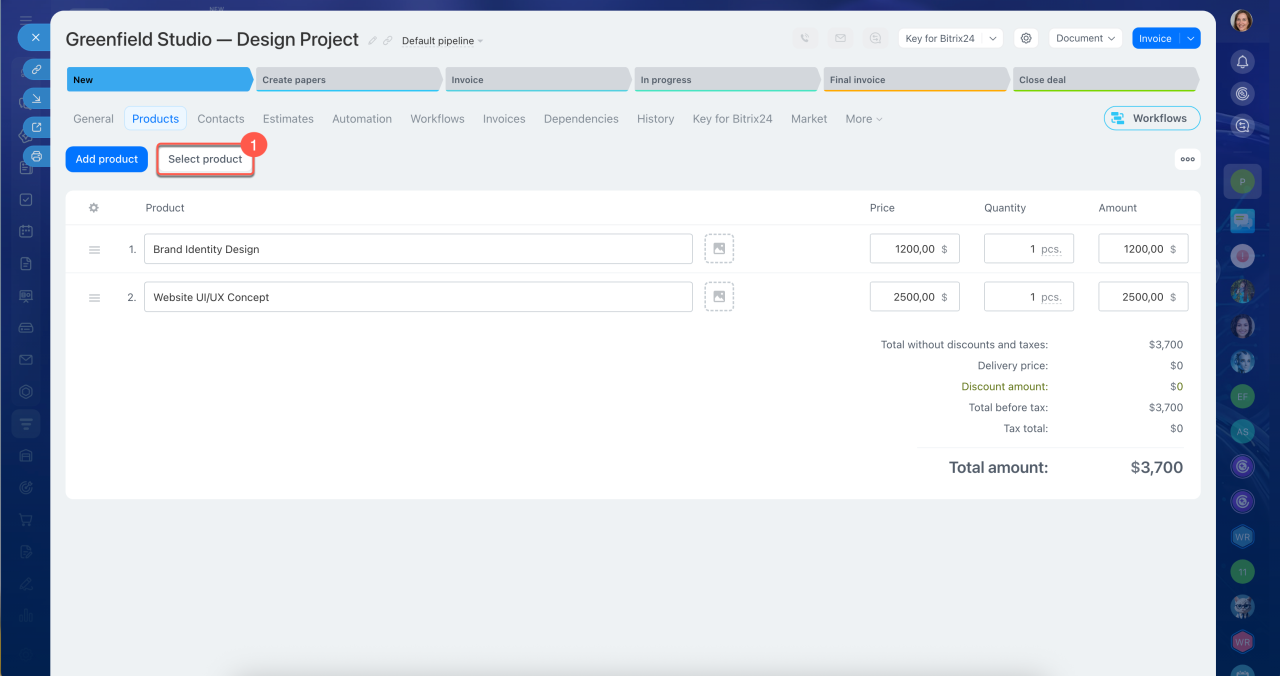
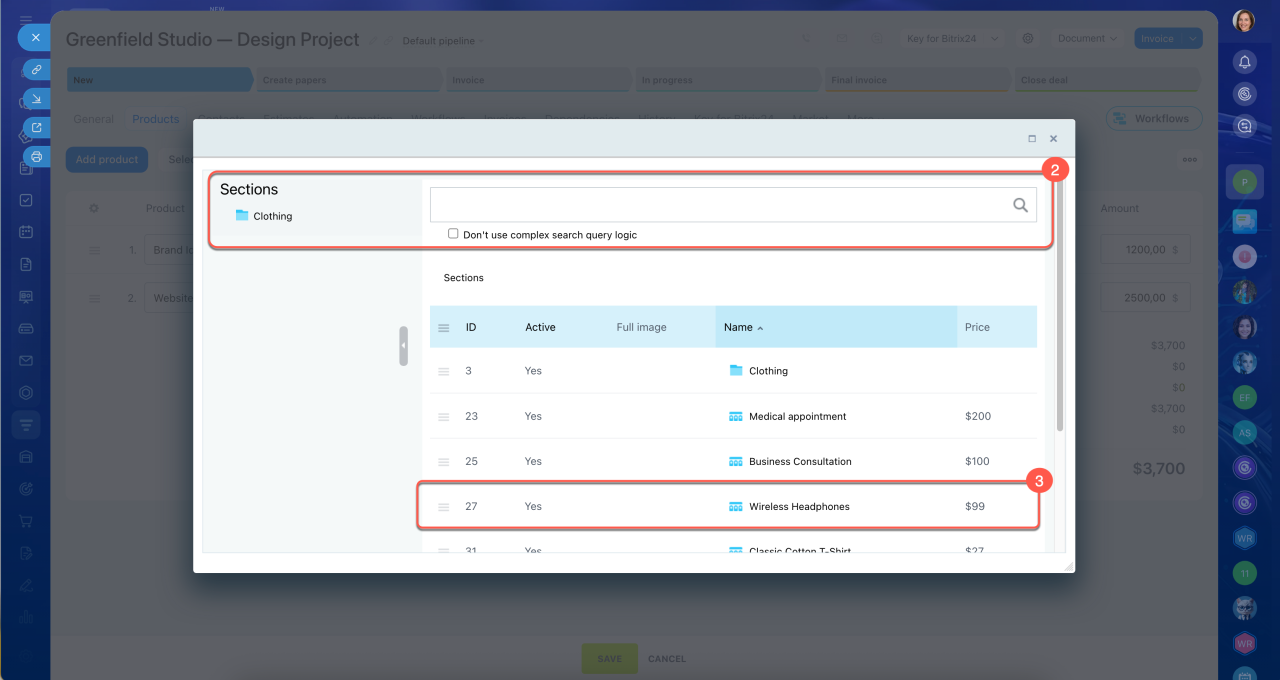
Select a product from the catalog. Use this method if you need to find a product in a specific catalog section or browse the product list.
1. Click Select product.
2. Find the product you need in the catalog.
3. Double-click it to add it to the Products tab.
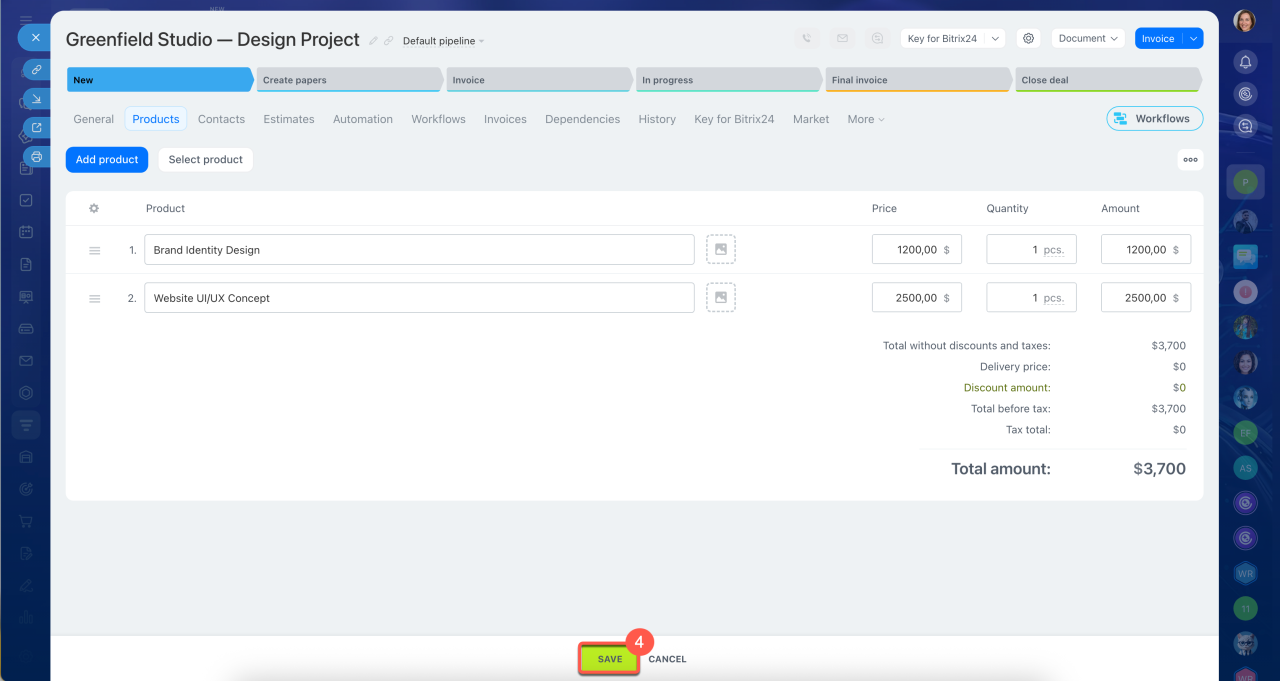
4. Save your changes.
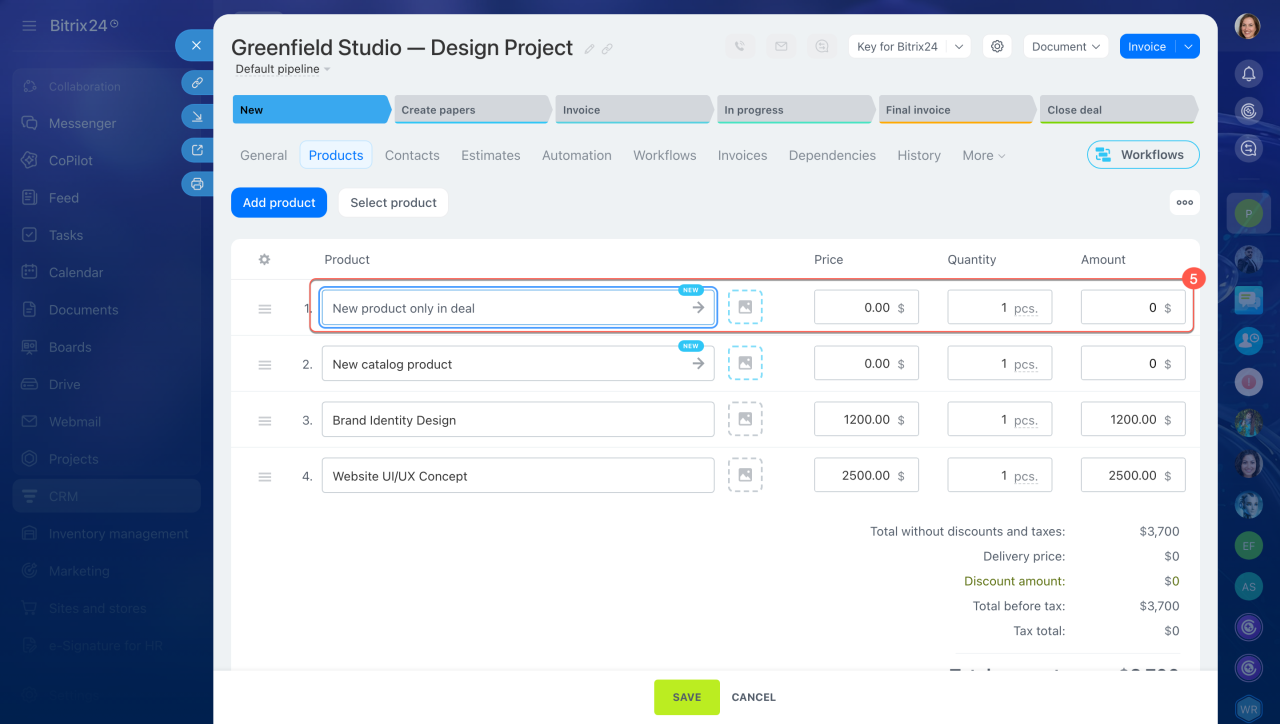
Create a new product. If the product you need doesn't exist yet, create it directly from the CRM item form.
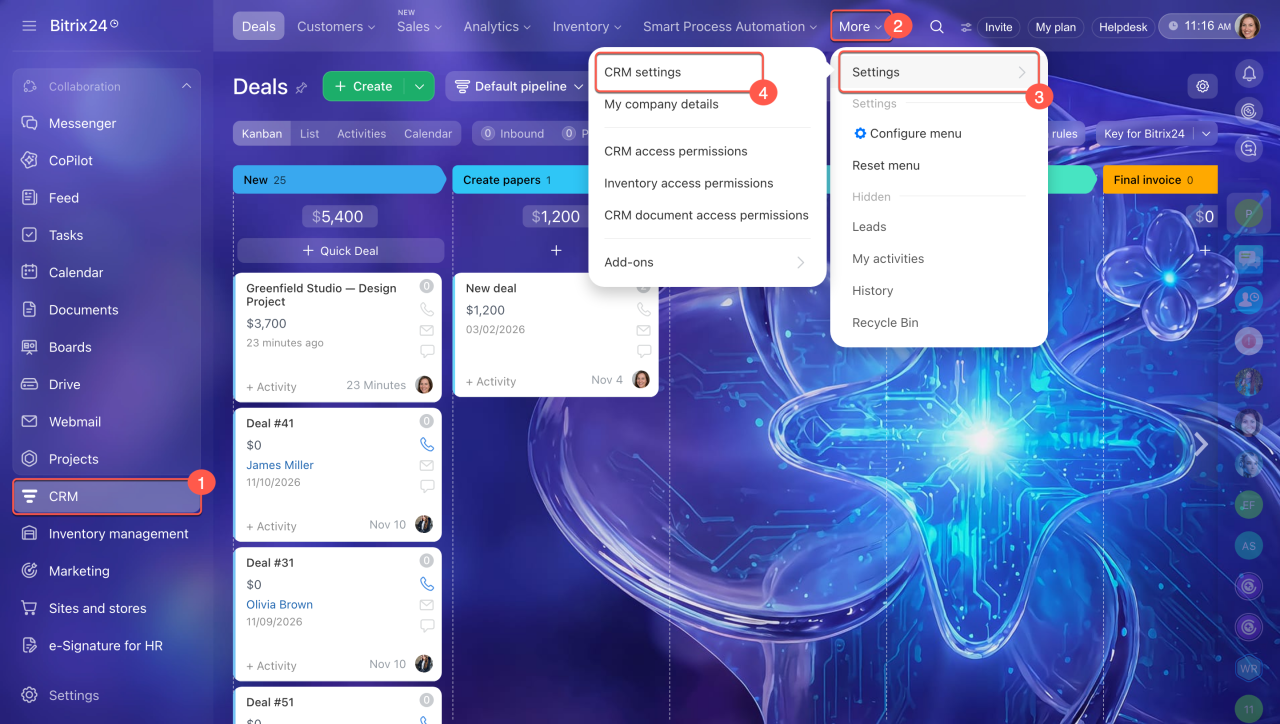
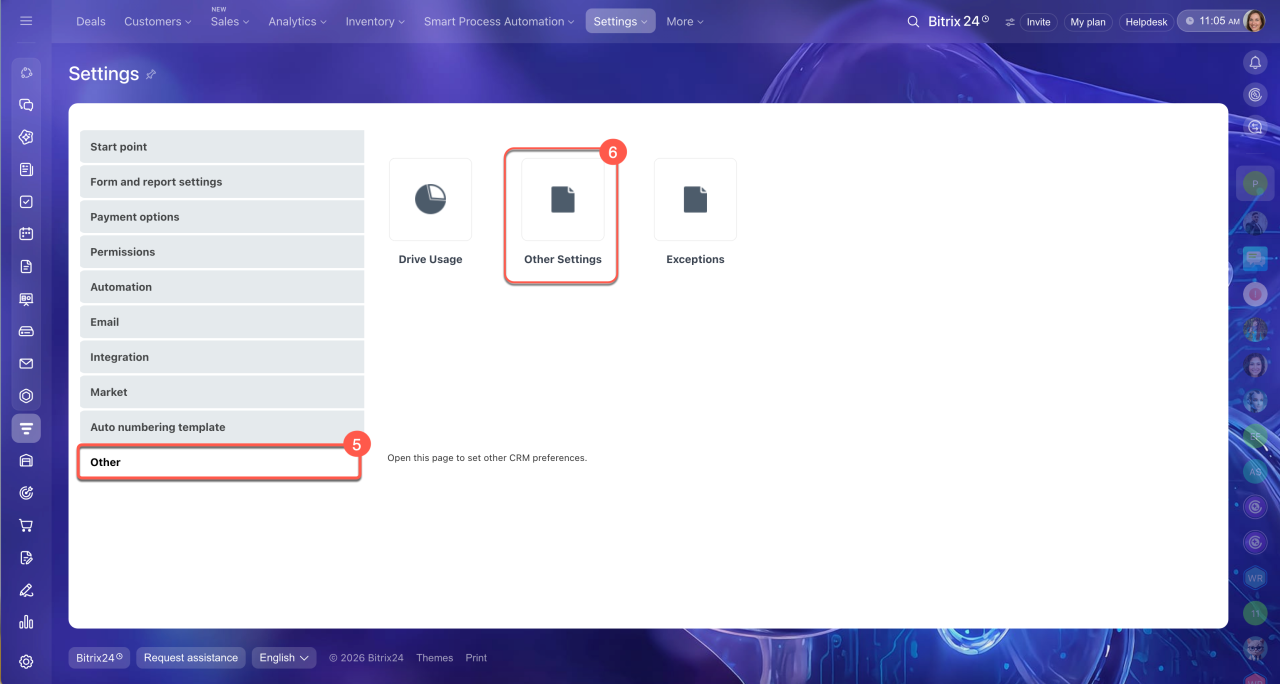
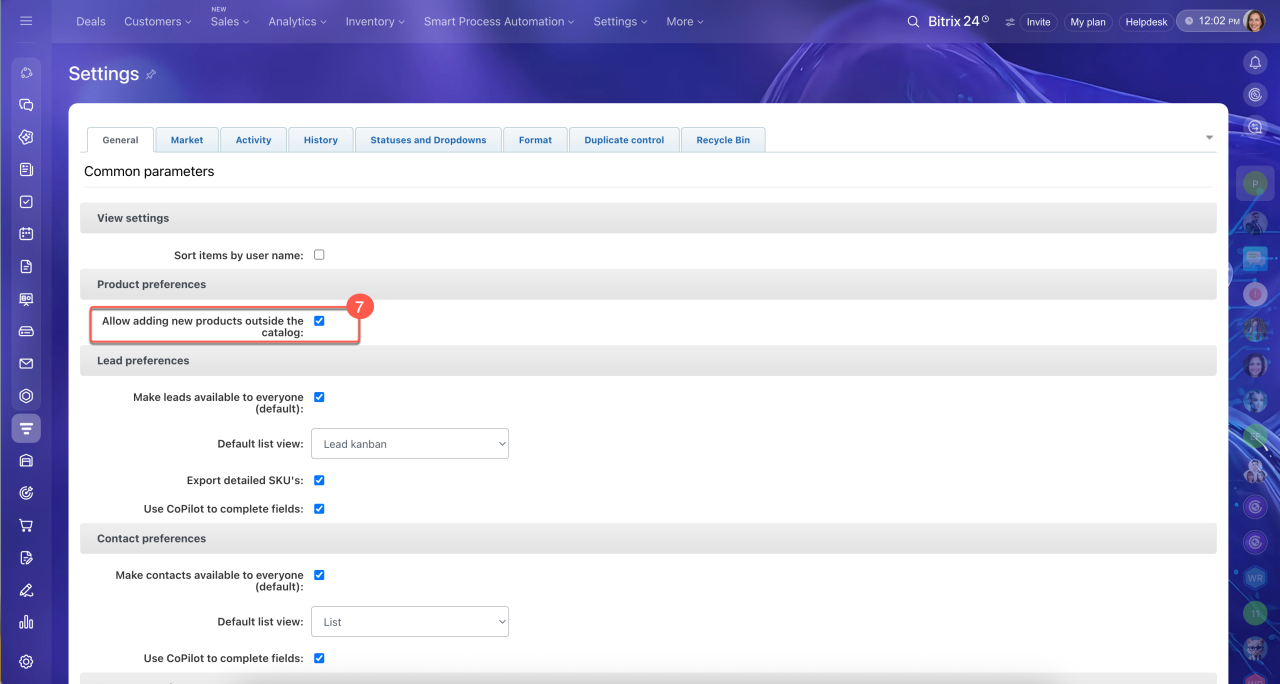
Whether the product is saved to the catalog depends on this setting: CRM > More > Settings > CRM Settings > Other > Other Settings > Allow creating a new product without saving it to the catalog.
If this option is enabled, you can add the product only to the deal. If it's disabled, the product is always saved to the catalog.
Other CRM settings
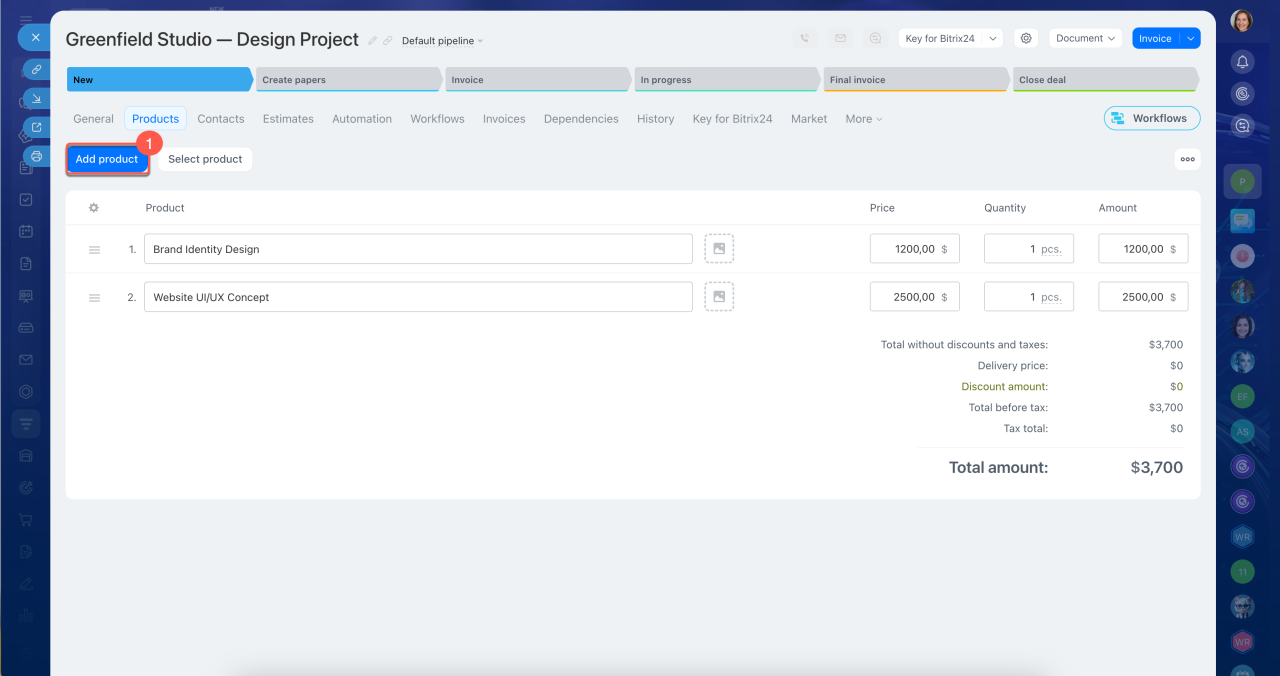
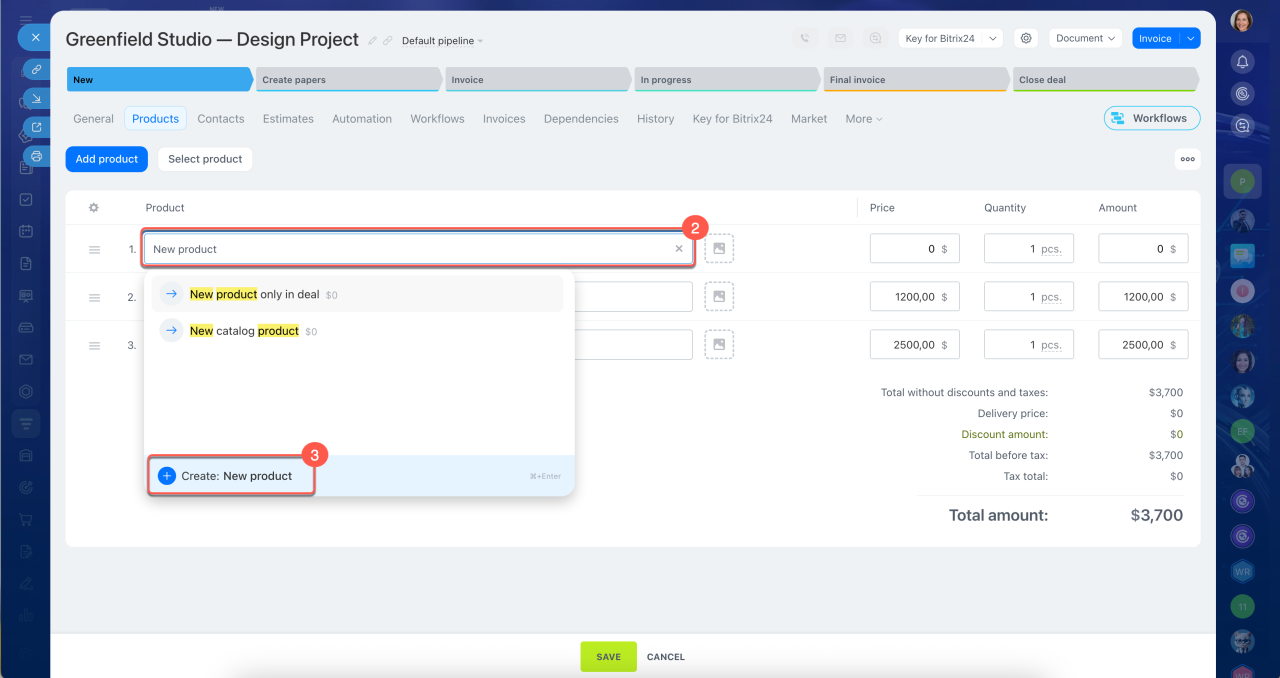
1. Click Add product.
2. Enter the name of the new product.
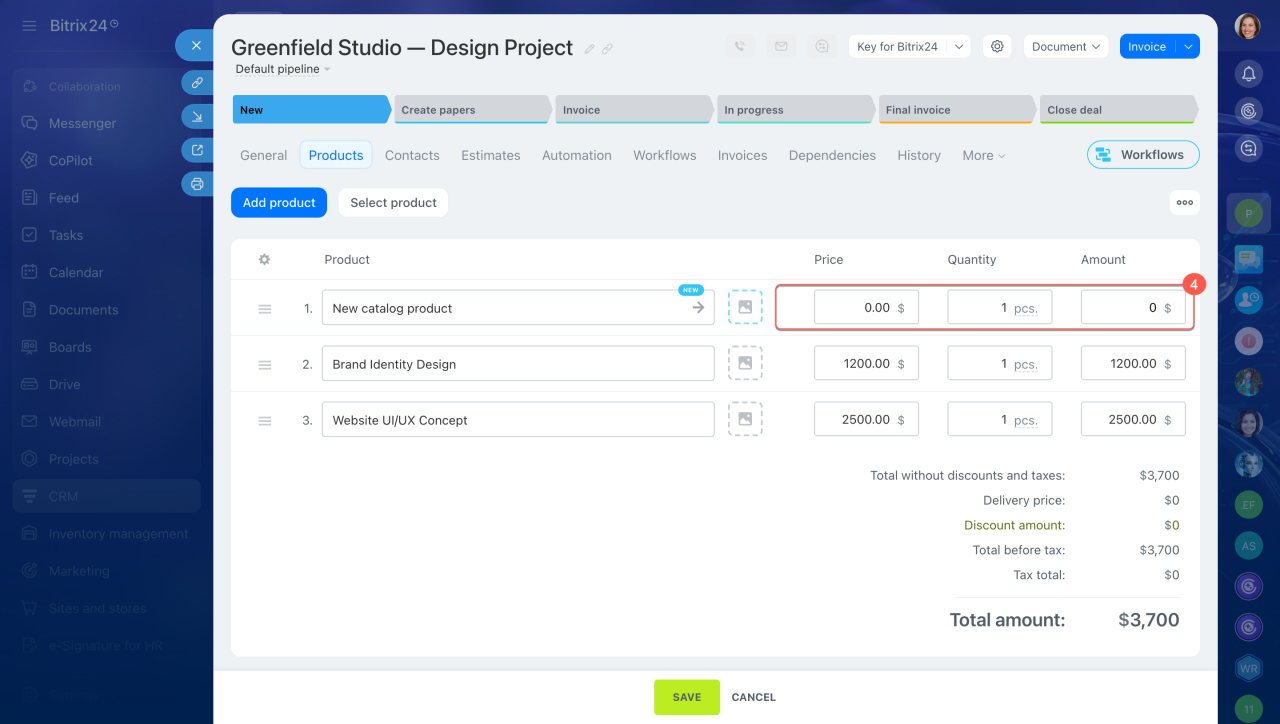
3–4. To add the product to the catalog, click Create, enter the price, and fill in the other fields.
5. To add the product only to the deal, enter its price and other details.
6. Click Save.
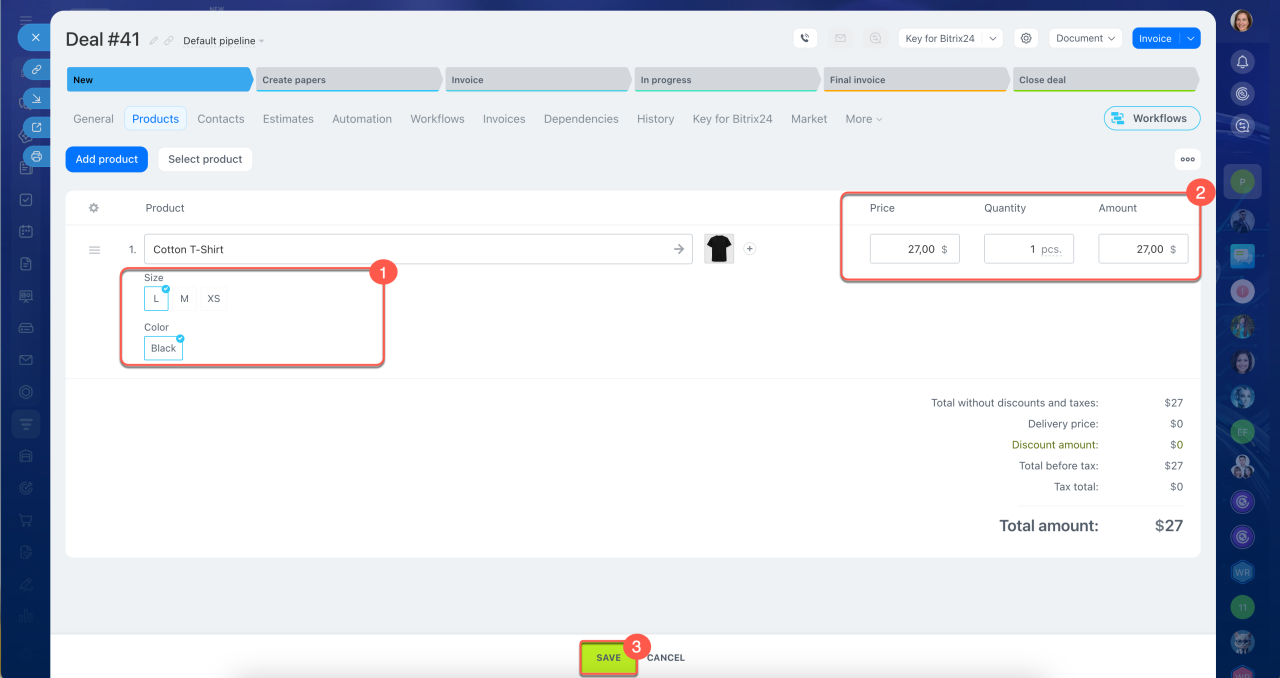
Set up product details. After adding a product to the CRM item form, configure its details.
1. If the product has variants, such as different colors or sizes, select the one you need.
Product and variant properties
2. Enter the quantity, taxes, and discount. The total updates automatically.
3. Save your changes.
On the right side of the screen, you can see a breakdown of the product total: the amount before discounts and taxes, the discount amount, the tax amount, and the final total. If automatic calculation is enabled, the deal amount matches the total amount of the products.
Deal amount calculation modes
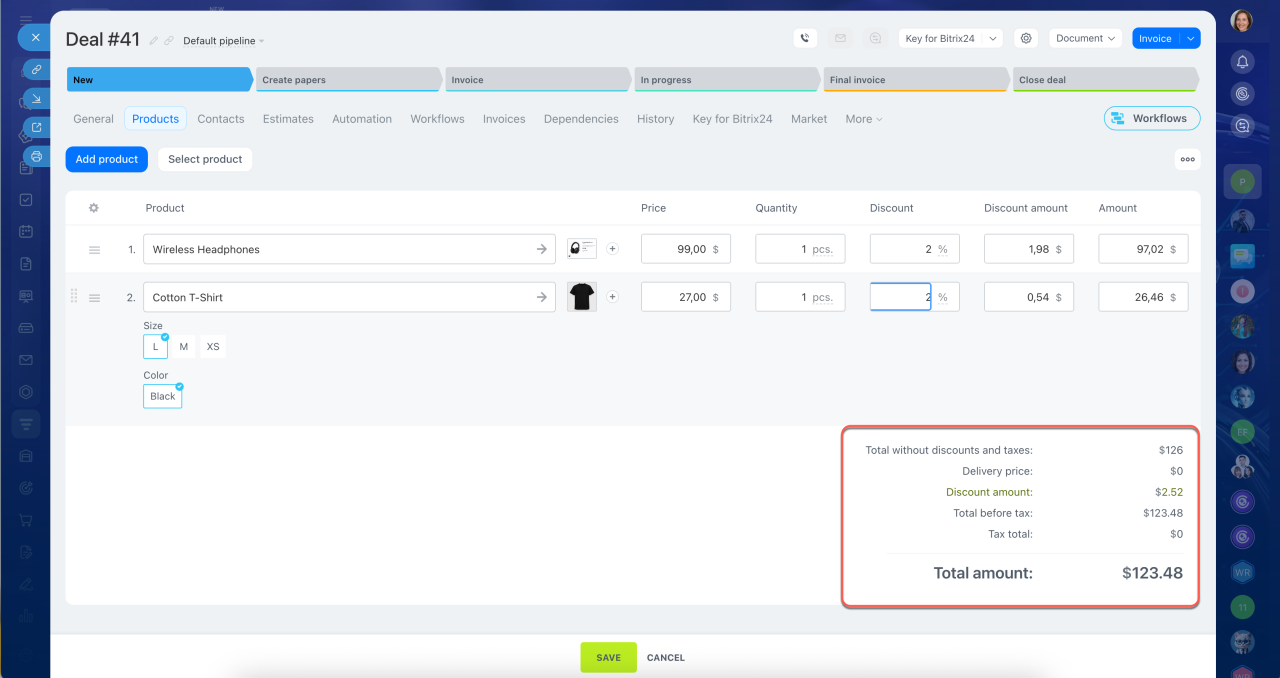 Final calculation for products
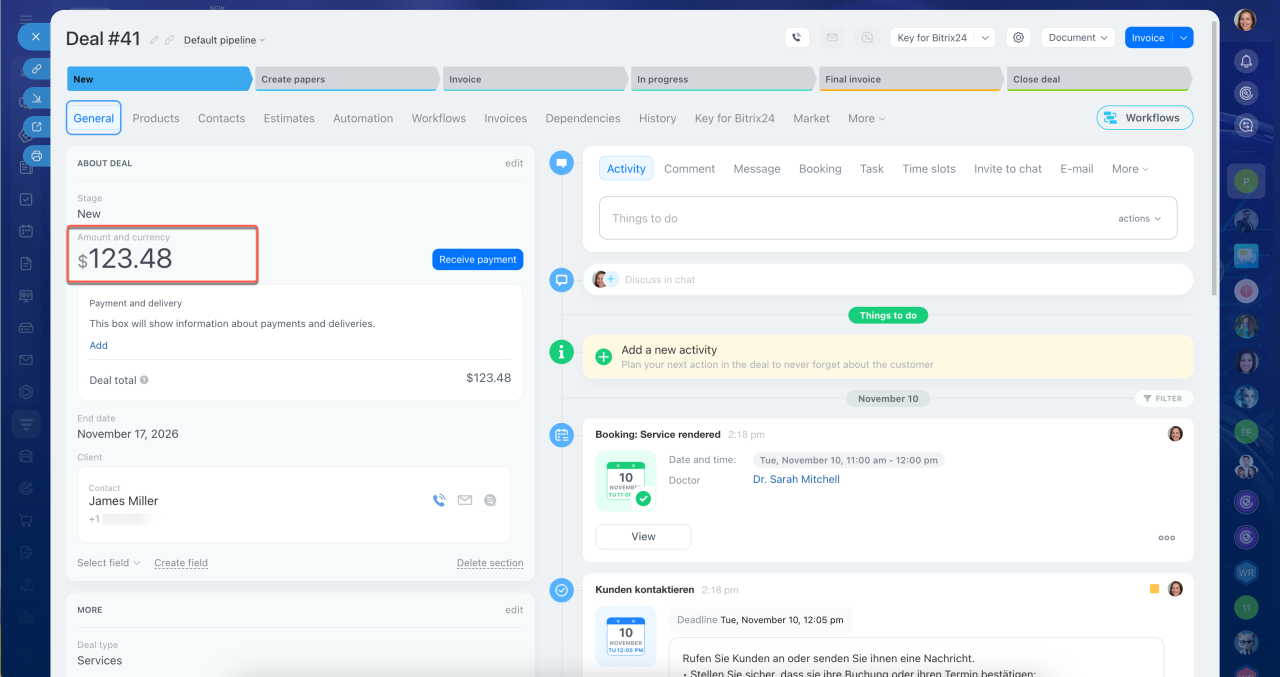 The deal amount equals the total product amount with automatic calculation
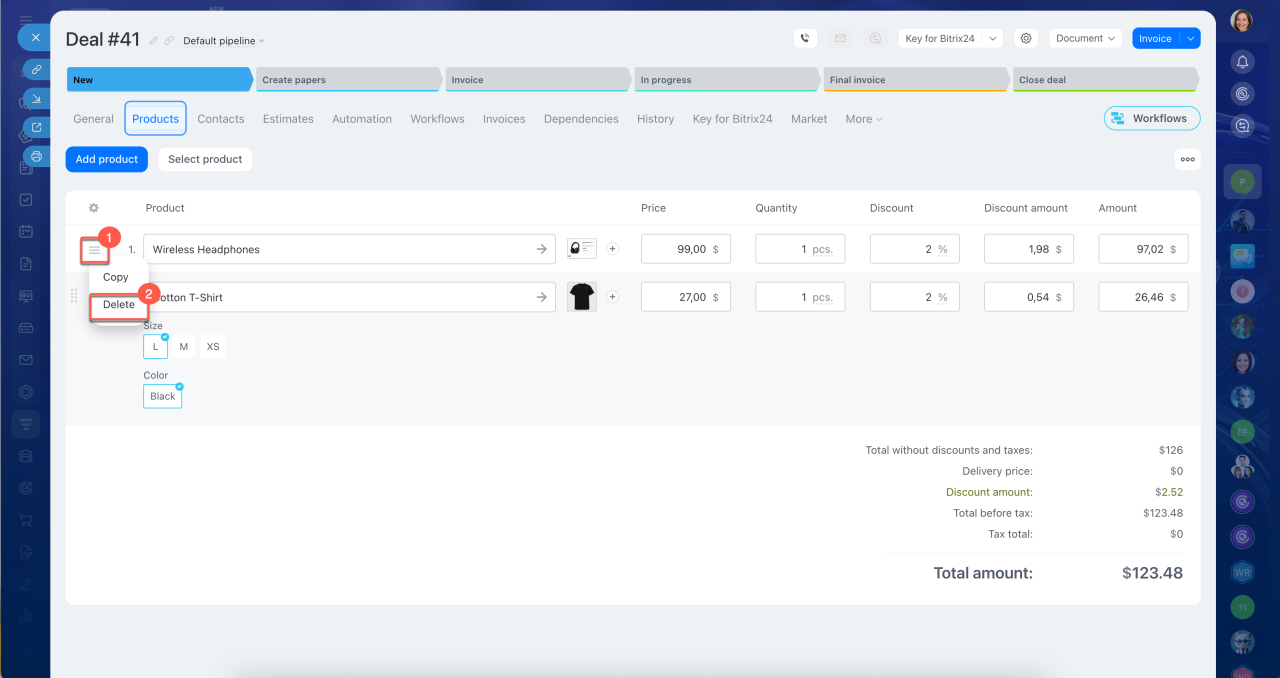
Remove a product. If you added a product by mistake or the deal terms have changed, remove it from the list.
1–2. Click Menu (≡) > Delete to the left of the product.
3. Save your changes.
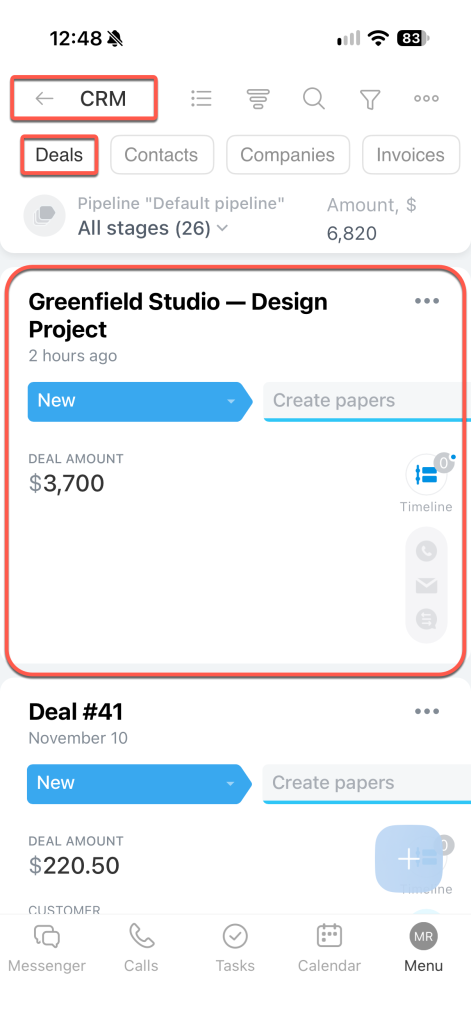
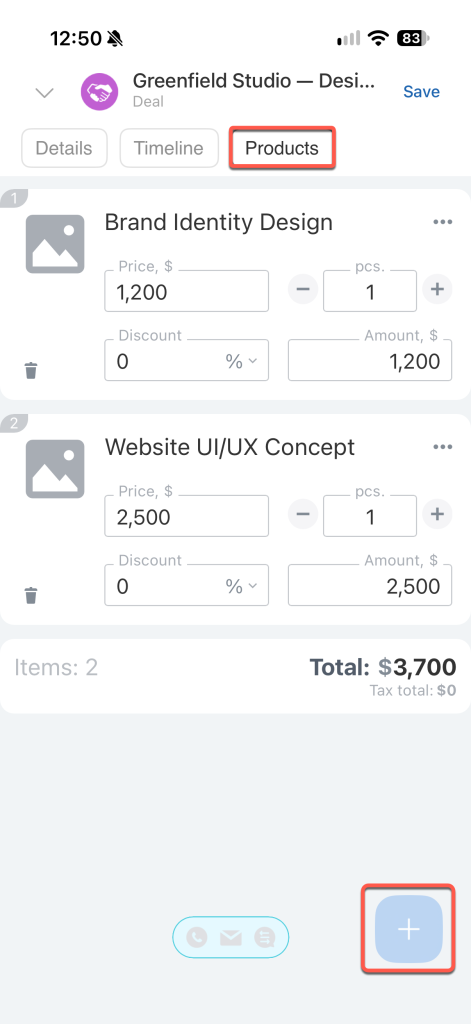
Open CRM > Deals, select the deal you need, and go to the Products tab. Tap Plus (+).
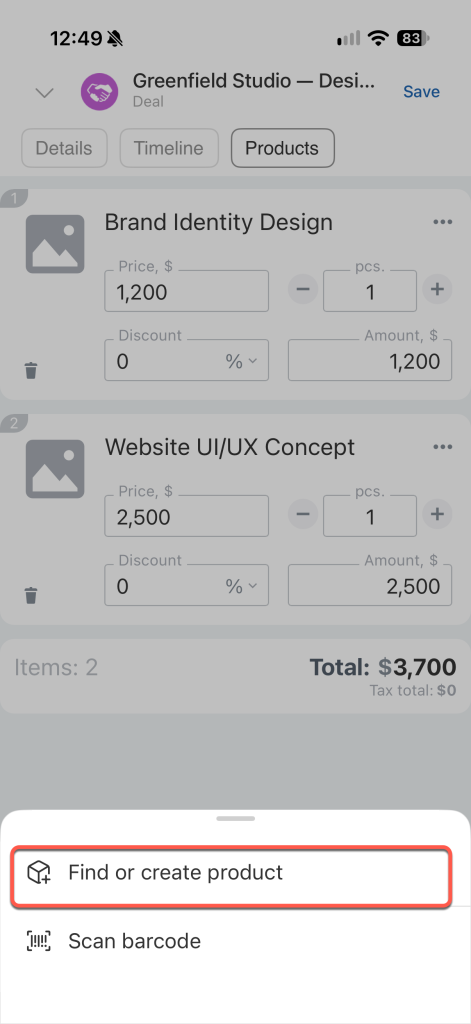
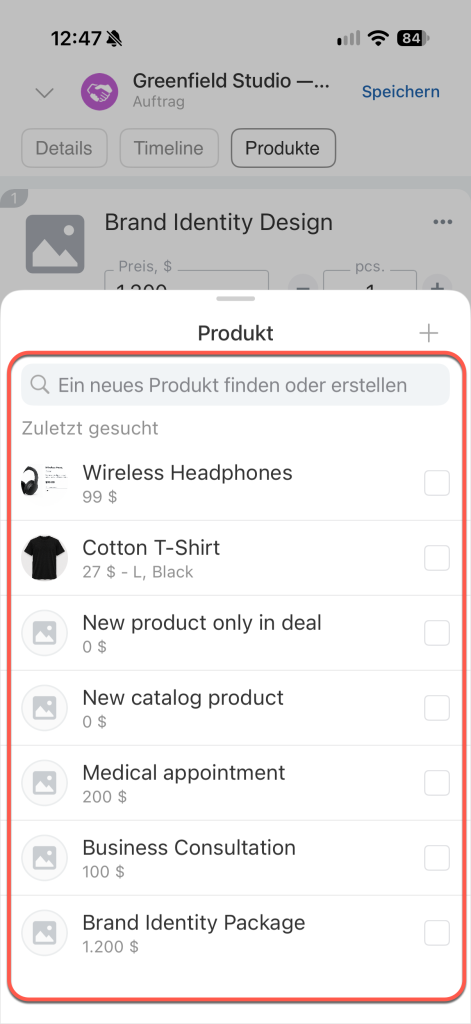
Select a product from the catalog. Use this method if the product already exists in the catalog.
Tap Find or create product. Select the products you need from the catalog.
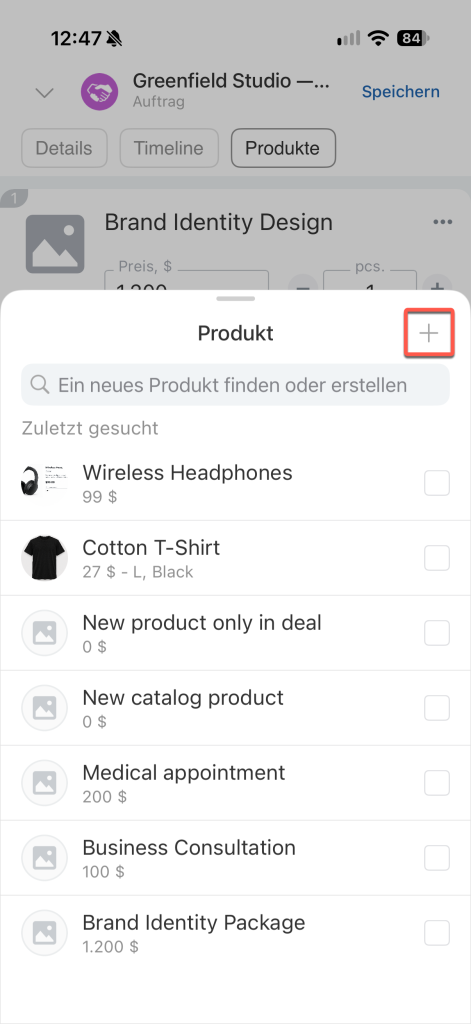
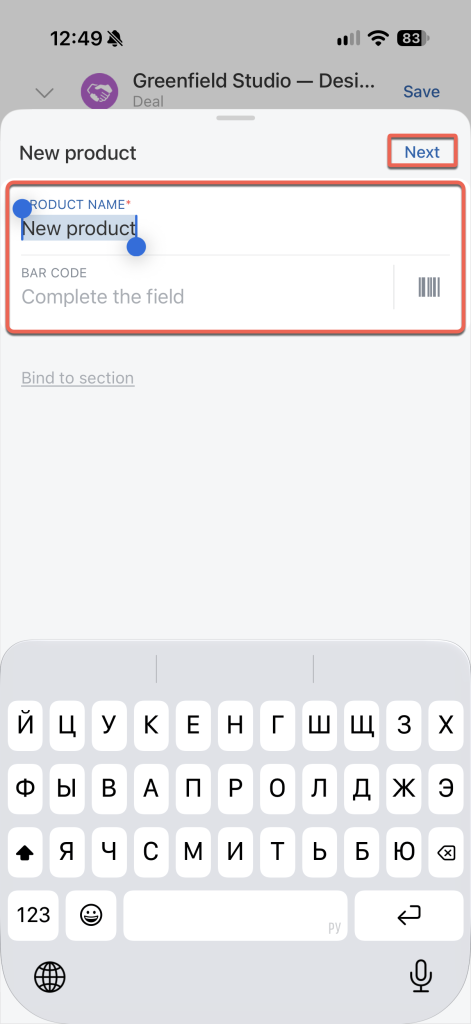
Create a new product. If the product you need isn't in the catalog yet, you can create it directly from the deal. In the mobile app, new products are always saved to the catalog.
Tap Plus (+) and enter the product name. If needed, add a barcode and select a catalog section. Tap Next.
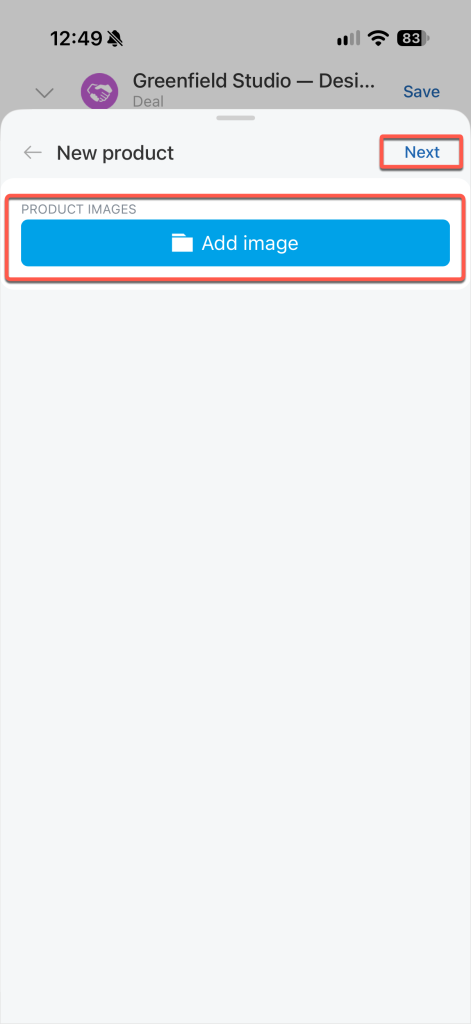
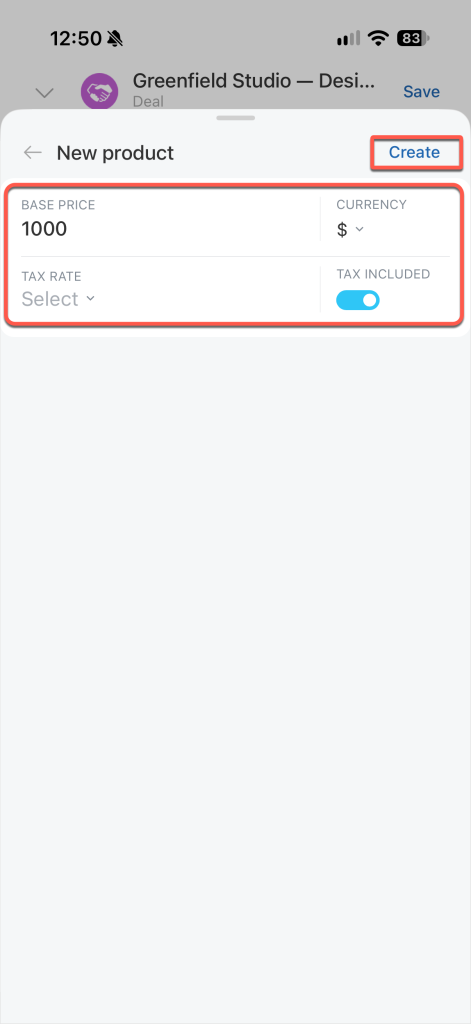
Add a product photo and tap Next. Enter the product price and tax, then tap Create.
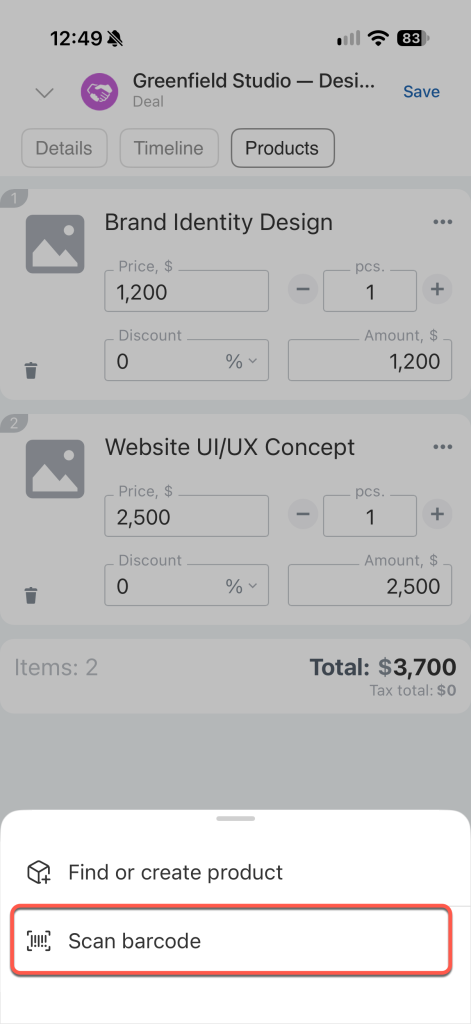
Scan a product barcode. If the product has a barcode, find it using a scanner.
On the Products tab, tap Plus (+) > Scan barcode.
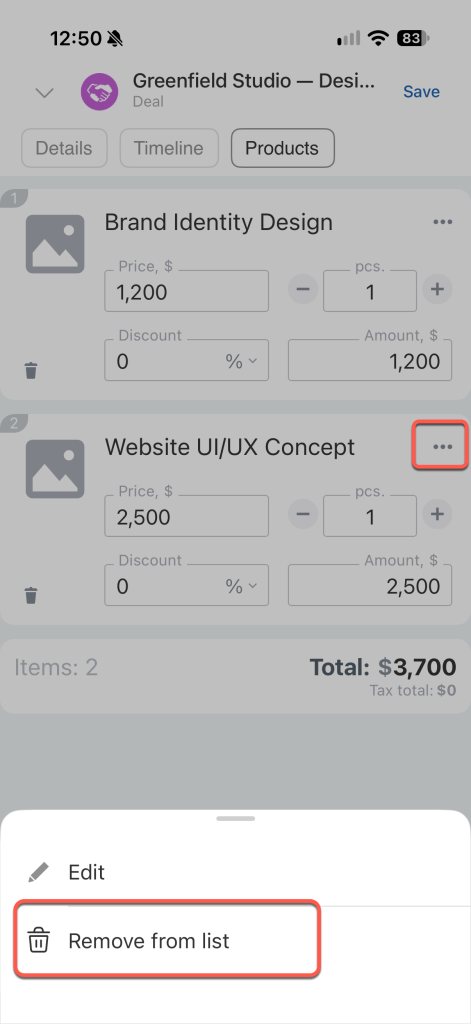
Remove a product from a deal. If you added a product by mistake or the deal terms have changed, remove it from the list.
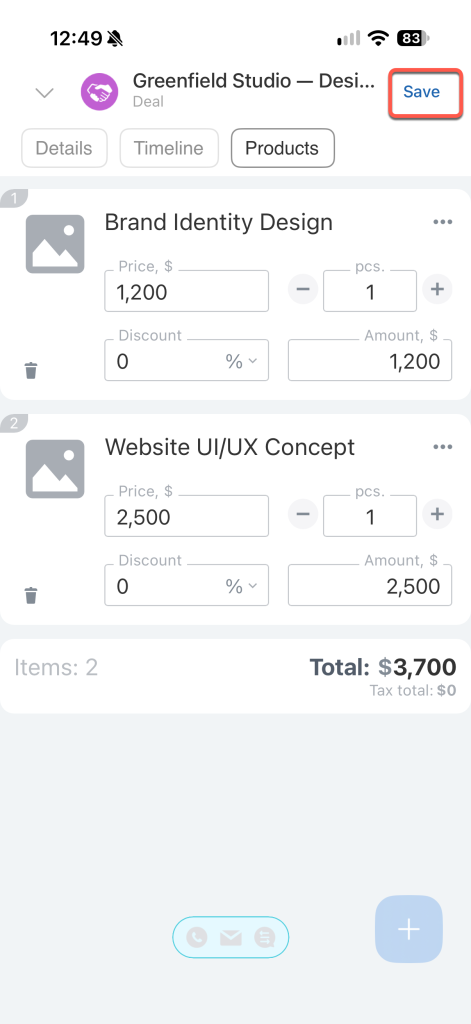
To the right of the product, tap Three dots (...) > Remove from list. Tap Save.
Set up the Products tab
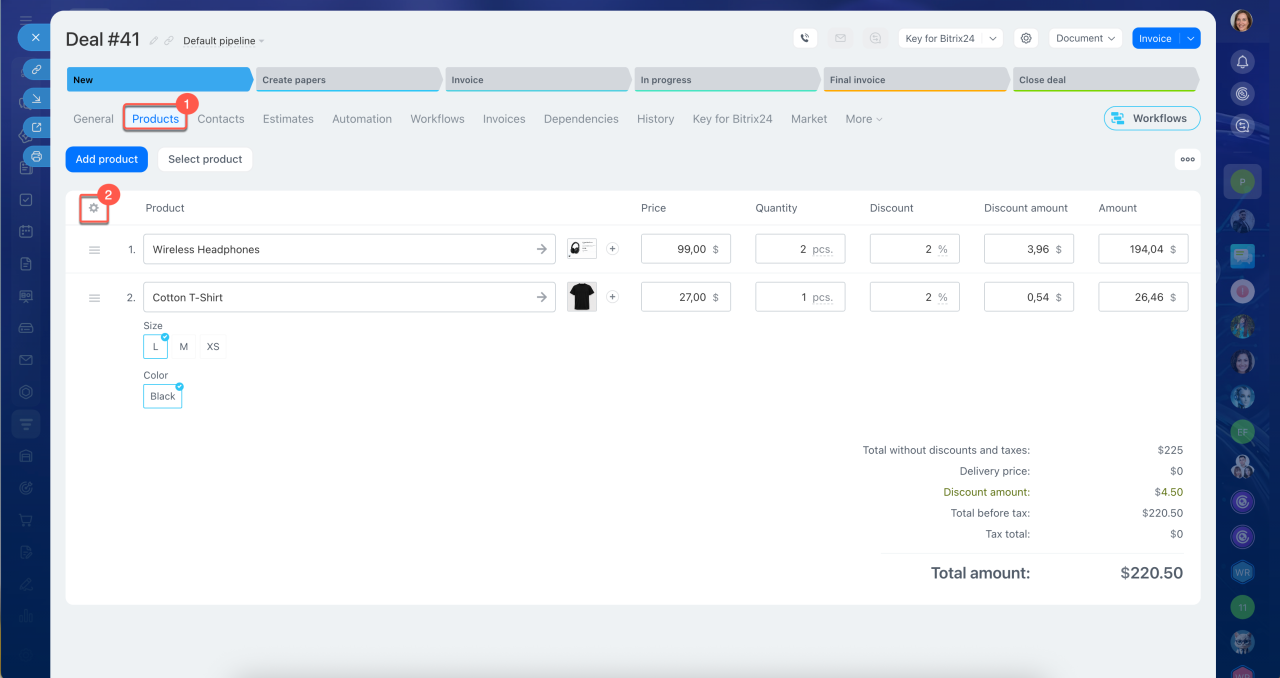
You can customize the columns on the Products tab to fit your needs. For example, add Purchase price to calculate profit margins or Tax for accounting purposes.
1. Open the Products tab in the deal form.
2. Click Settings (⚙️) in the top-left corner of the table.
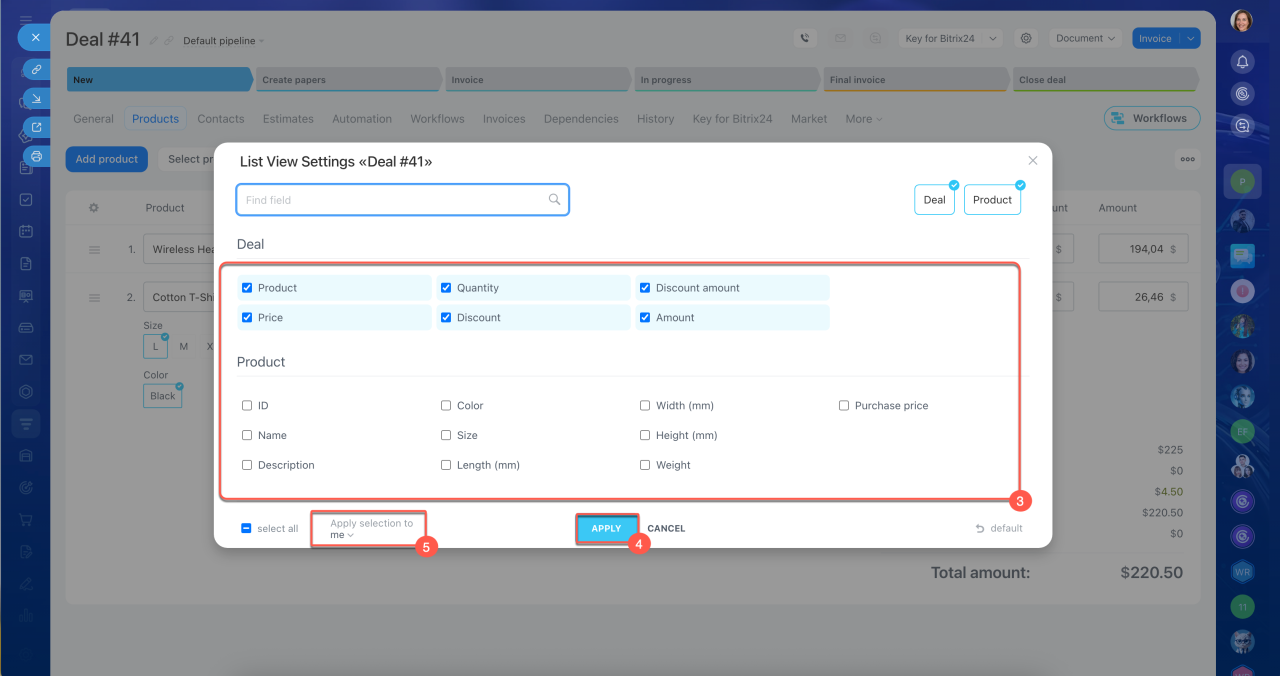
3. Select the fields you need.
4. Save your changes.
How to set up catalog access permissions
5. A Bitrix24 account administrator can apply these settings to all employees. To do this, select Apply for all. Once the settings are saved:
- The same columns appear in the same order for all employees.
- Employees can customize the column layout to fit their needs.
- If an employee clicks Default, the columns return to the layout set by the administrator.
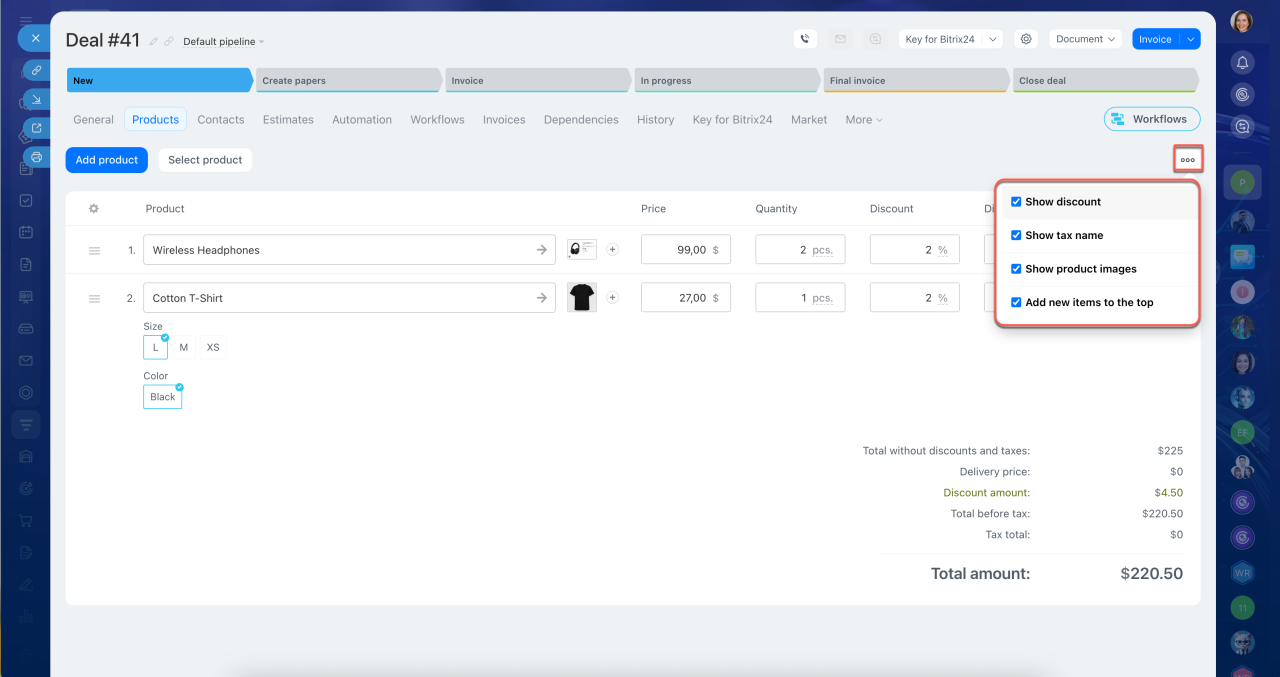
For more display options, click Three dots (...) in the top-right corner of the Products tab. For example, you can choose to show product images.
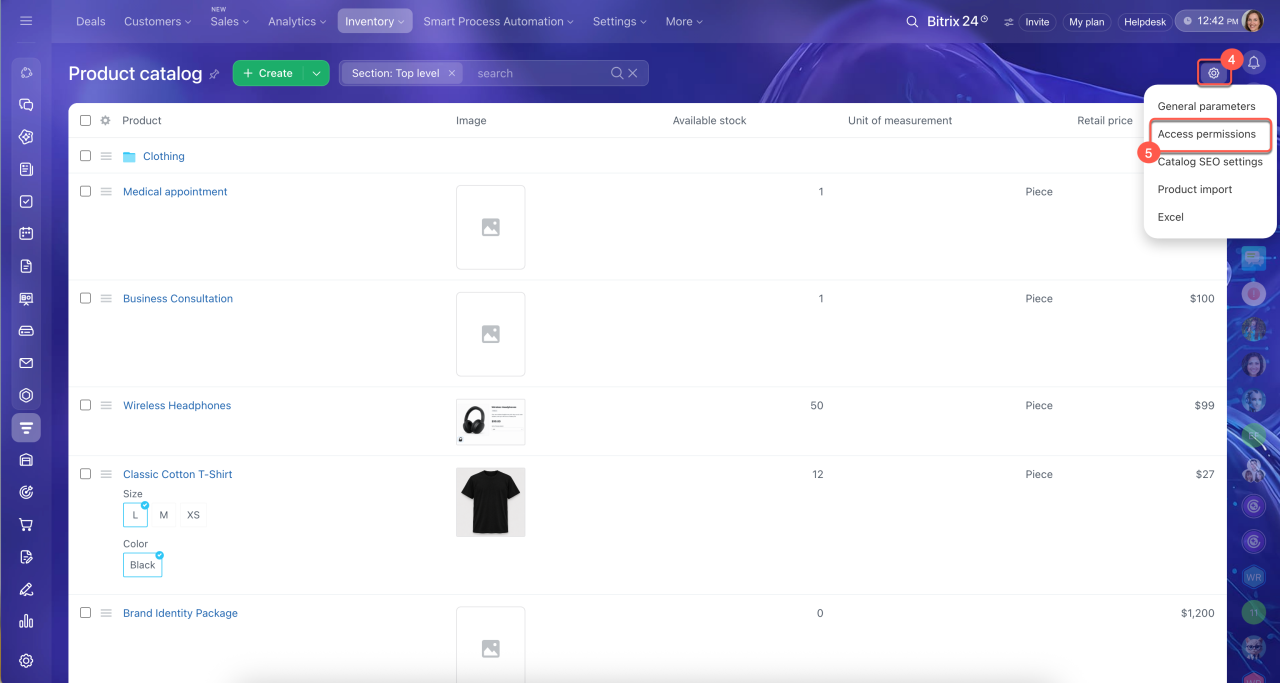
Set up catalog access permissions
To allow employees to add products to CRM item forms, give them the required catalog permissions.
How to set up catalog access permissions
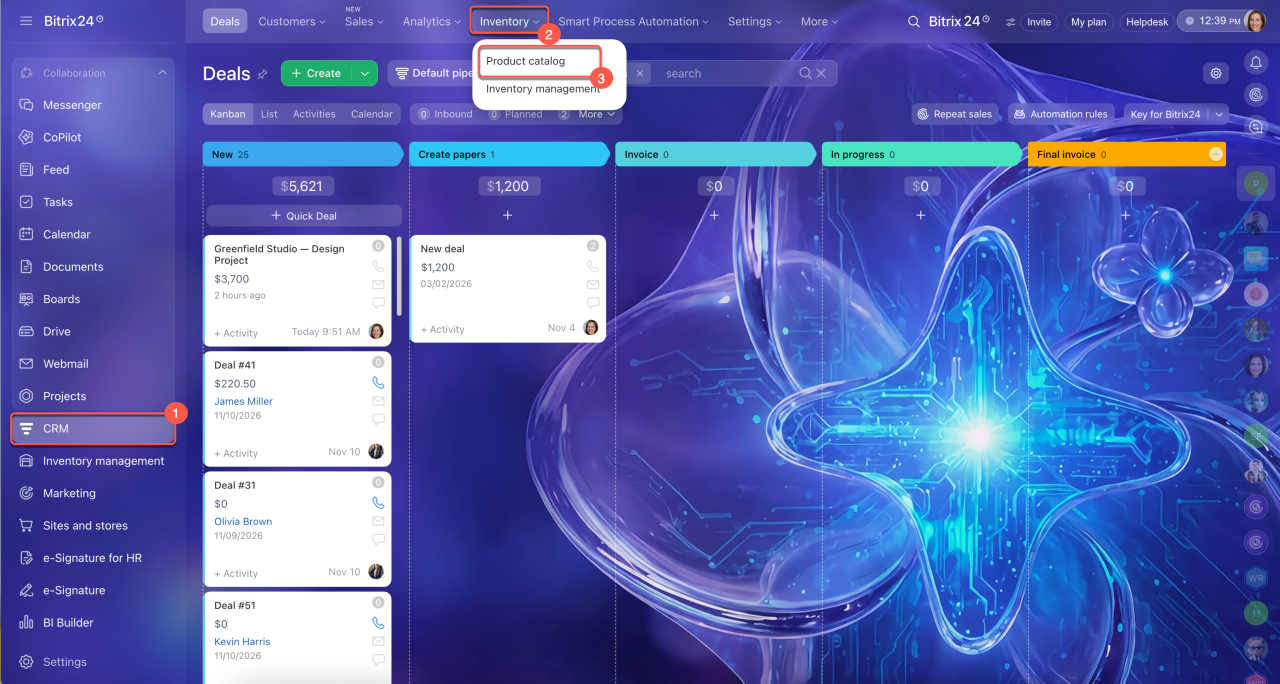
1–3. Go to CRM > Inventory > Product catalog.
4–5. Click Settings (⚙️) > Access permissions in the top-right corner.
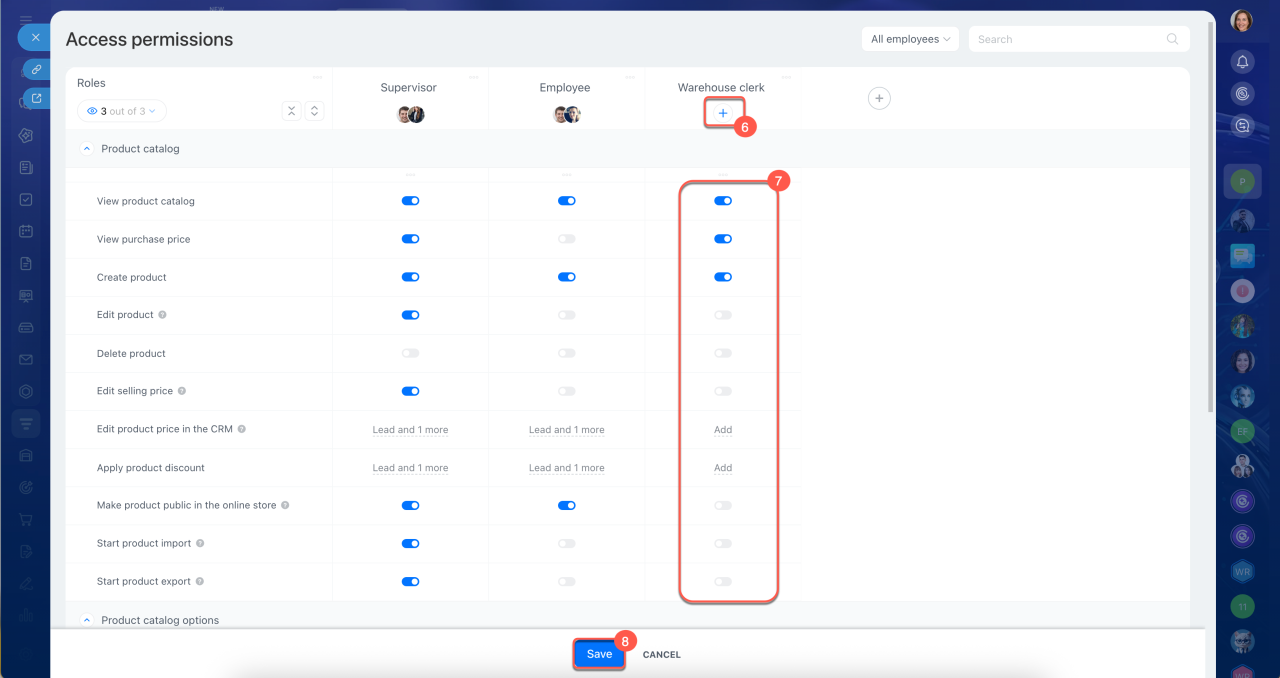
6. Add employees to an existing role or create a new one.
7. Assign the required permissions. For example, employees may need permission to:
- View the product catalog to see available products and add them to deals.
- Create products when new items need to be added to the catalog.
- Change product prices in CRM to offer clients individual prices without changing the catalog prices.
- Apply discounts to offer clients special pricing.
8. Save your changes.
If an employee has multiple roles, the permissions with the highest access level apply.
In brief
- Adding products to a CRM item form helps you track what you're selling to a client and automatically calculate the total amount.
- You can add products to the Products tab in lead, deal, estimate, invoice, and SPA forms.
- If you know the product name, click Add product and select it from the list. To browse the catalog, click Select product.
- If the product isn't in the catalog, click Add product to create a new one.
- After adding a product, select a variant if needed and enter the quantity, discounts, and taxes. The total updates automatically. If automatic calculation is enabled, the deal amount matches the total product amount.
- To customize the columns on the Products tab, click Settings (⚙️) in the top-left corner of the table.
- To let employees add products to CRM item forms, give them the required catalog permissions. Go to CRM > Inventory > Product catalog > Settings (⚙️) > Access permissions.