
Product properties describe a product and provide useful details for customers and employees. For example, clothing may have properties like material and brand, monitors may have screen size and panel type, and books may have author and publisher.
In Bitrix24, properties are fields in the product form. You can add fields like Material or Panel type to describe your products. If a product comes in different sizes, colors, or other options, use product variants.
In this article:
Types of product properties
Bitrix24 supports two types of product properties: simple properties and variant properties.
Simple product properties describe characteristics shared by all variants of a product, such as manufacturer, material, description, or product workgroup. You only need to set these properties once. They apply to every variant of the product.
Create and configure product properties in CRM
Variant properties describe the differences between product variants, such as size or color. For example, the same T-shirt may come in several sizes and colors.
Each combination of properties is a separate product variant. For example, a blue T-shirt in size XL and a red T-shirt in size M are two variants.
Work with product variants
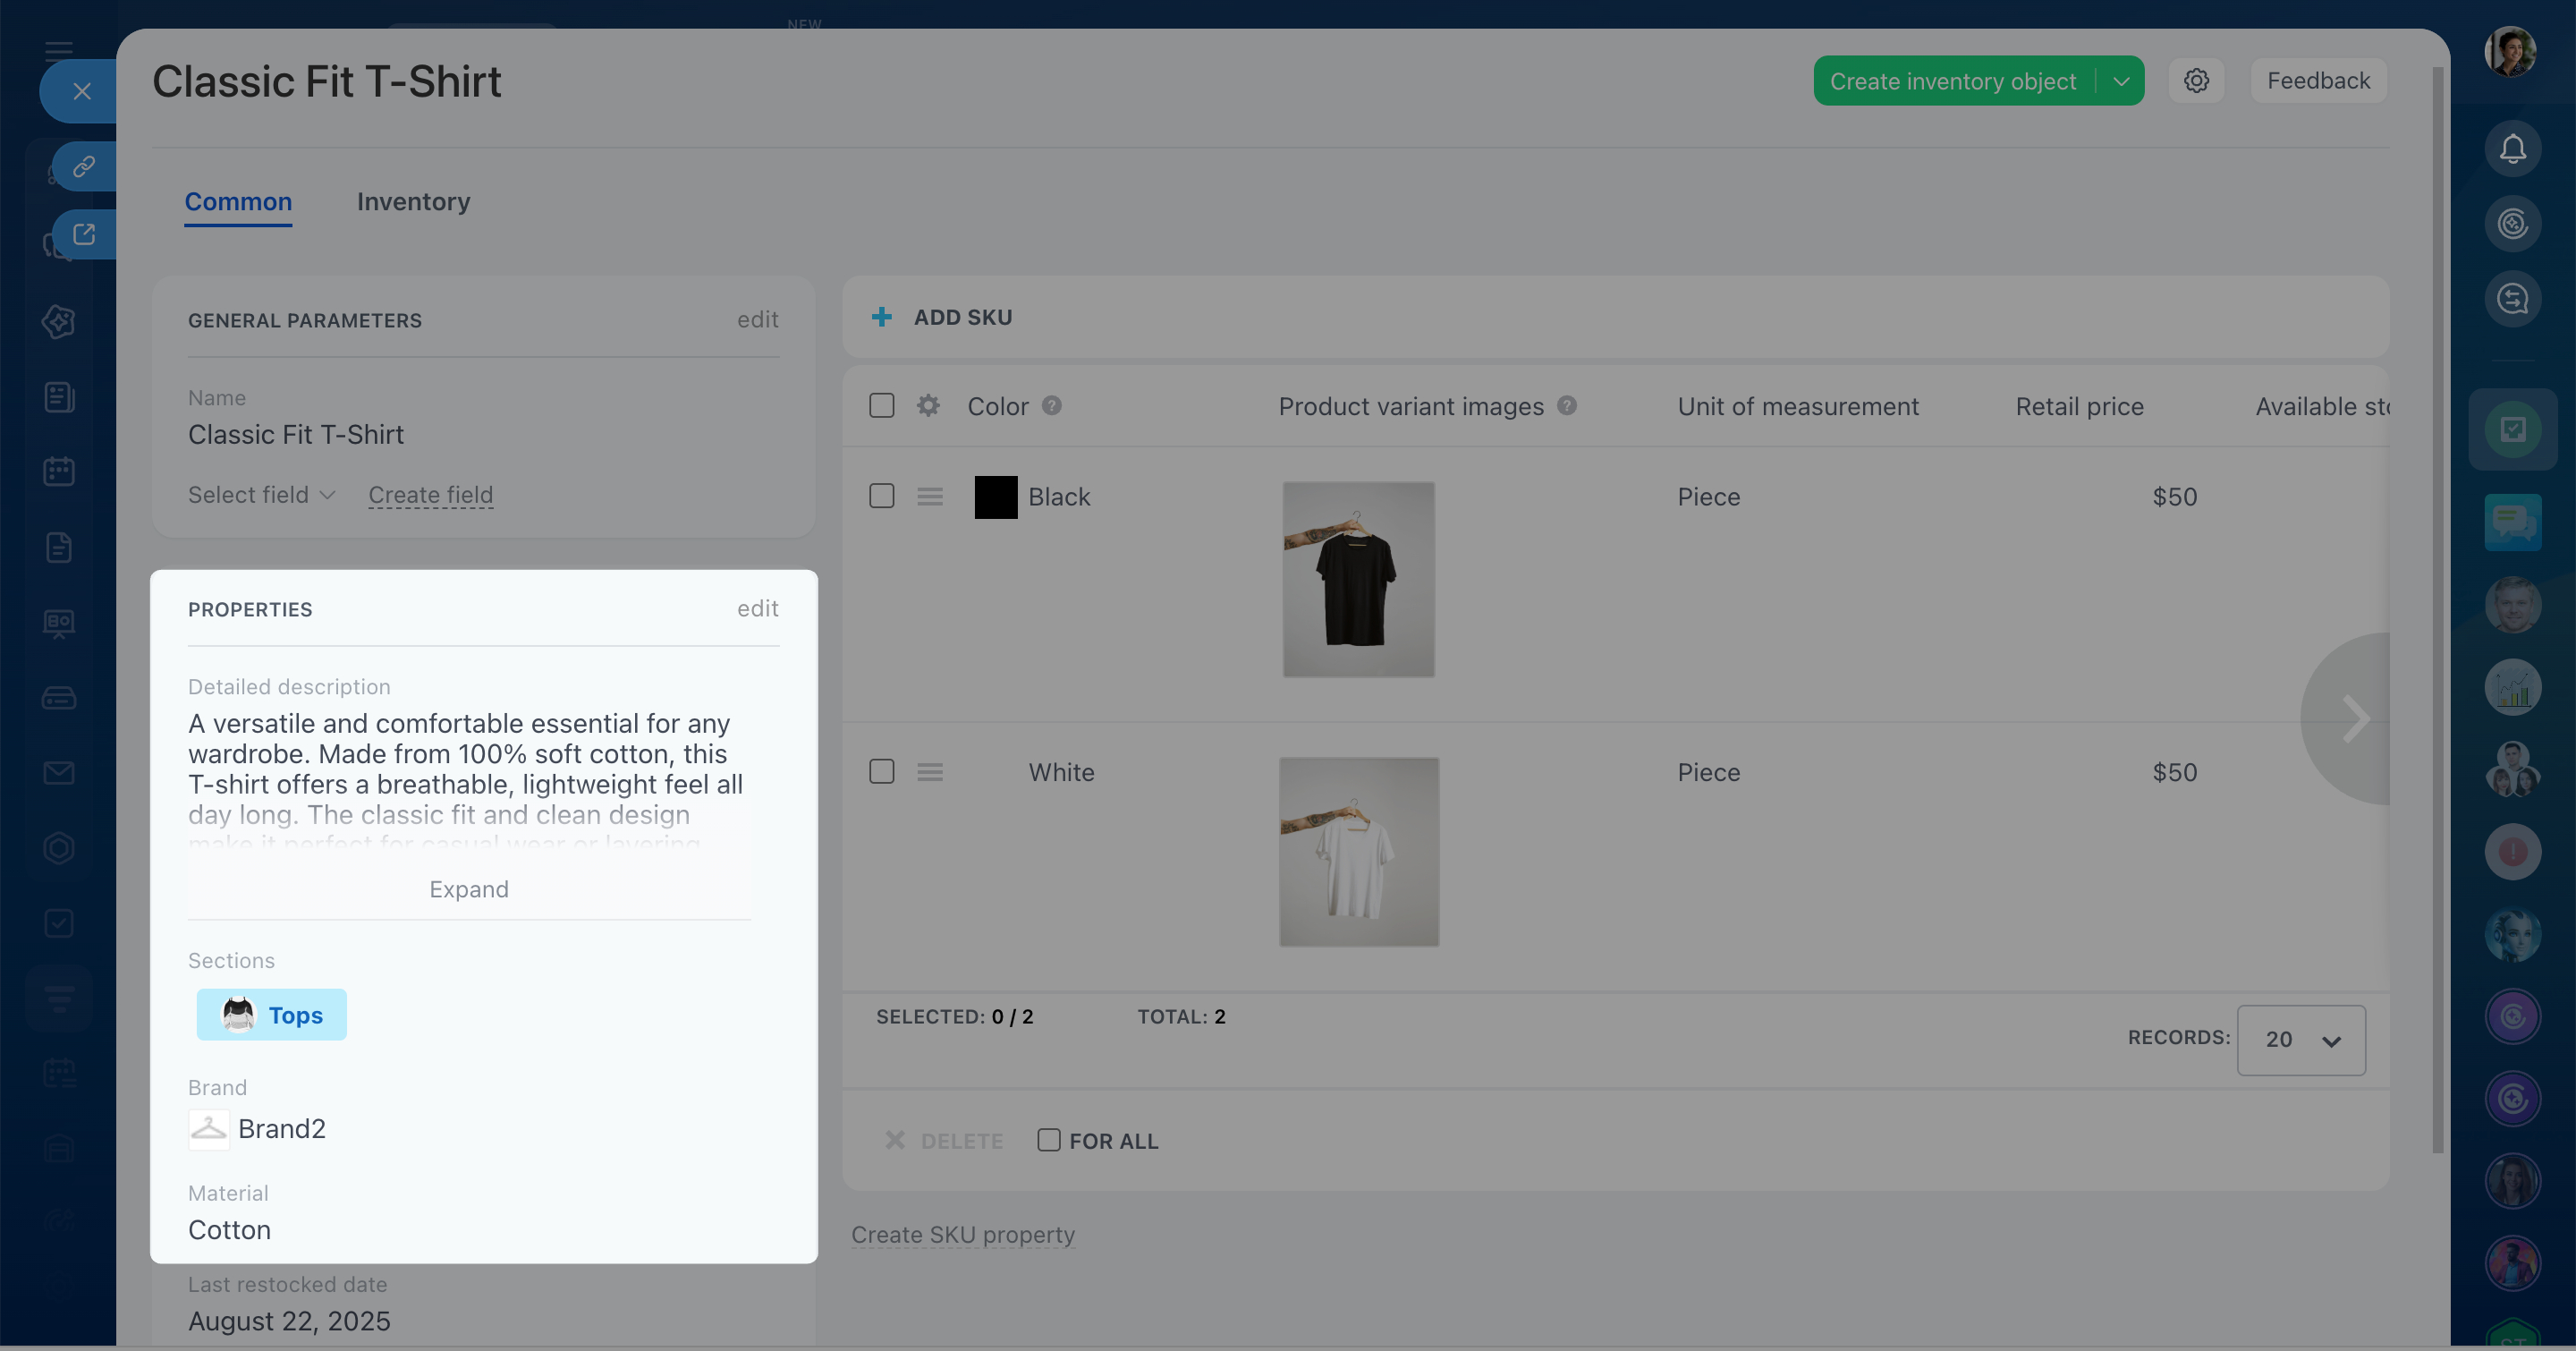 Simple product properties
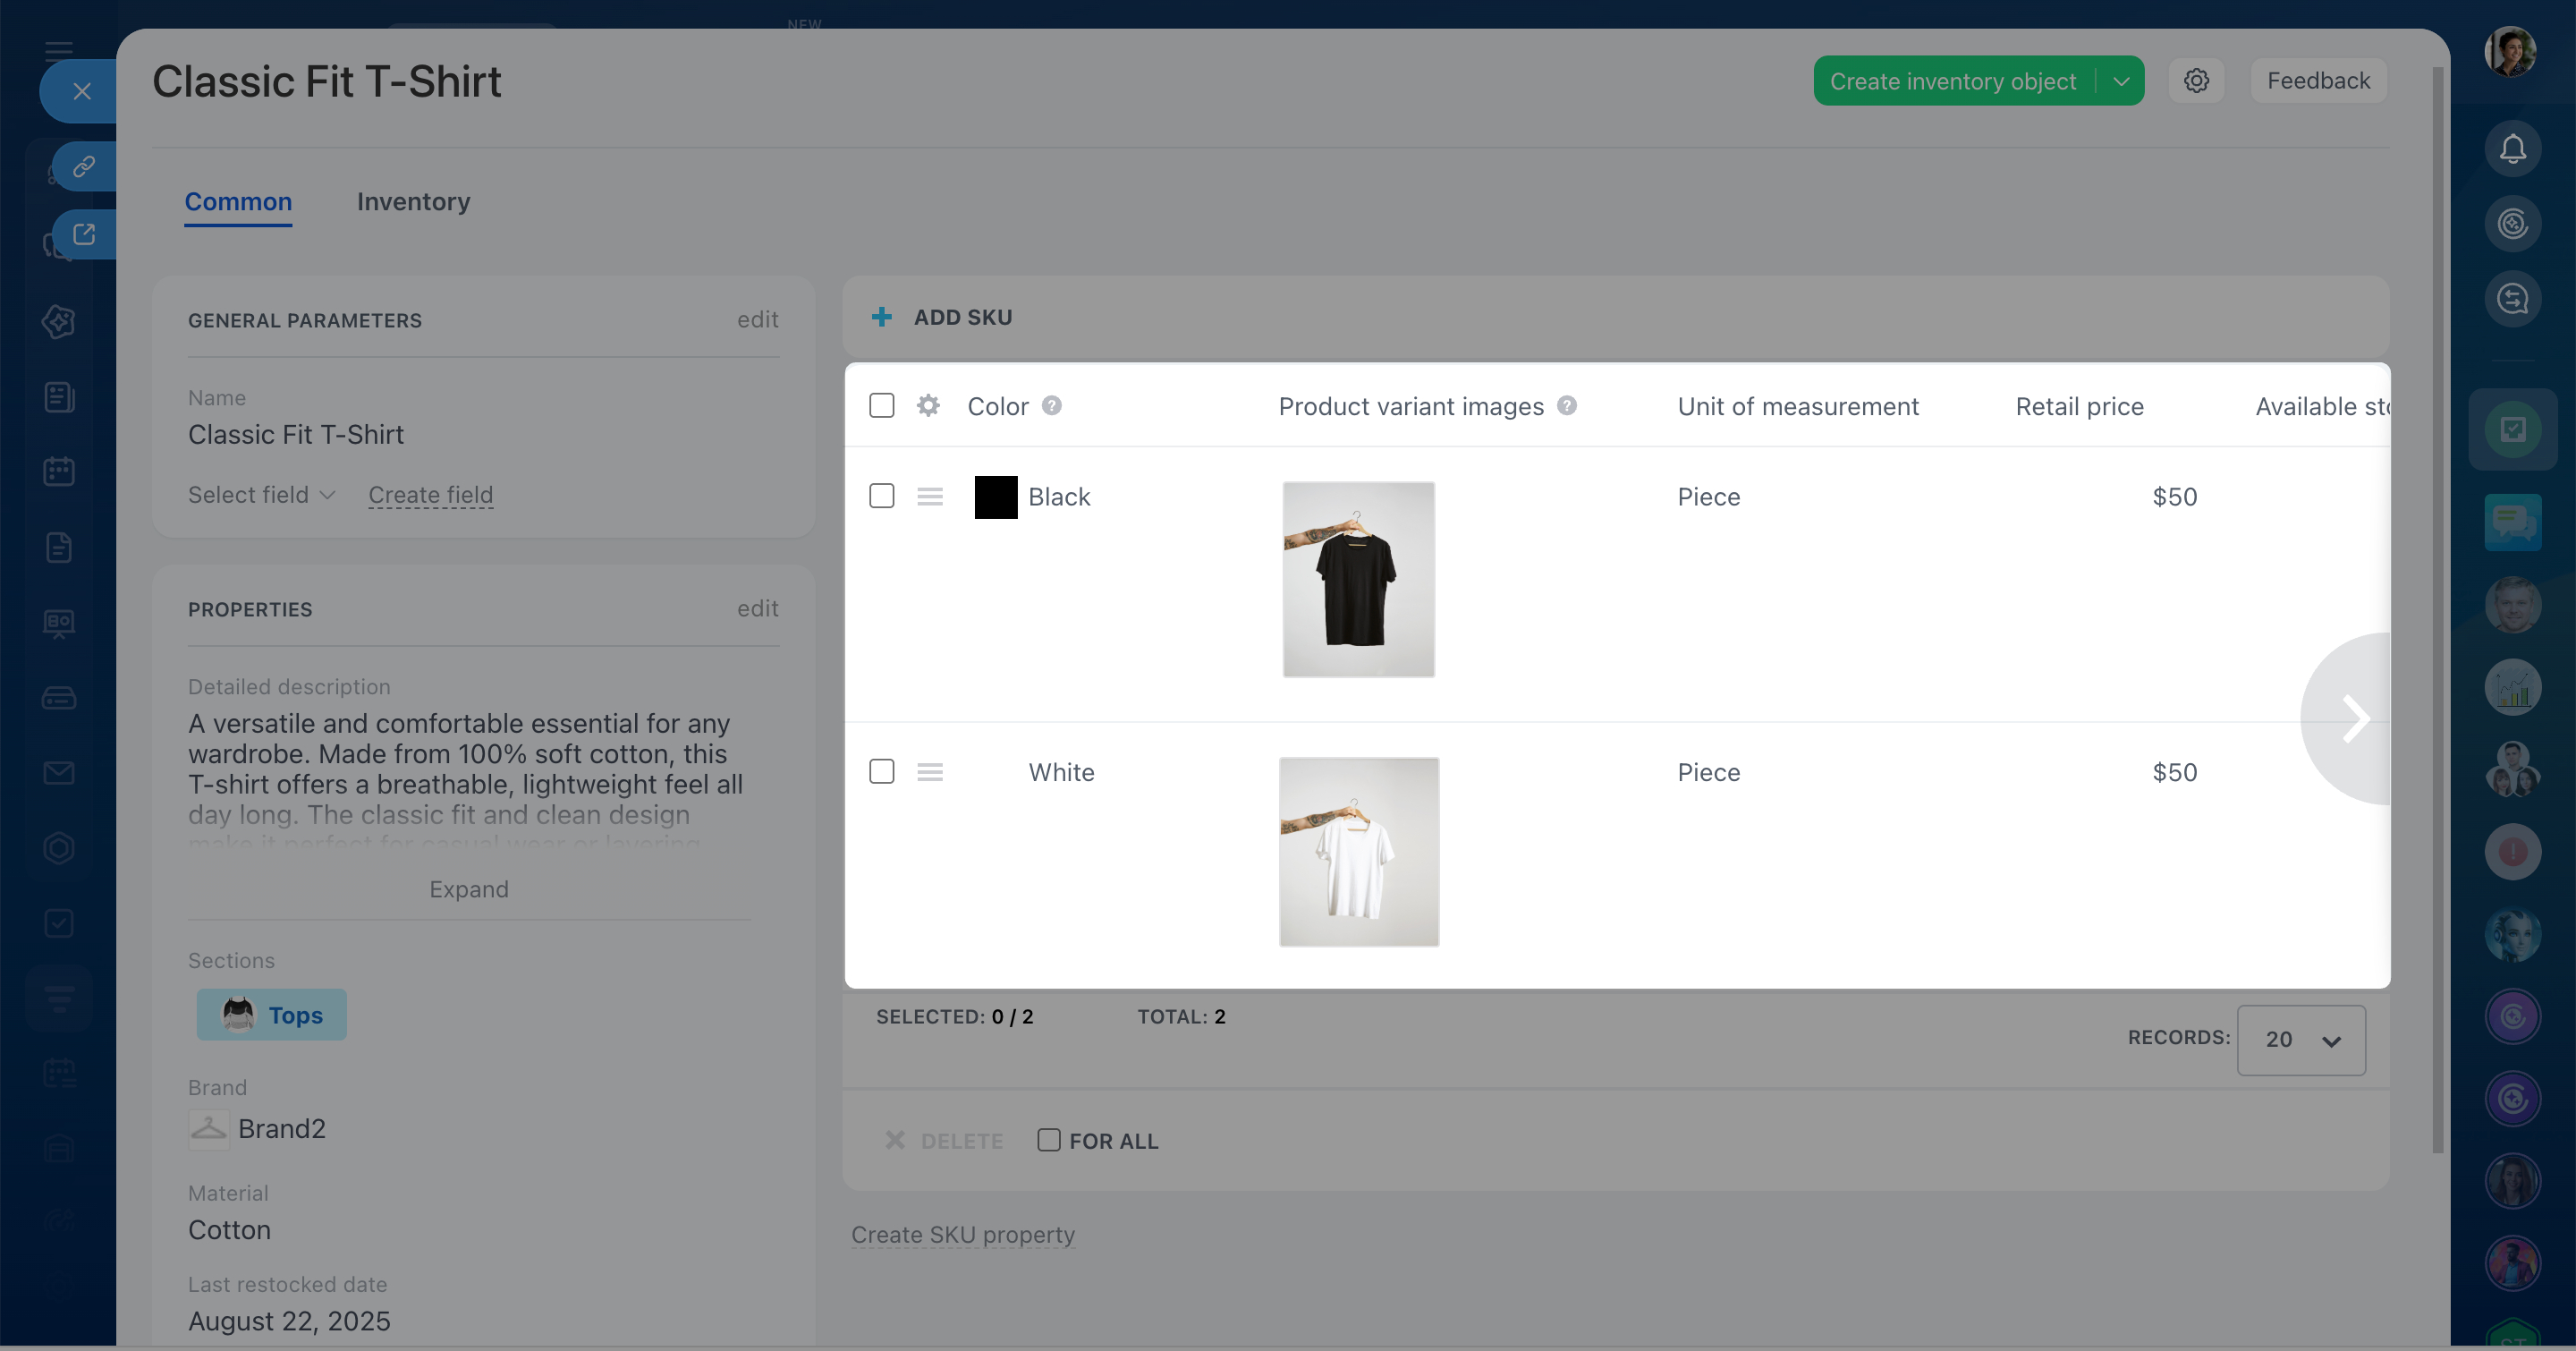 Product variants
Add and configure simple product properties
By default, the product form includes several fields that describe a product:
- Name
- Detailed description
- Product section
If you don't see these fields in the product form, you can add them.
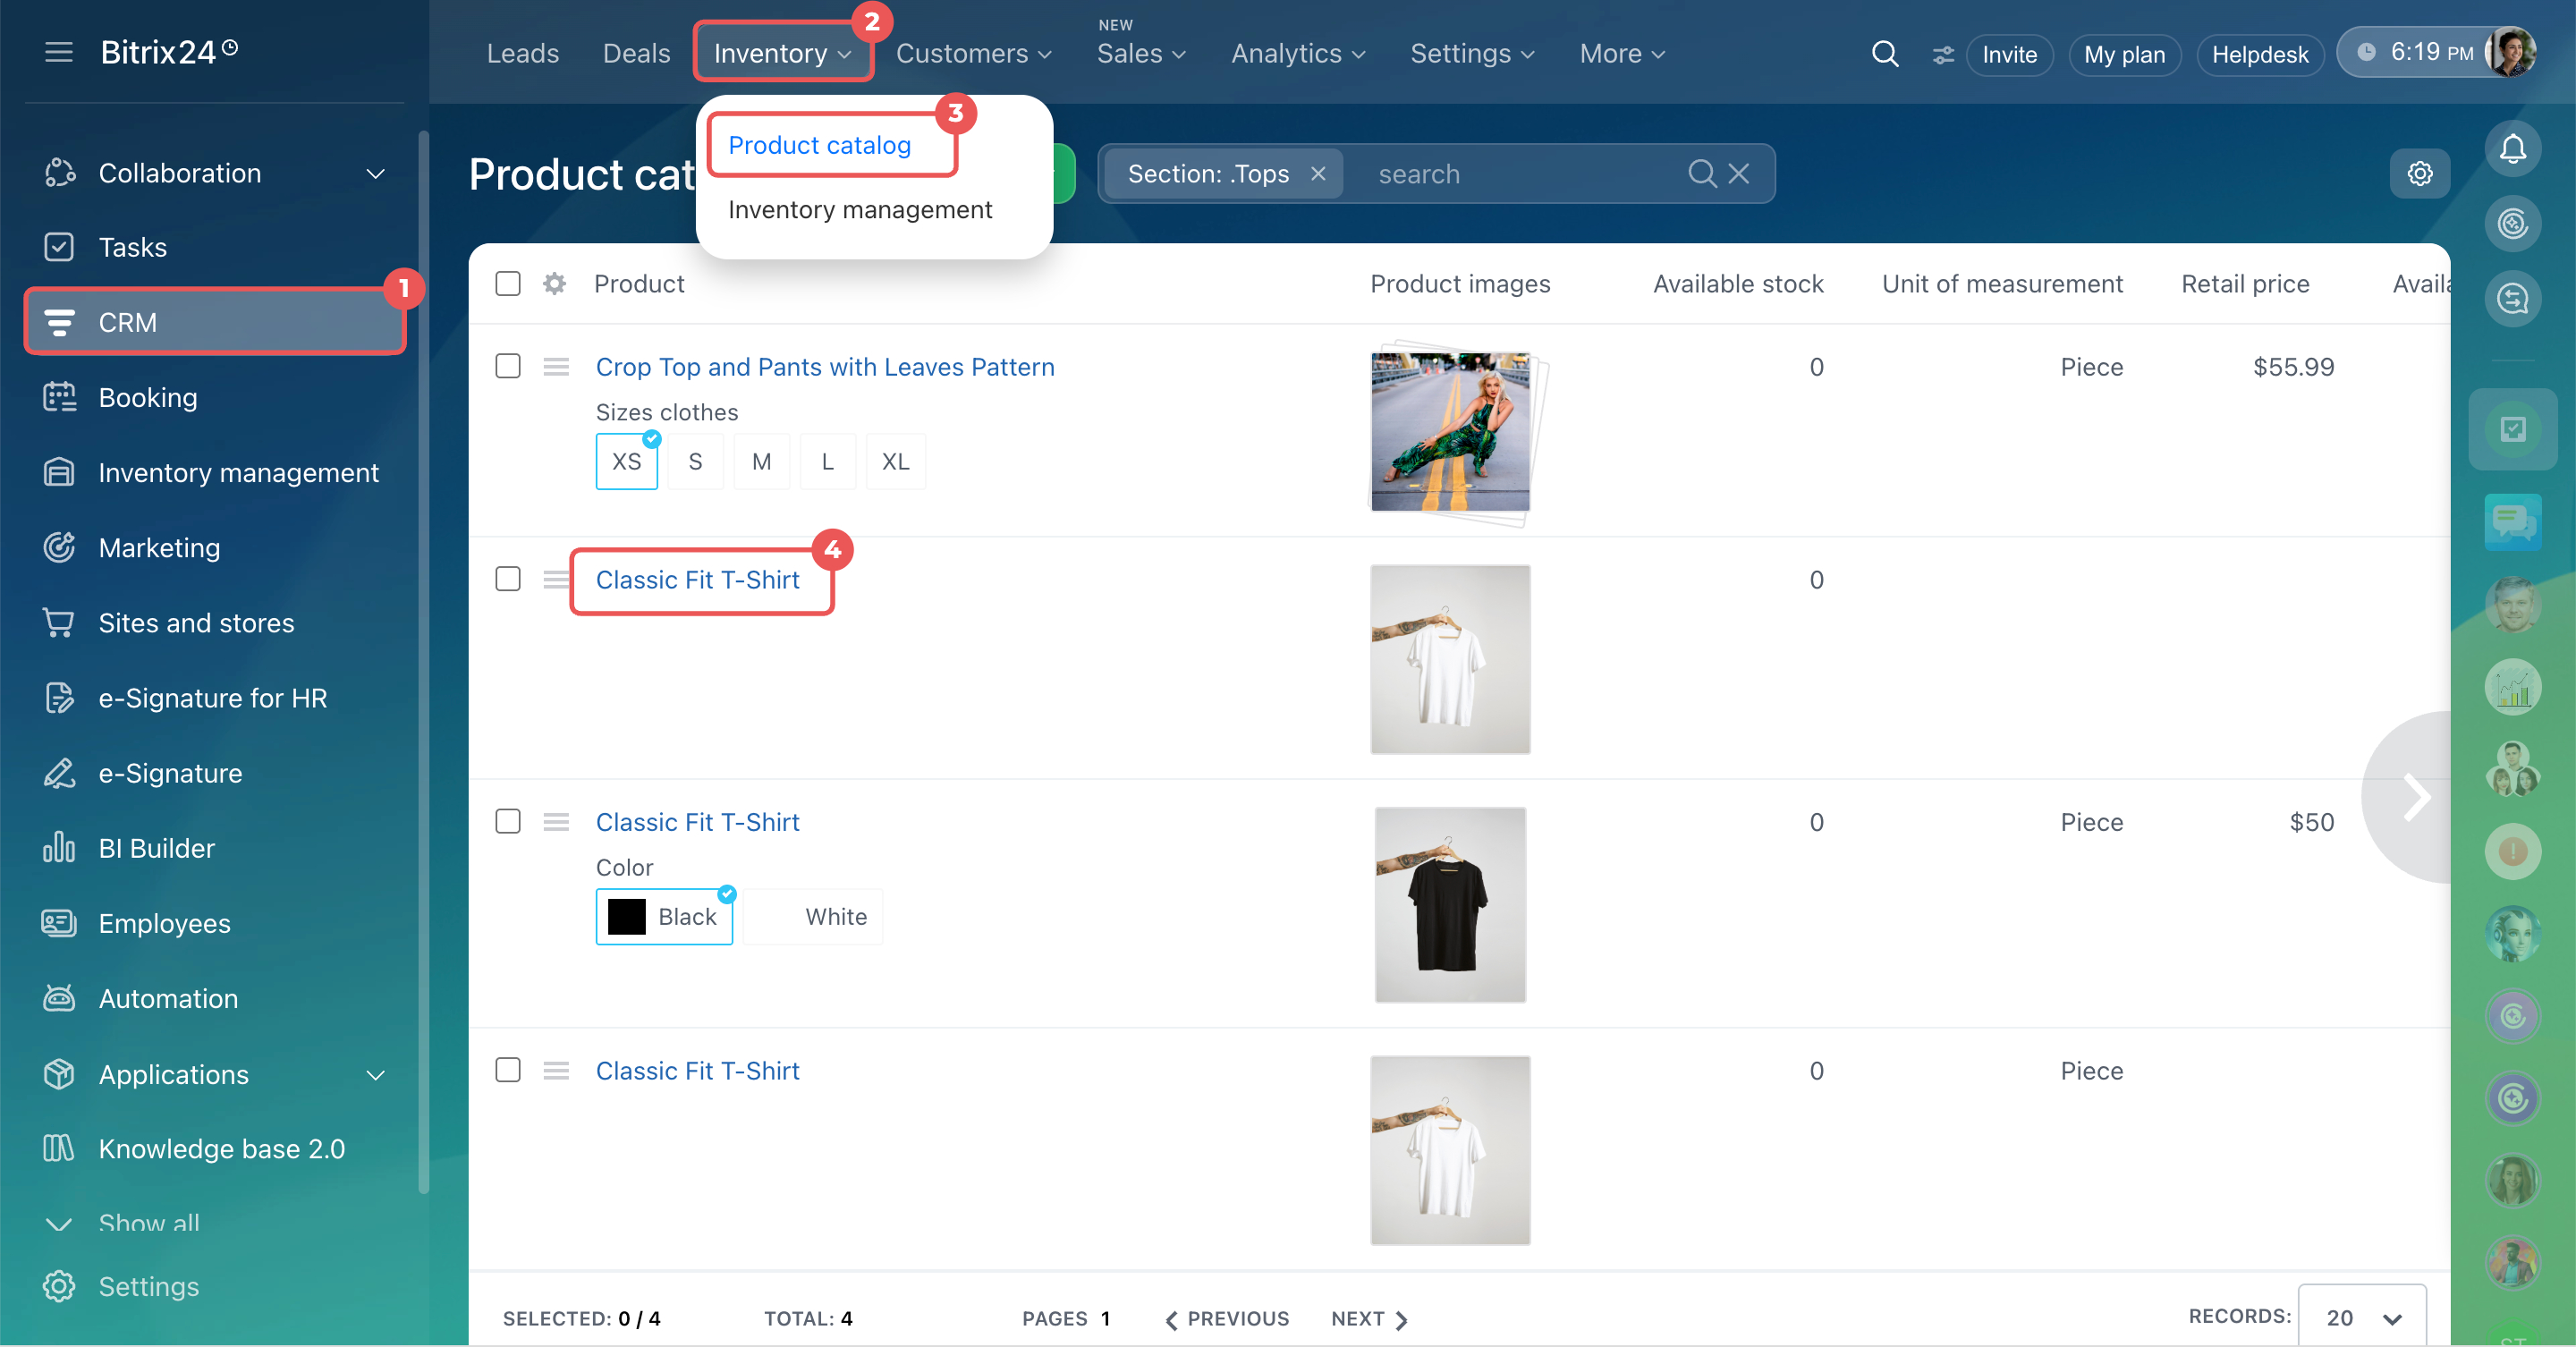
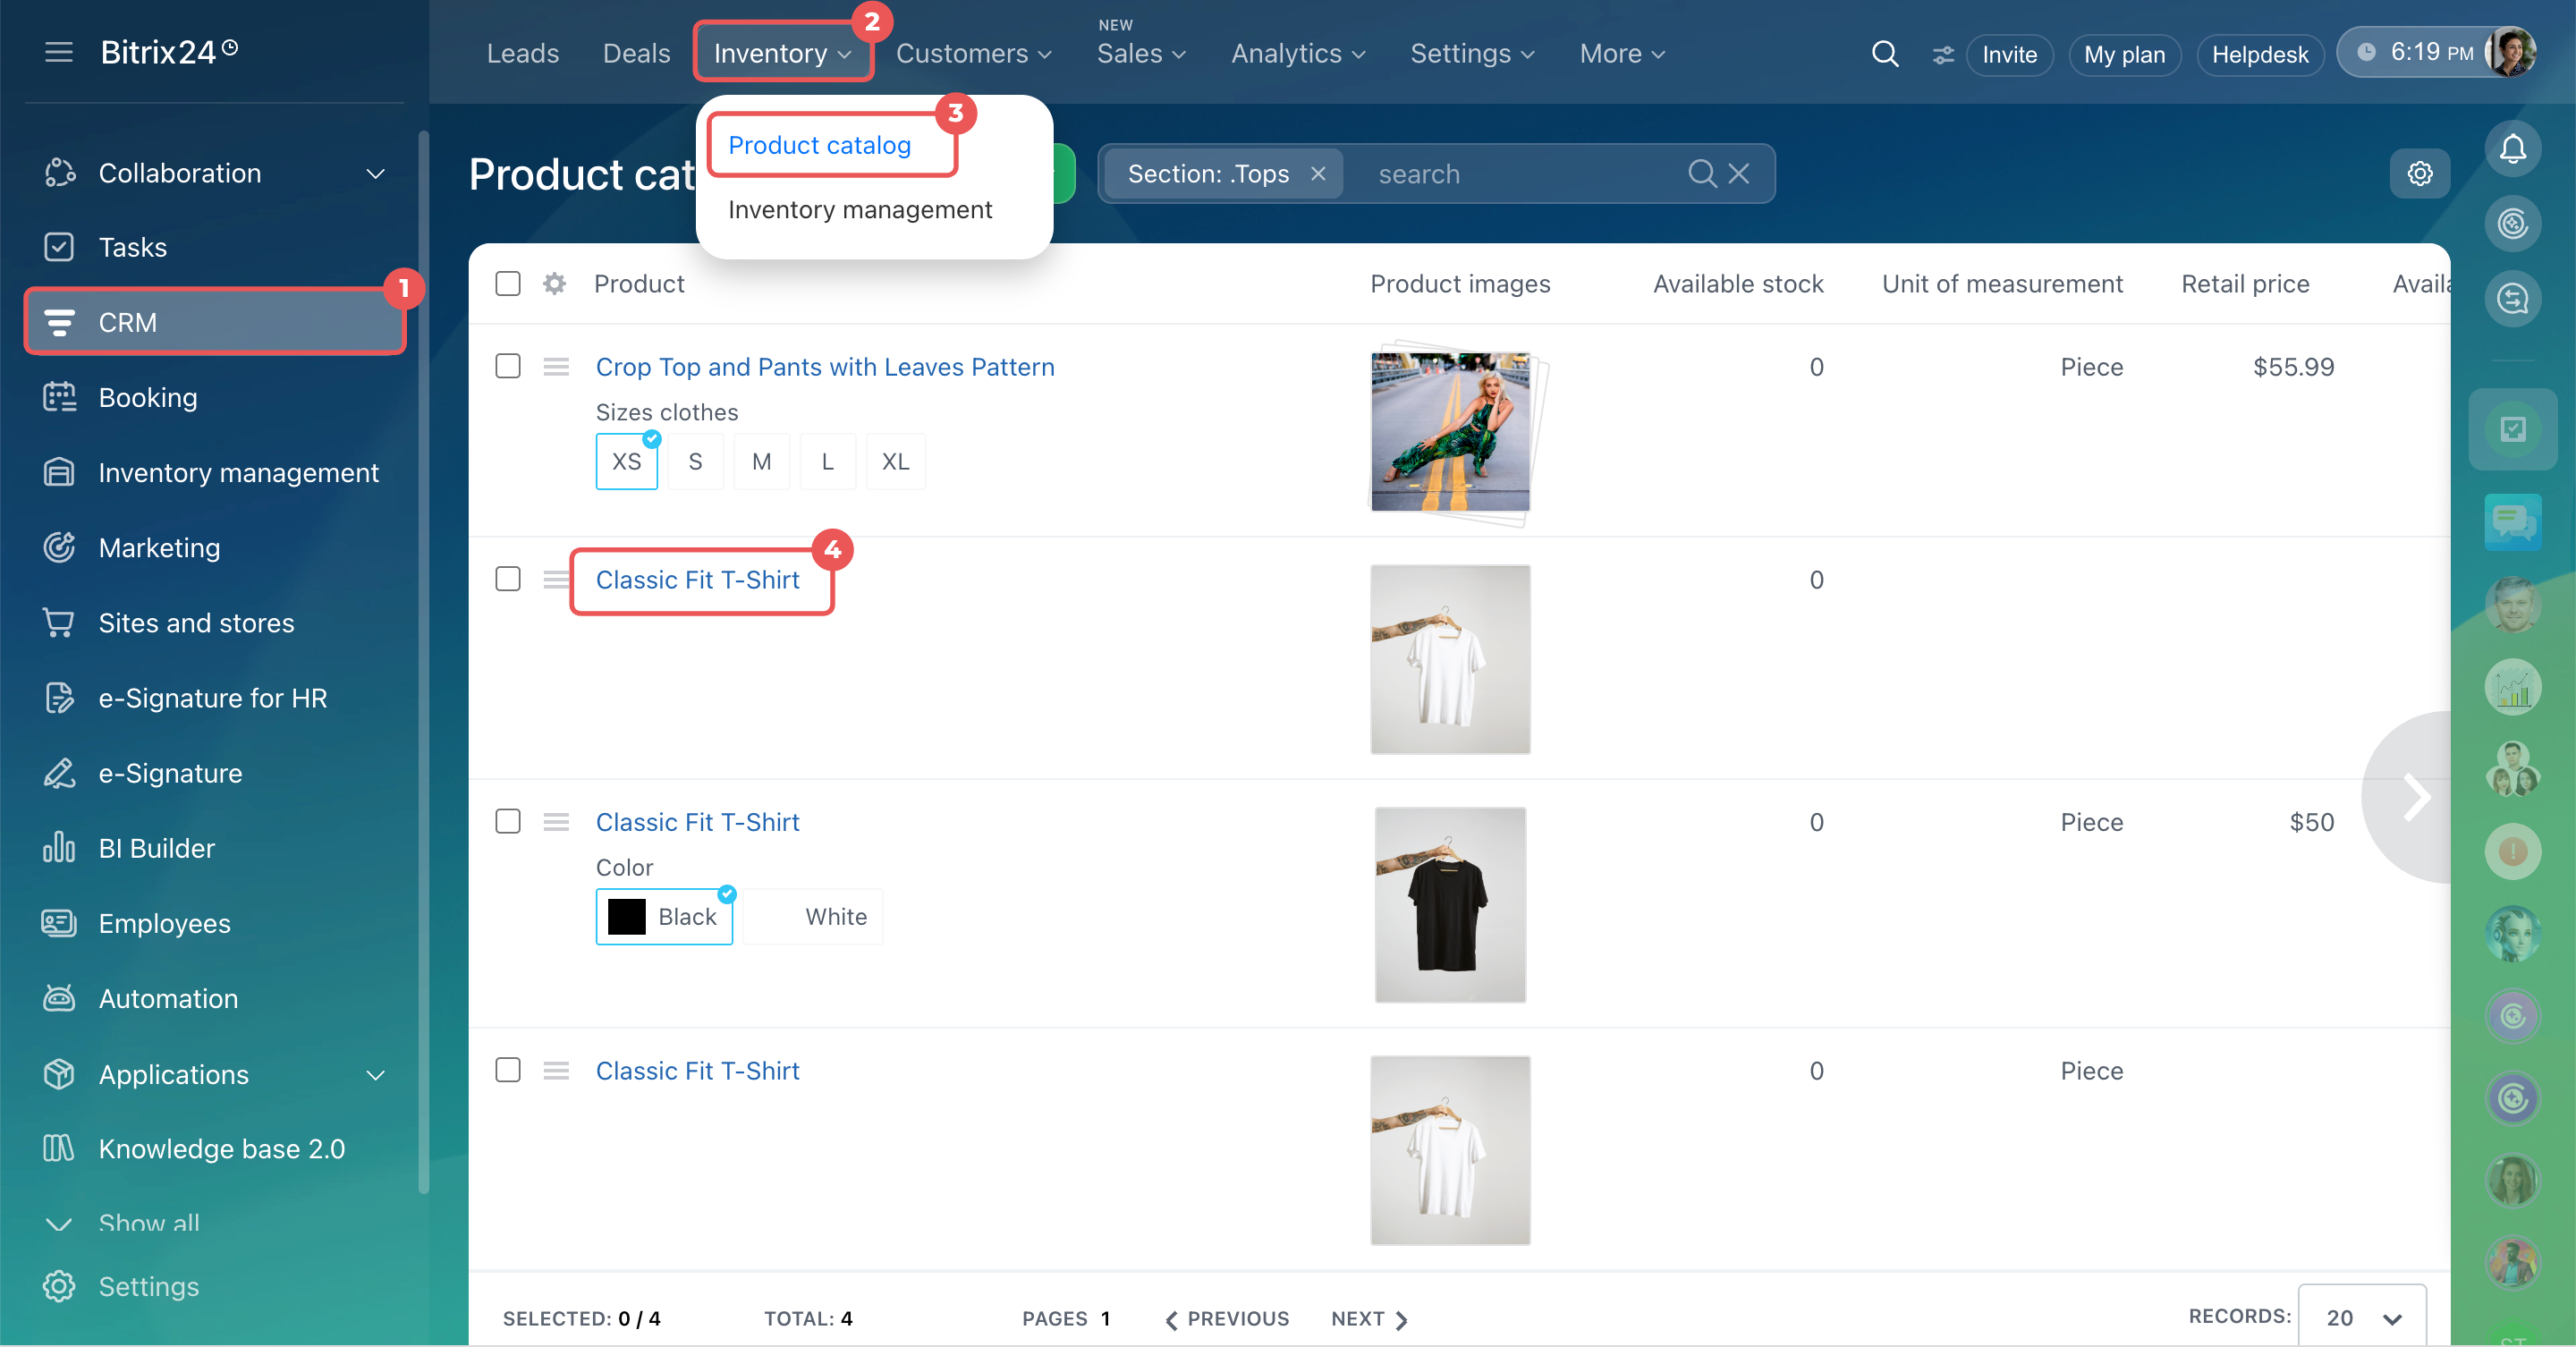
- Open CRM > Inventory > Product catalog and open the product form.
- Click Select field.
- Select the fields you need.
- Click Select.
The fields will appear in product forms.
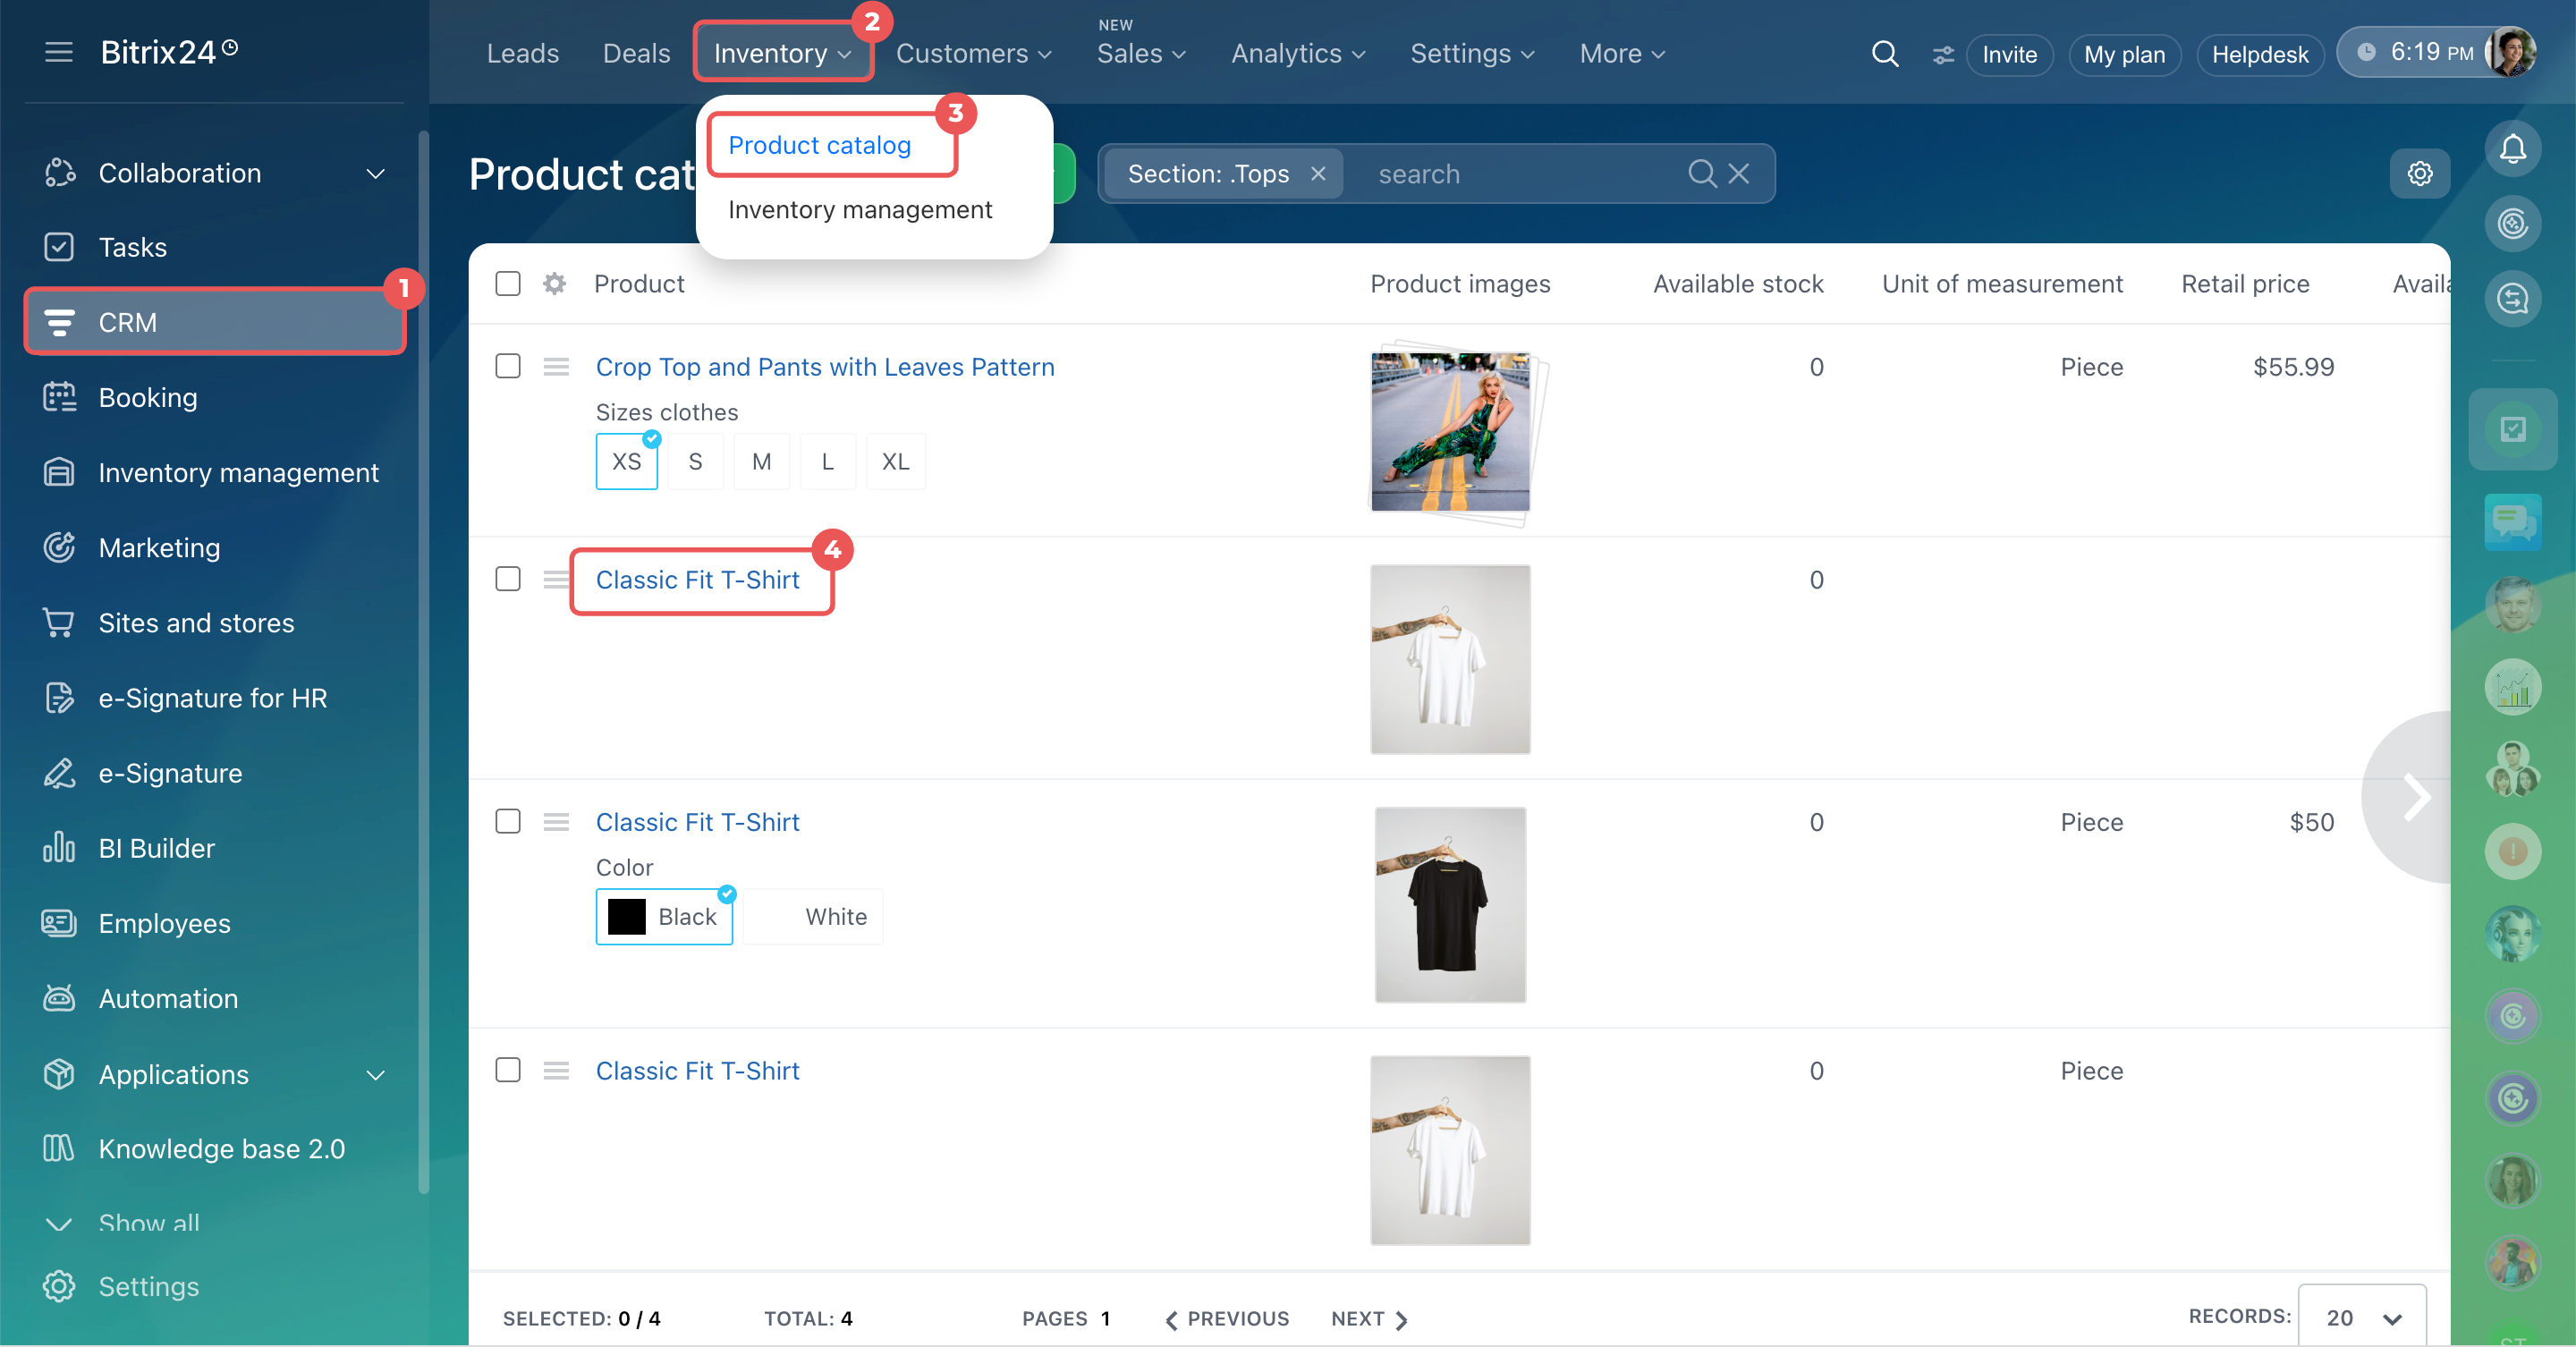
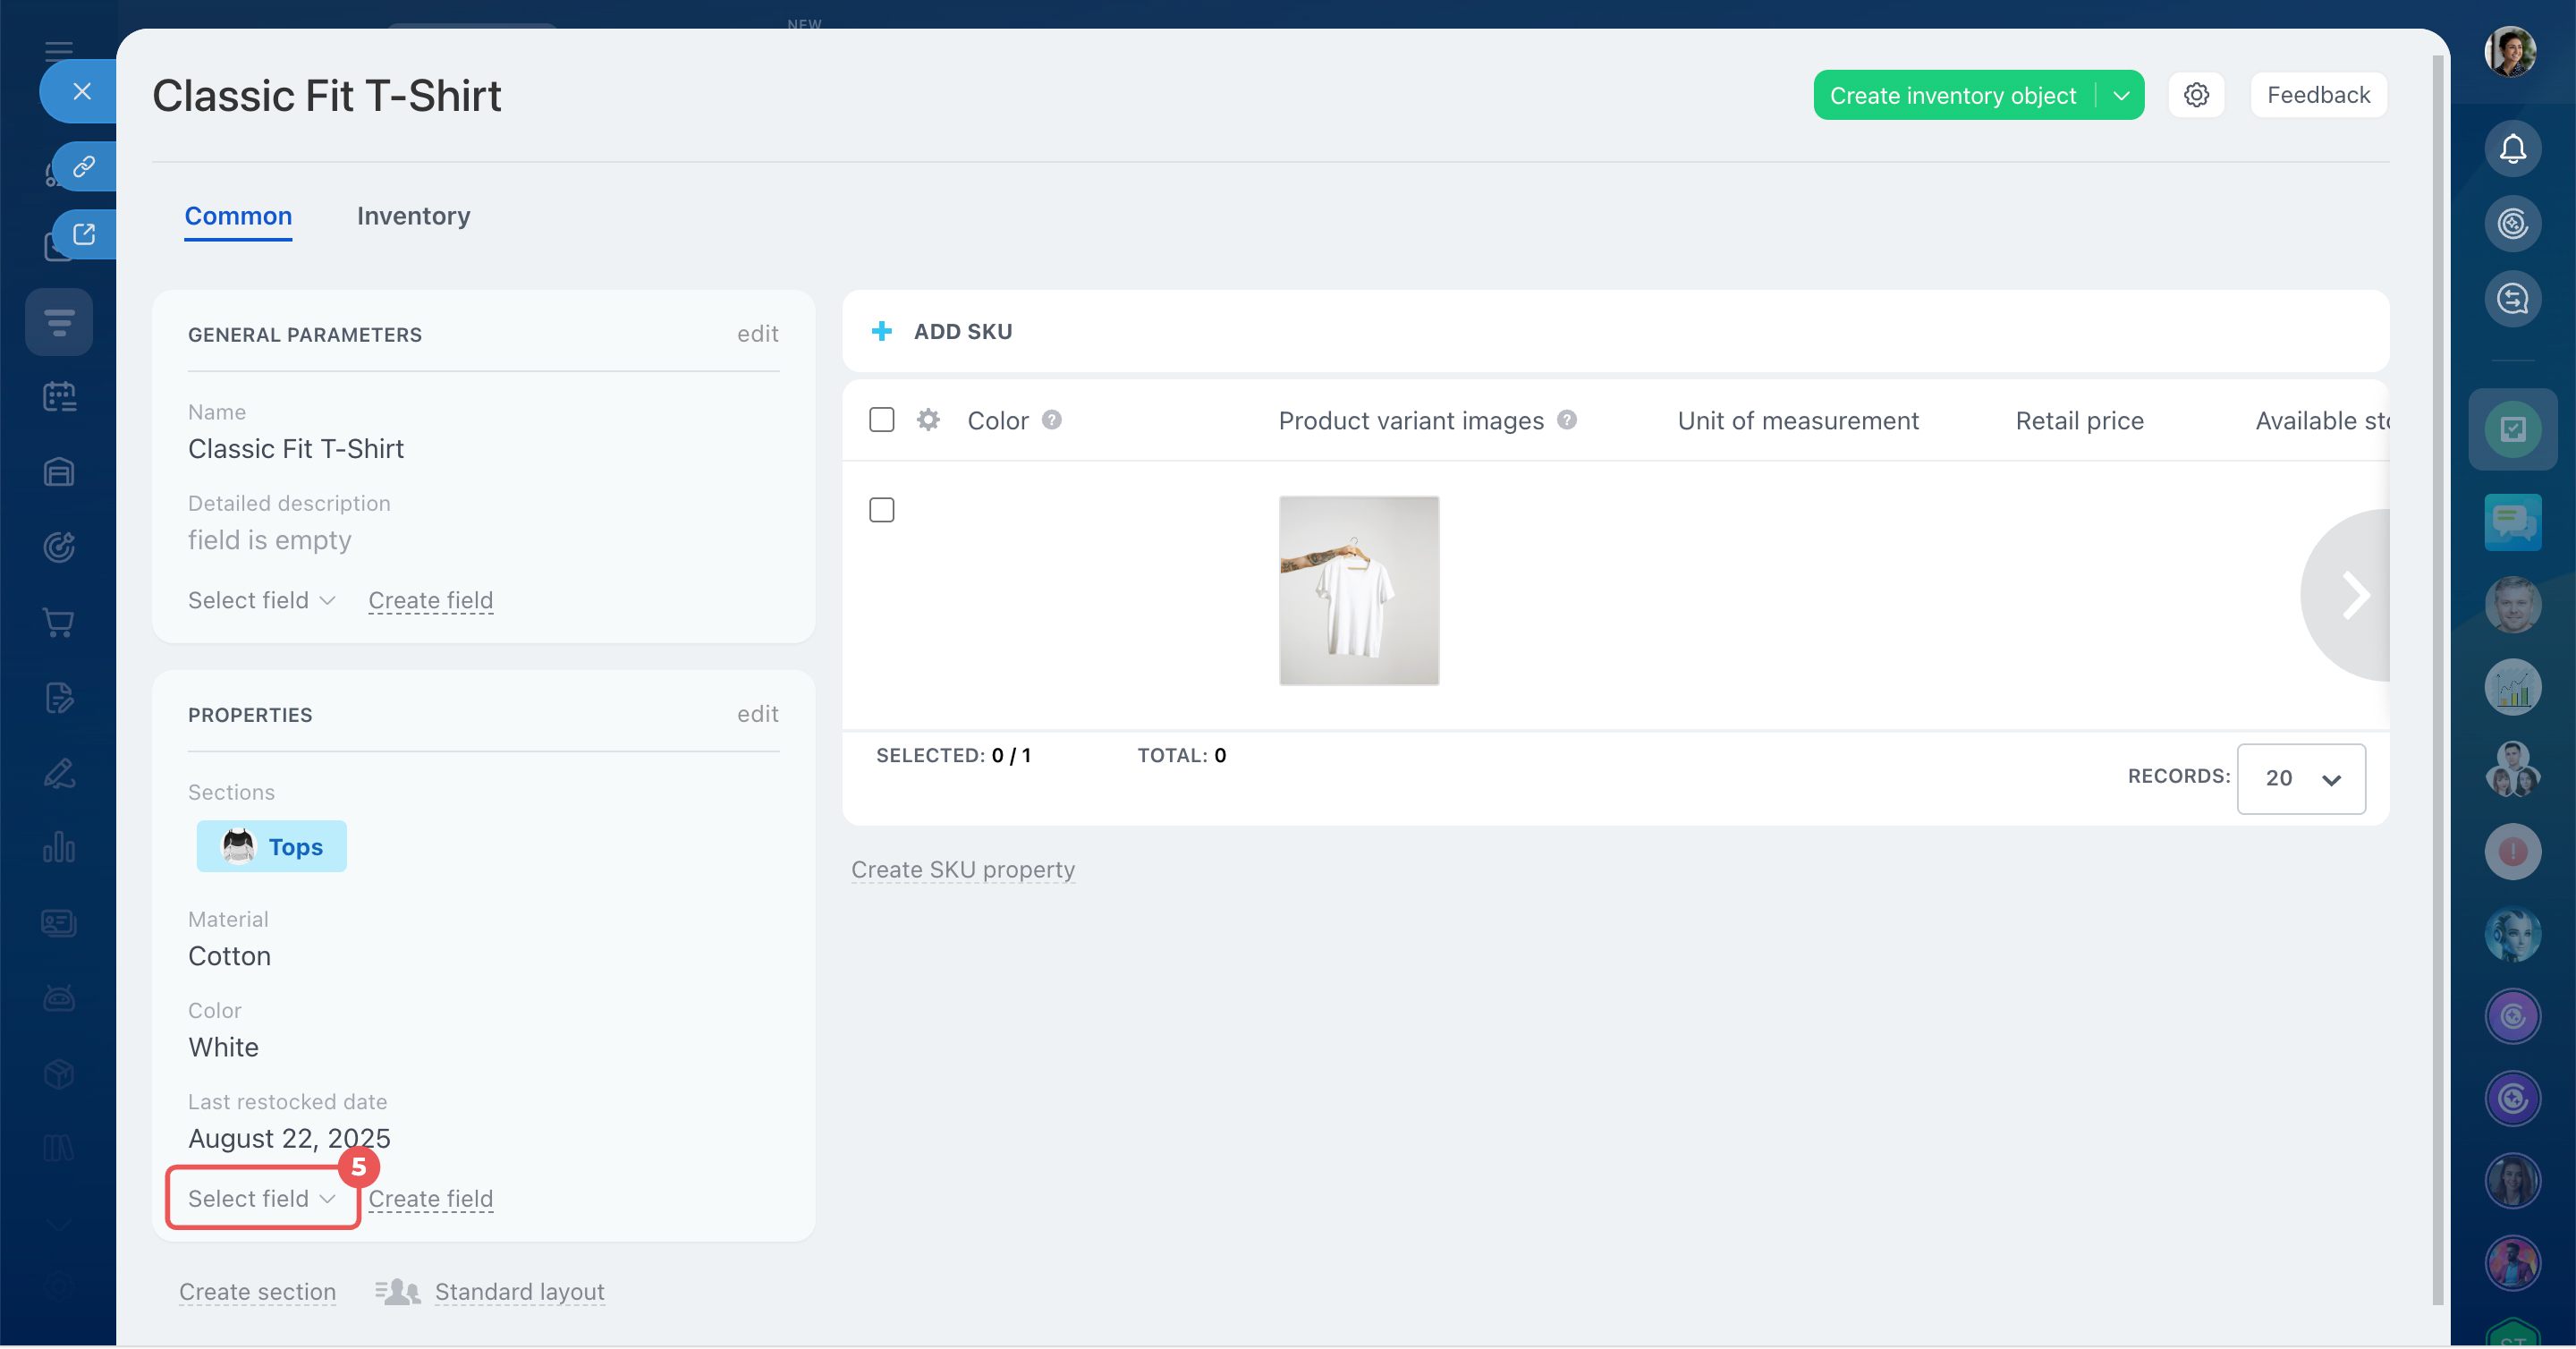
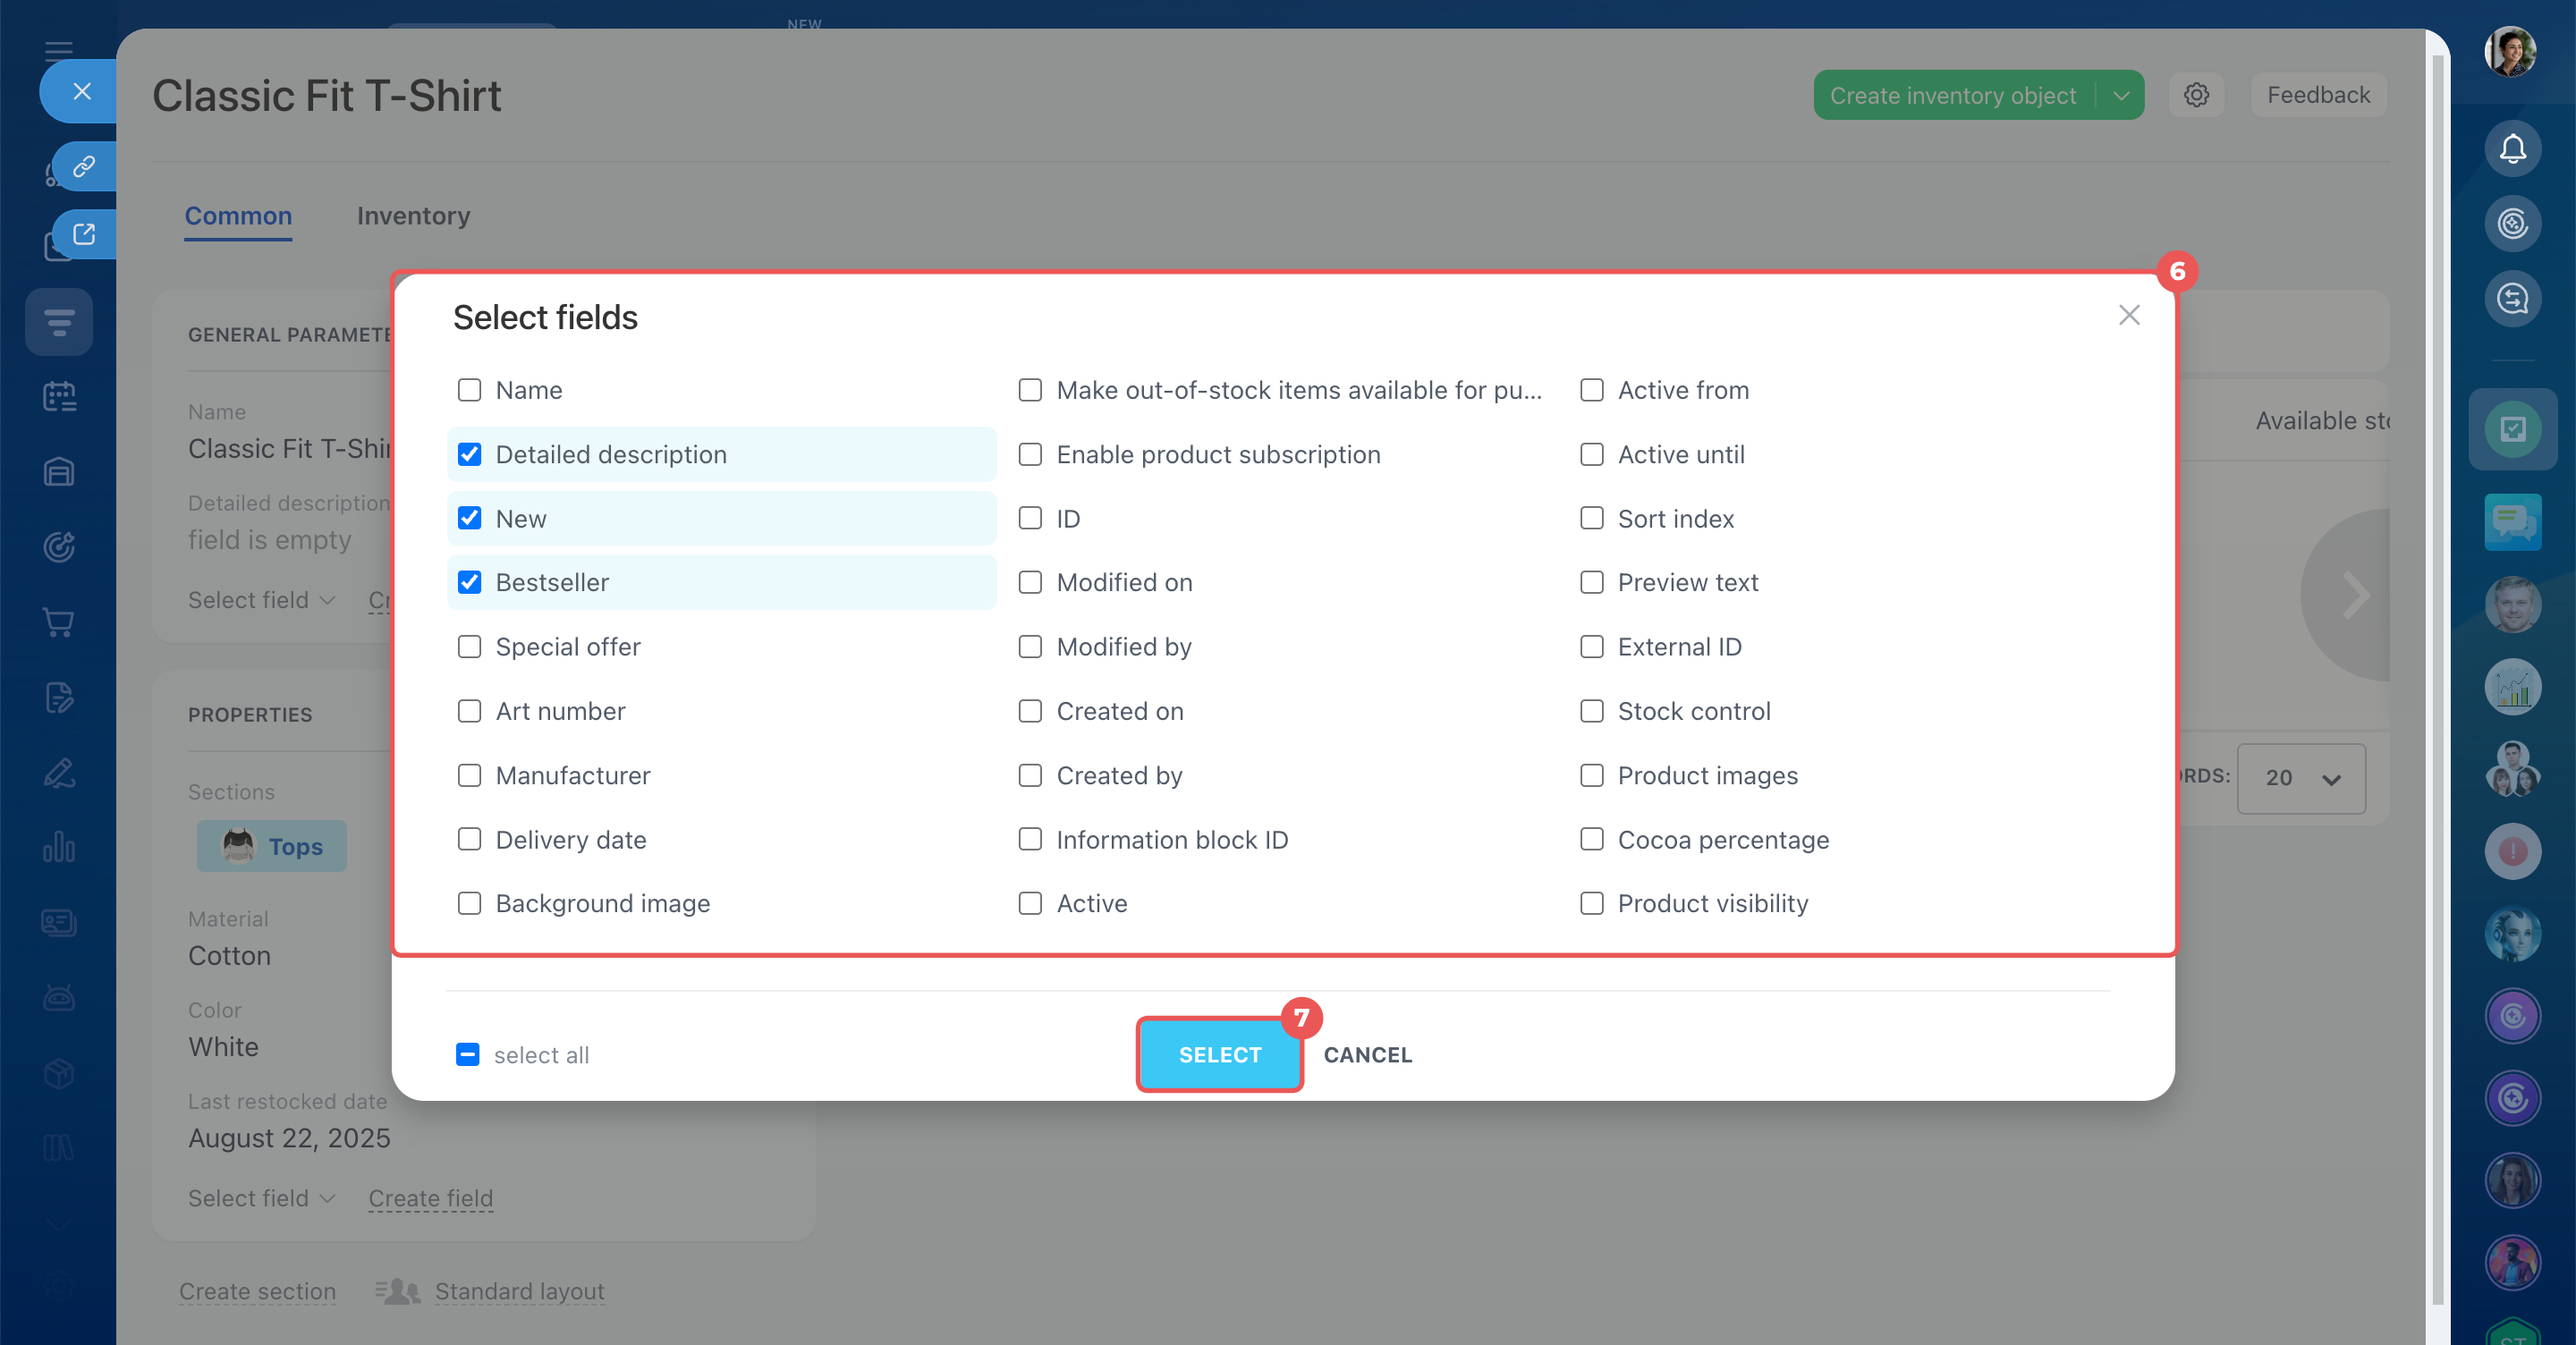
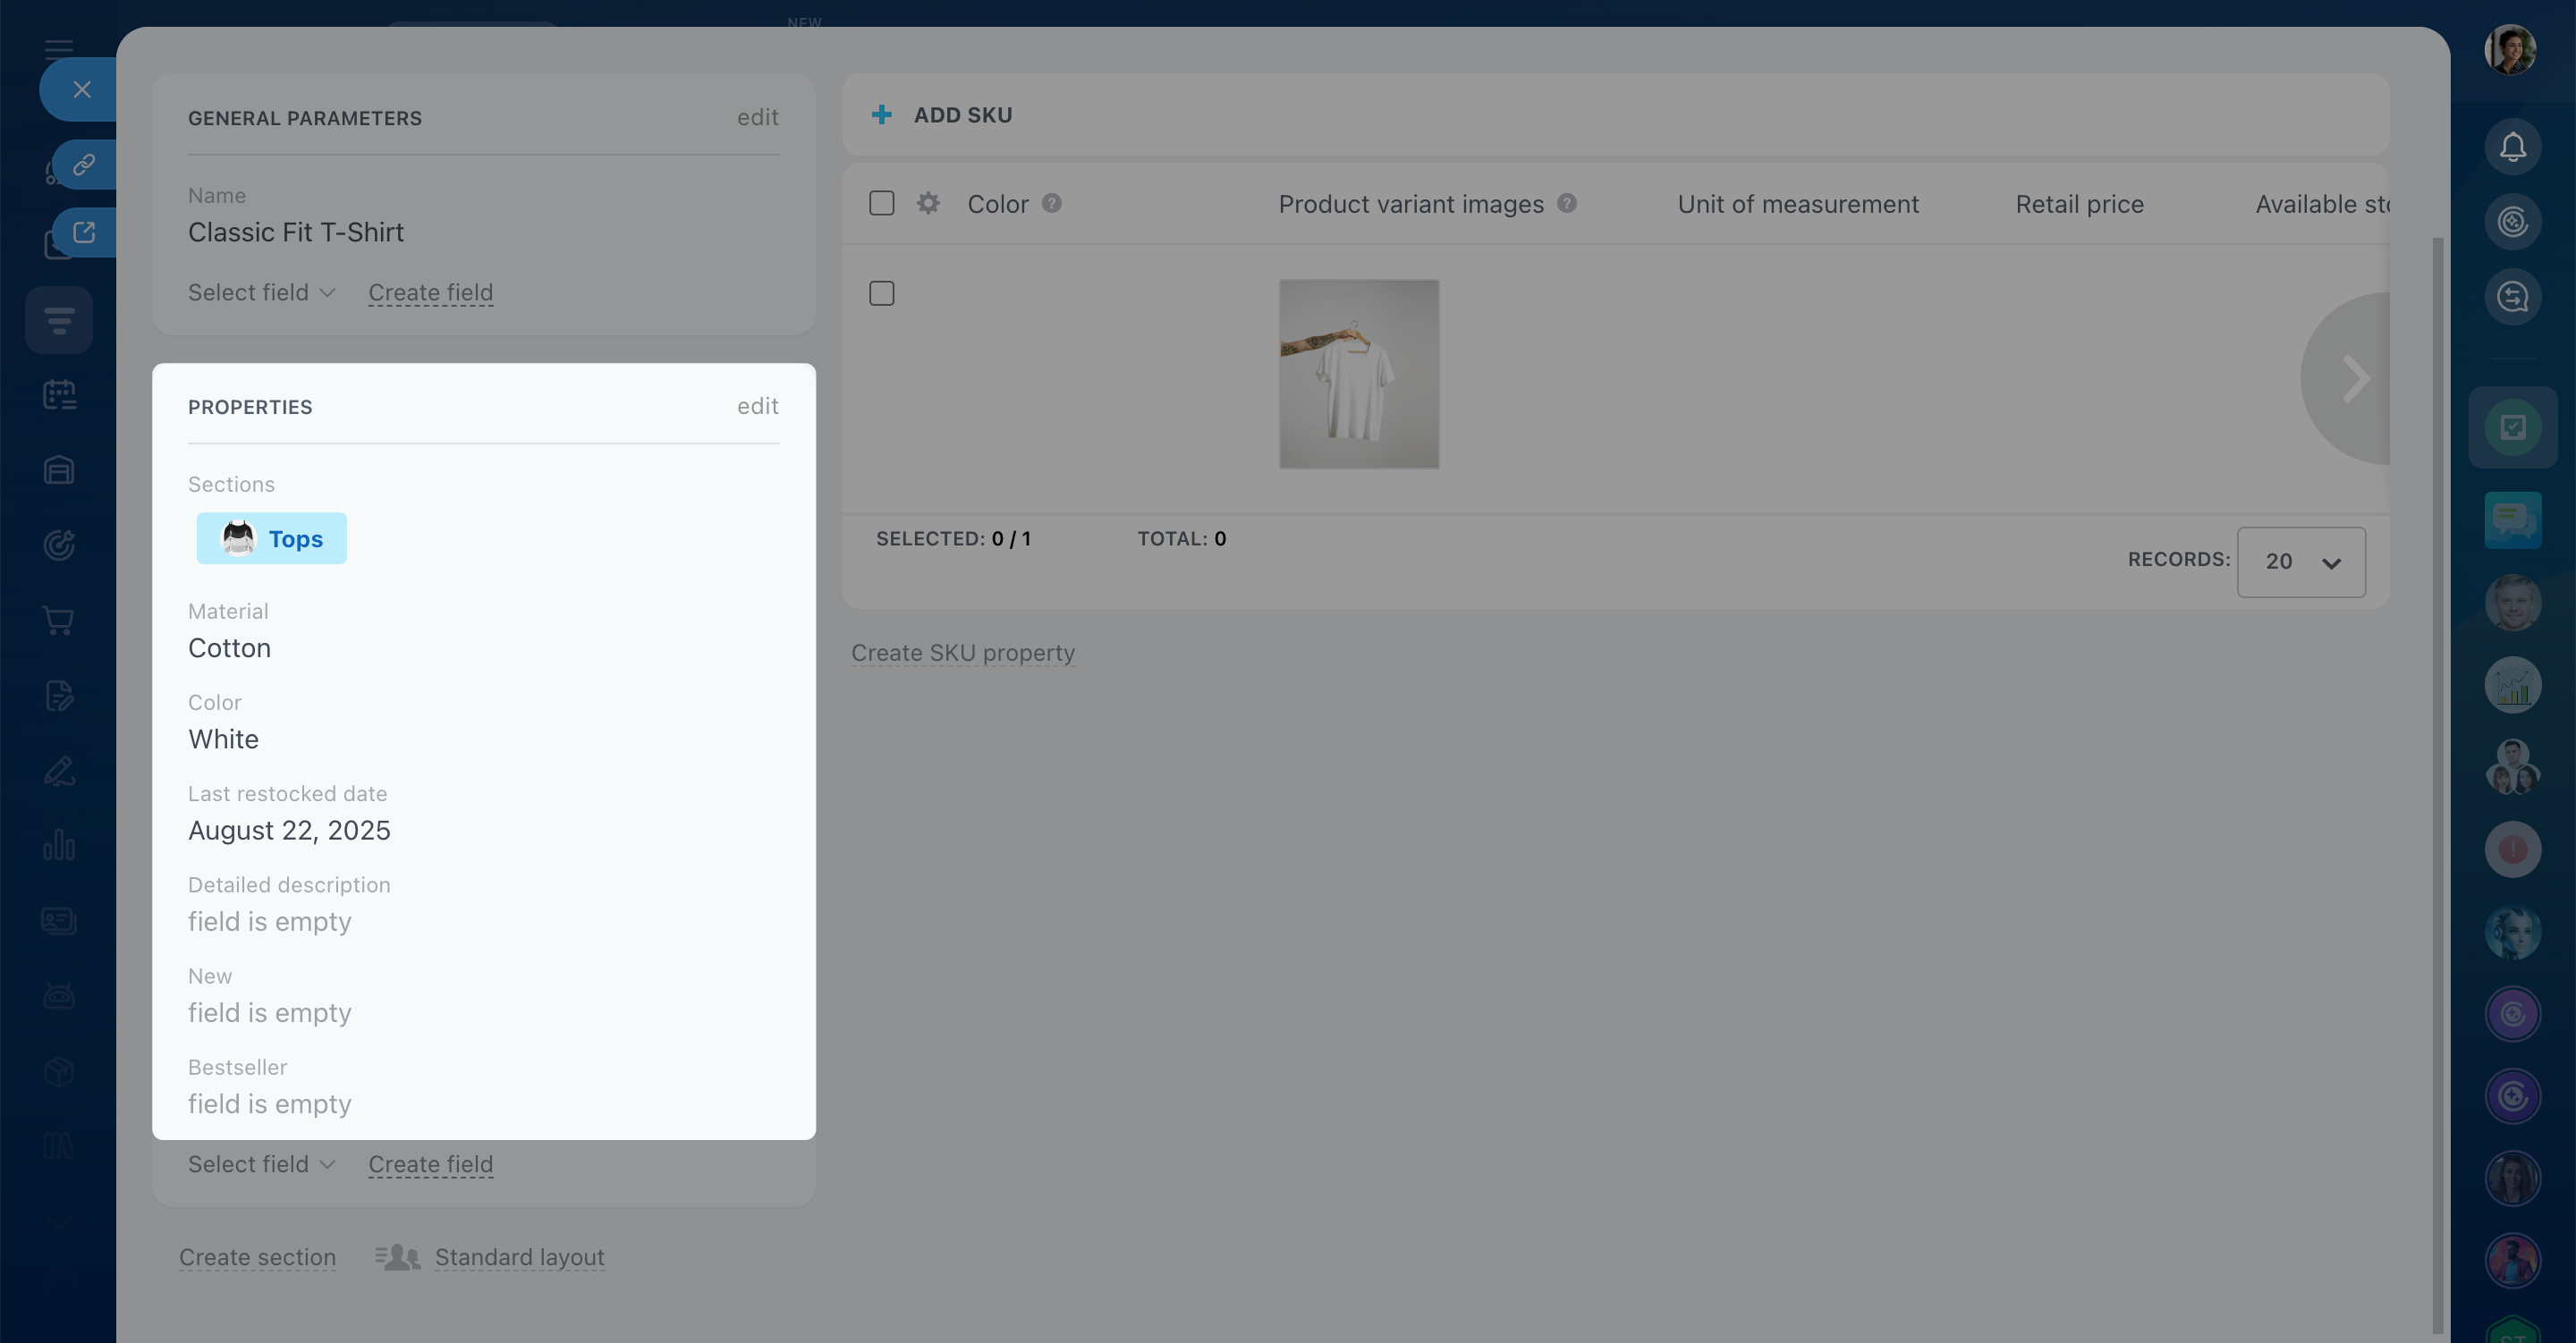
For example, if you sell clothing, you can add a Material field to specify what each item is made of.
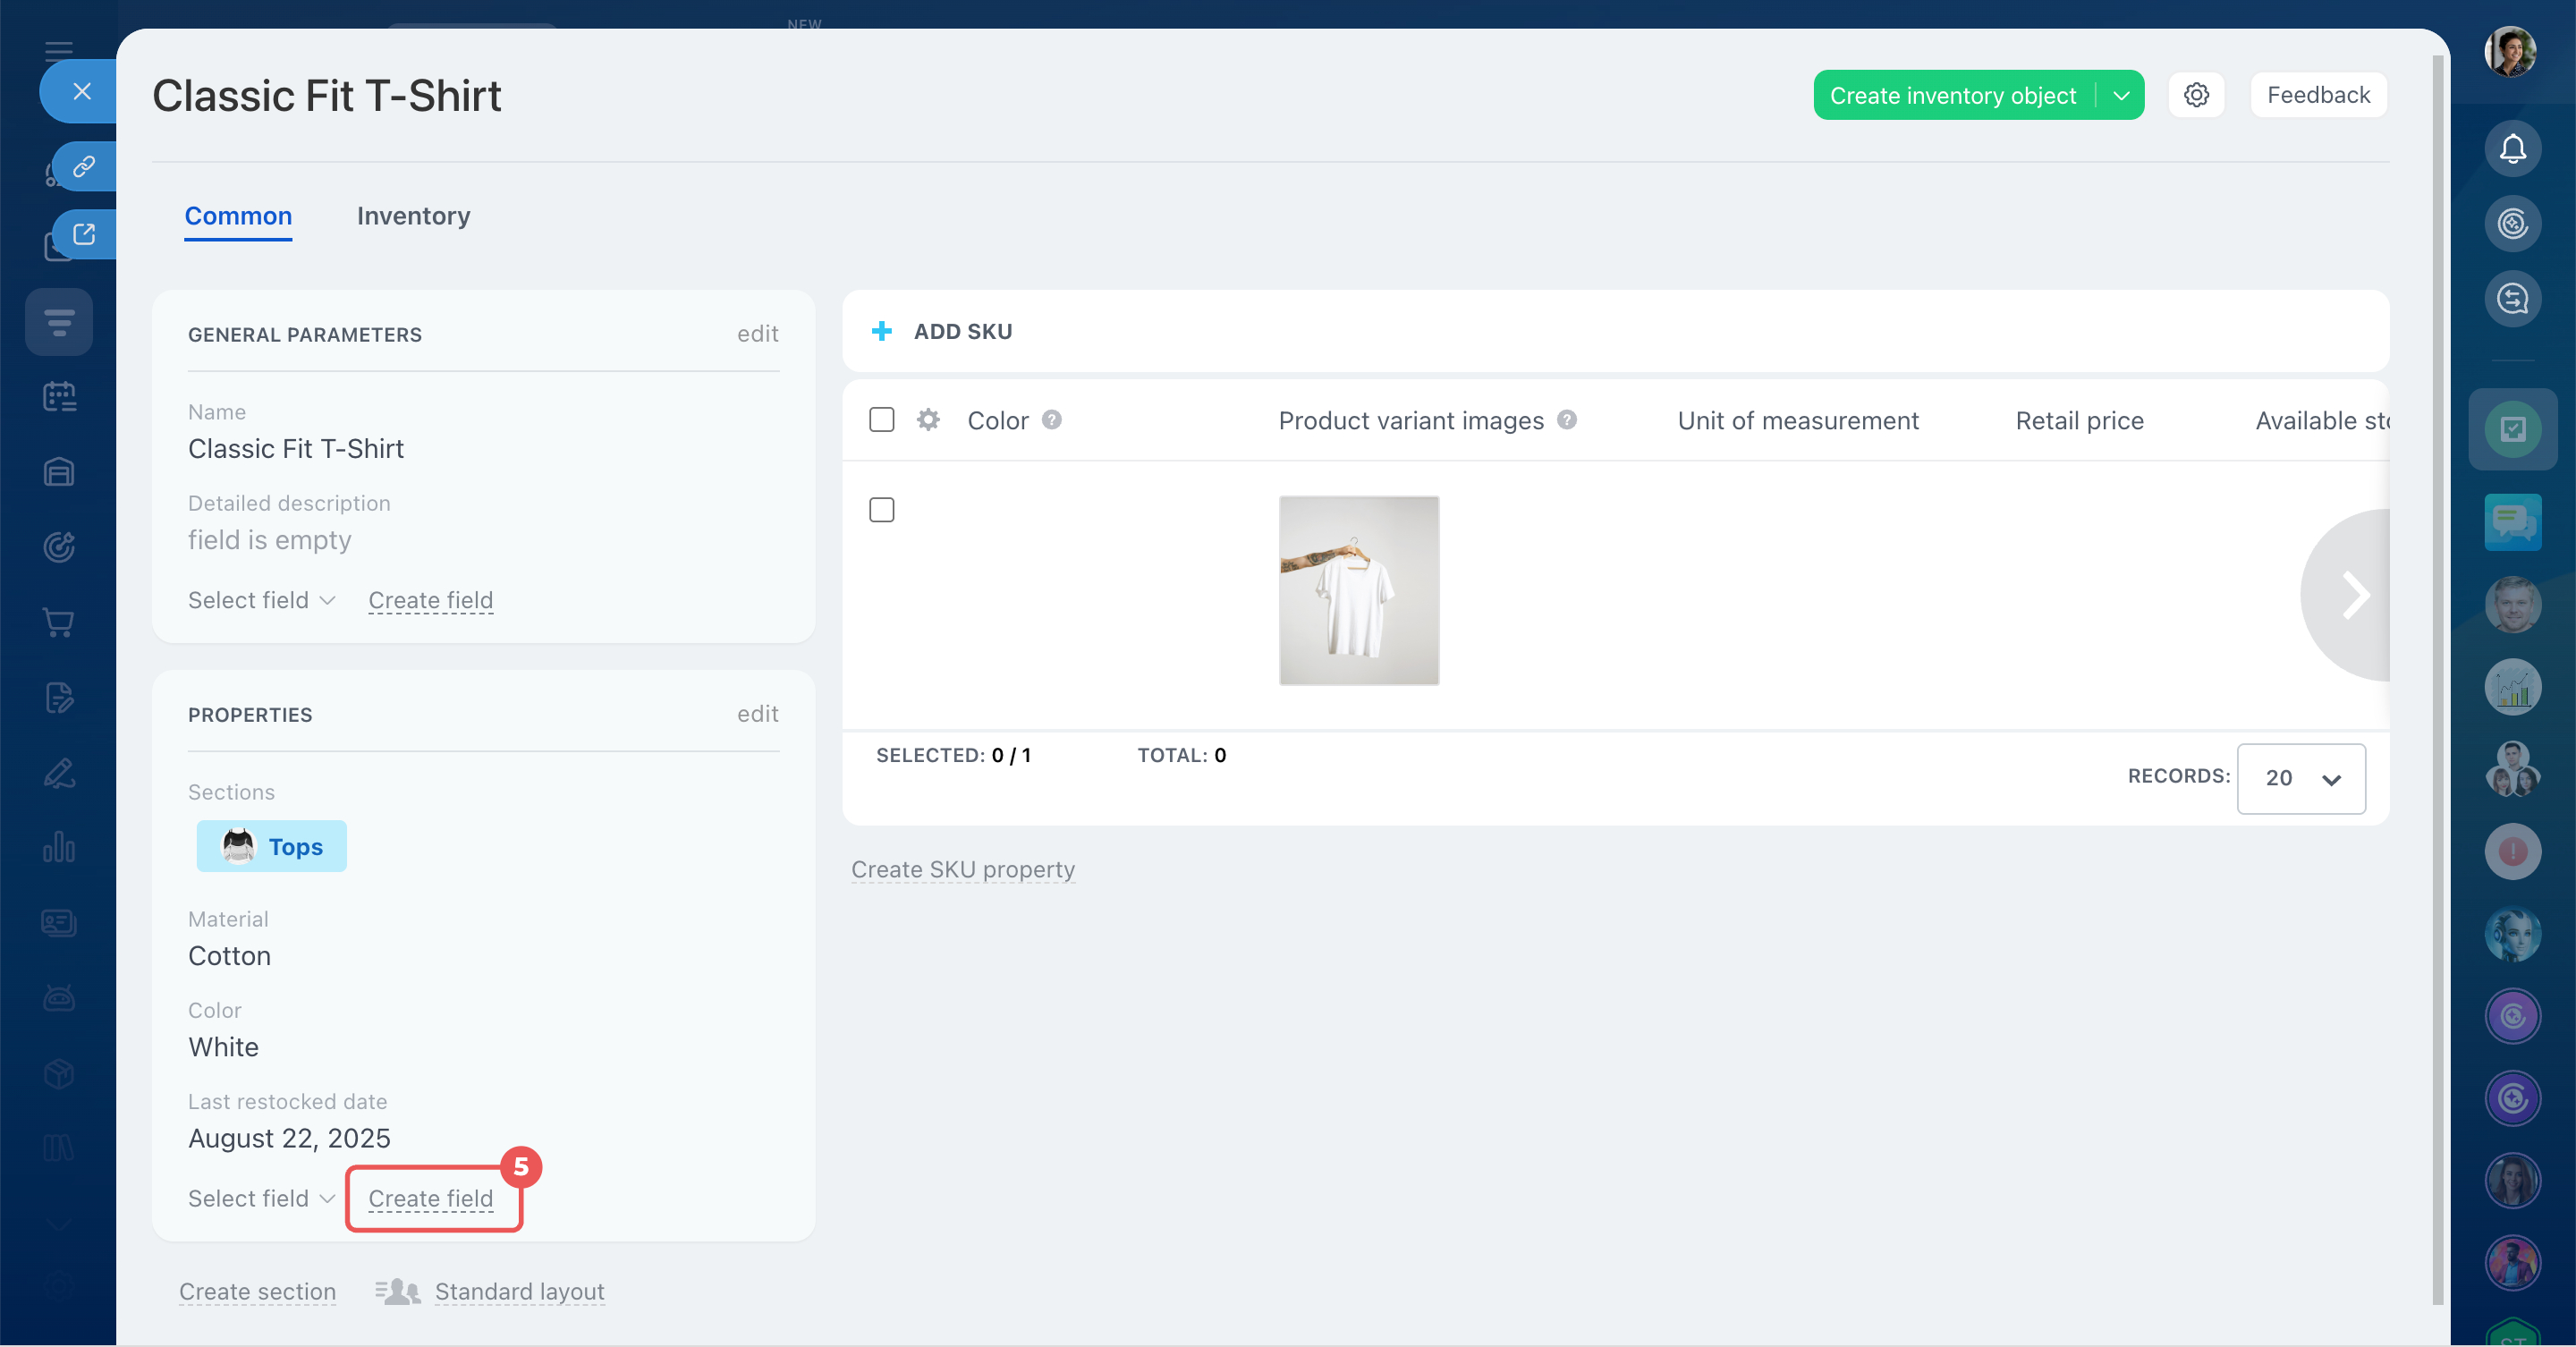
- Open CRM > Inventory > Product catalog and open the product form.
- In the section where you want to add the field, click Create field.
- Select a field type, such as List. This type works well when you need to select a value from a preset list.
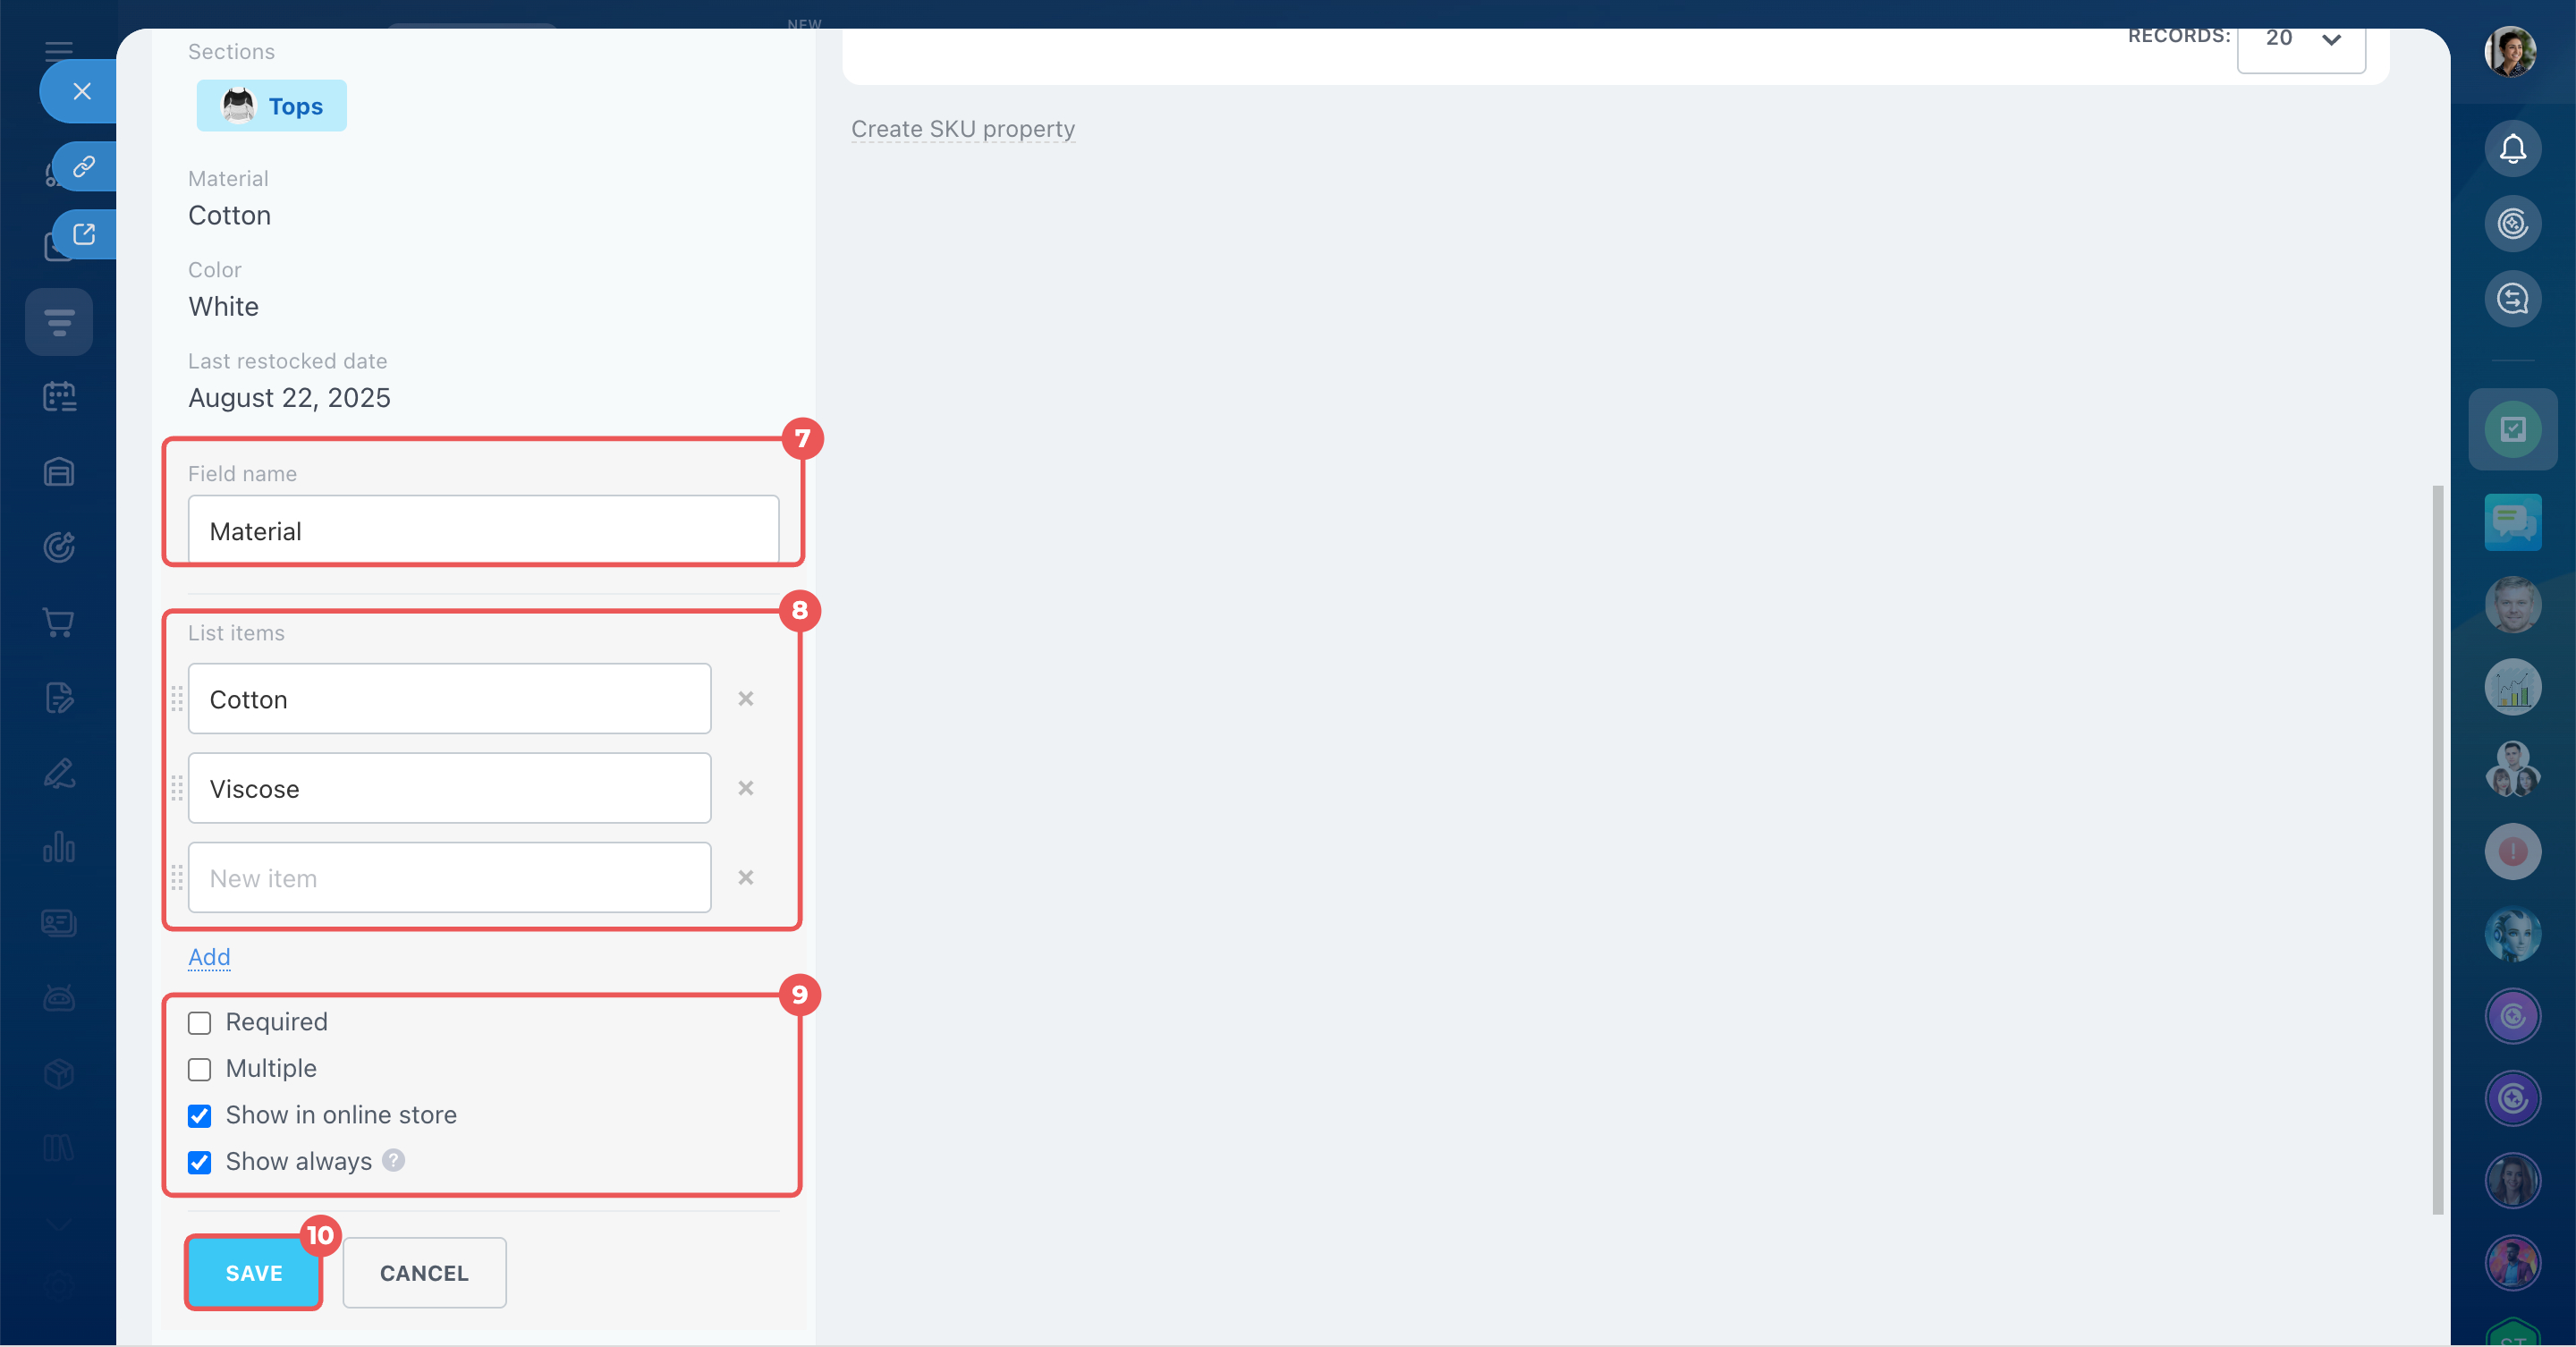
- Enter a field name, such as Material, and add value options.
- Configure the field parameters:
- Required — you cannot save the product without completing this field.
- Multiple — you can specify several values, such as multiple materials.
- Show in online store — clients will see the field value on the product page.
- Show always — the field appears in the form even when it is empty.
- Click Save.
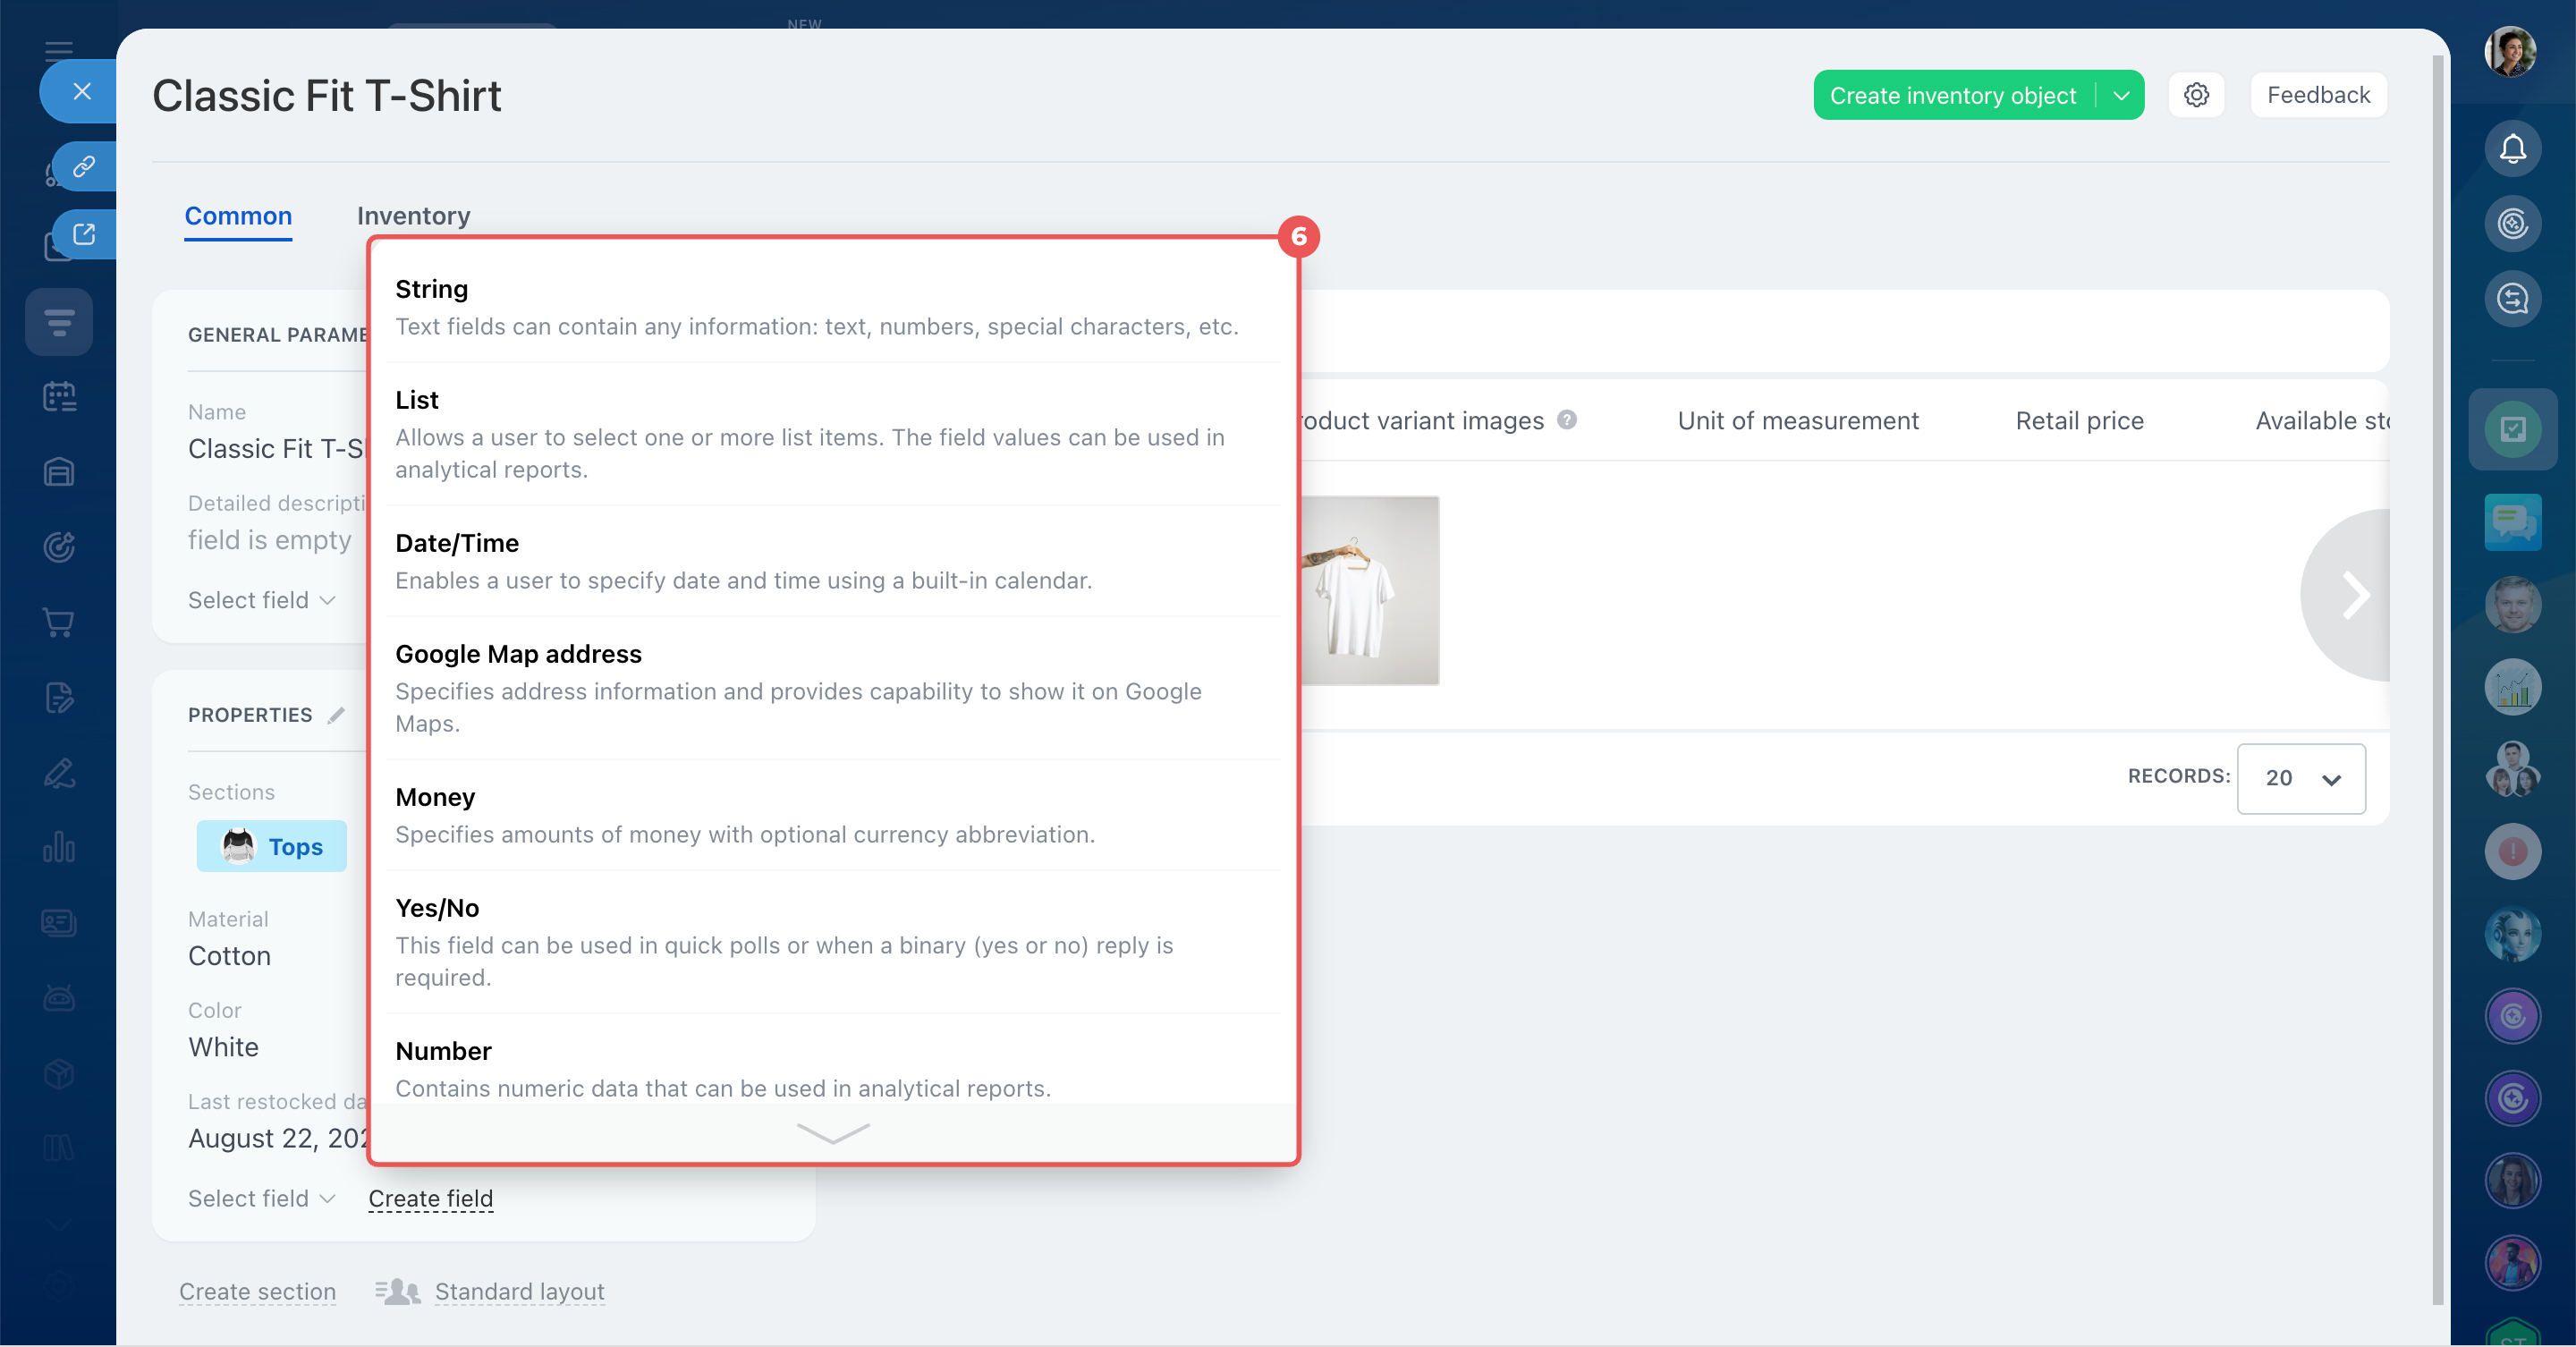
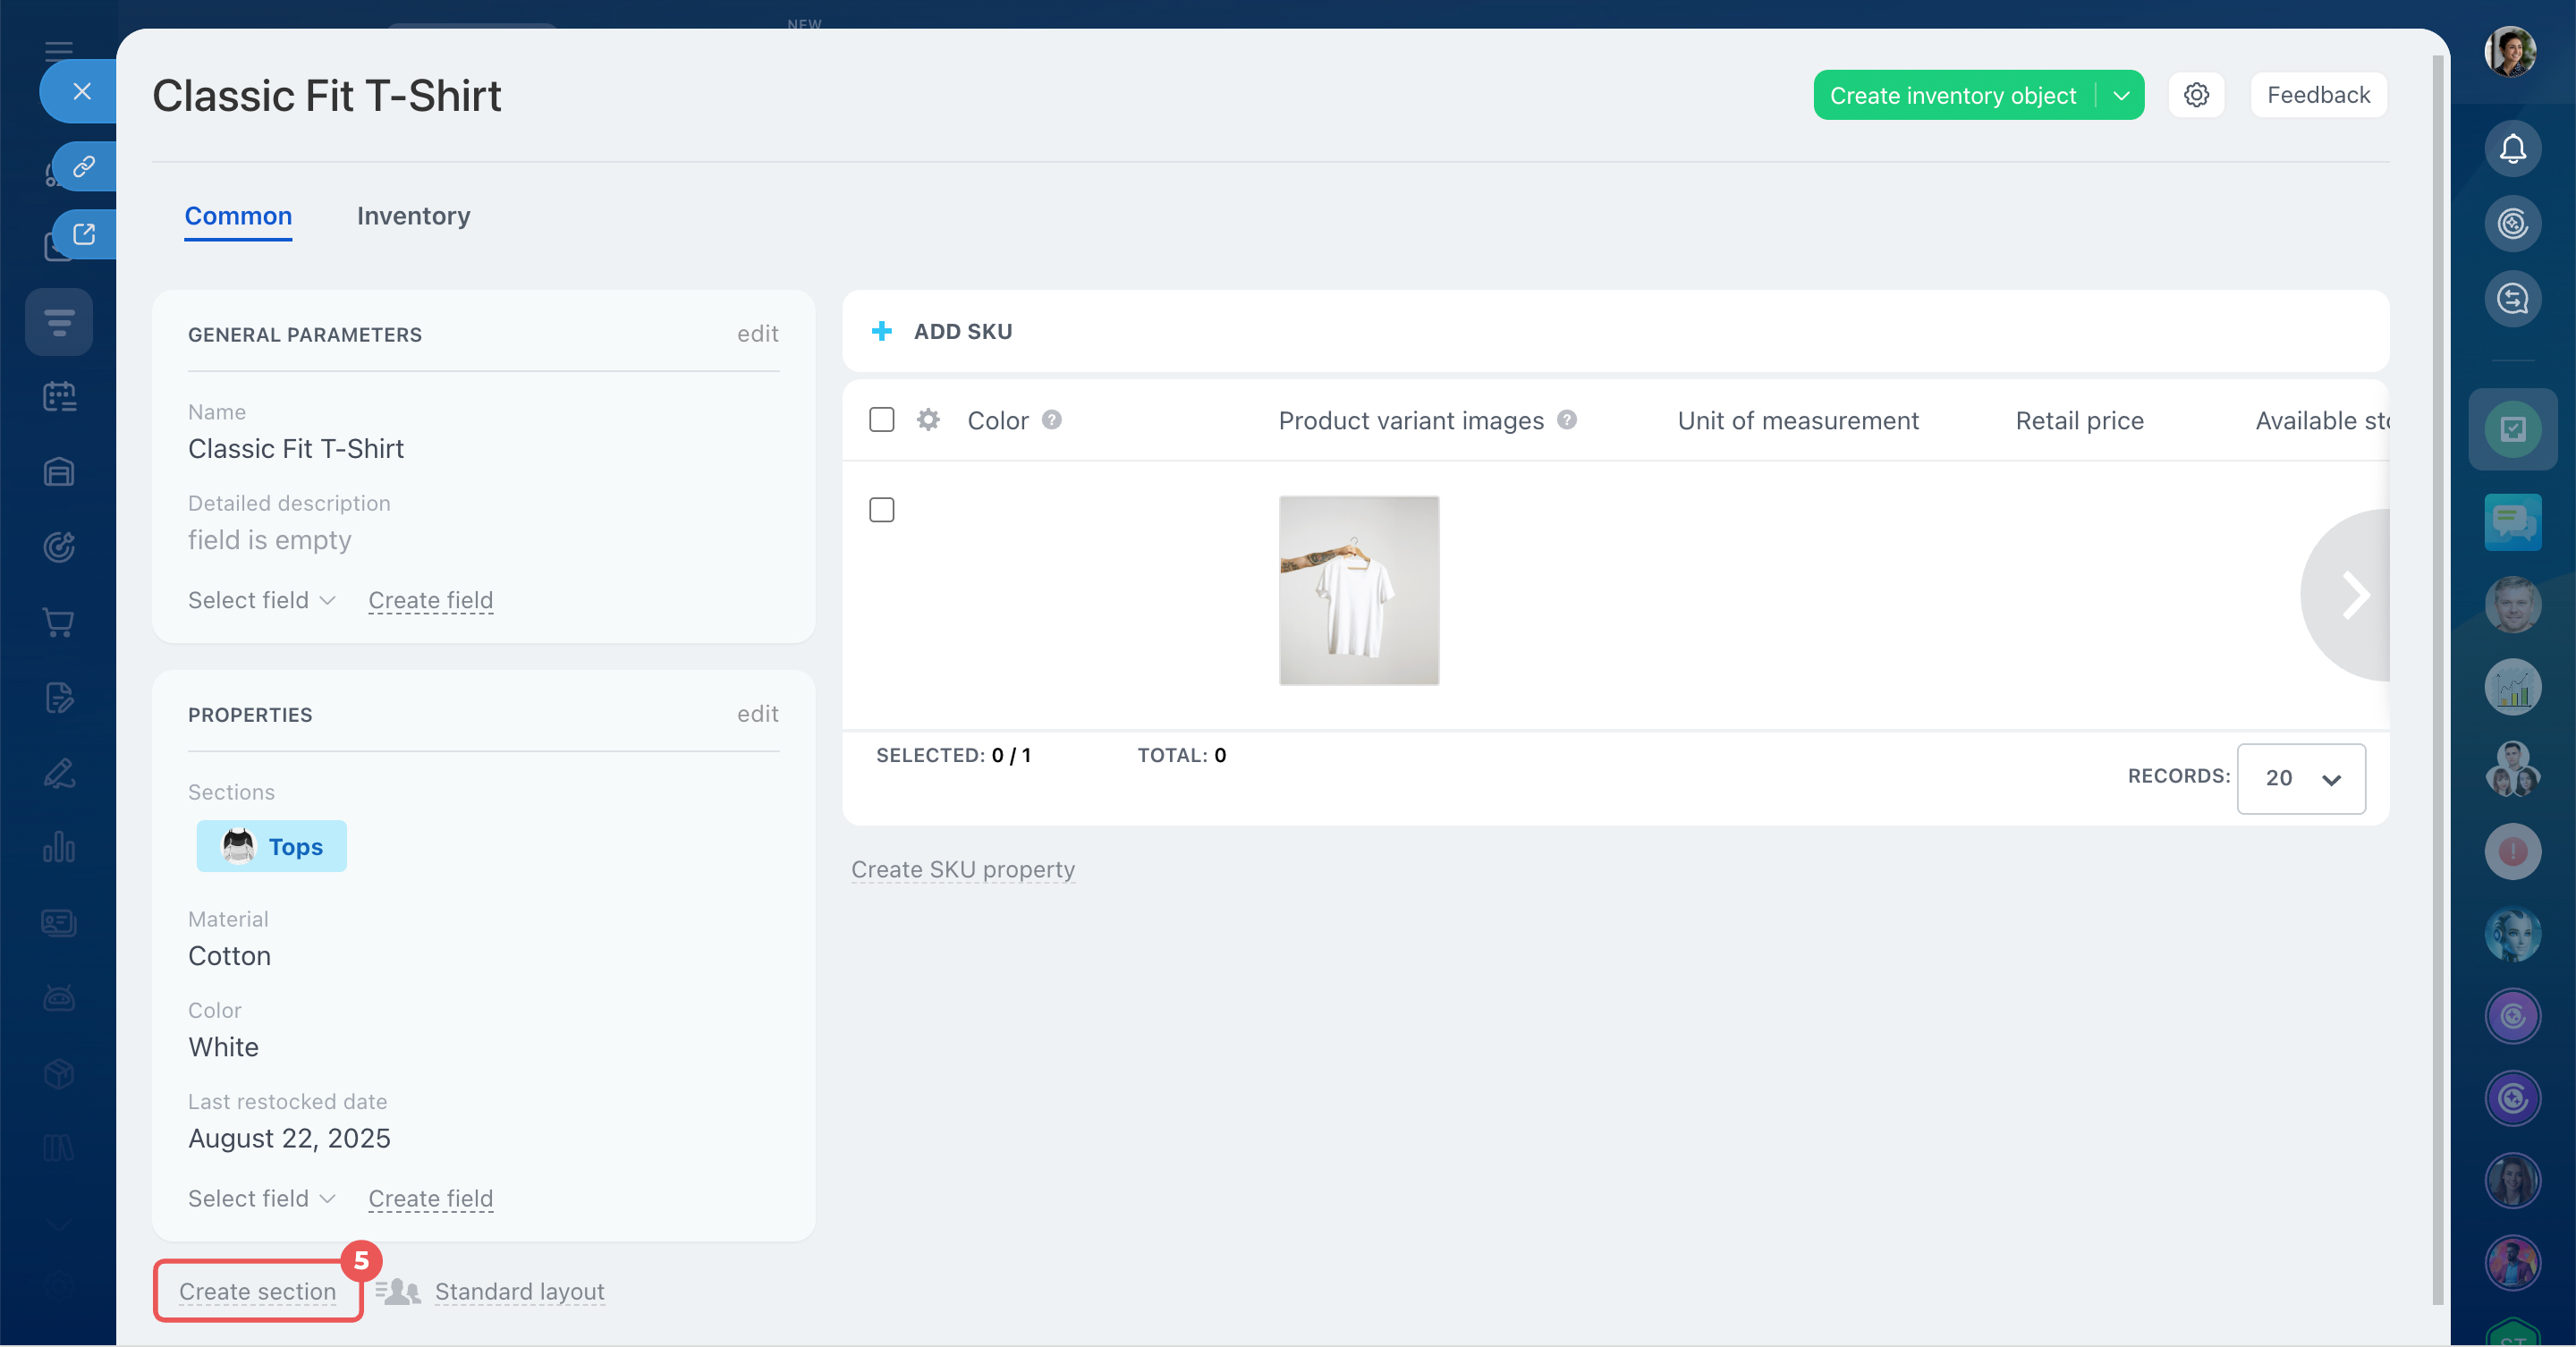
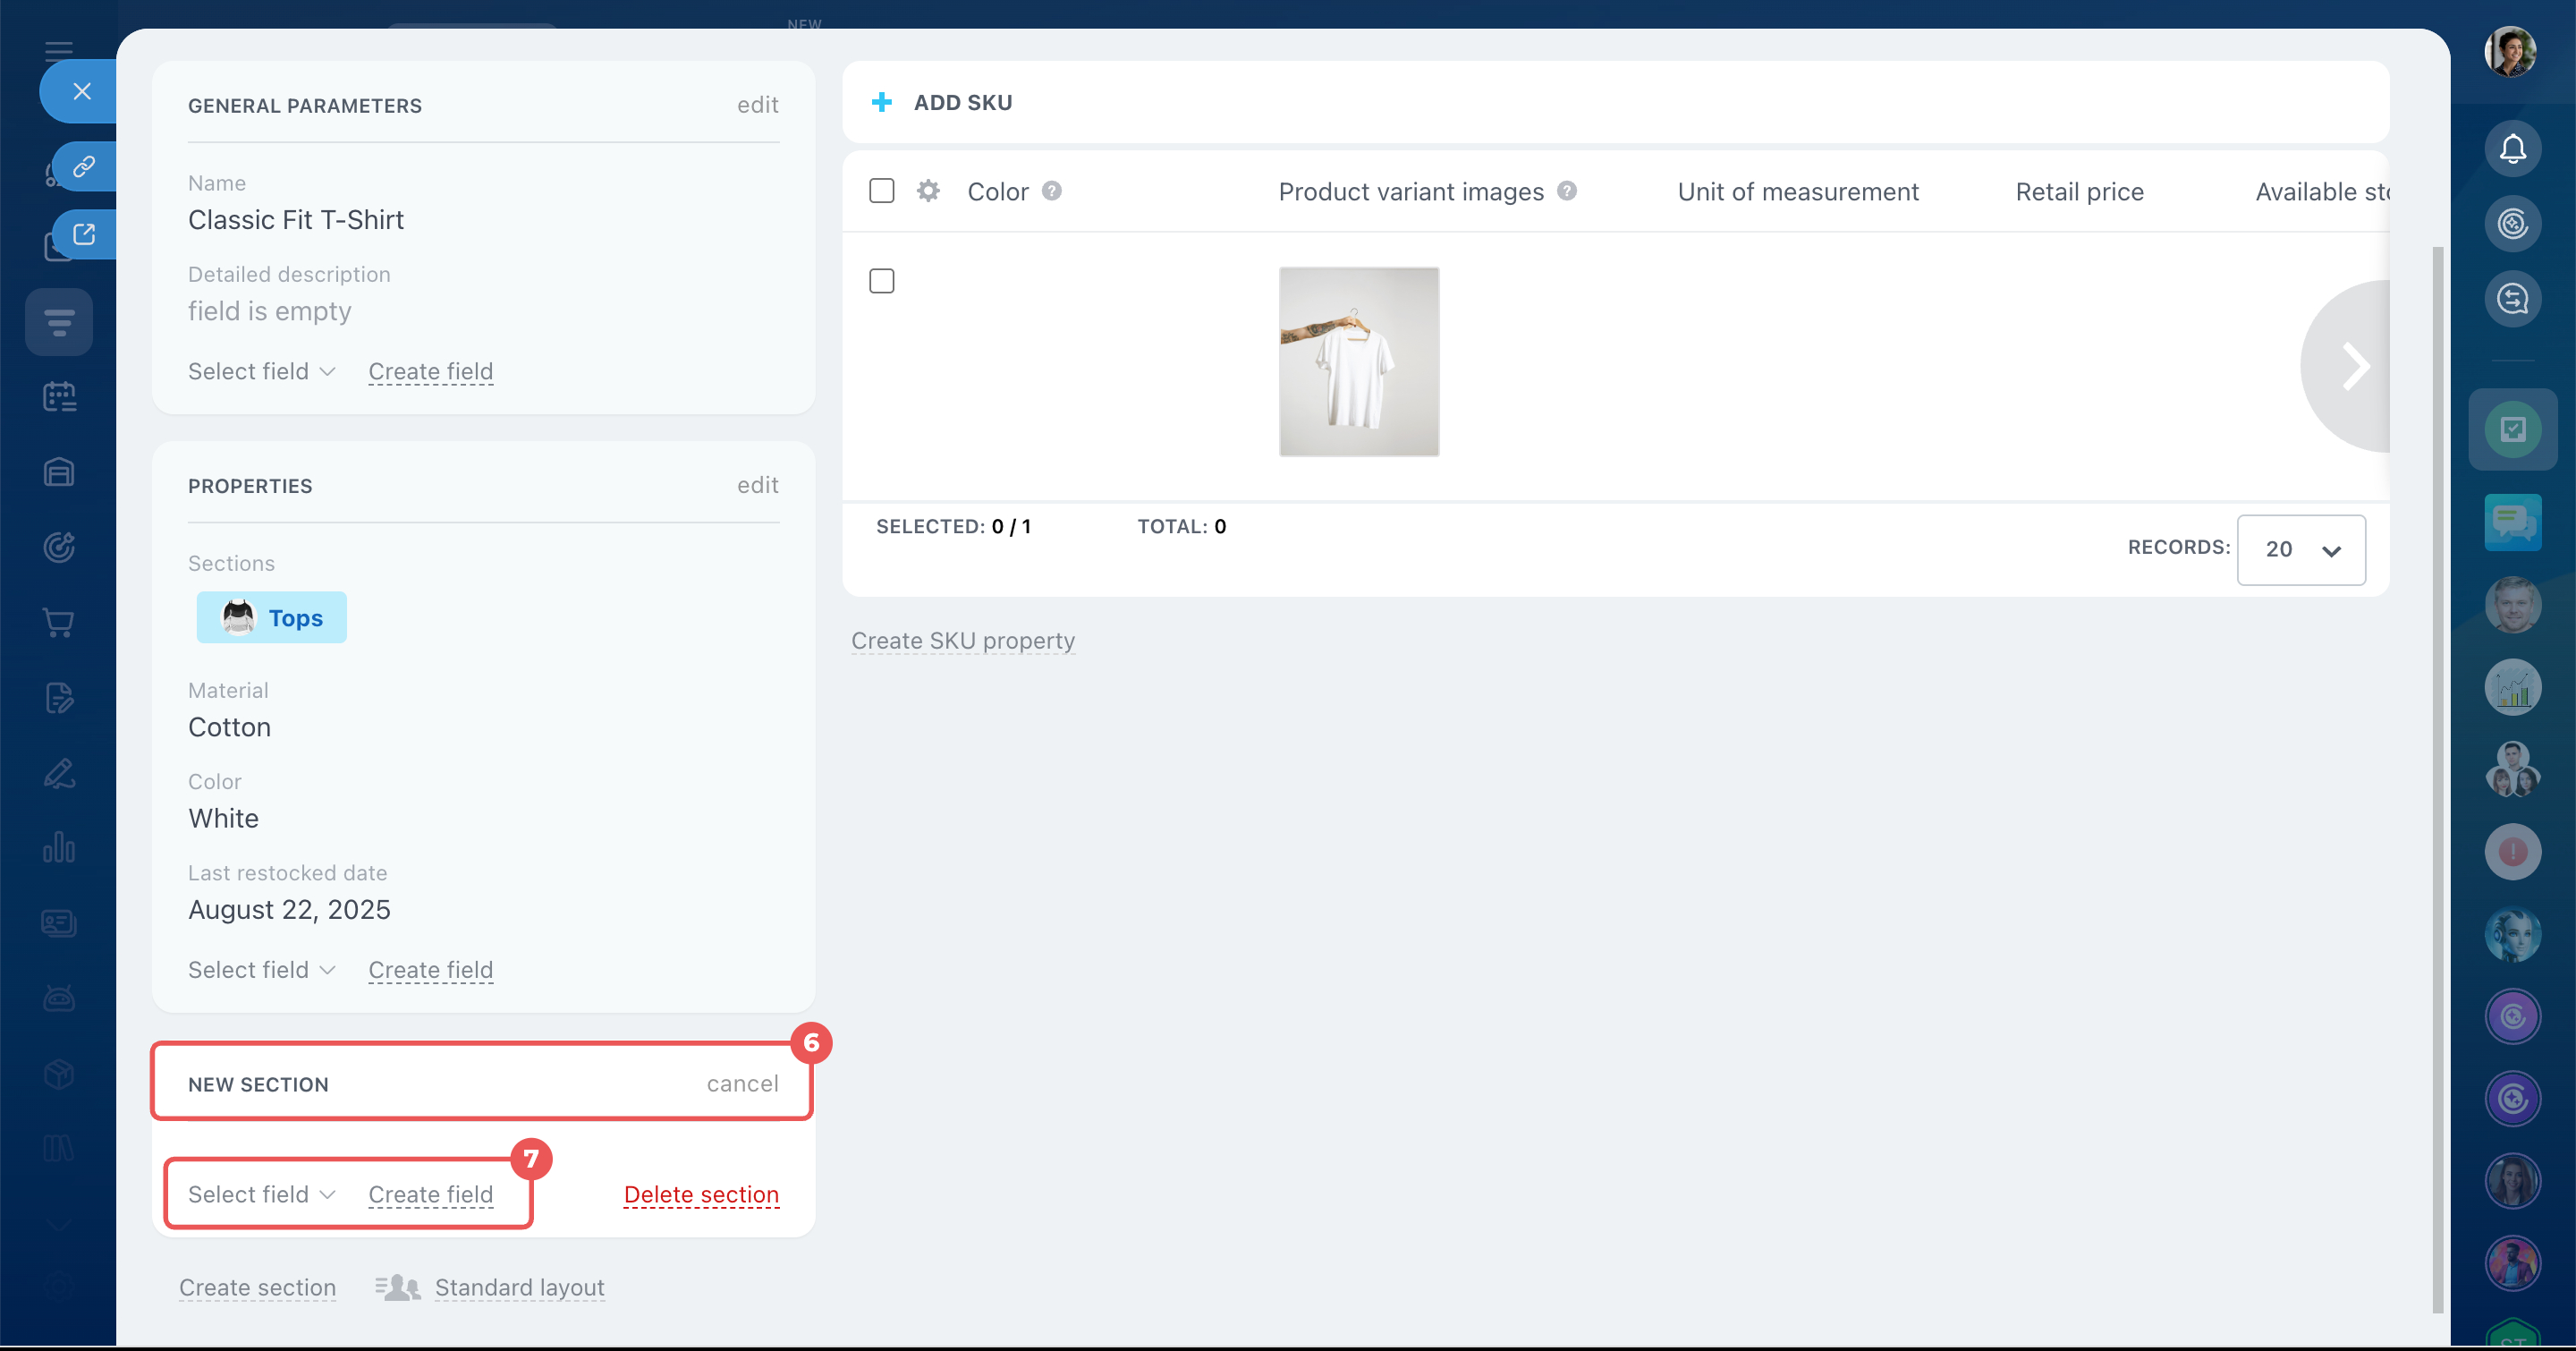
Create a section. Use sections to organize related product properties.
For example, if a product has many properties, create an Additional information section for fields like Material, Country of origin, and Warranty. This keeps related details together.
- Open CRM > Inventory > Product catalog and open the product form.
- At the bottom of the form, click Add section.
- Enter a section name.
- Add fields:
- Click Select field to add an existing field
- Click Create field to add a new field
- Click Save.
Configure how properties appear
Once you've added product properties, you can choose how they appear in the product form and product list.
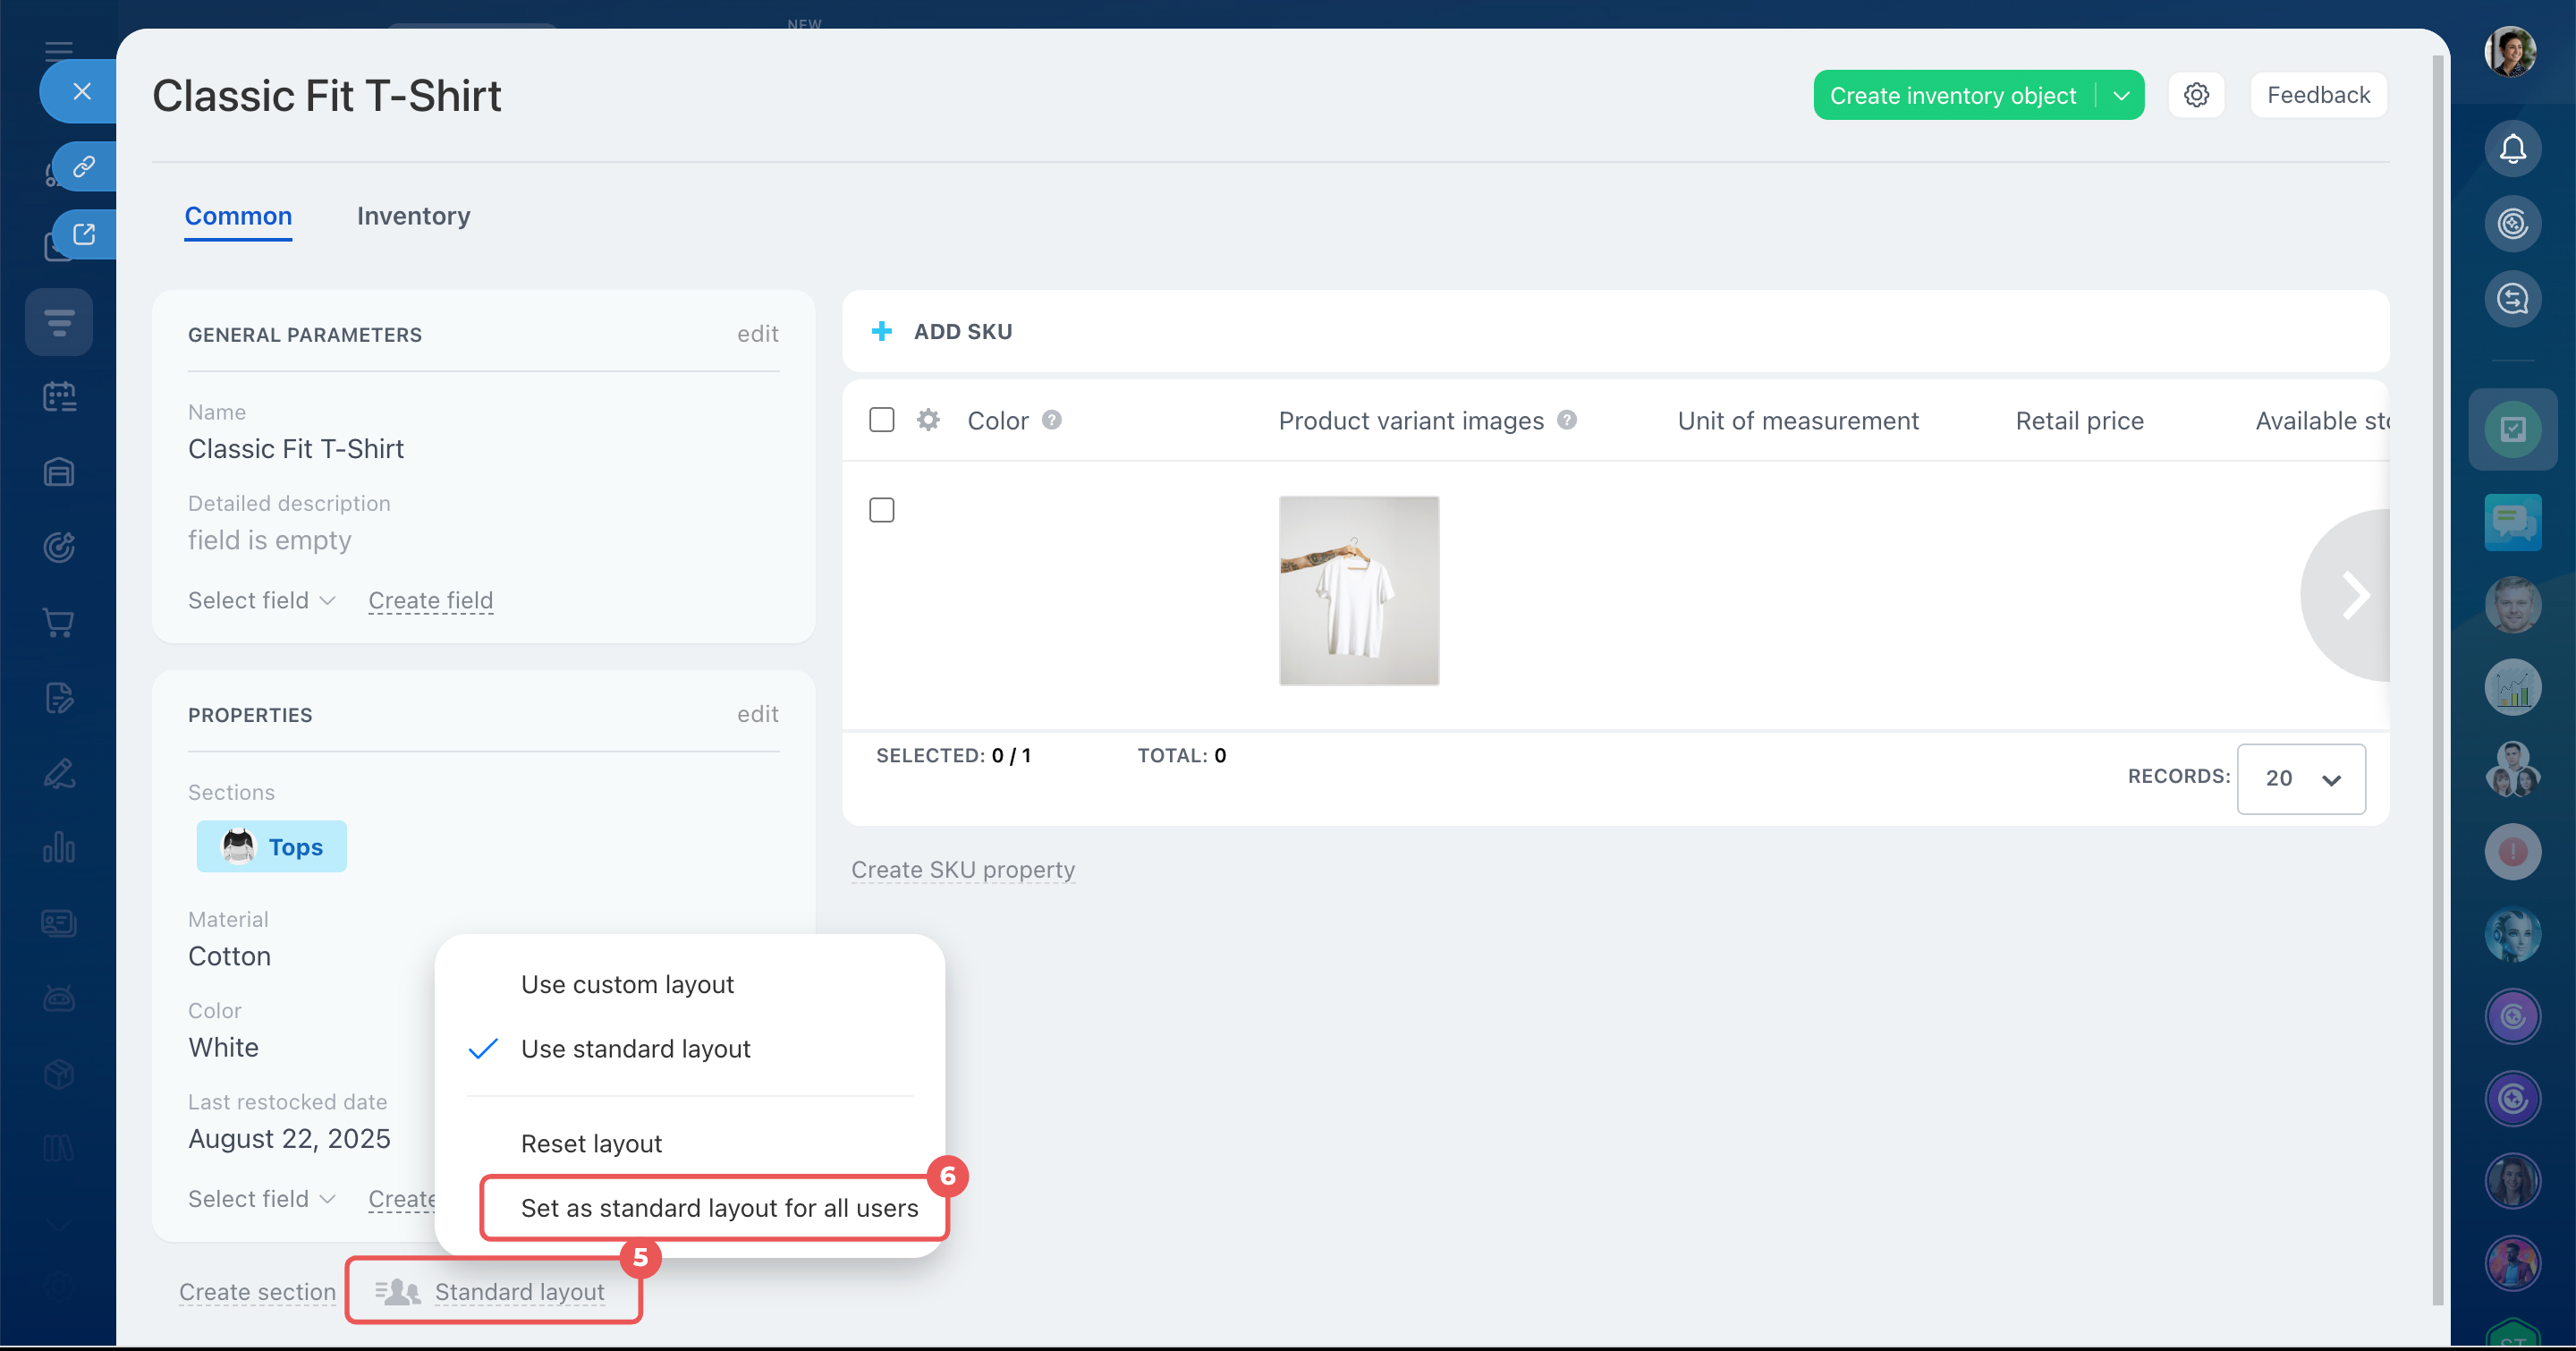
Set a standard form layout. You can configure the product form once and use the same layout for all employees.
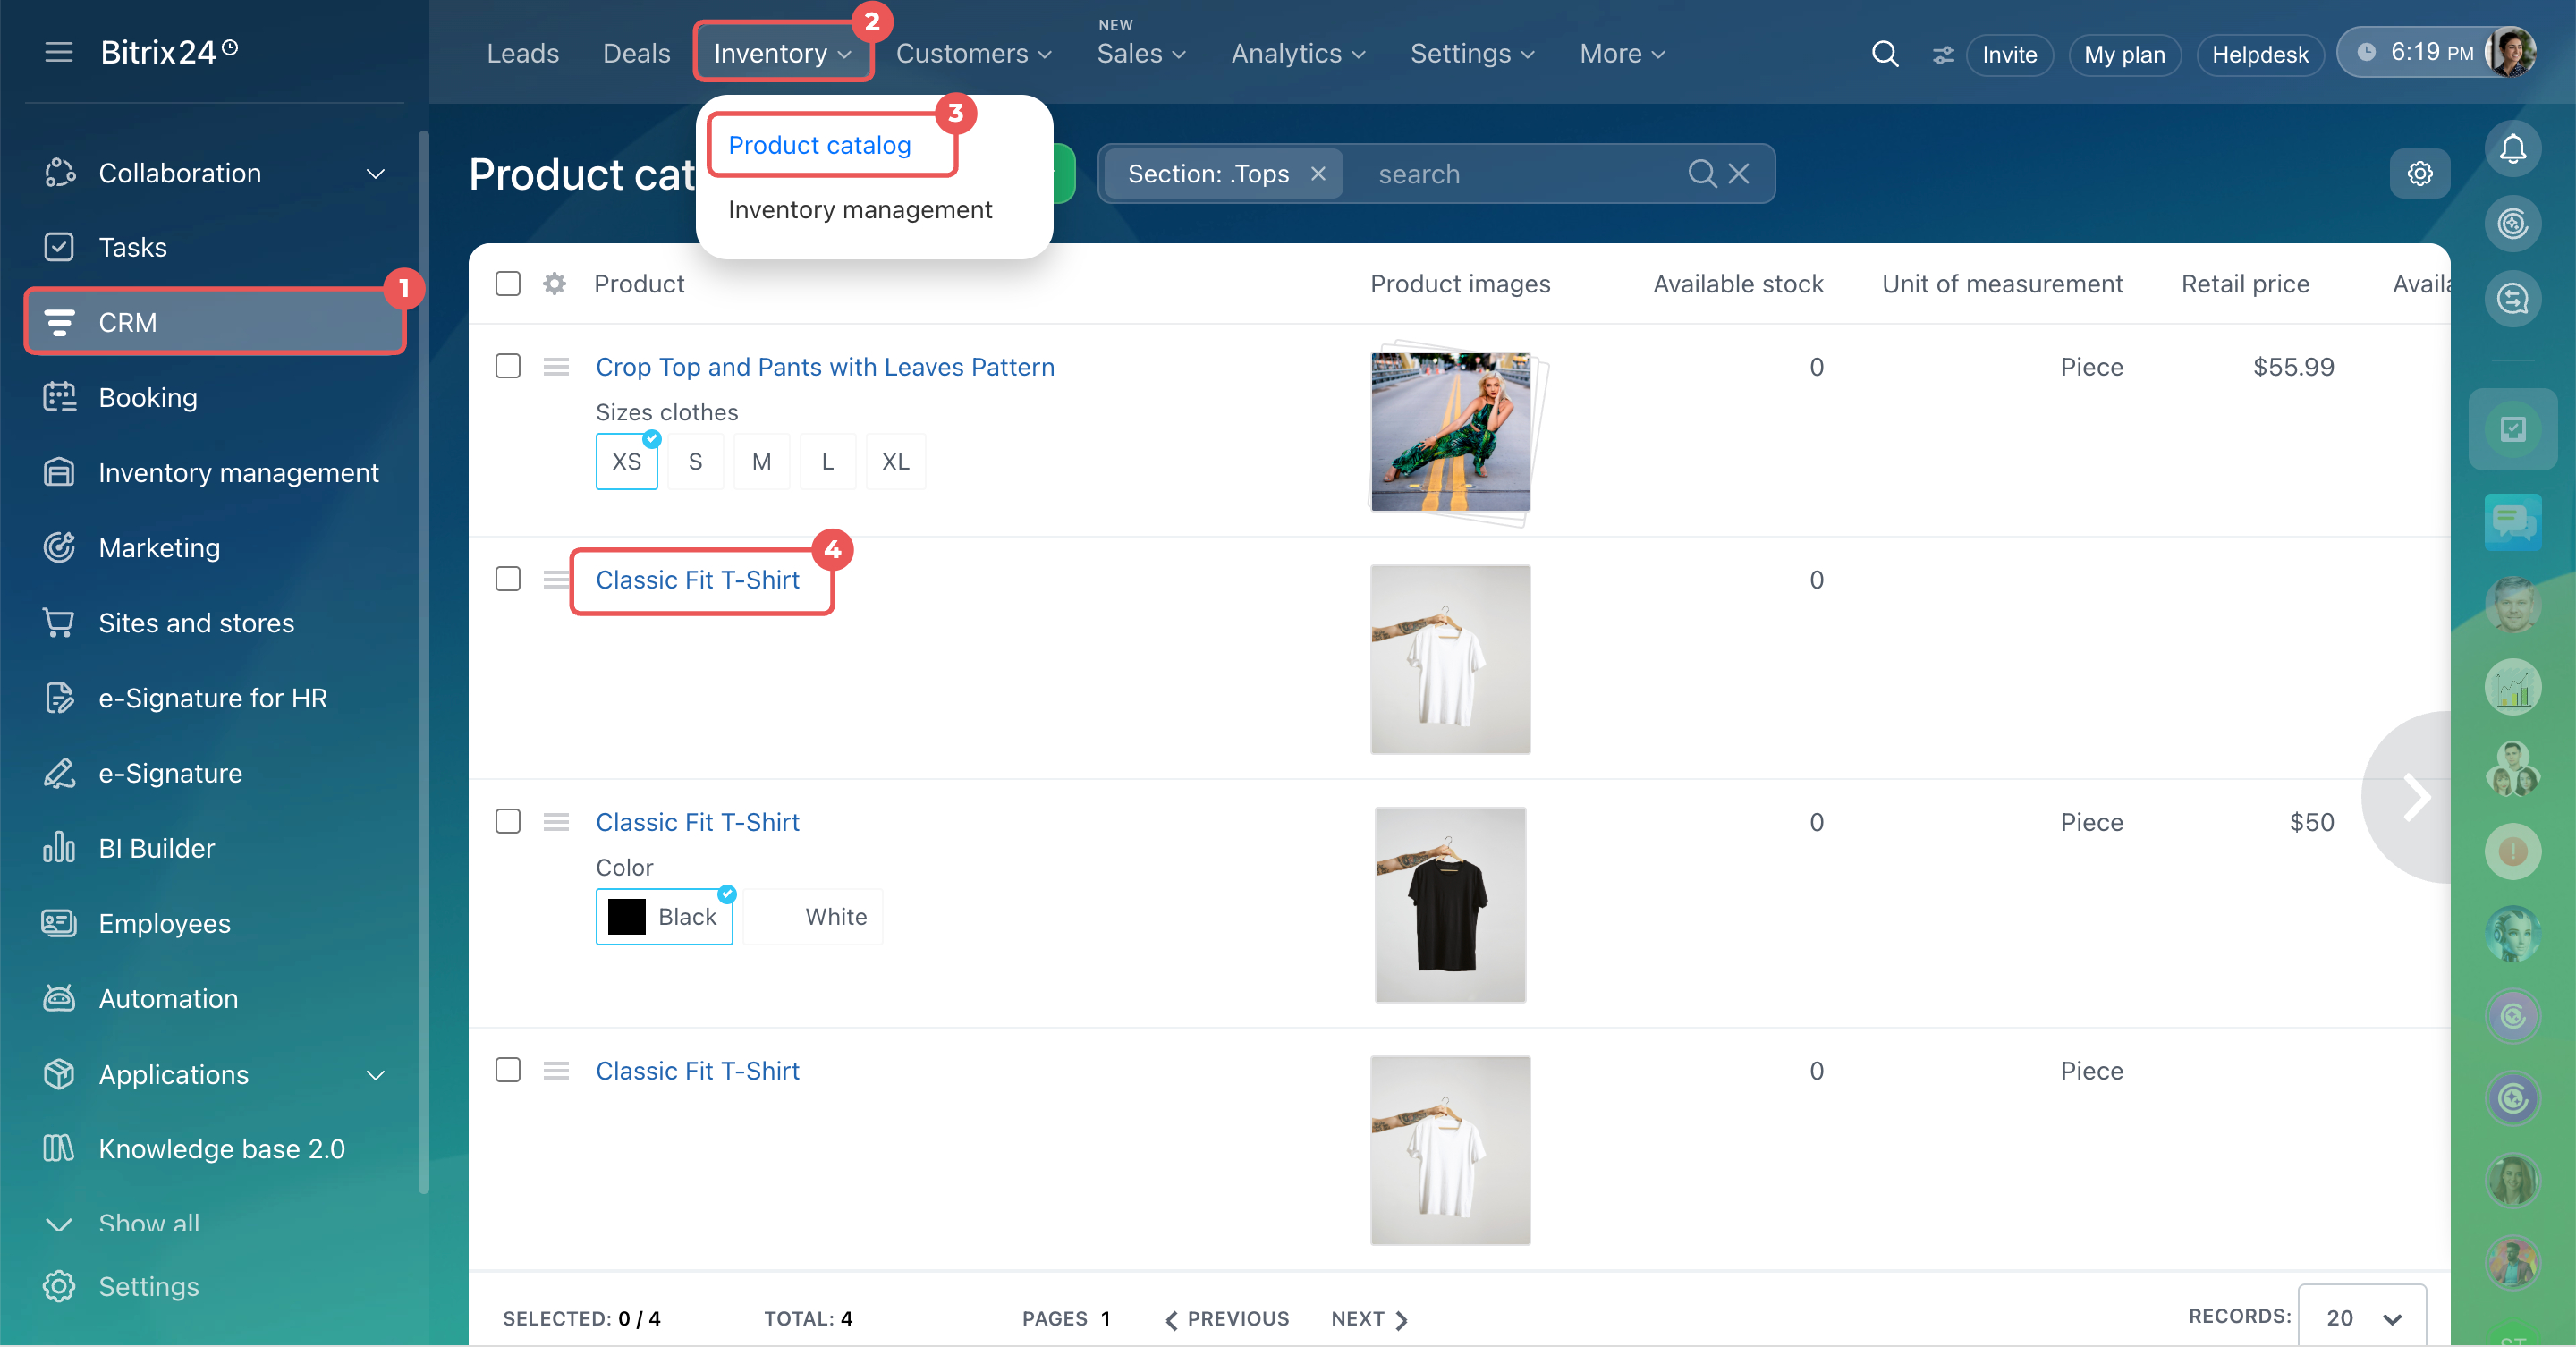
- View the product catalog
- Change the form layout
- Apply the form layout for everyone
- Open CRM > Inventory > Product catalog and open the product form.
- At the bottom of the form, click Standard layout.
- Select Set as standard layout for all users.
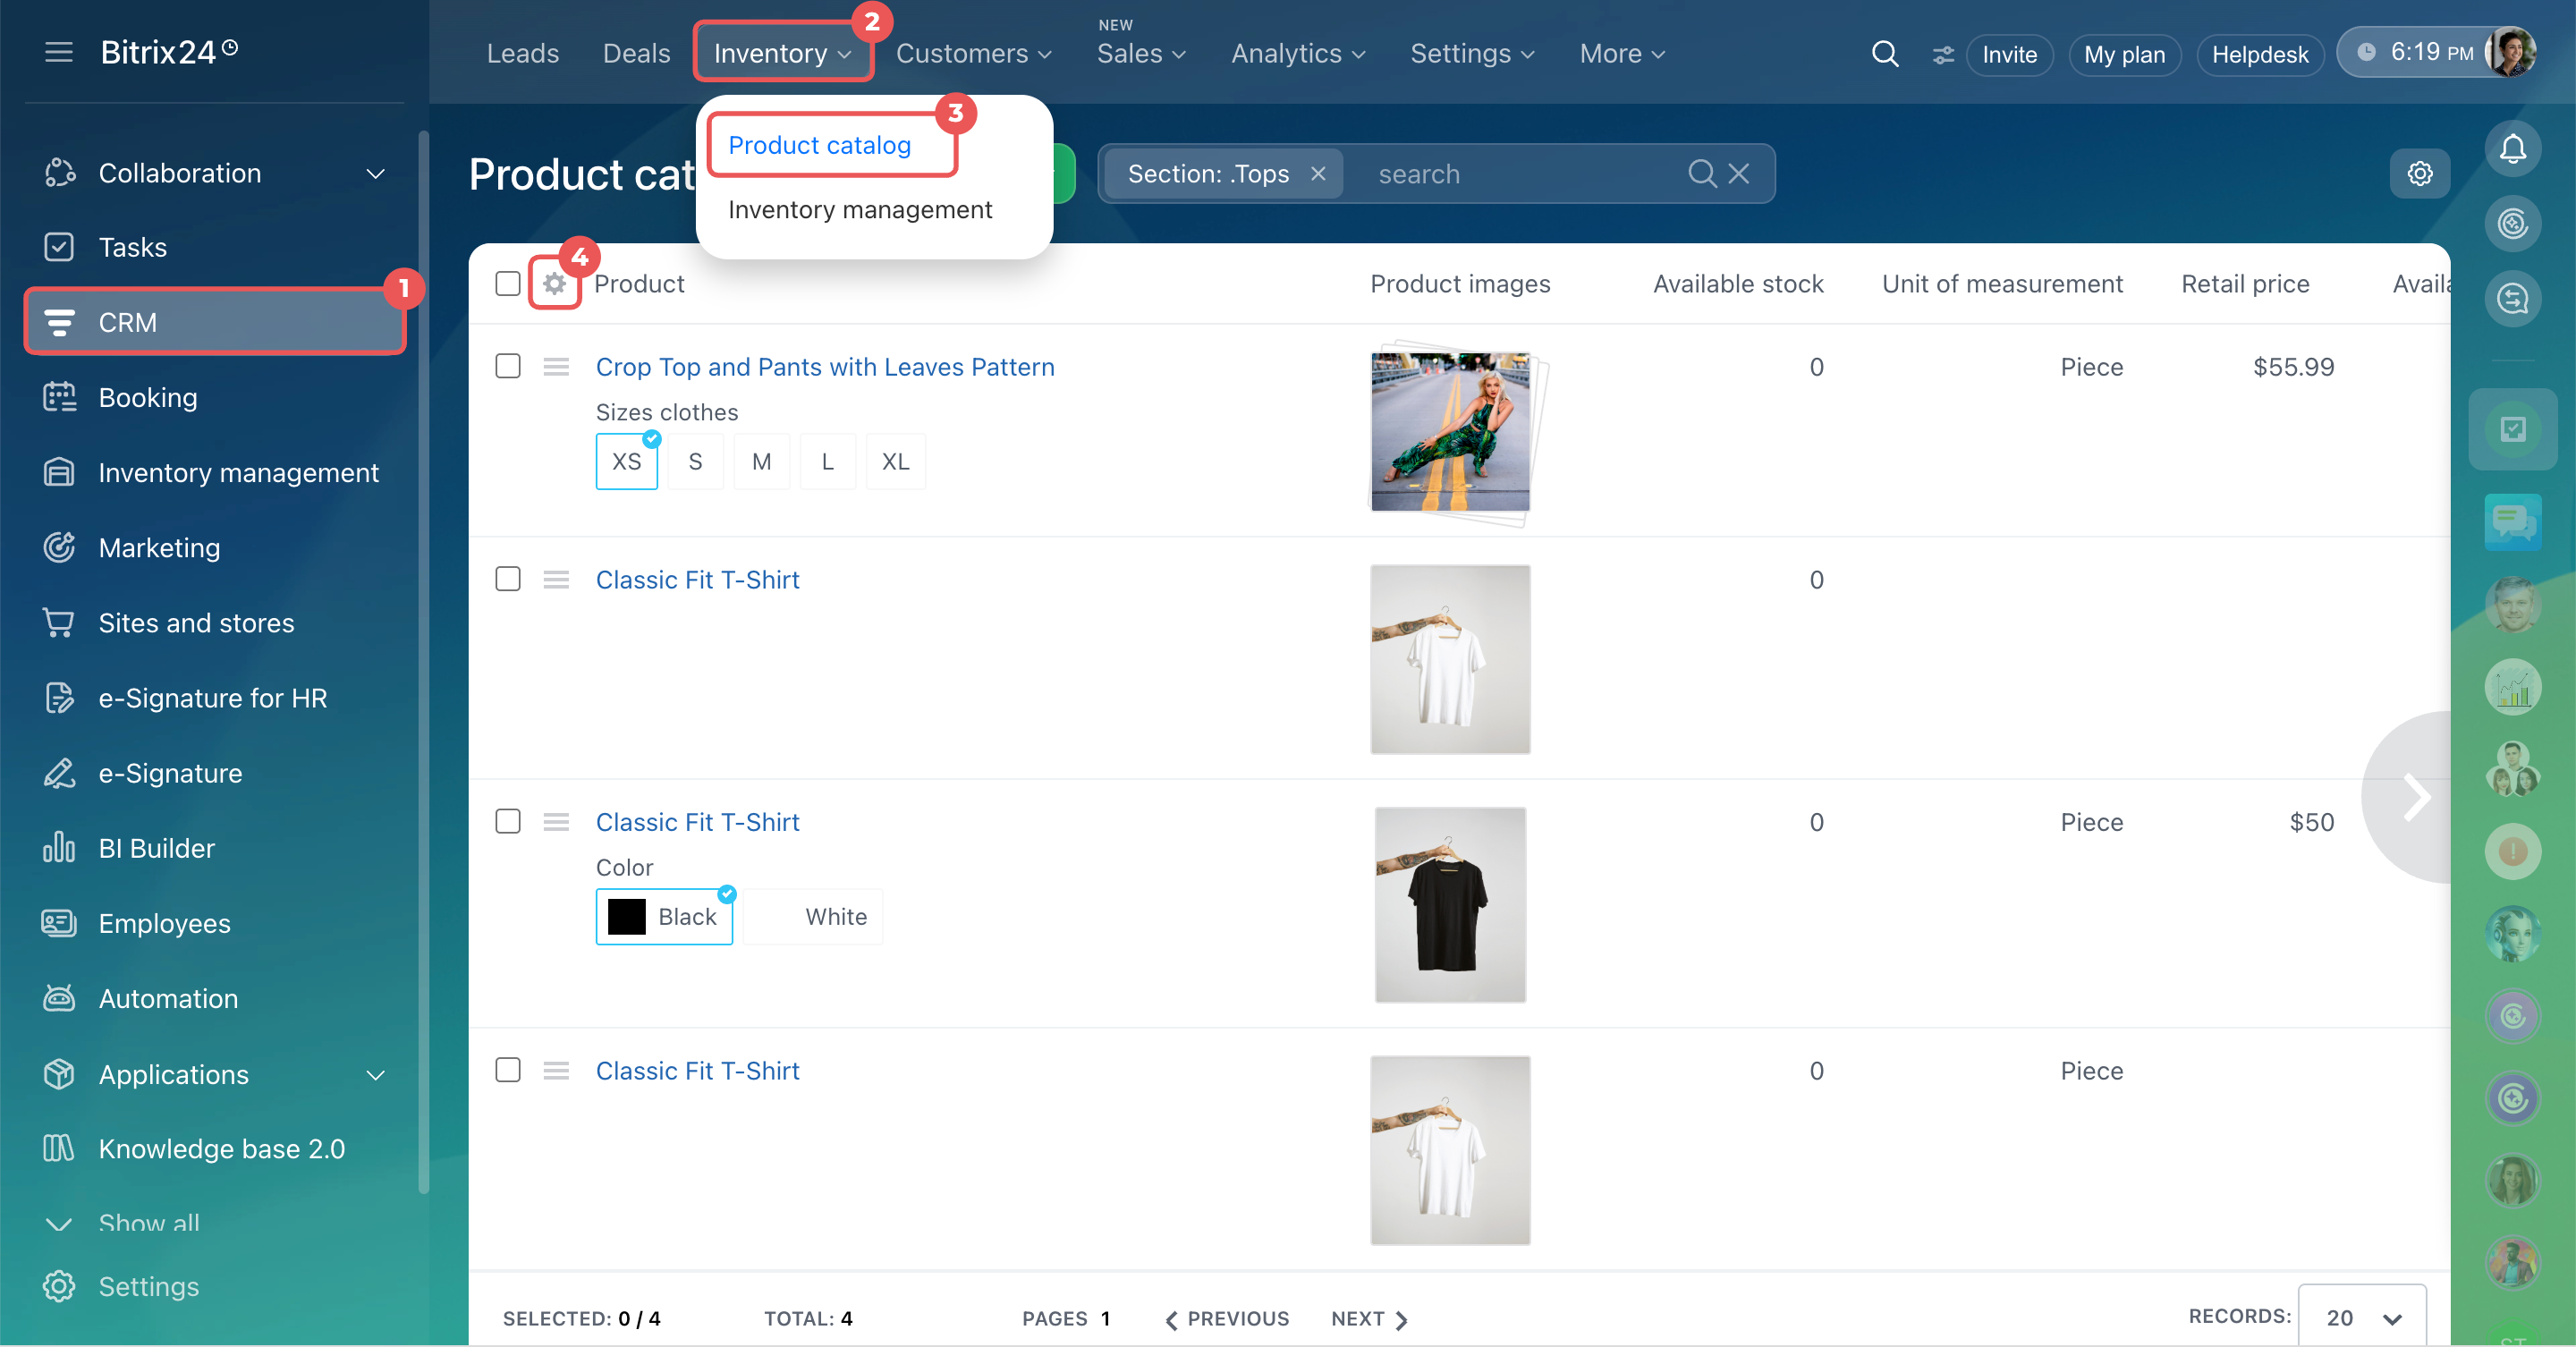
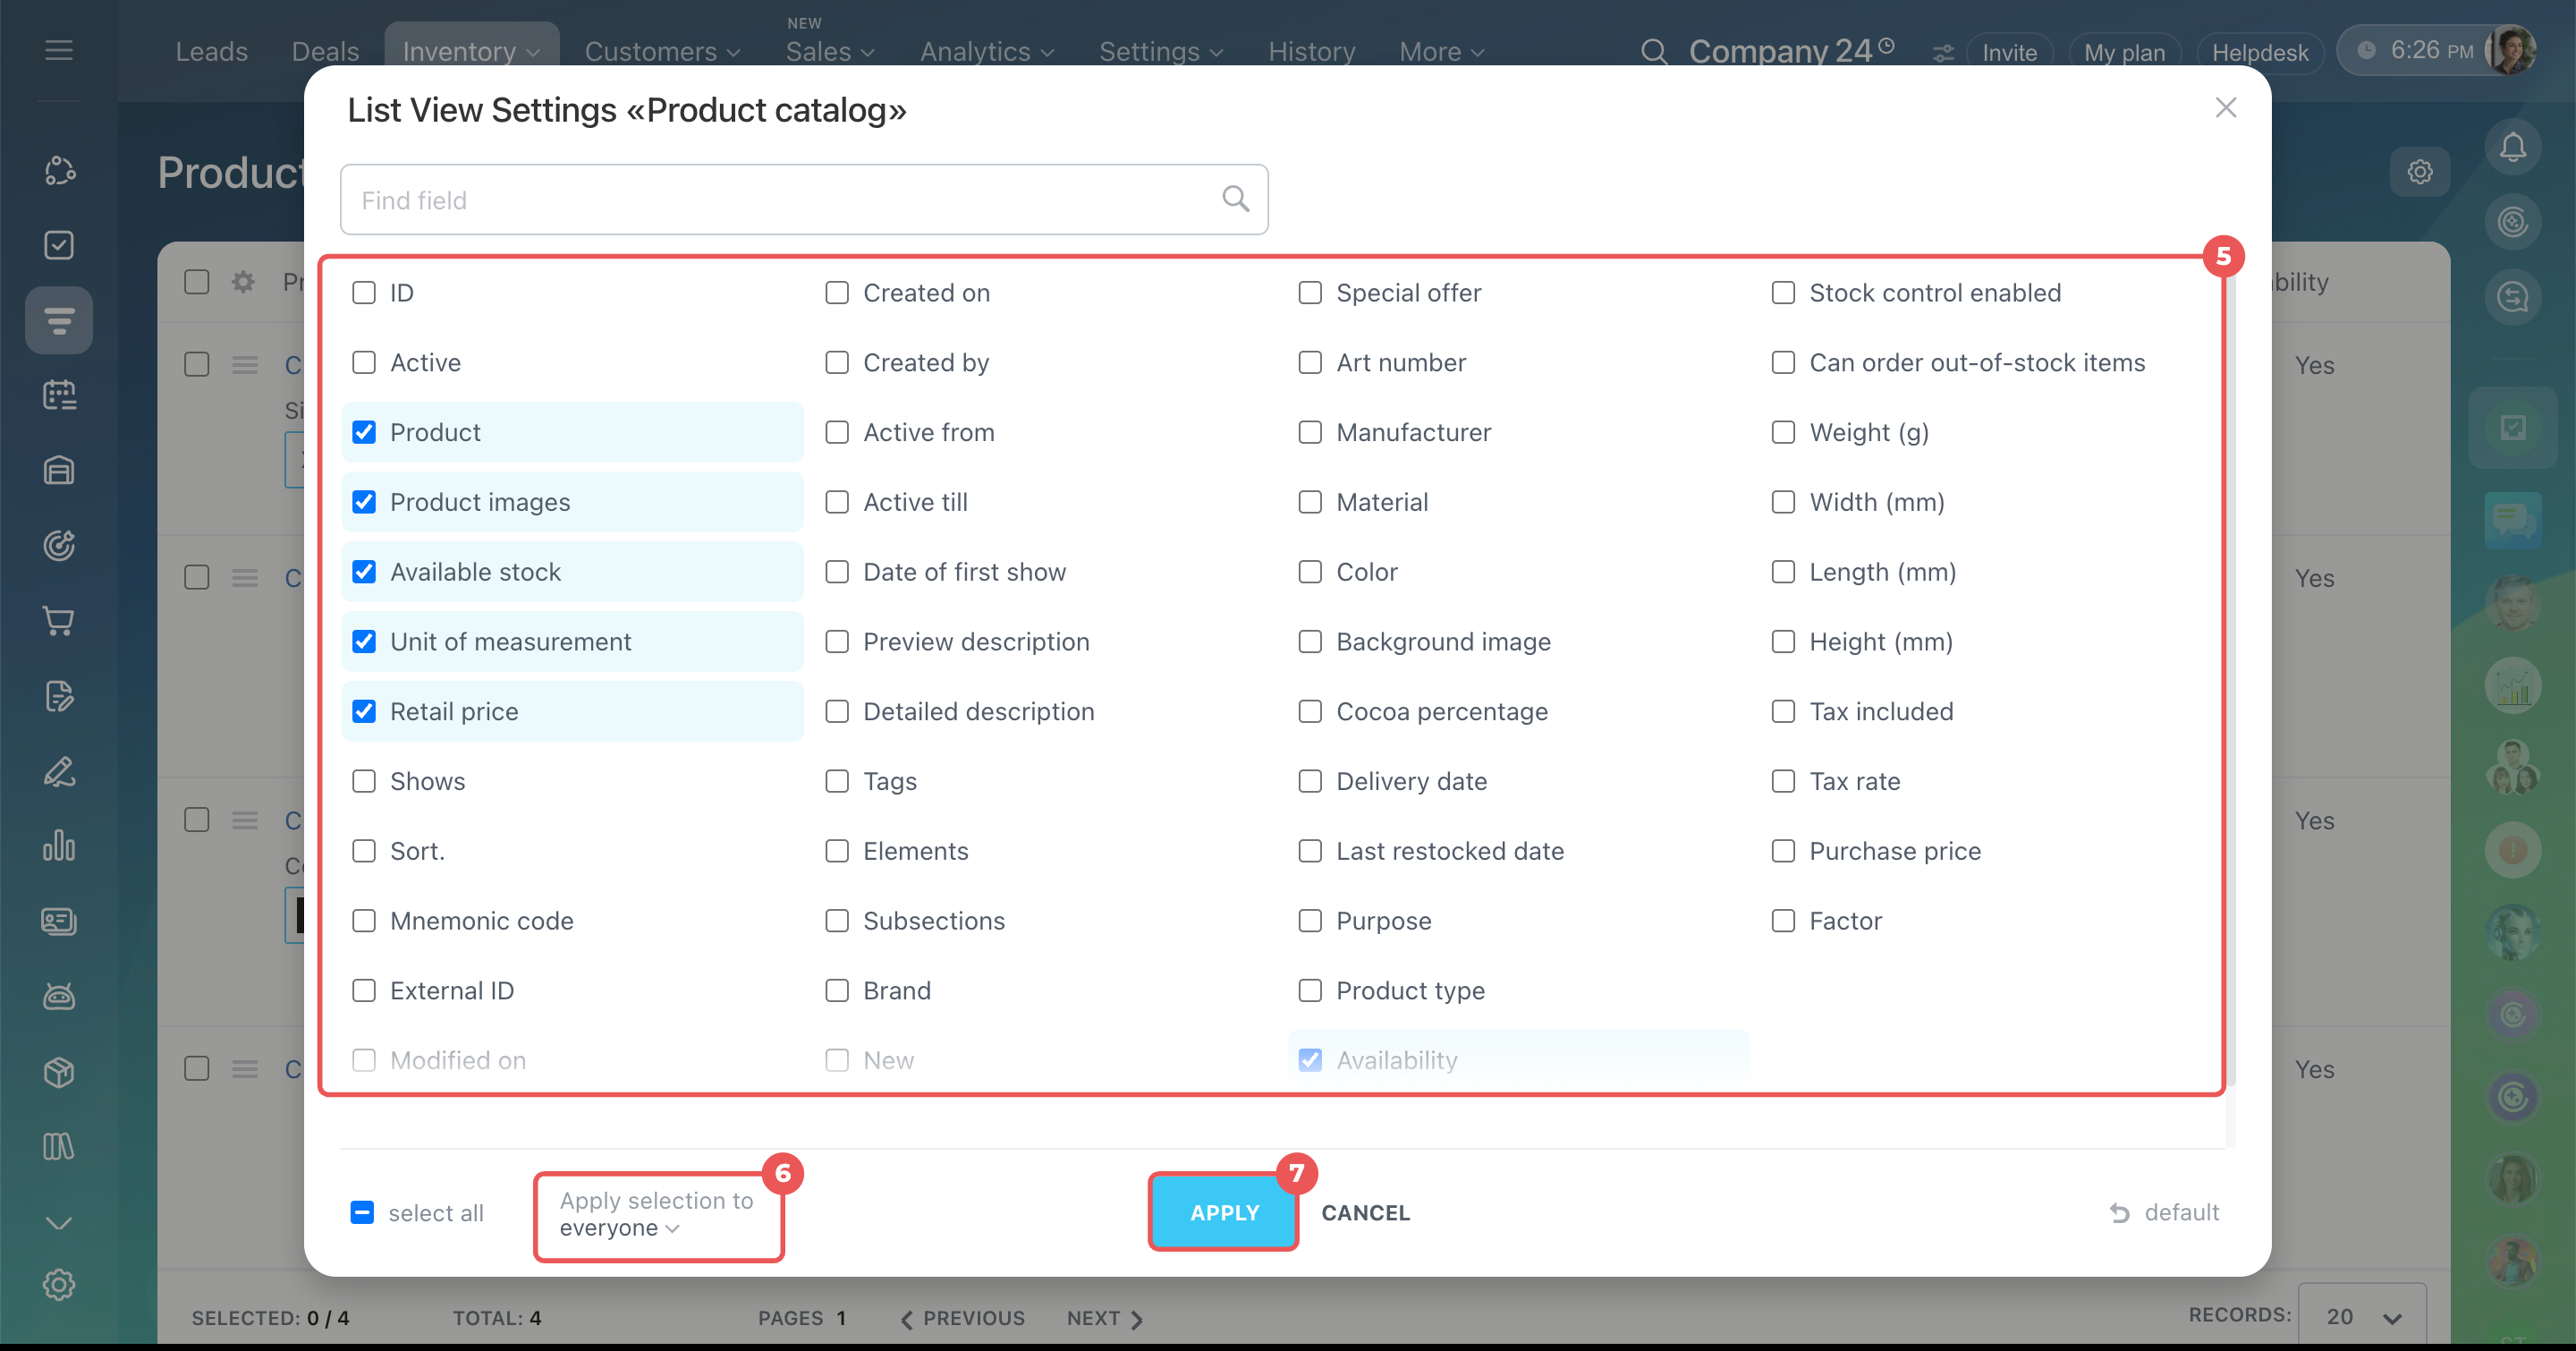
Show properties in the product list. Display the properties you need in the product list to view them without opening the form. For example, add a Material column to see what a product is made of at a glance.
- Open CRM > Inventory > Product catalog.
- In the upper-left corner of the table, click Settings (⚙️).
- Select the fields you need.
- Click Apply.
An account administrator can save these settings for all employees. To do this, click Apply for everyone. After you save the settings:
- This set of columns and their order applies to all employees.
- Each employee can adjust the display for their tasks.
- If an employee clicks Default, the list returns to the view configured by the administrator.
In brief
- Product properties describe characteristics like material, brand, or manufacturer.
- To add a property, open CRM > Inventory > Product catalog, open a product form, and click Create field.
- Use variant properties for products that come in different sizes, colors, or other options.
- To group related properties, click Add section in the product form. You can add existing fields or create new ones.
- To show properties in the product list, click Settings (⚙️), select the fields you need, and click Apply.
- To use the same form layout for all employees, open a product form and select Standard layout > Set as standard layout for all users.