Bitrix24 e-Signature allows you to sign documents with customers, vendors, and partners directly in your workspace, without using external tools. It helps you:
- Save time and resources: no need to print, scan, and send paper documents.
- Keep everything organized: maintain a unified document database and automate the signing process.
- Stay in control: track each signing stage and ensure document integrity.
In addition, this method of signing is not allowed for all types of documents. Therefore, if you are not sure whether e-Signature is suitable for signing your document, consult with lawyers. Trust in these signatures is the responsibility of the individual accepting the document.
Configure access permissions
Before you start using Bitrix24 e-Signature, set up access permissions. For example, specify who can create, edit, or delete documents.
By default, permissions for the e-Signature section are managed by the Bitrix24 administrator. However, the administrator can delegate this responsibility to other employees. To do this, go to e-Signature > Access permissions.
Configure access permissions for the e‑Signature section
Set up Kanban
Use Kanban in Bitrix24 e‑Signature to manage documents. Each employee can customize their own view.
In Kanban, you can easily track the current stage of each document and see what actions are needed, such as approval or signing.
To open it, go to e-Signature > Sign and manage > Kanban.
Kanban view in Bitrix24 e-Signature
Add signing parties
In Bitrix24, signing parties are vendors, customers, and partners you sign documents with in the e-Signature section.
Add signing parties to:
- Keep a shared contact database for all employees
- Quickly select recipients when creating documents
- Automatically fill in contact details in the document
Signing parties in Bitrix24 e‑Signature
To add a signing party, go to e-Signature > Contacts > Create.
Prepare a document for signing
Employees with the right permissions can create and send documents for signing.
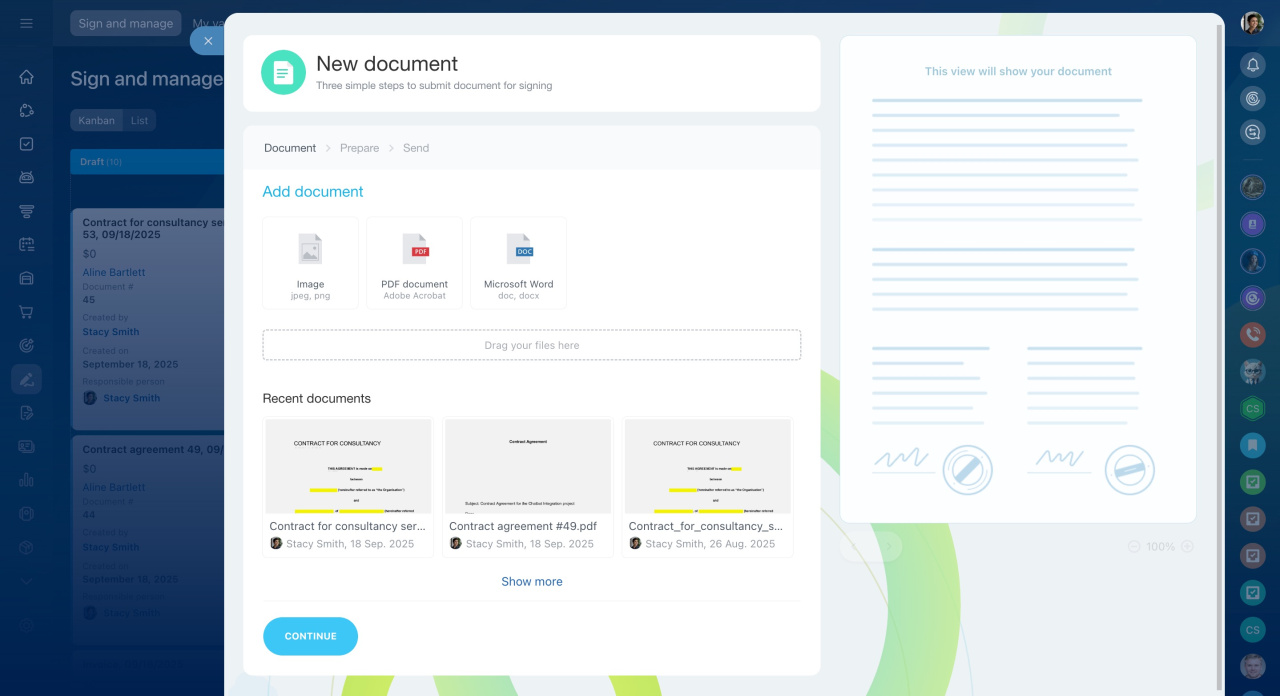
The process includes the following steps:
- Create a document in the e-Signature section. Upload an existing file or choose one from the recently created documents.
- Select who will sign the document on behalf of your company and the other party.
- Edit the document if needed.
- Choose how to send the signing link—by SMS or email.
- Review all details and send the document.
Sign a document
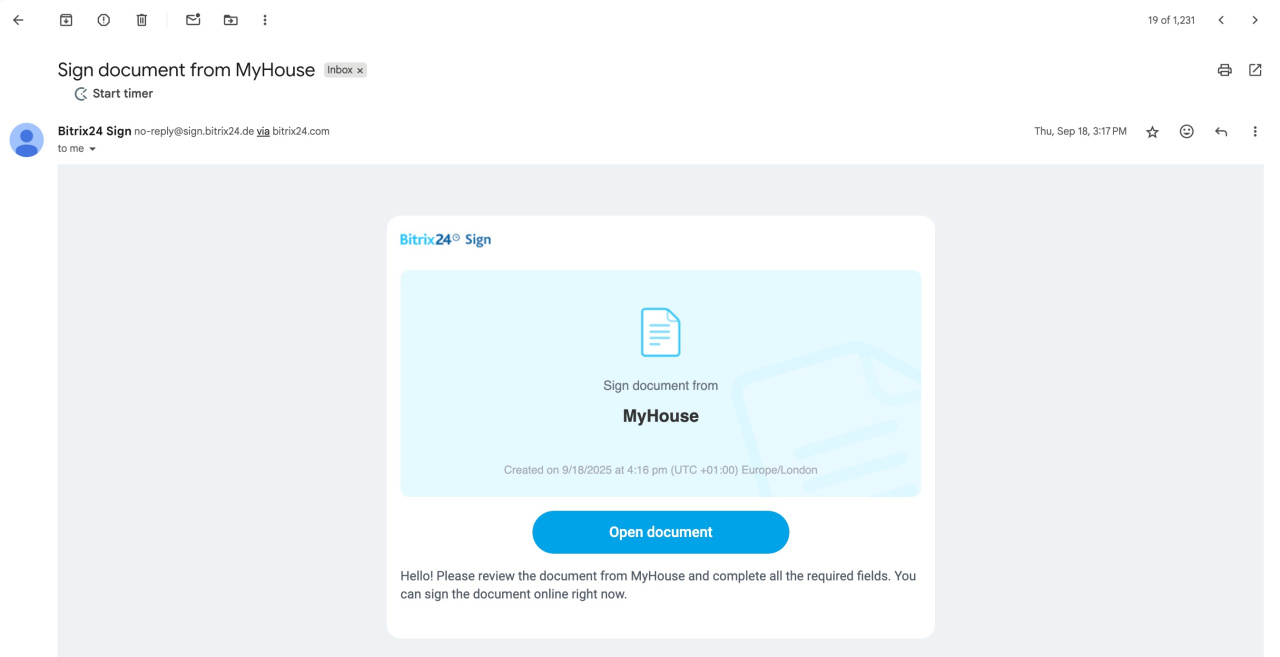
The signing process is the same for both parties. The company director or any employee with signing rights receives a link to the document and signs it online.
Sign a document with Bitrix24 e-Signature
Sign an electronic document as a client
Check document integrity
Each signed document includes a digital certificate that guarantees the file hasn’t been changed after signing. For example, if someone edits the document, such as changing a contract amount, verification will fail.
Bitrix24 e-Signature: Check document integrity
Add automation rules and triggers
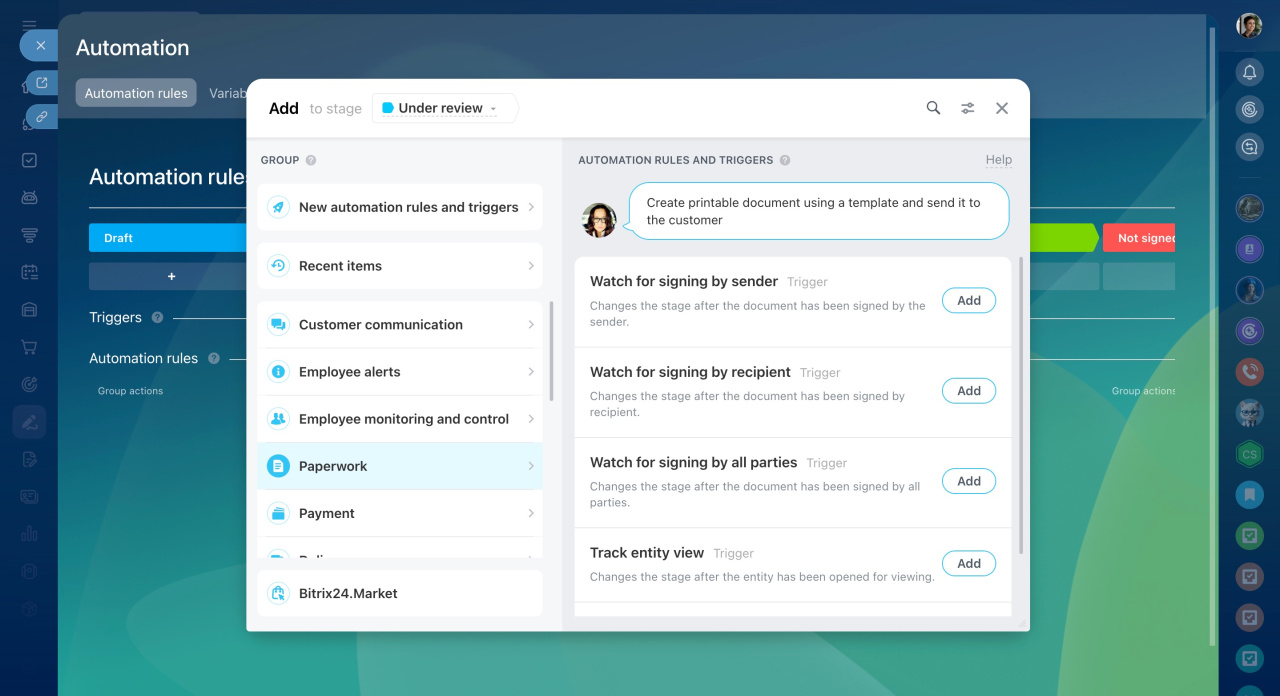
Automation rules and triggers in Bitrix24 e-Signature help automate document processing. They move documents through stages and send them for signing automatically. For example, when your company’s director signs a document, a trigger moves it to the "Sent to customer" stage, and an automation rule sends the contract to the customer for signing.
Automation rules and triggers in Bitrix24 e‑Signature
In brief
-
Bitrix24 e-Signature allows you to sign contracts, agreements, and other documents with other parties directly, without switching to external services.
-
Before using e-Signature, configure access permissions, set up Kanban, and add signing parties.
-
To create and send a document, go to the e-Signature section.
-
The signing process is the same for both parties—the director or another employee with signing rights receives a link to the document via email or SMS and signs it.
-
Each signed document includes a digital certificate to ensure its integrity.
-
Use automation rules and triggers to speed up document signing.


