
In Knowledge base 2.0, you can change text styles and heading levels, add links and media, create lists, and more.
Clear formatting makes articles easier to read and helps employees find important information faster.
Configure access permissions to a space or article
In this article:
Open an article for editing
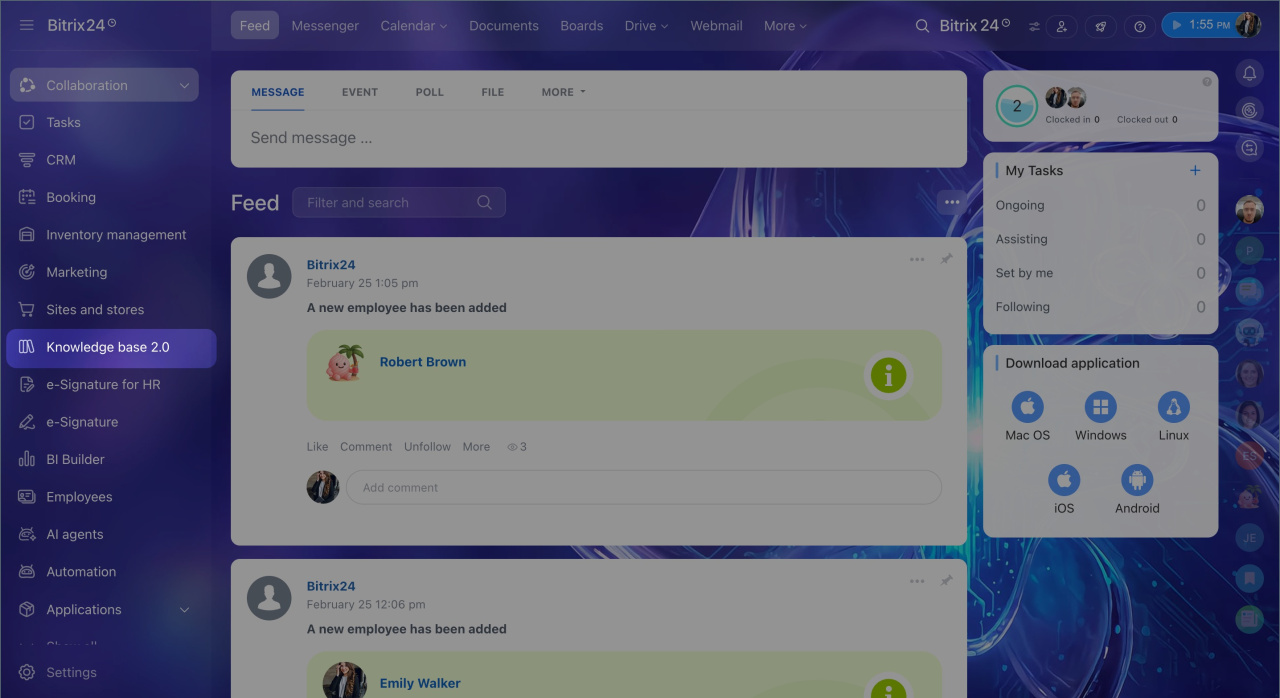
1. In the menu on the left, open Knowledge base 2.0.
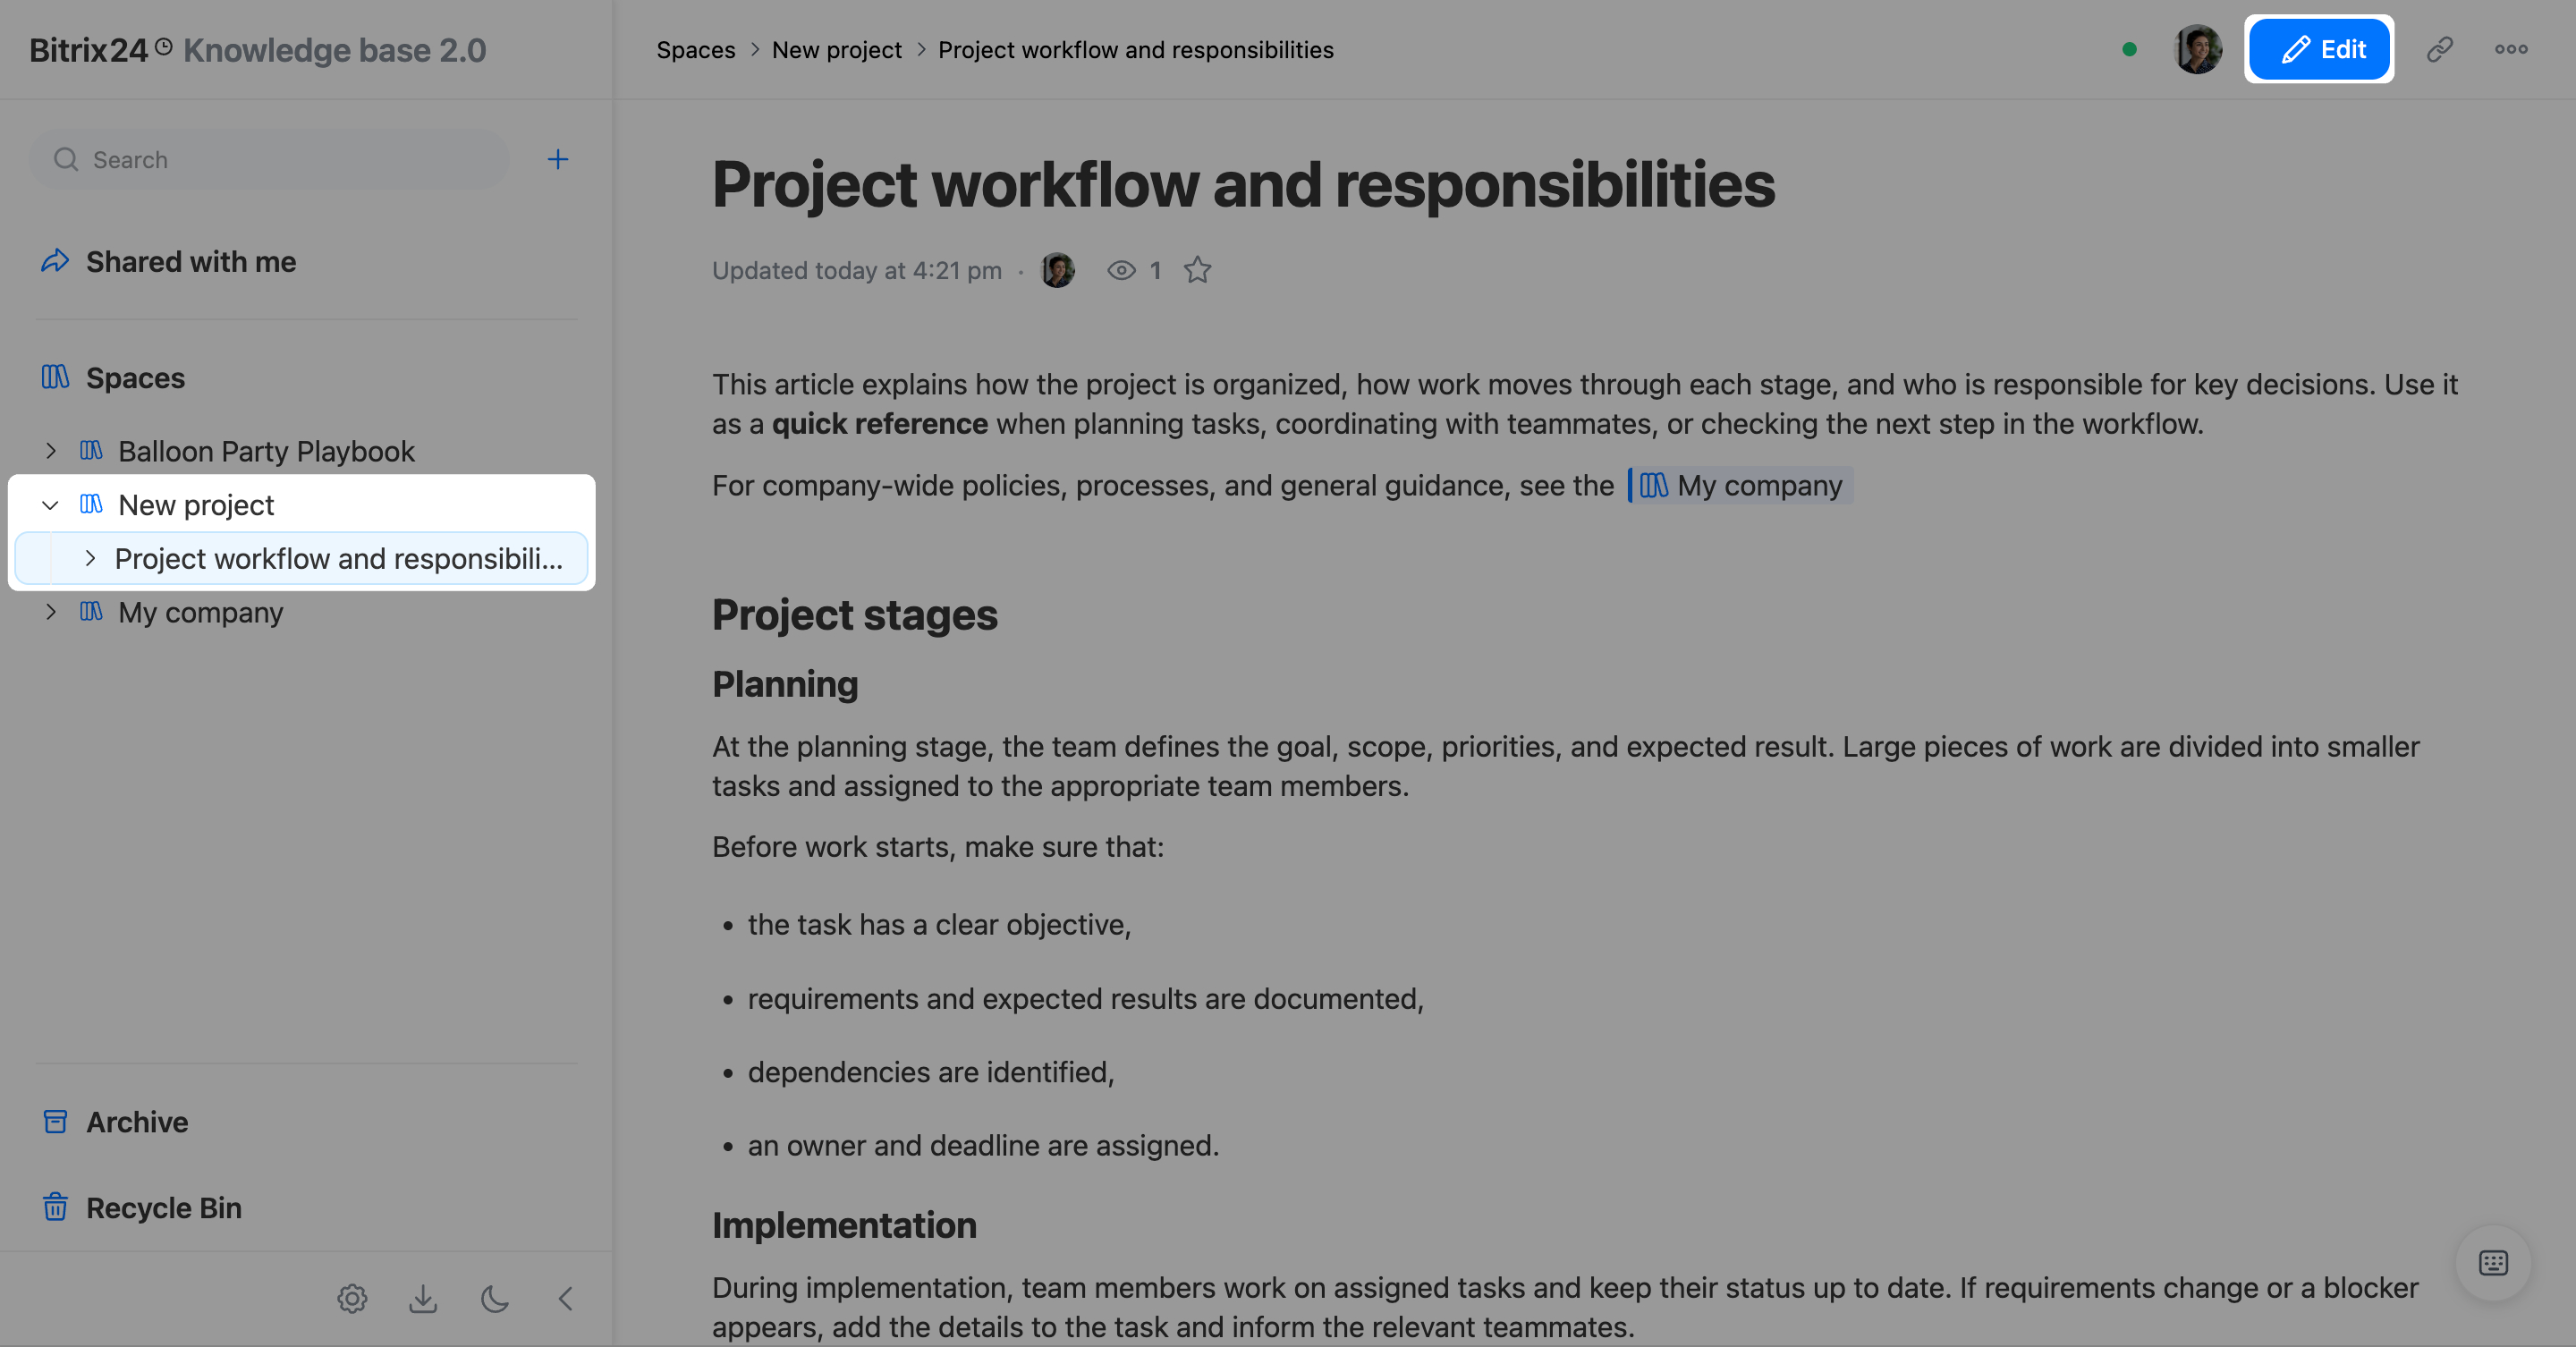
2–3. Expand the space you need and open the article.
4. In the top-right corner, click Edit.
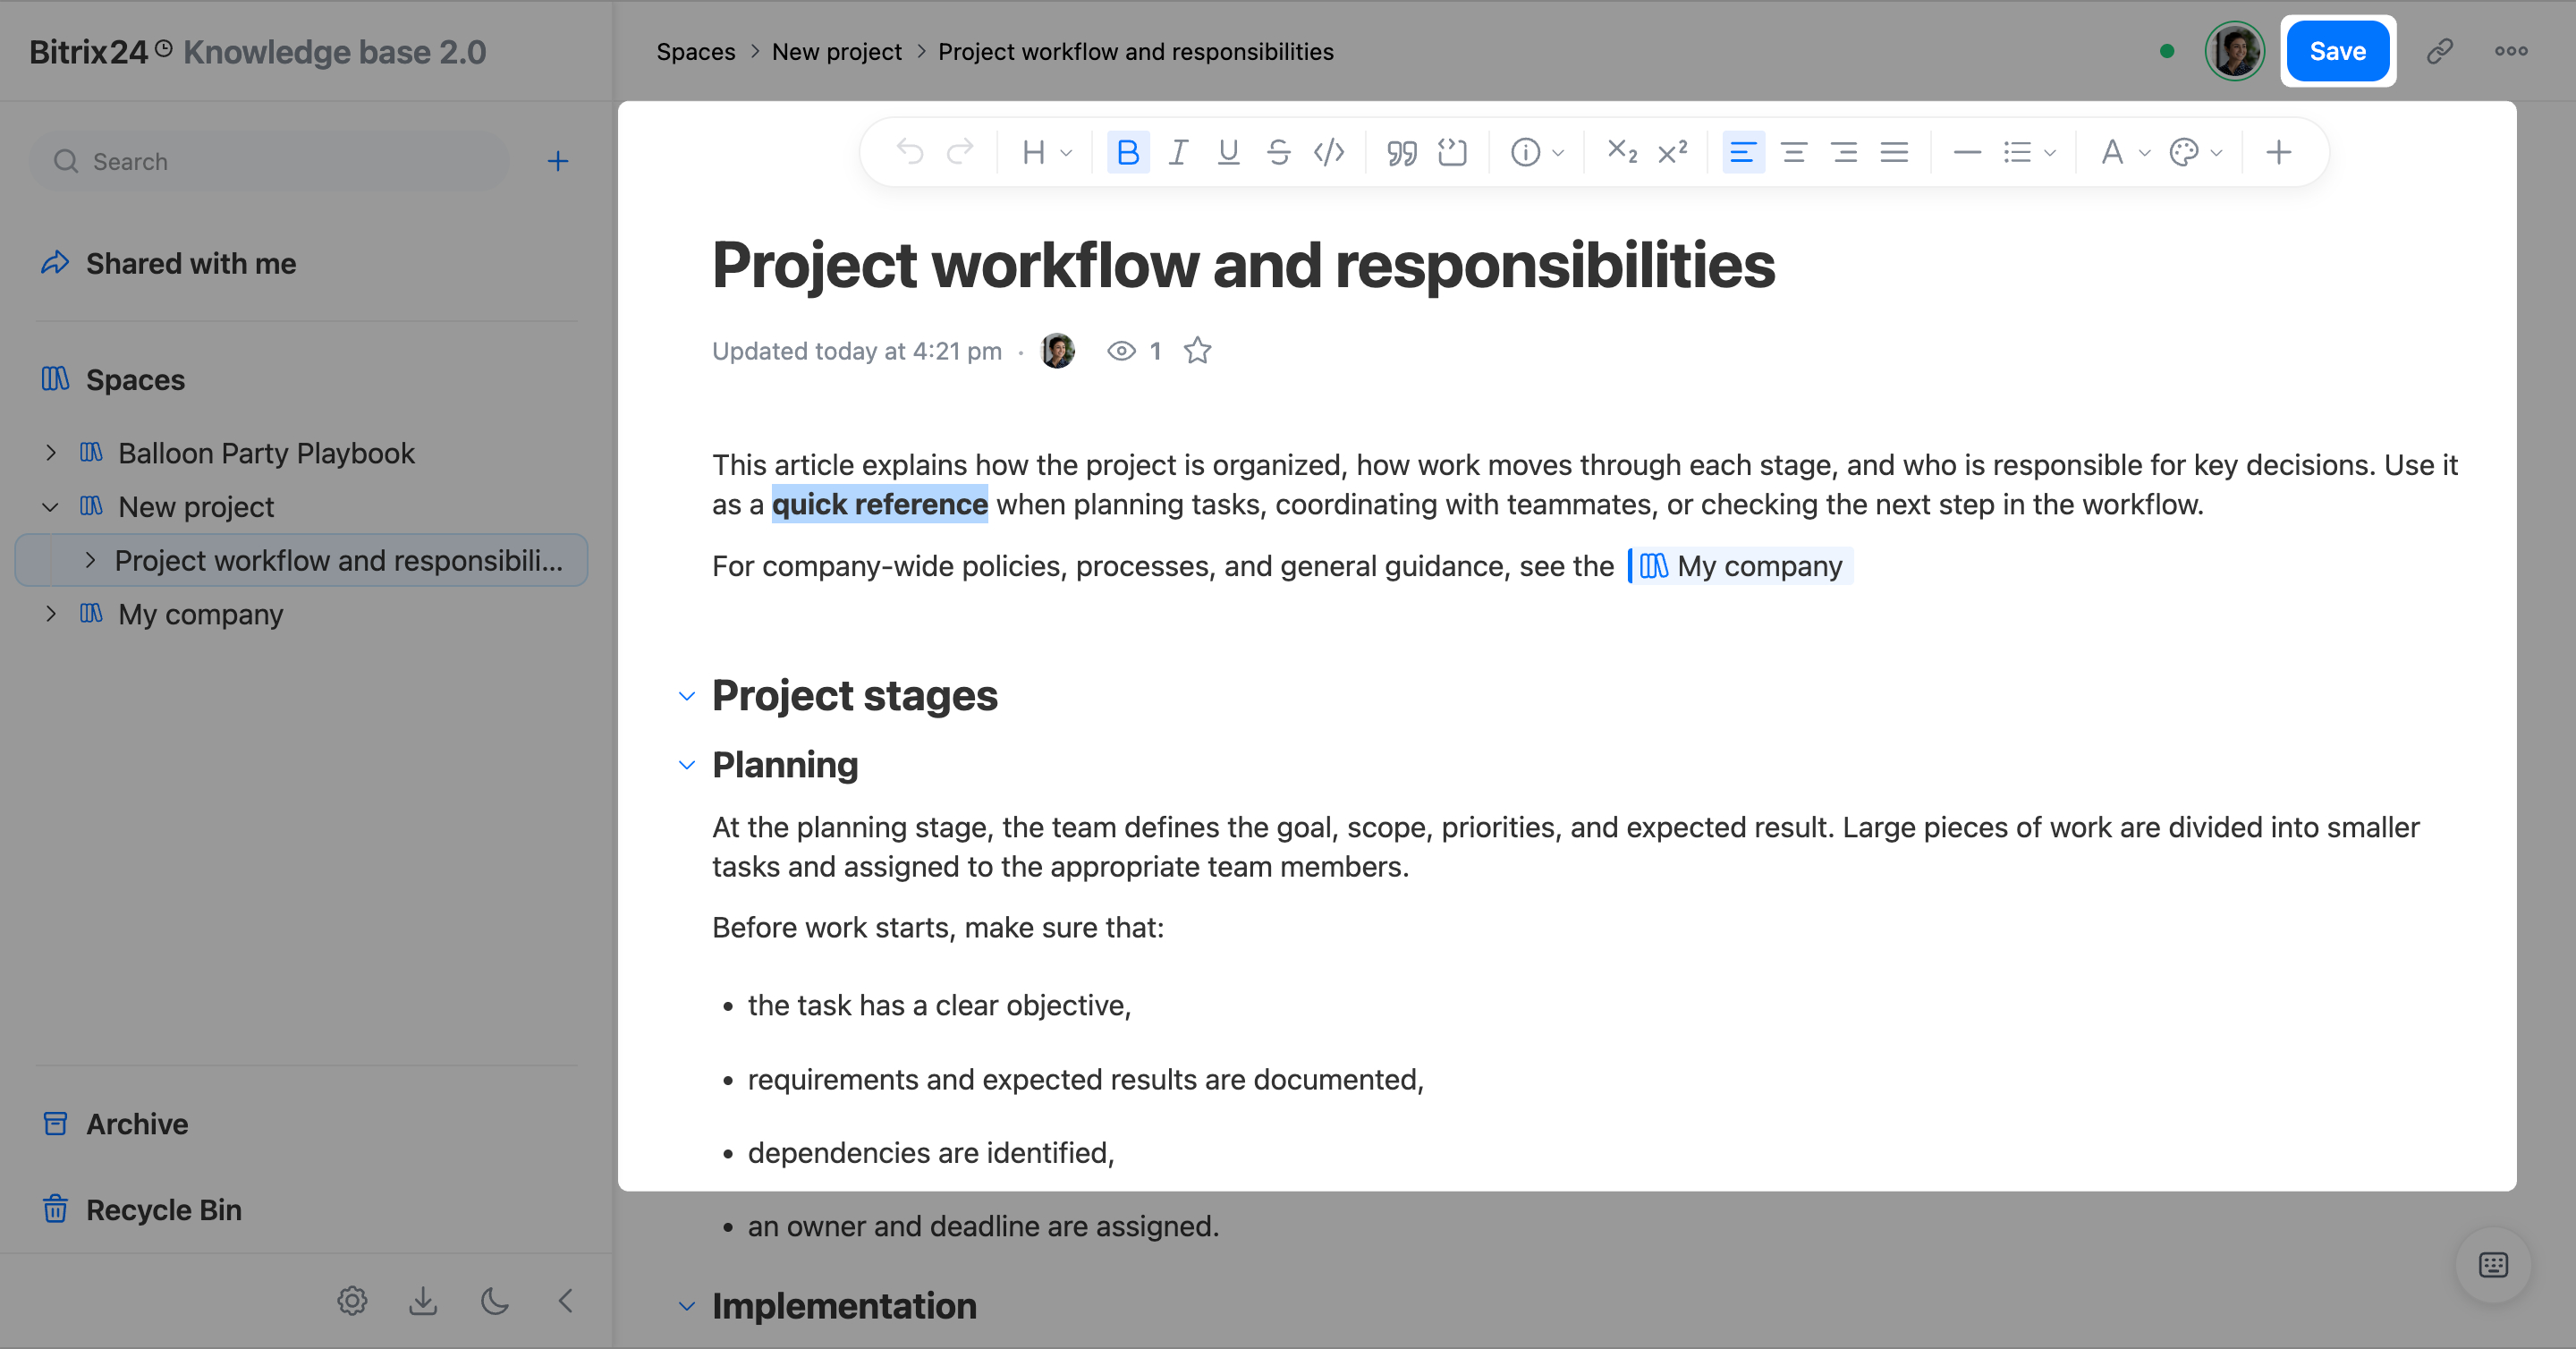
5. Format the article — all changes are saved automatically.
6. Click Done to exit editing mode.
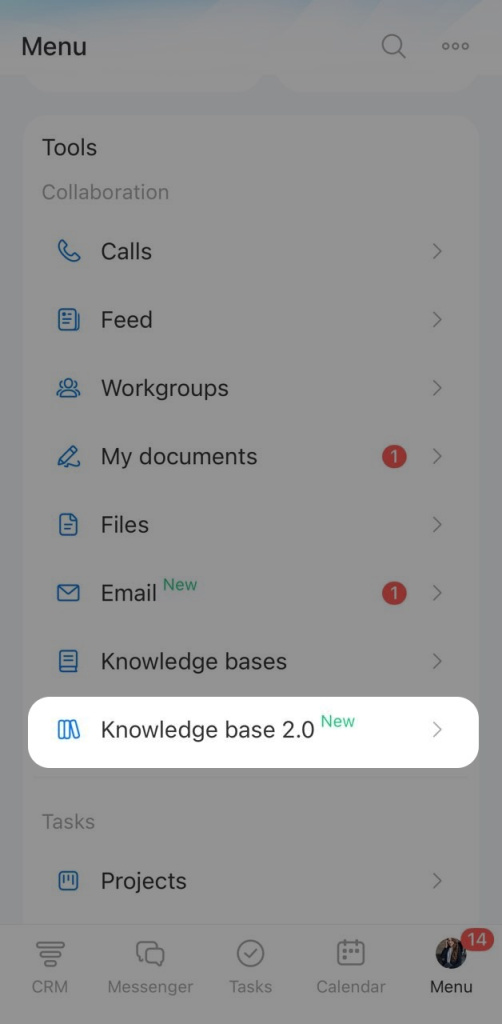
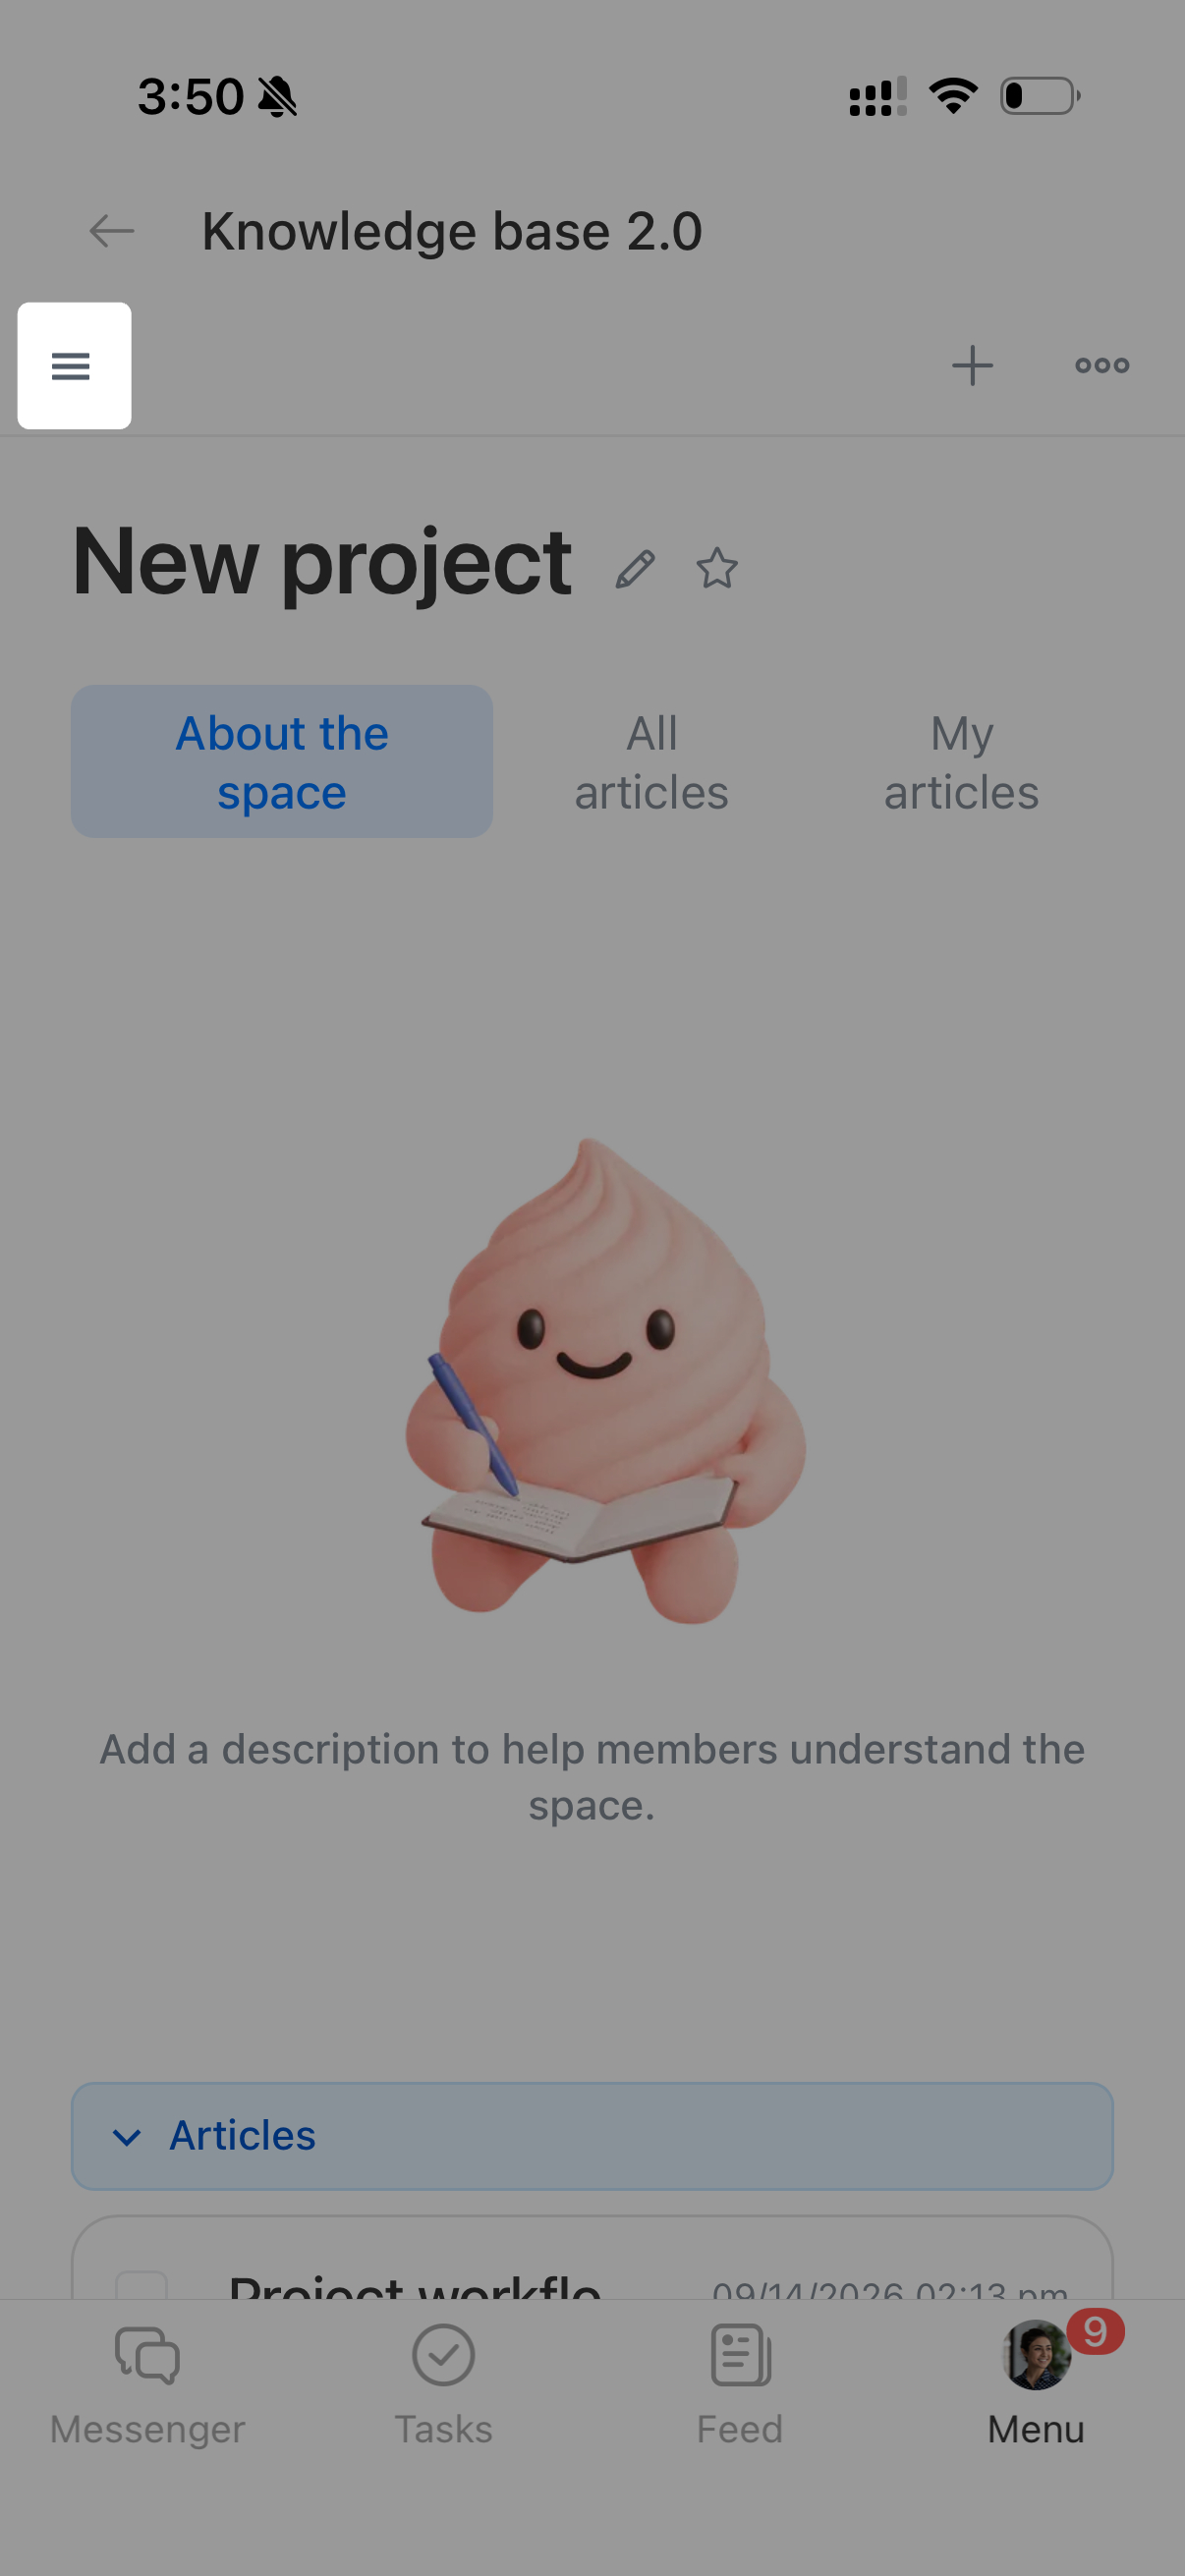
1–2. In the bottom-right corner, tap Menu > Knowledge base 2.0.
3. In the top-left corner, tap Menu (☰ ).
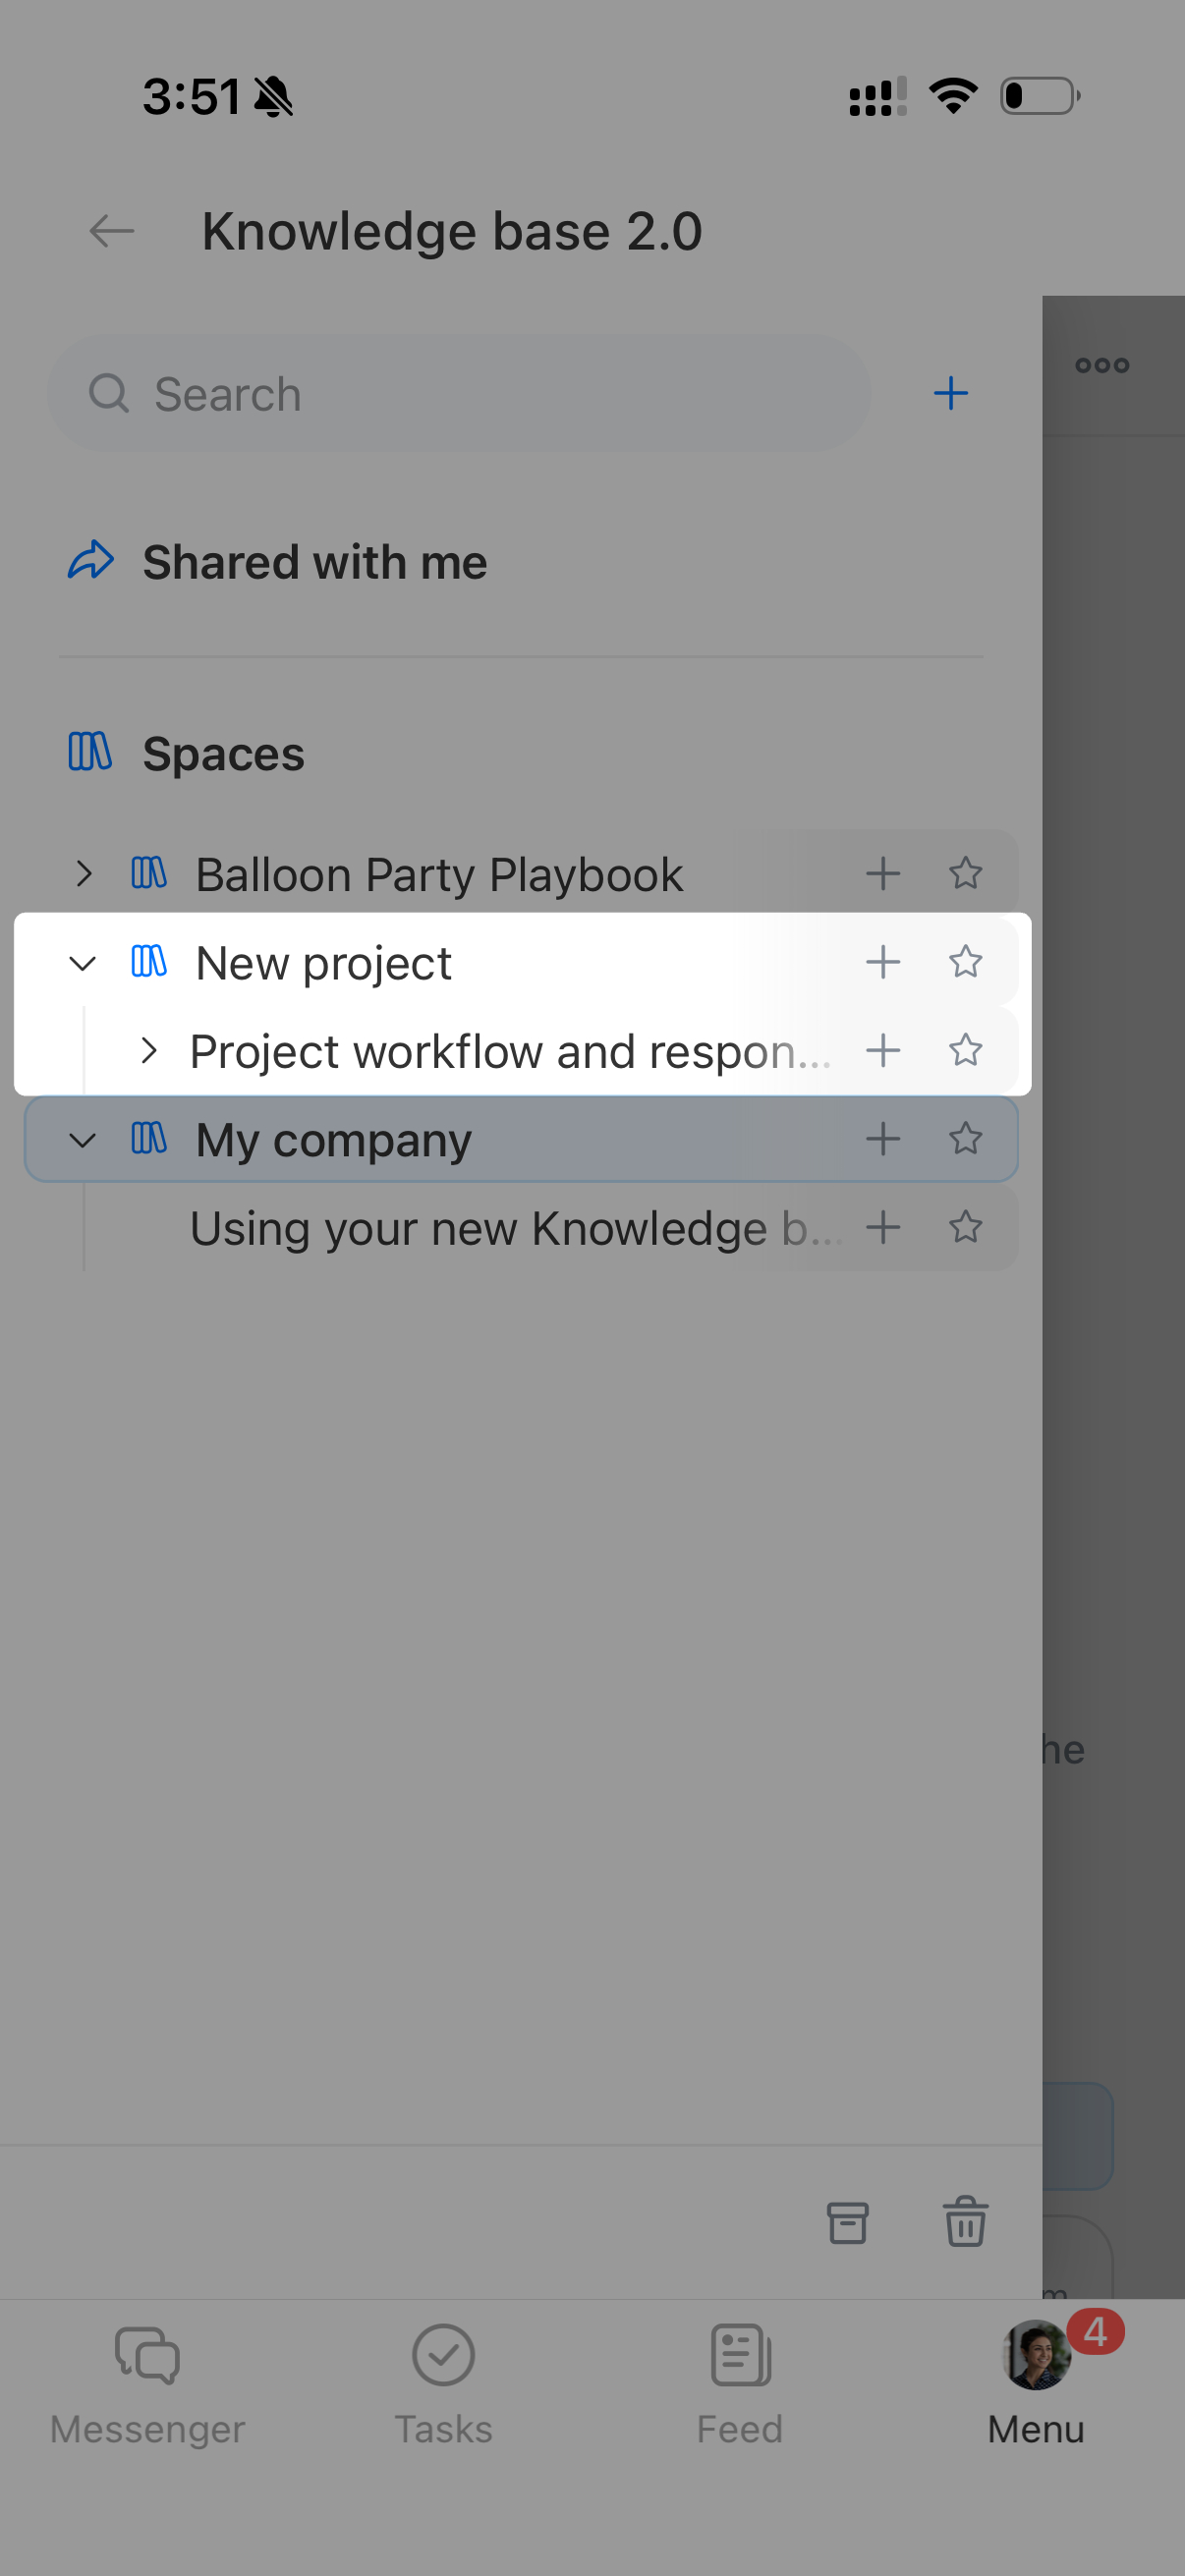
4–5. Expand the space you need and open the article.
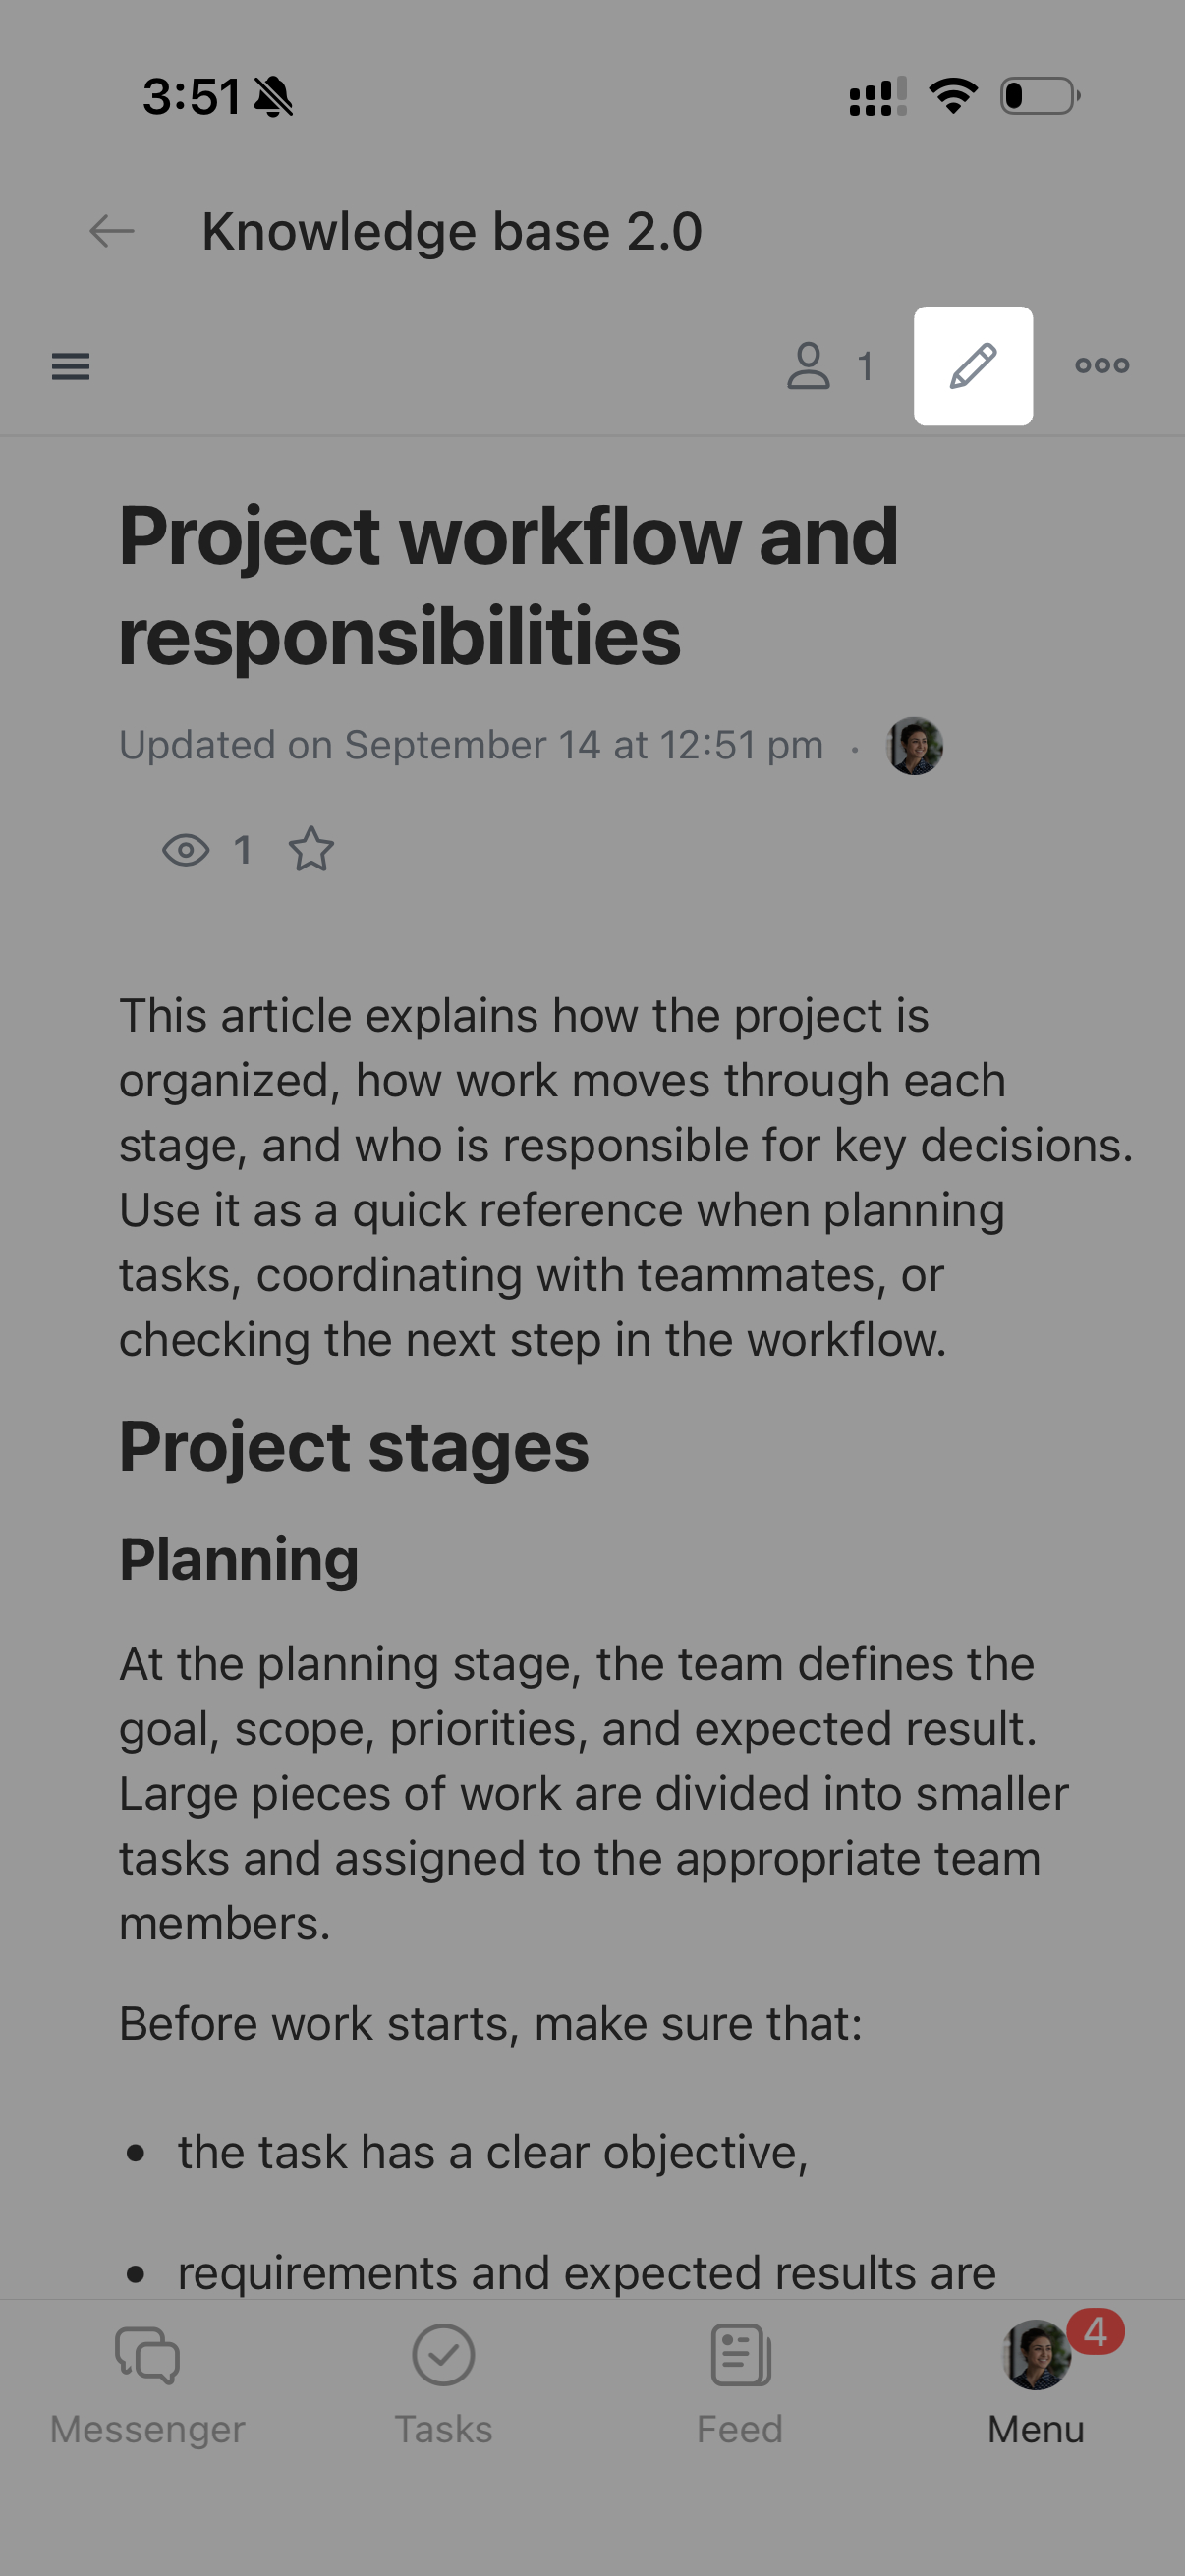
6. In the top-right corner, tap the pencil icon to switch to editing mode.
7. Format the article — all changes are saved automatically.
8. Tap the checkmark icon to exit editing mode.
Use the formatting panel
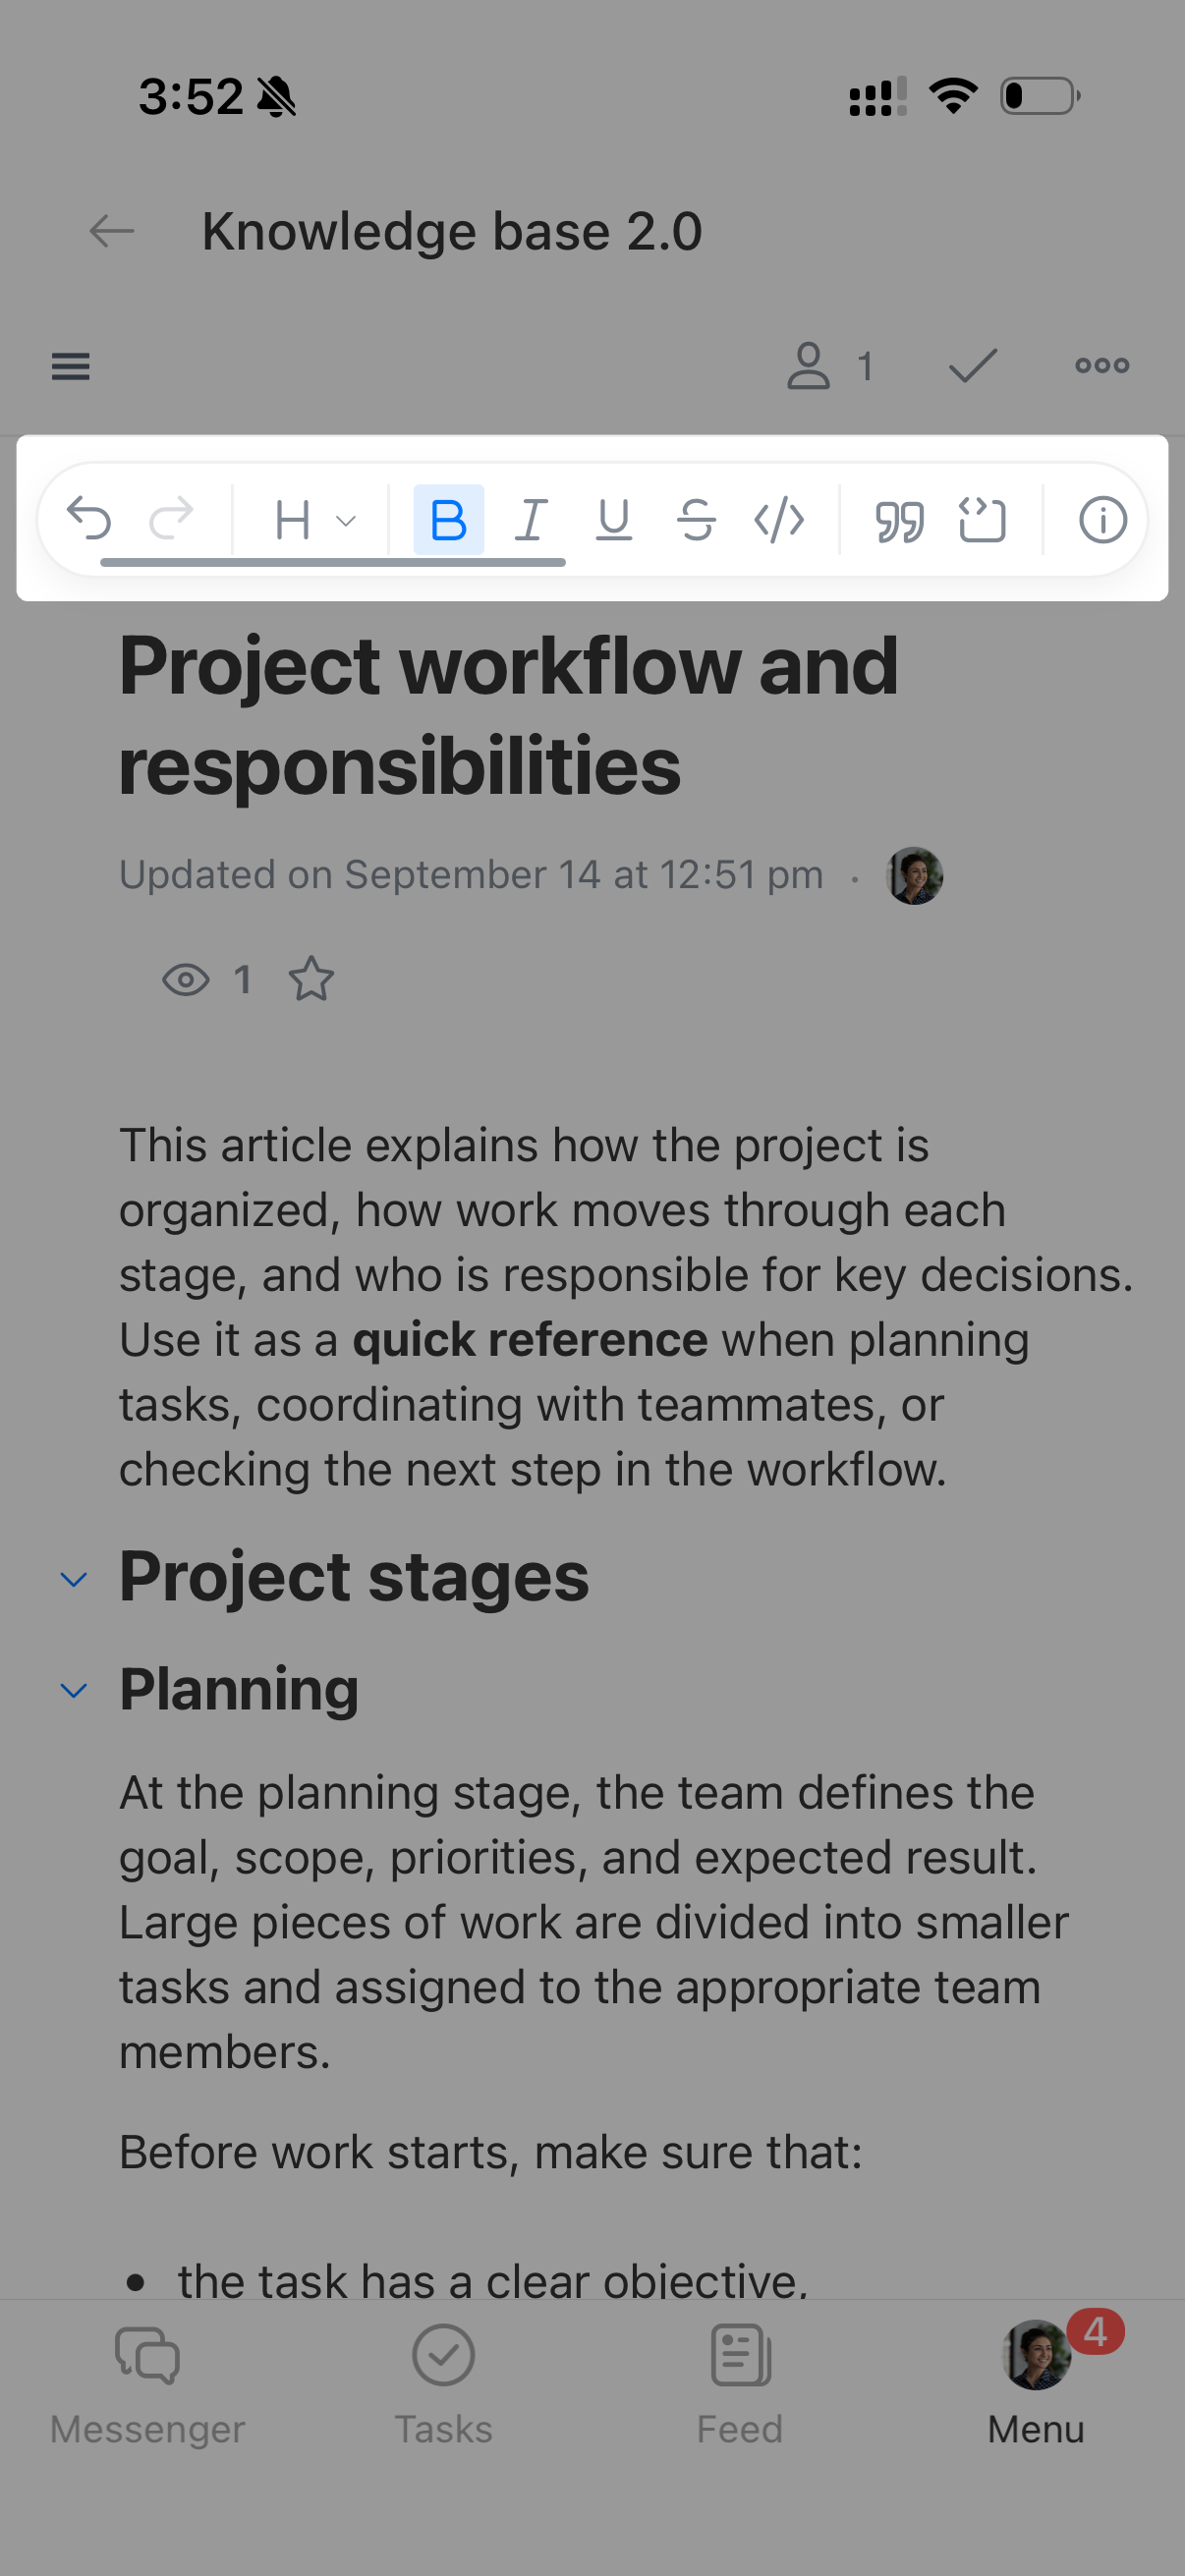
The formatting panel opens at the top of the screen when you edit an article. Use it to change text styles and add lists, tables, links, media files, and other elements. Select the icon you need and format the text.
Undo and redo  . Use arrows to undo or redo the last action.
Text style  . Choose regular text or a heading level from 1 to 4. Use headings to divide the article into clear sections.
Text formatting  . Make text bold, italic, underlined, or strikethrough, or format it as code. For example, use bold to highlight an important step or strikethrough to mark an outdated action.
Quote  . Set text apart from the rest of the article with a vertical line. Use quotes for notes, recommendations, warnings, or excerpts from regulations.
Code block  . Add a code snippet to the article in a separate formatted block. This is useful for technical instructions when you need to show a sample request, script, or style and let colleagues copy it.
Callout  . Highlight text with a colored background and an icon. Use callouts for notes, tips, warnings, and other important information.
Click the information icon and select the symbol you need.
Superscript and subscript  . Use these options for formulas, exponents, chemical symbols, abbreviations, and other special notation.
Text alignment  . Align text to the left, center, right, or justify it. This makes the article neater and easier to read.
Horizontal rule  . Add a line between sections of the article. Use it to visually separate main steps, examples, notes, or other content.
Lists  . Create bulleted lists, numbered lists, and checklists.
Text and background color 
 . Change the text or background color to highlight important information.
Insert  . Add a date, link, table, file, video, or image to an article. Images up to 48 MB are added as images. Larger images are added as files. The maximum file size is 5 GB, and the maximum image resolution is 7,000 × 7,000 pixels.
Click Plus (+) at the end of the formatting panel and select the object you want to add to the article.
The mobile app includes the same formatting tools. To see all available options, touch and hold the formatting panel, then swipe through the tools.
Use built-in features
Knowledge base 2.0 supports keyboard shortcuts, media management, and mentions of employees, other spaces, and tasks.
Indent text. Press Tab to quickly indent a paragraph and structure the article.
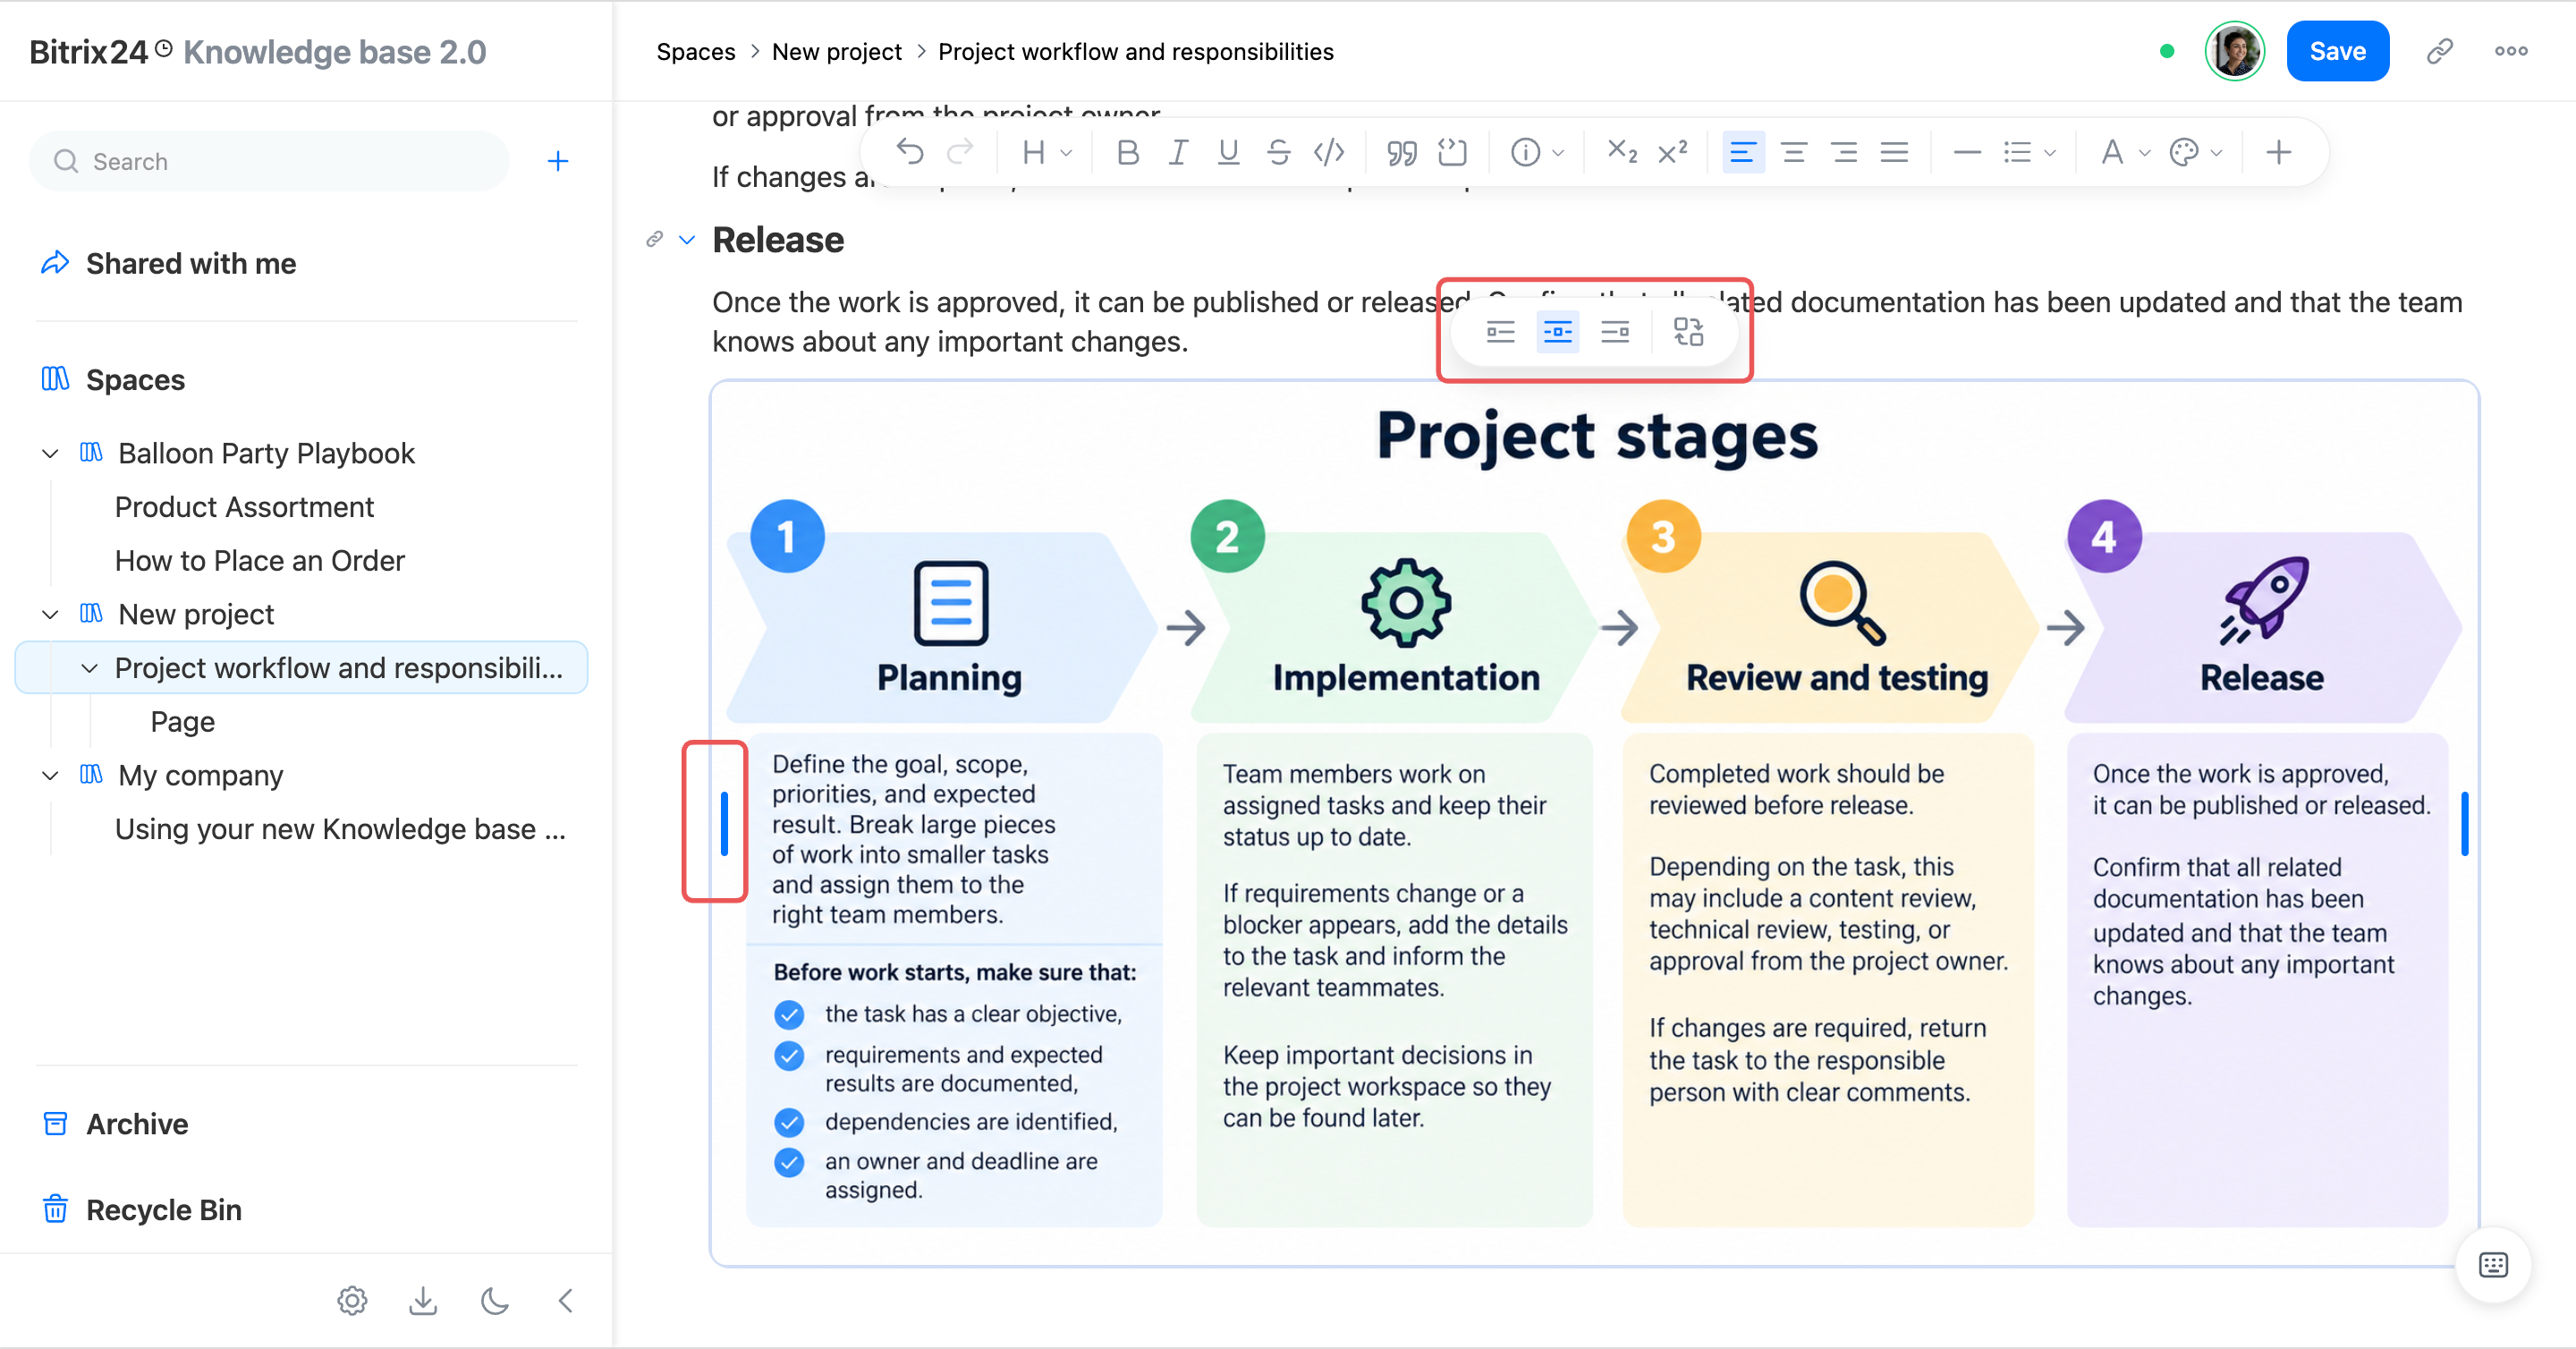
Working with media. To resize an image or video, press and hold its right or left edge, then drag it.
To change the position of an image or video or quickly replace it, click the media file and select an option from the panel above it.
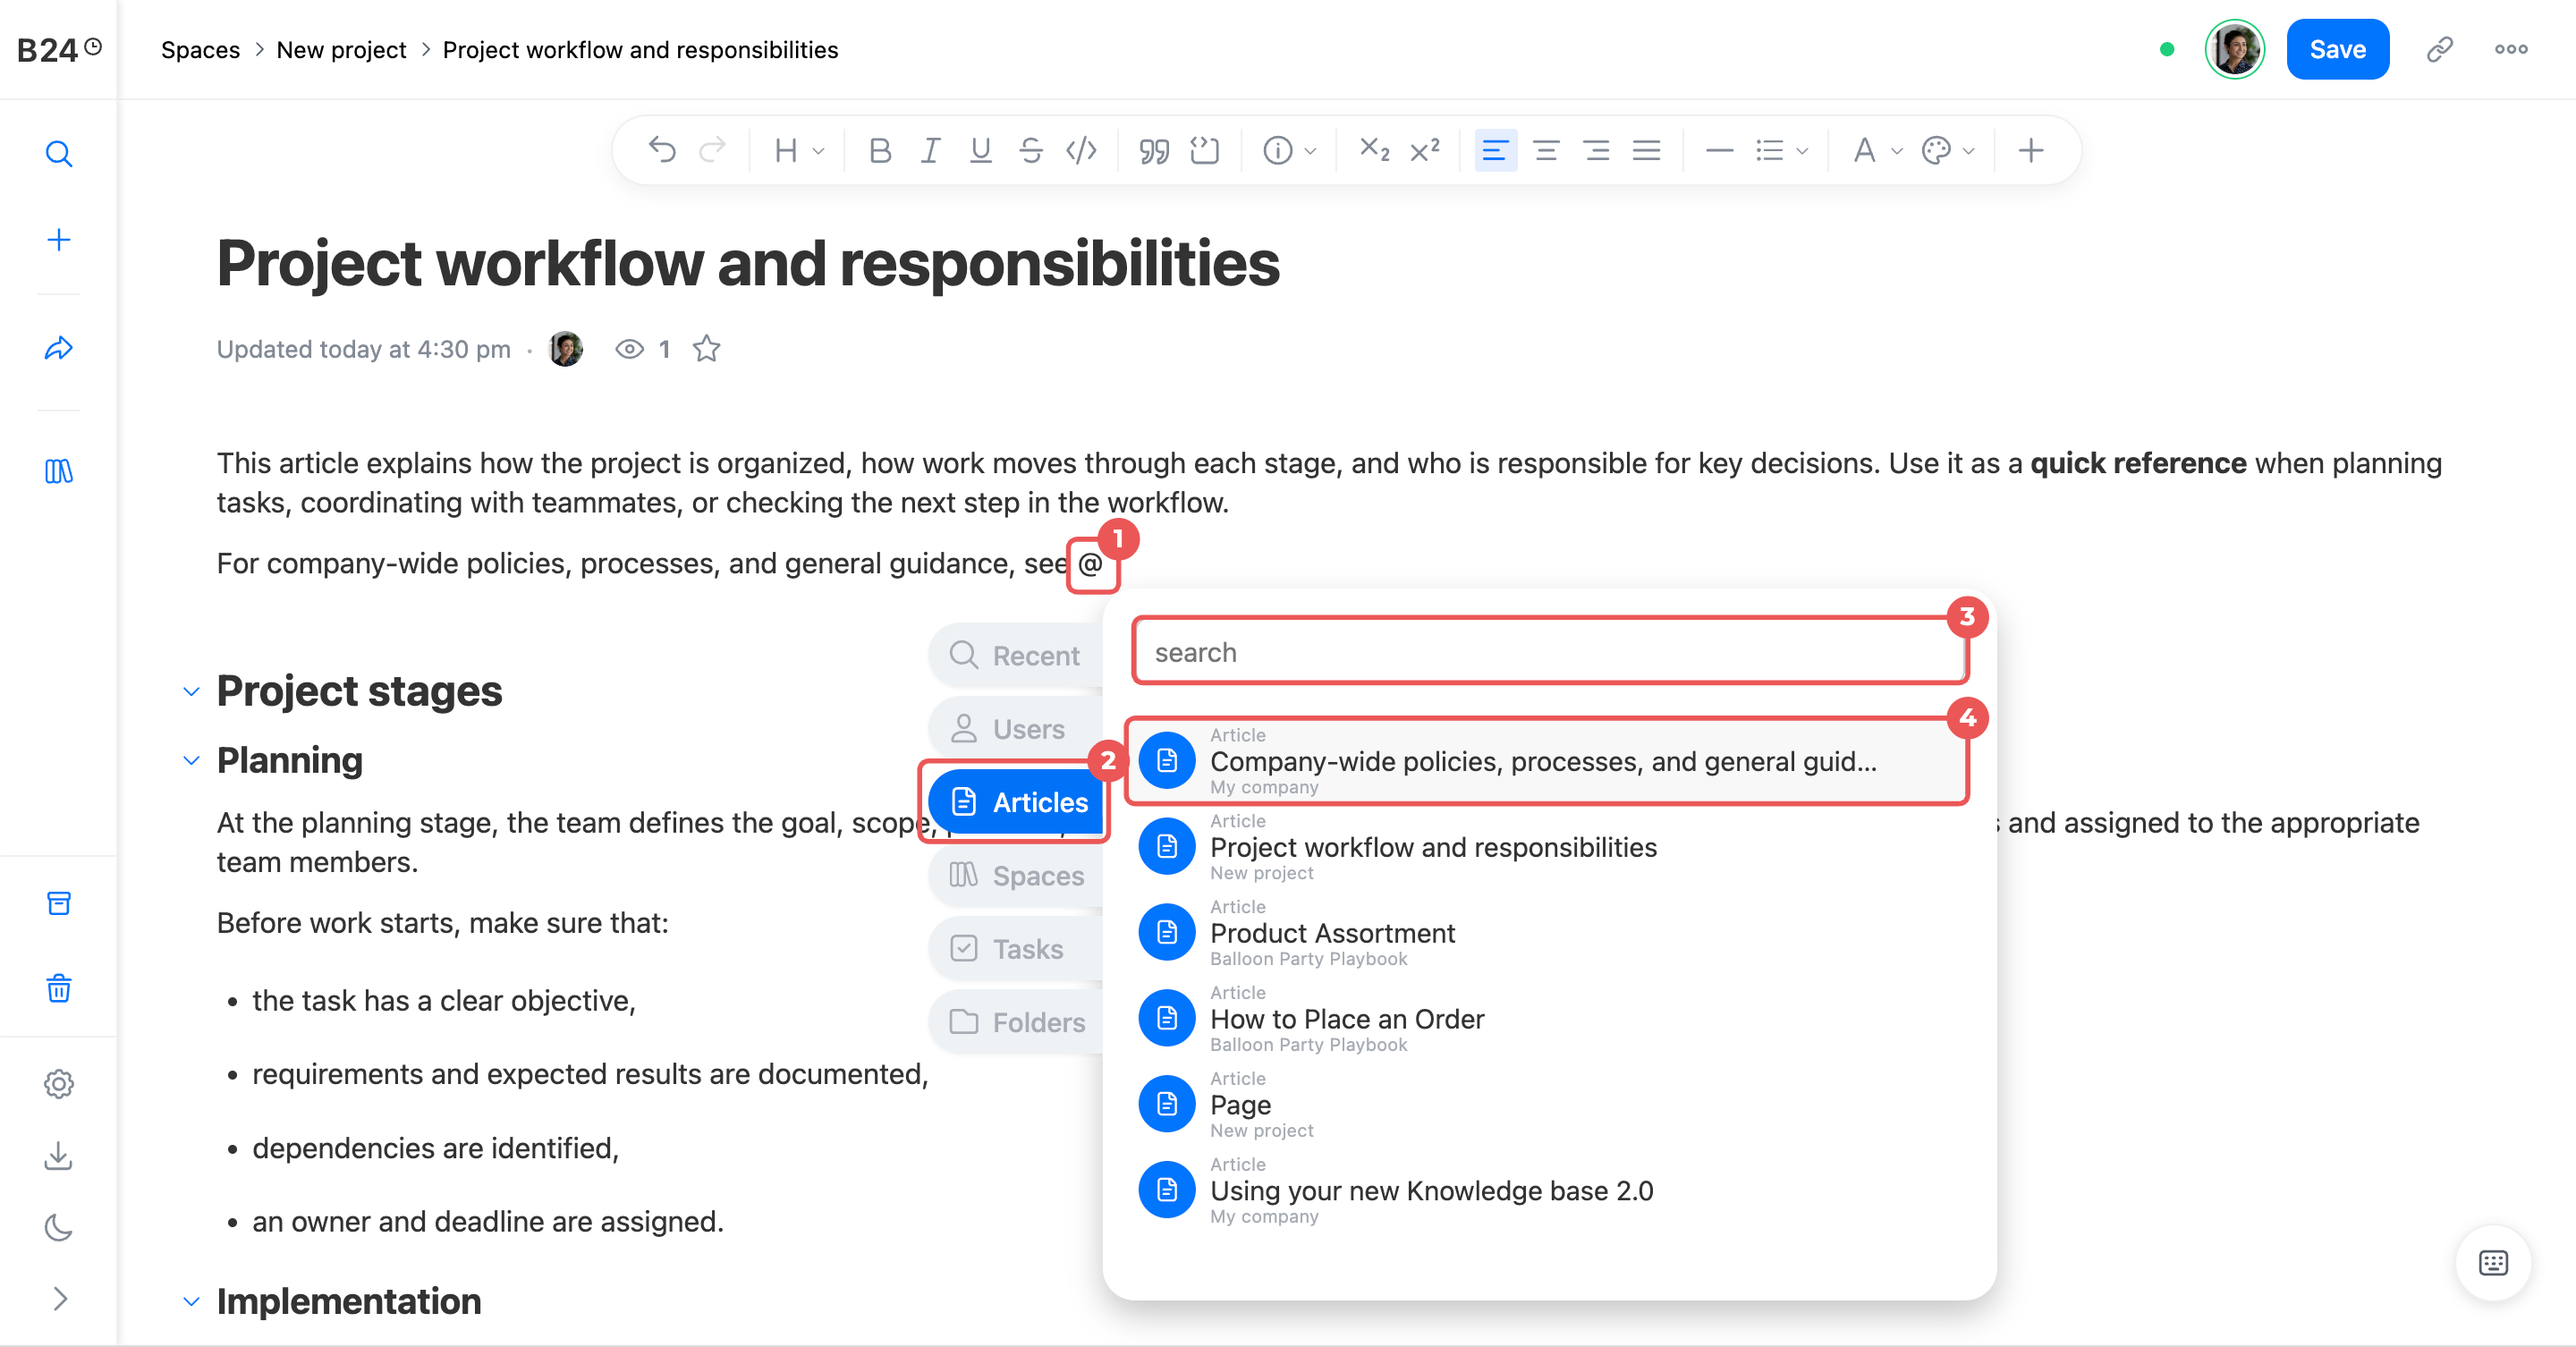
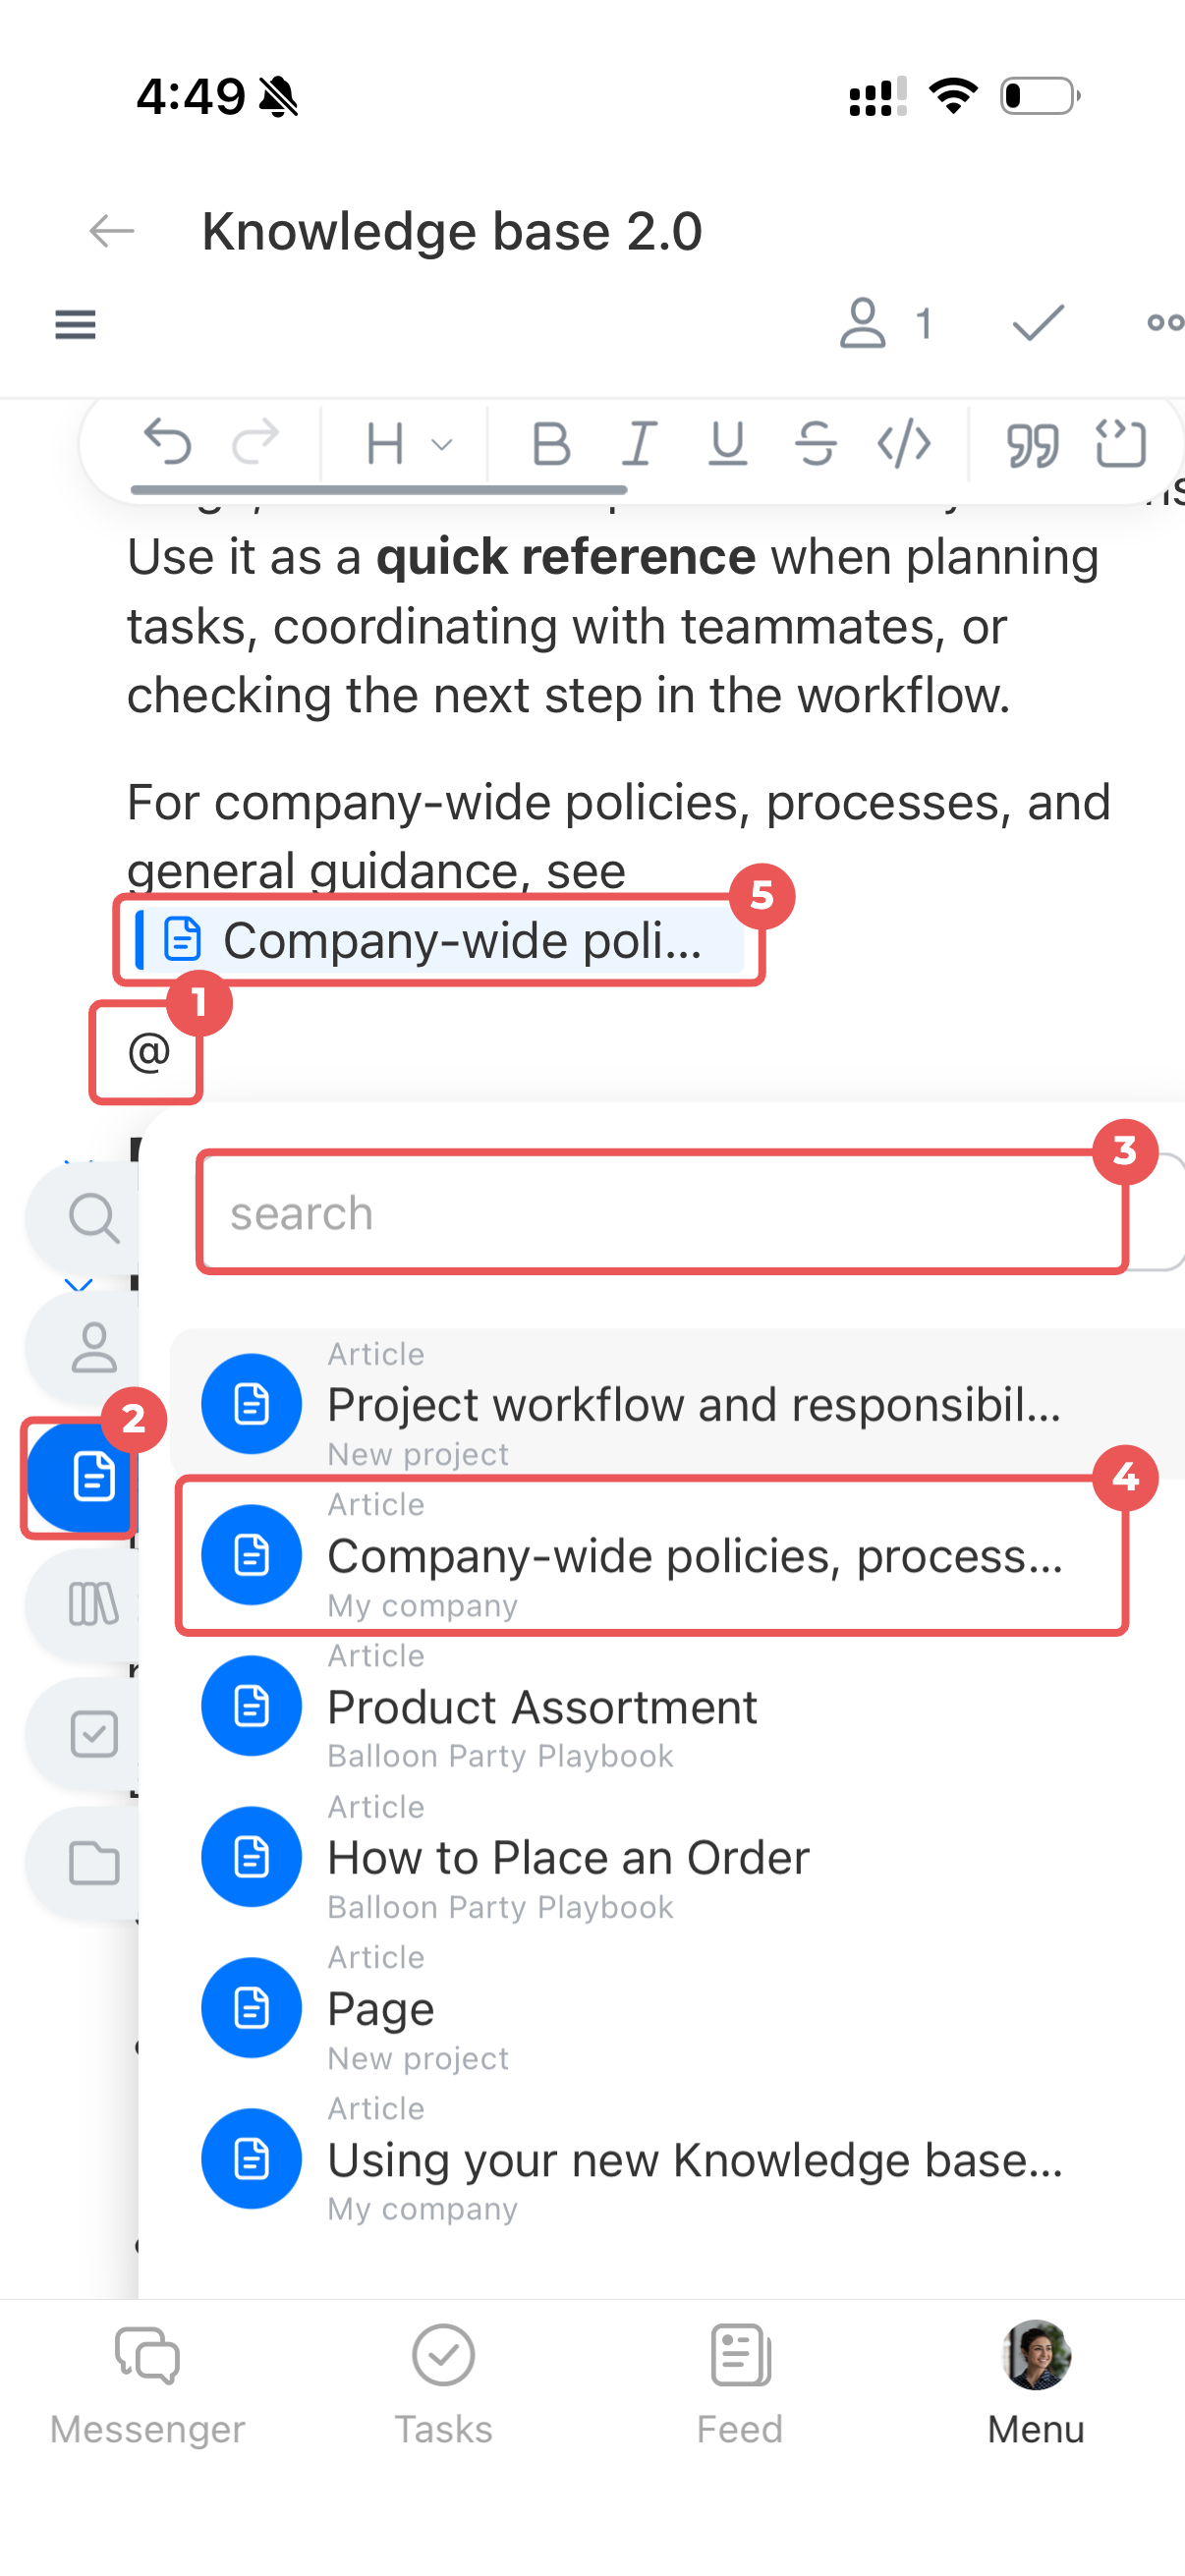
Add mentions. You can add links to employees, articles, spaces, tasks, or Drive folders.
- Type @ in the text and start entering the user’s name or the title of the task, article, space, or Drive folder in the search field.
- You can also open the relevant tab next to the search field.
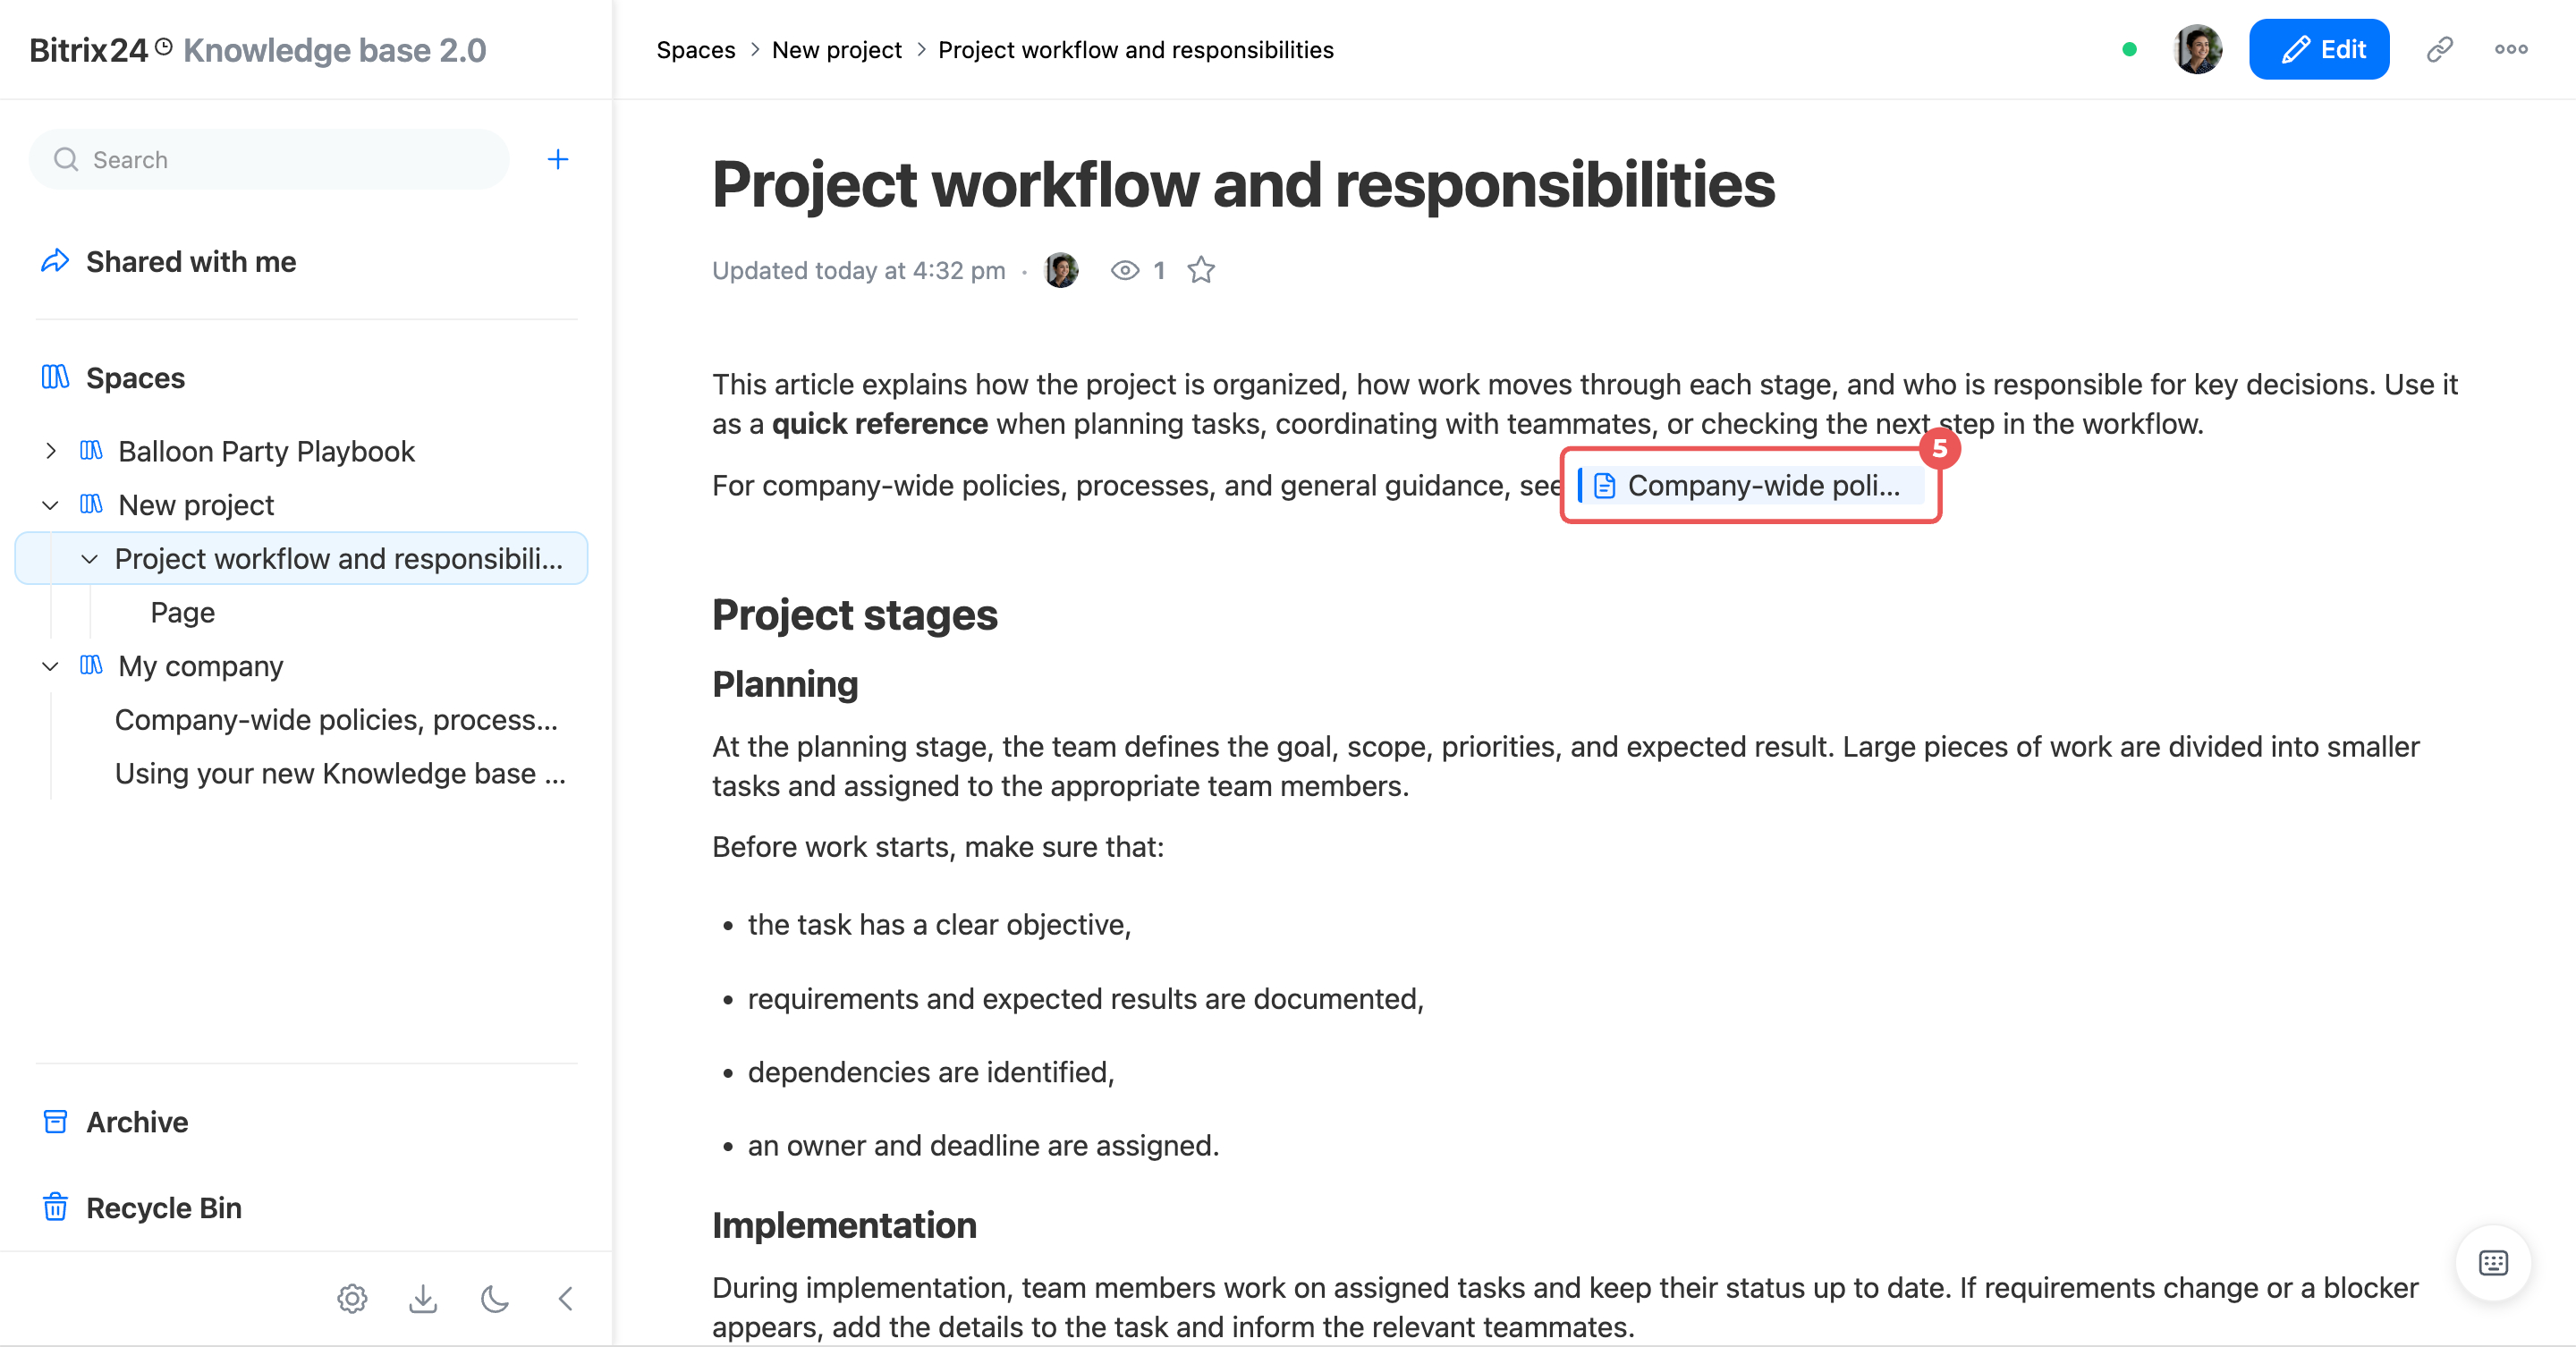
- Select an employee or item — a link to it appears in the text.
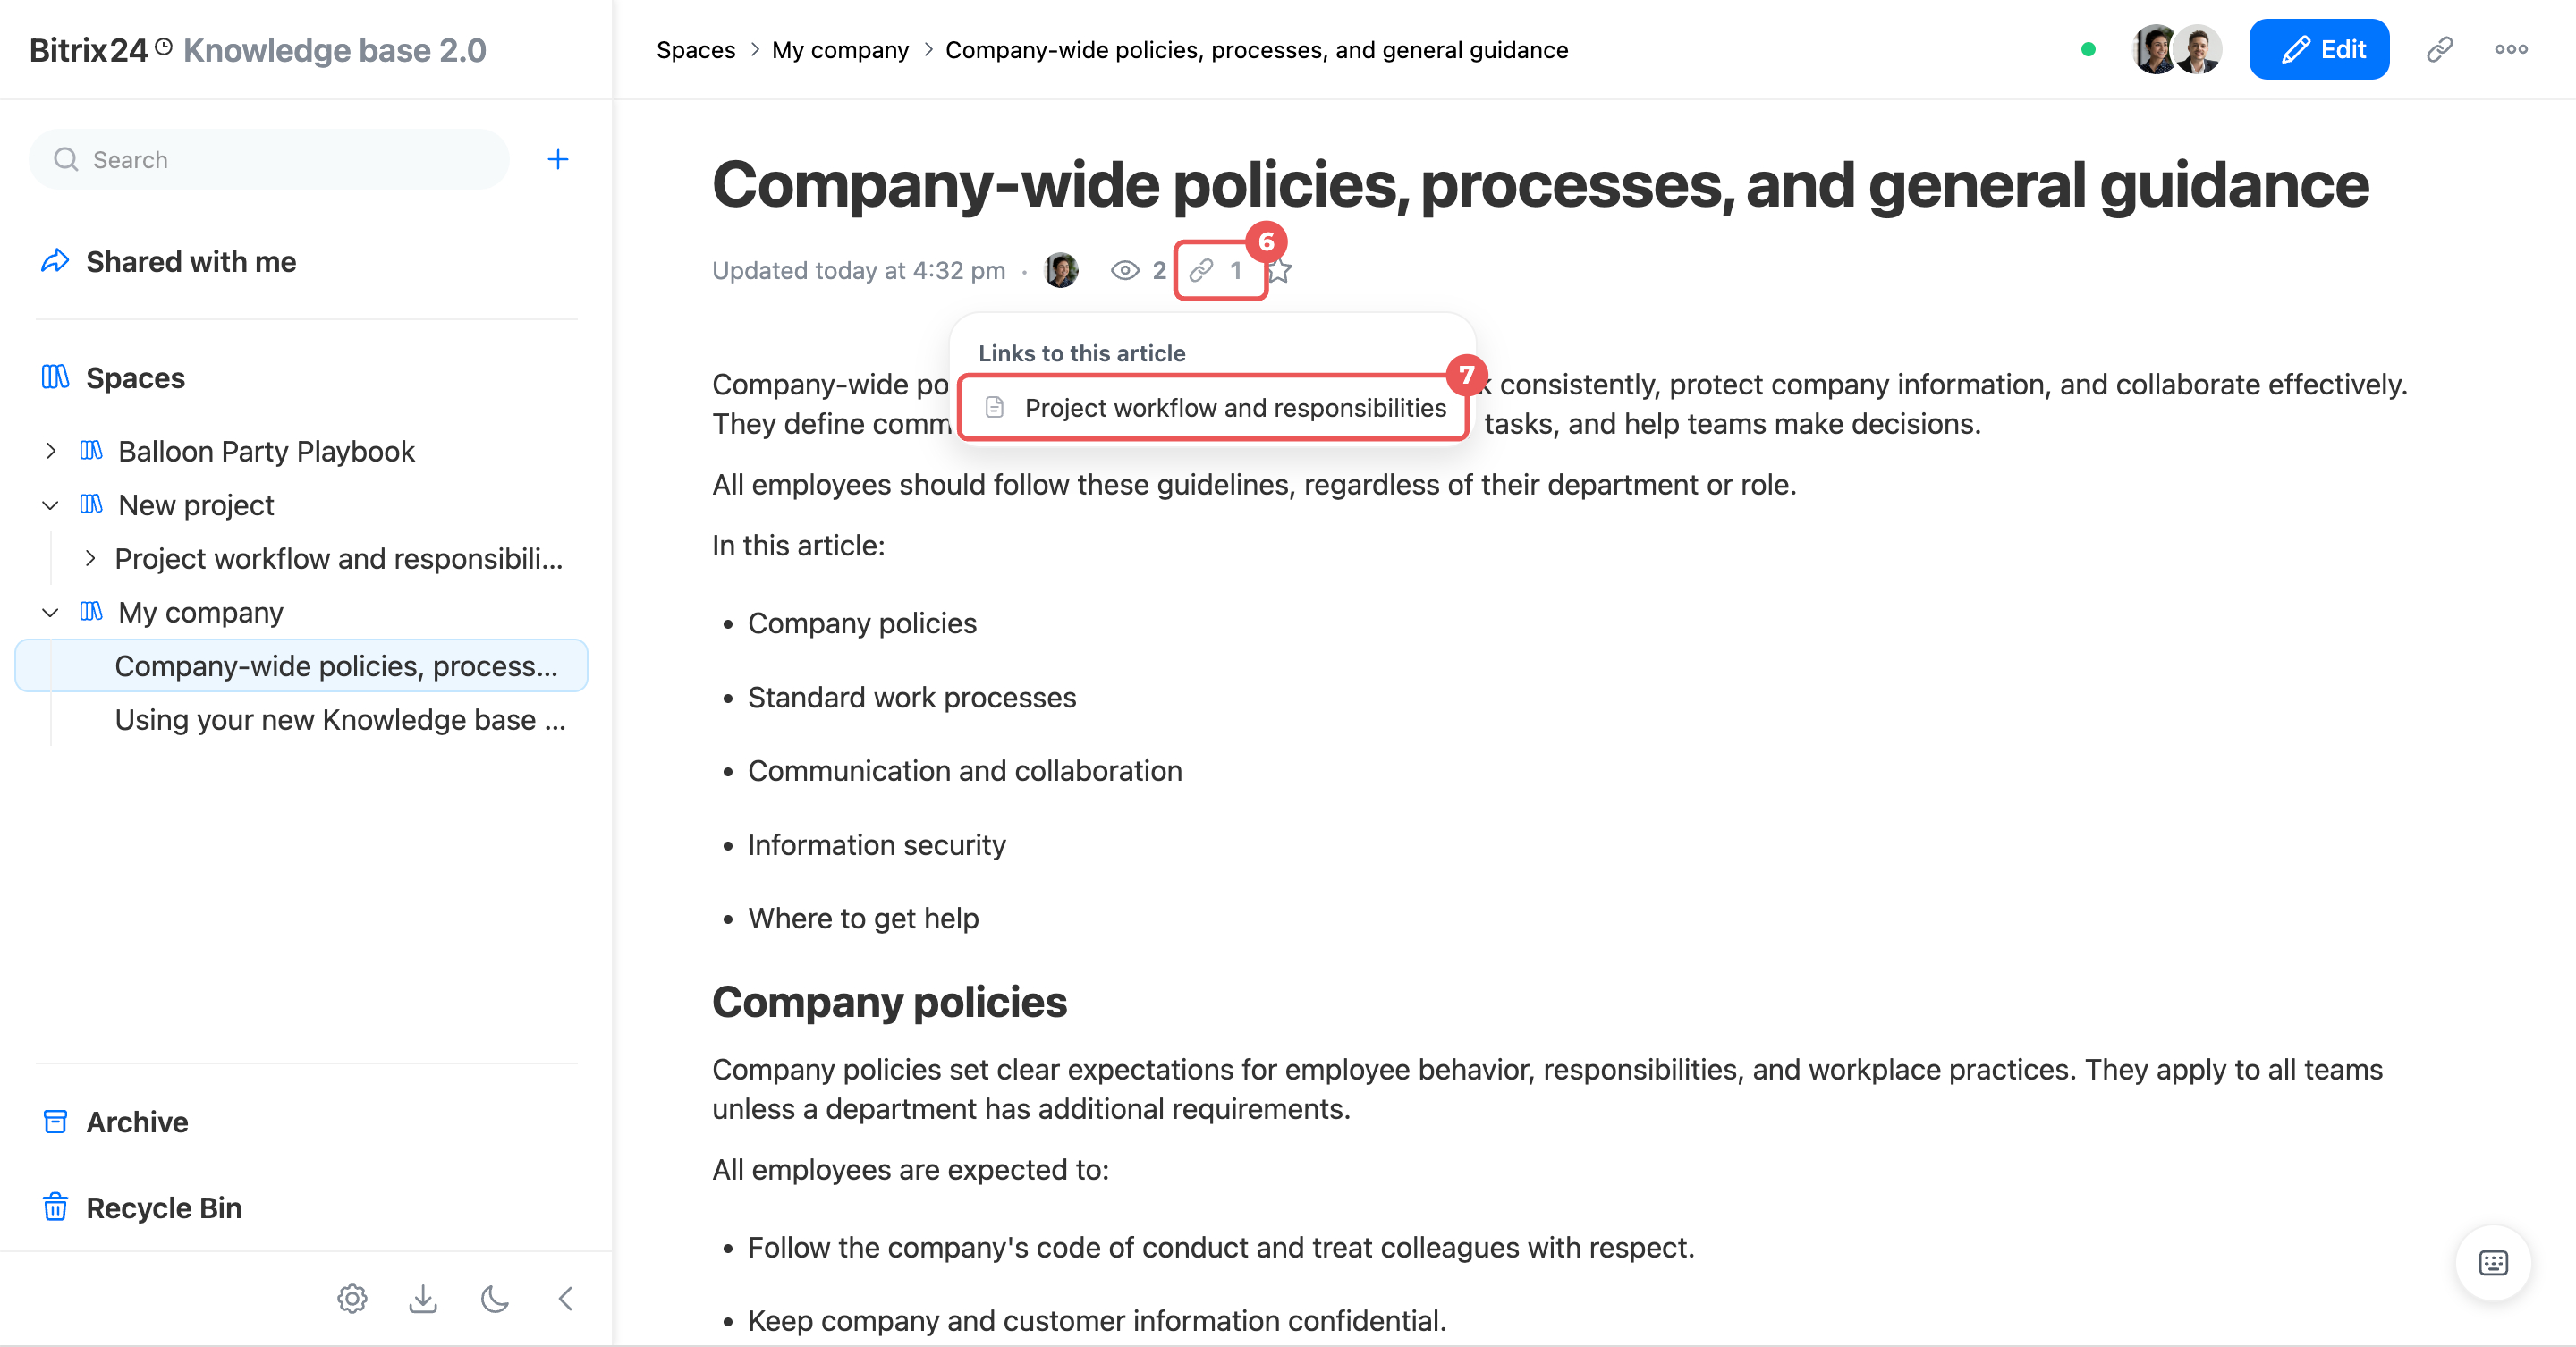
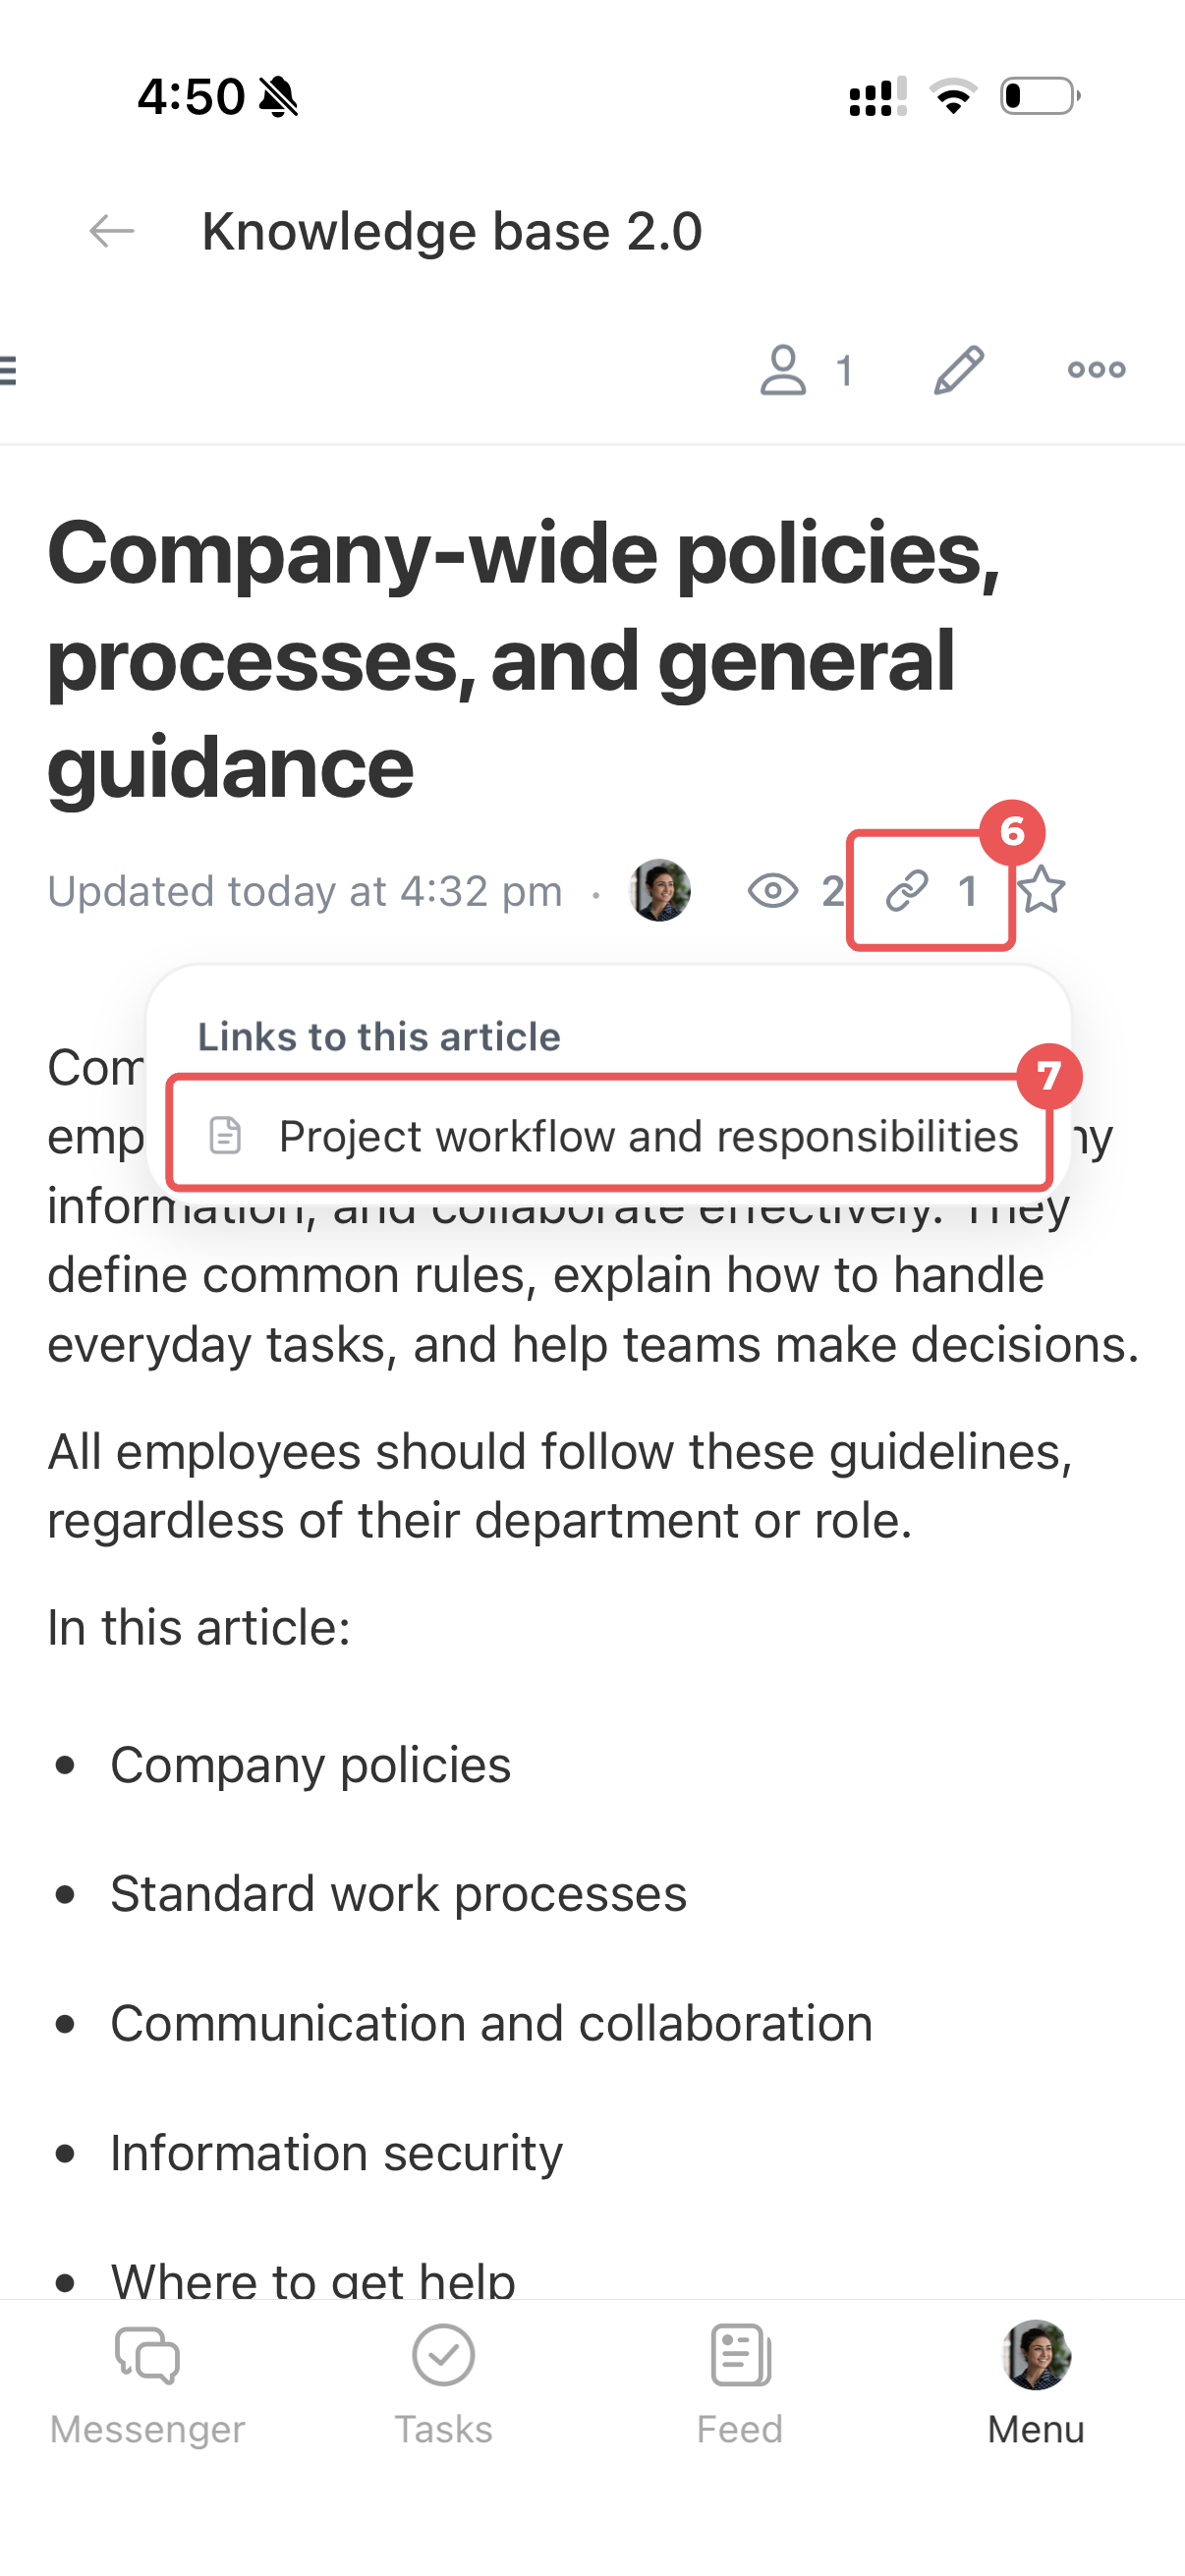
- If you mention another article, Bitrix24 creates a link between the two articles. A hyperlink icon with a counter appears below the title of the referenced article. Click the icon to see which articles link to it and open any of them.
In the mobile app, you can add links to employees, articles, spaces, tasks, or Drive folders. When you mention another article, Bitrix24 creates links between the articles just as it does on the web.
- Type @ in the text and start entering the user’s name or the title of the task, article, space, or Drive folder in the search field.
- You can also open the relevant tab next to the search field.
- Select an employee or item — a link to it appears in the text. A Drive folder opens when you tap the link.
- If you mention another article, a counter appears below its title. Tap the hyperlink icon to see related articles and open them.
In brief
- In Knowledge base 2.0, you can format an article manually using the formatting panel and built-in features, or with the CoPilot Agent.
- To edit an article manually, open it and click Edit. All changes are saved automatically. Click Done to exit editing mode.
- The formatting panel offers text styles, lists, tables, quotes, code blocks, callouts, indents, text and background colors, and options to insert links, files, videos, and images.
- Built-in features help you quickly resize media files and add mentions of employees, articles, spaces, tasks, and Drive folders.