
Temporarily hide spaces or individual articles from users, or delete content you no longer need. For example, archive articles for a project that is on hold or delete materials for a product your company no longer sells.
In this article:
Work with the Archive
Archive a space or individual articles to temporarily hide them from users. Articles and their attachments move separately to the Archive section. You can see which space each item belongs to and restore archived content at any time.
- Employees with edit permission can archive articles.
- Employees with administration permission can restore and delete items from the Archive.
- Employees with view permission can open and copy archived articles or download them in .md format.
Archive an article.
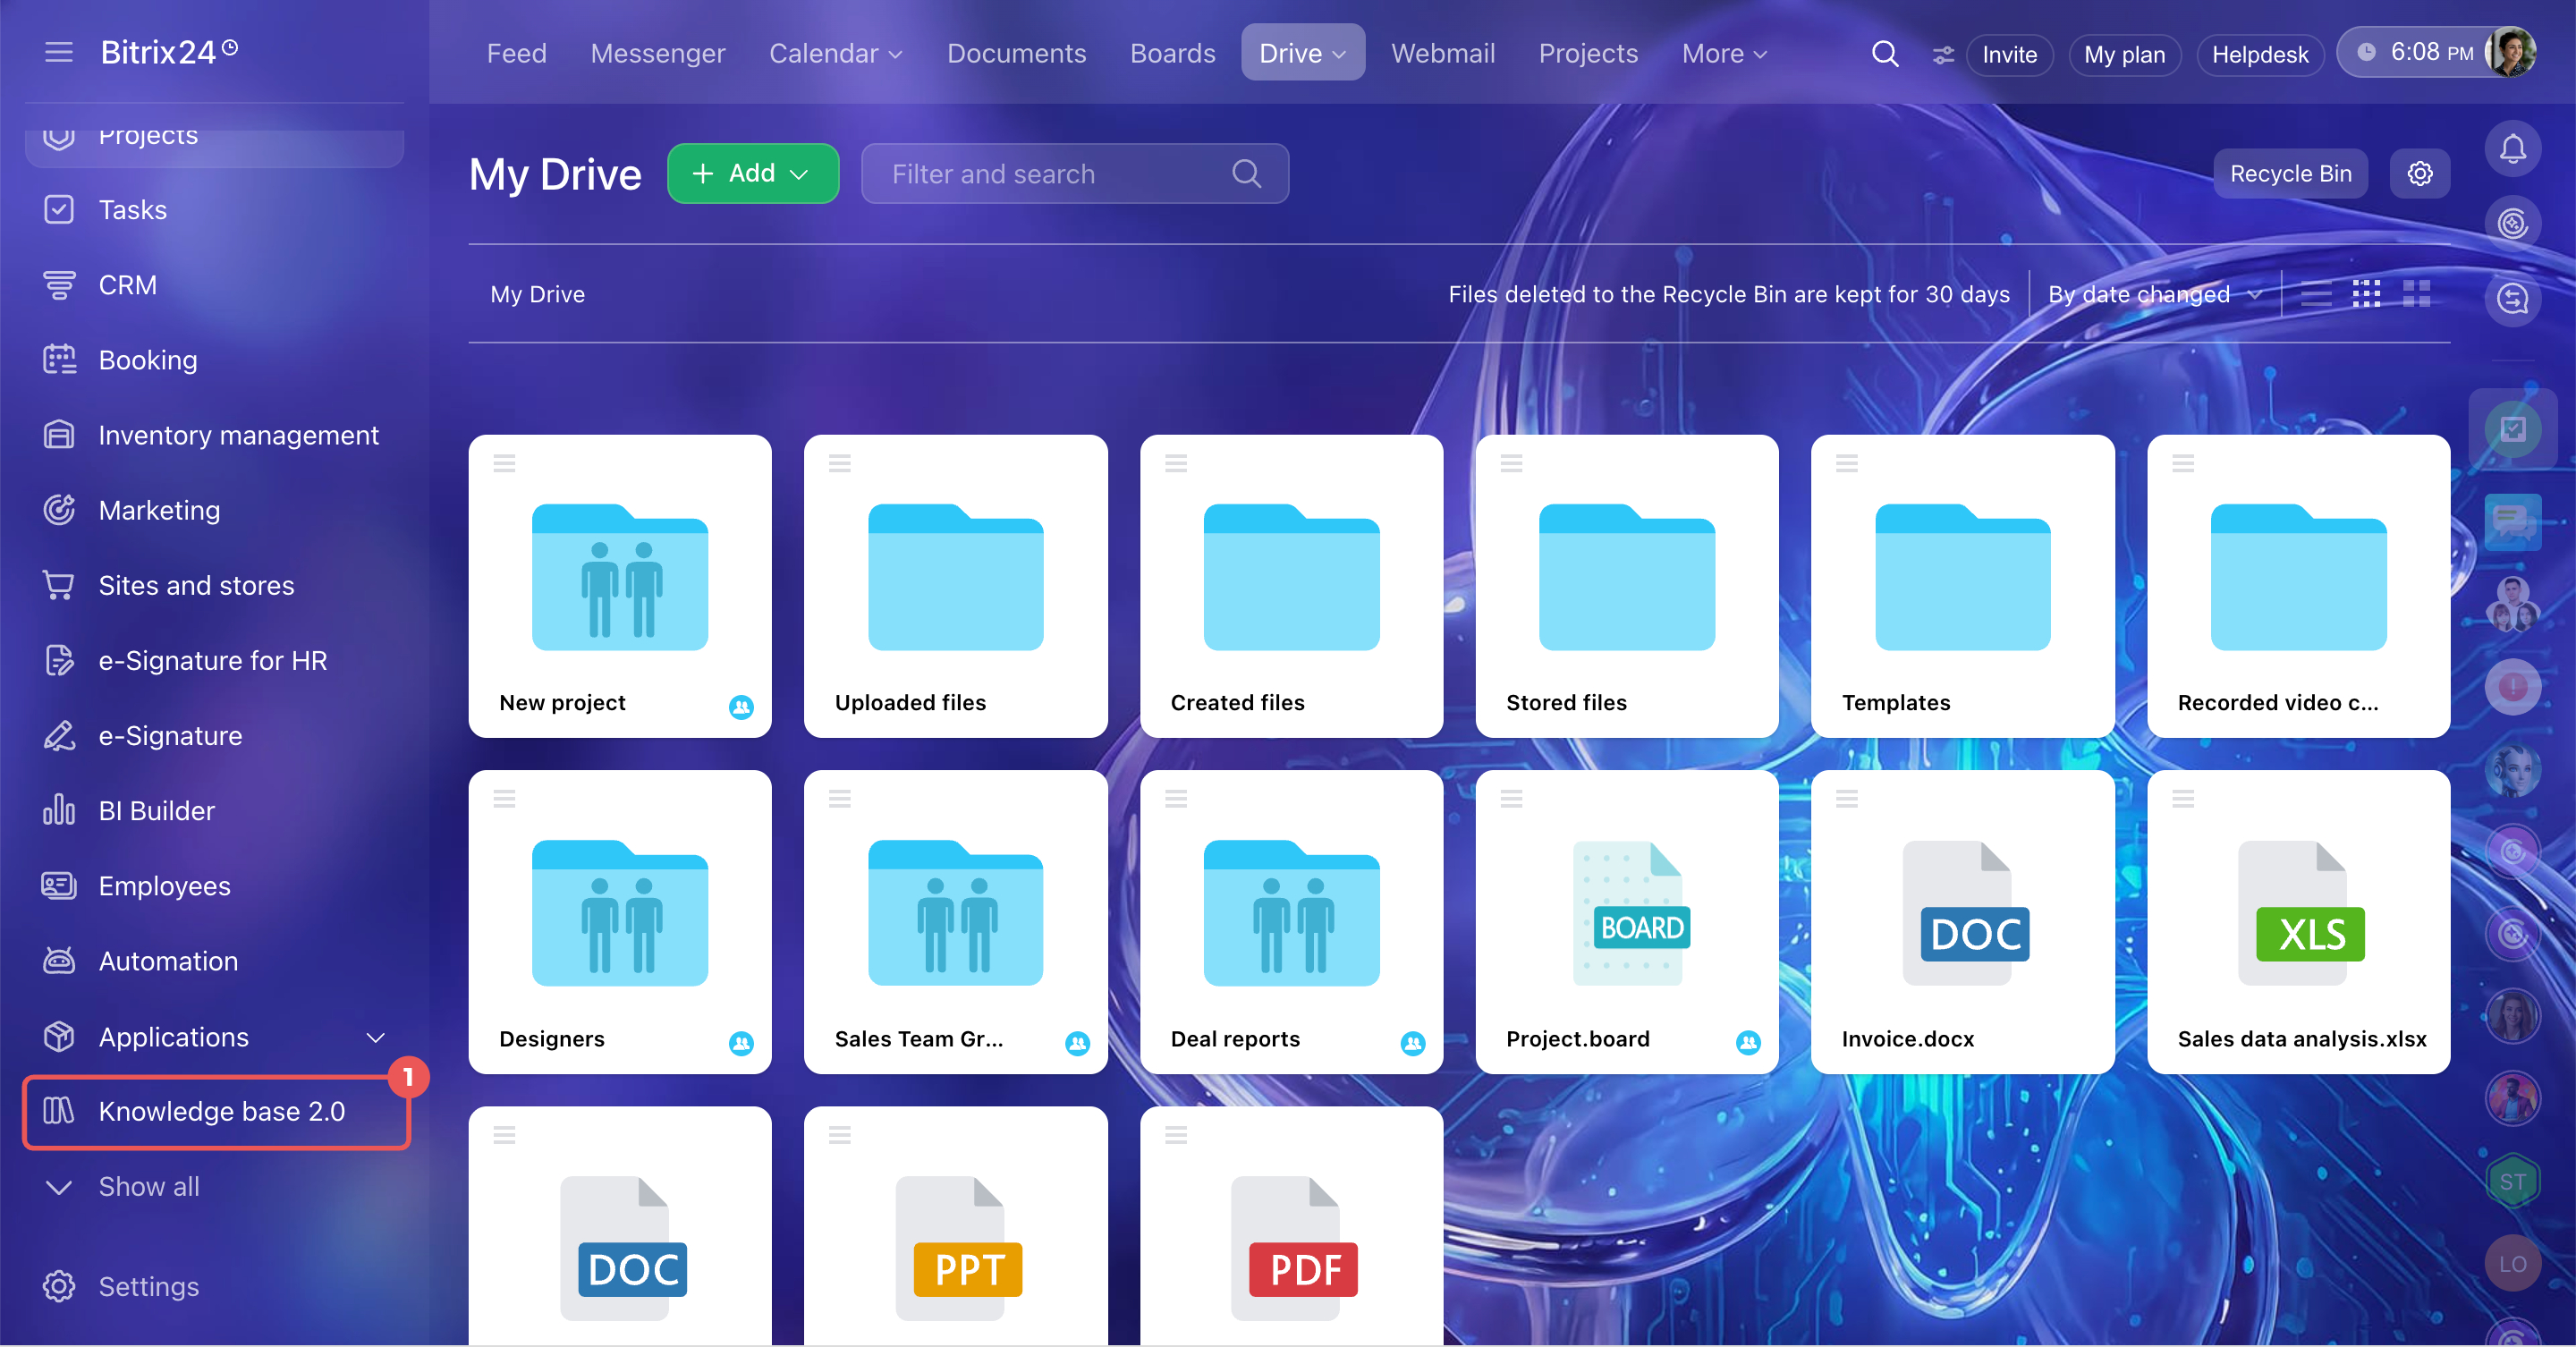
- In the menu on the left, go to Knowledge base 2.0 and open a space or article.
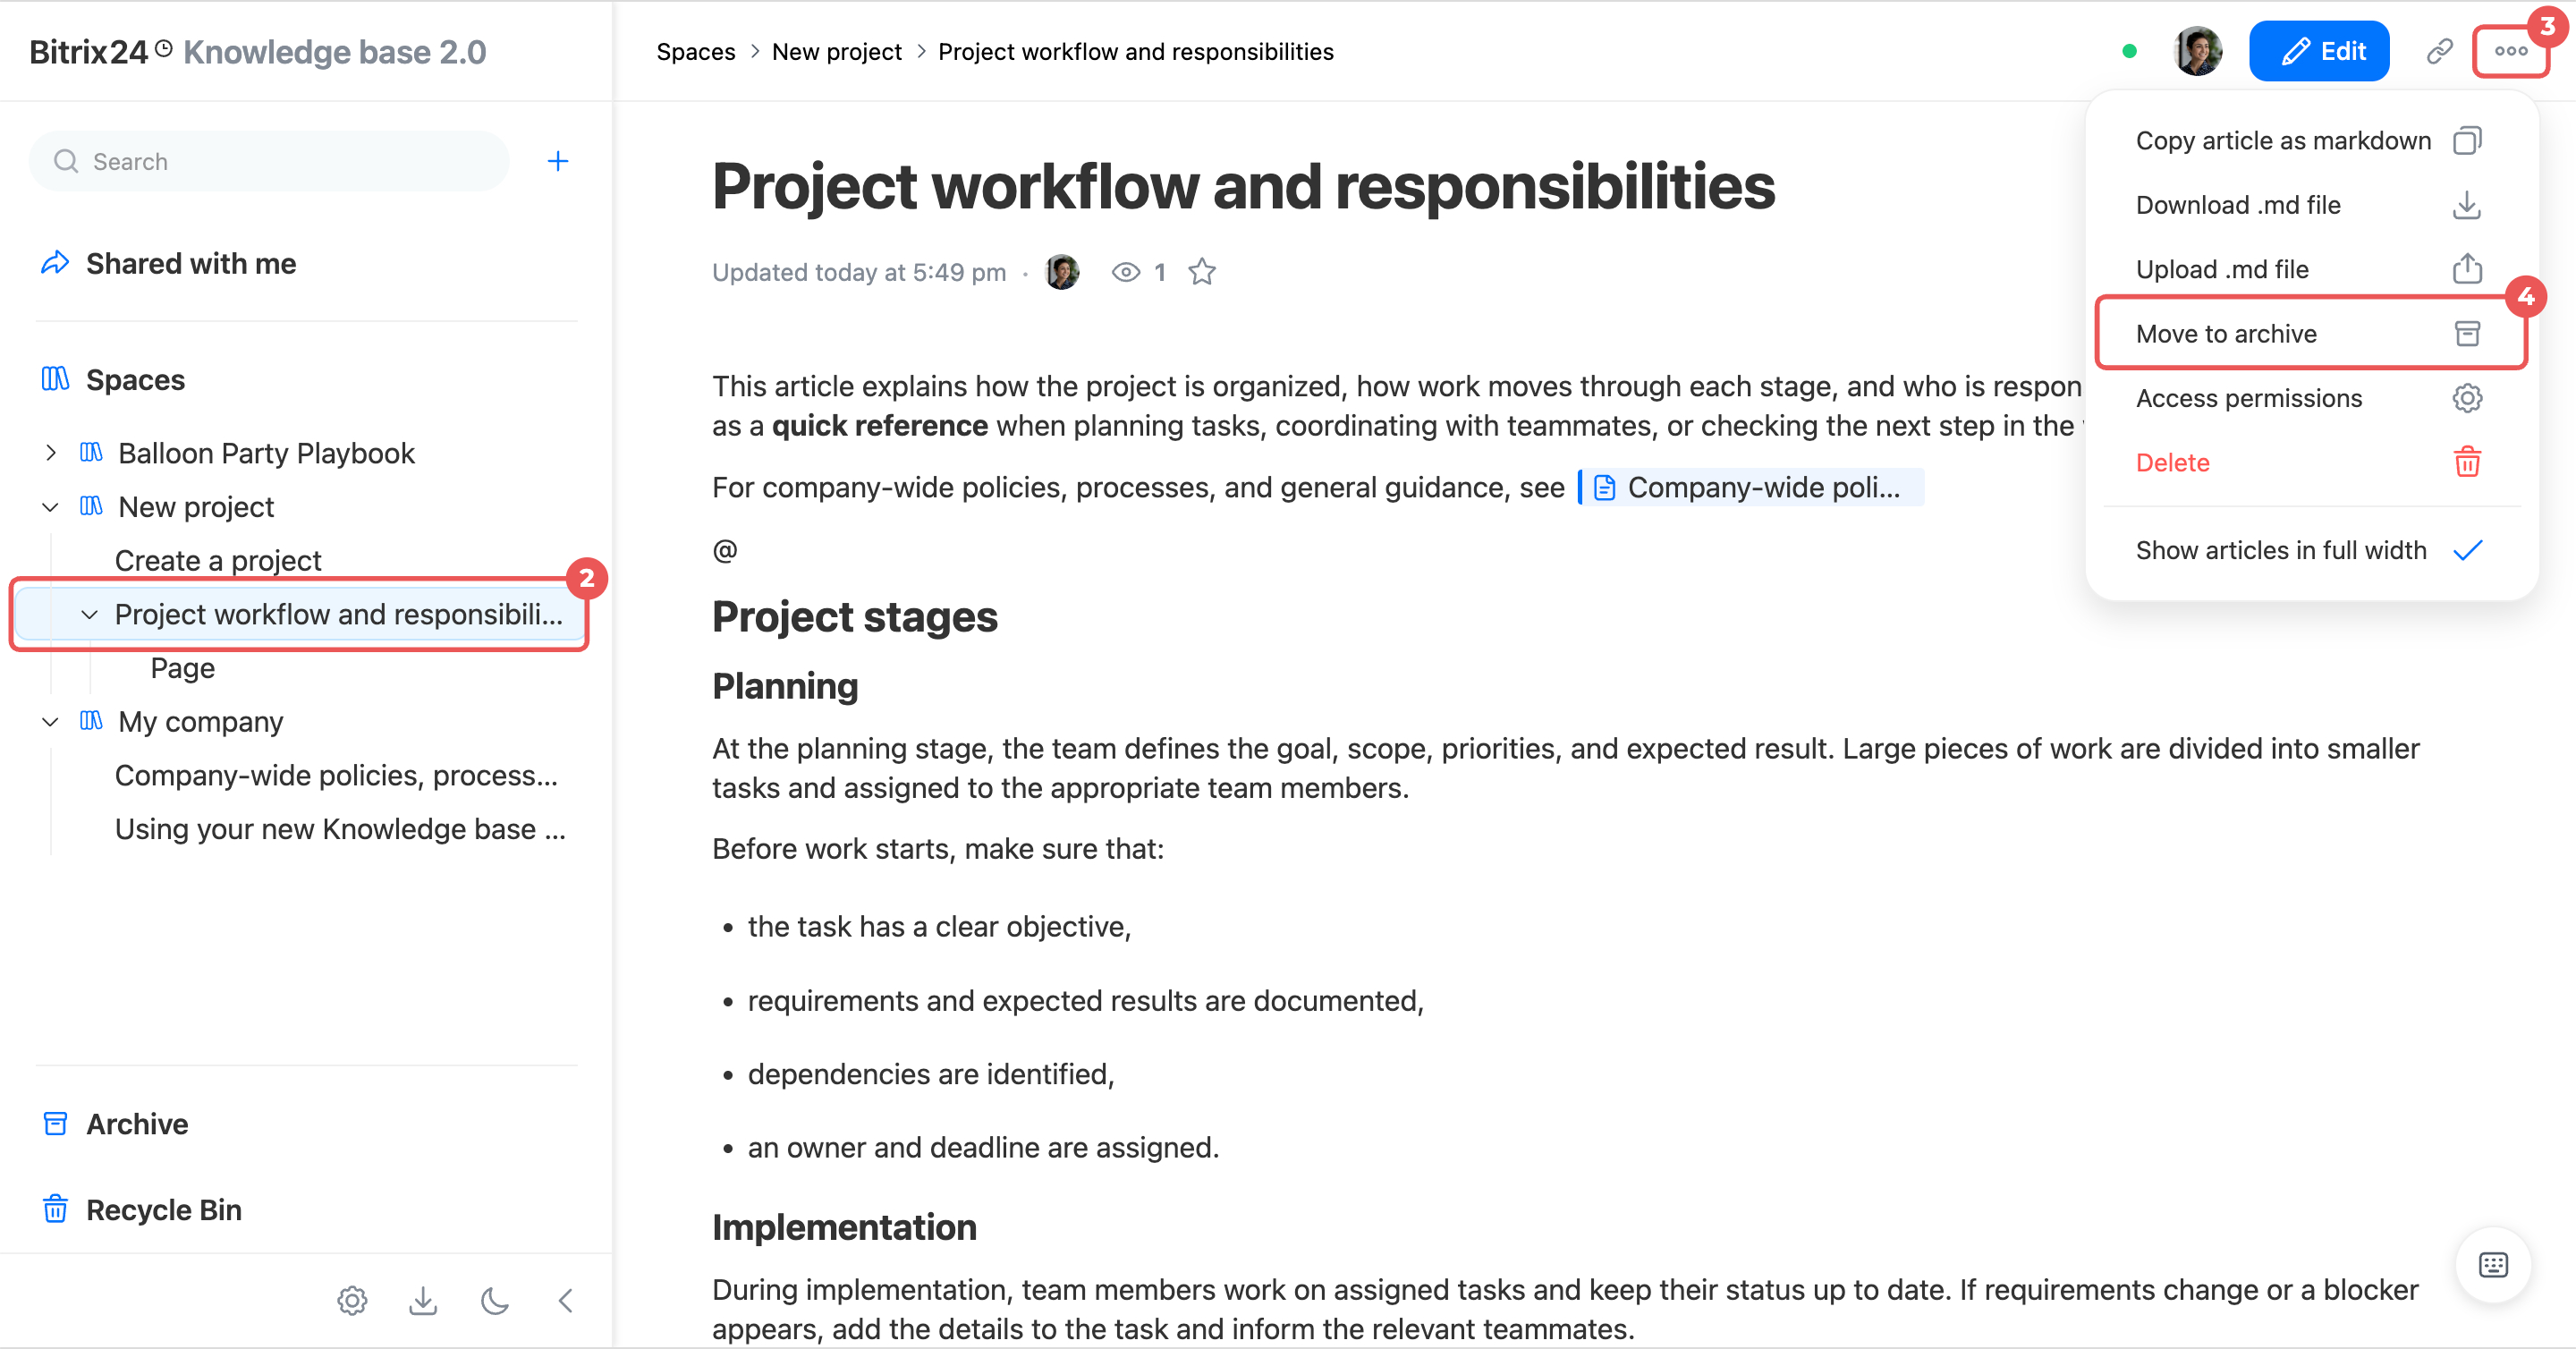
- Click Three dots (...) > Move to archive.
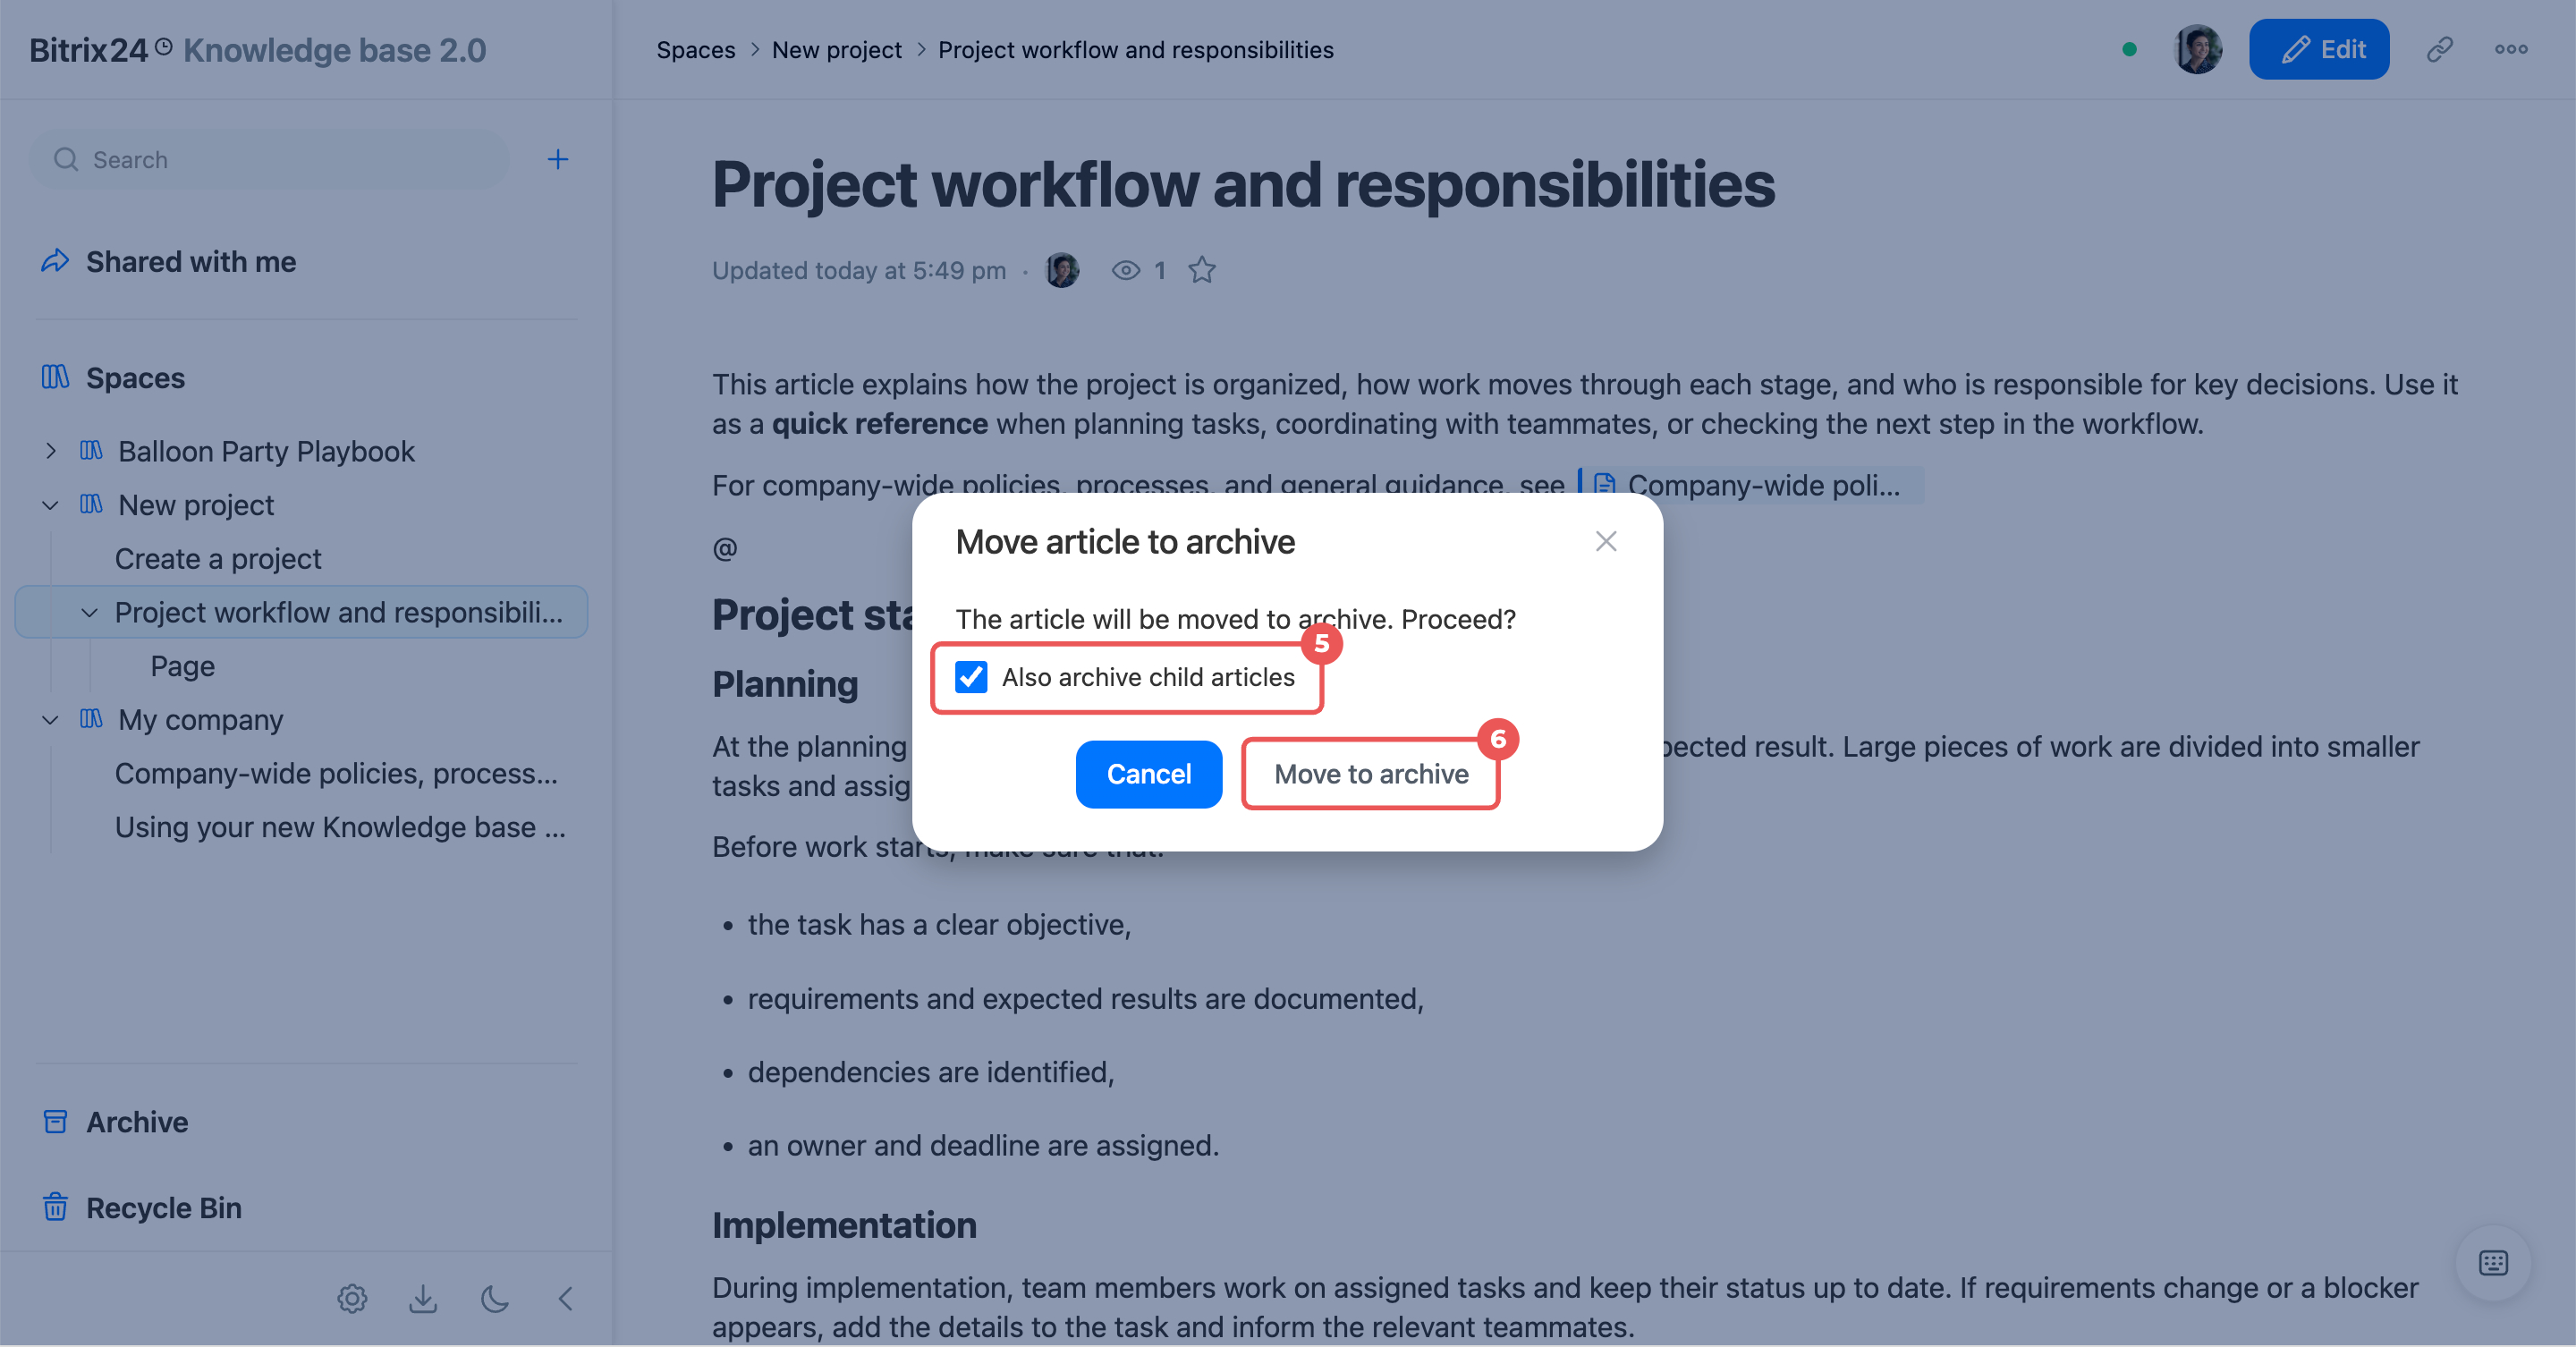
- If the article has nested articles, select Also archive child articles to move the entire branch to the Archive. If you don't select this option, only the selected article moves to the Archive. Its nested articles remain in the space and move up one level.
- Confirm the action.
Restore or delete an article.
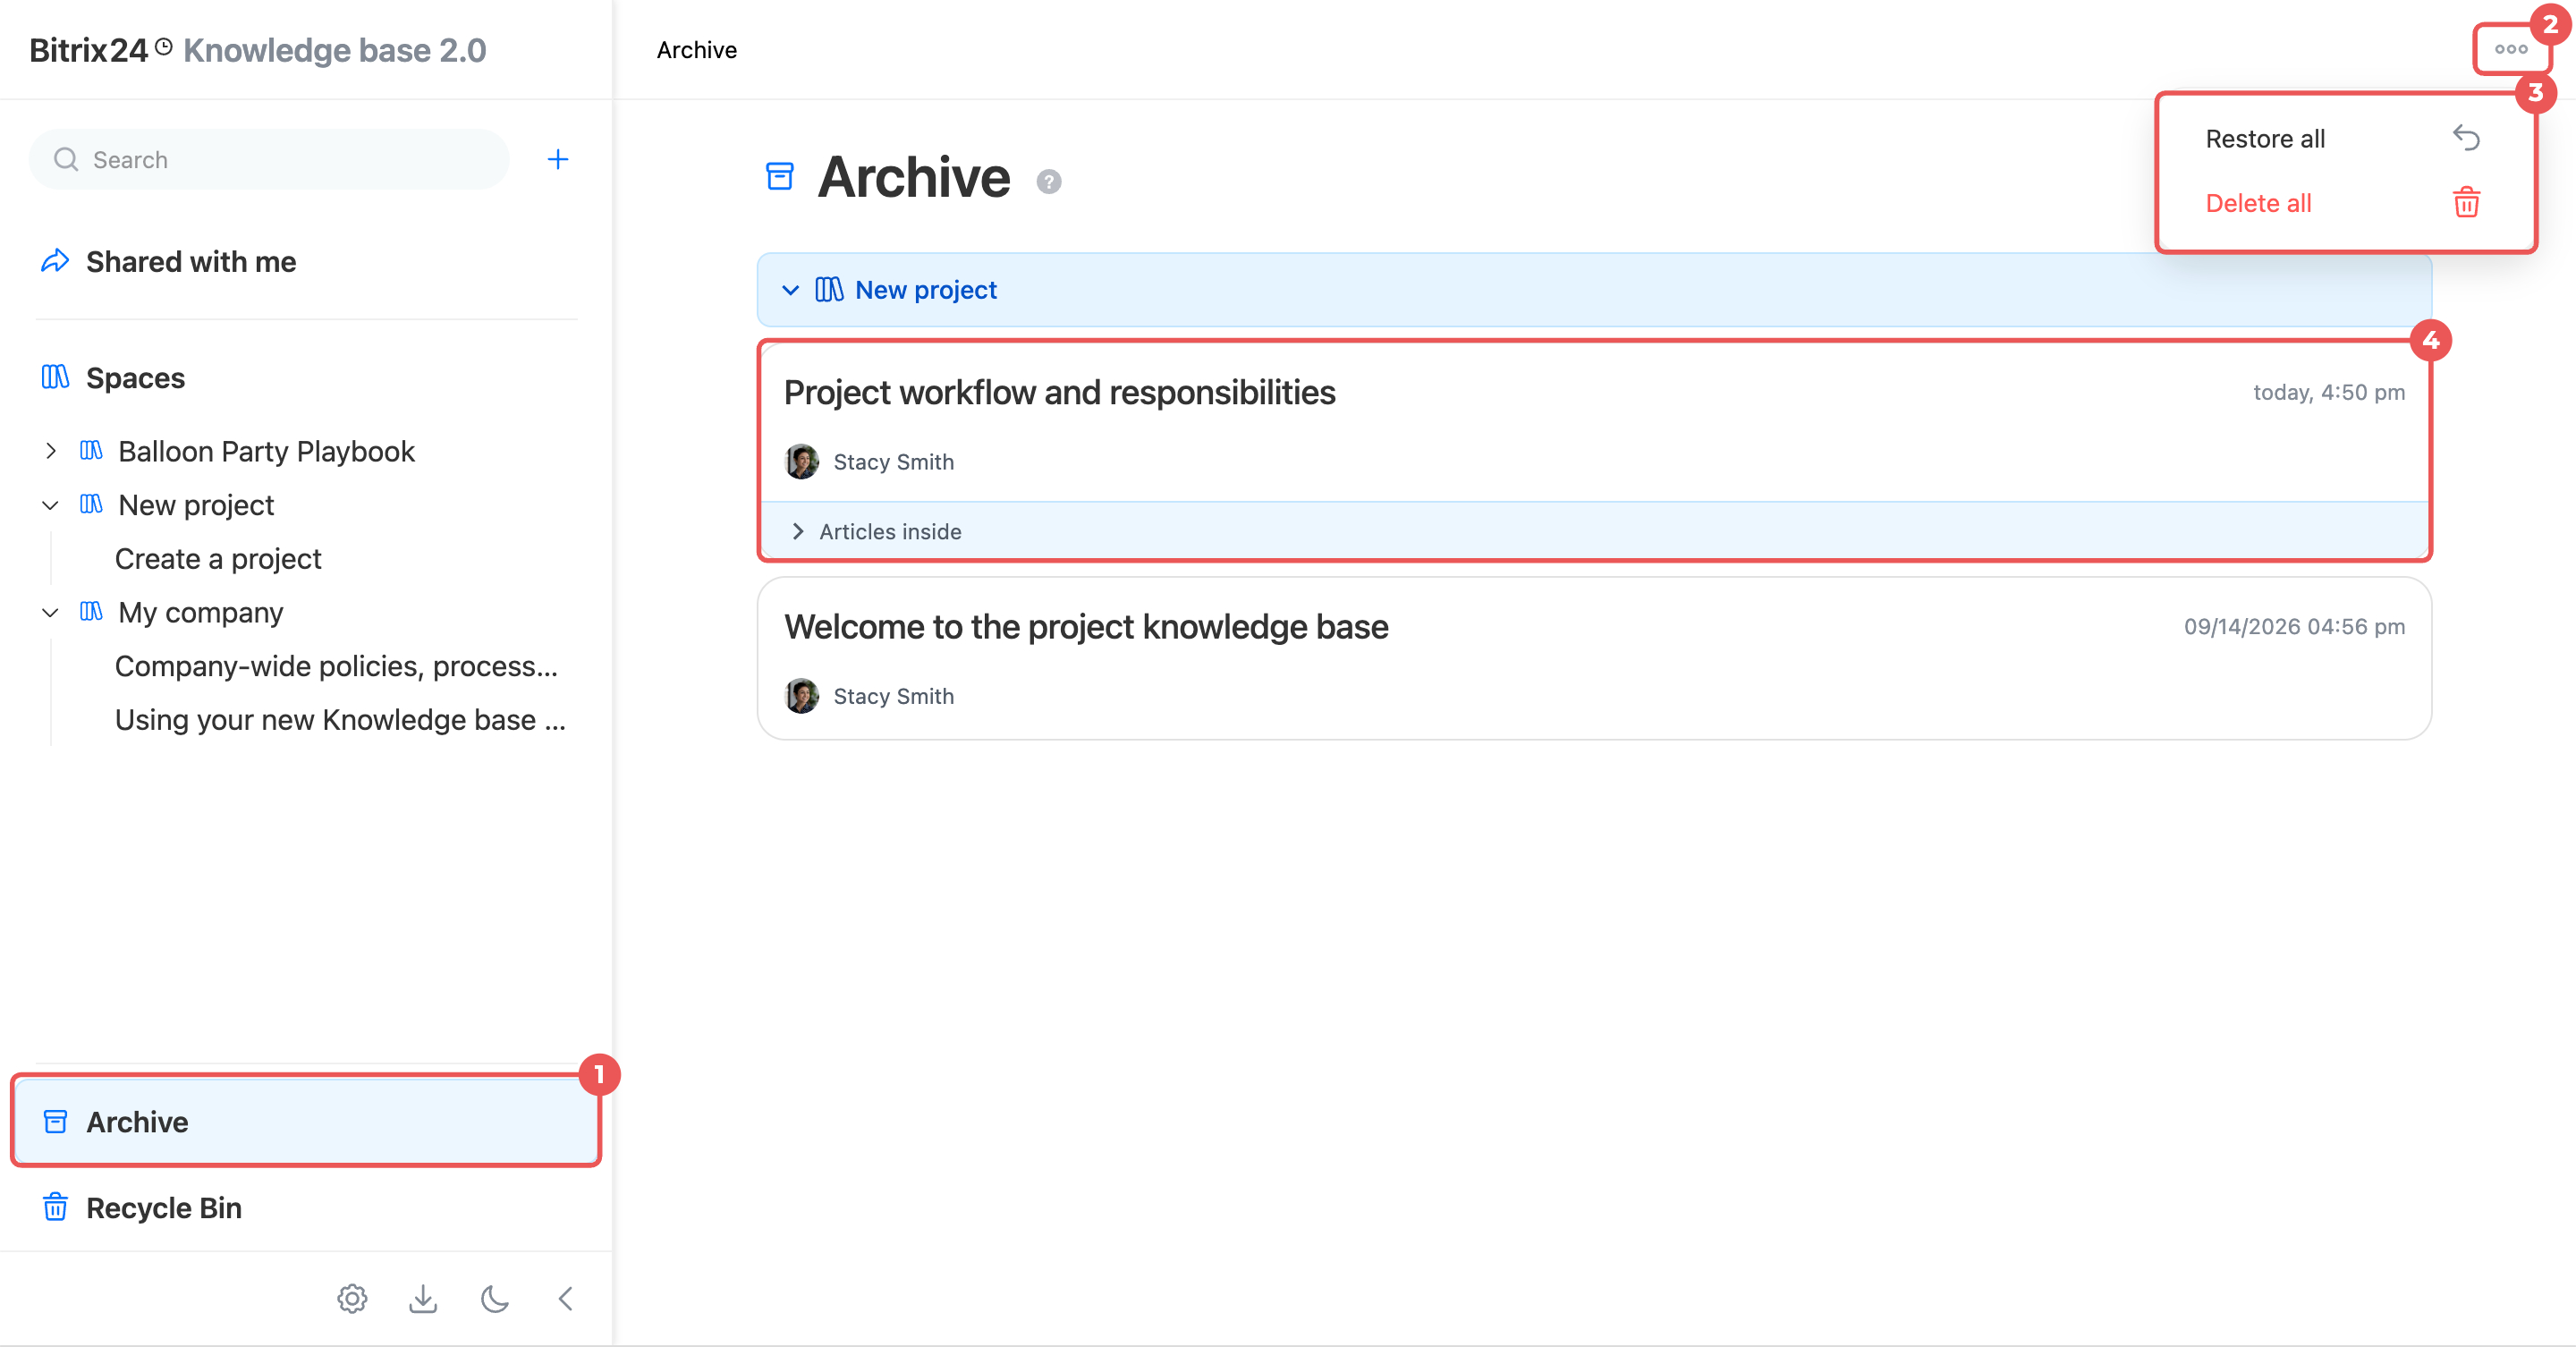
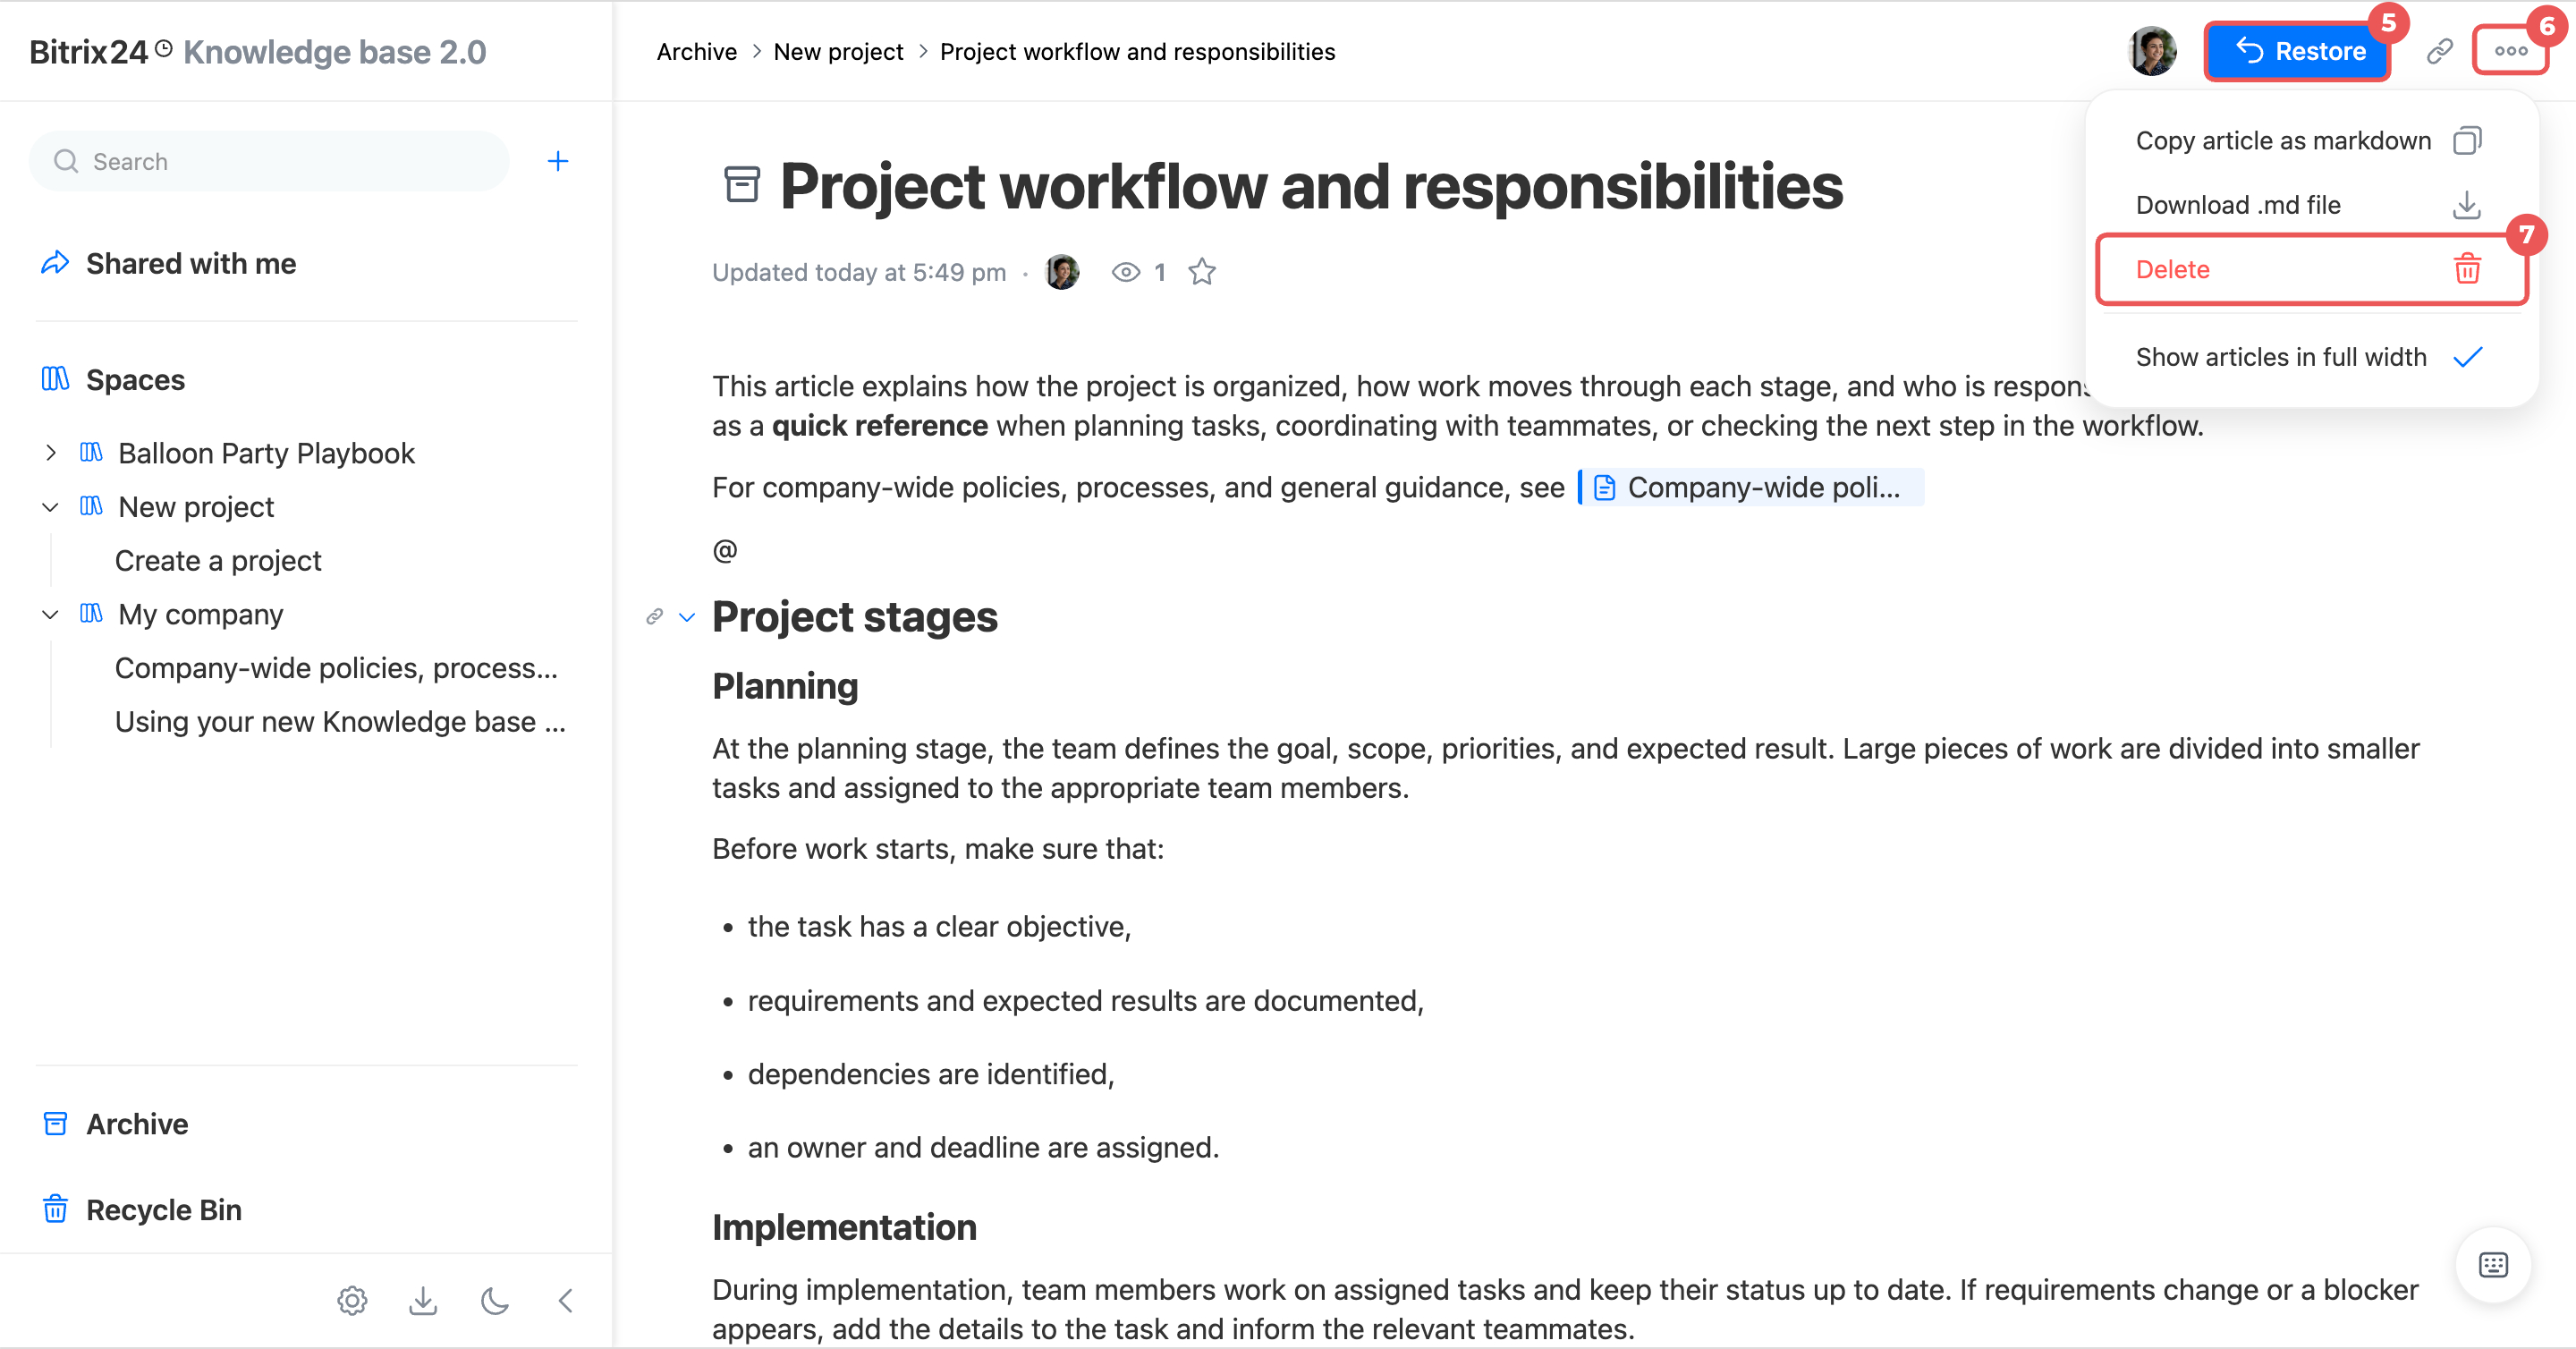
- In the control panel on the left, go to the Archive section.
- To manage all archived articles, click Three dots (...) in the upper-right corner and select an action:
- Restore all — Restore all archived articles and make them available to users again.
- Delete all — Move all archived articles to the Recycle Bin. Confirm the action.
- To manage an individual article, open it and click Restore or Delete in the Three dots (...) menu. Confirm the action.
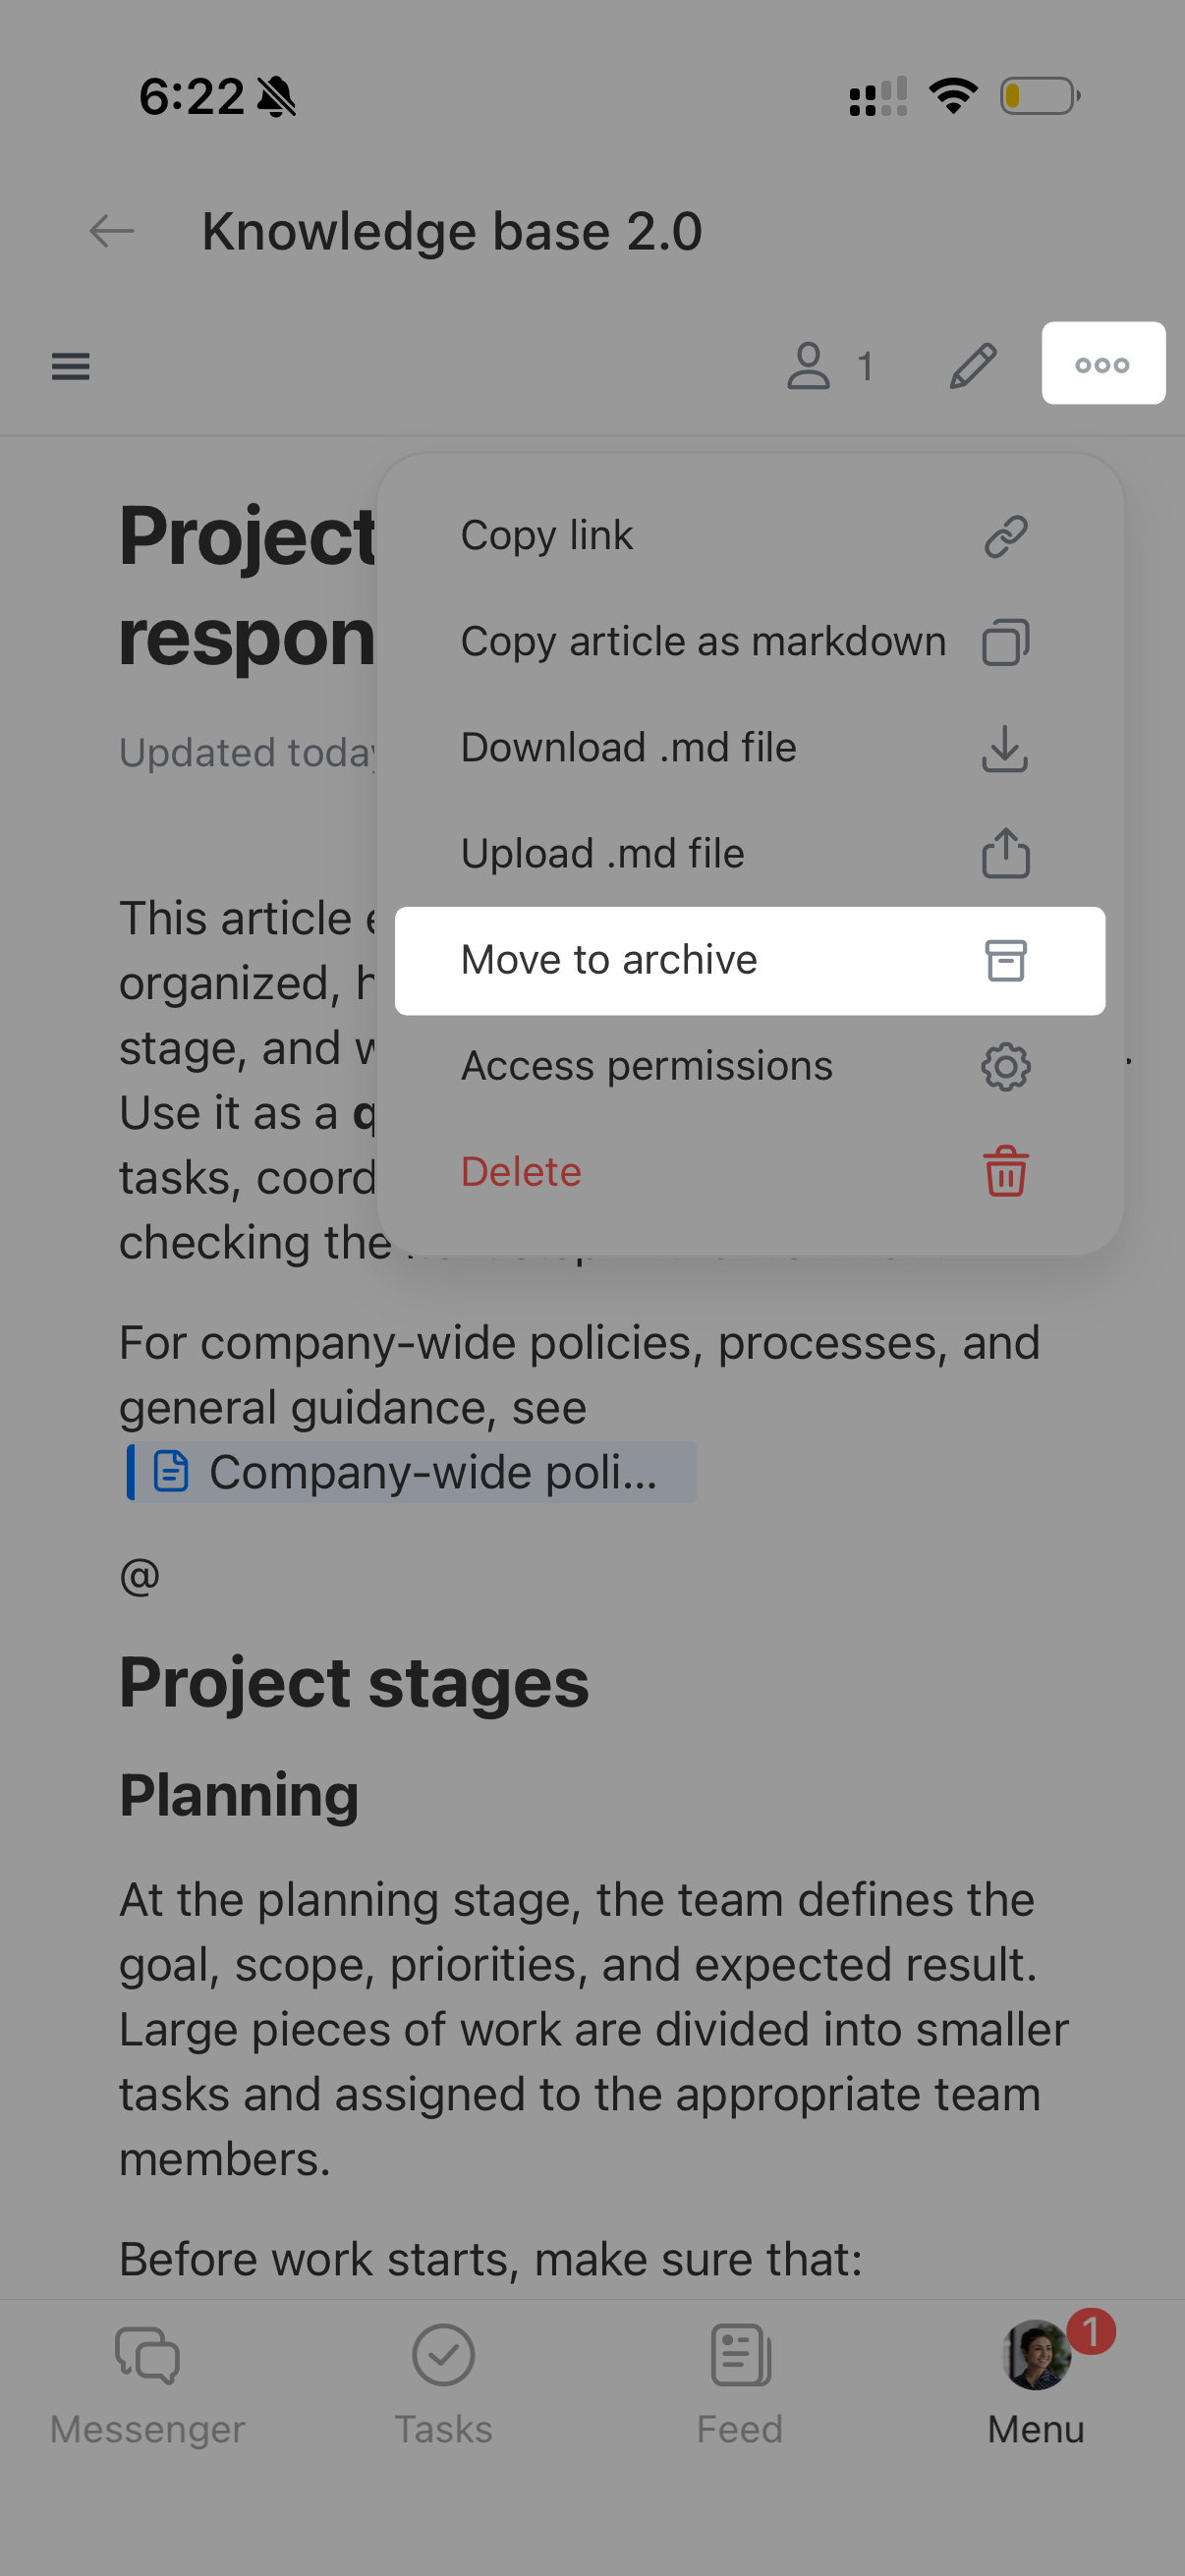
Archive an article.
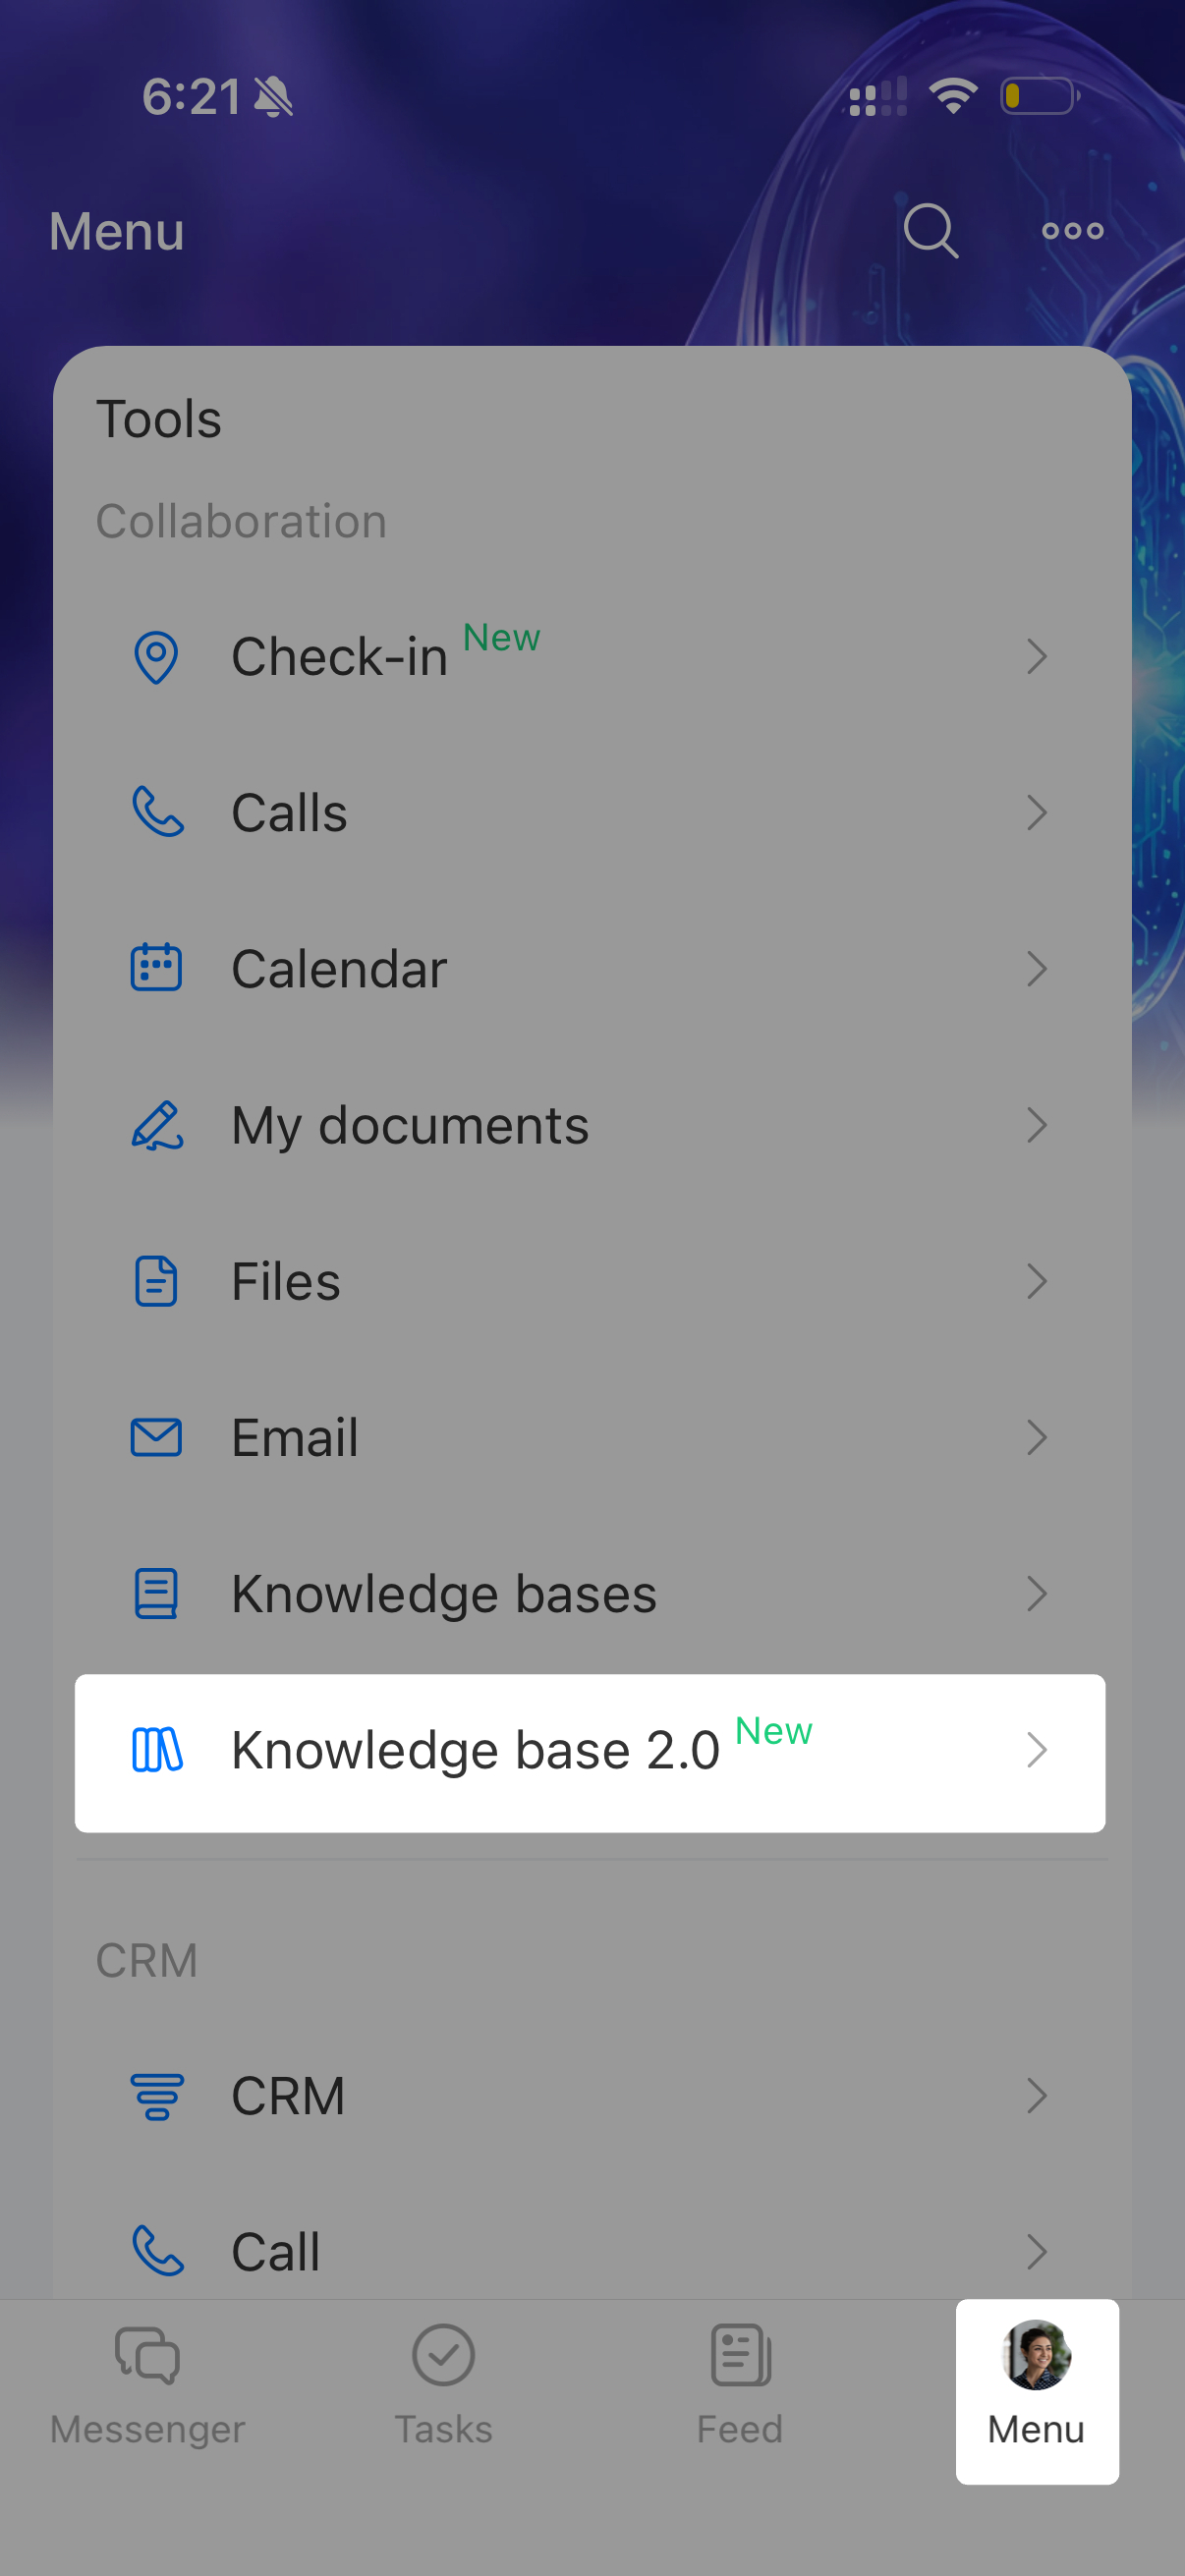
- In the lower-right corner, tap Menu > Knowledge base 2.0.
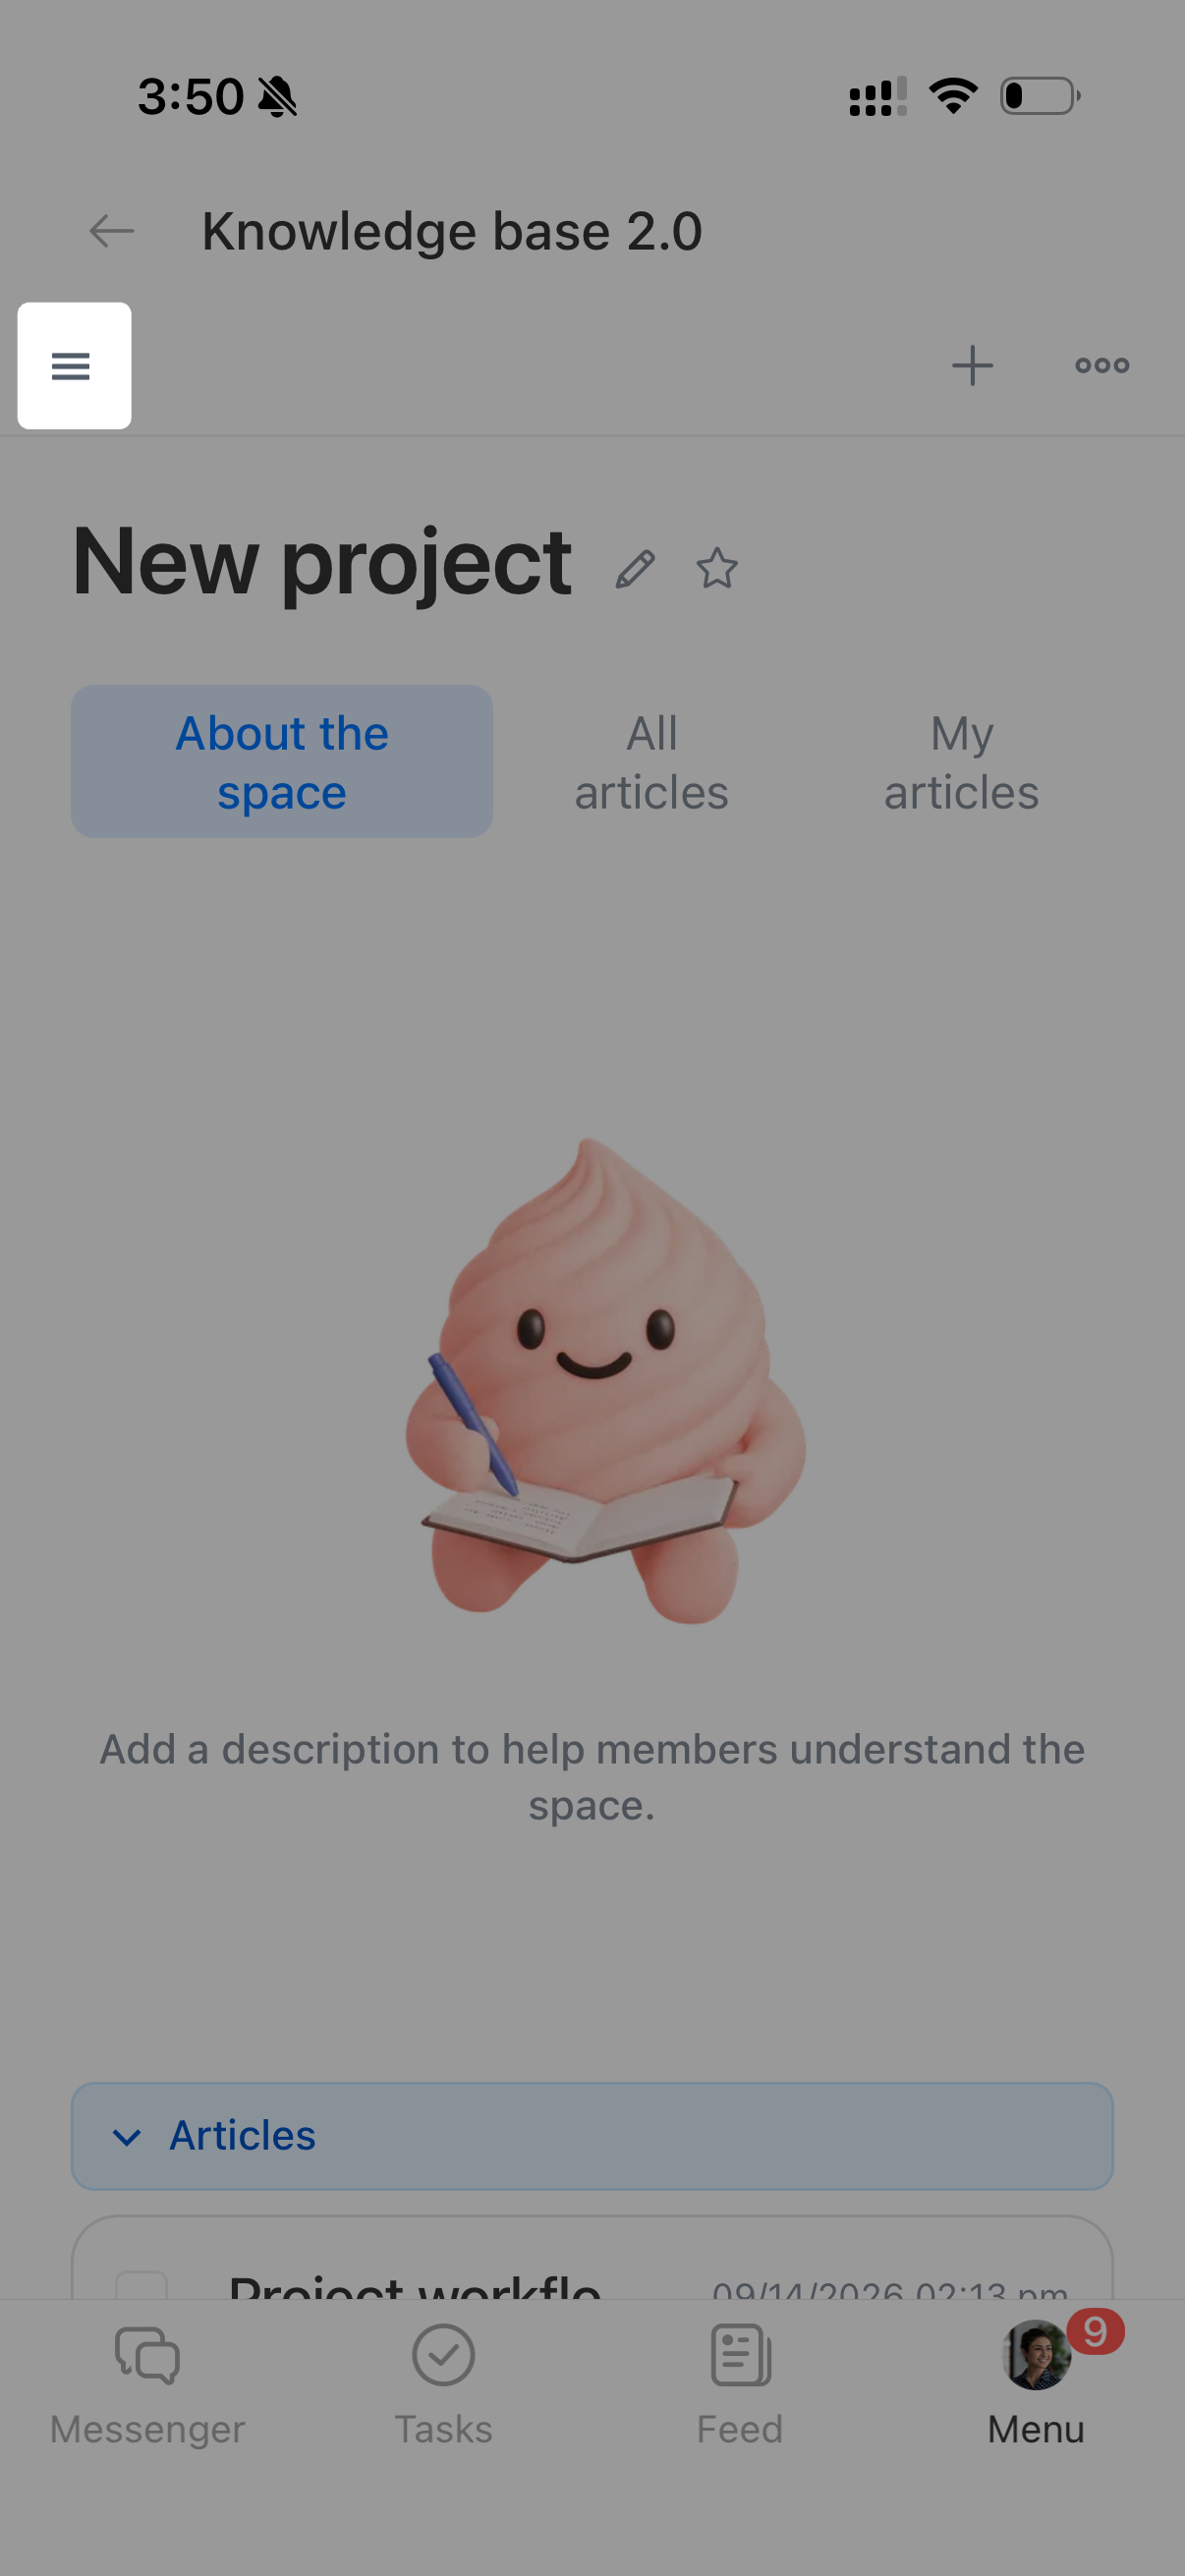
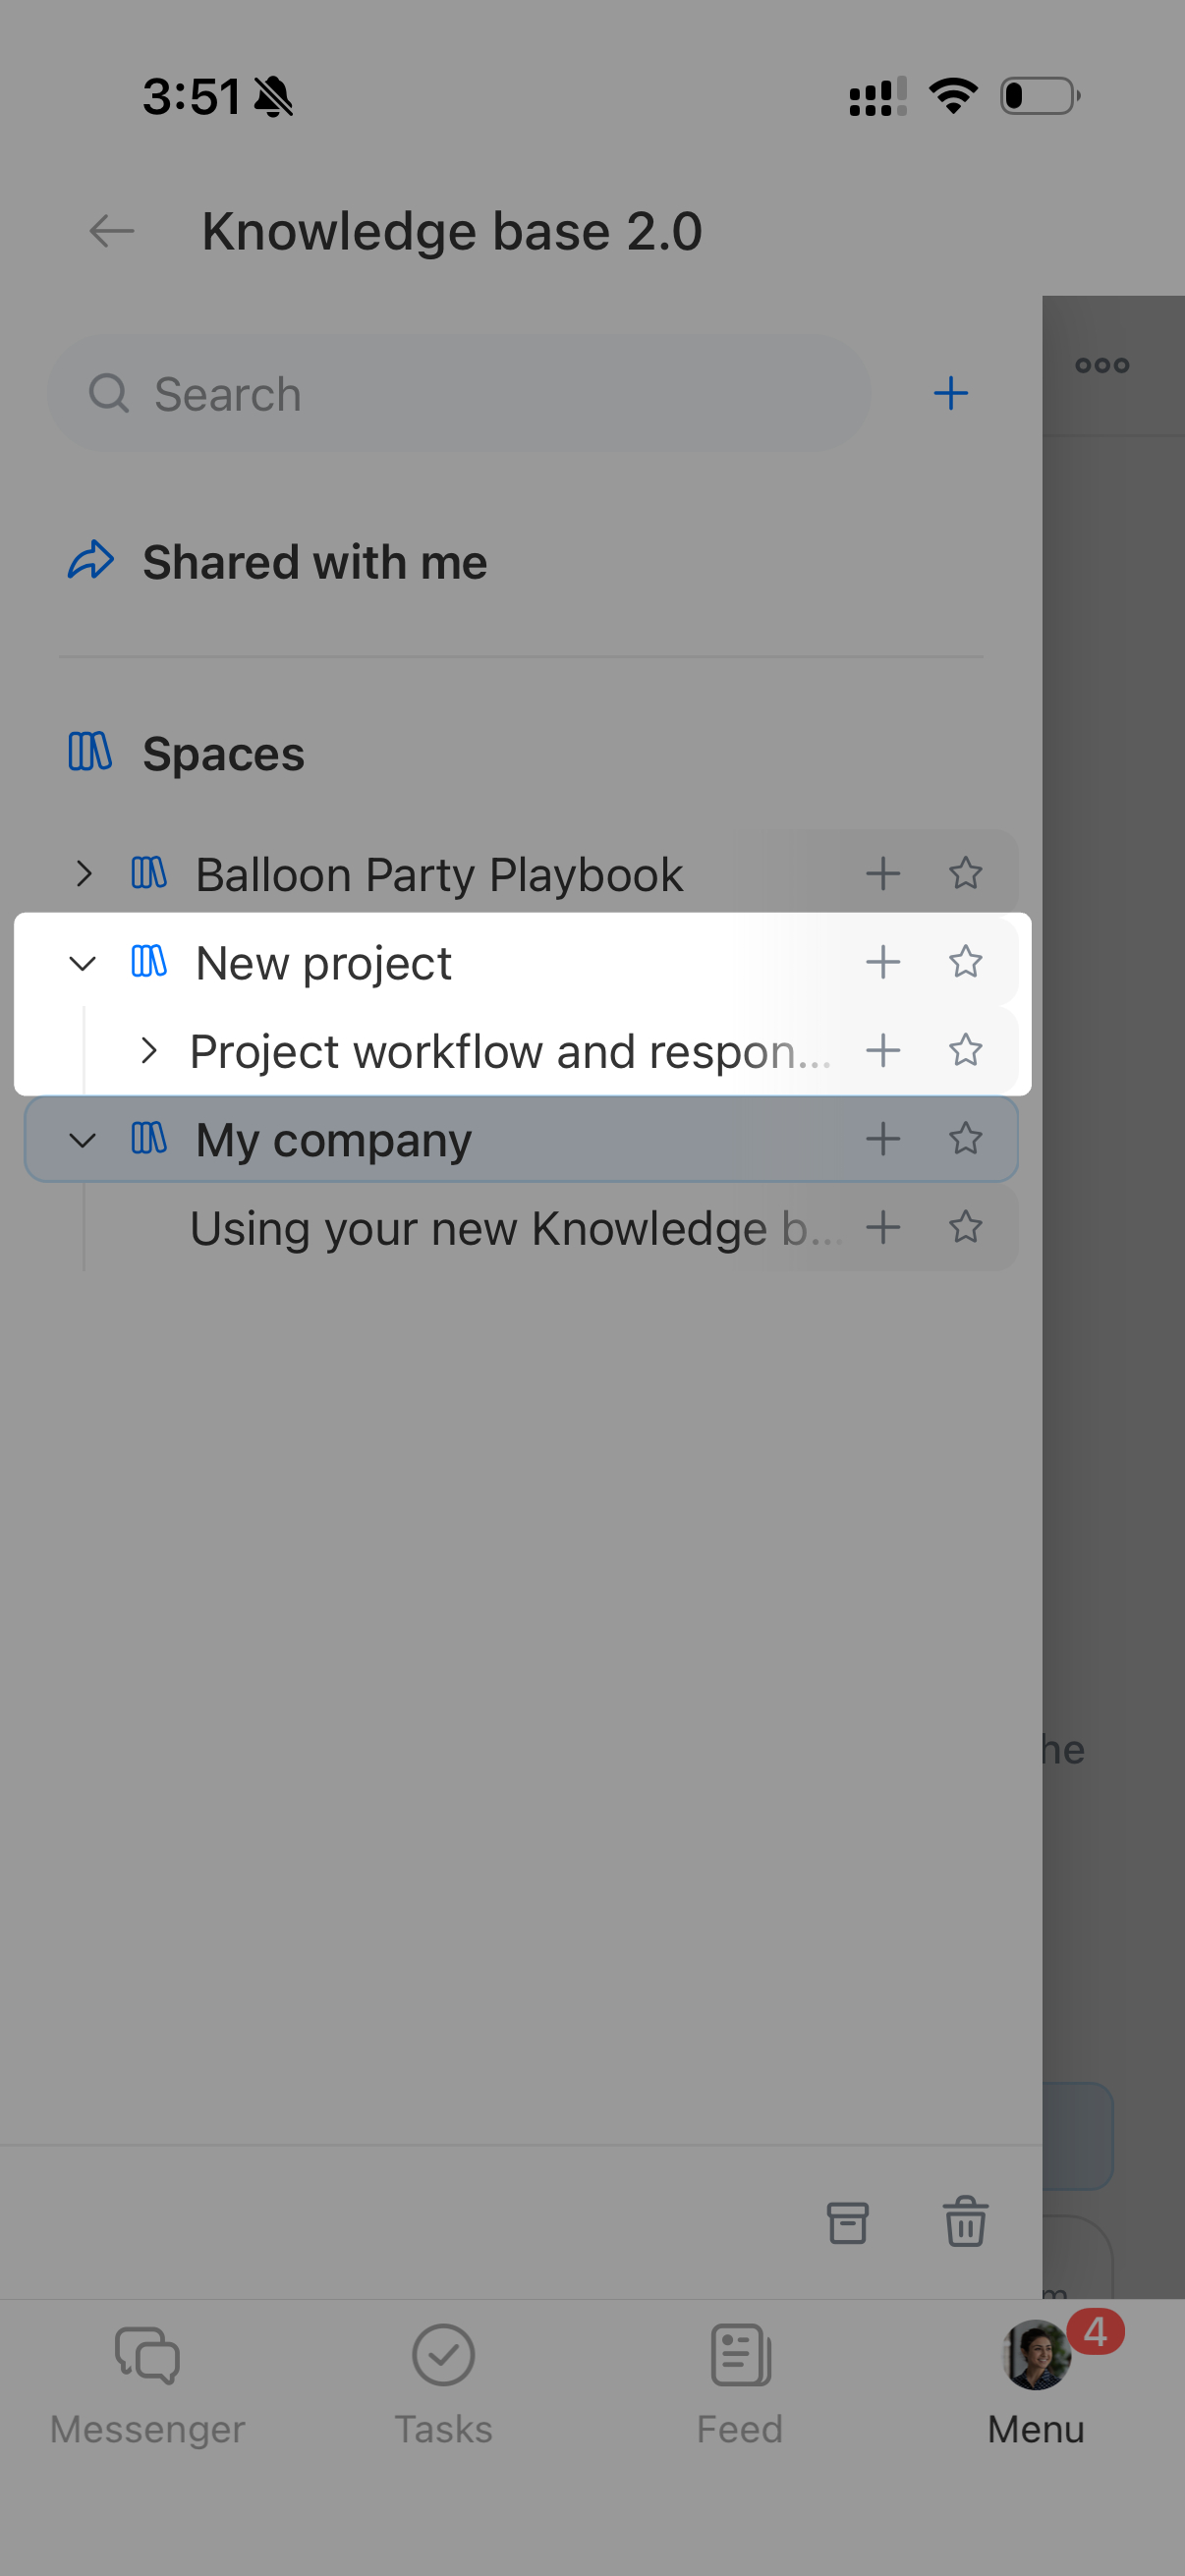
- In the upper-left corner, tap Menu (☰) and open a space or article.
- In the upper-right corner, tap Three dots (...) > Archive.
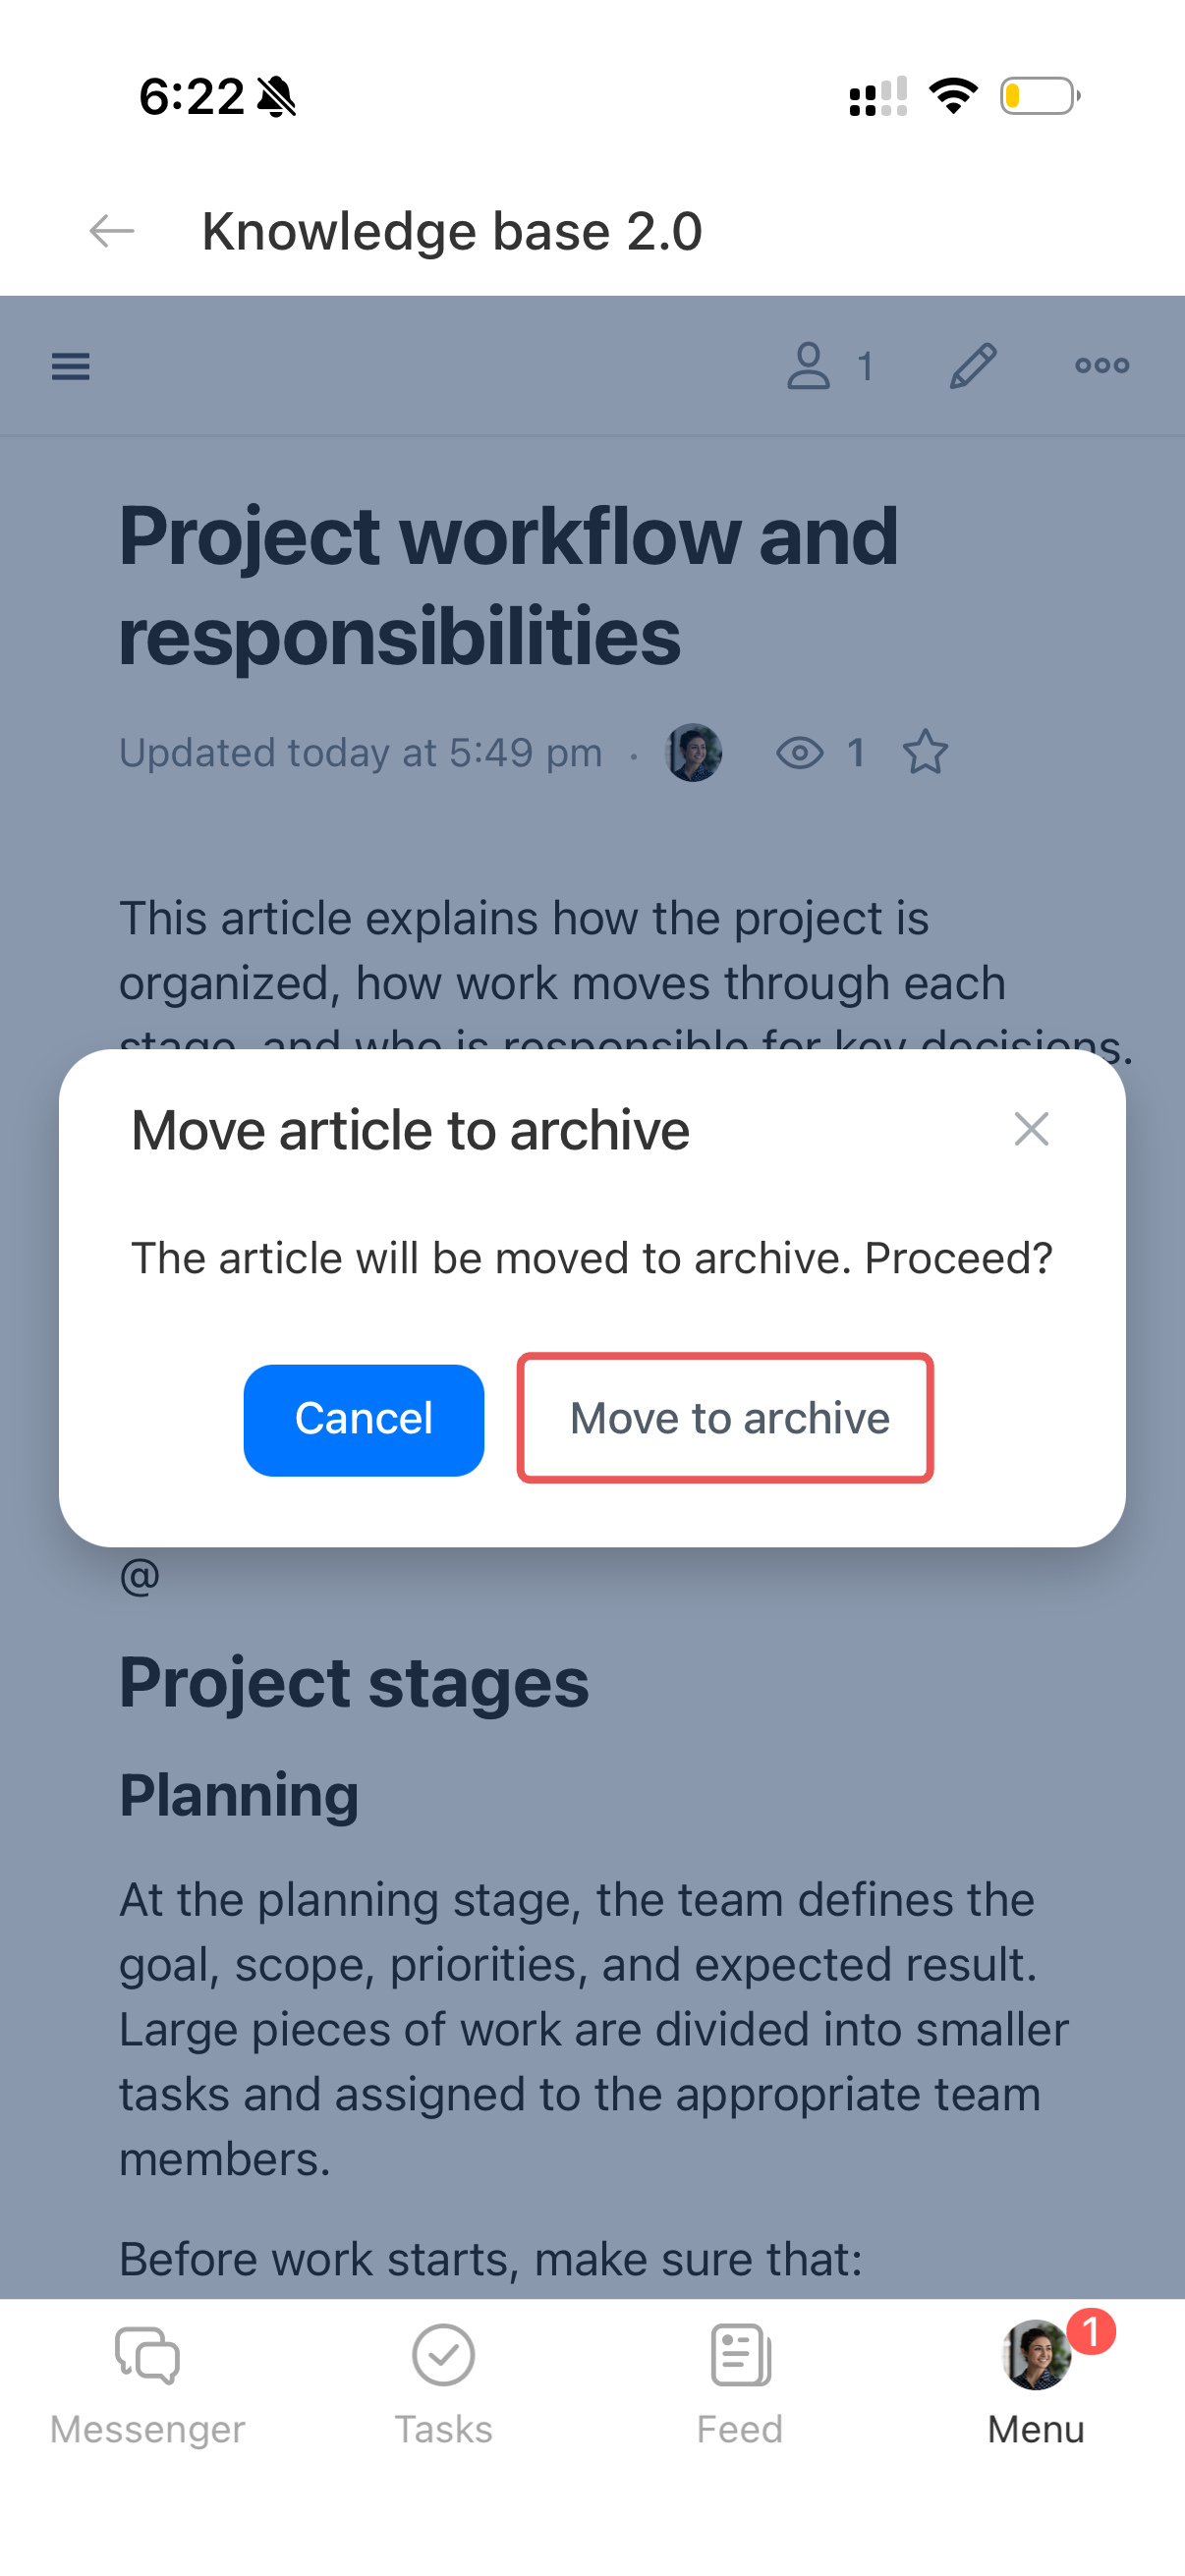
- If the article has nested articles, select Also archive child articles to move the entire branch to the Archive. If you don't select this option, only the selected article moves to the Archive. Its nested articles remain in the space and move up one level.
- Confirm the action.
Restore or delete an article.
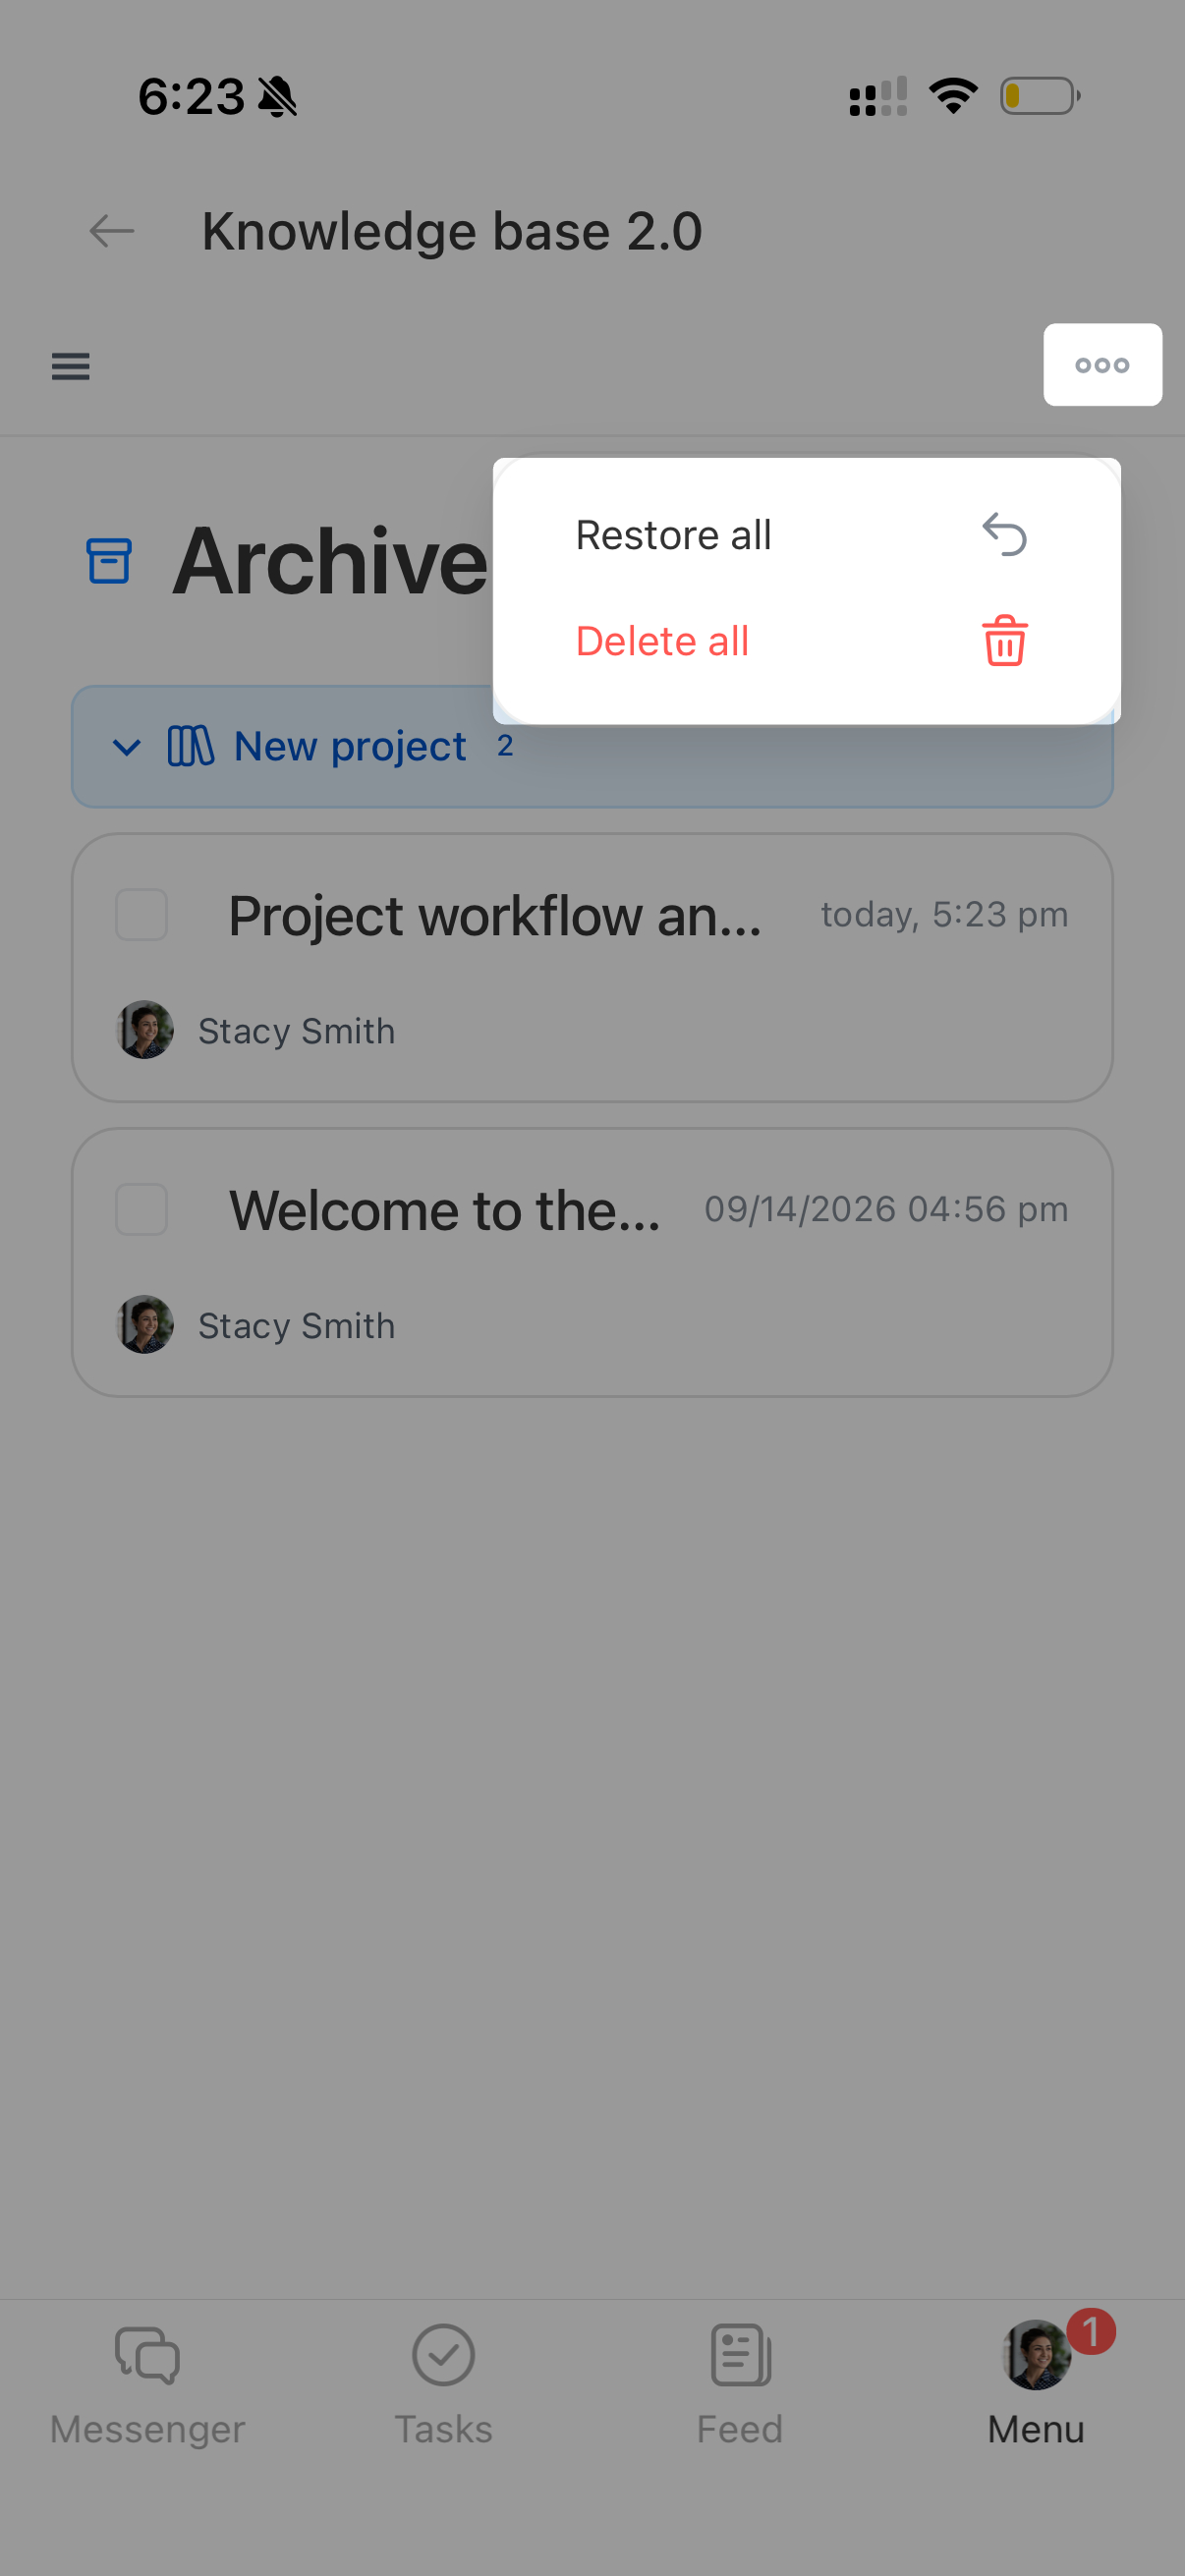
- In the upper-left corner, tap Menu (☰) > Move to archive.
- To manage all archived articles, tap Three dots (...) in the upper-right corner. Select Restore all or Delete all and confirm the action.
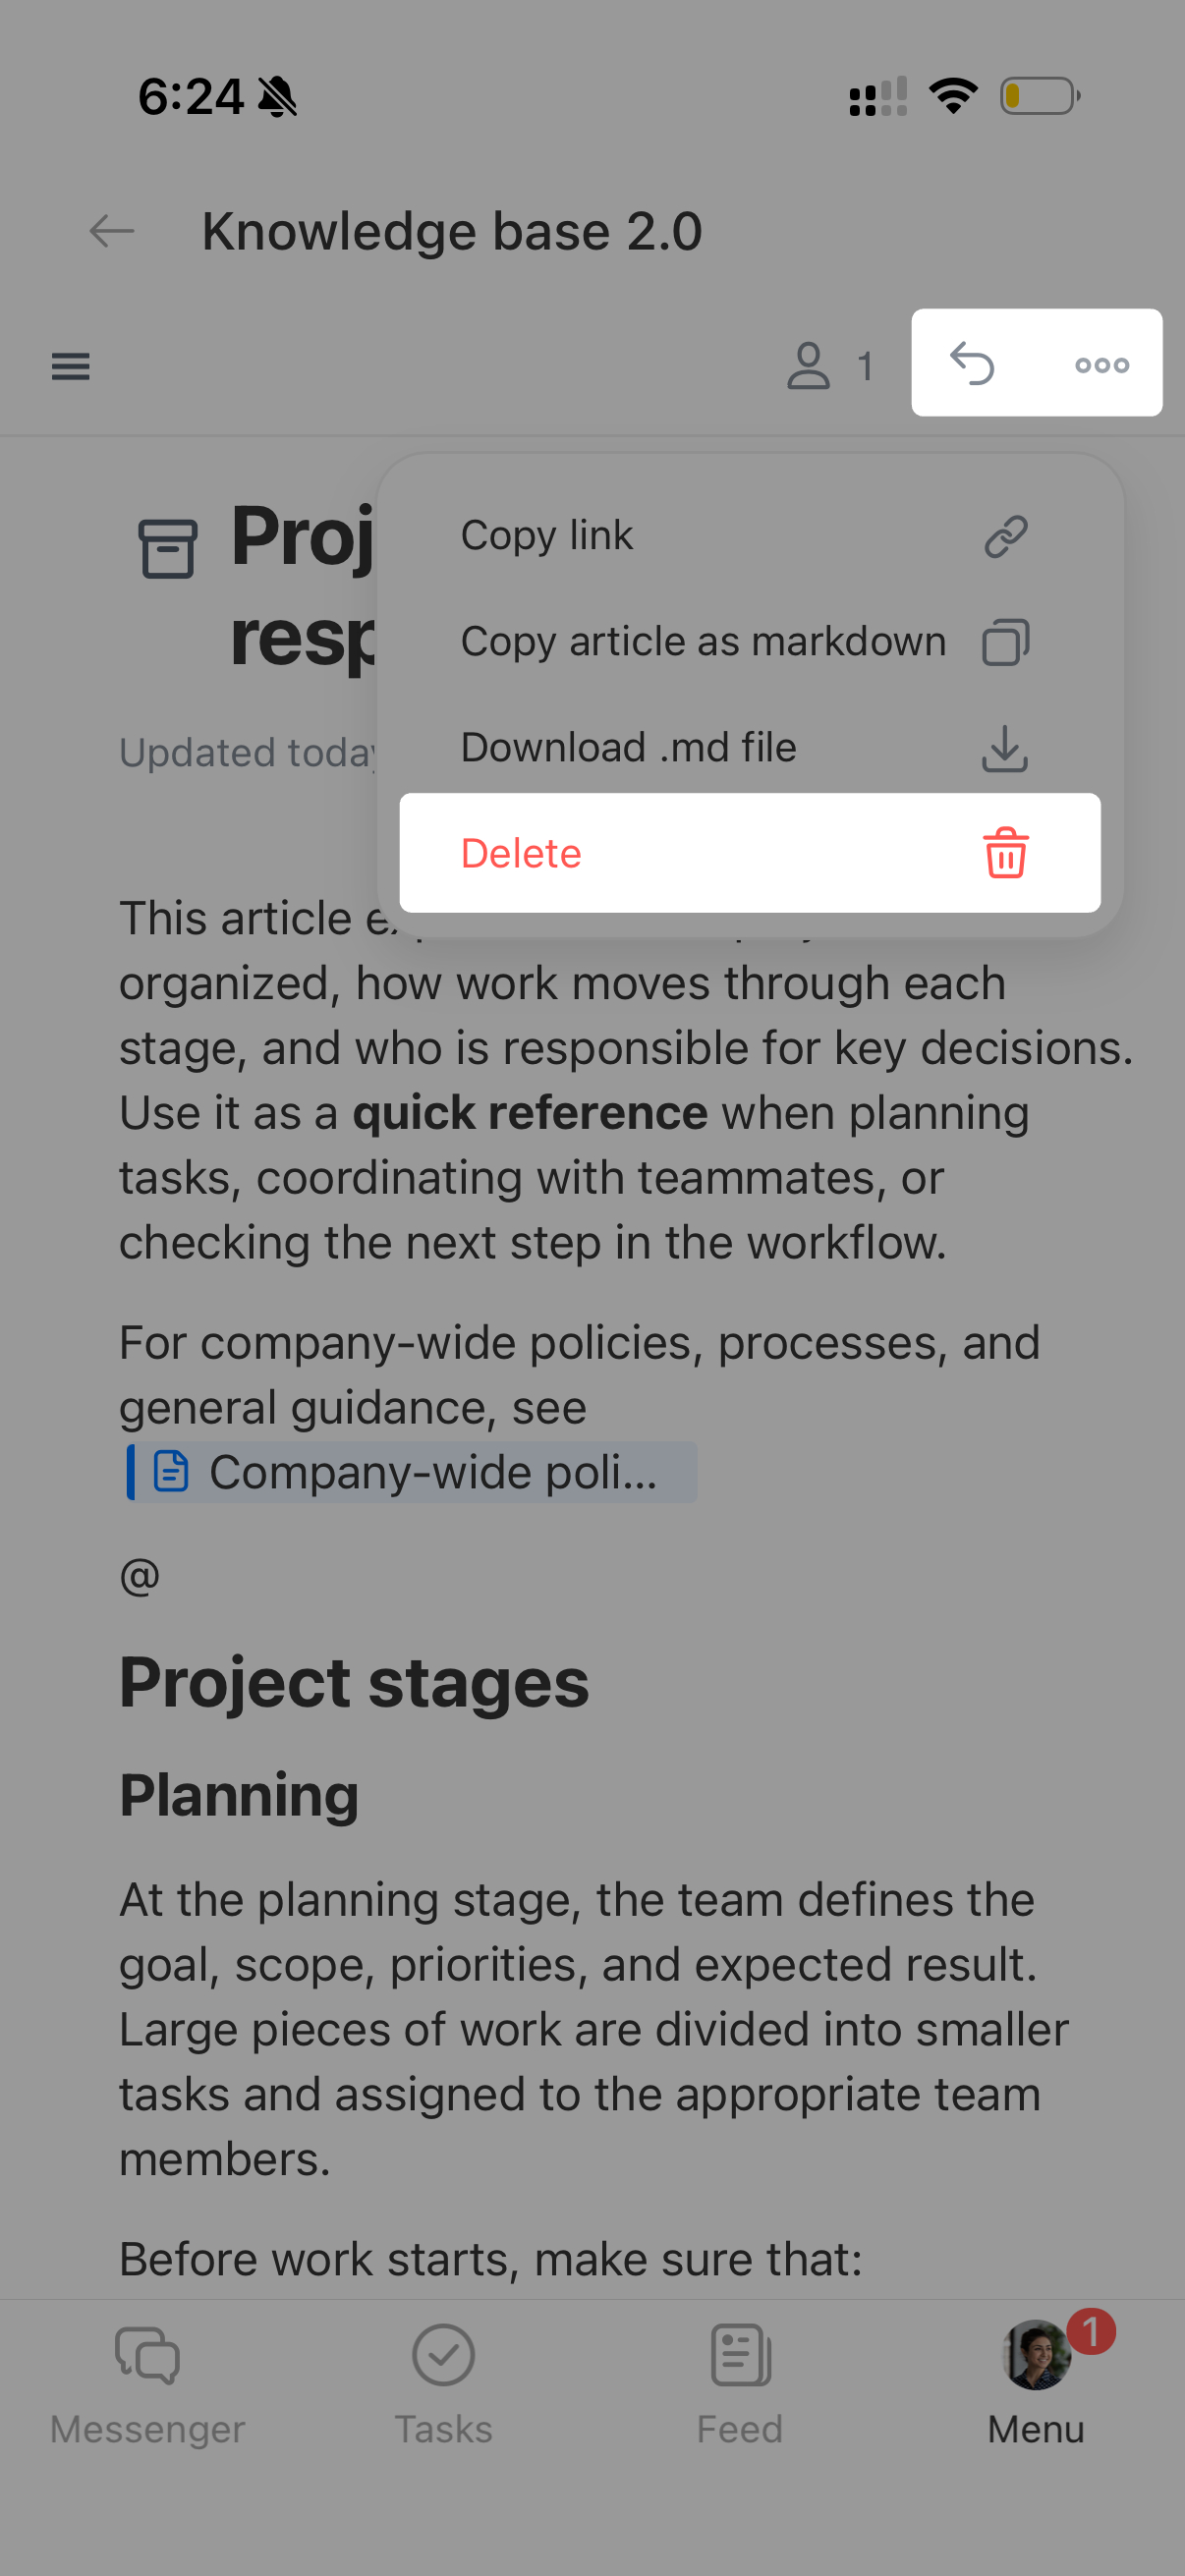
- To manage an individual article, open it and tap the arrow to restore or Three dots (...) > Delete. Confirm the action.
Work with the Recycle Bin
Delete a space or article when you no longer need it. A space is deleted immediately, while its articles, both archived and active, move separately to the Recycle Bin section, which shows the space each item belongs to. You can restore materials within 30 days. After that, they become unavailable.
- Employees with edit permission can move articles to the Recycle Bin.
- Employees with administration permission can restore and permanently delete items.
- If a space was deleted, its creator or the employee who deleted it can restore an article.
- View permission lets you open, copy, and download deleted articles in .md format.
Move an article to the Recycle Bin.
- In the menu on the left, go to Knowledge base 2.0.
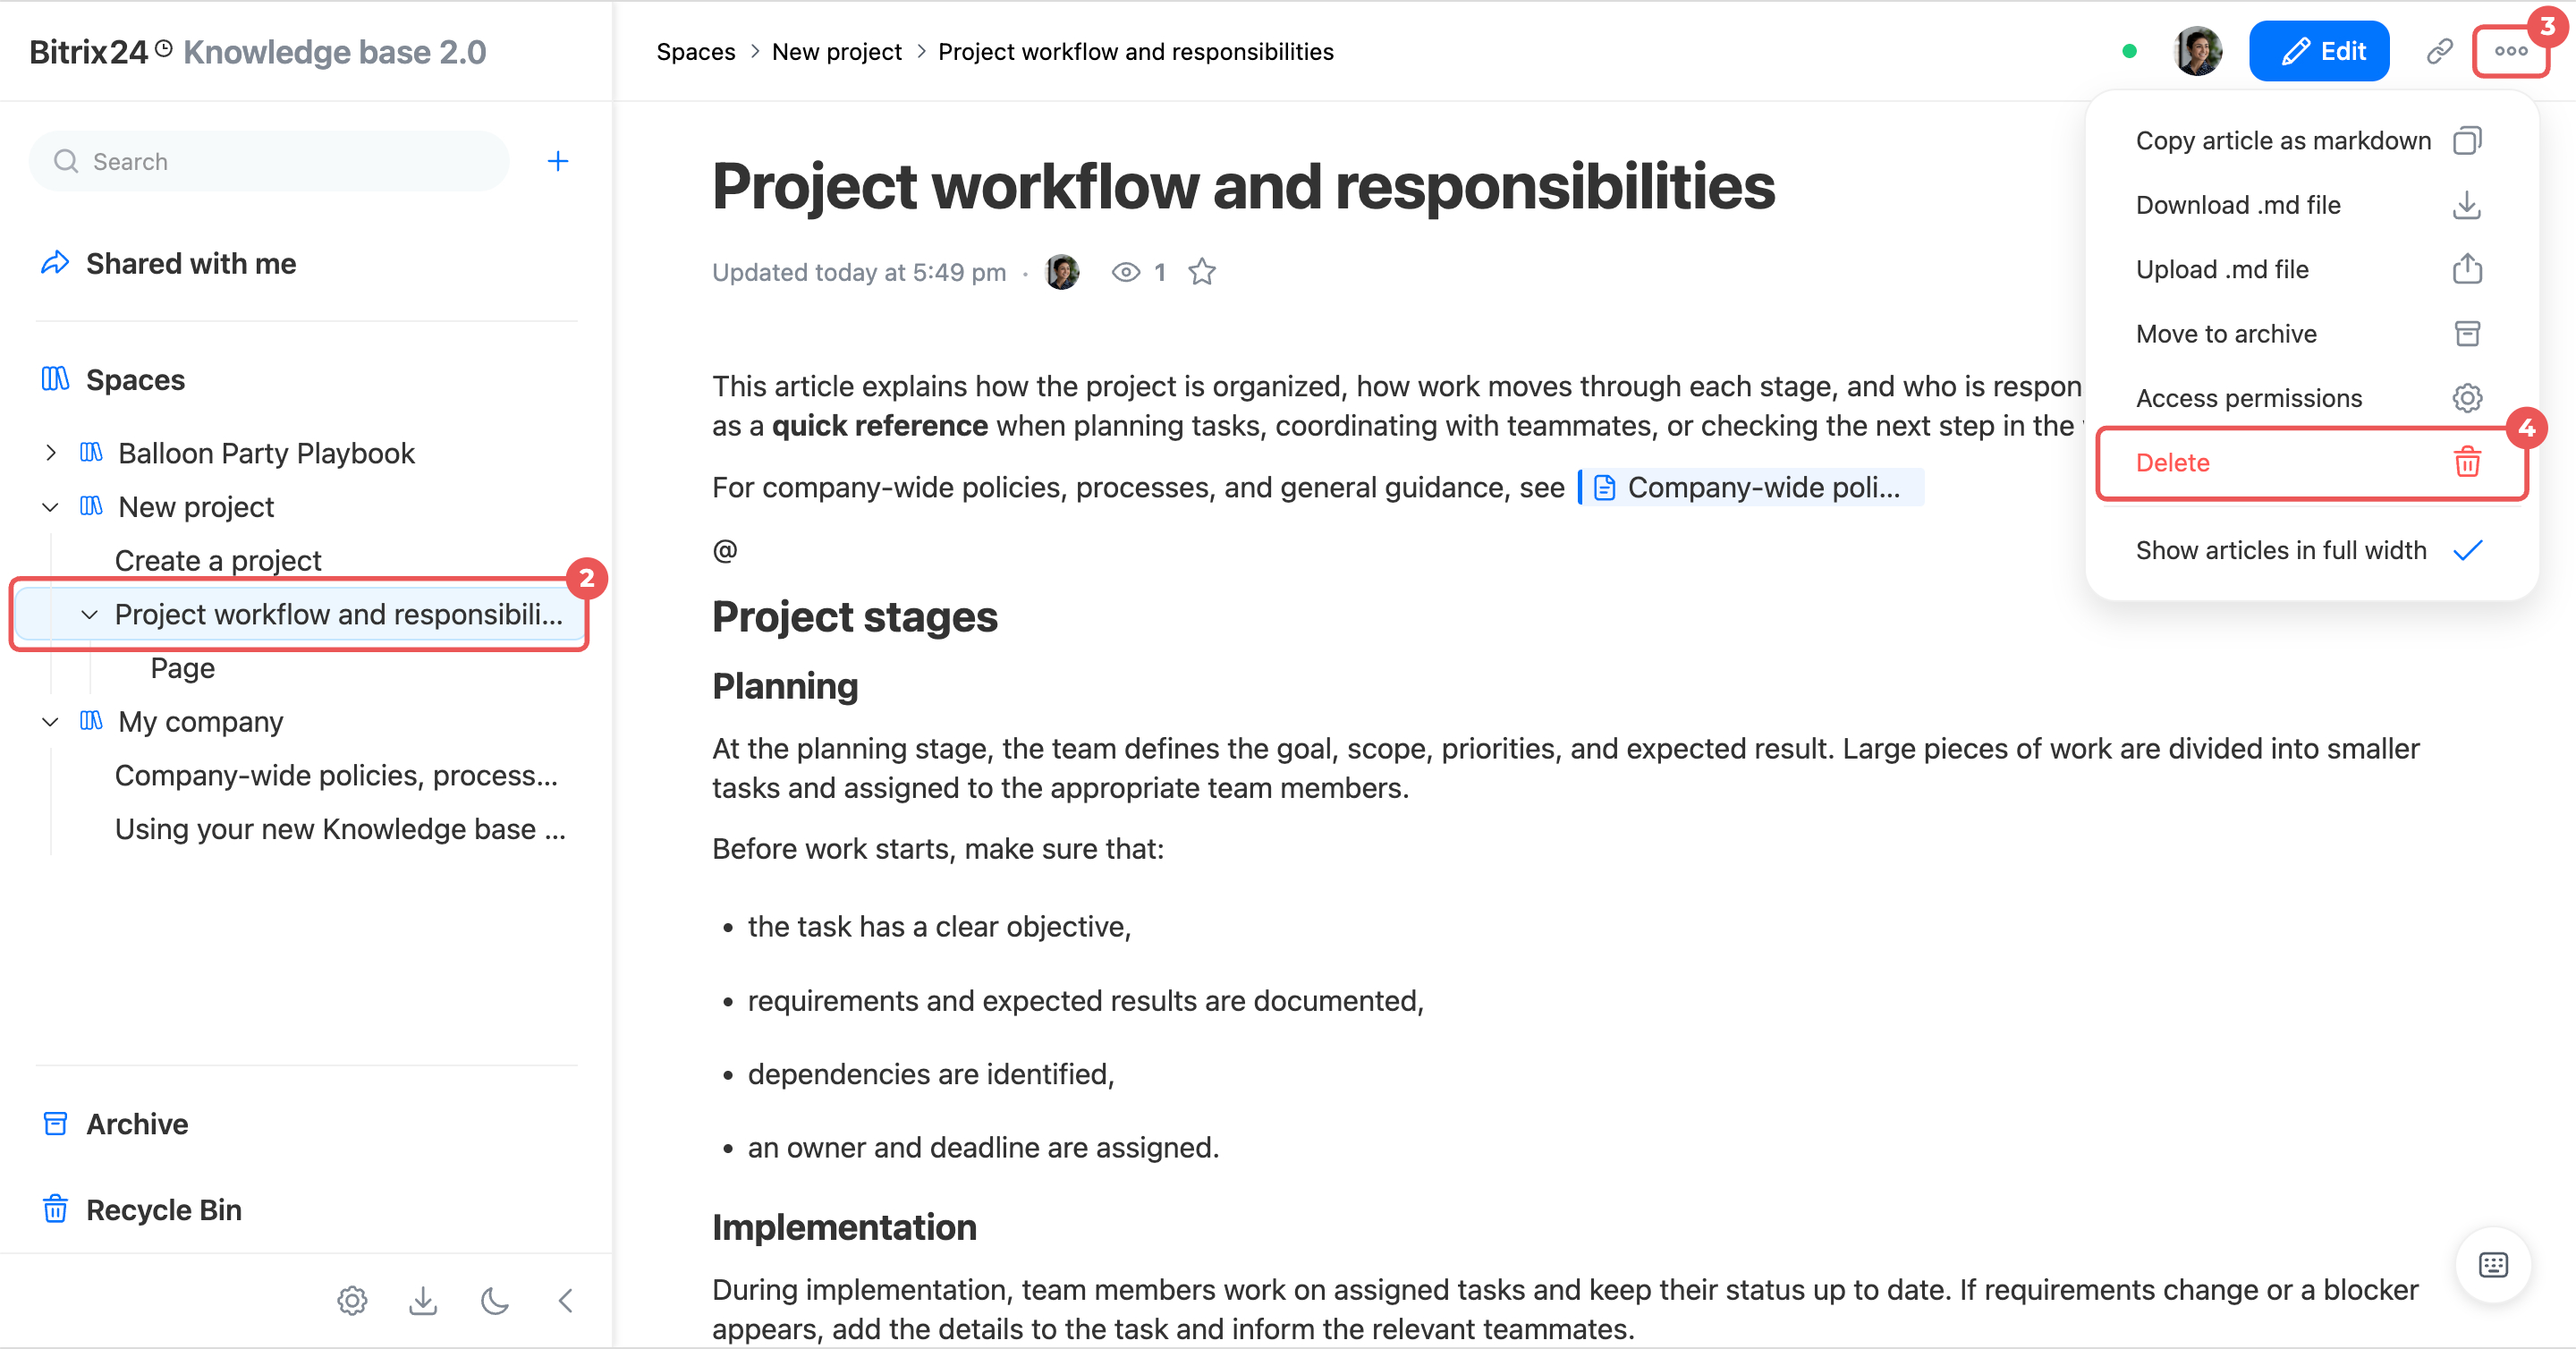
- Open a space or article and click Three dots (...) > Delete.
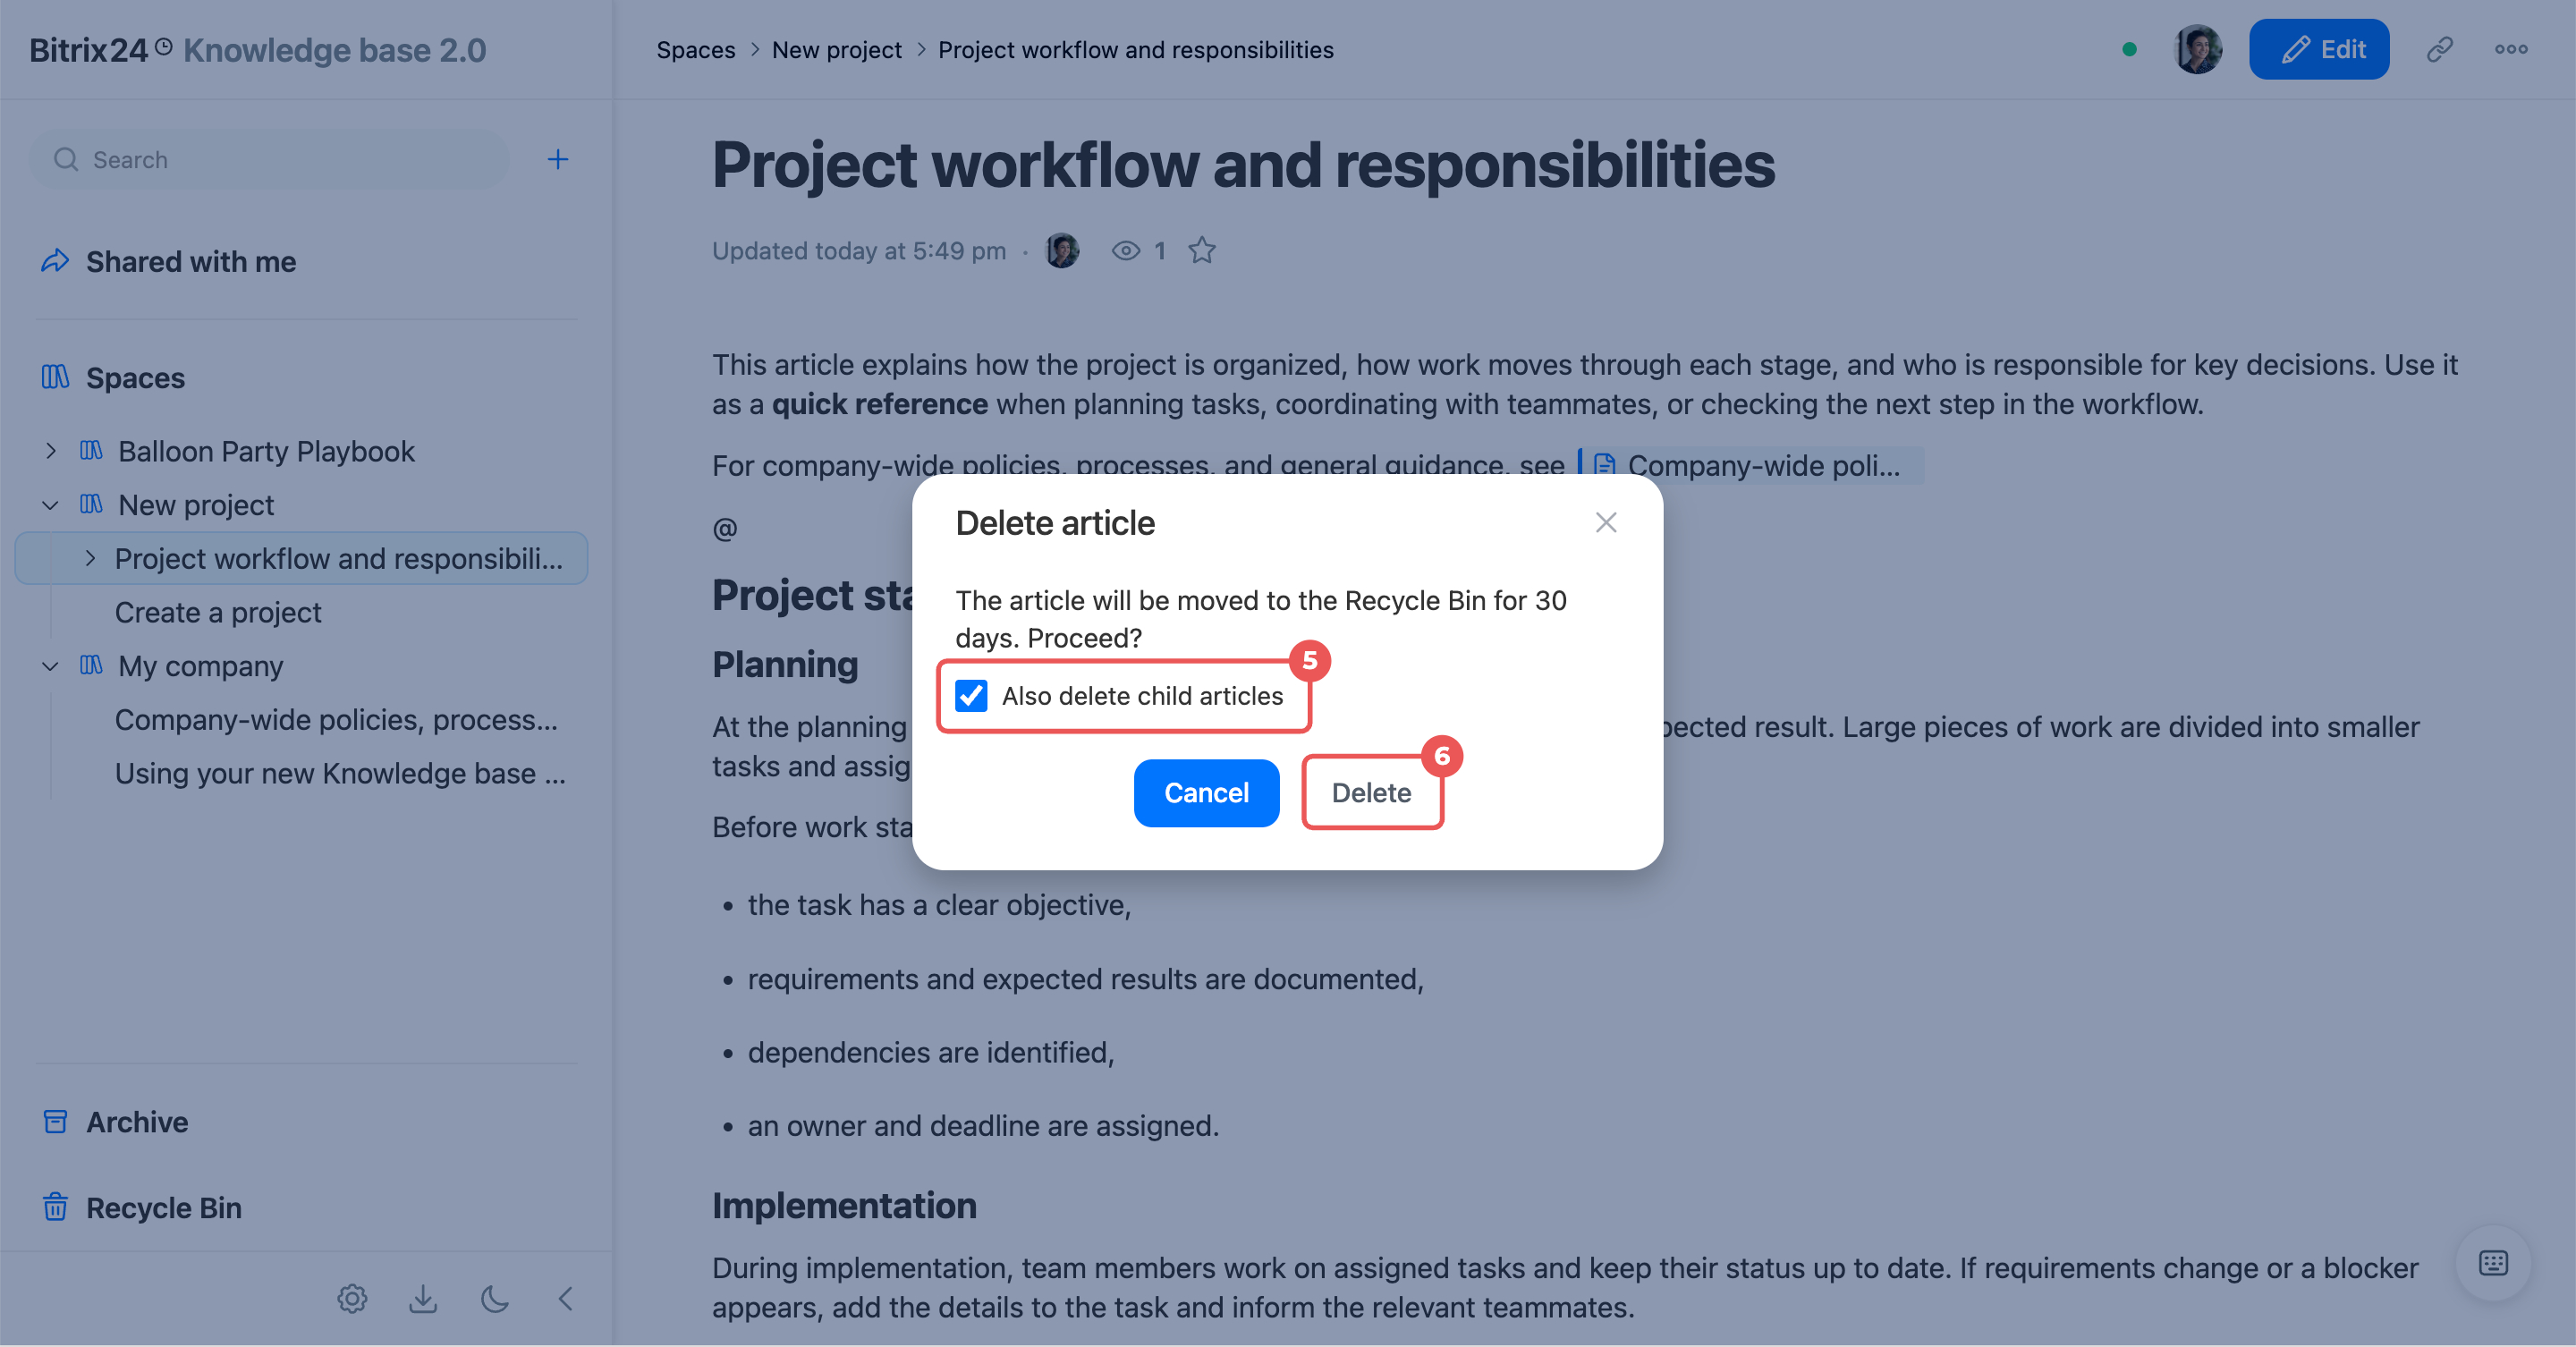
- If the article has nested articles, select Also delete child articles to move the entire branch to the Recycle Bin. If you don't select this option, only the selected article is deleted. Its nested articles remain in the space and move up one level.
- Confirm the action. If you delete a space, the next available space opens. If none are available, a page prompts you to create a new one.
Restore or permanently delete an article.
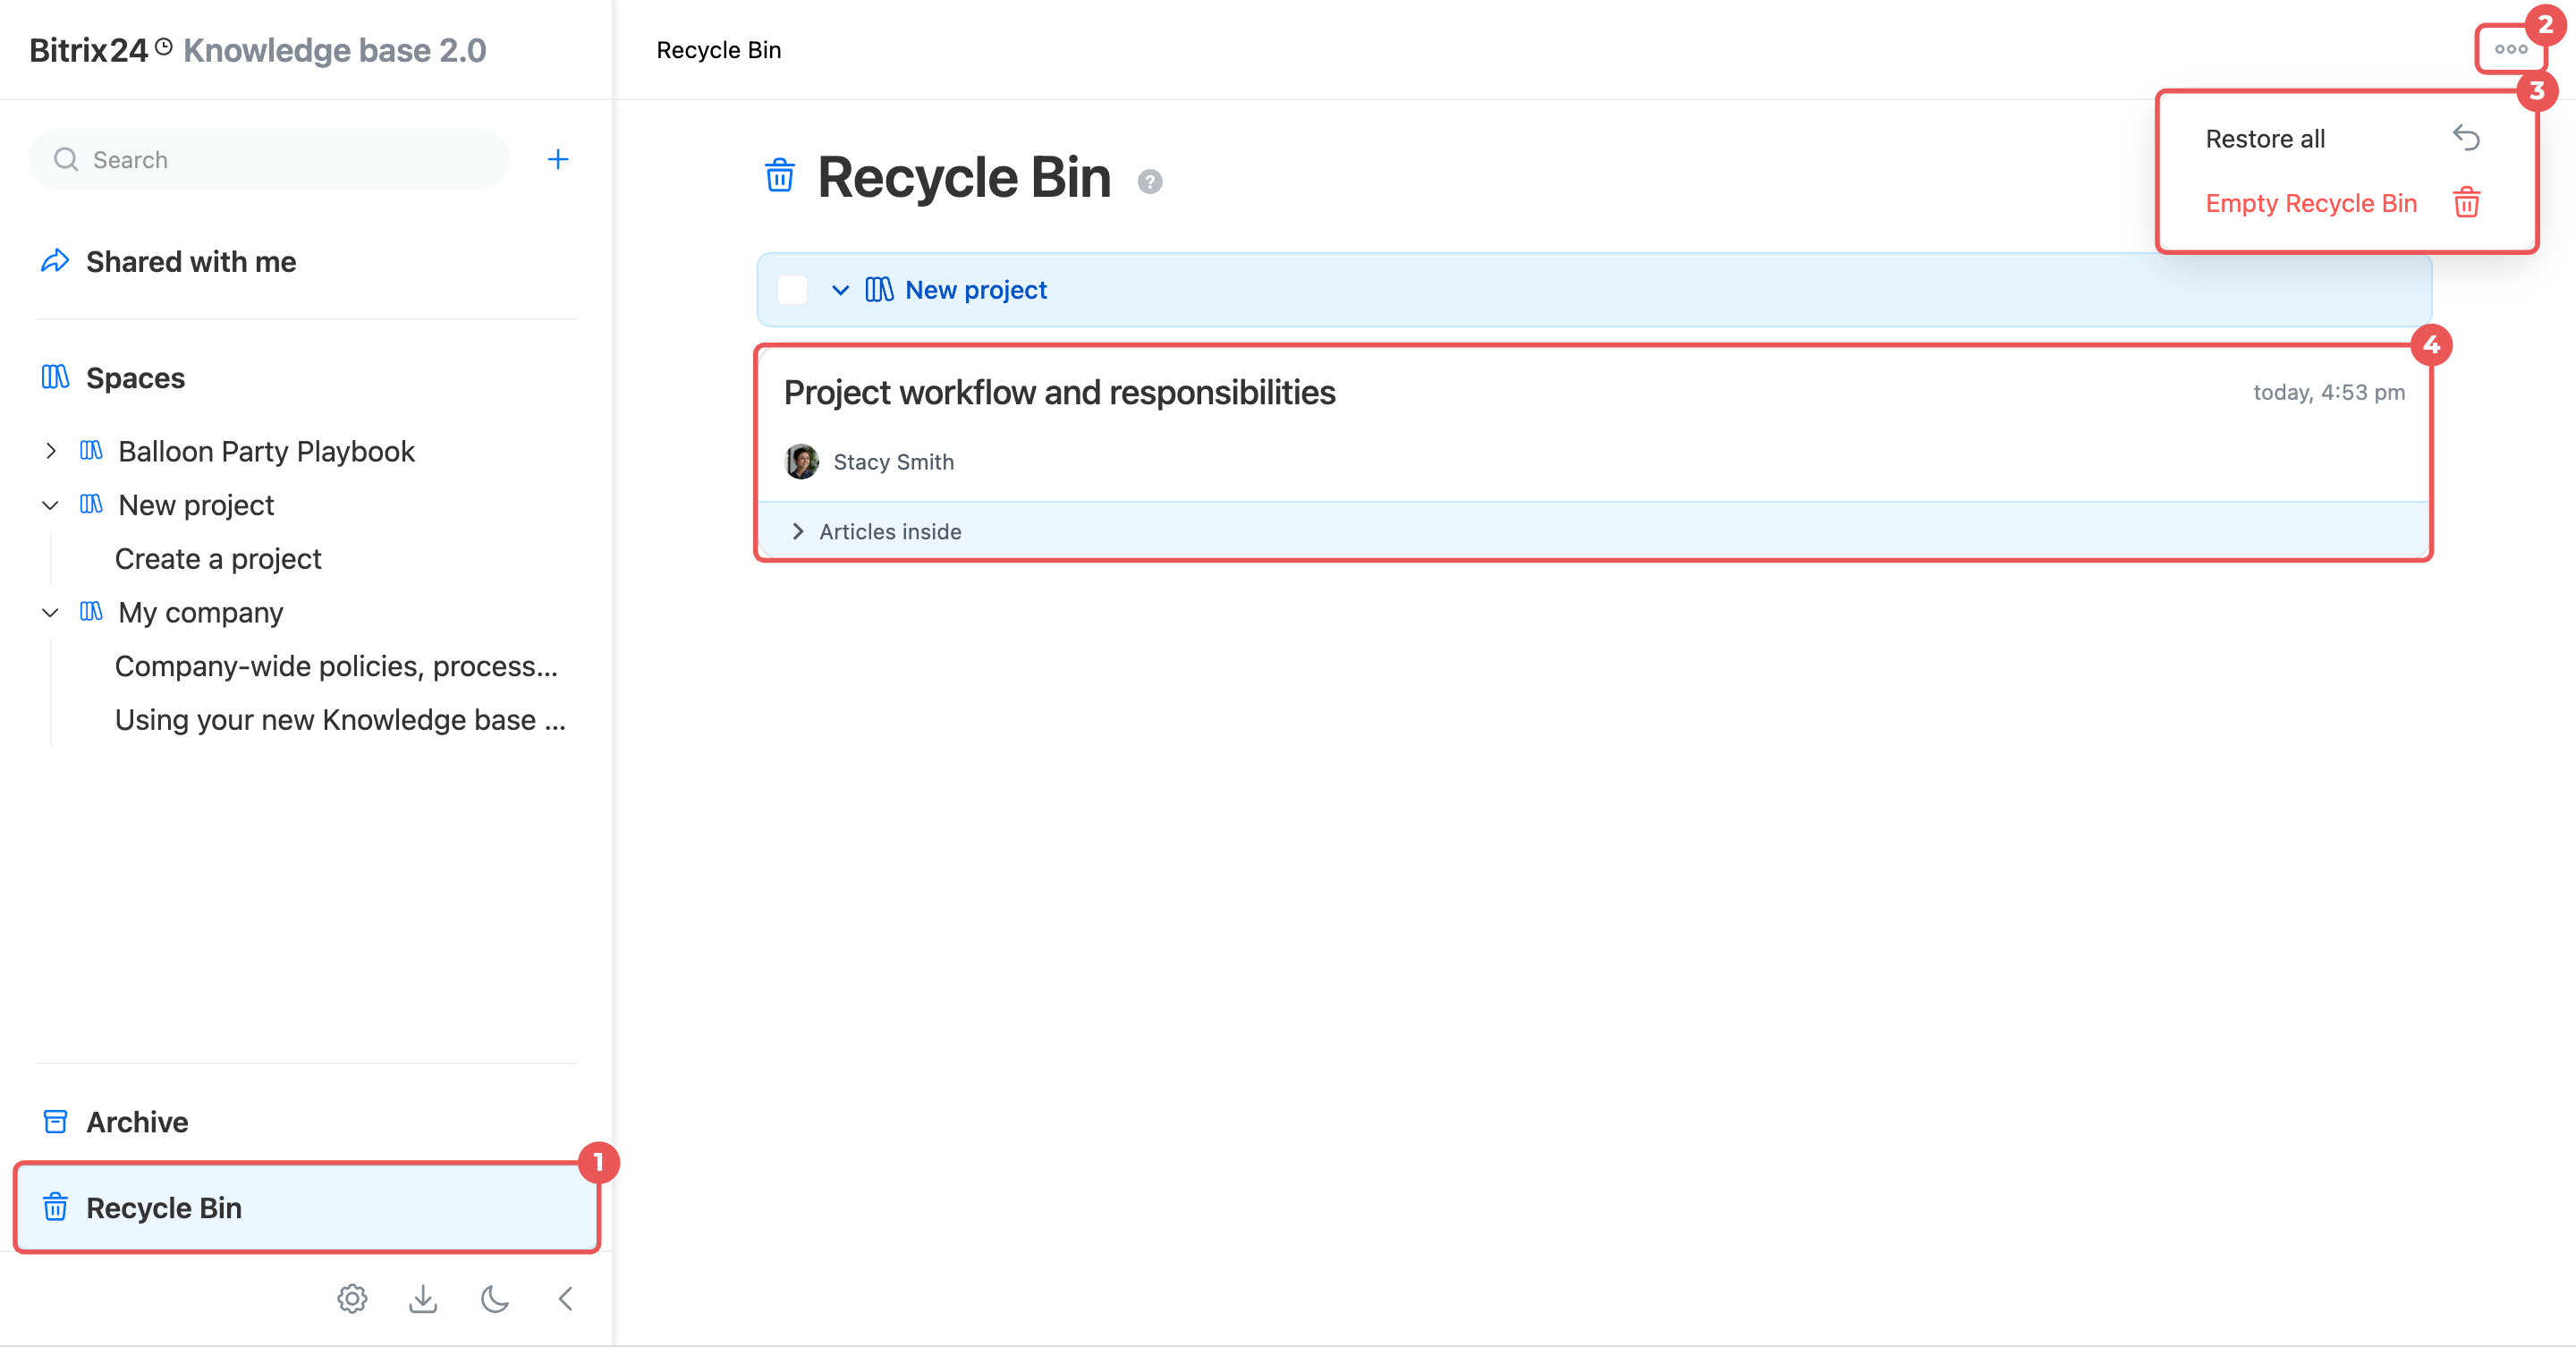
- In the control panel on the left, go to the Recycle Bin section.
- To manage all deleted articles, click Three dots (...) in the upper-right corner and select an action:
- Restore all — Restore all deleted articles and make them available to users again. Their access settings stay the same.
- Empty the Recycle Bin — Permanently delete all articles. Confirm the action.
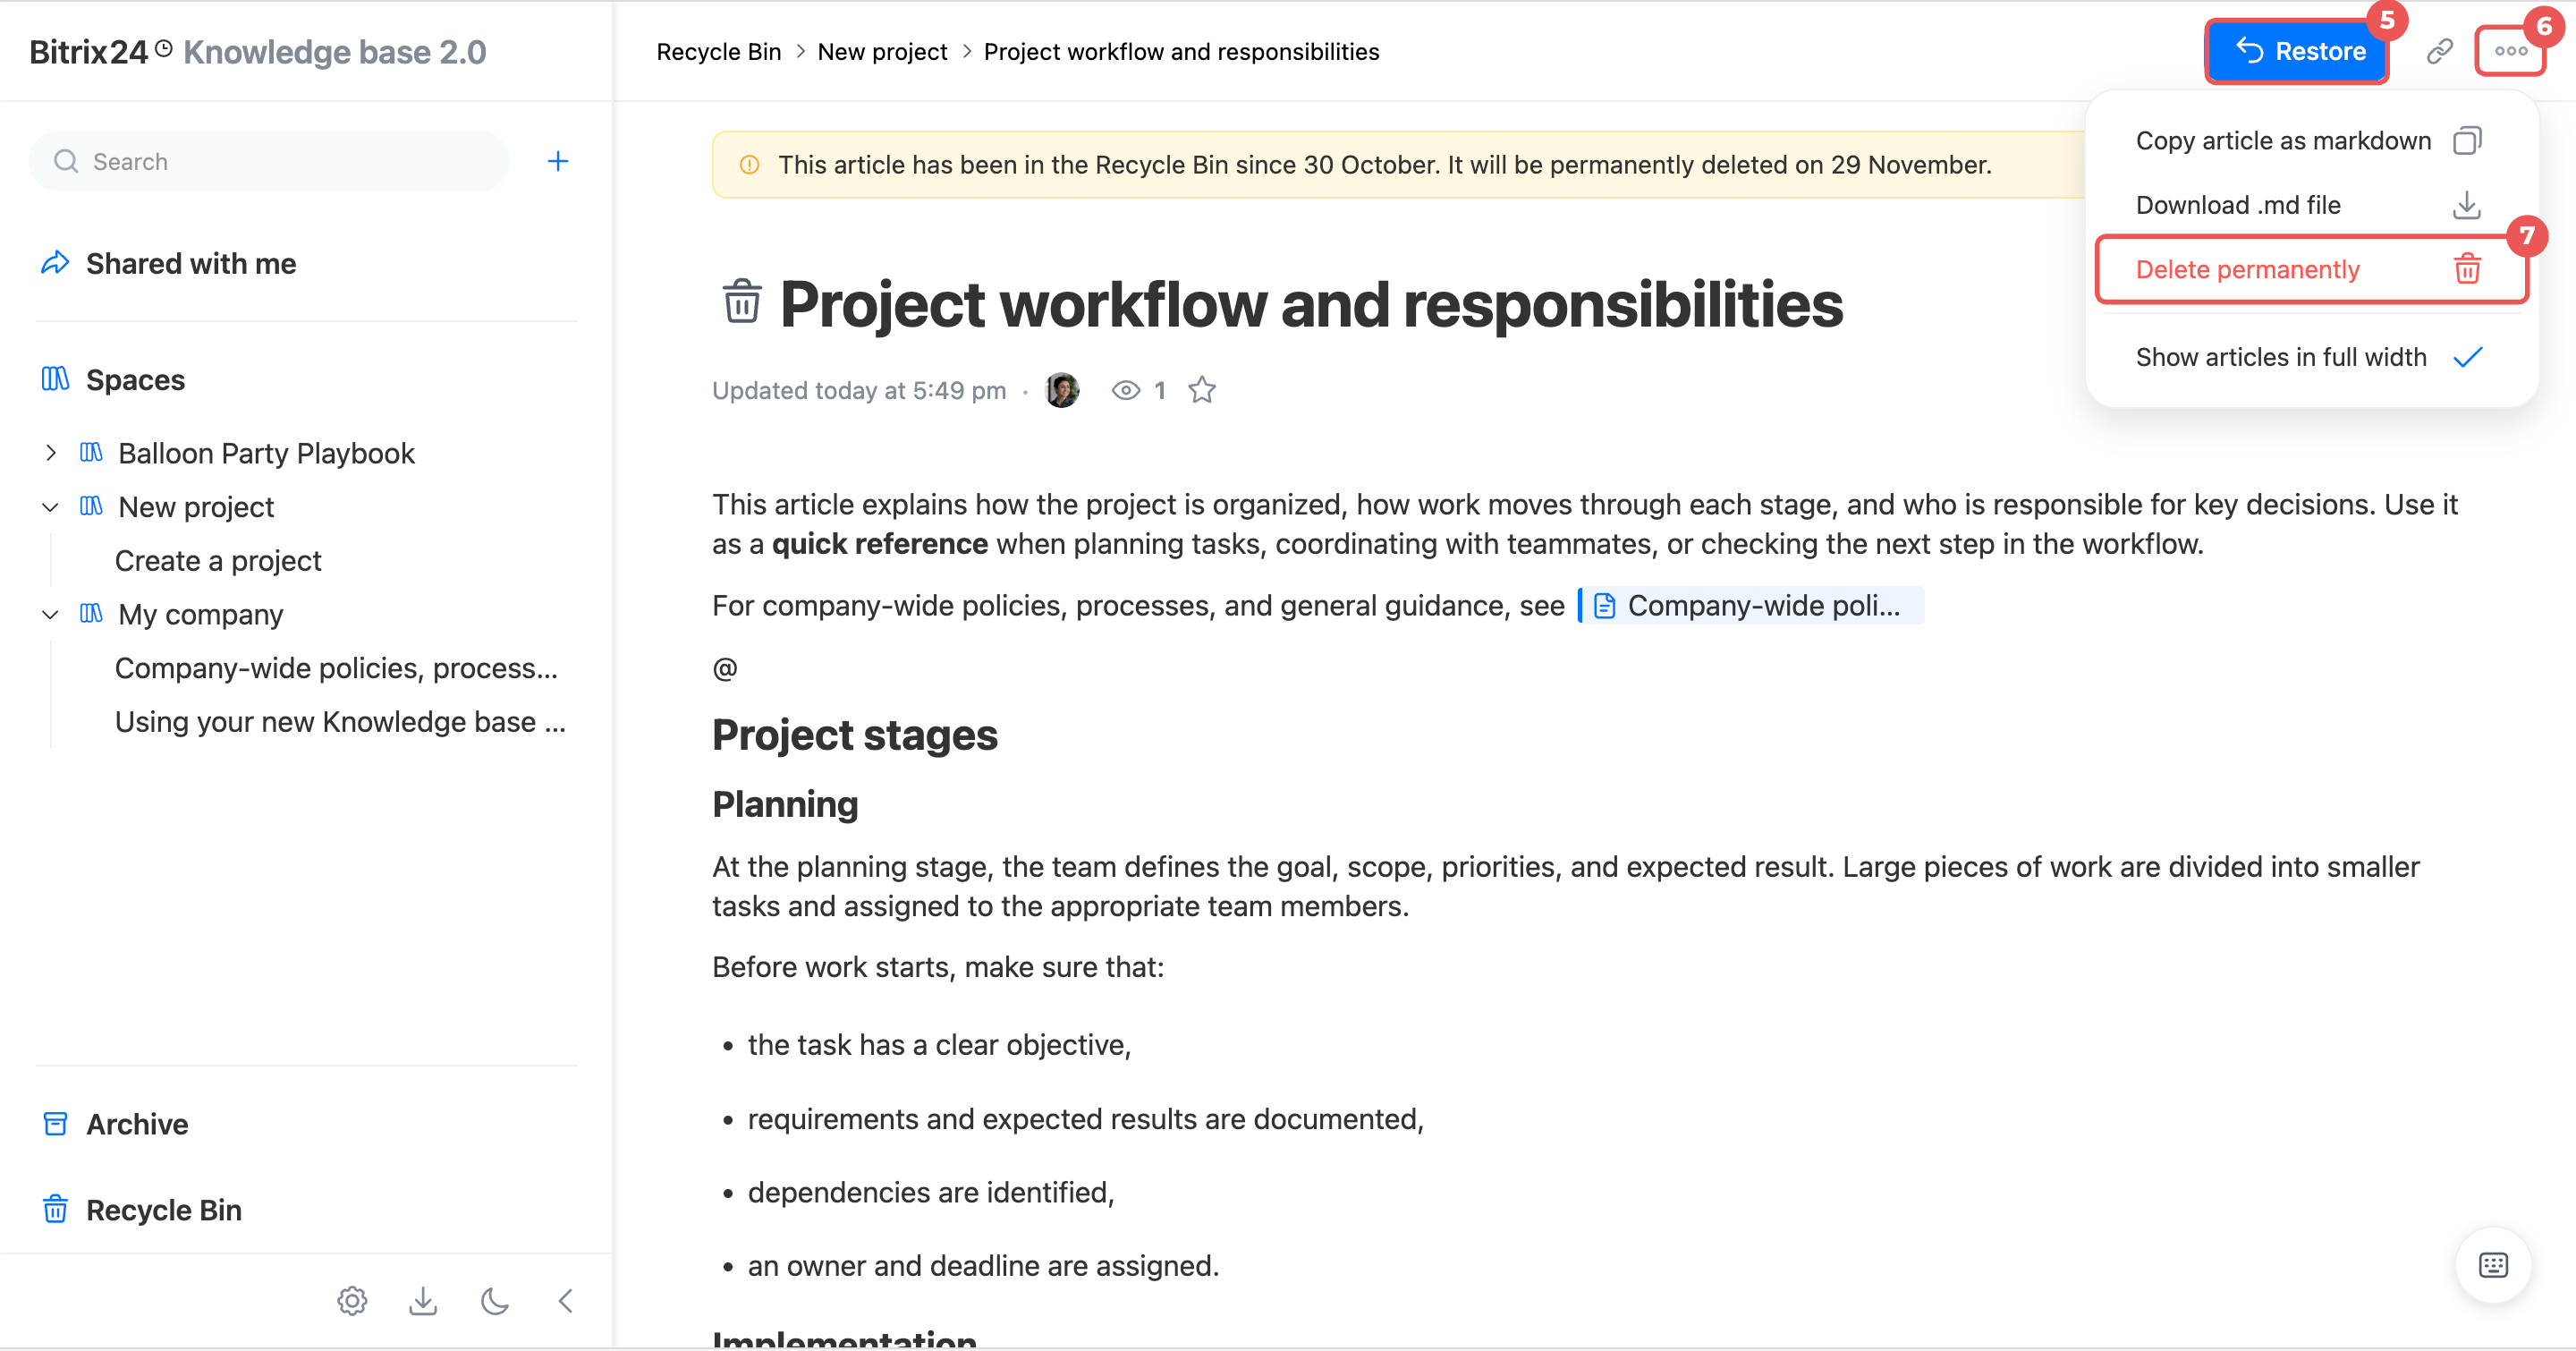
- To manage an individual article, find it in the list and open it. Click Restore or Three dots (...) > Delete permanently. Confirm the action.
Articles deleted from the Archive return to the Archive when restored.
Move an article to the Recycle Bin.
- In the lower-right corner, tap Menu > Knowledge base 2.0.
- In the upper-left corner, tap Menu (☰) and open a knowledge base or article.
- In the upper-right corner, tap Three dots (...) > Delete.
- If the article has nested articles, select Also delete child articles to move the entire branch to the Recycle Bin. If you don't select this option, only the selected article is deleted. Its nested articles remain in the space and move up one level.
- Confirm the action. If you delete a space, the next available space opens. If none are available, a page prompts you to create a new one.
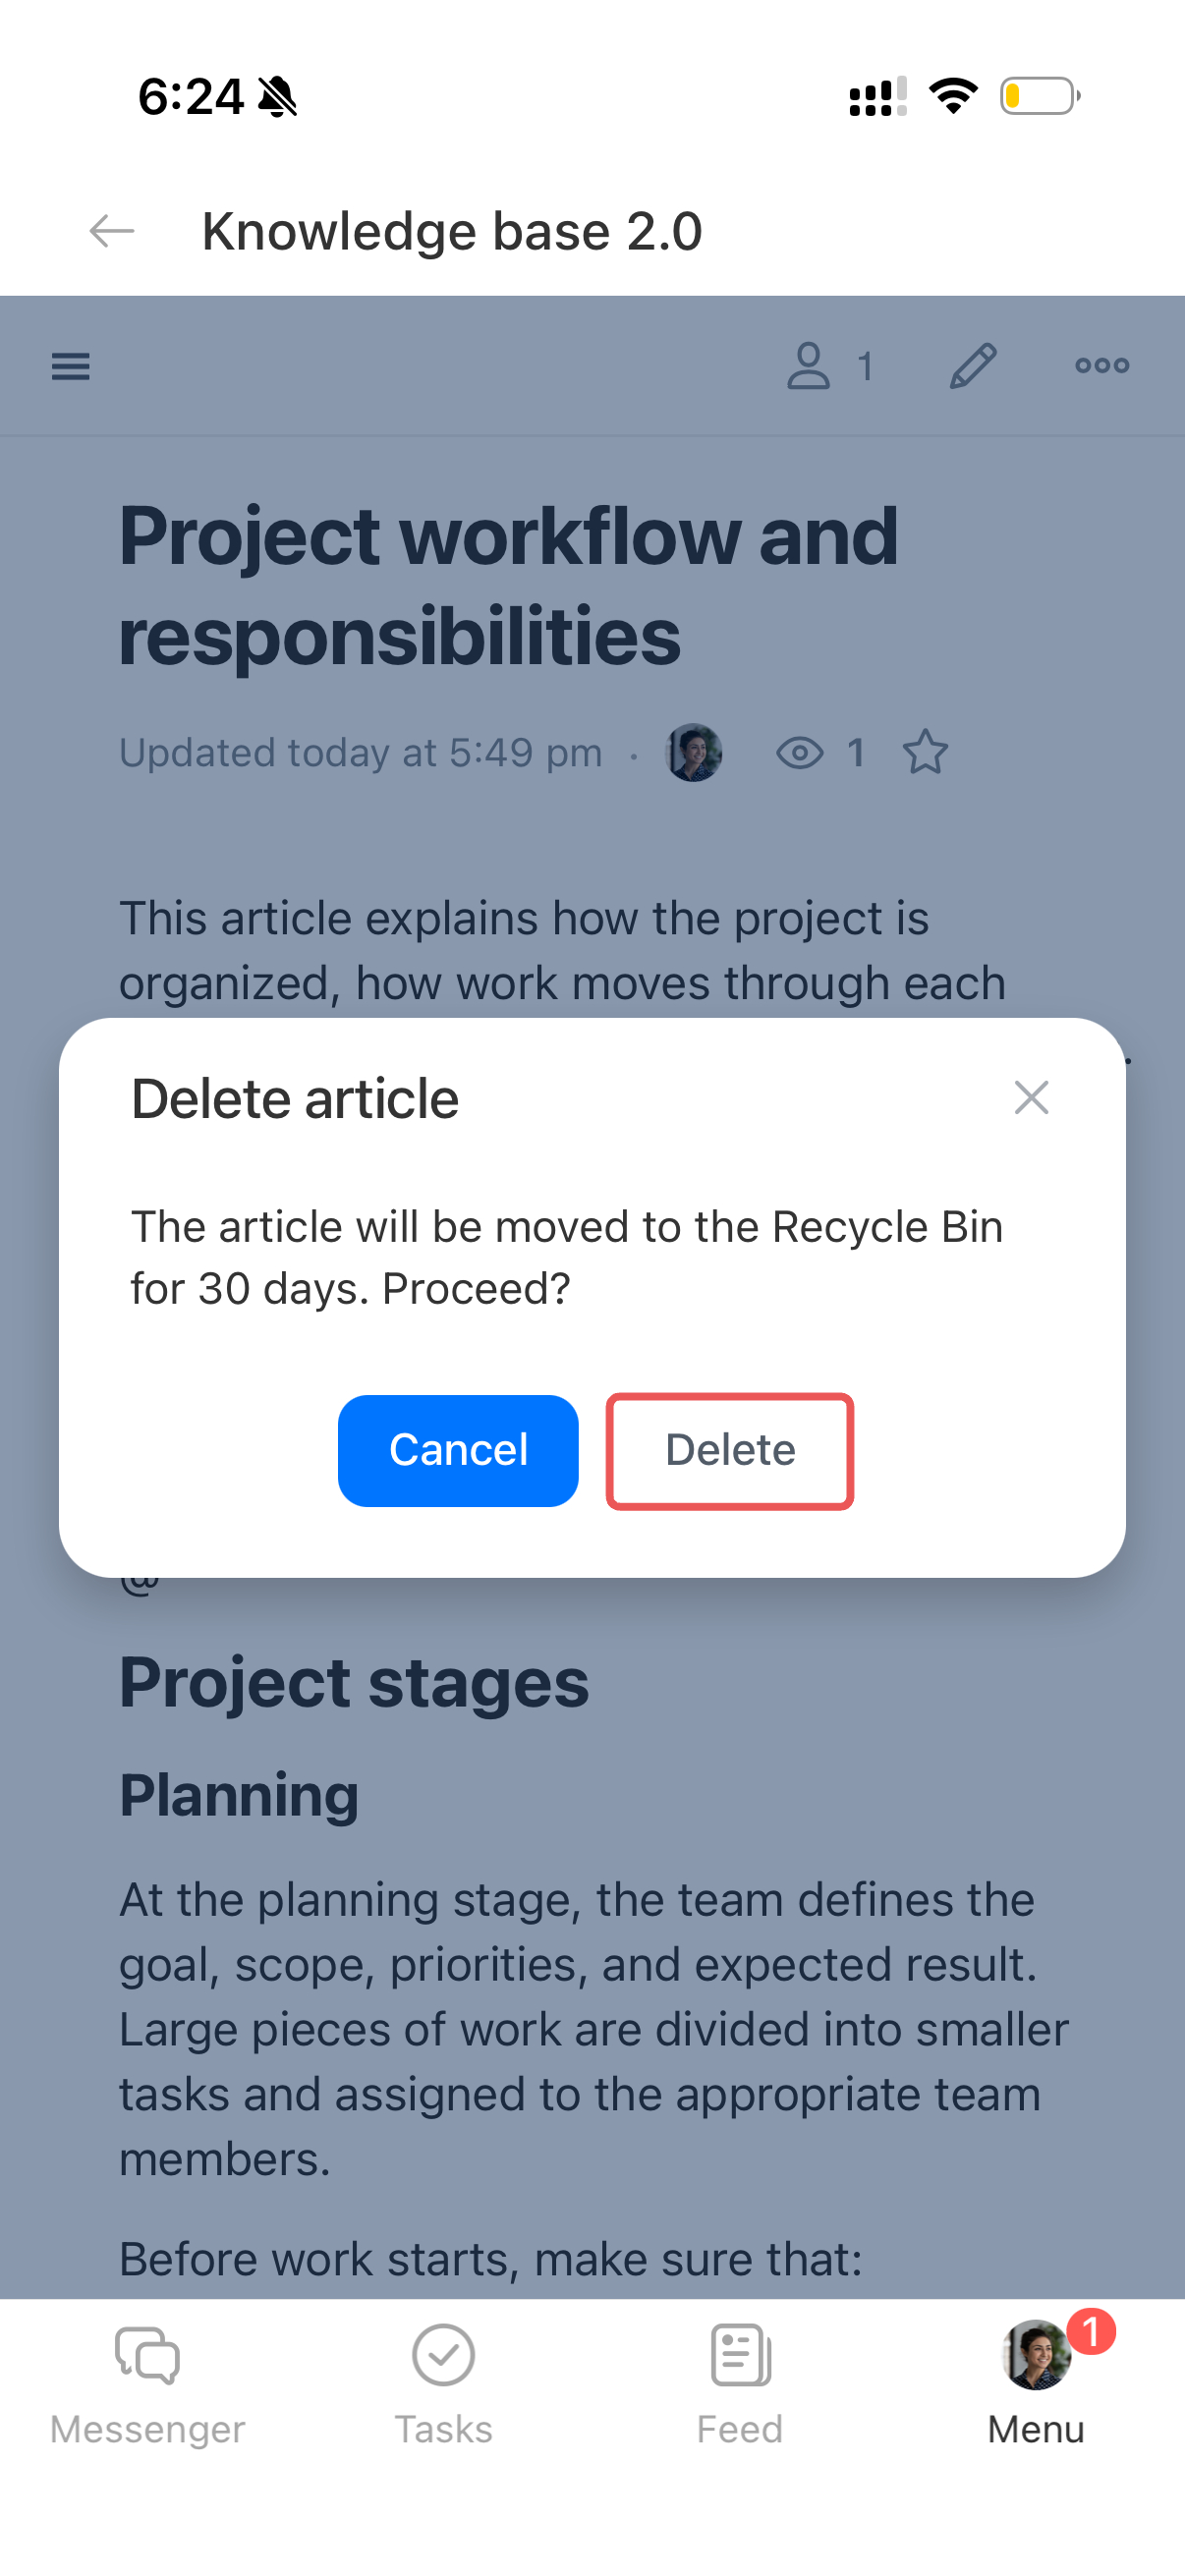
Restore or permanently delete an article.
- In the upper-left corner, tap Menu (☰) > Recycle Bin.
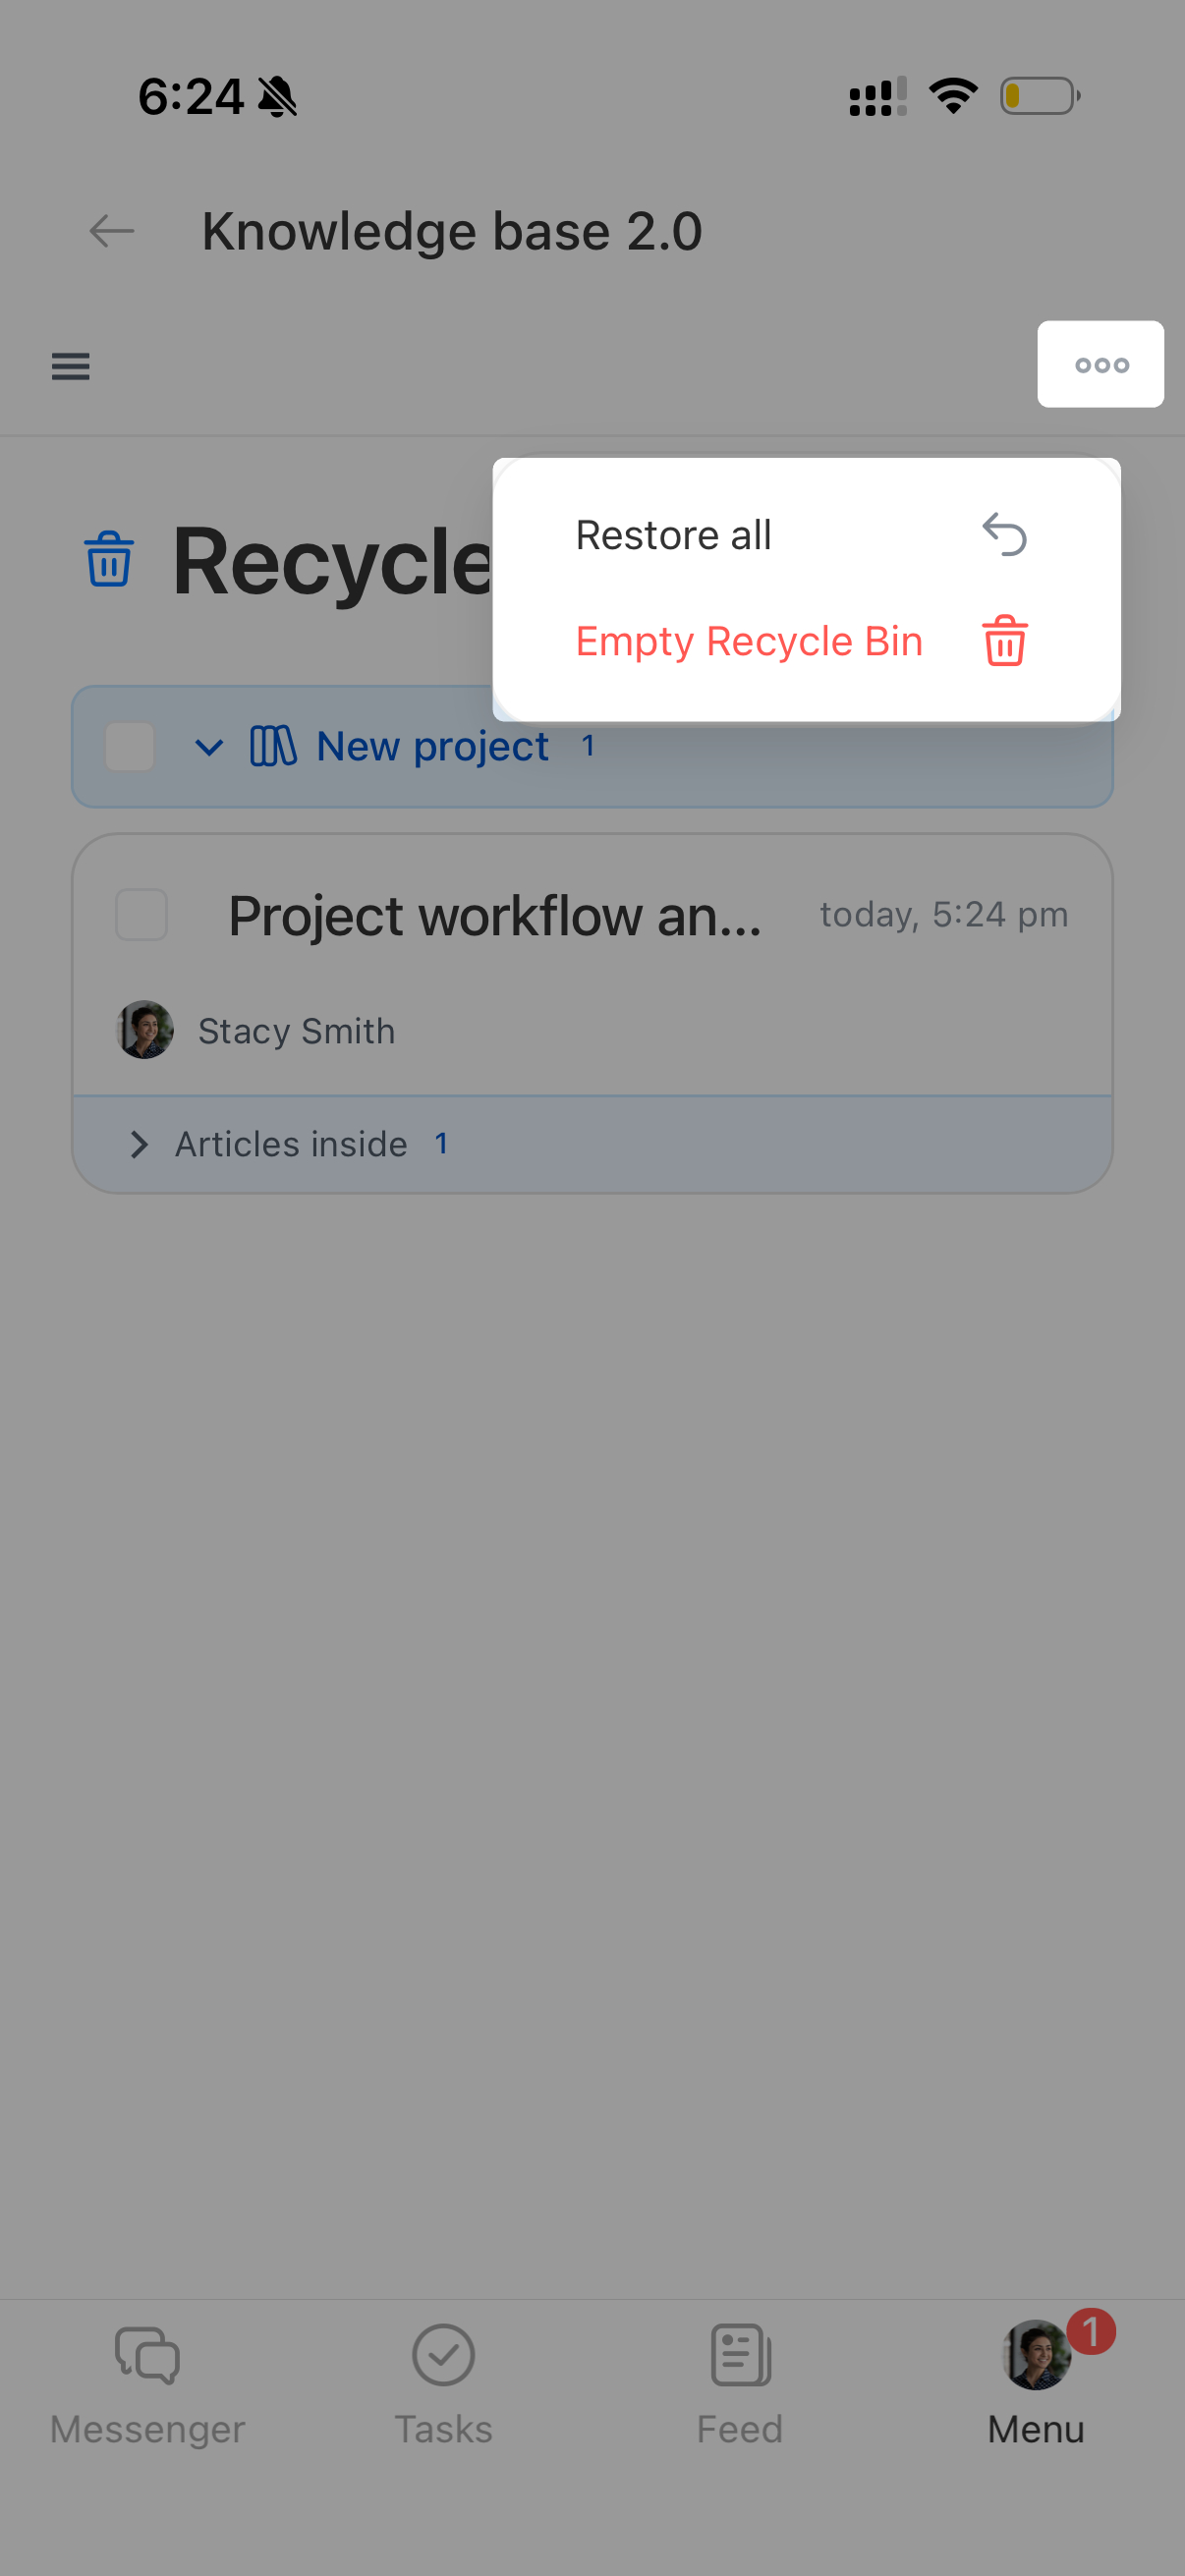
- To manage all deleted articles, tap Three dots (...) in the upper-right corner and select an action:
- Restore all — Restore all deleted articles and make them available to users again. Restored spaces keep their structure and access settings.
- Empty the Recycle Bin — Permanently delete all articles. Confirm the action.
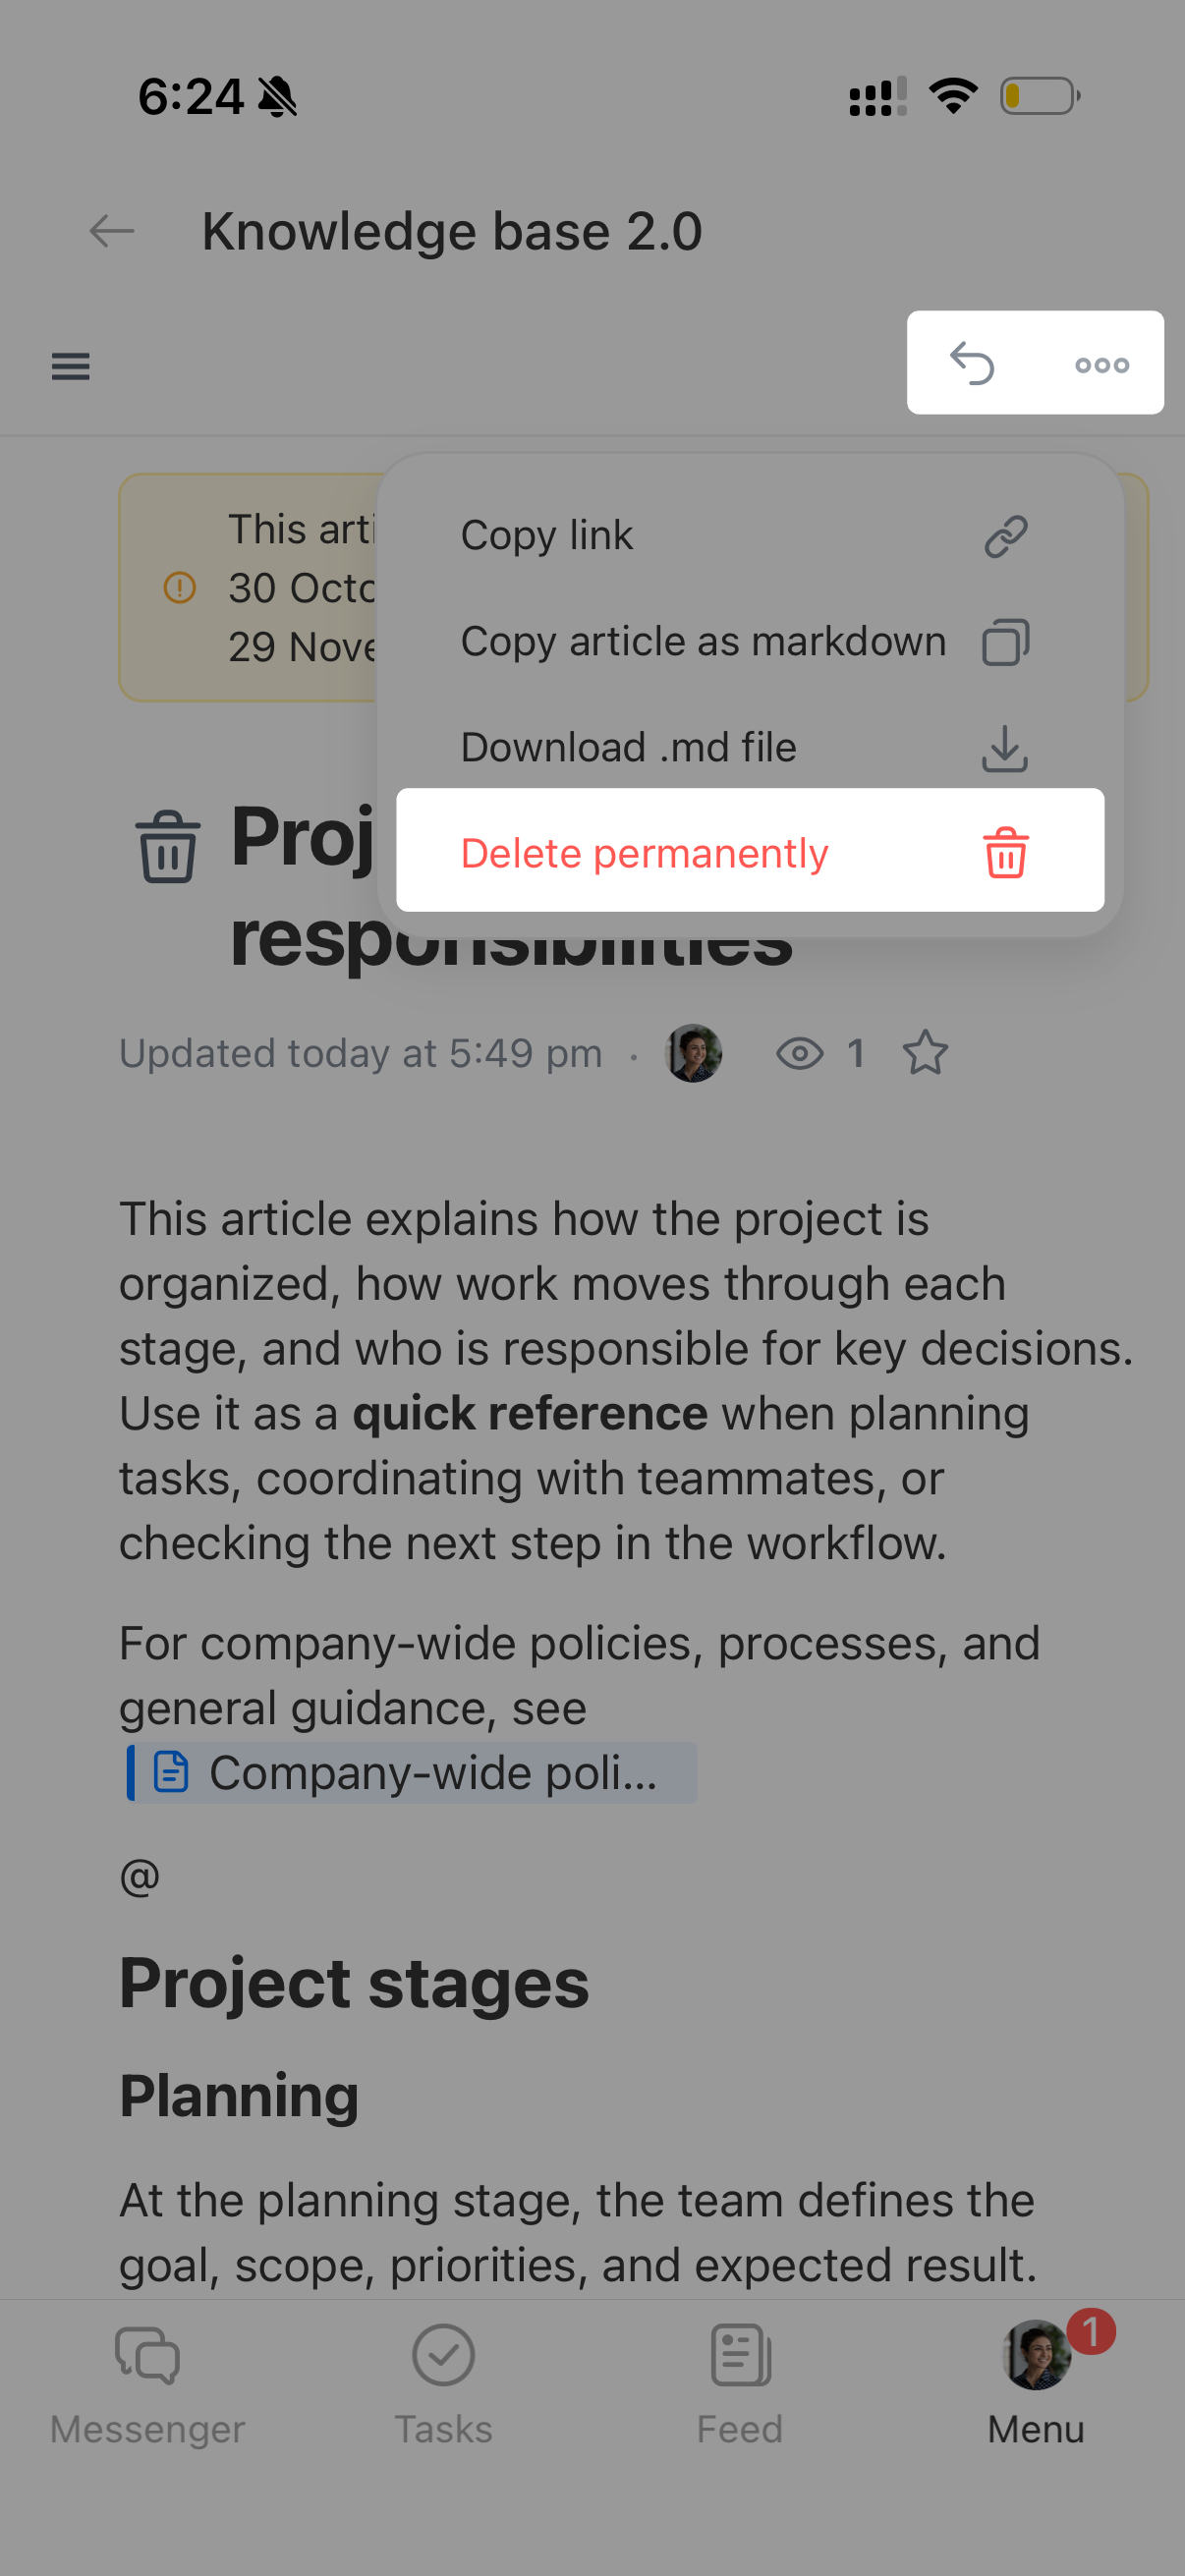
- To manage an individual article, find it in the list and open it. Tap the arrow to restore or Three dots (...) > Delete permanently. Confirm the action.
Articles deleted from the Archive return to the Archive when restored.
In brief
- In Knowledge base 2.0, you can temporarily hide content from users or delete it when you no longer need it. These actions are available in the web version of Bitrix24 and the mobile app.
- Archive a space or article to temporarily hide it from users. You can restore it at any time from the Archive section.
- Move an article you no longer need to the Recycle Bin. It remains there for 30 days, then is deleted automatically.
- If you move an article from the Archive to the Recycle Bin, it returns to the Archive when restored.