
Statuses show the path an order takes in your online store, from placement to delivery. You can customize this flow to match your team's process. For example, you can add an Order confirmation status. This helps managers see each step an order must go through and reduces manual follow-up.
Work in Store without orders
In this article:
Find status settings
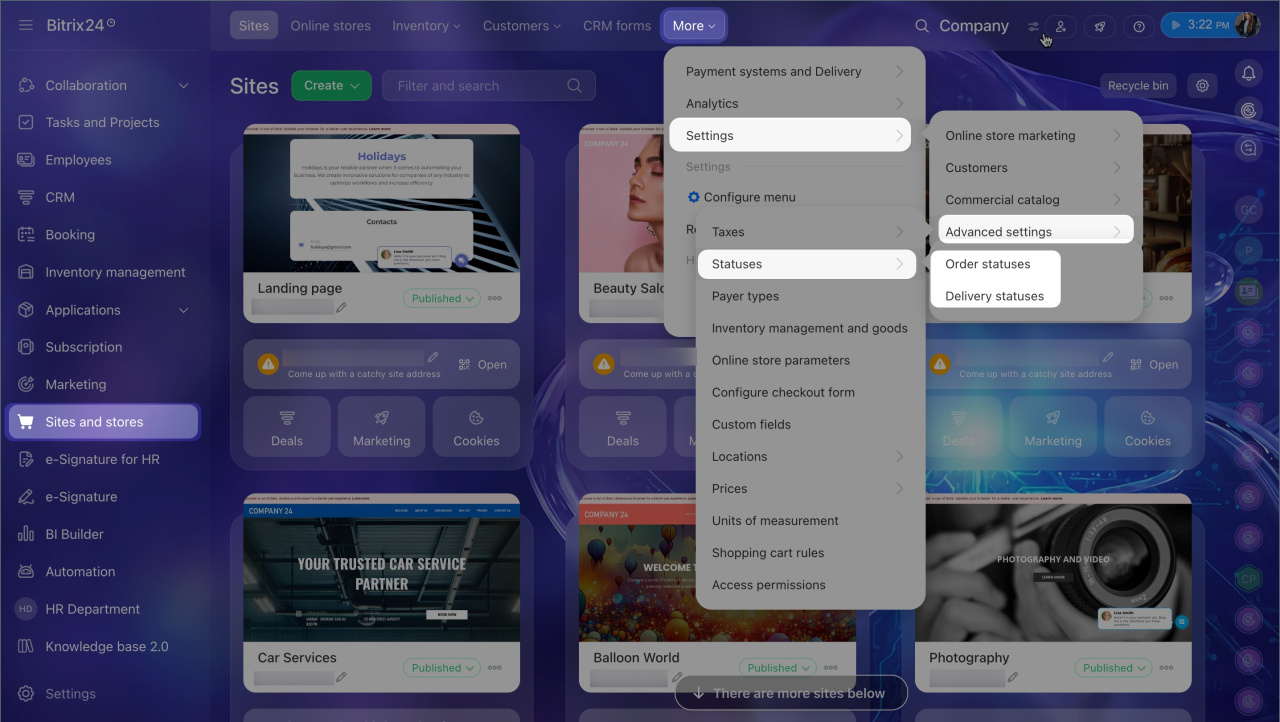
Go to Sites and stores > More > Settings > Advanced settings > Statuses. Then choose the section you need: Order statuses or Delivery statuses.
Configure order statuses
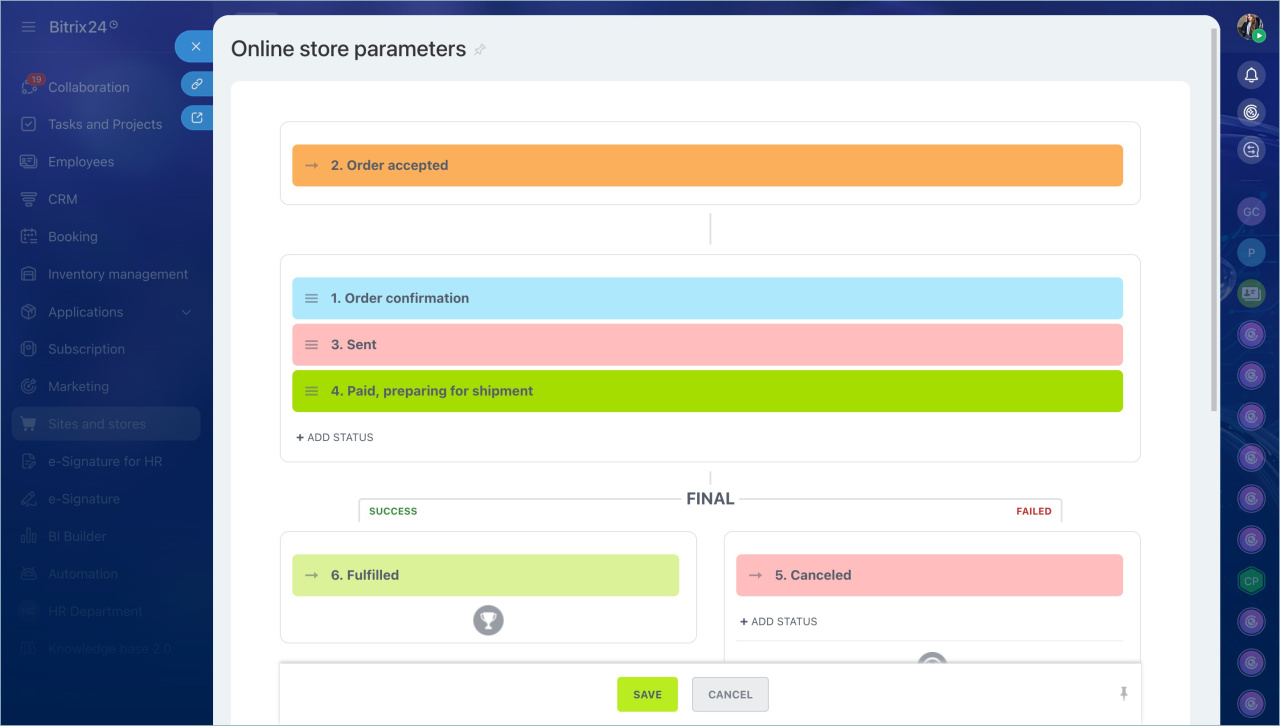
By default, an order moves through three stages:
- Initial — with one status: Accepted, awaiting payment.
- Intermediate — with two statuses: Paid, preparing for shipment and Shipped.
- Final — with two statuses for successful and unsuccessful outcomes: Completed and Canceled.
You can add statuses only in two stages: intermediate and final for unsuccessful orders. For all other statuses, you can only change the name and color.
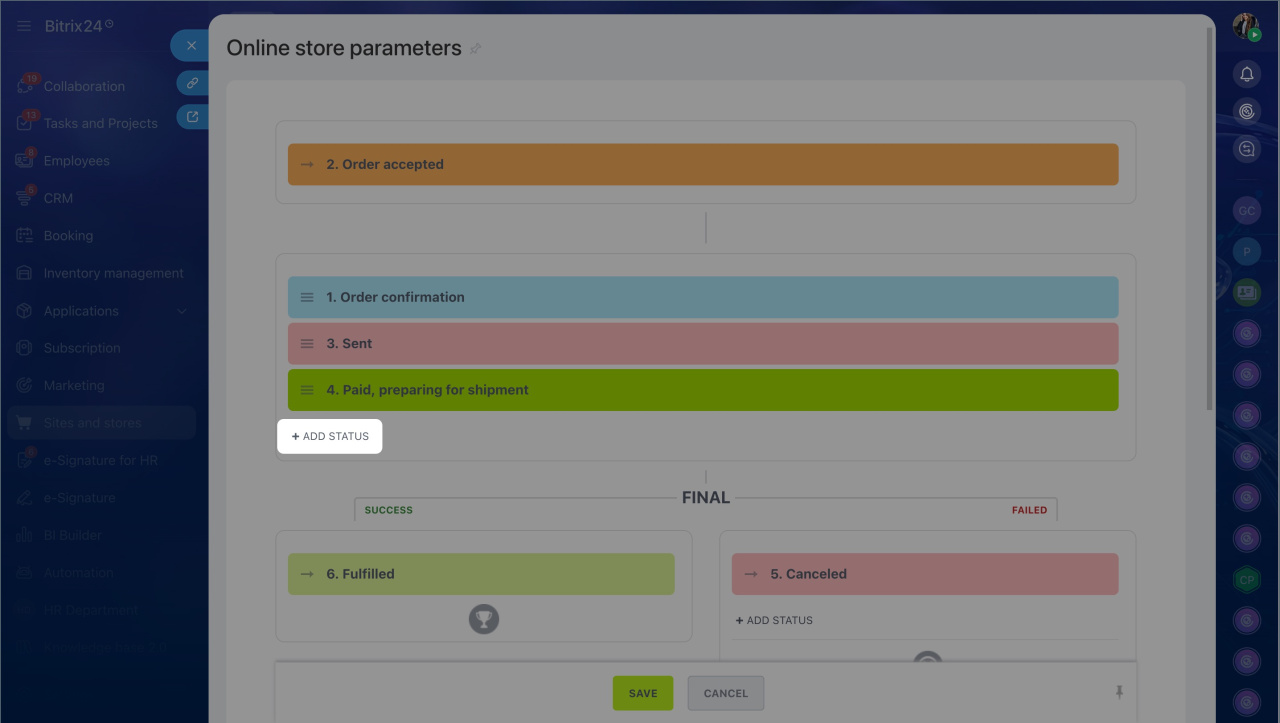
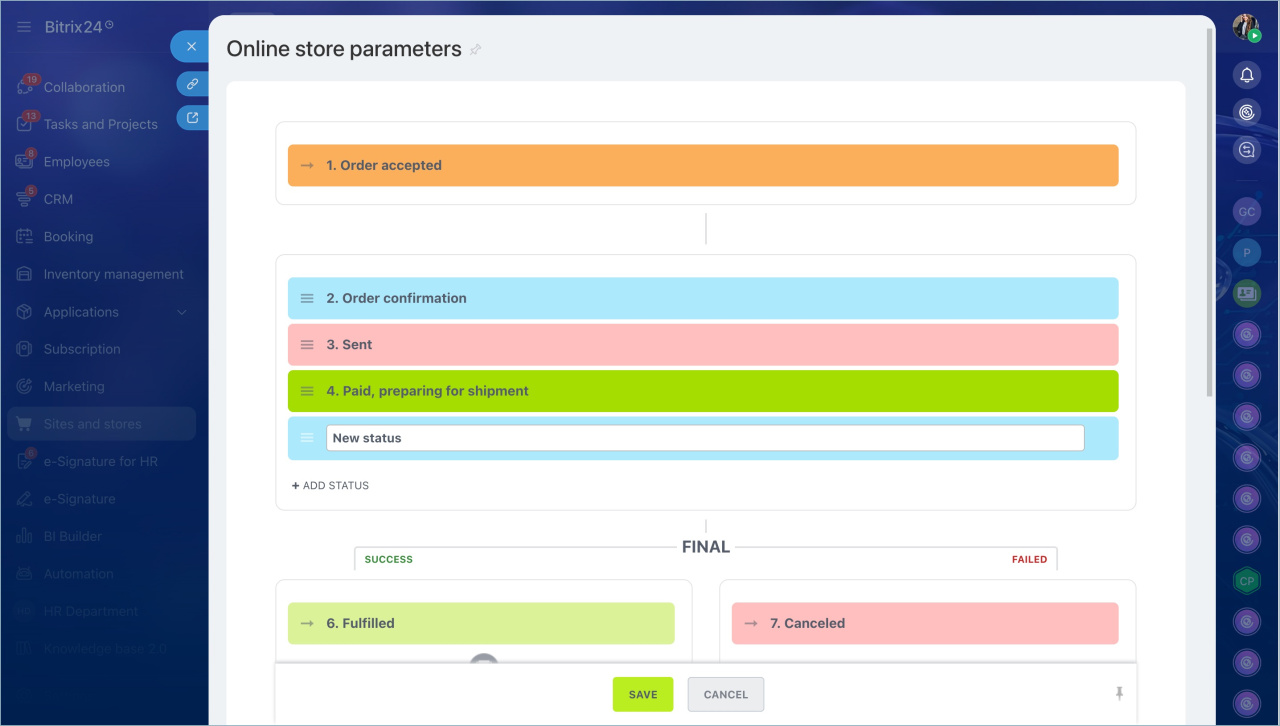
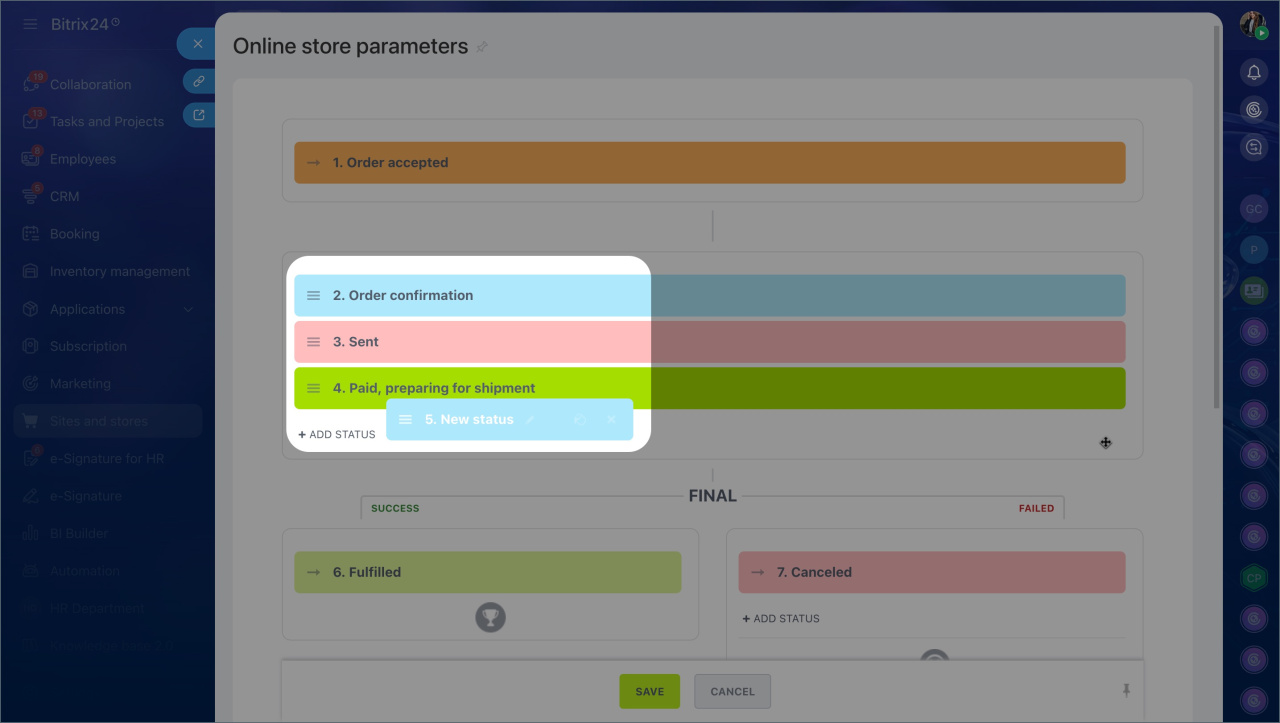
Example: add an intermediate status called Order confirmation. A manager can use it to contact the customer and confirm the order details.
1. Click + Add status under the intermediate statuses section.
2. Enter the name.
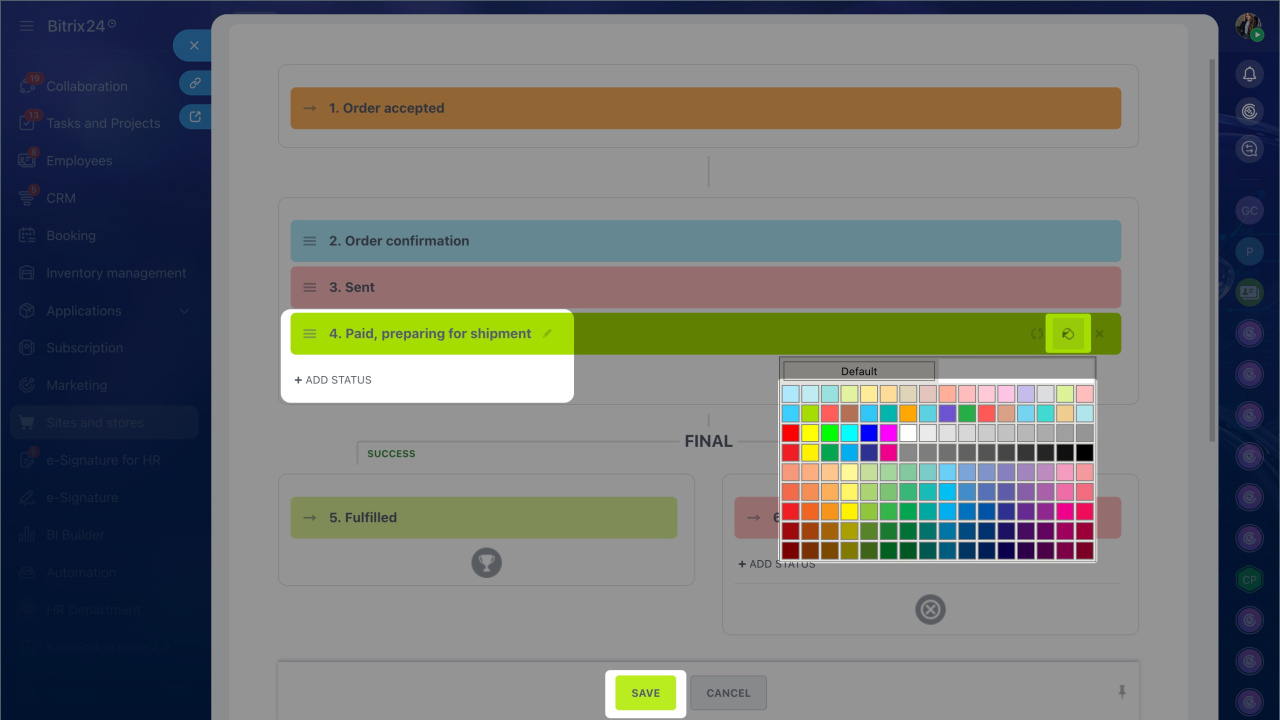
3. Click the fill icon to the right of the status name and choose a color from the palette. Color helps you quickly identify statuses in the order form.
4. Click the three-line icon (≡) to the left of the status name and drag the status to the right place in the list.
5. Click Save — the new status will appear in the order form.
Configure delivery statuses
By default, delivery has no intermediate statuses. It includes only two stages:
- Initial — with the status Awaiting processing.
- Final — with two statuses for successful and unsuccessful outcomes: Dispatched and Canceled.
You configure delivery statuses the same way as order statuses. You can add statuses only in two stages: intermediate and final for unsuccessful deliveries. For all other statuses, you can only change the name and color.
Example: add an intermediate status called Ready for dispatch. A warehouse employee can use it to mark an item as packed and ready to ship, so the manager does not need to check the status manually.
1. Click + Add status between the initial and final stages.
2. Enter the name.
3. Click the fill icon to the right of the status name and choose a color from the palette.
4. Click Save.
In brief
- Statuses show the path an order takes in your online store.
- You can configure order and delivery statuses in Sites and stores > More > Settings > Advanced settings > Statuses.
- The flow includes three stages: initial, intermediate, and final for successful or unsuccessful outcomes.
- You can add statuses only in the intermediate stage and in the final stage for unsuccessful orders.
- This setting is only available in Unlimited deals + Orders mode.