Use Flows to collect department or project tasks and distribute them to performers.
Bitrix24 Flows: Get started
Create and find tasks in Flows
Distribute tasks in the Flow
- Go to the Tasks and Projects section.
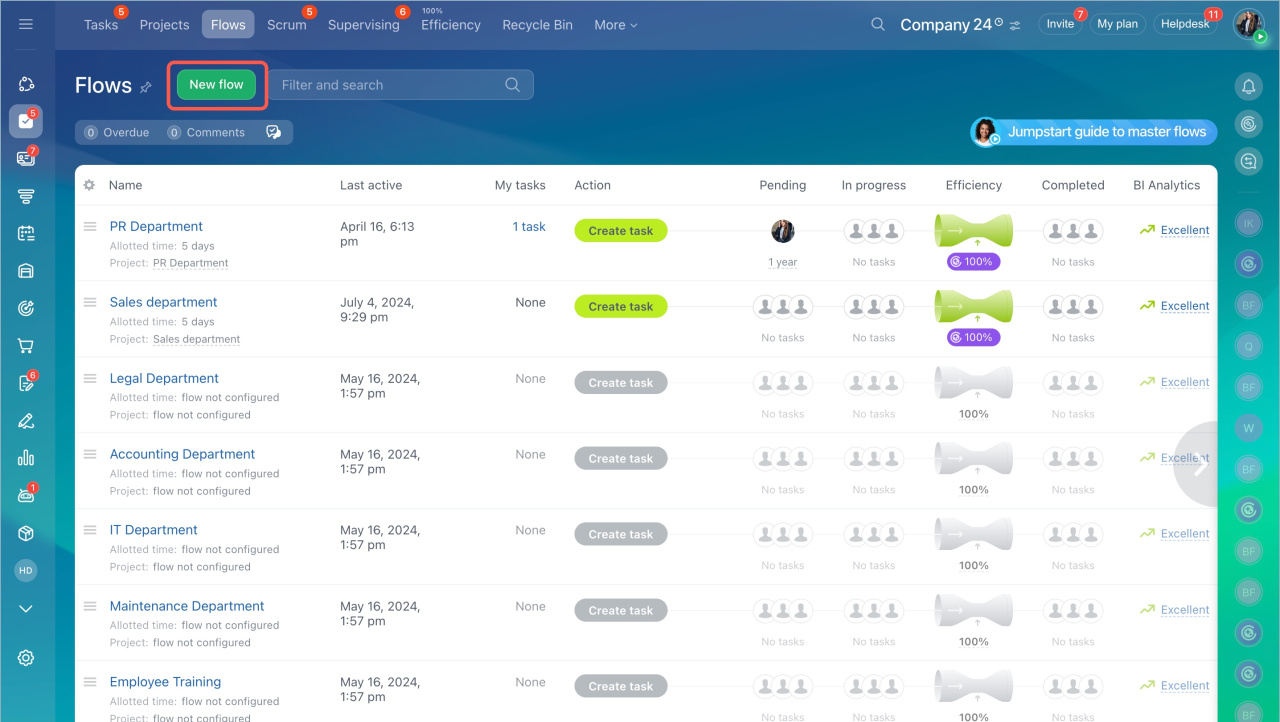
- Open the Flows tab.
There are two ways to create a Flow:
- Add a new one
- Select a ready-made template
Click New Flow or select a template.
Go to the Flow settings.
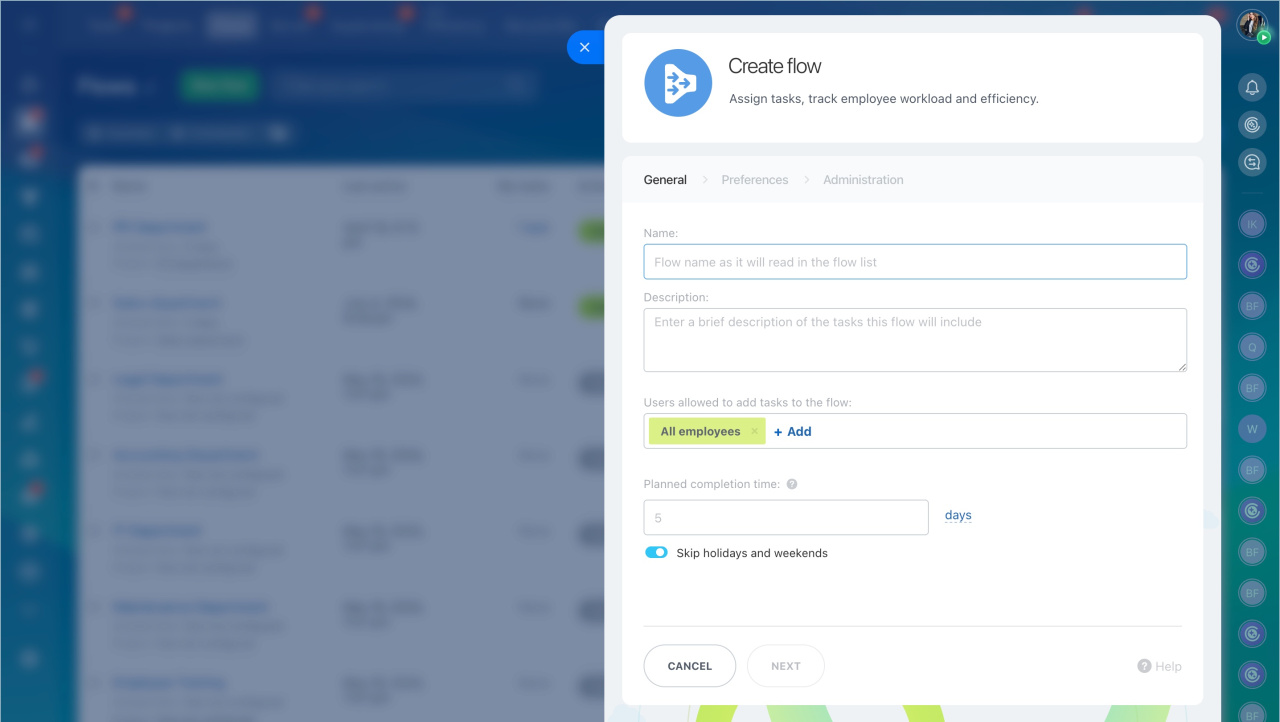
Fill in the information about the Flow
- Add name and description.
- Add employees who will be able to set tasks in the Flow.
- Specify the Planned completion time in hours, days or months. The same deadline will automatically appear in all tasks of the Flow.
Configure Flow
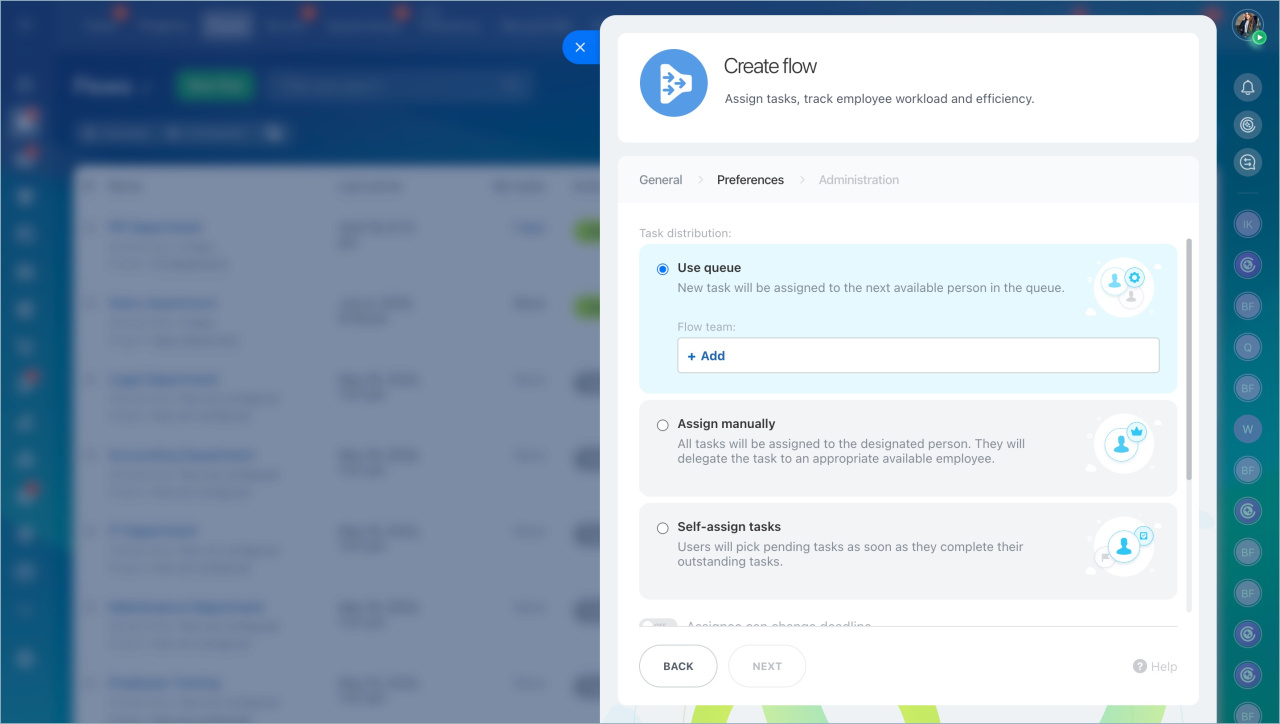
1. Choose how to distribute tasks to employees:
Use queue: Add employees to the task distribution queue. New tasks are automatically assigned to the next person in the list. After everyone has received a task, the cycle starts over from the first employee. This method works great for teams that need to keep the workload evenly balanced.
Assign manually: All tasks are assigned to one selected employee, who can reassign them to others if needed. This approach is useful when a coordinator or manager needs to review tasks first and decide who should handle them. For example, in a marketing team, all tasks can go to the project manager first, who then distributes them among the designer, copywriter, and targeting specialist.
Self-assign tasks: Employees choose tasks themselves when they are ready to start something new. This method works well for teams that prefer flexible task distribution instead of assigning tasks to specific employees. For example, in a Legal Department flow, tasks might be created by any employee in the company. Lawyers then open the task list and choose the next task when they’re available to take on a new request.
Automation rule-based: Tasks are automatically created and assigned using automation rules or workflows. The assignee is defined in the settings—you can choose a specific employee or use a CRM item field, such as lead creator. Task parameters like project, deadline, and other fields come from the flow settings. For example, when a deal moves to the Contract stage, an automation rule creates a task in the Legal review flow and assigns it to the lawyer responsible for contract checks.
2. Configure additional task options:
- Allow the assignee to change the deadline
- Enable halfway point alert
- Submit task to creator for approval
3. Select a project for the flow.
4. To ensure colleagues create tasks in the flow only using a template, toggle the switch. Choose a template from the list or create a new one.
Configure the control
- Specify an administrator to control the Flow. He or she will receive notifications on tasks and changes settings.
- Set up notifications for changes in Flow tasks: overload and low efficiency of the team. If efficiency drops, the Flow funnel will turn red.
- Click Create Flow.
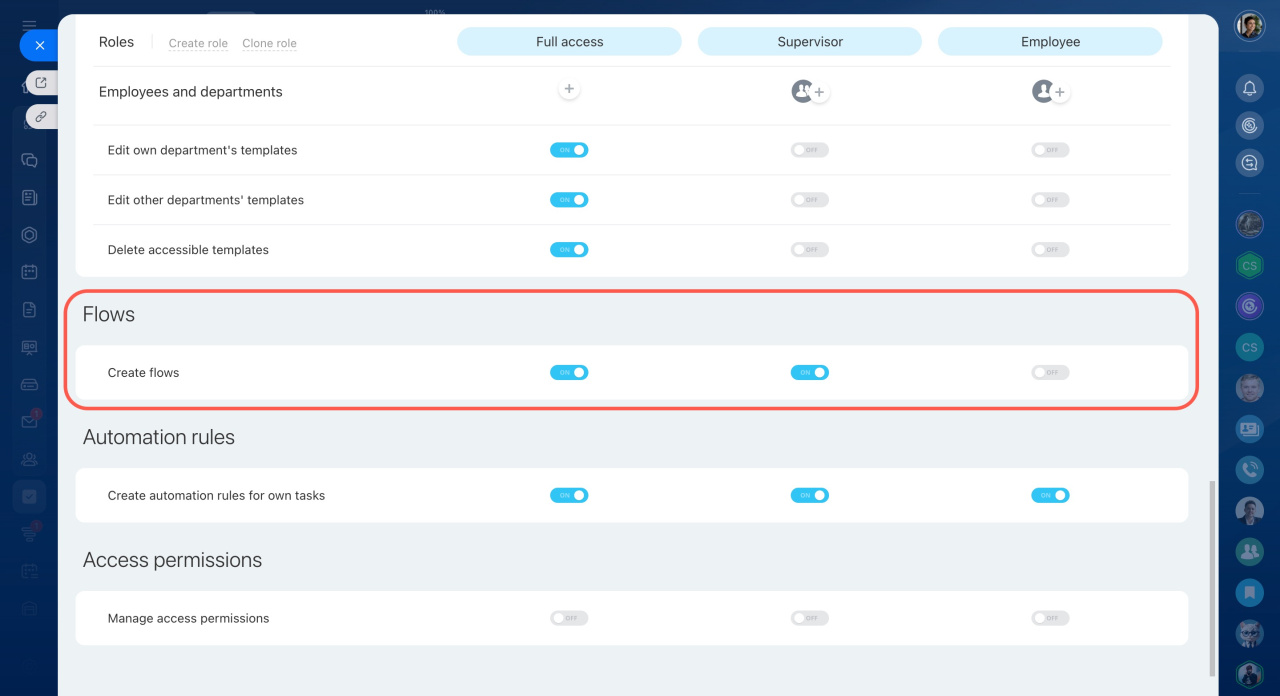
Tasks: Access permissions
To edit, disable, or delete a Flow, click menu and select an action. The Disable option temporarily suspends the Flow and colleagues will not be able to assign tasks to it. You can re-enable the Flow in the future.
- Use Flows to collect department or project tasks and distribute them to performers.
- There are two ways to create a Flow: add a new one or select a ready-made template.
- Choose how to distribute tasks to employees: automatically by queue, manually, through self-assignment, or based on automation rules.
- The Flow administrator monitors the team's work.


