Use date filters to select, analyze, and compare data, and track trends. Apply these to your datasets and dashboard panels to prevent errors, like showing unnecessary information.
This article explains how to test requests and filter data in the BI Builder dashboards.
How to test requests and see how a filter works
Test your request using Postman. This is a tool for working with API, which allows you to send requests to services and work with their responses.
Request debugging using Postman
If there is a date-time field in the dataset, you can use it as a filter. For example, you can filter deals by date_create, date_modify, begindate, and closdate fields.
Description of entity fields in BI Analytics
Here's how to filter deals by their creation date, that is, the date_create field.
Select the Post method and add a request address: https://account_name.bitrix24.com/bitrix/tools/biconnector/pbi.php?table=crm_deal. To get the SQL query execution plan, add the &explain parameter to it.
Write a request to Bitrix24. It must include three parameters:
-
key: "vMYihzN3QS4XXXXXXXXXX" is the key for accessing the data. Each key is unique and can be found under CRM > Analytics > BI analytics > BI analytics settings > Manage keys.
-
dateRange: {"StartDate": "2022-1-1", "EndDate": "2023-1-1"} is the time range for requesting data. In our example, it covers the period from January 1, 2022, to January 1, 2023.
-
configParams: {"timeFilterColumn": "DATE_CREATE"} is the filter for selecting deals by the creation date.
{ "key":vMYihzN3QS4XXXXXXXXXX", "dateRange": { "startDate": "2022-1-1", "endDate": "2023-1-1" }, "configParams": { "timeFilterColumn": "DATE_CREATE" } }
date_create field. If there are errors or no specified field for filtering, the BI Builder will choose the first date-time field from the dataset.Once you've entered your request, click Send.
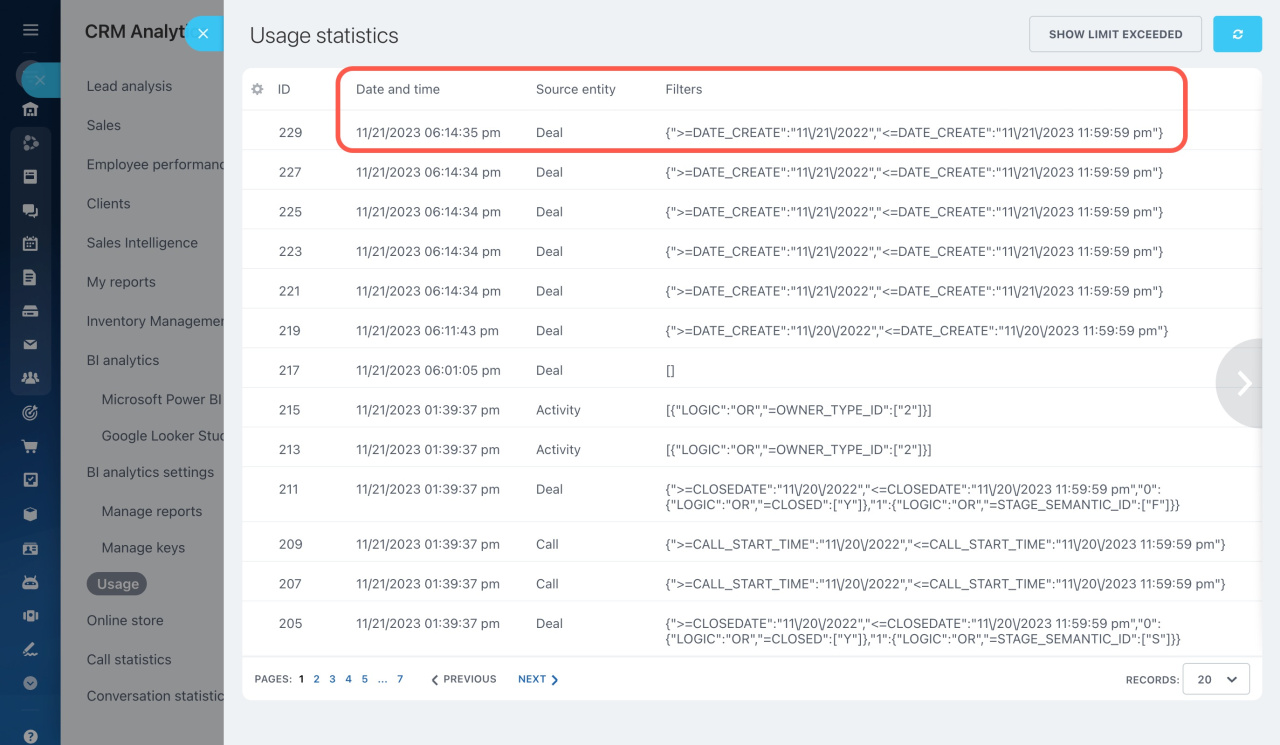
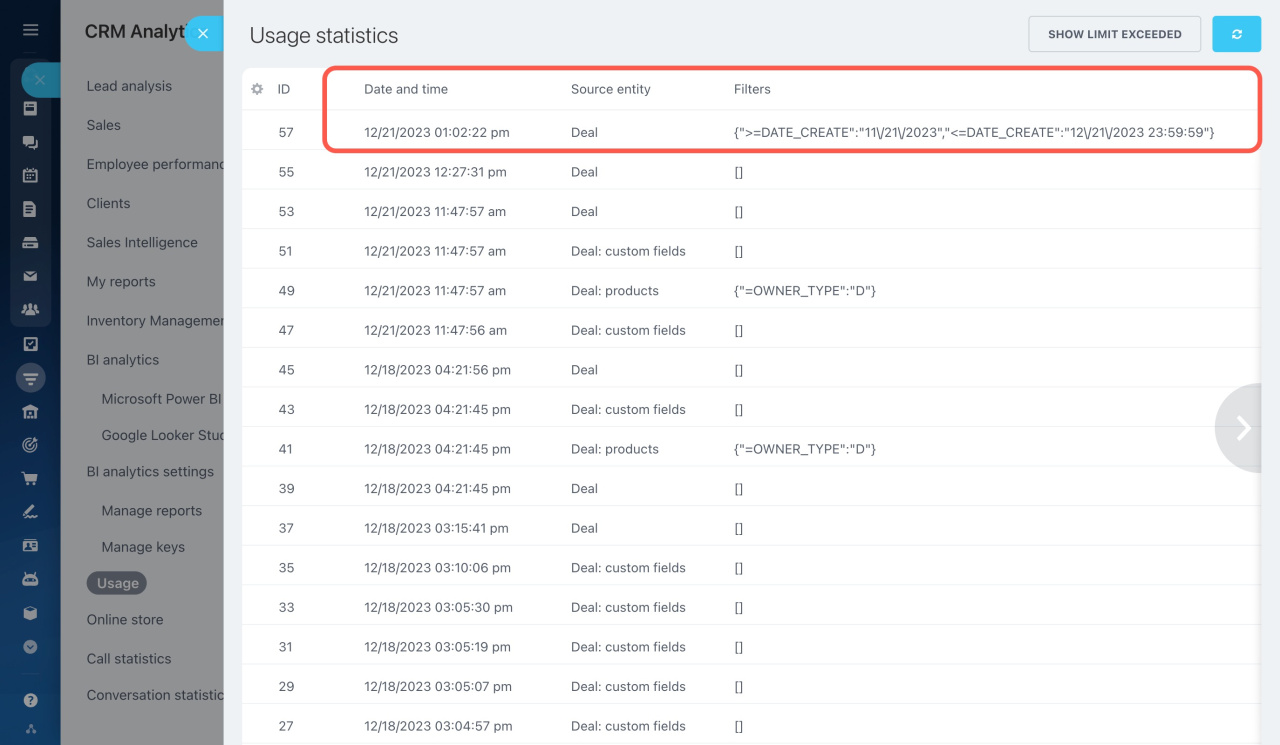
To check the results in Bitrix24, go to CRM > Analytics > BI analytics > BI analytics settings > Usage. This page shows the usage statistics, data source, and filters applied to the dataset.
How to set a field for data filtering in a chart on a dashboard
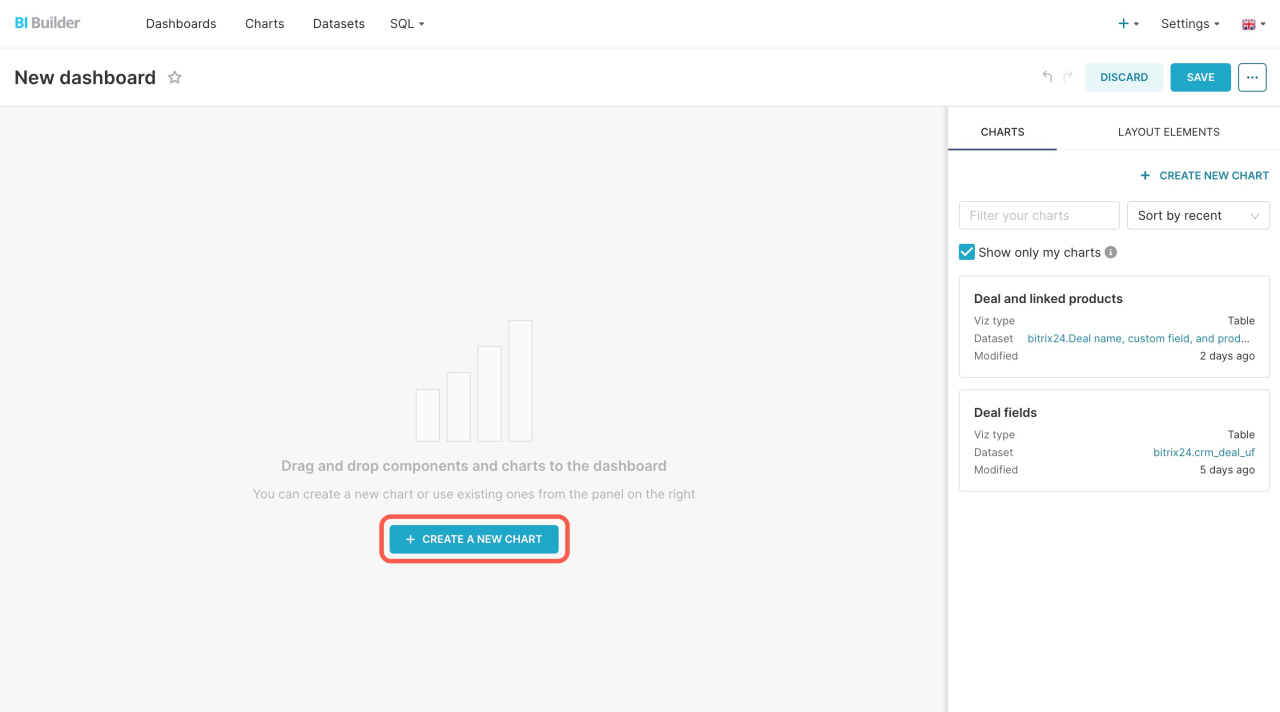
Open your dashboard and create a new chart to count the number of deals in Bitrix24. Just click the + Create a new chart button.
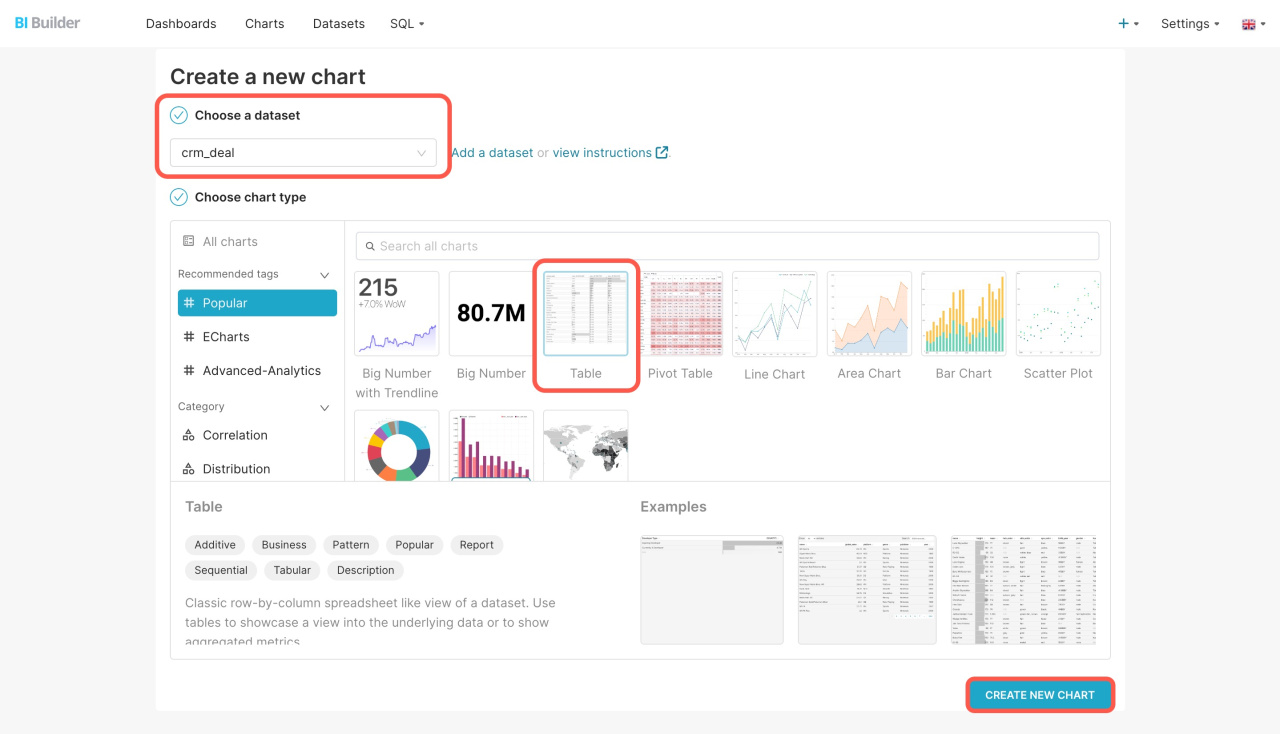
Select the crm_deal dataset, specify the chart type, and click Create new chart.
Move Quantity to the Metric block. Under the Filters, select a field by which to filter the data. Then click Create chart. In our example, the deals are filtered by their creation date.
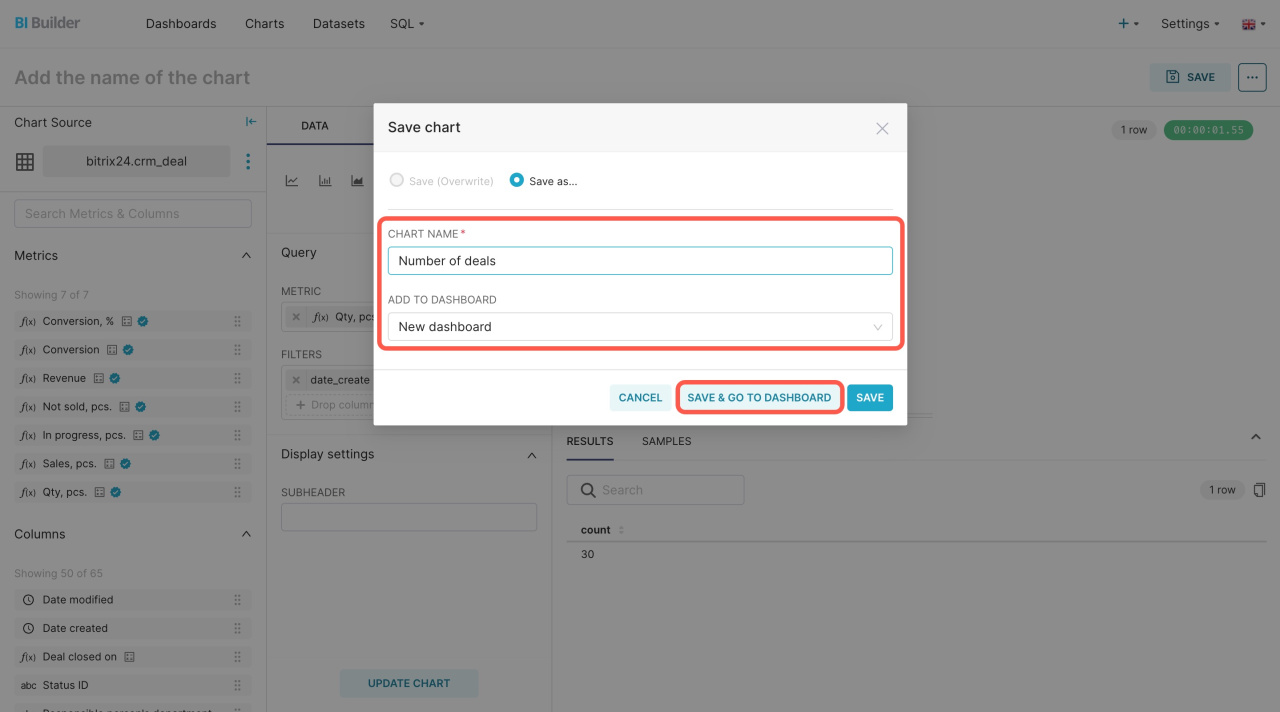
Then save the chart. In the pop-up window, specify its name, select a dashboard, and click Save and go to dashboard.
To show data for a specific period,
-
Click + Add/edit filters on the left.
-
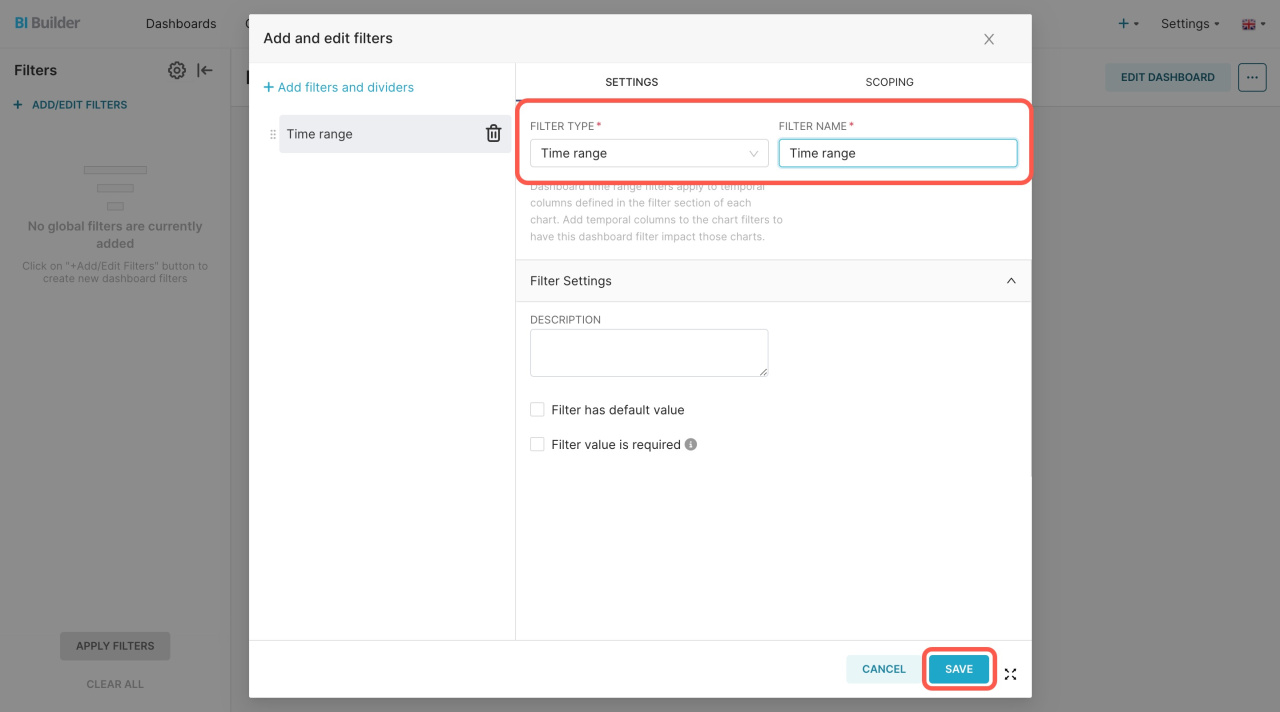
Select the Time range filter type, specify its name, and click Save.
-
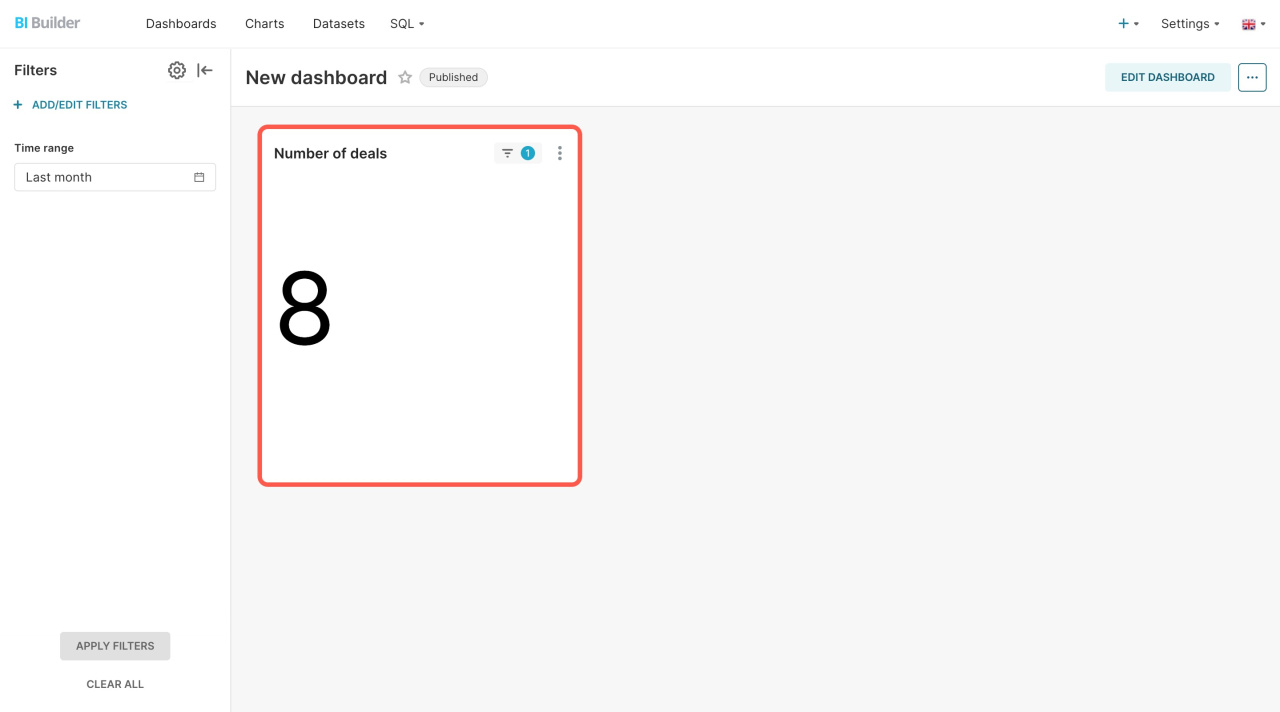
Open the filter settings and specify the time range, for example, last month.
-
Then click Apply filters in the bottom left corner.
After that, the number of deals will be updated. The chart will show the deals created during the last month.
You can check the request results and the field by which your data was filtered in Bitrix24 under CRM > Analytics > BI analytics > BI analytics settings > Usage.
How to filter data from a virtual dataset
To filter data from a virtual set, edit your SQL query and add a required field for filtering.
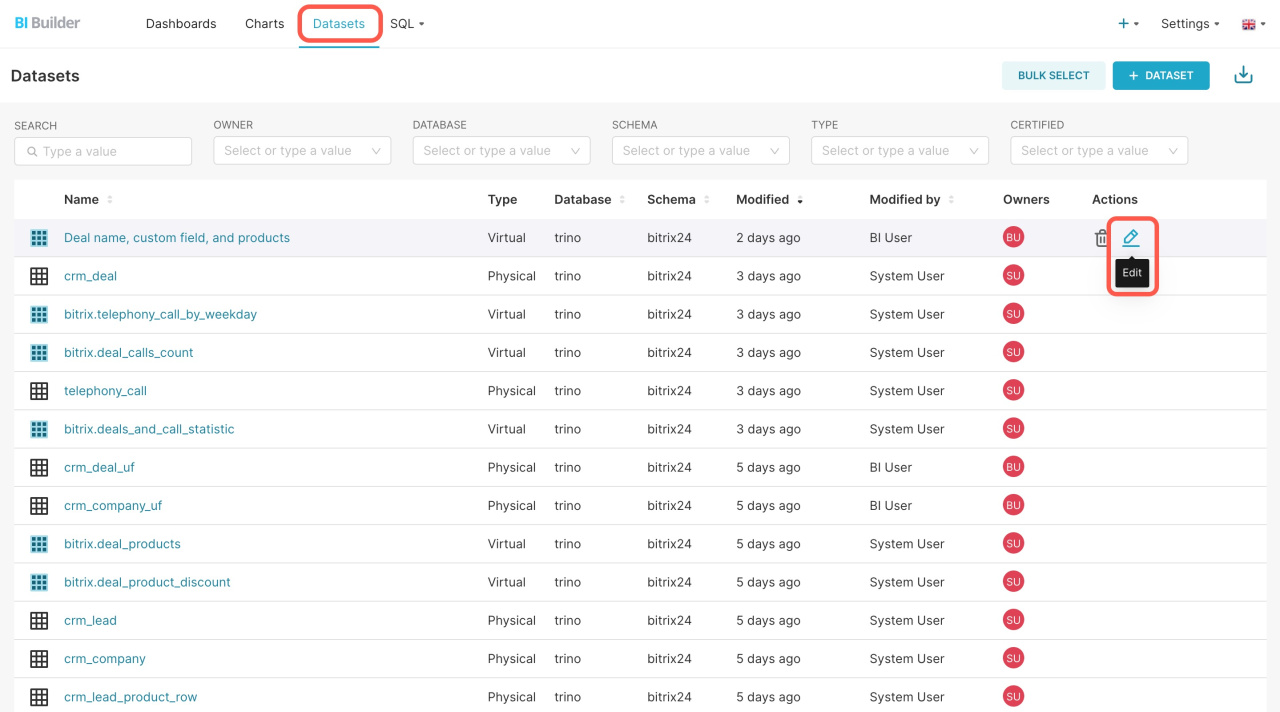
Open the Datasets tab, select a virtual dataset, and click Edit.
To illustrate how this works, we will edit the dataset, which includes both regular and custom deal fields, and information about linked products. Click here to learn how to create such a dataset in BI Builder.
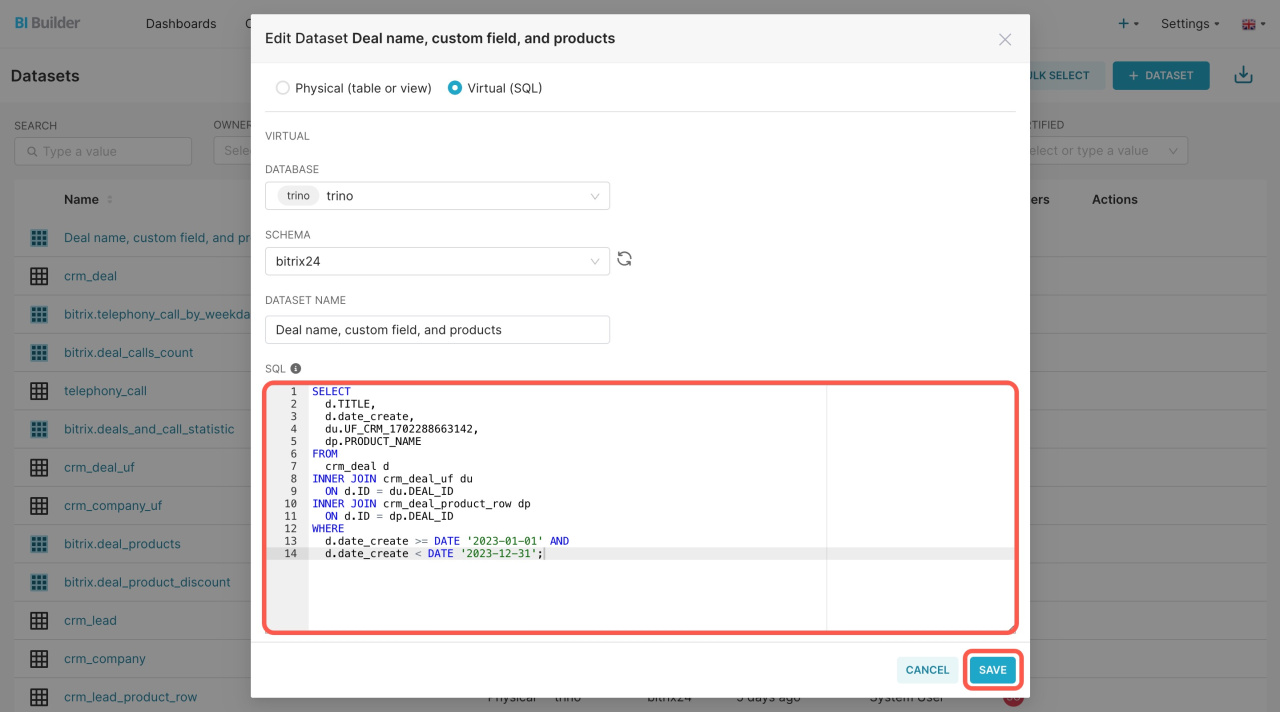
Our SQL query lacks the date_create field. Let's add it and save the updated request that performs the following actions:
-
d.TITLE selects the deal name from
crm_deal. -
d.date_create is used to filter deals by the Created on field.
-
du.UF_CRM_1702288663142 selects a specific custom field from
crm_deal_uf. -
dp.PRODUCT_NAME selects the product name from
crm_deal_product_row. -
INNER JOIN connects tables by the common deal identifier
DEAL_ID. -
WHERE d.date_create filters deals by their creation date for a certain period.
SELECT d.TITLE, d.date_create, du.UF_CRM_1702288663142, dp.PRODUCT_NAME FROM crm_deal d INNER JOIN crm_deal_uf du ON d.ID = du.DEAL_ID INNER JOIN crm_deal_product_row dp ON d.ID = dp.DEAL_ID WHERE d.date_create >= DATE '2023-01-01' AND d.date_create < DATE '2023-12-31';
To display a new field in your virtual dataset, open the Columns tab and click Sync columns from source.
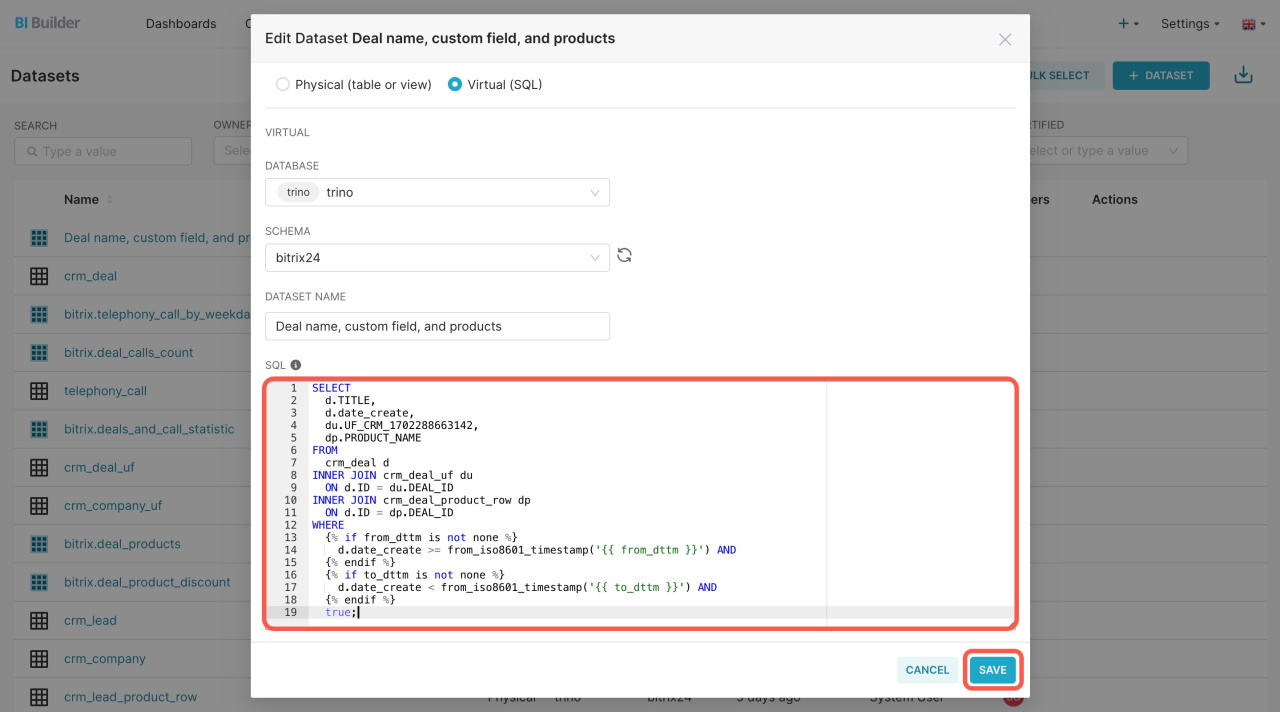
Then replace the WHERE parameter in your query. This way, you can dynamically filter data without having to edit it again.
SELECT d.TITLE, d.date_create, du.UF_CRM_1702288663142, dp.PRODUCT_NAME FROM crm_deal d INNER JOIN crm_deal_uf du ON d.ID = du.DEAL_ID INNER JOIN crm_deal_product_row dp ON d.ID = dp.DEAL_ID WHERE {% if from_dttm is not none %} d.date_create >= from_iso8601_timestamp('{{ from_dttm }}') AND {% endif %} {% if to_dttm is not none %} d.date_create < from_iso8601_timestamp('{{ to_dttm }}') AND {% endif %} true;
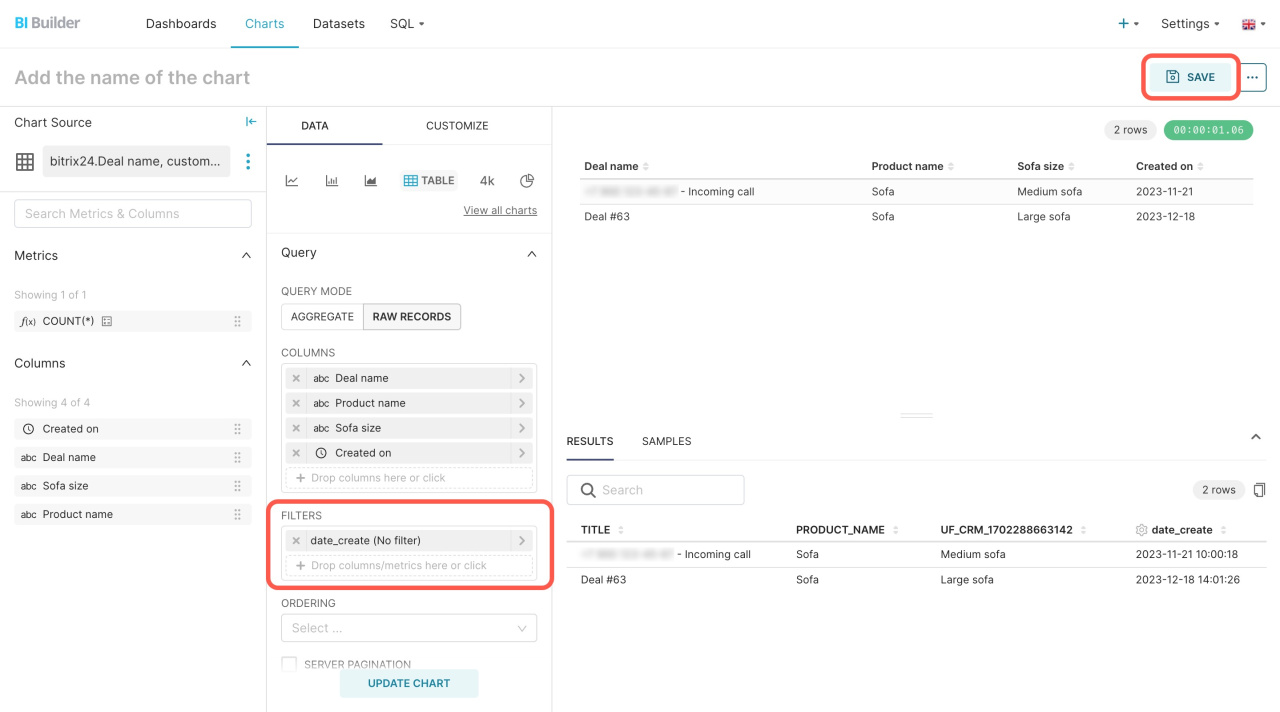
Create a new chart, ensure that there is a field for filtering, and click Save. In addition, in our chart, we have a column to track the date and time when each deal was created.
The dashboard will show the deal data for a selected period.
In brief
-
Use date filters to select, analyze, and compare data, and track trends.
-
Test your requests using Postman.
-
If there is a date-time field in the dataset, you can use it as a filter.
-
If there are errors or no specified field for filtering, the BI Builder will choose the first date-time field from the dataset.
-
To filter data by date and time, always set a field you need in the Filters section. Otherwise, the chart will load all of your data.
-
To filter data from a virtual set, edit your SQL query and add a required field for filtering.


