Bitrix24 Booking is a tool for customers to make appointments with specialists, rent rooms, equipment, etc.
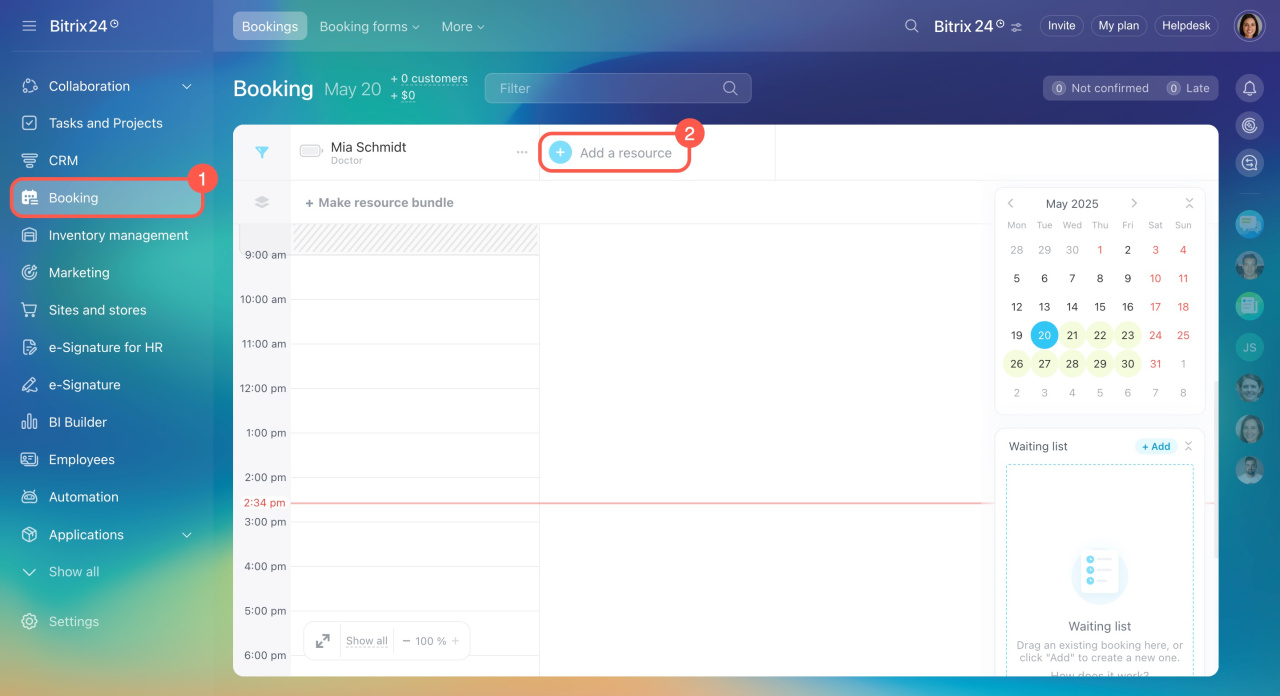
Go to the Booking section and click Add a resource.
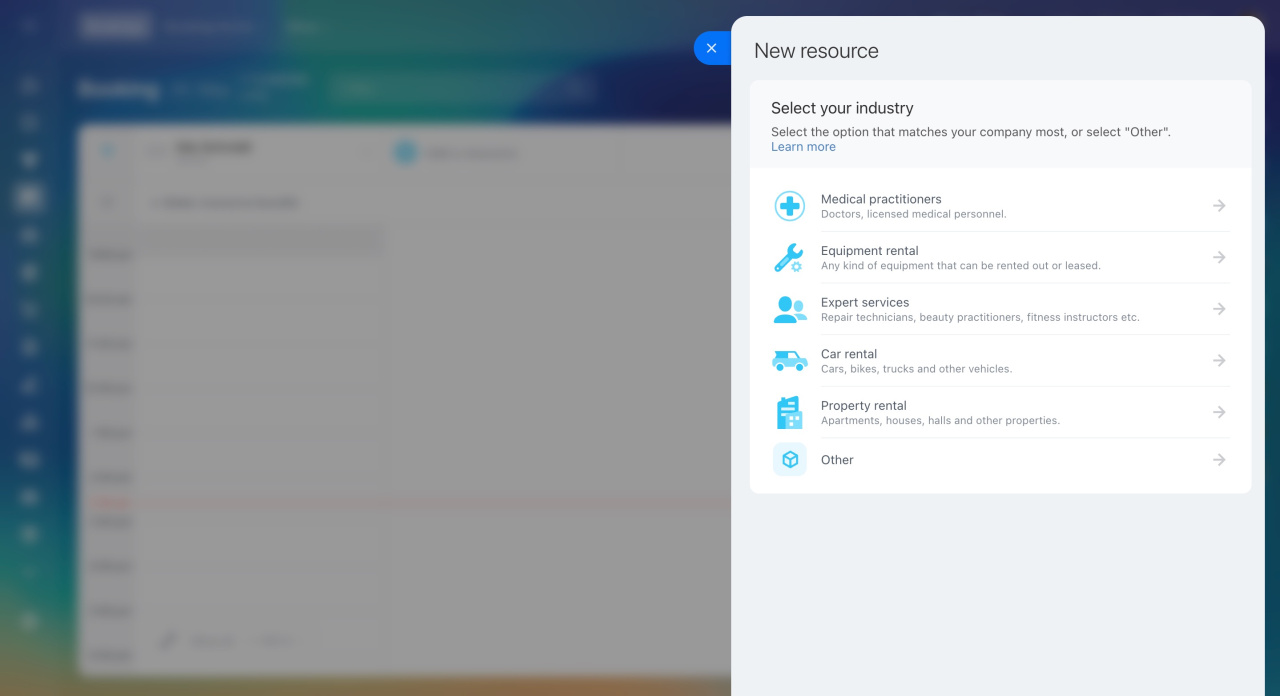
Select your industry
Choose the option that fits your business area:
- Medical practitioners — doctor appointments, cosmetologists, and health diagnostics.
- Equipment rental — construction, sports, event equipment, etc.
- Expert services — all types of counseling, repair work, beauty salon services.
- Car rental — cars and special vehicles.
- Property rental — banquet halls, apartments, houses, photo studios, etc.
- Other — select this option if you don't have the desired business area in the list.
Configure the resource
Name. Enter an expert's first and last name or any important information for the customer.
Type. Select it from the list or create a new one by entering its name and clicking Create custom type.
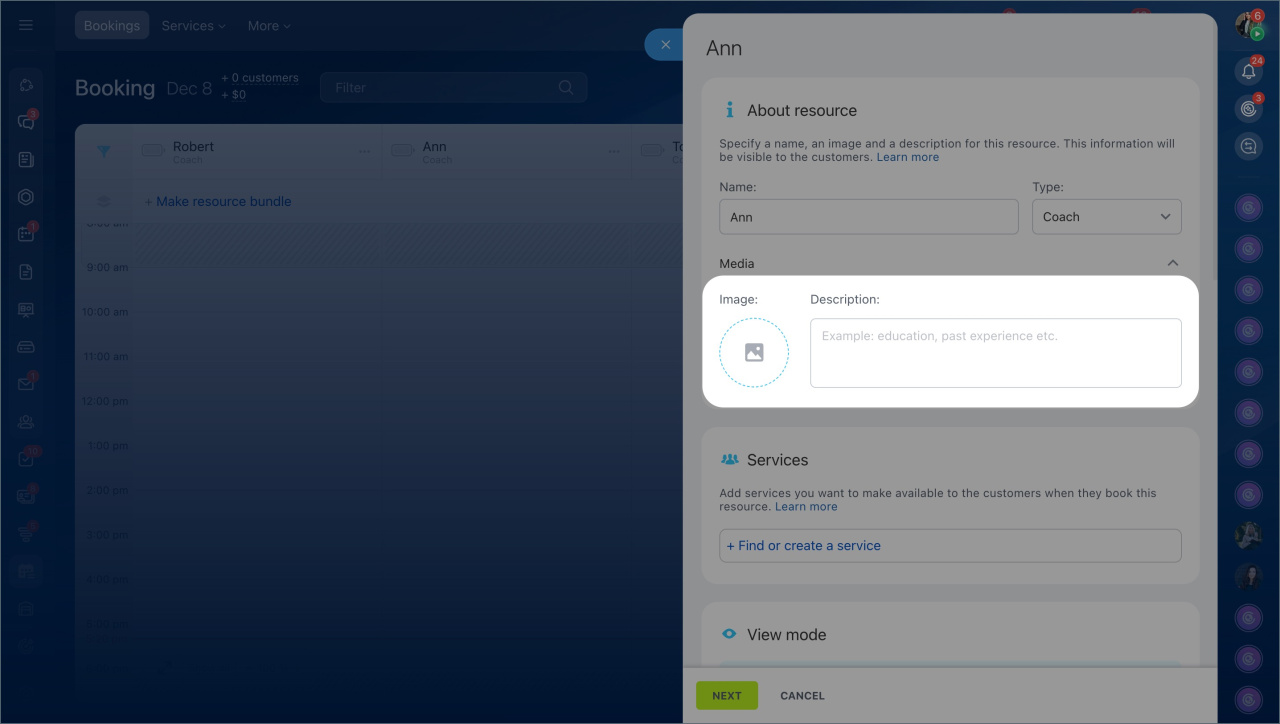
Information for customers. You can add an image and a brief description to help them learn more about the resource before booking. For example, upload photos of the specialists and include details about their education.
Services. Create or select services to associate with this resource like endocrinologist consultation. Customers will see the service when booking an appointment. The manager will see it in the booking form. Services created in the Booking section automatically appear in the CRM product catalog.
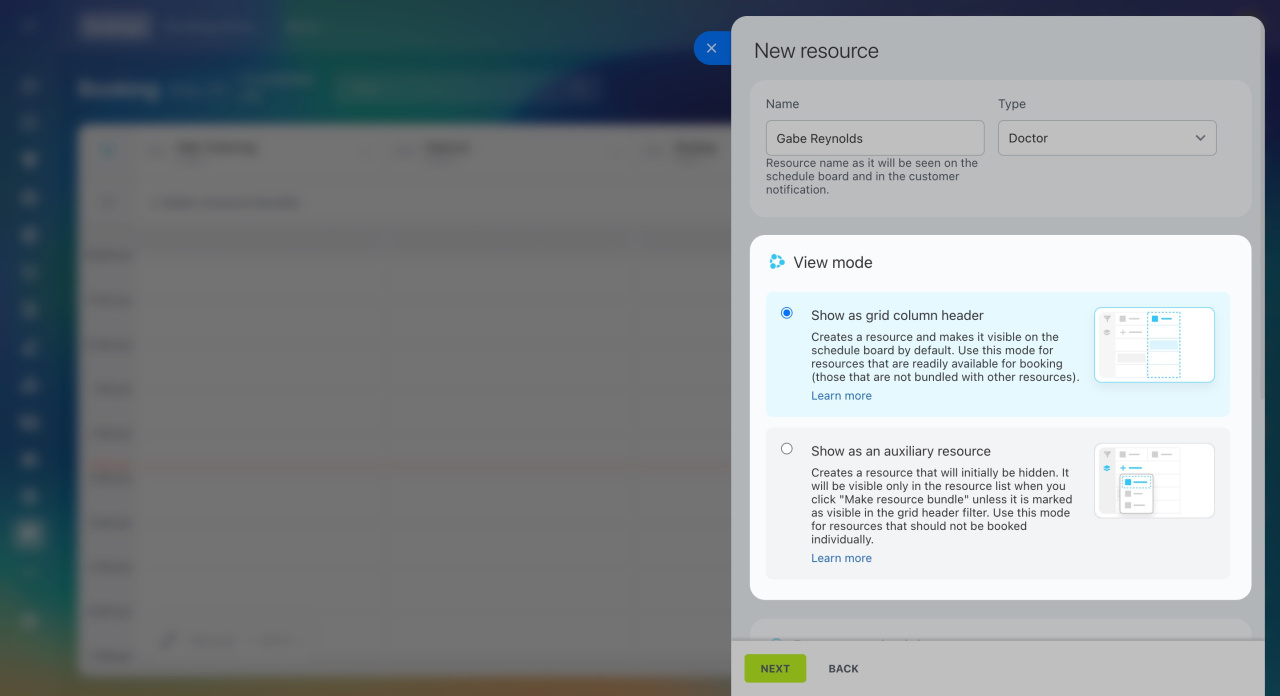
View mode. Select how the resource is displayed:
- Show in grid column header — the resource is always visible on the schedule board. Ideal for the main resources that customers book, like experts or rental cars.
- Show as an auxiliary resource — the resource isn't shown on the schedule board. It can only be used as part of a resource bundle, serving as an additional resource to the main one. For example, if the main resource is a doctor, the auxiliary resource could be a room.
Bookings. Enable the Calendar option to link bookings with the Bitrix24 calendar. This way, all bookings will automatically appear in employees’ personal calendars. Specialists can instantly see their schedules without having to check in multiple places. Configure the following settings:
- Users and calendars: Select the employees whose calendars will display the events. The booking will always appear in the calendar of the specialist providing the service, but you can also add other employees if needed. For example, add a supervisor to help track the team’s schedule and workload.
- Location: Choose a meeting room from the list if the specialist meets clients only there. The meeting room will be automatically added to the event to avoid any confusion about the location.
Create and reserve meeting rooms - Reminder: Set reminders so the employee doesn’t miss the booking. Decide how early to send the reminder, such as a day or an hour before the meeting.
Resource schedule. Specify the resource's availability for booking. To make the resource available only during the company's working hours, enable the Use company's business hours option. If you need to set a specific schedule for a resource, disable the option and specify the working days and hours.
Default booking duration. Define how long an appointment will last by default. Select a preset option or specify your own, then click Next. You can also adjust the duration when making a booking for a customer.
Set up booking notifications
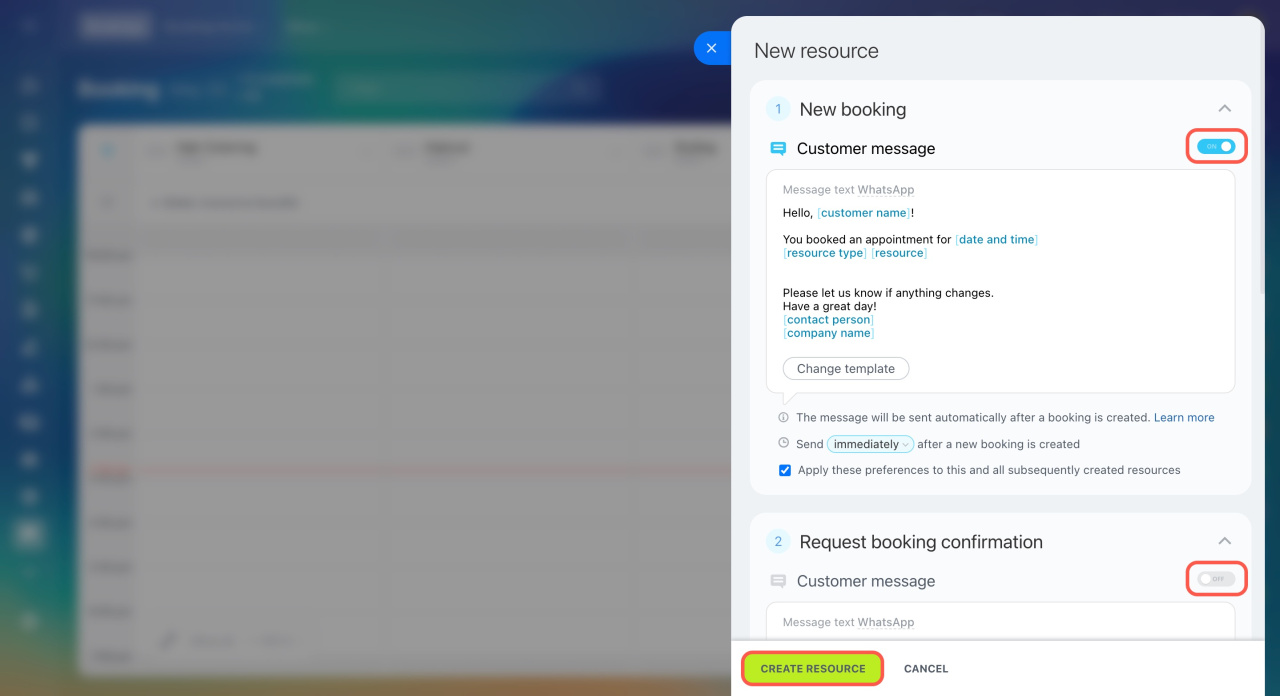
Enable and configure reminders for both customers and booking agents. Customers will receive messages via WhatsApp, while an activity will be created for the agent in the CRM item form.
-
New booking: Notifies the customer with the booking date, time, and resource name.
-
Booking confirmation: Sends the customer a message with a link to confirm their appointment. If the customer doesn’t confirm, an activity is automatically created in the deal form for the agent to follow up.
-
Booking reminder: Sends the customer a notification on the day of their booking.
-
Reminder if the customer is late: If the customer is late, they receive a message asking them to confirm their appointment. If they don’t confirm, an activity is automatically created and assigned to the agent to follow up and free up the slot if needed.
Click Create Resource.
After adding resources, you can use them for customer bookings and track their availability.
Add a client to a booking form
Edit or delete a resource
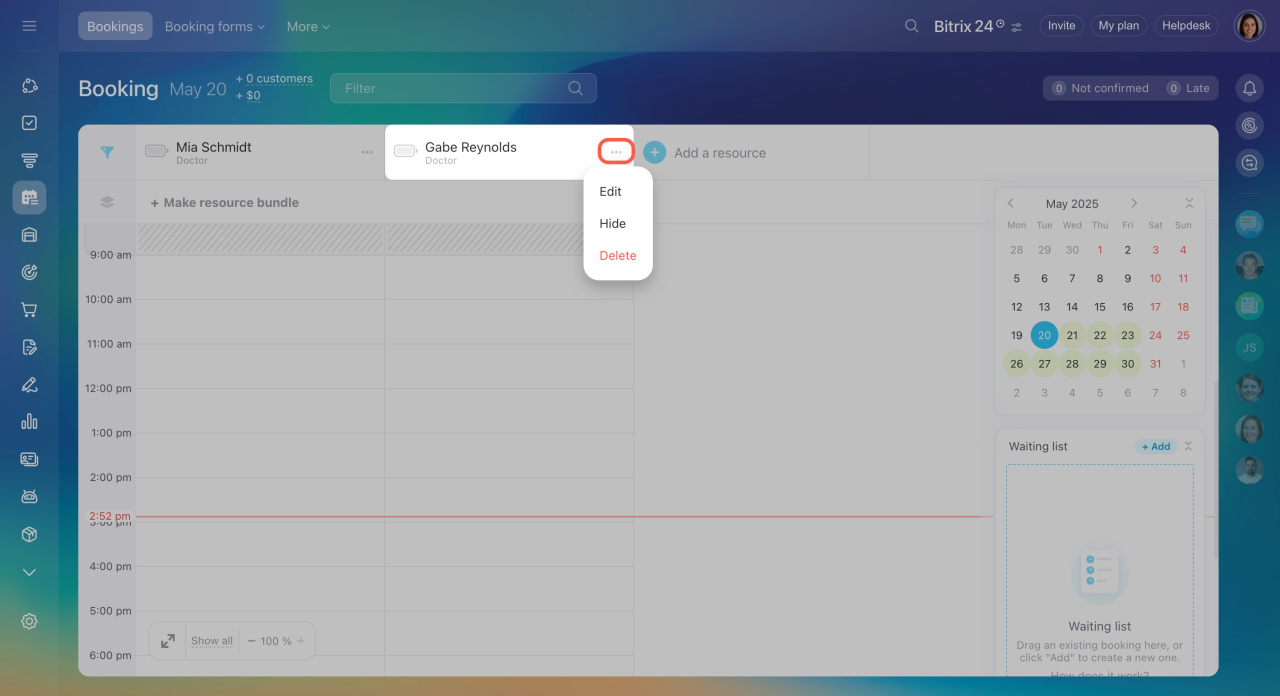
Select a resource on the schedule board and click the three dots next to its name. You can delete the resource or change its settings, for example, adjust the doctor's schedule. If the resource is temporarily unavailable, hide it. For example, if the doctor is on vacation.
In brief
-
Bitrix24 Booking is a tool for customers to make appointments with specialists, rent rooms, equipment, etc.
-
To get started, create and configure resources.
-
All employees of your Bitrix24 account can create and edit resources.
-
Select the resource type, customize its settings, and enable notifications for customers.
-
After adding resources, you can use them for customer bookings and track their availability.

