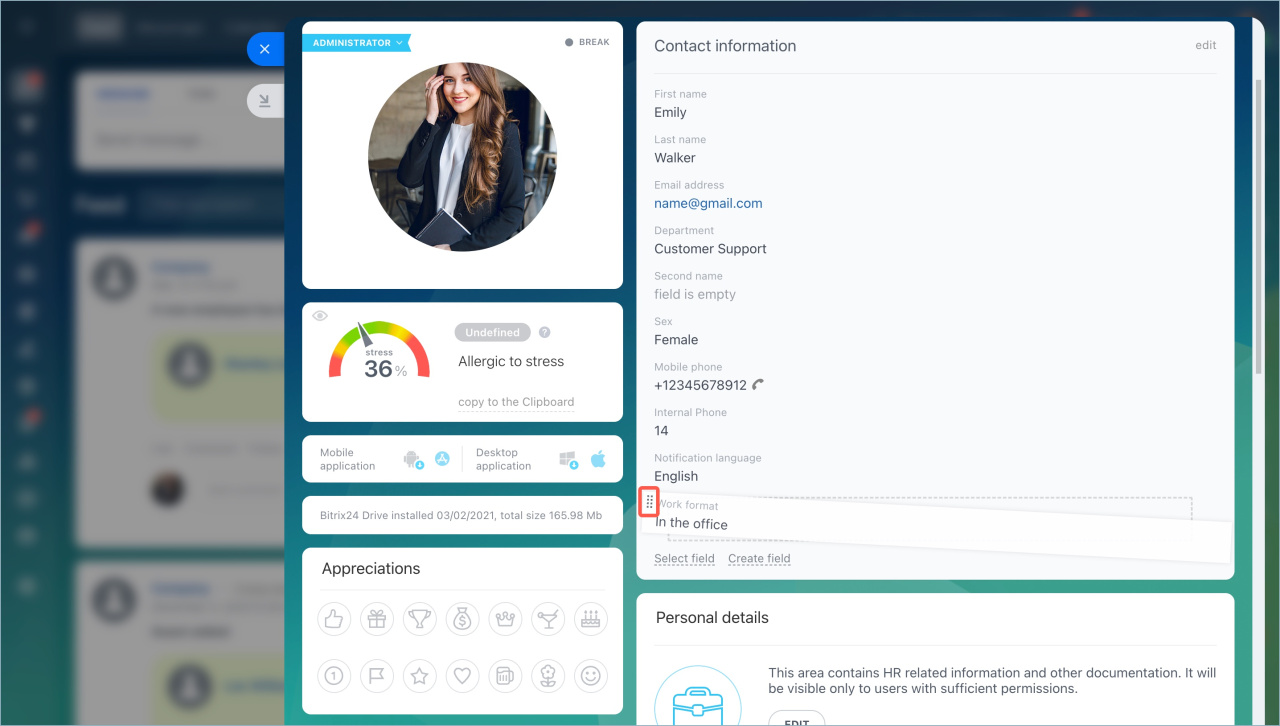
The employee profile in Bitrix24 is a form containing key information like name, contacts, position, department, etc. Custom fields allow you to add extra information to the profile, such as work format, schedule, or car number.
In this article:
Assign admin permissions
Create a custom field
- Click on the photo in the top right corner to open a profile and click the name.
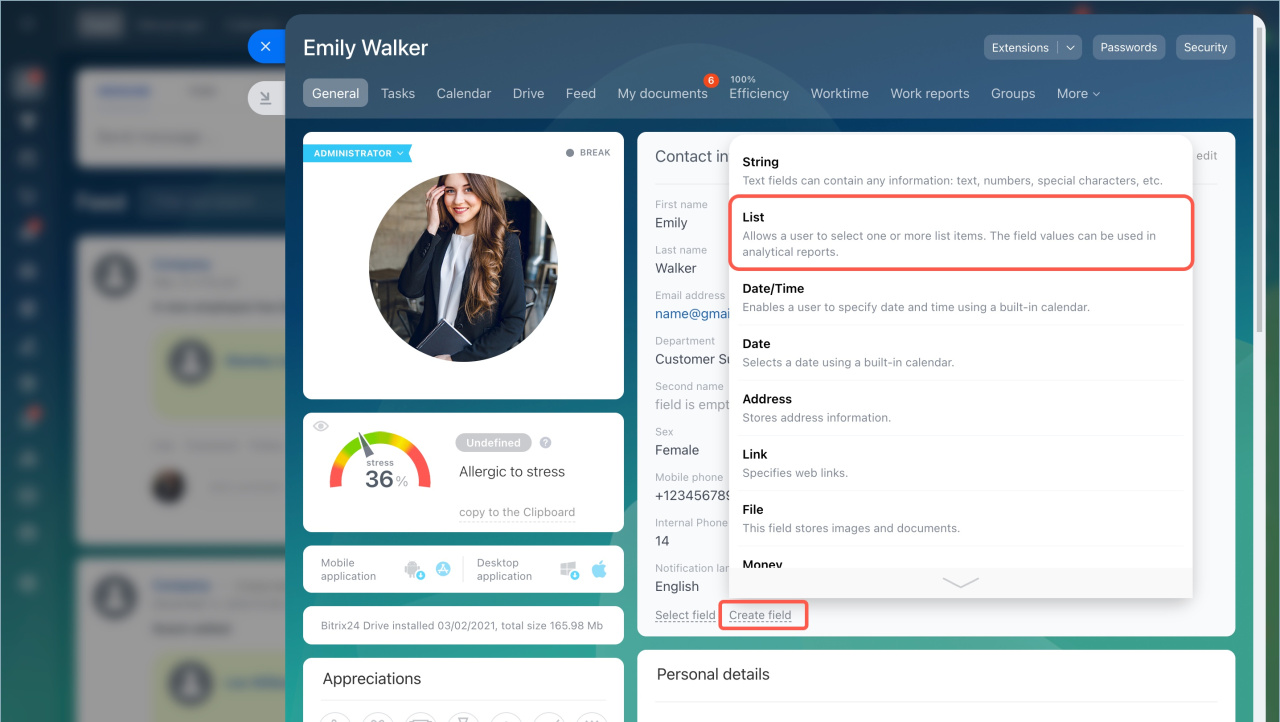
- Click Create field and select the field type:
- String — enter any information like text, numbers, special characters, etc. For example, an employee's car number.
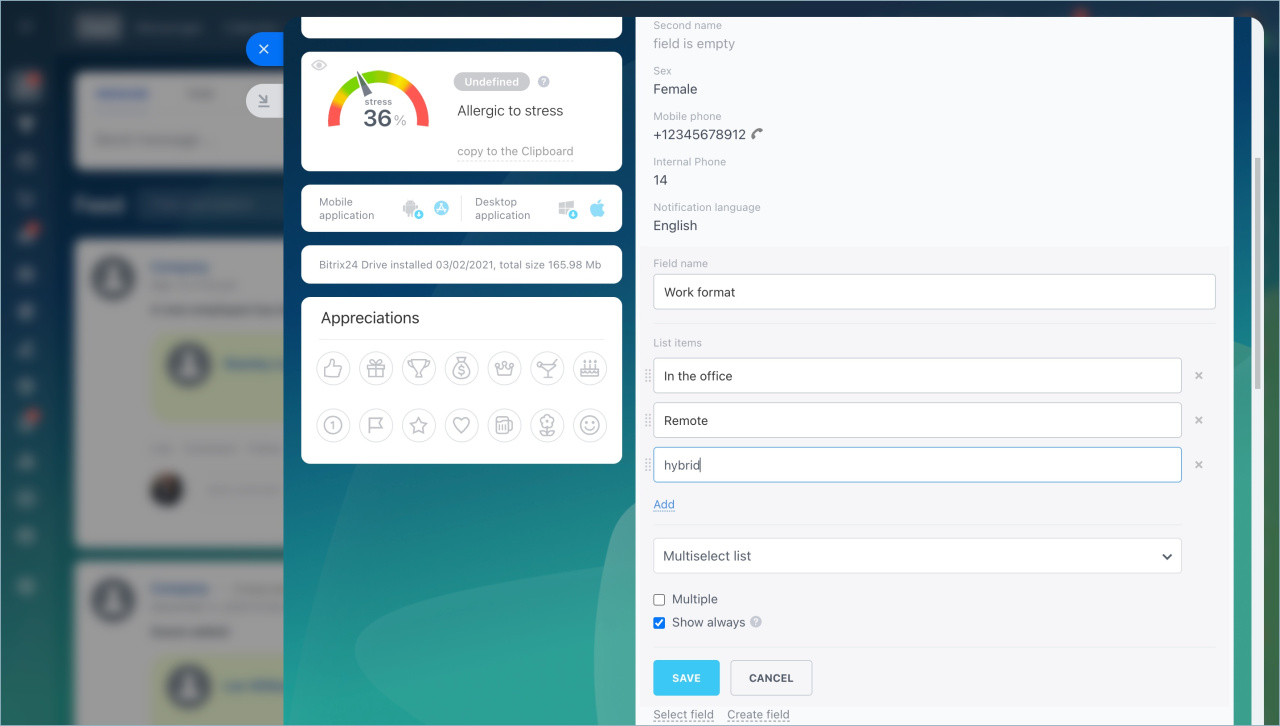
- List — select one or multiple options. For example, work format: office, remote, or hybrid.
- Date/Time — specify an exact date and time. For example, the date of the next work shift.
- Date — specify a date without time. For example, the next evaluation day.
- Address — select a location on the map. For example, a document delivery address.
- Link — add any links. For example, an employee's social media profile.
- File — upload documents. For example, diplomas or certificates.
- Money — specify an amount and currency. For example, a budget for colleague gifts.
- Yes/No — choose "Yes" or "No". For example, whether the employee uses corporate transport.
- Number — enter any number. For example, an office number.
Enter the field name and configure its settings:
- Multiple — allows adding several values to the field.
- Always show — displays the field in the profile even if it is empty.
Click Save. The field will appear in the profile.
Edit a custom field
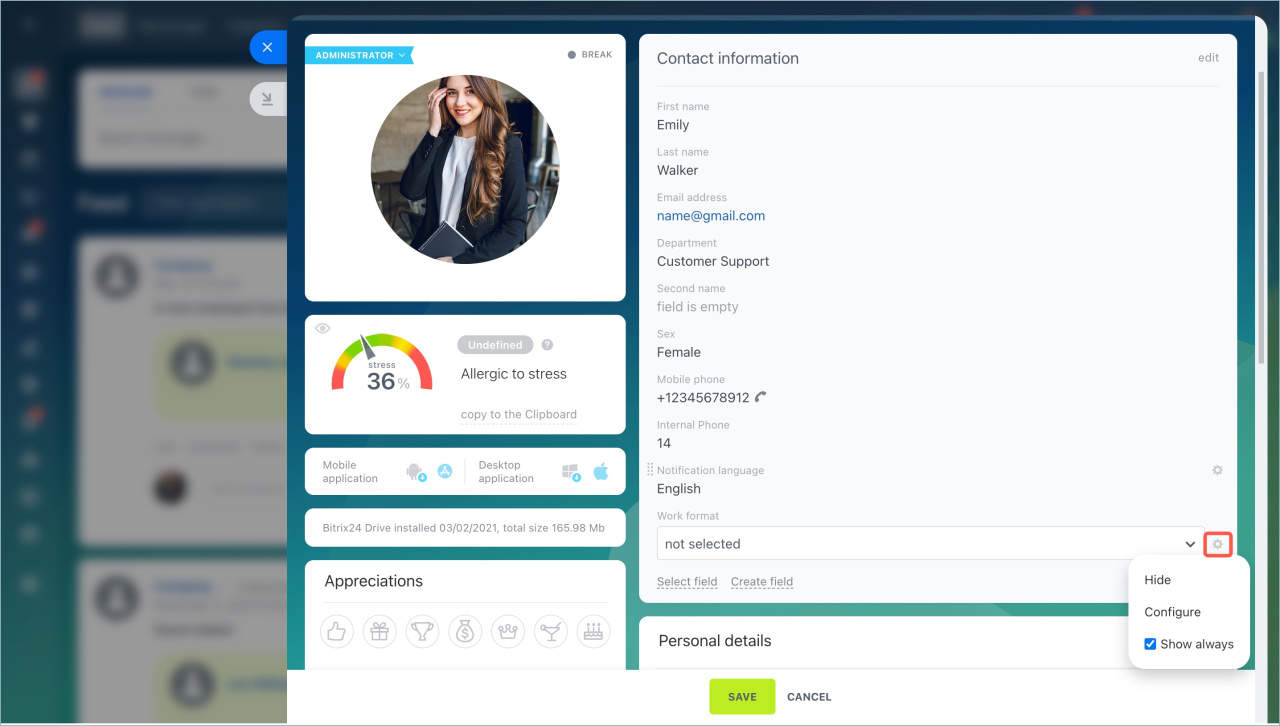
Click Settings (⚙️) next to the field and choose an action:
- Hide — remove the field from all employee profiles.
- Configure — change the field settings.
- Always show — display the field in the profile even if it is empty.
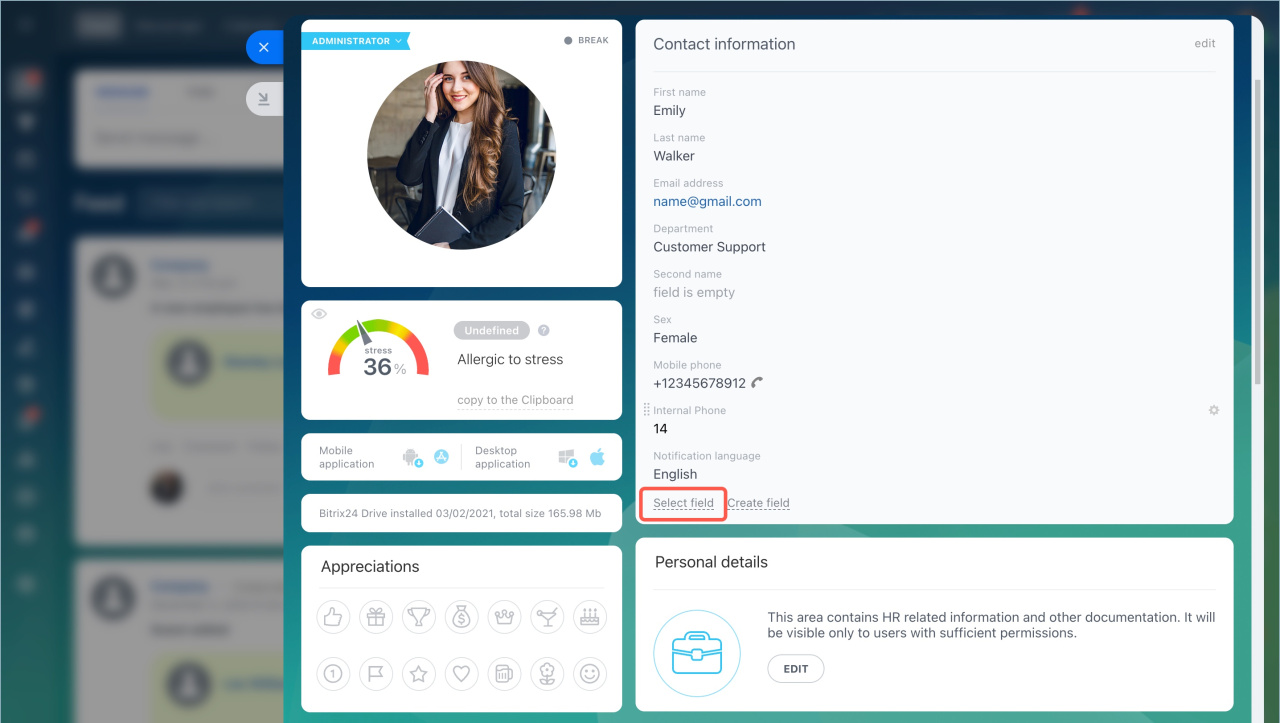
To restore a hidden field in the profile:
- Click Select field.
- Check the one from the list and click Select.
To change the order of fields, hold the field and drag it to a new position.
In brief
- Custom fields in the employee profile can store any information like work format, schedule, or car number.
- Go to the profile and click Create field.
- To edit a field, click Settings (⚙️) next to it and select an action: hide, configure, or always show.
- Only a Bitrix24 administrator can create and edit fields in the profile.


