If you’re planning a vacation, maternity leave, or unpaid leave, you can submit a leave request directly from the Feed.
To start the workflow:
- Go to Feed.
- Click More.
- Select Workflow.
- Click Start next to the Leave Approval workflow.
- Click Next to continue.
First launch and setup
When you launch the workflow for the first time, the system will ask the administrator to configure the workflow constants.
Bitrix24 administrators can also configure access permissions for this workflow.
- Go to Automation.
- Click Workflows.
- Select Workflows in Feed.
- Click Leave Approval.
- Click Settings (⚙️).
- Select Change workflow preferences.
- Go to the Access tab and set permissions.
Configure permissions to use a workflow
Once the parameters are set, employees can start using the workflow template.
Sumbit a leave request
Fill in the required fields: Absence type, Start date, and End date. You can also provide a short description in the Reason for leave section if needed.
The employee involved in the process of approval will receive your submission immediately.
Track the request status
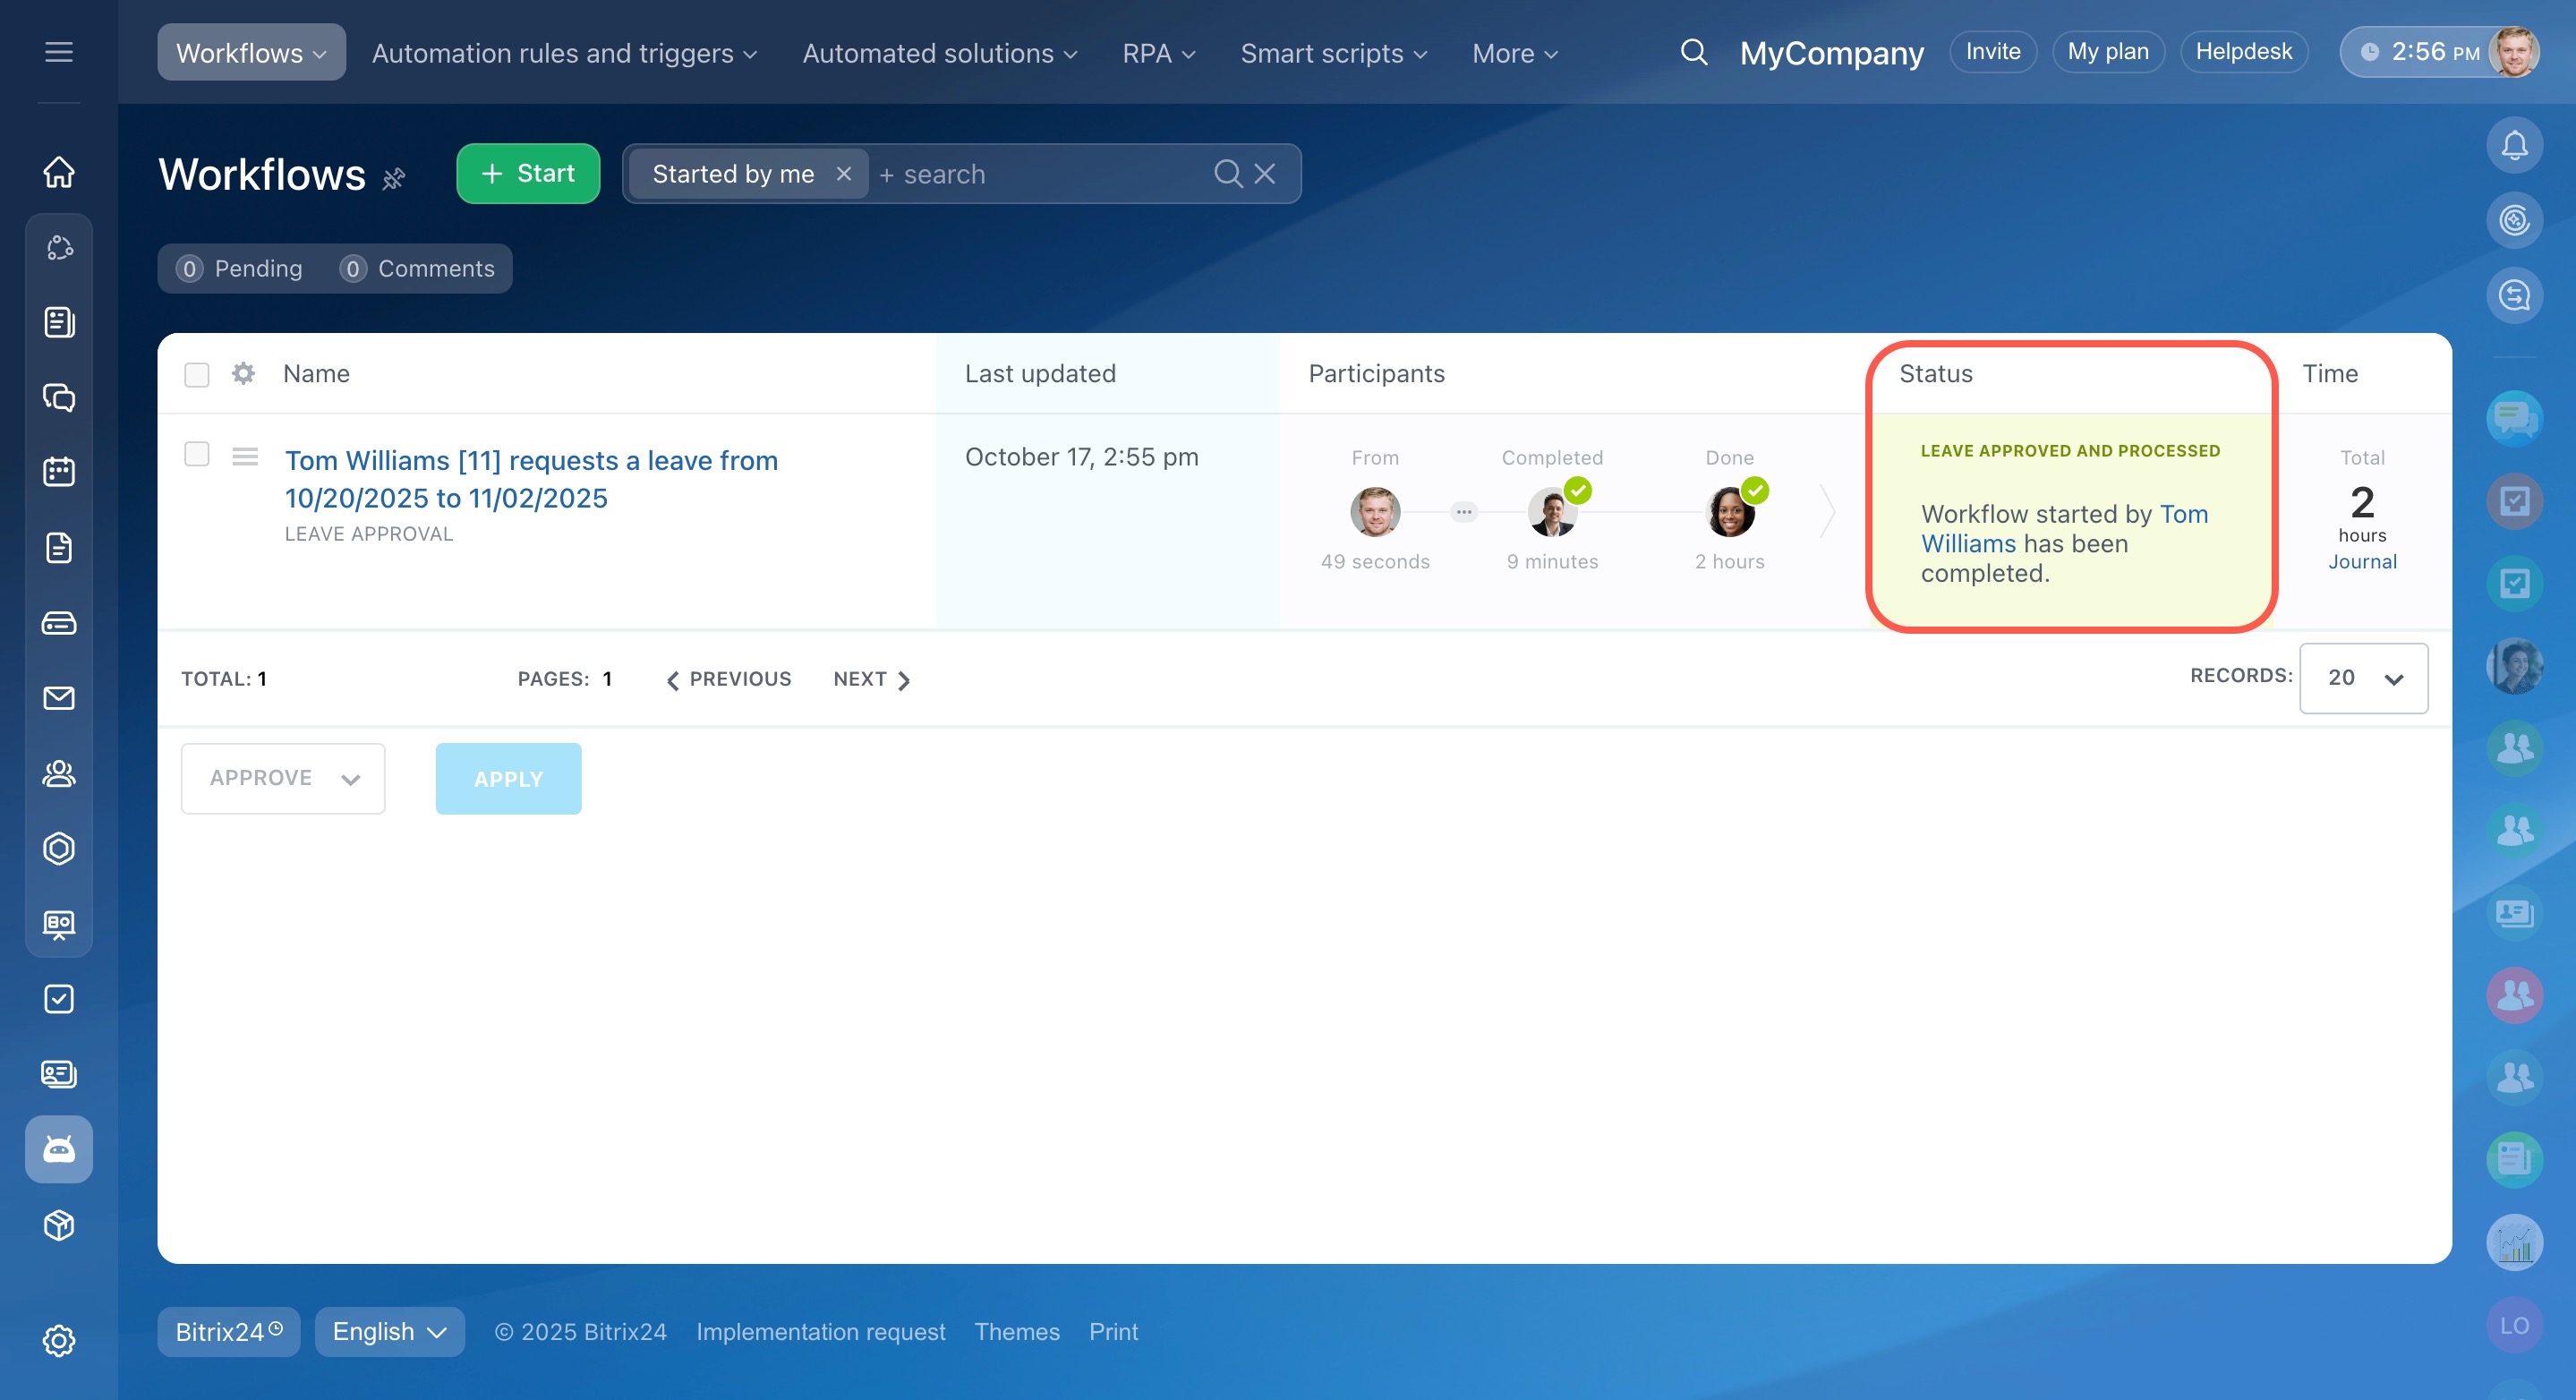
You’ll receive a notification each time your request is approved or denied. The request status is also visible in your Feed.
To find all requests you’ve sent:
- Go to Automation in the left menu.
- Open the Workflows tab.
- Select Started by me in the filter.
Once all required approvals are received, the request is sent to the final approver. When the process is complete, the workflow status will show as Leave approved and processed.
All approved leaves are automatically added to the Absence chart.
Absence chart
Delete a leave request sent by mistake
- Go to Automation in the left menu.
- Open the Workflows tab.
- Find the element created by mistake and click its name.
- Click Worfklow element.
There are two ways to remove an unnecessary request:
- Click Stop. The workflow will pause, but you can resume it later.
- Click Settings (⚙️) and select Delete element. This action completely removes the request from the system.
In brief
-
You can submit a leave request directly from the Feed using the Leave Approval workflow.
-
Administrators can select approvers and set up access permissions.
-
You can track your request status in the Feed or under Automation > Workflows > Started by me.
-
Approved leaves are automatically added to the Absence chart.
-
If you sent a request by mistake, you can stop or delete it in the workflow settings.


