
You can now manage email settings in the Bitrix24 mobile app. You can turn on CRM integration, give coworkers access, and choose how mailbox folders sync. This helps you update settings quickly without using a computer.
Mailbox settings
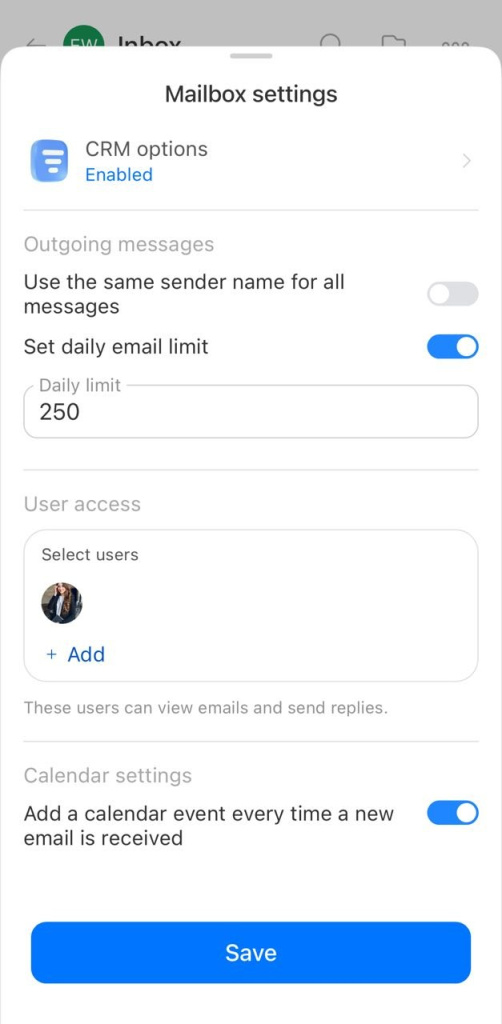
In this section, you can set up CRM integration, outgoing email, employee access, and Calendar sync.
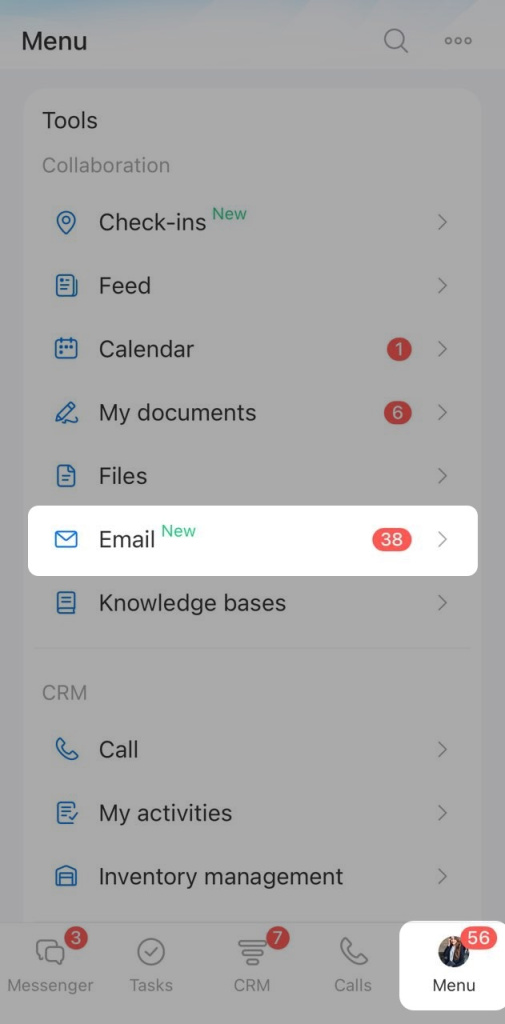
1. Open Menu > Email.
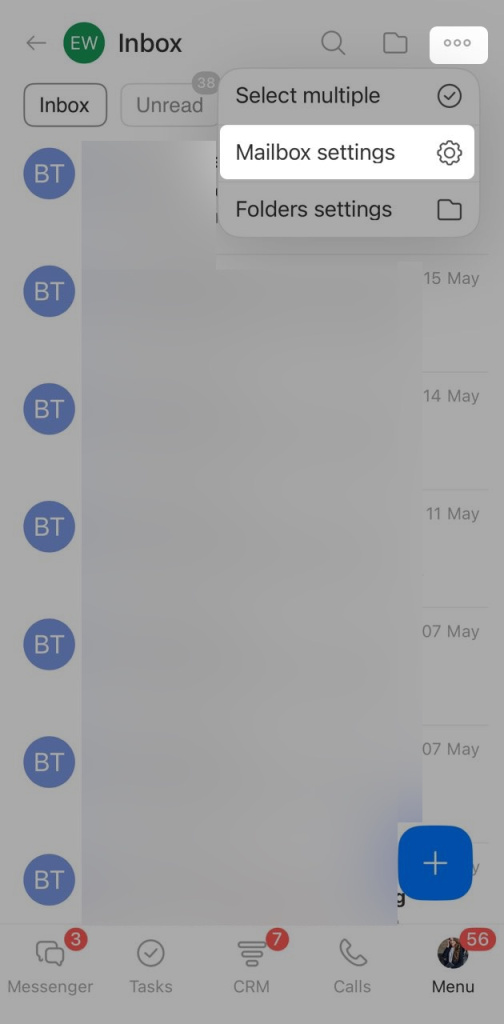
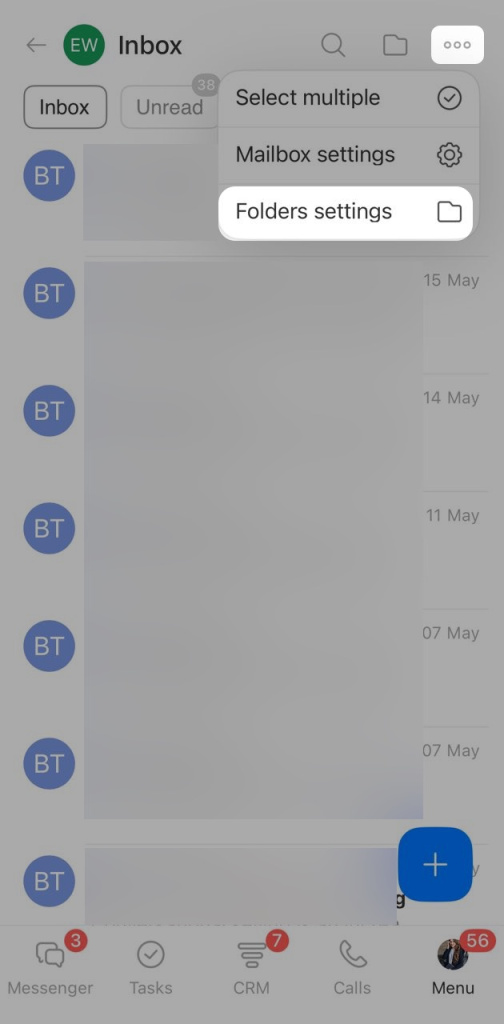
2. Tap three dots (...) in the top-right corner.
3. Select Mailbox settings.
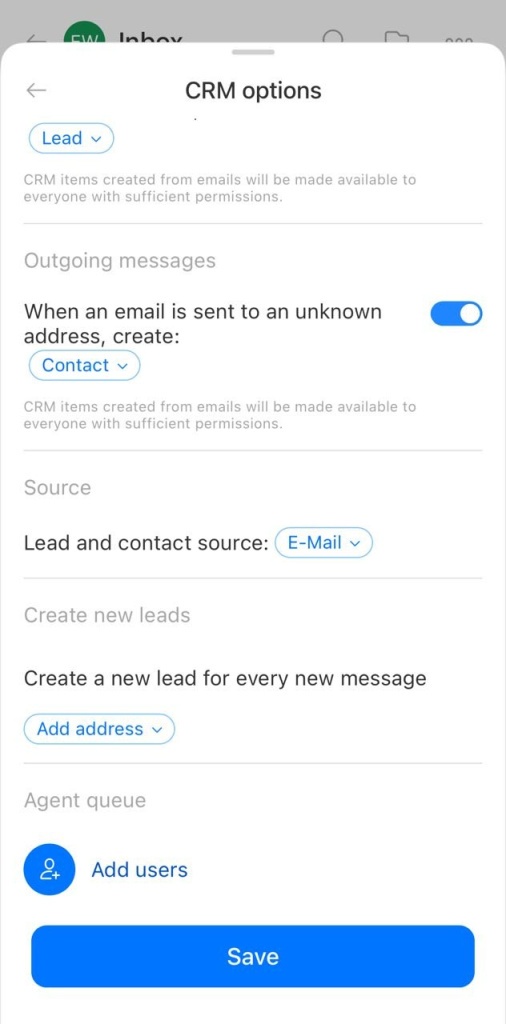
CRM options. Tap CRM options at the top of the screen.
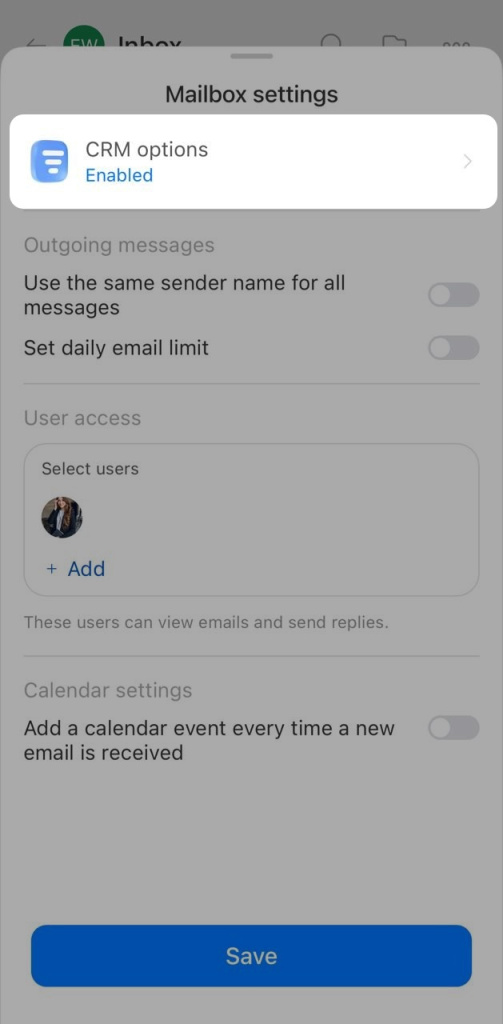
Available settings:
- Sync emails with CRM for. Choose the time period for saving mailbox emails to the CRM. These emails will be visible to all employees who have access to the CRM record.
- Assign emails from known contacts to respective responsible persons. If an email comes from a client who is already in the CRM, Bitrix24 links it to the existing record.
- When an email is received from an unknown address, create. Choose what Bitrix24 should create when an email comes from an unknown address: a lead or a contact.
- When an email is sent to an unknown address, create. Choose what Bitrix24 should create when you send an email to a new address: a lead or a contact.
- Lead and contact source. Choose the source shown in newly created CRM records, such as Email.
- Create a new lead for every new message. Add addresses that should always create a new lead, even if the sender already exists in the CRM.
- Agent queue. Add employees who will receive new leads and contacts in turn. Tap Add chat members and select employees from the list.
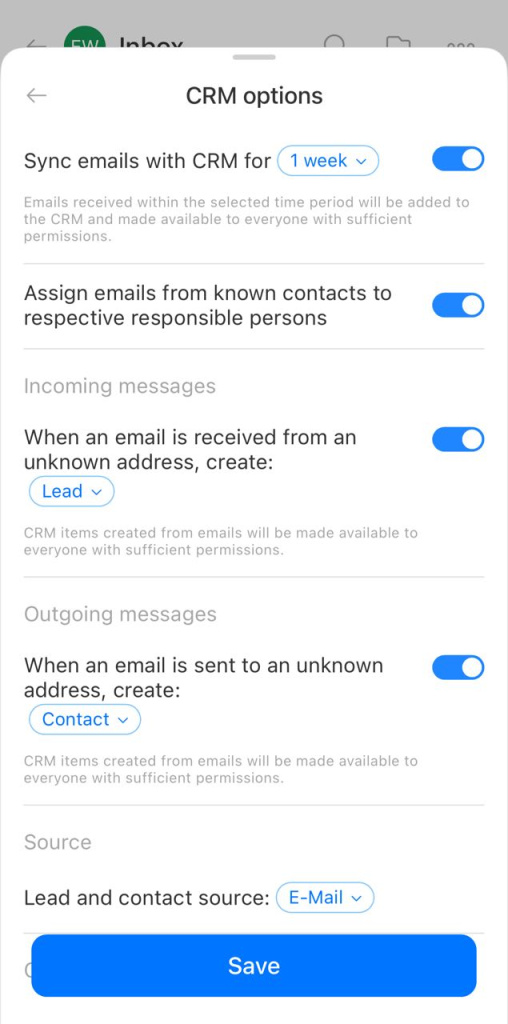
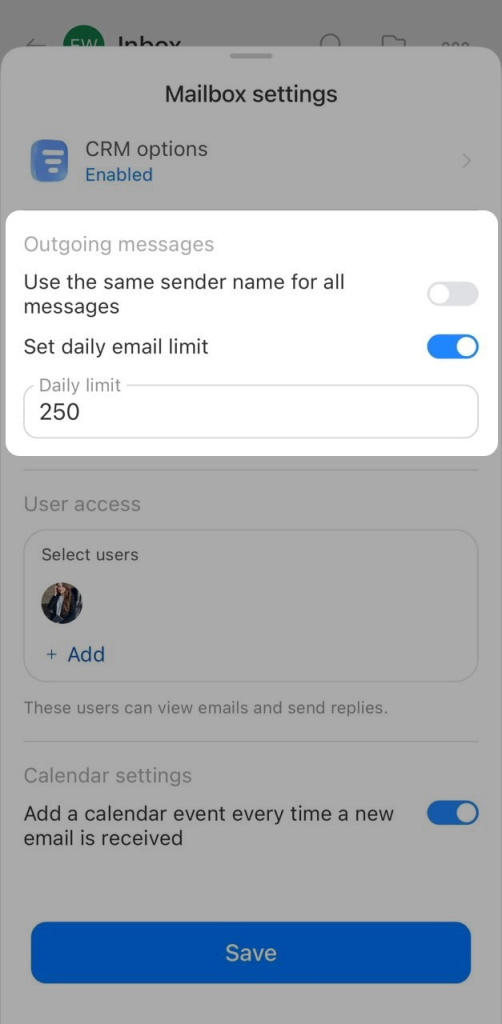
Outgoing messages. This section includes two options:
- Use the same sender name for all messages: Turn this on if you want clients to see the same sender name for all emails sent from this mailbox.
- Set daily email limit: Turn this on and set a limit if needed.
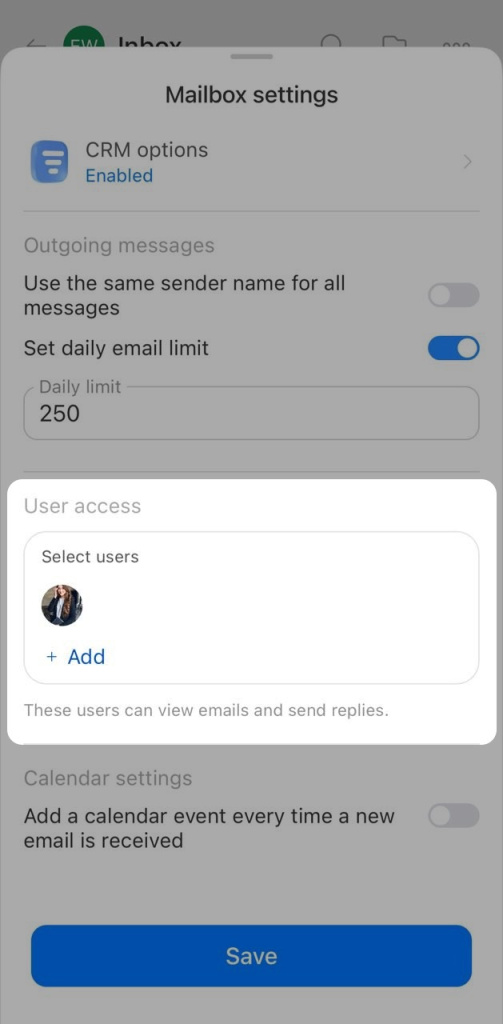
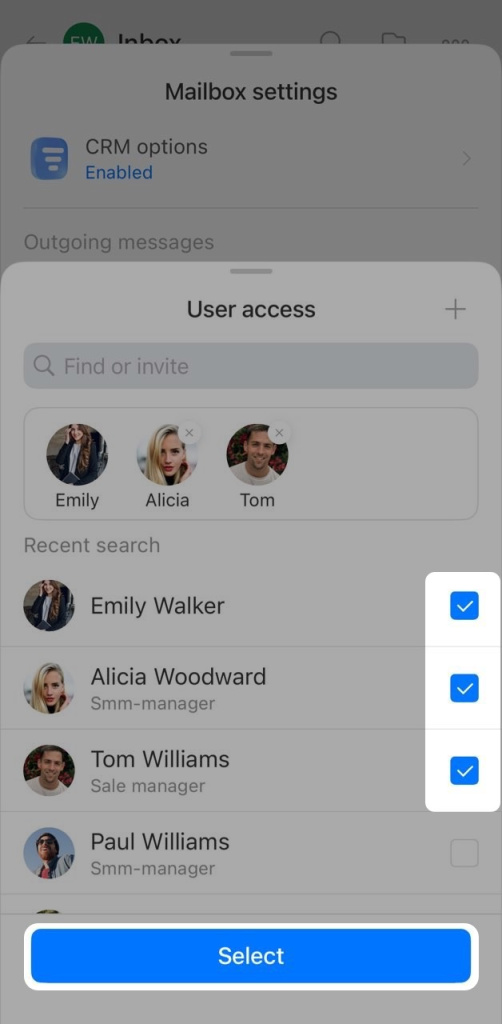
Mailbox access. You can allow other employees to receive and reply to emails from this address. Tap Add and select employees. These employees can read, write, and delete emails, but cannot change mailbox settings.
Calendar settings. Turn on Add a calendar event every time a new email is received to create Bitrix24 Calendar events from meeting invitation emails. For example, if you receive a meeting invite from a third-party service, the event will appear in the Bitrix24 Calendar automatically.
Save your changes.
Folder settings
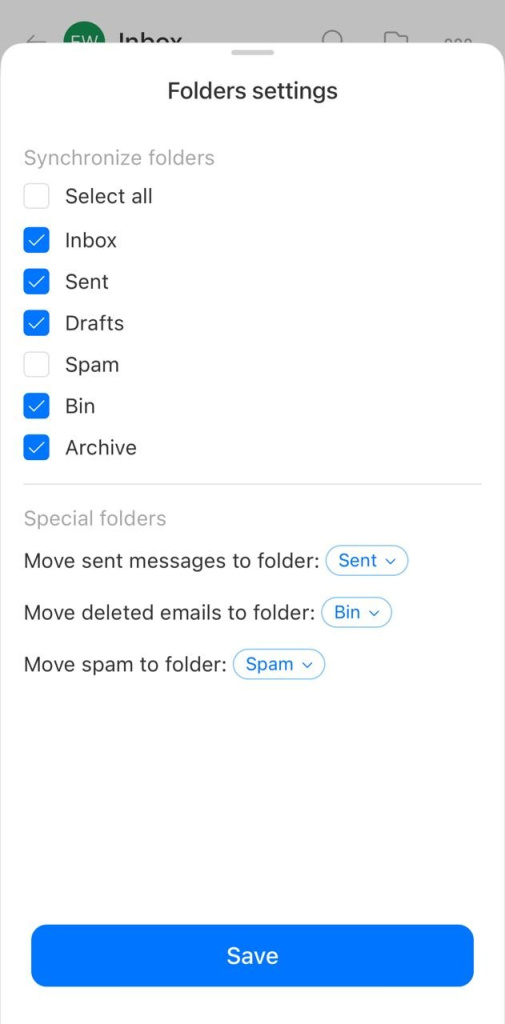
In this section, you can choose which folders to sync. You can also choose where to save sent emails, deleted emails, and spam.
To open folder settings, tap three dots (...) > Folder settings.
In Synchronize folders, select the folders whose emails should appear in Bitrix24. To select all folders at once, tap Select all.
In Special folders, choose the following:
- Move sent messages to folder: Select the folder in your email service where emails sent from Bitrix24 will be stored.
- Move deleted emails to folder: Select the folder for deleted emails.
- Move spam to folder: Select the folder for emails marked as spam.
Tap Save. You can now work with email in the mobile app just like you do in Bitrix24 on a computer.
In brief
- You can manage email in the mobile app the same way as in Bitrix24 on a computer.
- To configure email, tap Menu > Email > three dots (...).
- You can connect email to the Calendar, set up CRM options and outgoing messages, and give coworkers access.
- In Folder settings, you can choose folders to sync and set where sent emails, deleted emails, and spam are stored.