Use checklists in tasks to simplify your work.
Creating a checklist
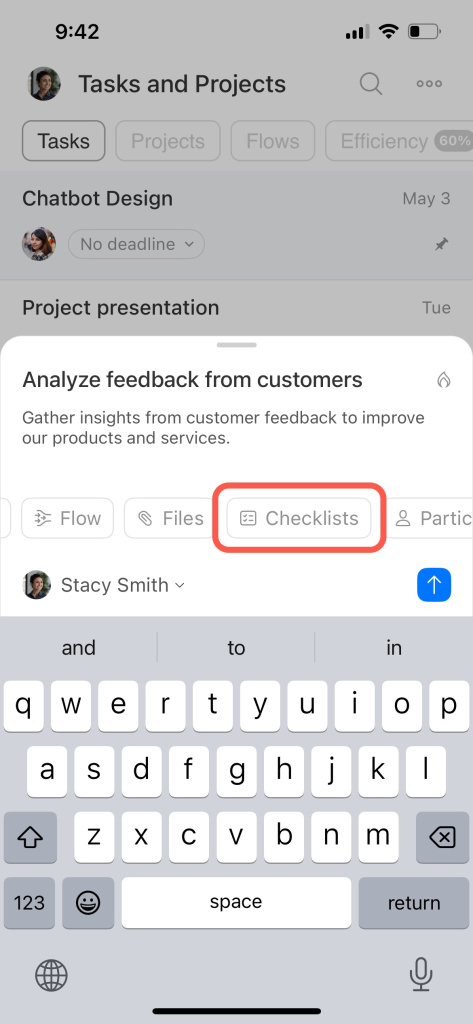
You can create and use checklists on the web and on mobile.
To create a checklist, click Checklist when adding a new task.
Keyboard shortcuts to quickly create a checklist:
- Press Enter to save a checklist item.
- Use Up and Down to switch between checklist items.
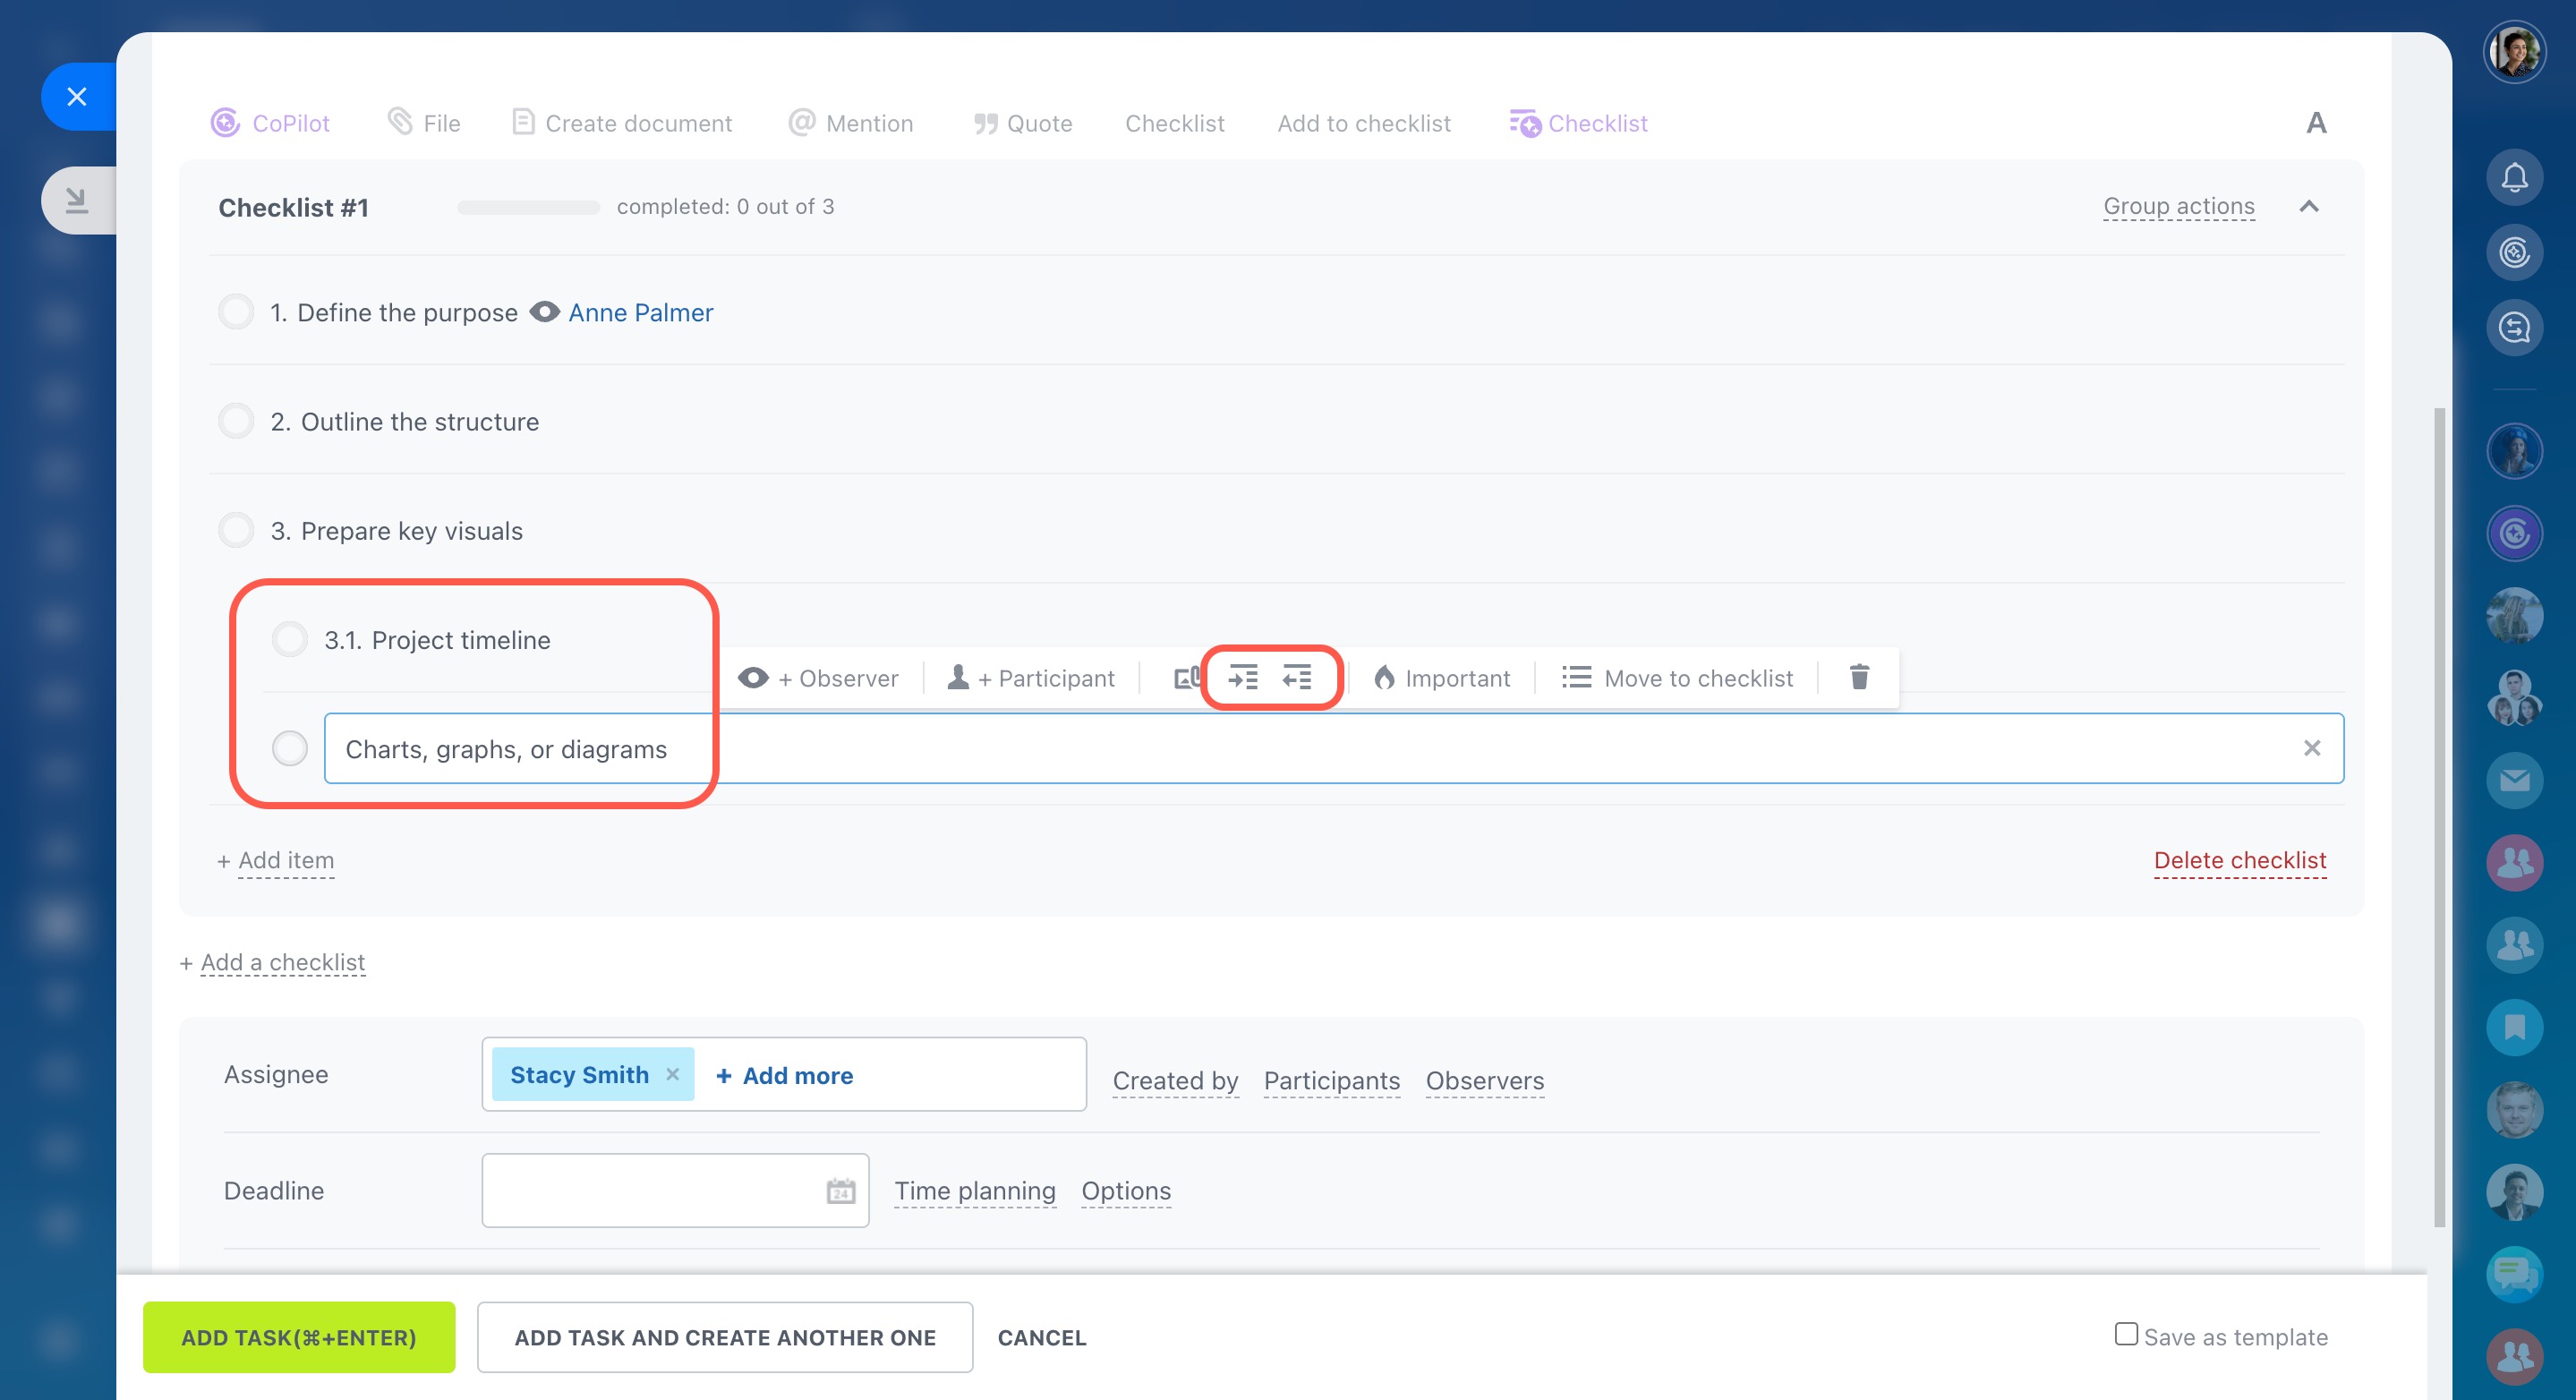
- Press Tab to add a subitem to the checklist.
Checklist options
There are some important options available when creating a checklist:
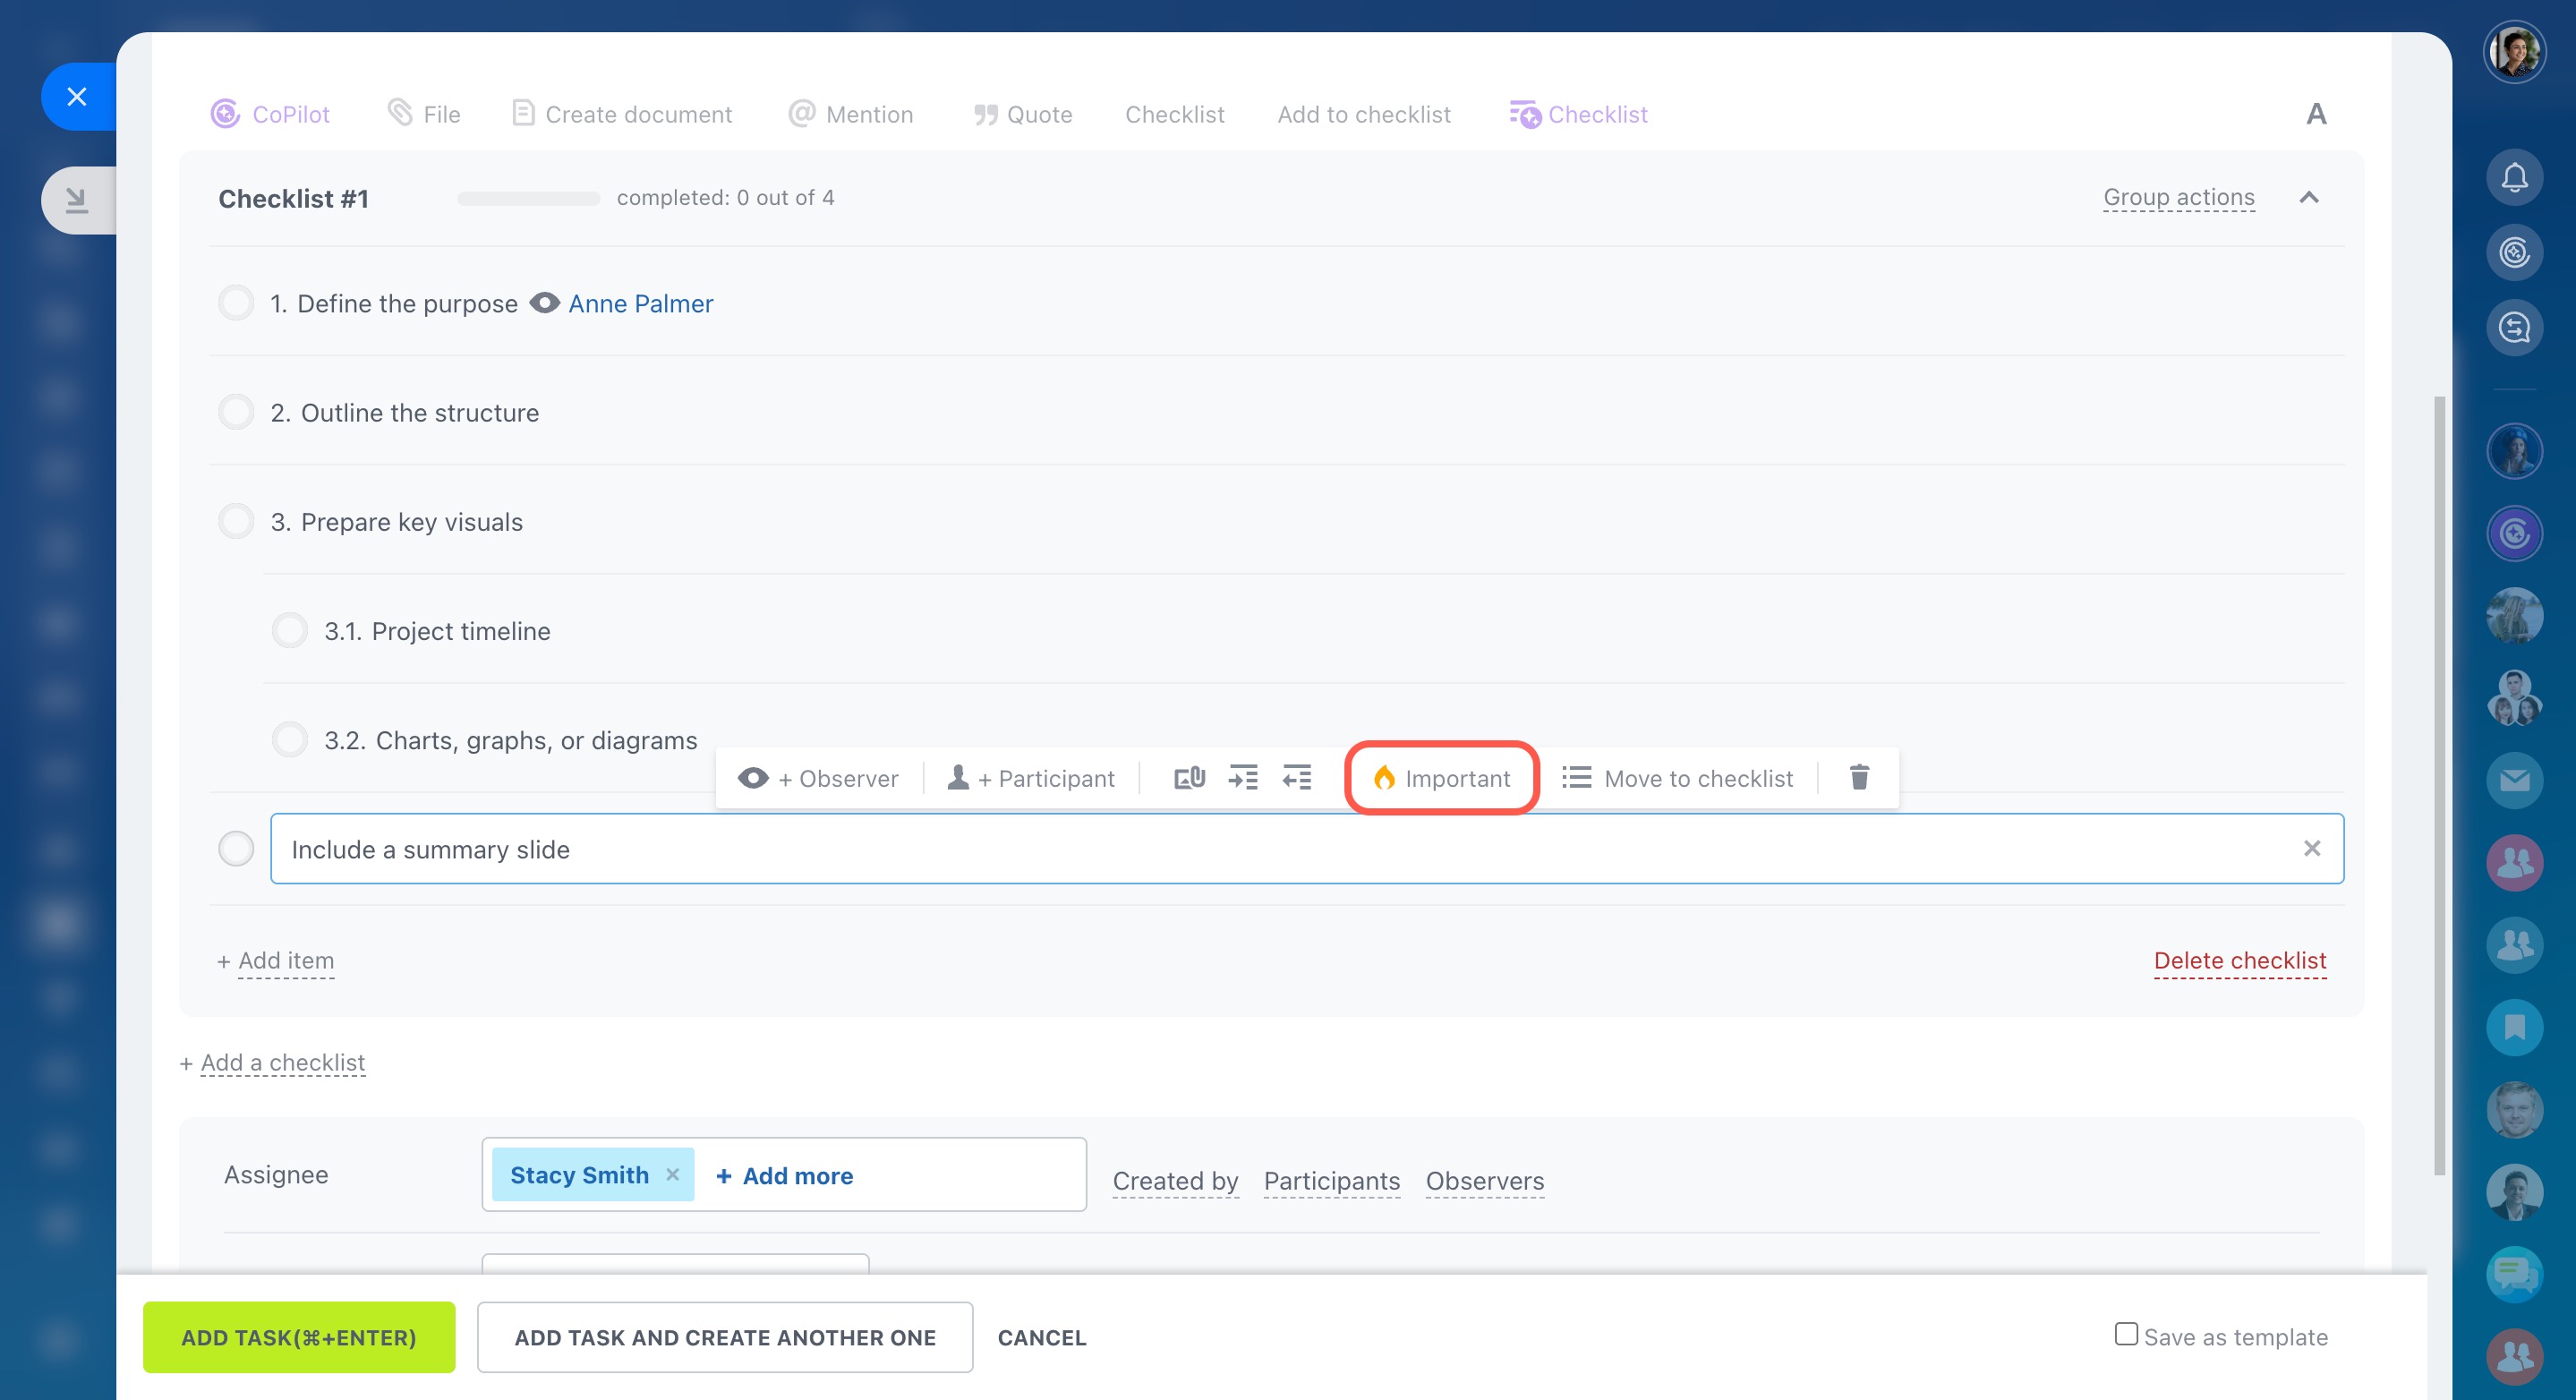
-
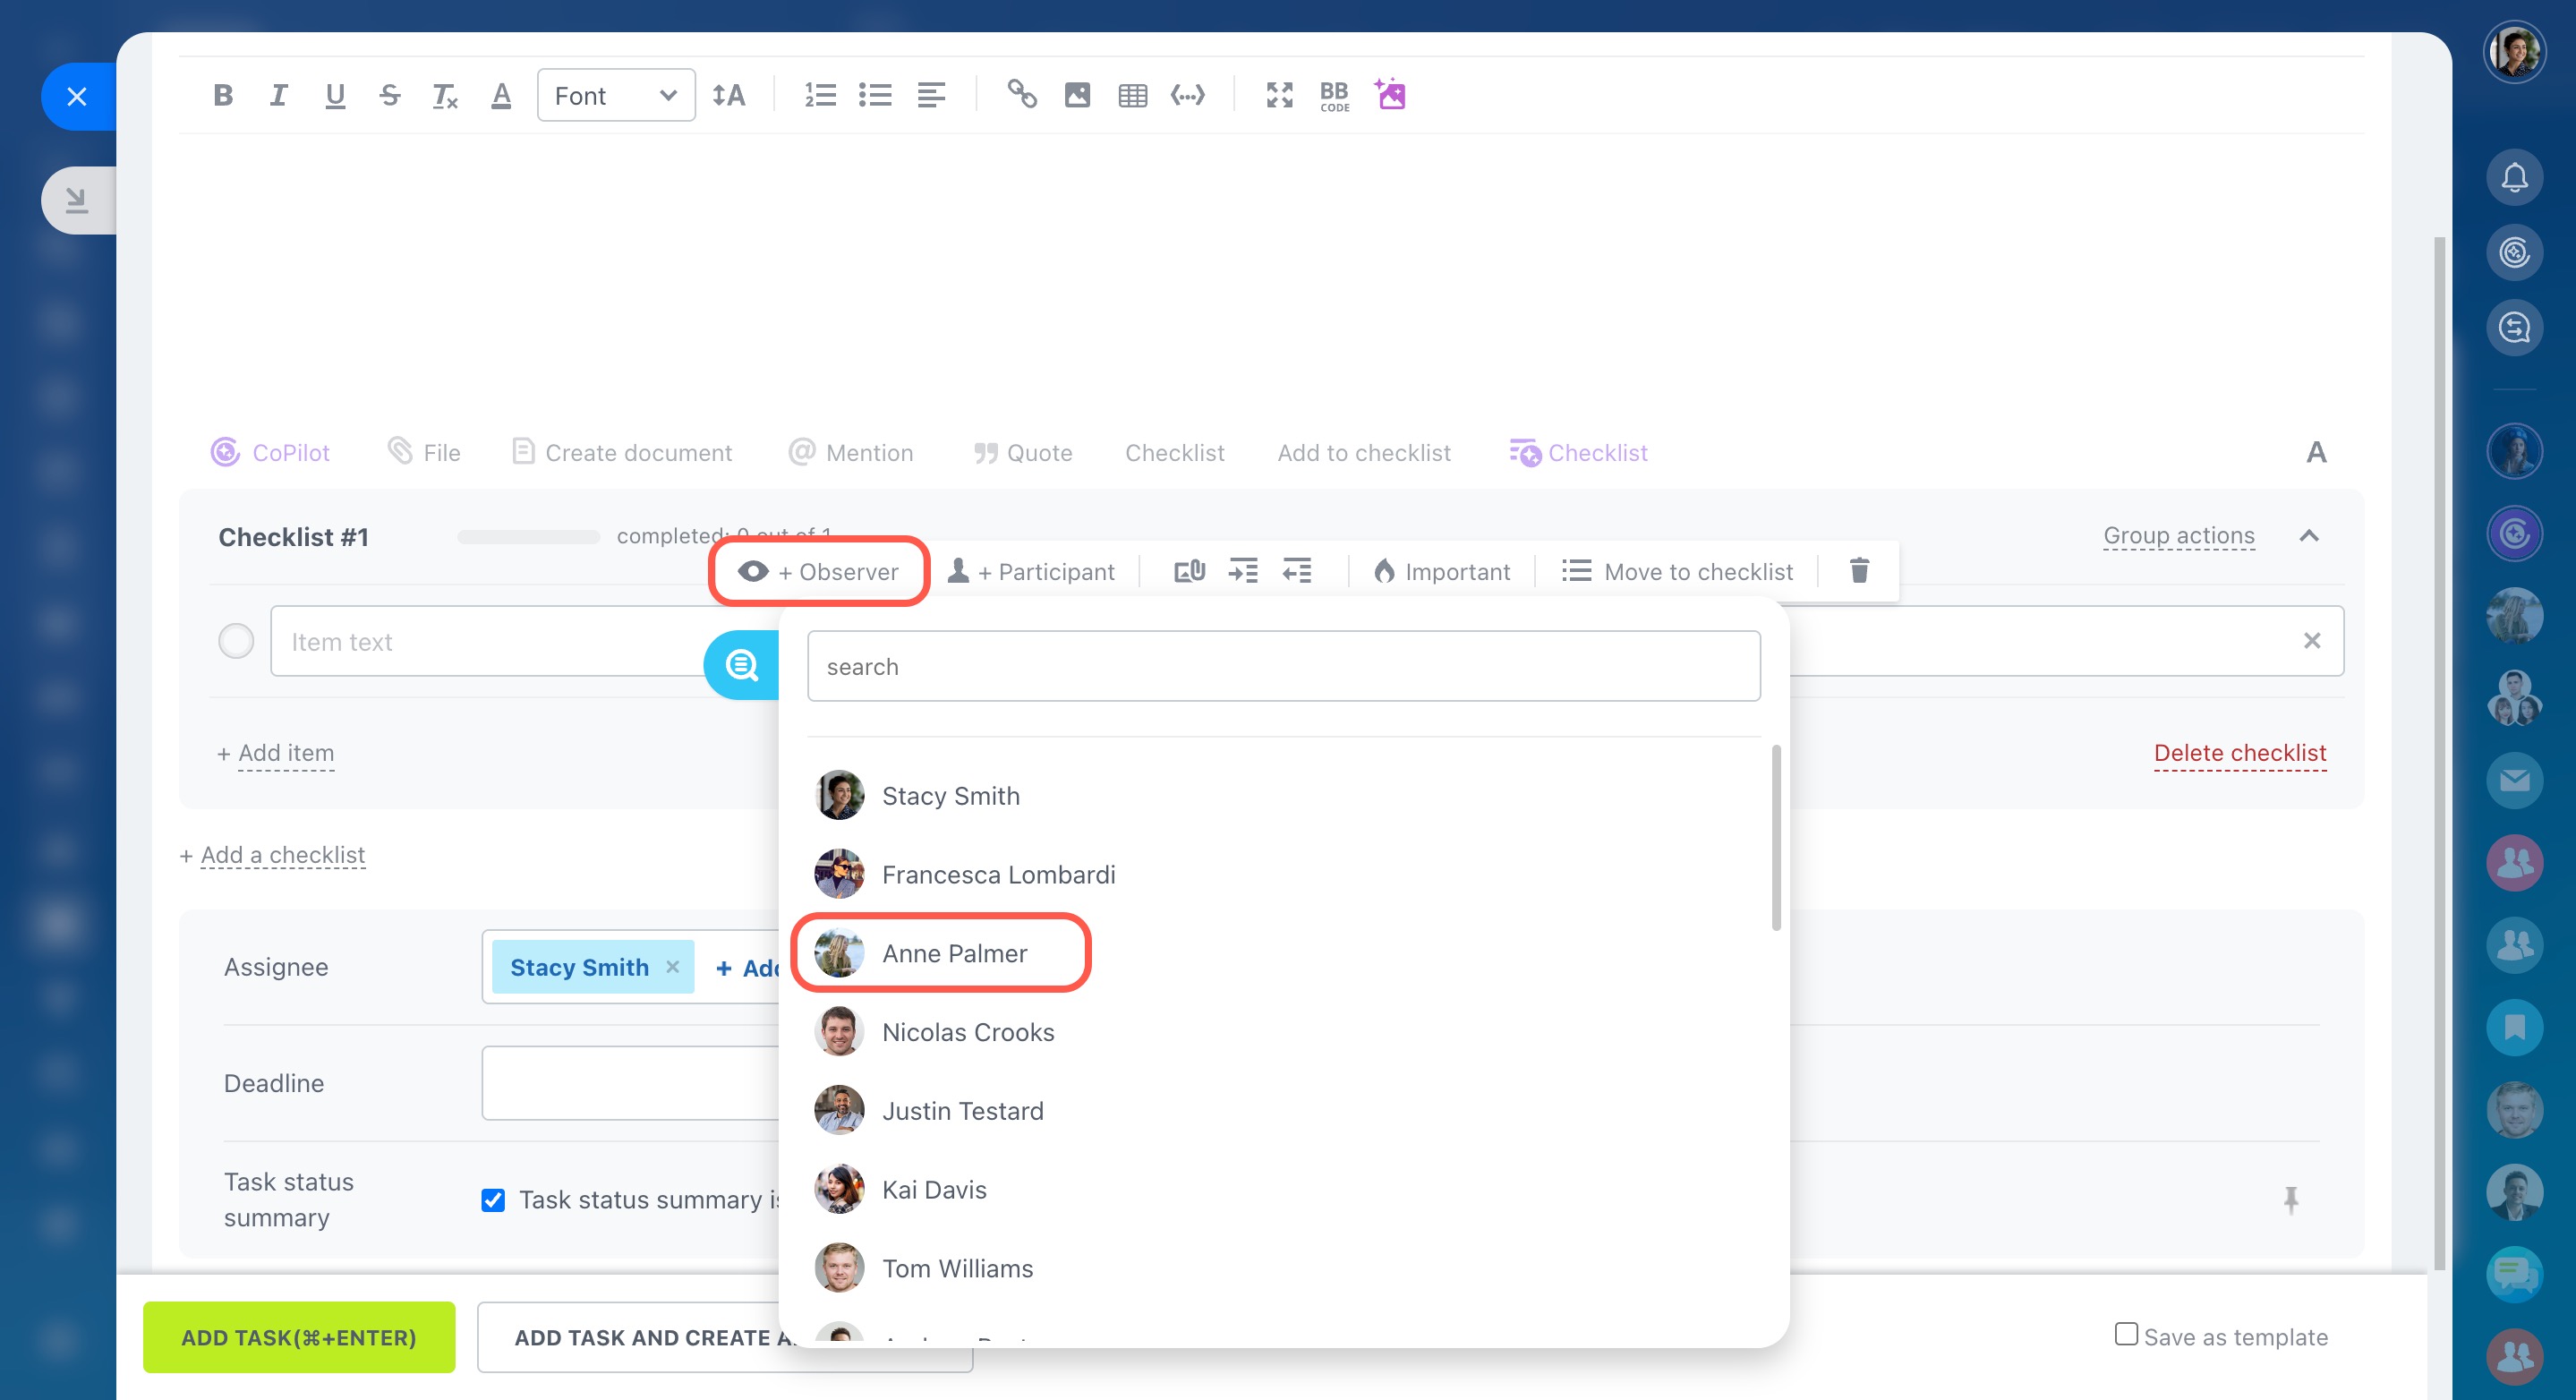
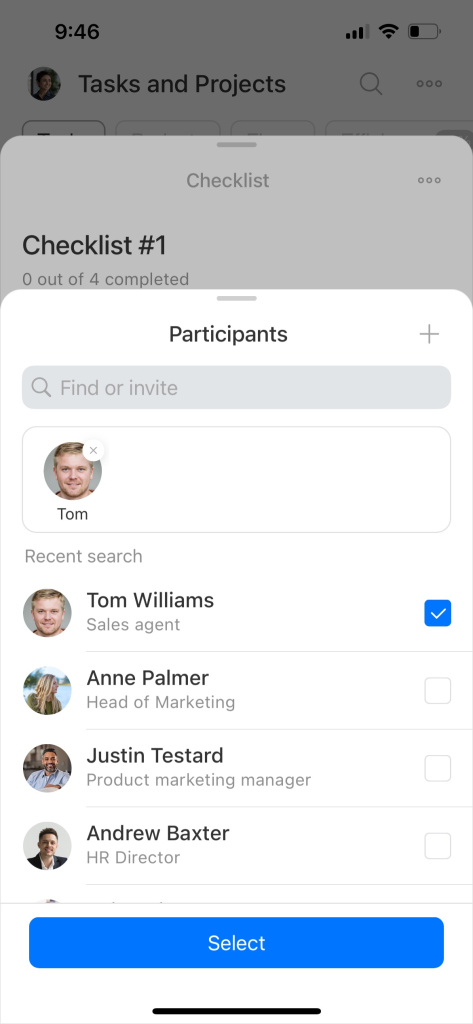
Assign an observer or participant for a checklist item to distribute responsibilities within a task.
-
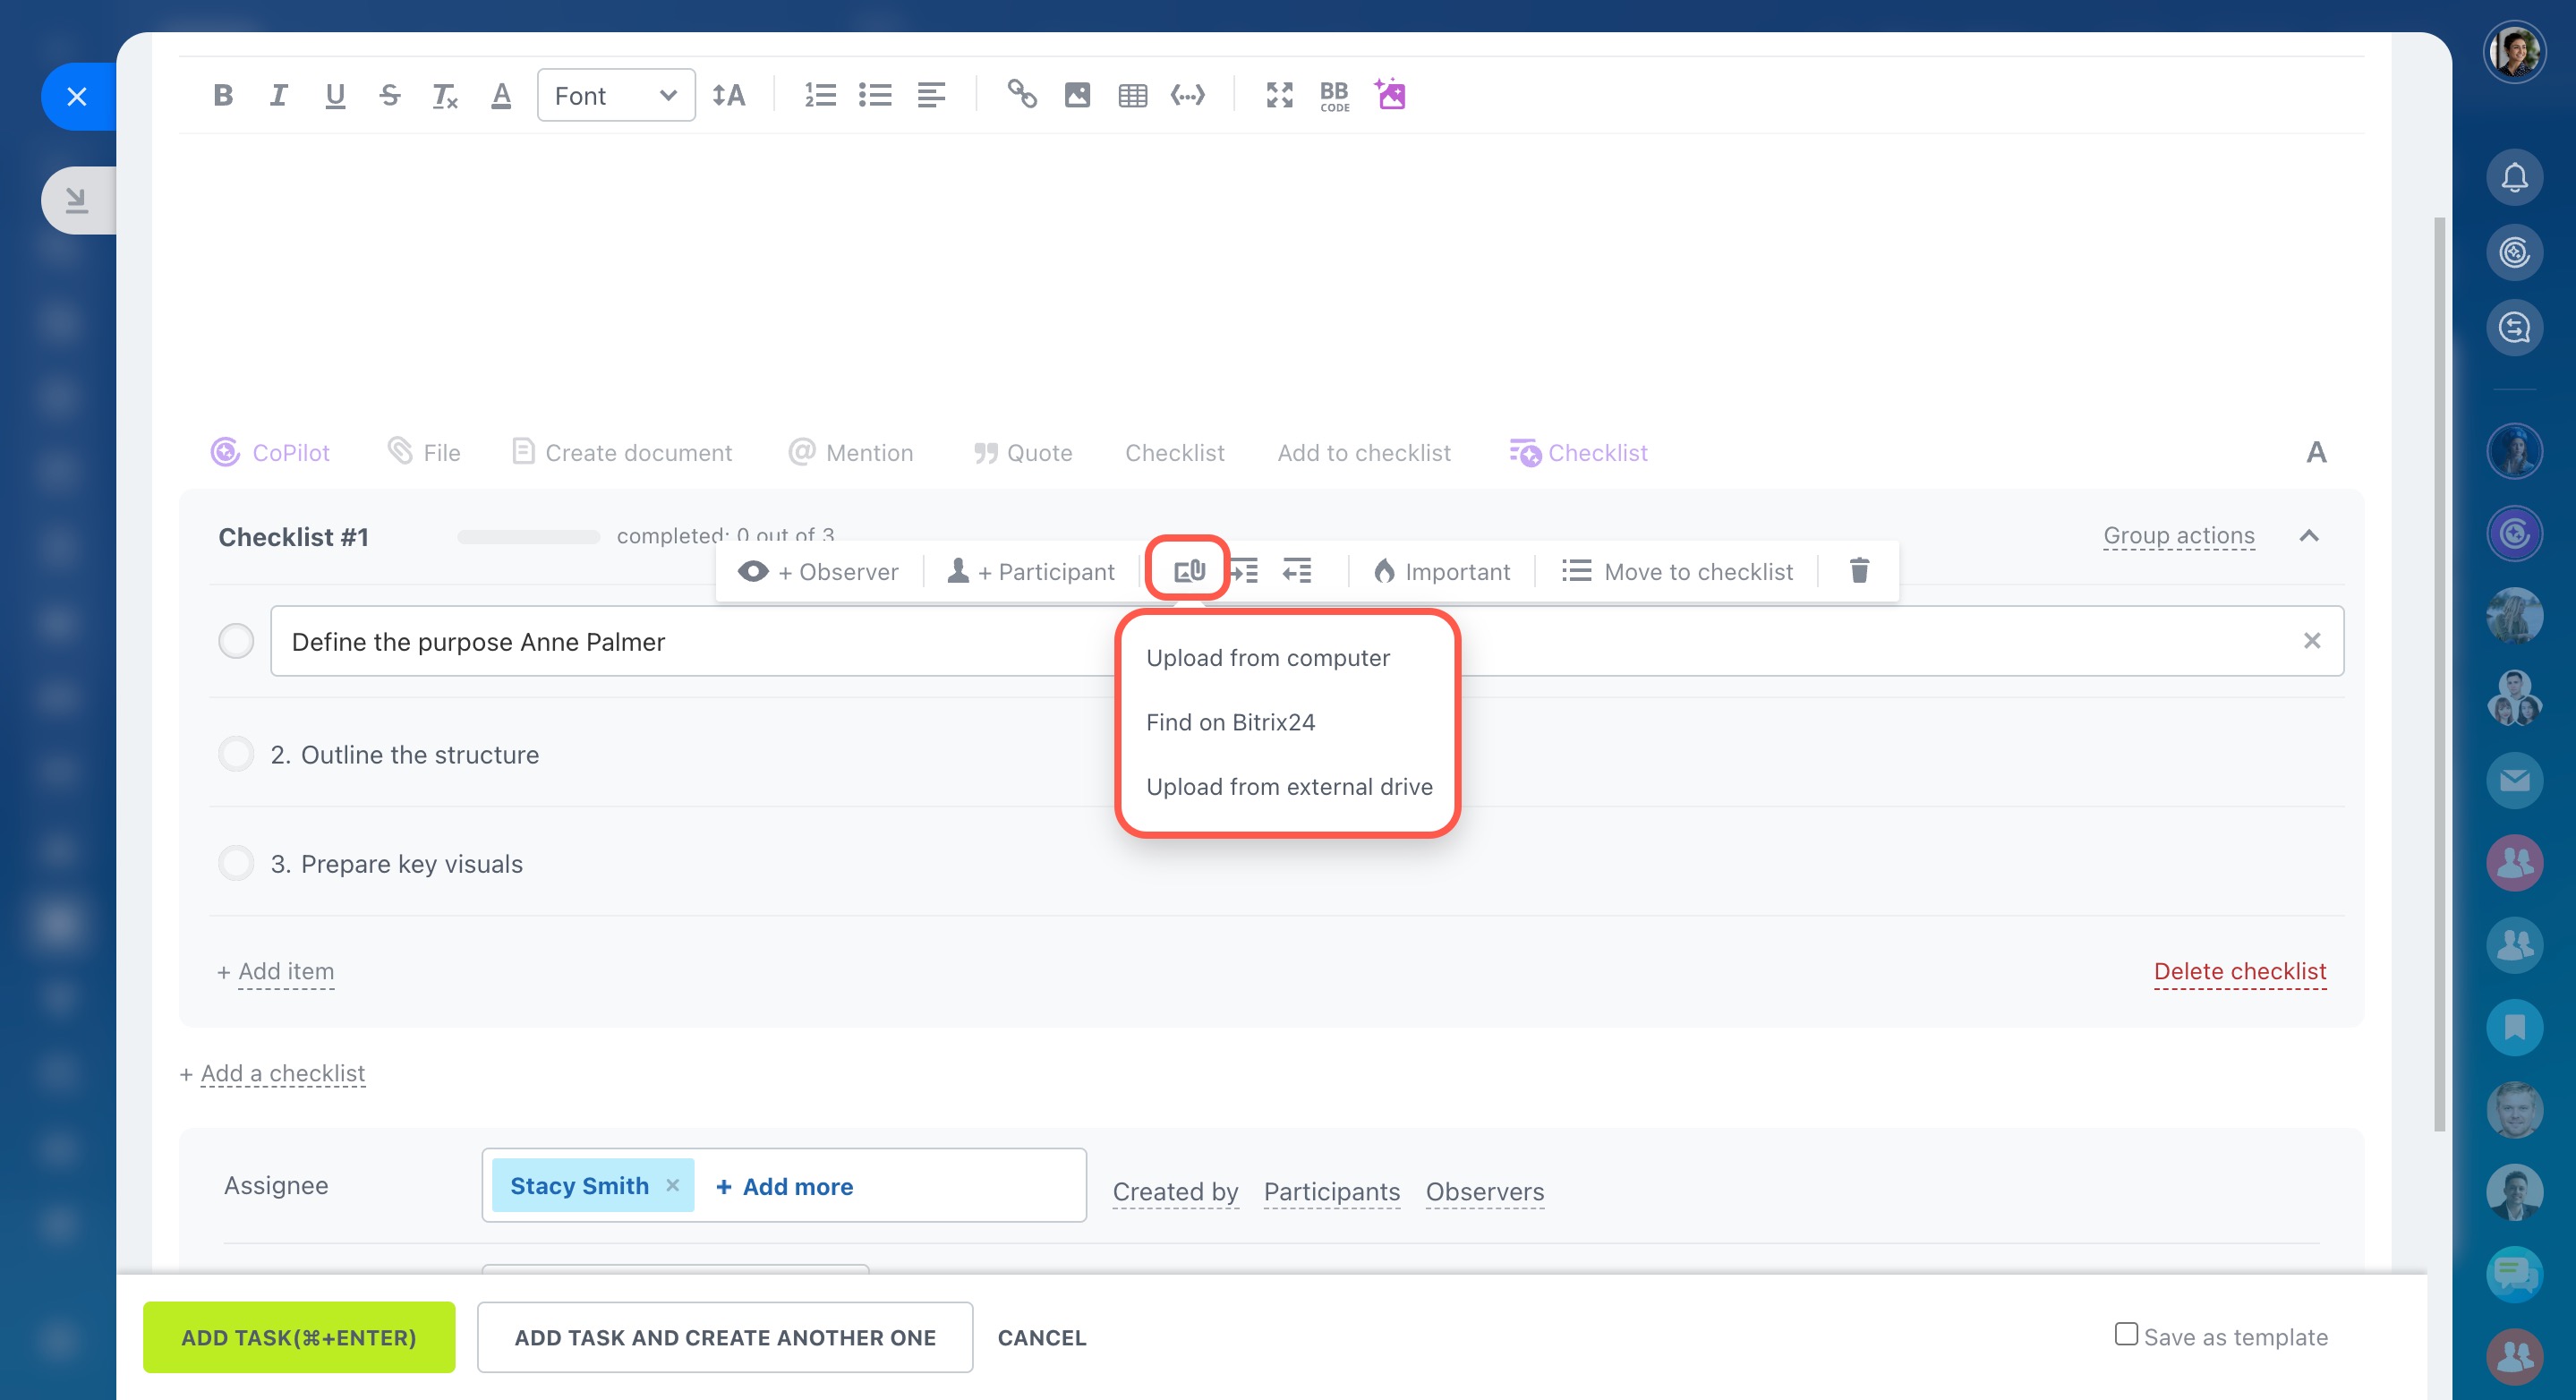
Attach files to any checklist item.
-
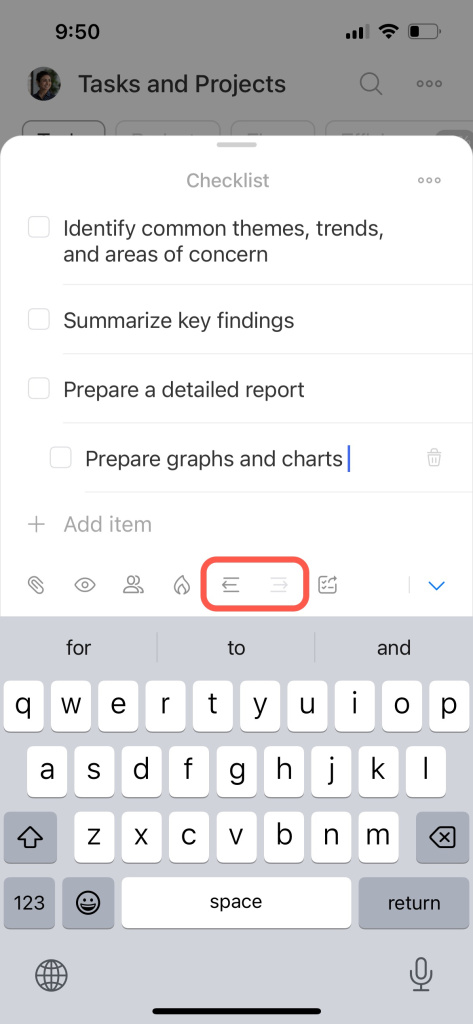
Add subitems to a checklist item. You can add an unlimited number of levels of nested checklists.
-
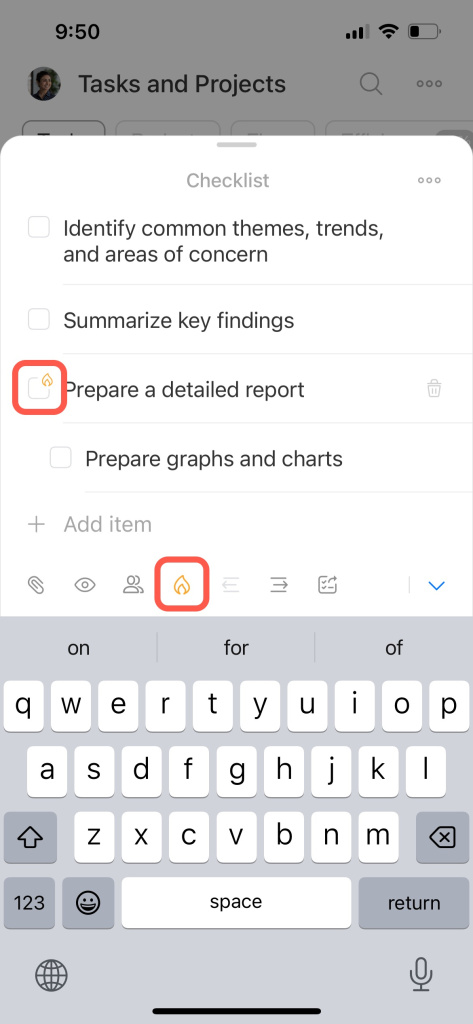
Highlight an item as important.
-
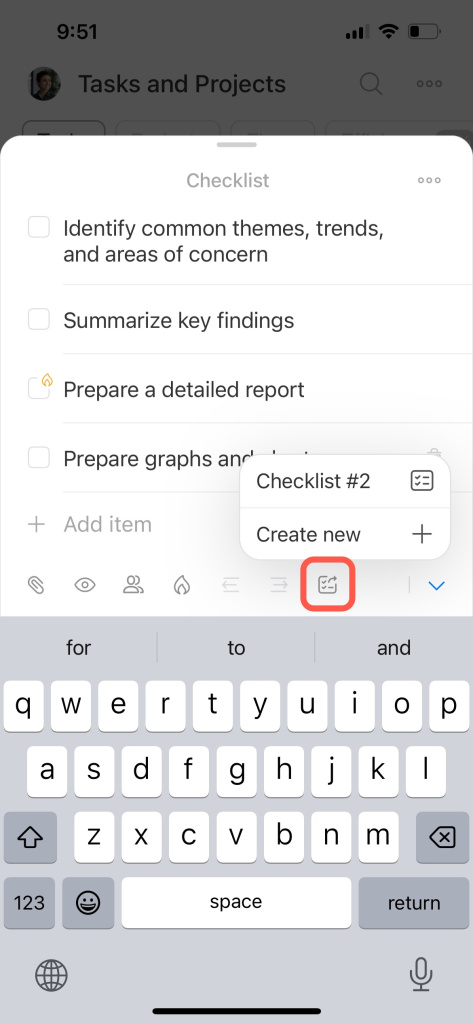
Also, if you have several checklists, you can move items between them.
-
Delete a checklist item by clicking the bin icon.
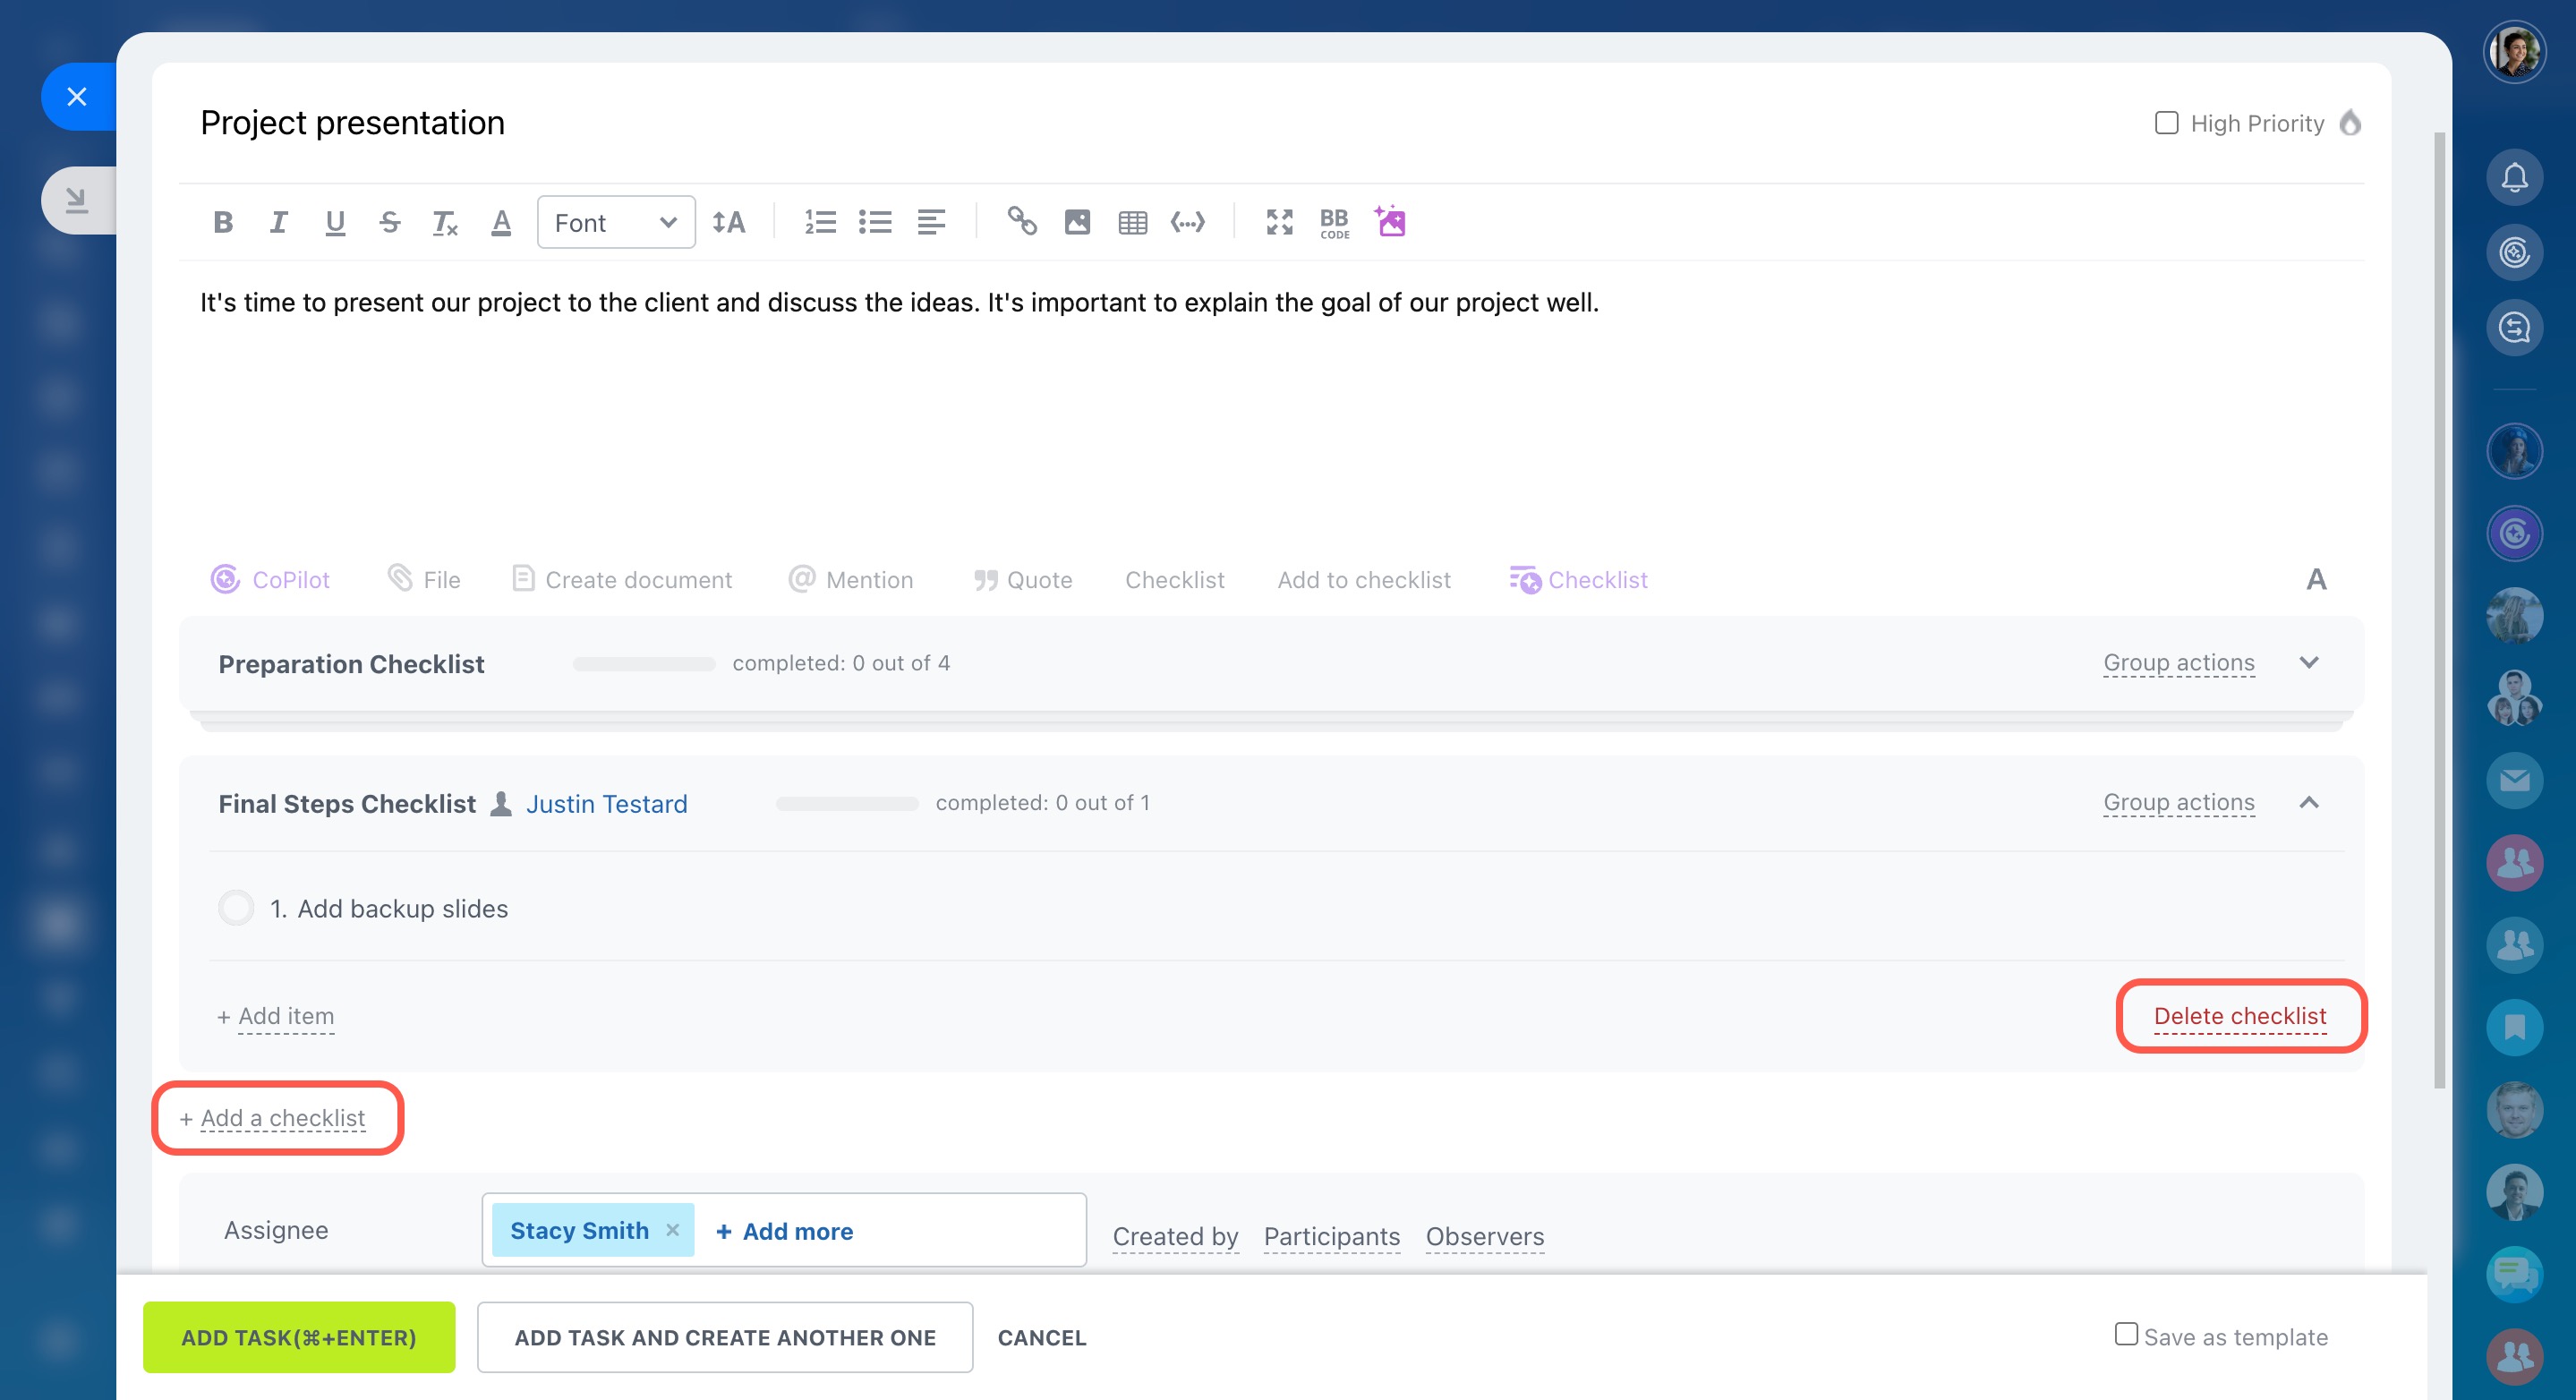
-
Rename the checklists and add observers or participants to their names.
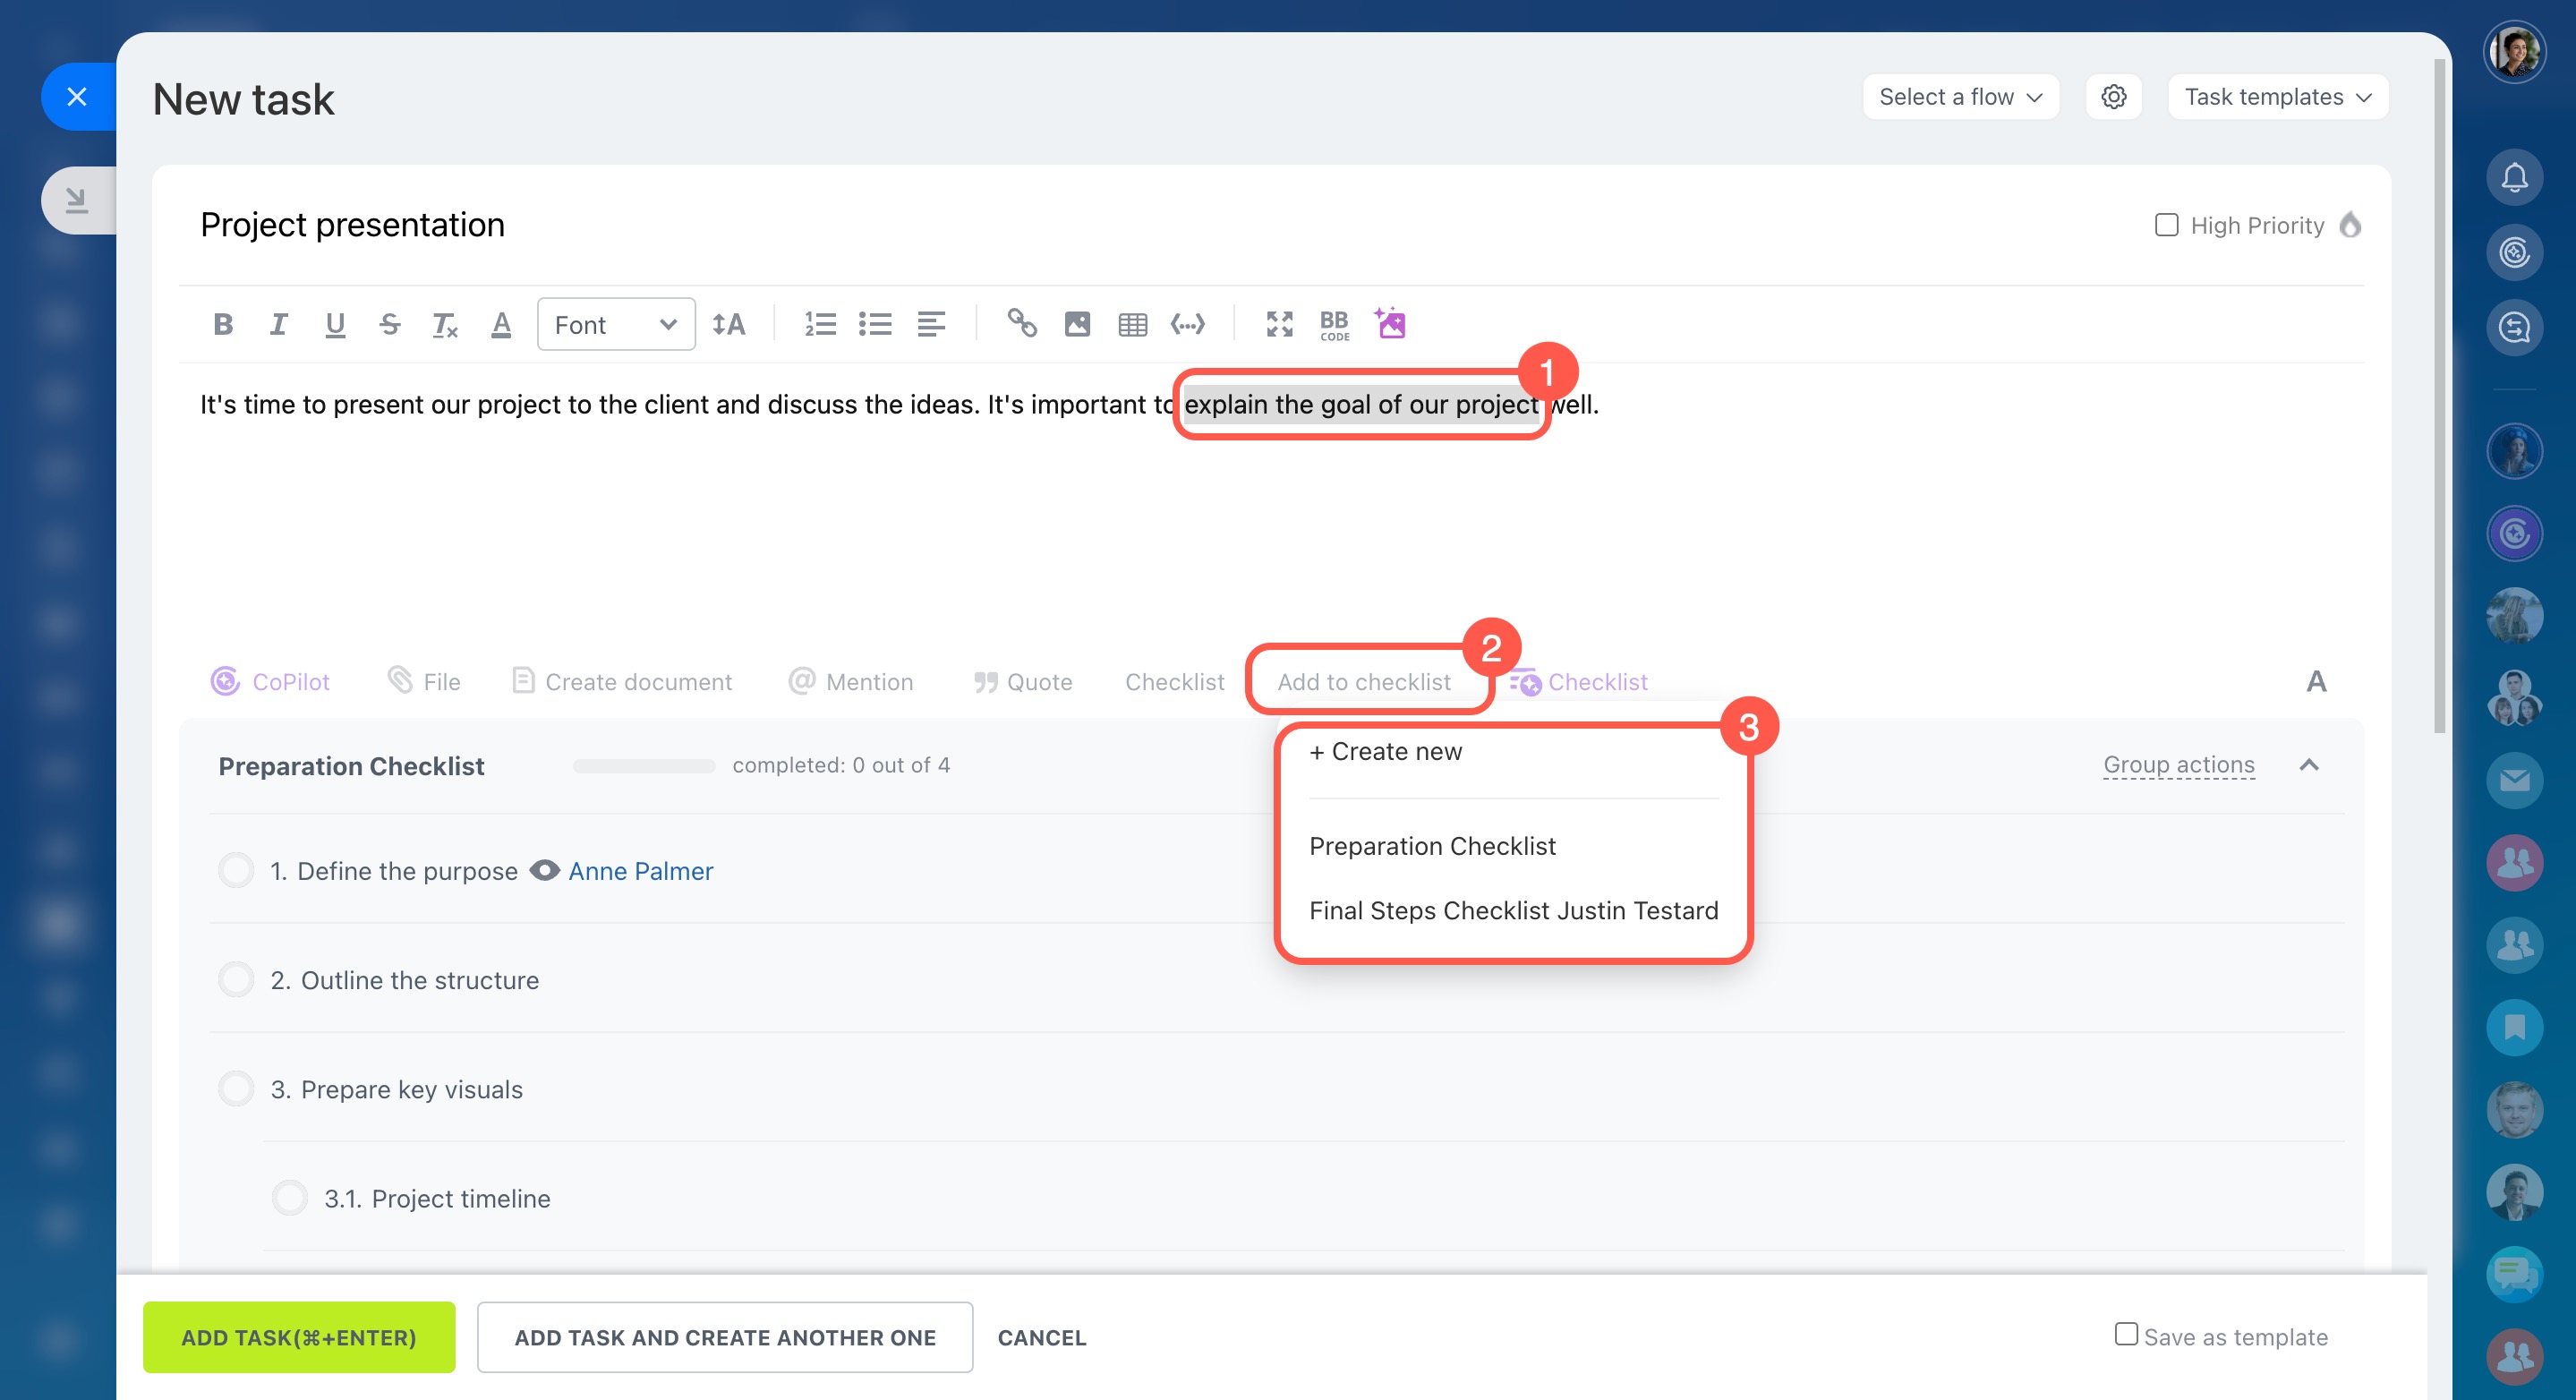
-
Convert any part of the task description into a checklist item. Select an existing checklist or create a new one.
Add more checklists to your task with the Add checklist button, or remove them with the Delete checklist button.
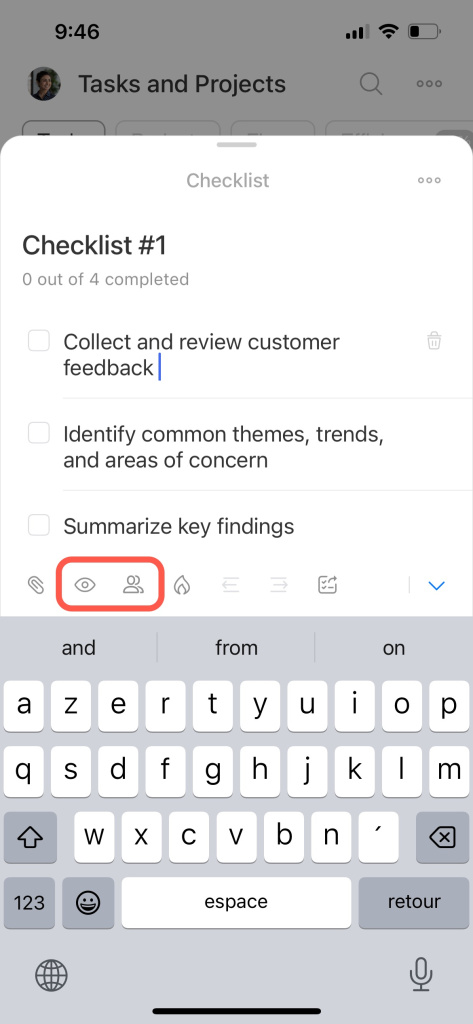
There are some important options available when creating a checklist:
-
Assign an observer or participant for a checklist item to distribute responsibilities within a task.
-
Attach files to any checklist item. Tap the paperclip icon and pick one of your files or take a photo.
-
Add subitems to a checklist item. Tap the special icons to move items to the right or left. You can add an unlimited number of levels of nested checklists.
-
To highlight an item as important, select the High priority option.
-
If you have several checklists, you can move items between them. Also, you can delete the items you don't need.
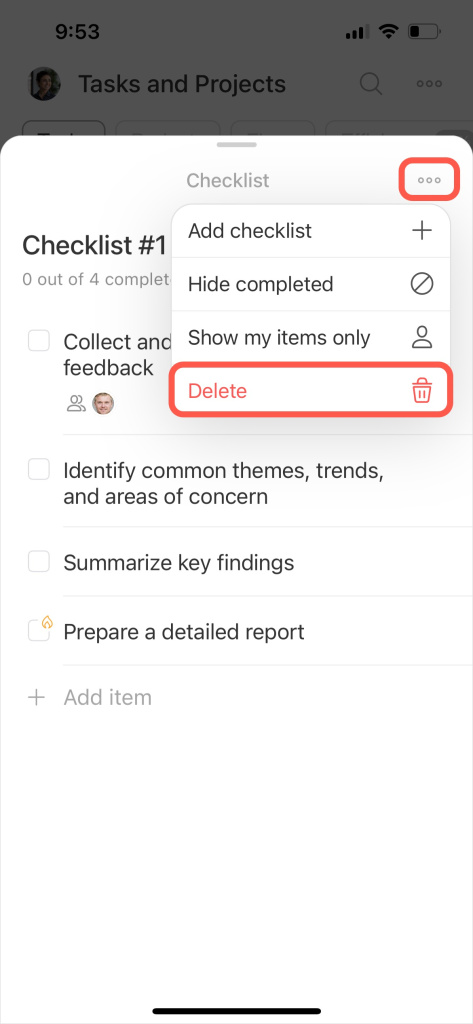
Add another checklist by tapping the corresponding button. To delete a checklist, tap on the three dots (...) and select Delete.
Group actions
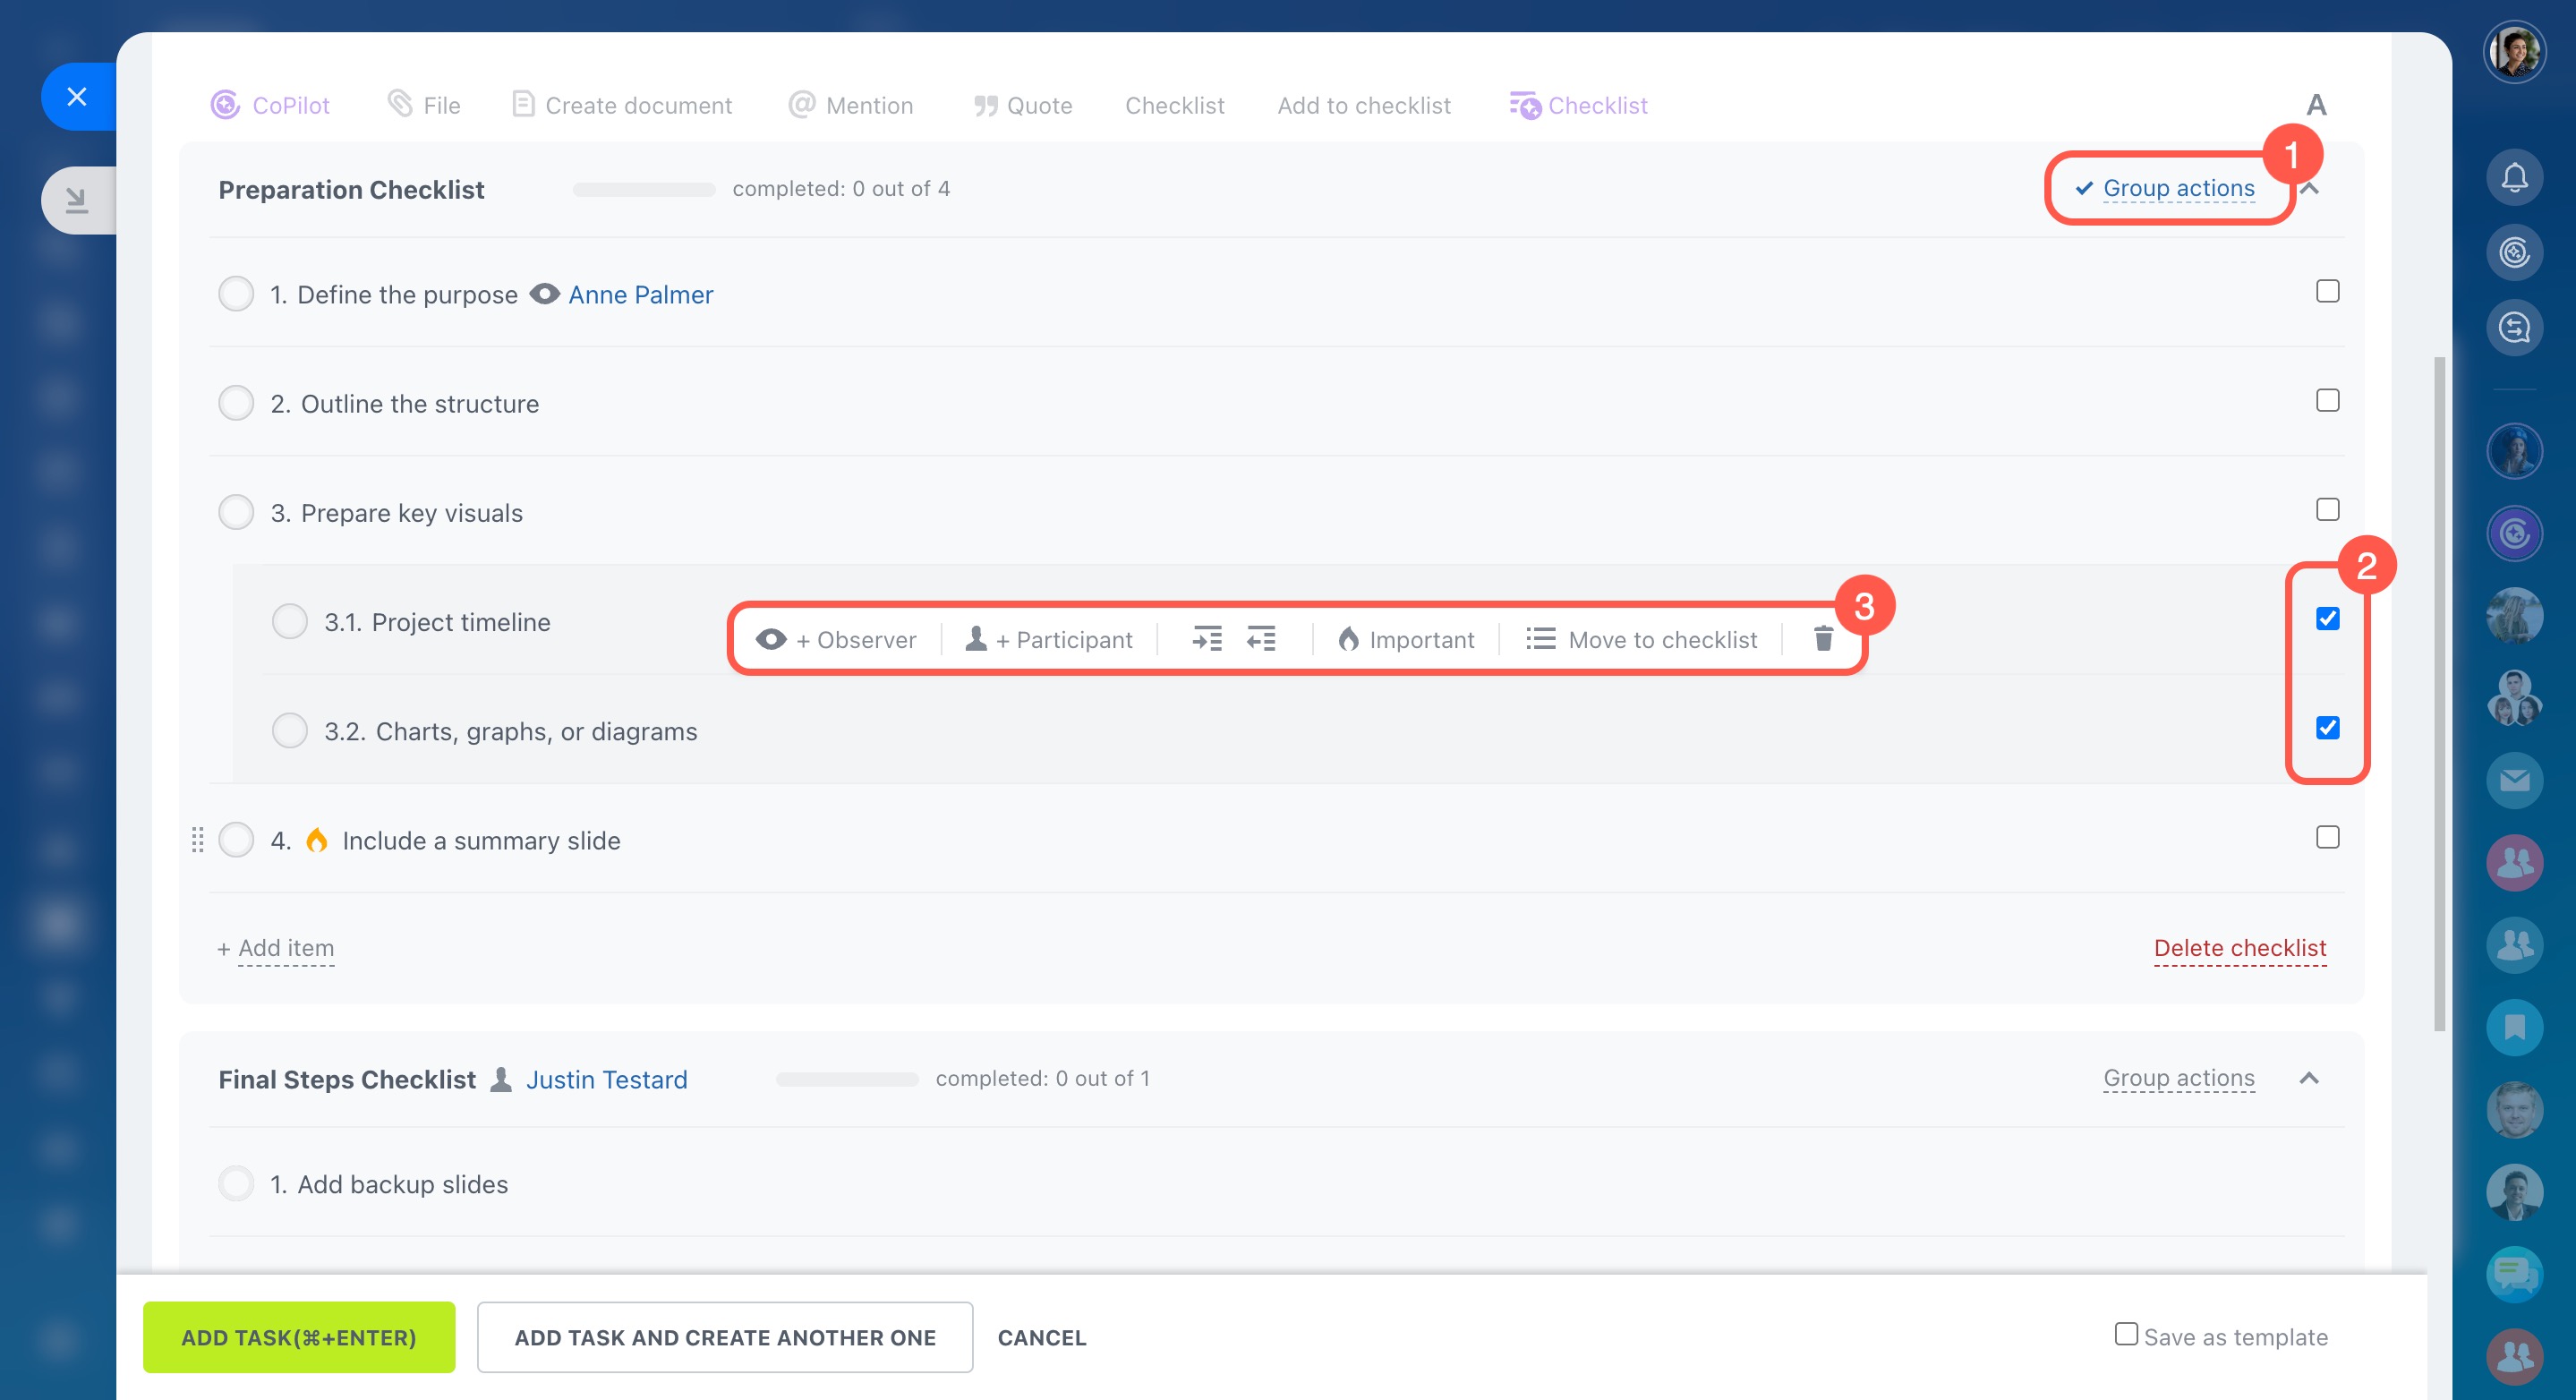
You can perform group actions with checklist items. Click Group actions, tick the items, and select an action you want to perform.
Checklist settings
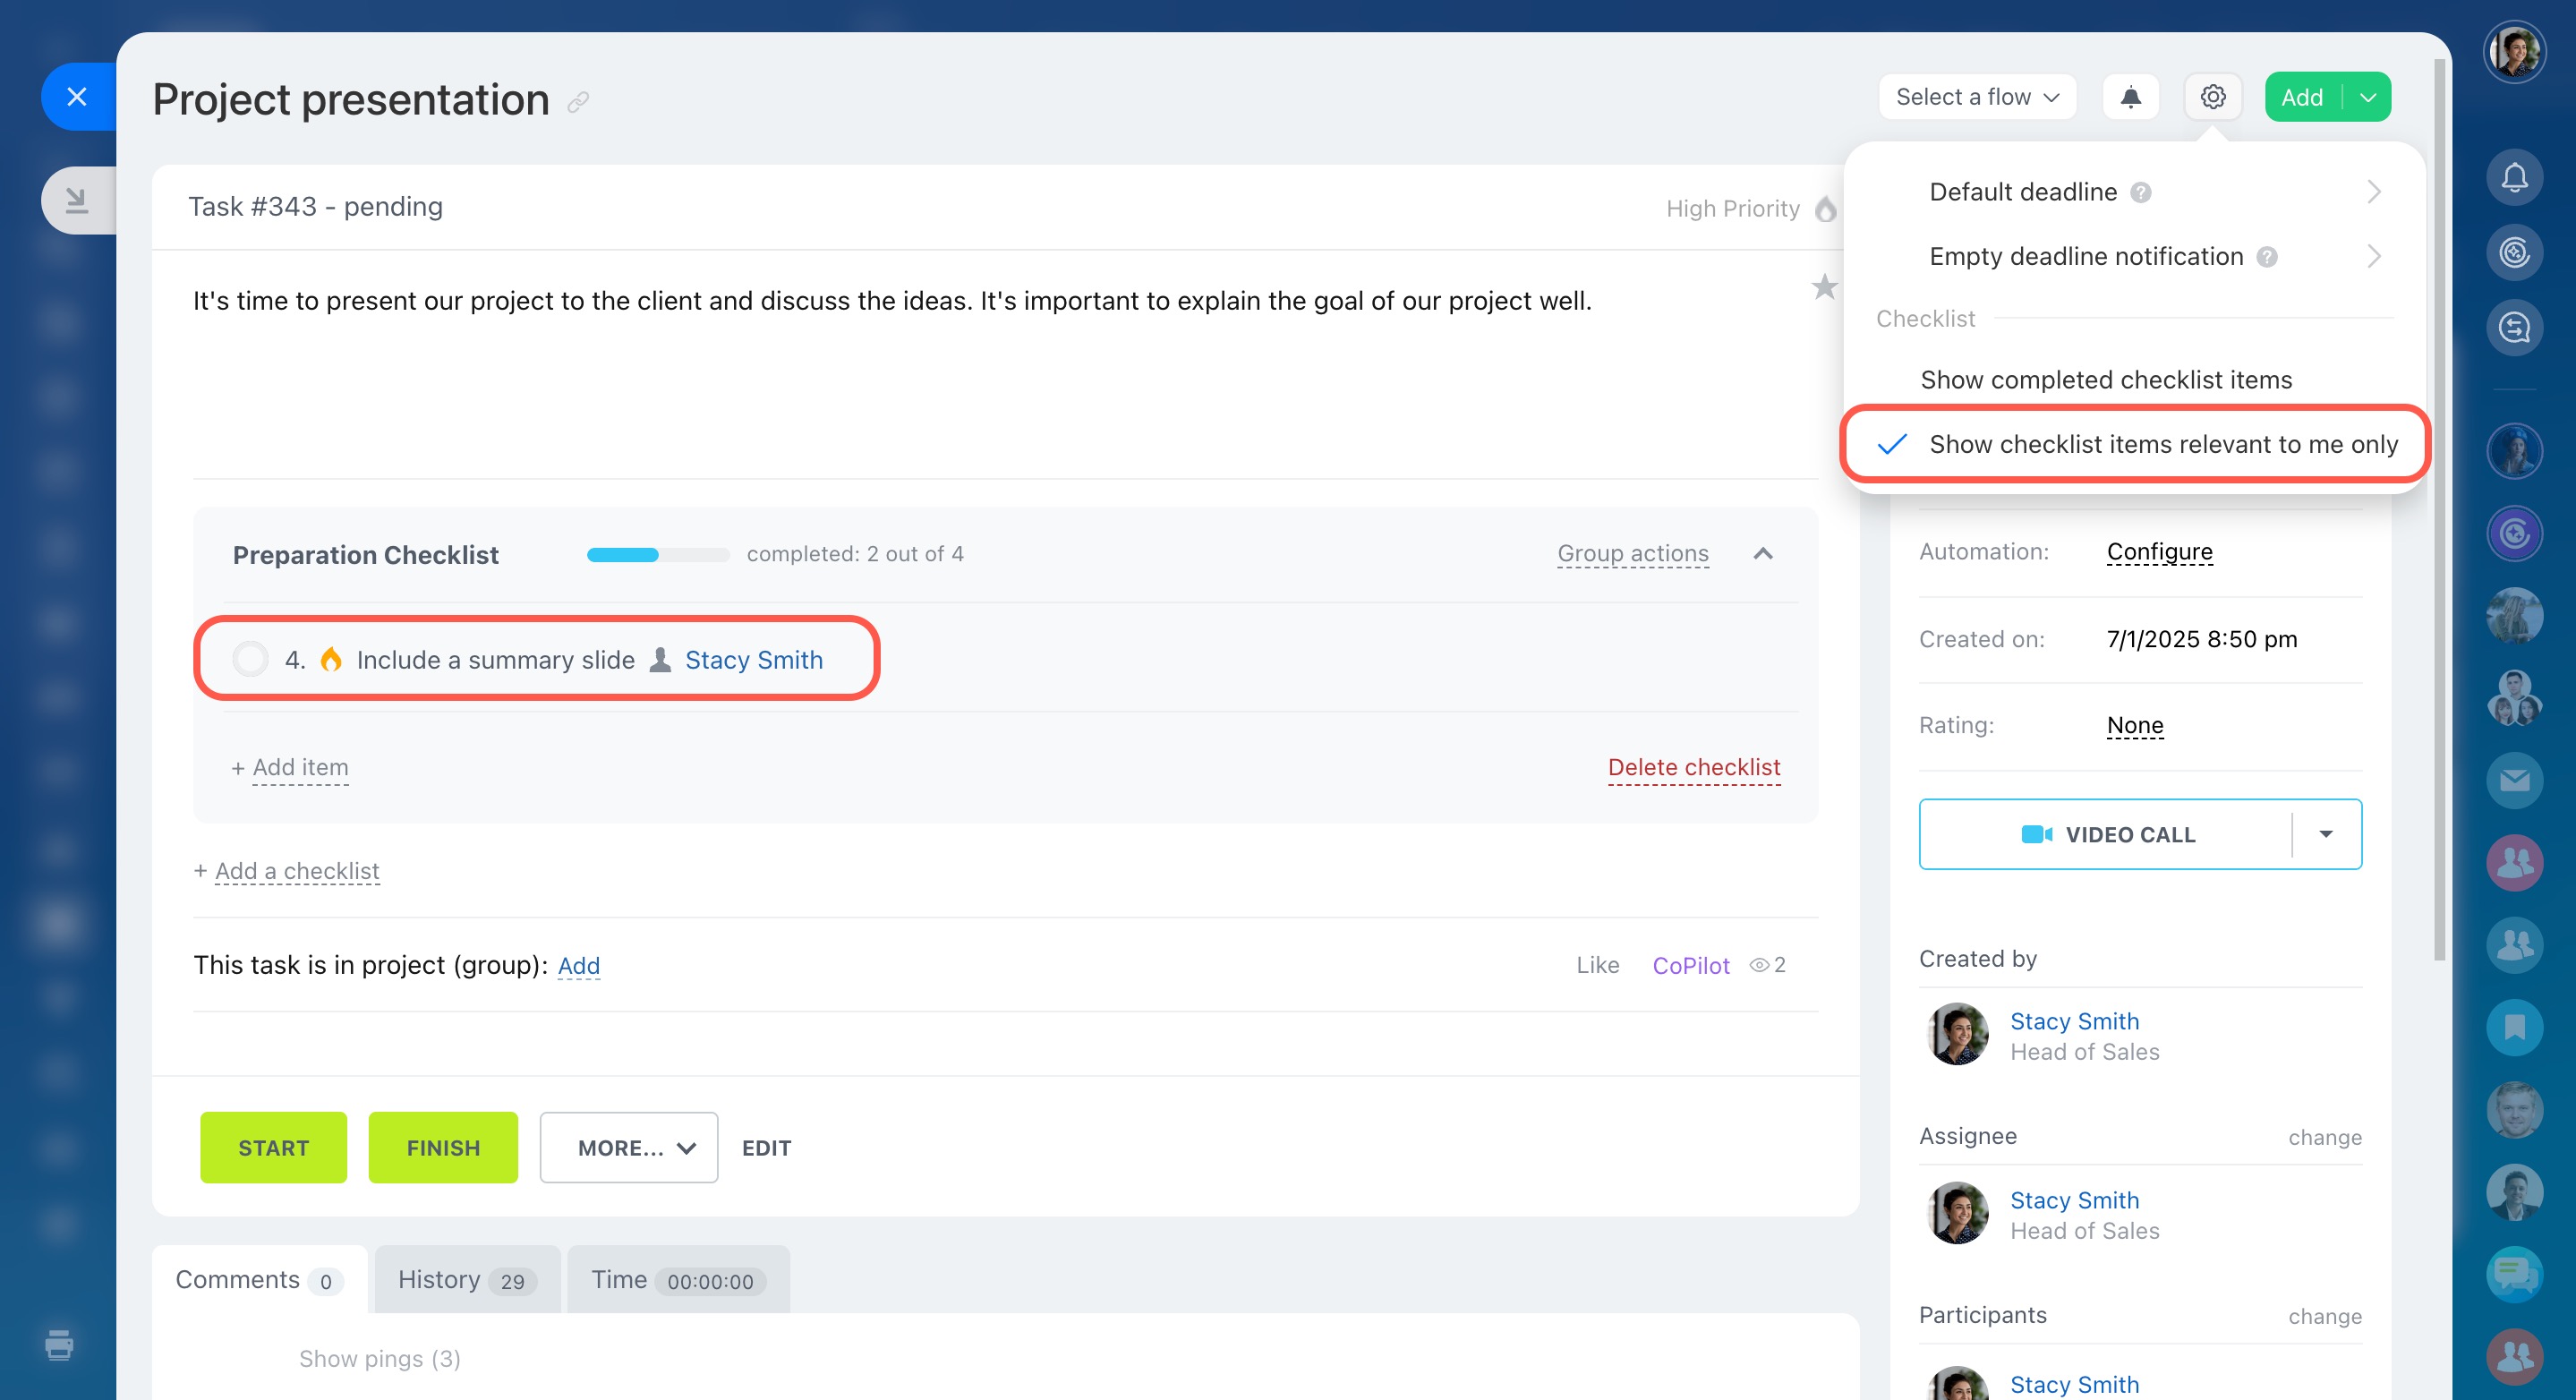
Click the gear (⚙️) button in the top right corner to configure the checklist settings.
-
Enable the Show completed checklist items if you want to see completed items.
-
Enable the Show checklist items relevant to me only to see only the items where you are an observer or participant.


