Custom fields allow you to add extra information to your tasks that only your company needs.
How to create custom fields for tasks
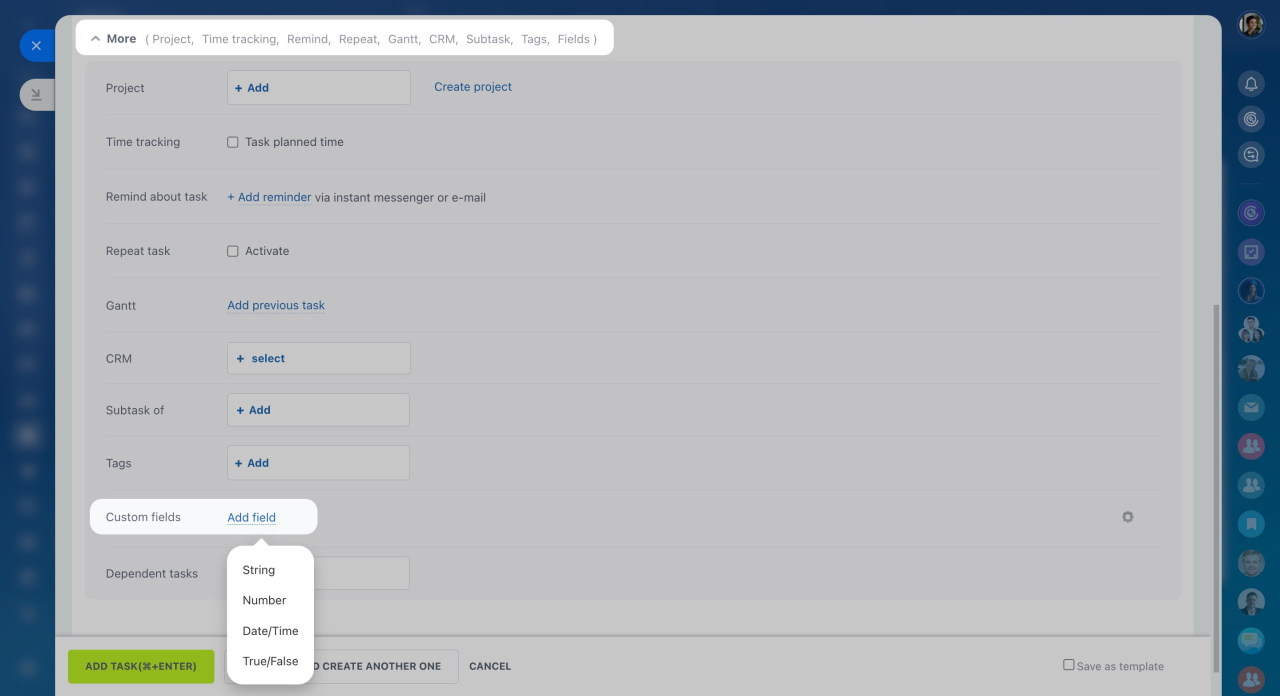
When creating a task, open the More section, find Custom fields, and click Add field.
Here are the types of custom fields you can create for tasks:
-
Text: This is for typing a bit of text, like a short note.
-
Number: Use this for putting numbers into a task, such as amounts, prices, or costs.
-
Date/time: This lets you choose a specific date and time for something related to the task, like the delivery date or when an event is scheduled.
-
True/false: This gives you a yes or no choice, like if something is included or not.
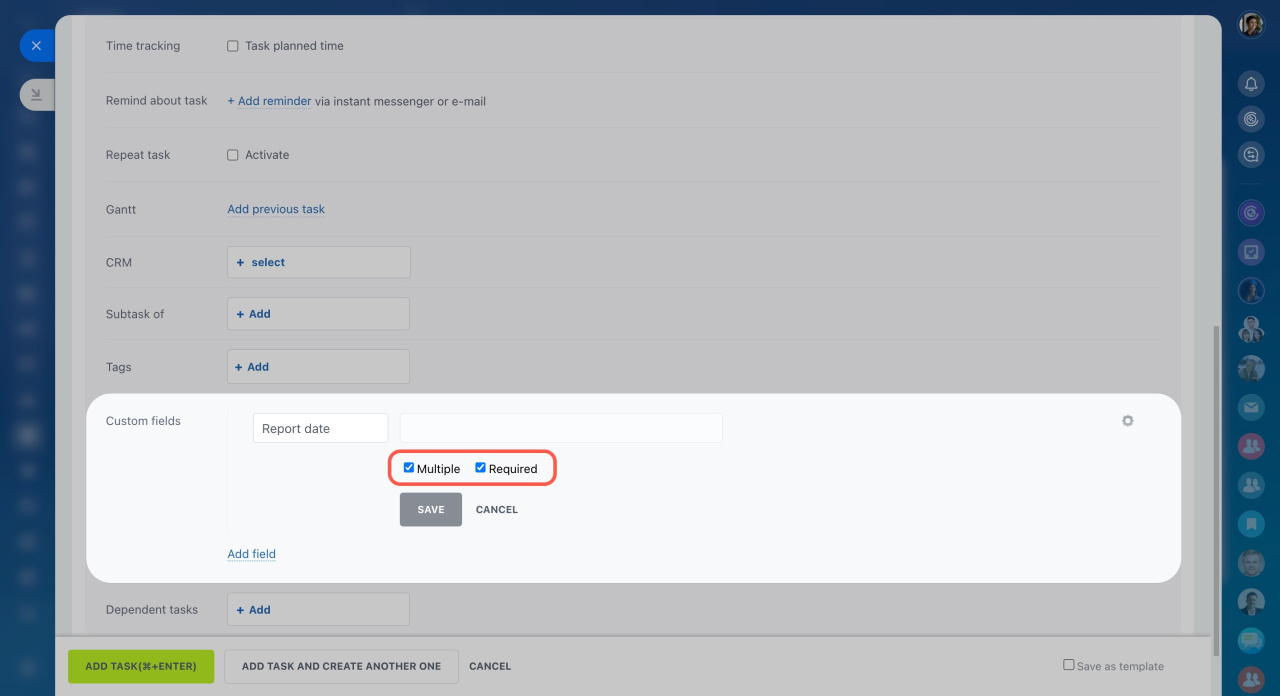
You can also decide if new custom fields should be required and/or multiple.
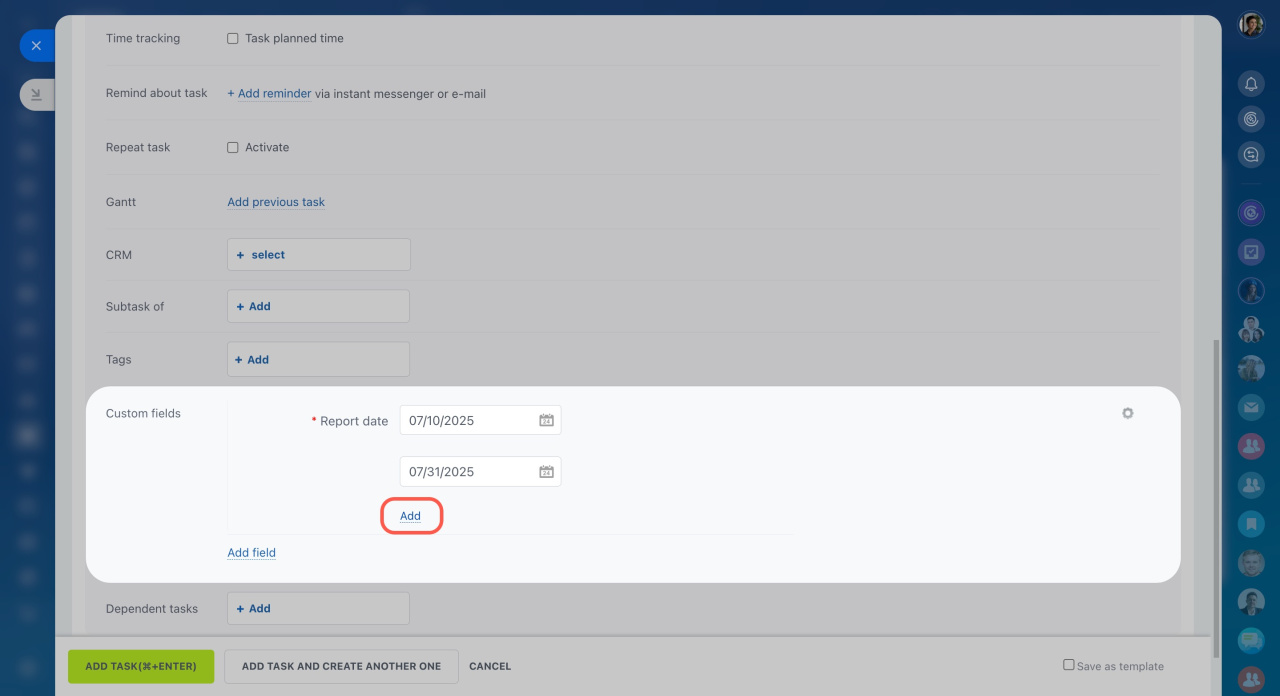
To always complete a custom field when creating a task, make it required. These fields are marked with a red sign in the task form. The warning message will appear when trying to add a task without filling in the required field.
Enable the option for a new custom field to add more than one value in the same field. Just click Add under the field values to specify new ones.
How to configure custom fields for tasks
Next to your new custom field, you'll see a settings gear (⚙️). It gives you two options:
-
Set field set to all users: This option shares the custom field with everyone in your company. If other users have their own task form configured, this action will replace their settings with yours.
-
Enable field dragging: This allows you to move and reorder your custom fields as you wish.
Bitrix24 pricing page


