In Bitrix24, you have the opportunity to create a chat for each workgroup or project. This feature automatically includes all members of the workgroup or project into the chat.
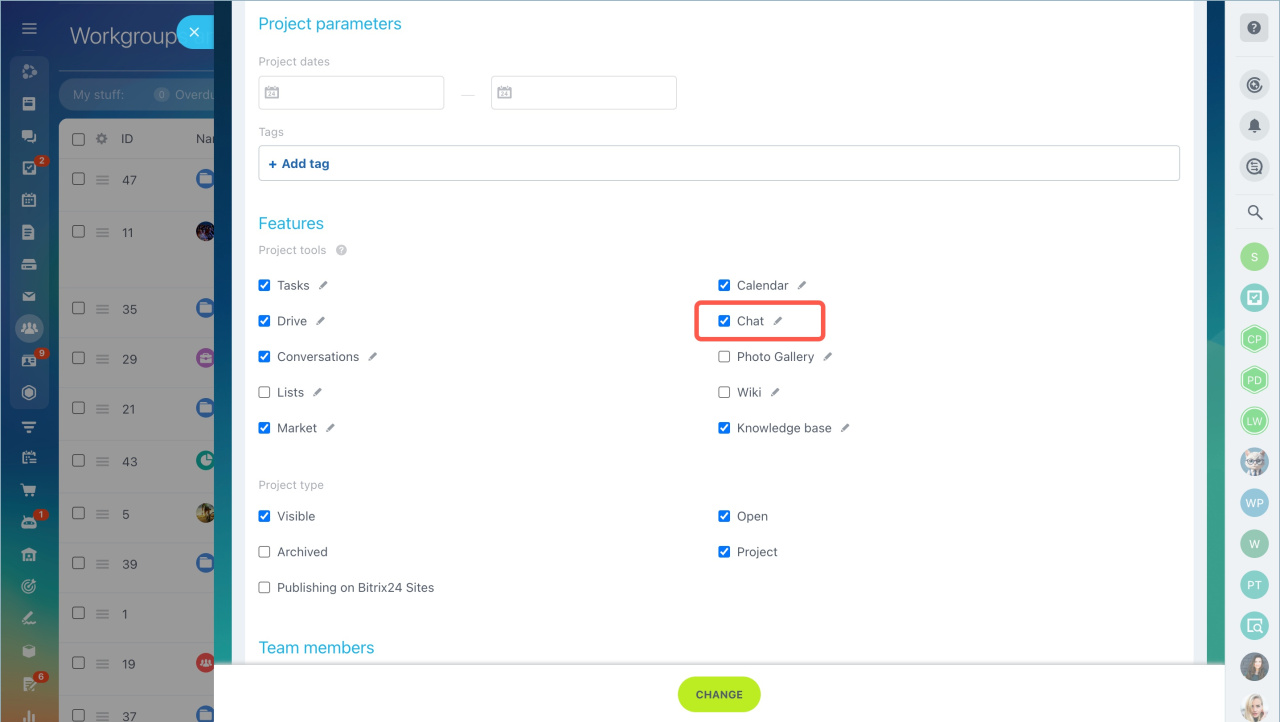
- Go to Workgroups section, select a workgroup and the Edit option in the menu.
- Click Extended parameters and tick the Chat box.
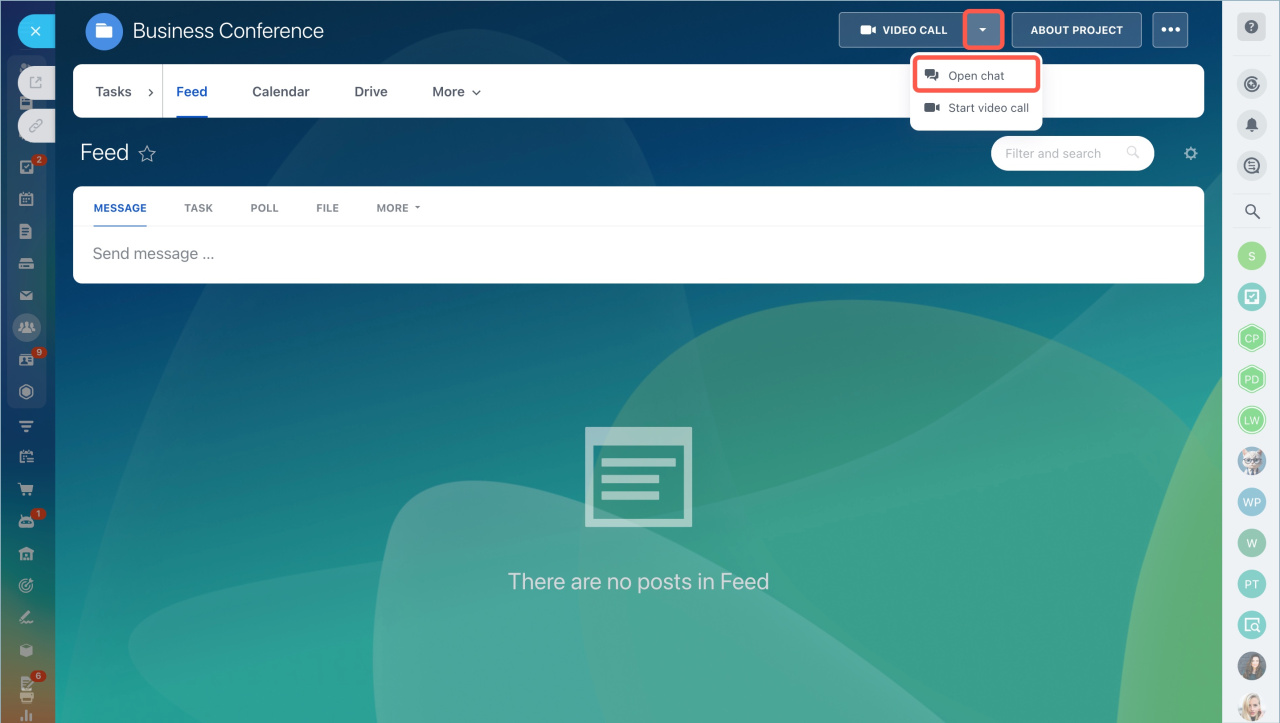
The chat button will be added to the workgroup menu. All members of the workgroup are added to the chat automatically.
You cannot quit the workgroup chat, you can only disable the workgroup chat notifications. The workgroup chat can be disabled the same way as it's enabled in the workgroup settings.
When the workgroup chat is disabled, there will be a notification saying that the workgroup chat is no longer linked to the workgroup. In this case, the chat is automatically converted to a regular private chat. You can now leave this chat or remove users from it.
In brief:
- In Bitrix24, you have the opportunity to create a chat for each workgroup or project.
- Go to Workgroups section, select a workgroup and the Edit option in the menu.
- Click Extended parameters and tick the Chat box. The chat button will be added to the workgroup menu. All members of the workgroup are added to the chat automatically.
- The workgroup chat can be disabled the same way as it's enabled in the workgroup settings.


