Automation rules and triggers are available in the
Deals + Orders mode. Read more in the article
Work in Store without orders.
Automation rules and triggers in the Bitrix24 Online Store allow automating the order handling, informing your customers about their order status, creating tasks for your employees, etc.
They are divided into three groups:
- Automation rules for employees - edit the element form, run a workflow, create a task, notify an employee, etc.
- Client communications automation rules - send an email or SMS, or perform a robocall to a client.
- Triggers - change the order status.
Check if this tool is available on your plan. You can find all the information about Bitrix24 plans on the
pricing page.
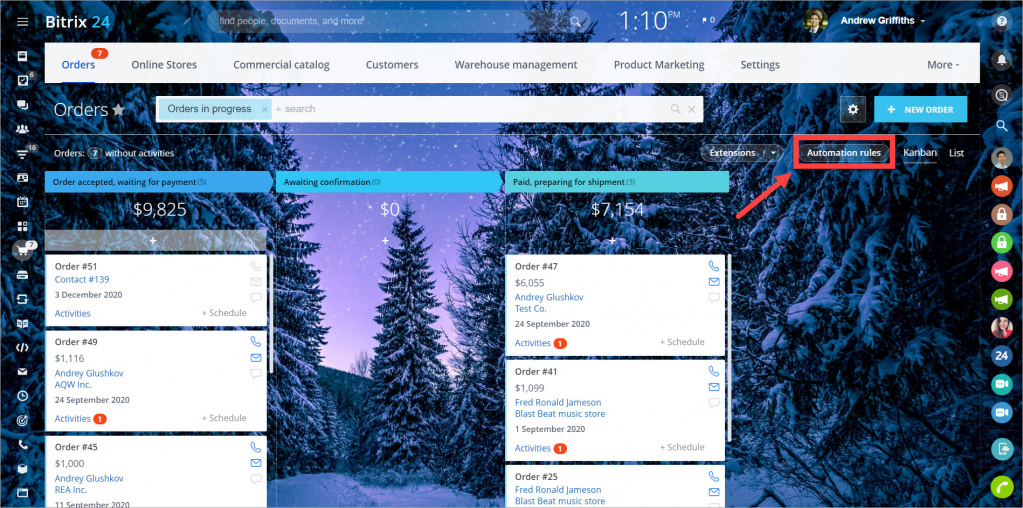
Go to the Online Store section > Orders > Automation rules.
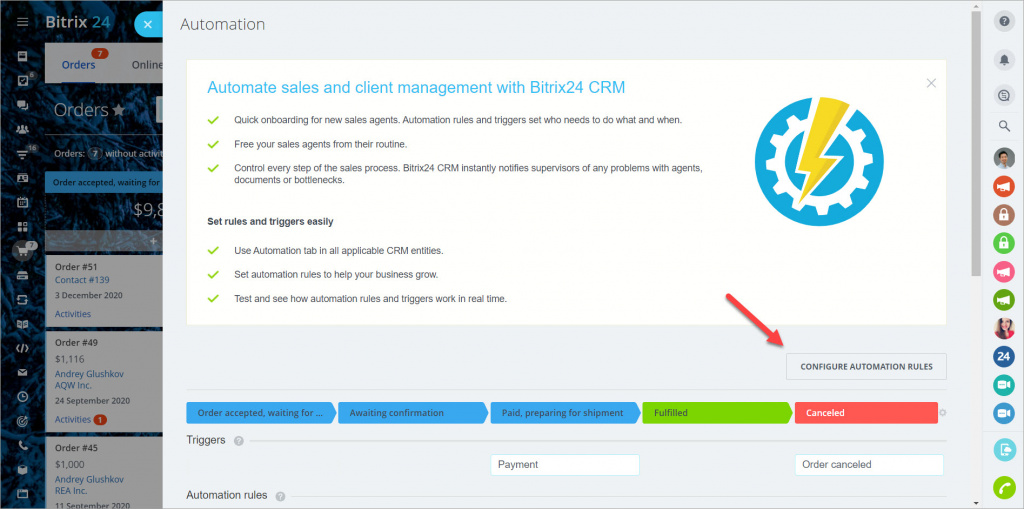
Click the Configure automation rules button to configure the automation rules and triggers.
How does the automation rules work?
An automation rule gets activated when the order status is changed for the status where the automation rule is added. As soon as the order is moved to another status, the previous order status's automation rules stop working.
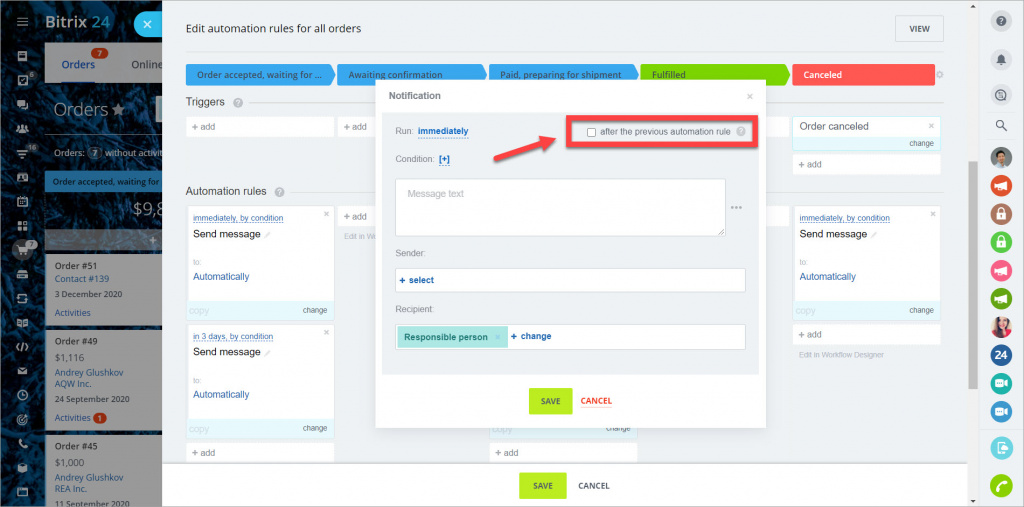
All automation rules have an option after the previous automation rule. It's a good idea to enable this option if you need to perform several sequential actions. For example, generate an order number and send it to the client immediately. If the option is disabled, then all automation rules at the current order status will work simultaneously.
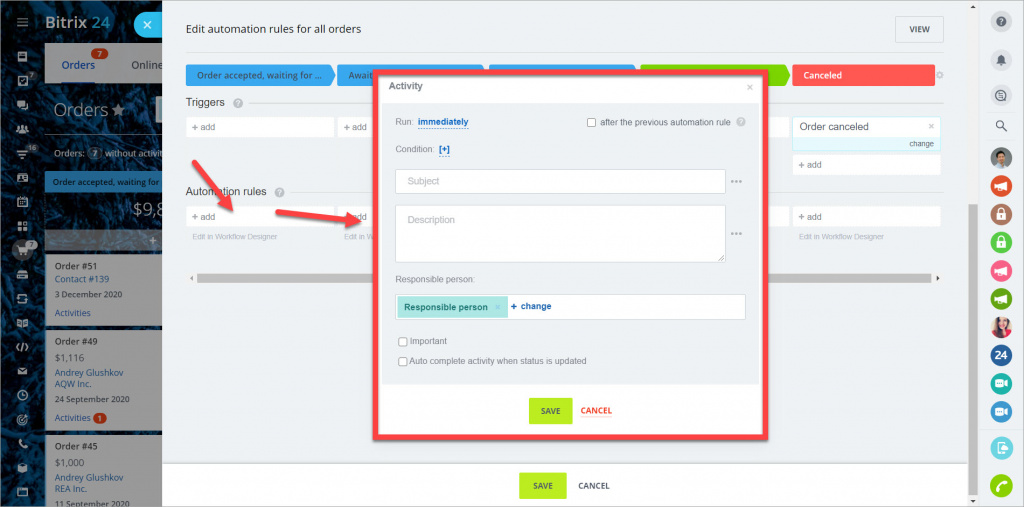
Activity
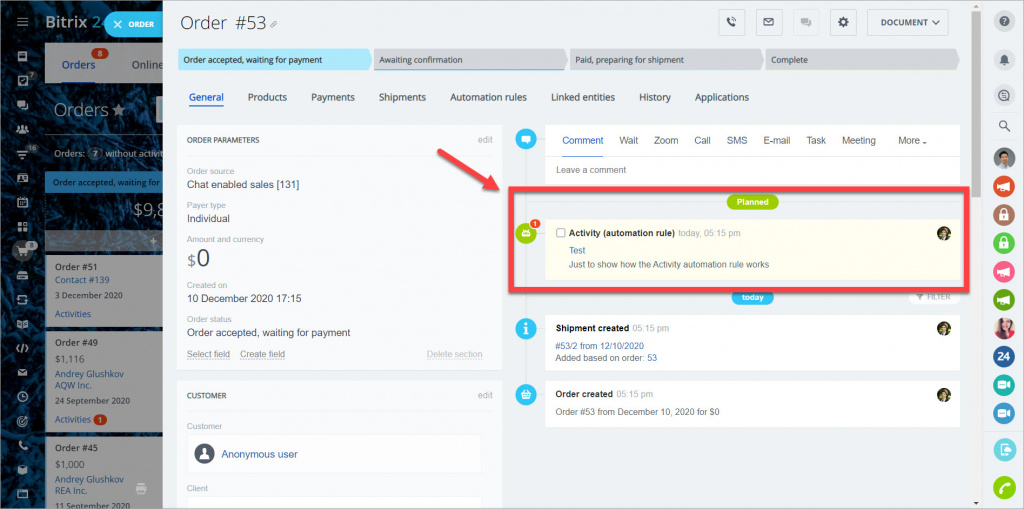
The automation rule adds an activity to the order.
The activity will be shown in the order card.
Write to log
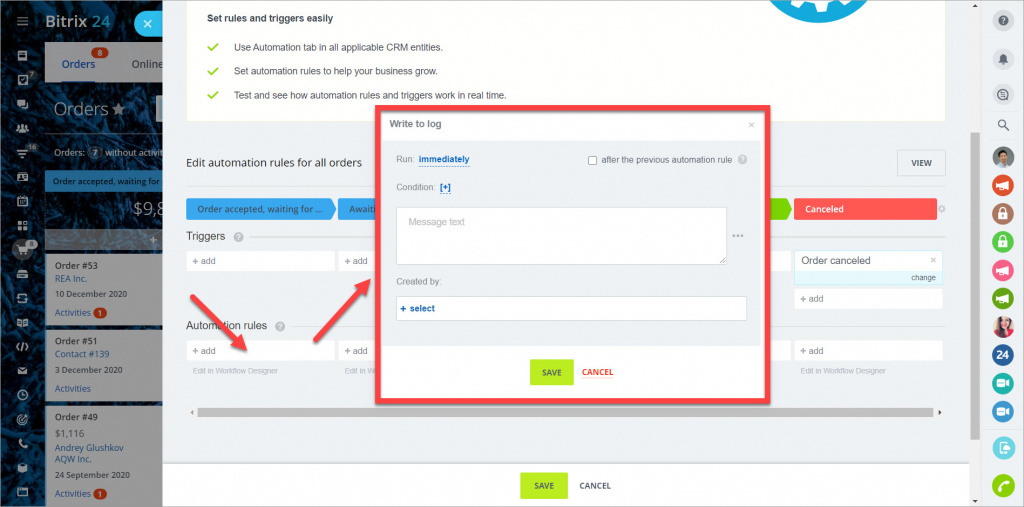
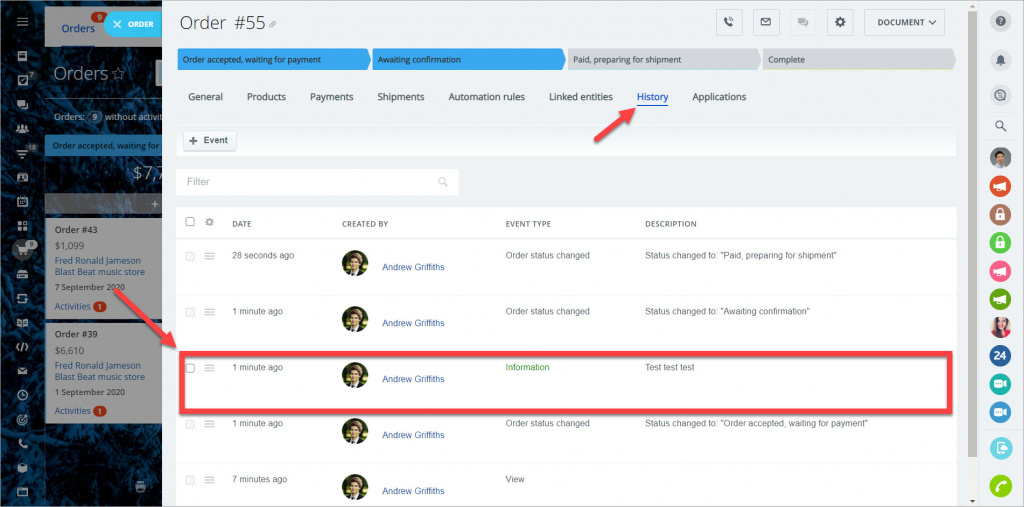
The automation rule will add a specified message to an order log.
The specified message text will be added to the order card > History.
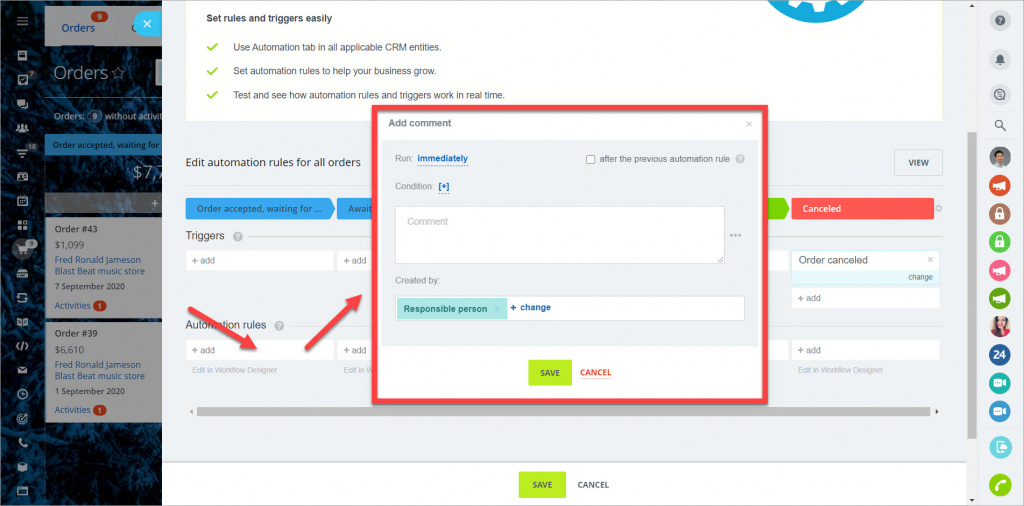
Add comment
The automation rule adds a comment to the timeline of an order card.
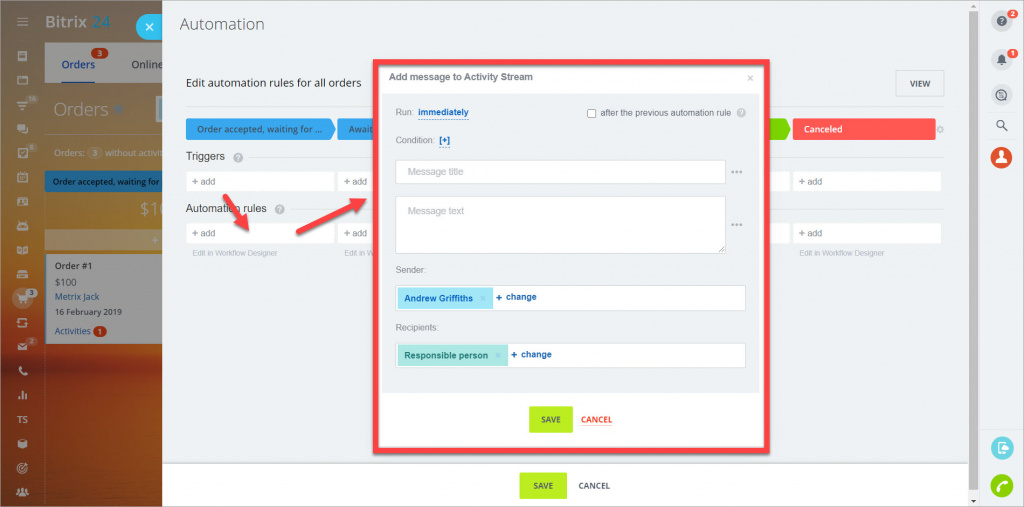
Add message to Feed
The automation rule adds a message to the Feed.
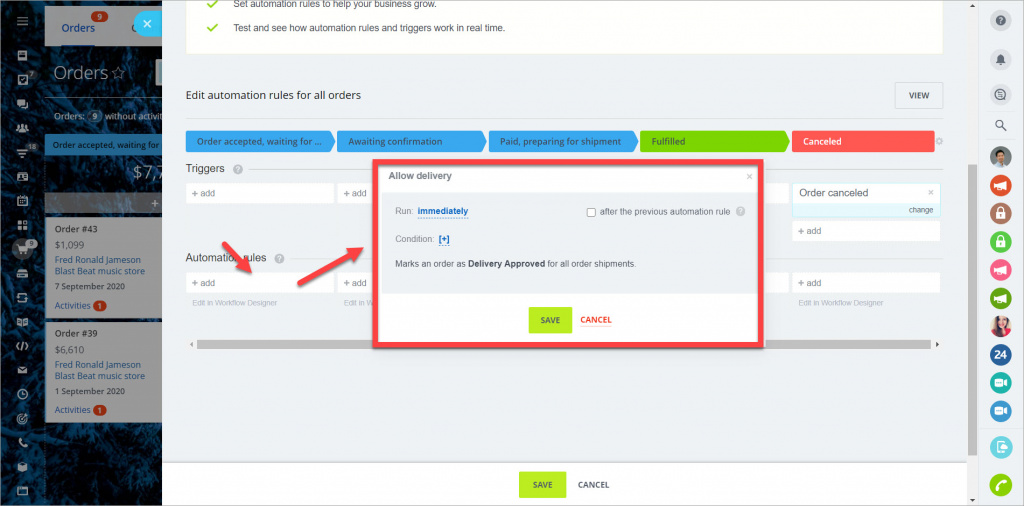
Allow delivery
The automation rule marks an order as
Delivery Approved for all order shipments.
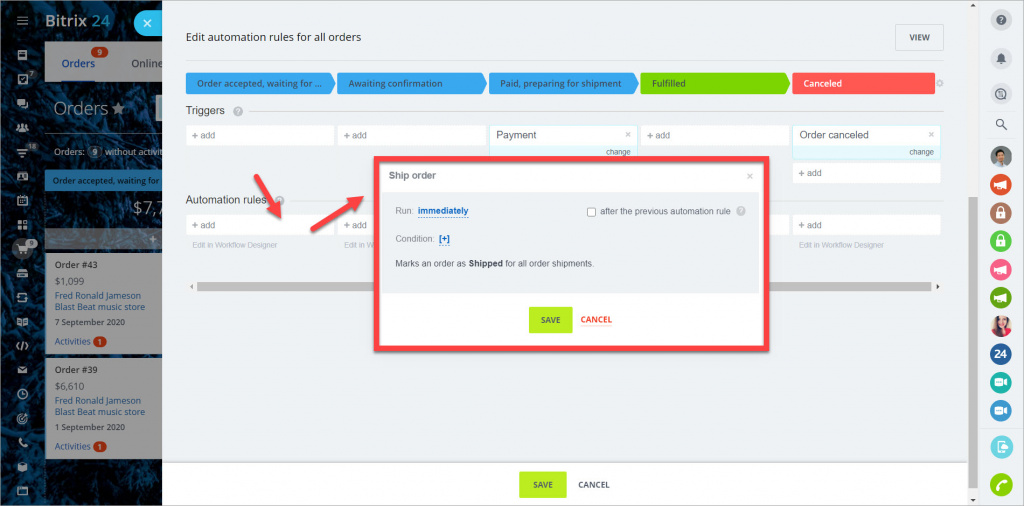
Pay, ship, cancel order
The automation rule marks an order as Paid, Shipped, Cancelled for all order shipments.
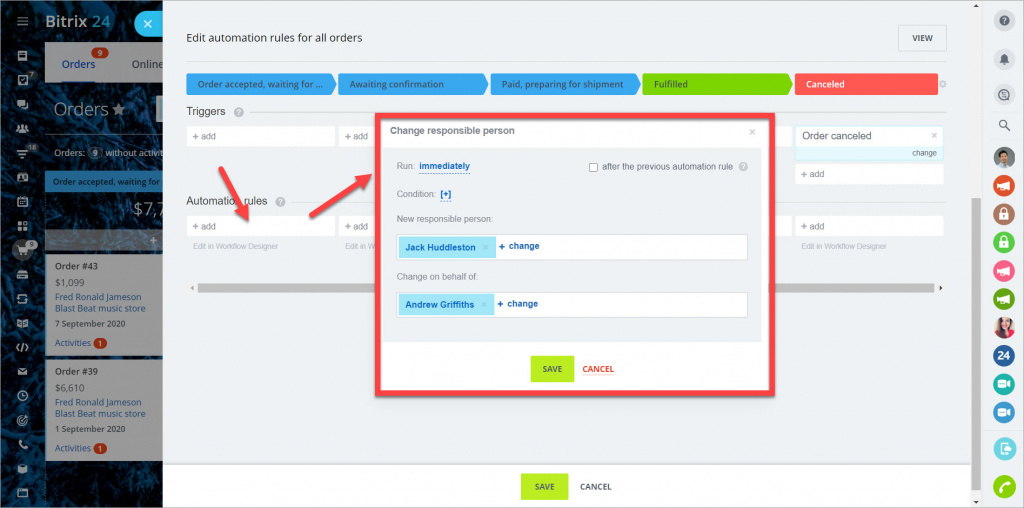
Change responsible person
The automation rule changes the person responsible for the order.
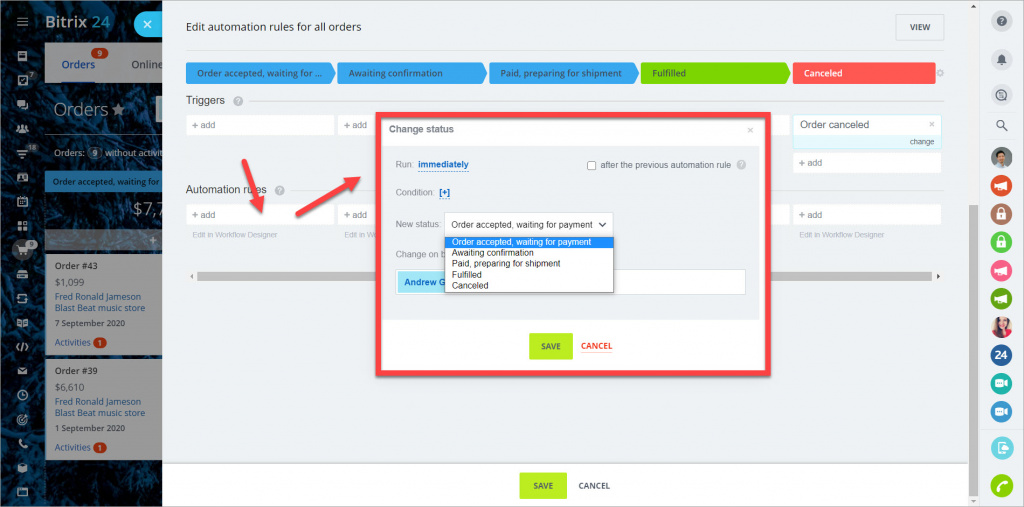
Change status
The automation rule changes the status of the order.
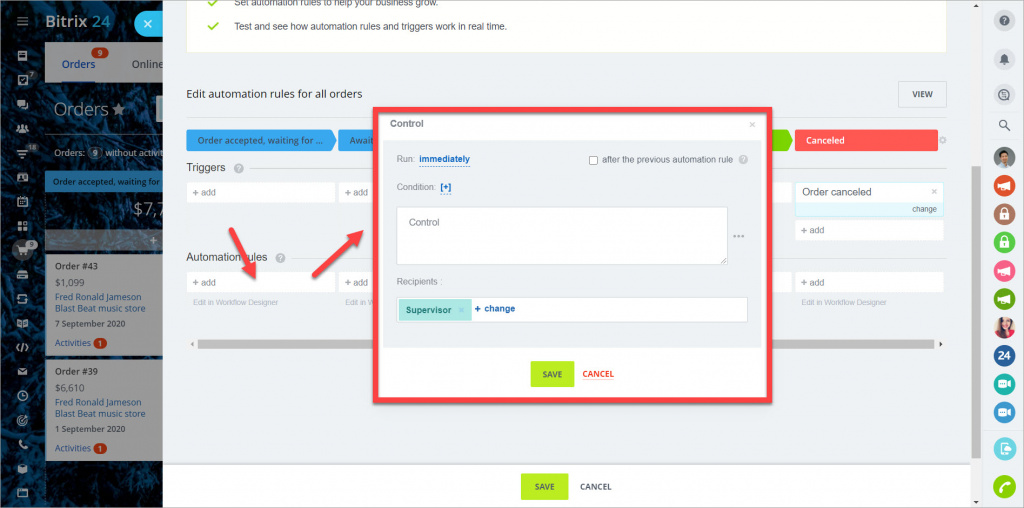
Control, notification
The automation rule sends a notification to the selected employee. The difference between the two automation rules is that the sender can be configured in the
Notification automation rule but not in the
Control automation rule.
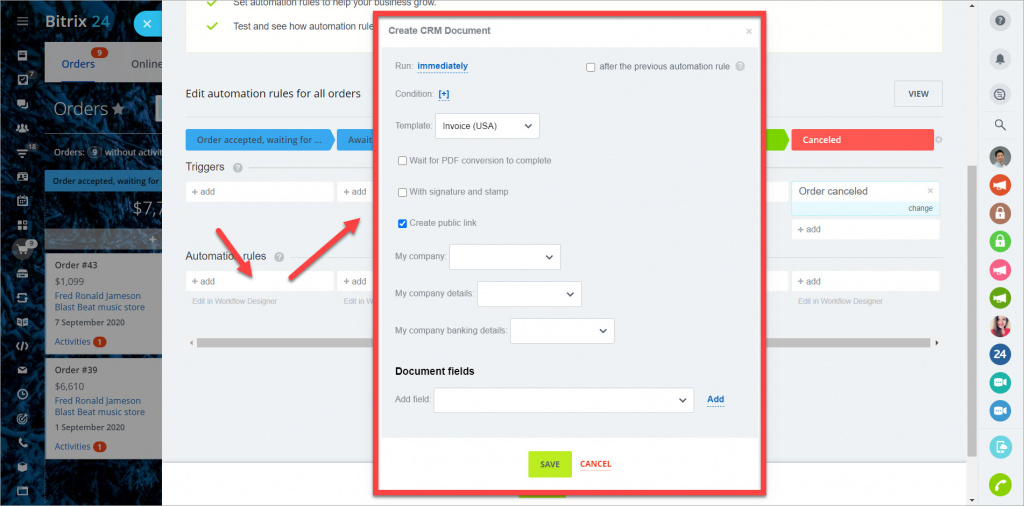
Create CRM Document
The automation rule creates the CRM document based on the selected template.
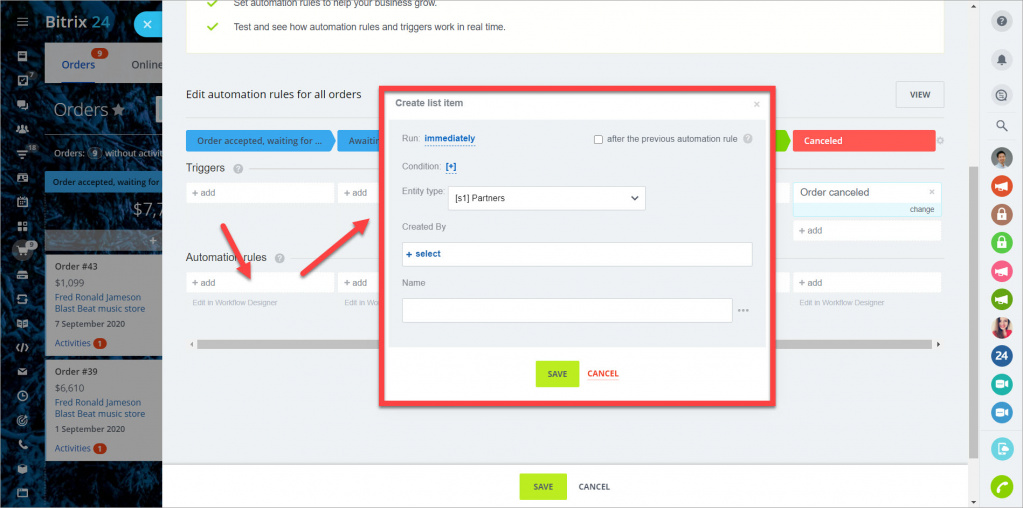
Create list item
The automation rule creates list item in the selected list.
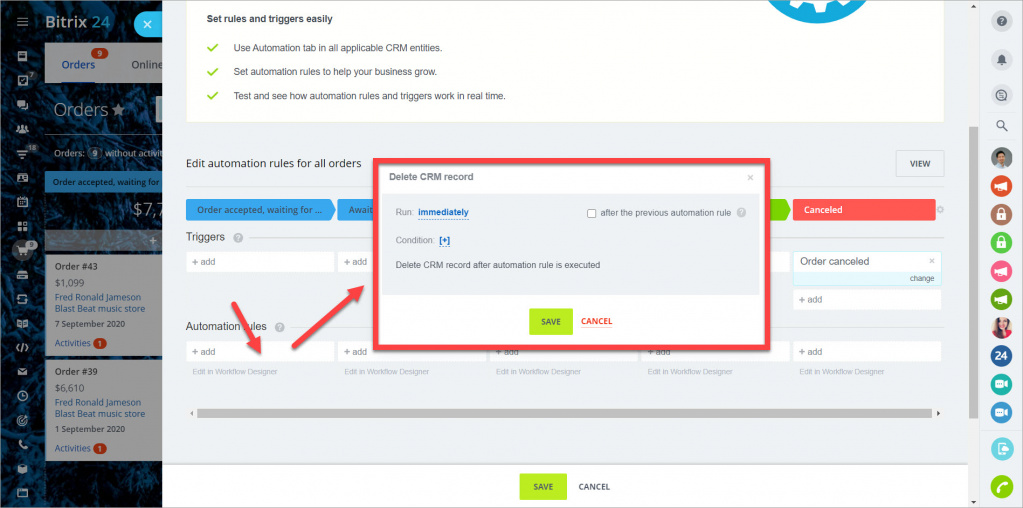
Delete CRM record
The automation rule deletes the CRM record if an order
is not paid.
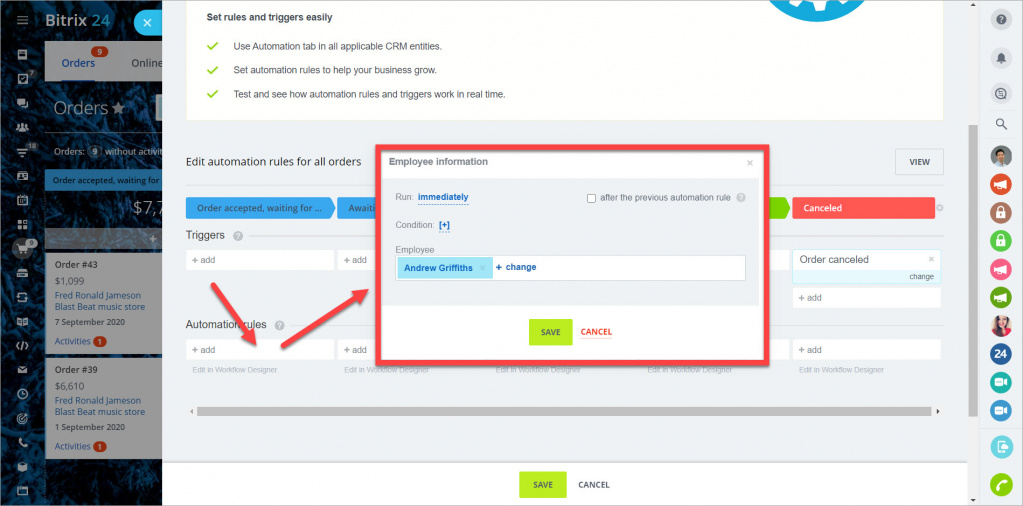
Details information, Employee information
The automation rule gets the information from contact/company details or the information about an employee.
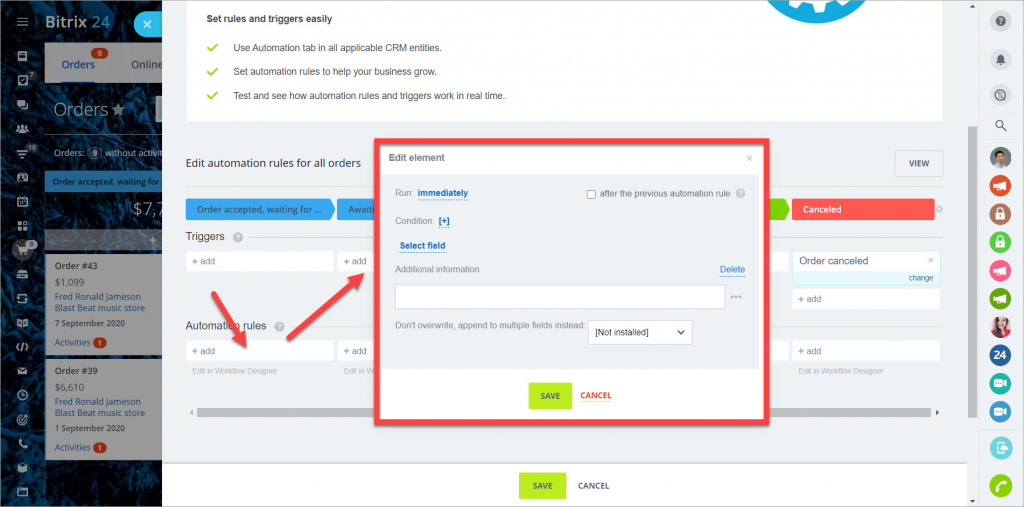
Edit element, Edit details
The automation rule edits the element or edits details.
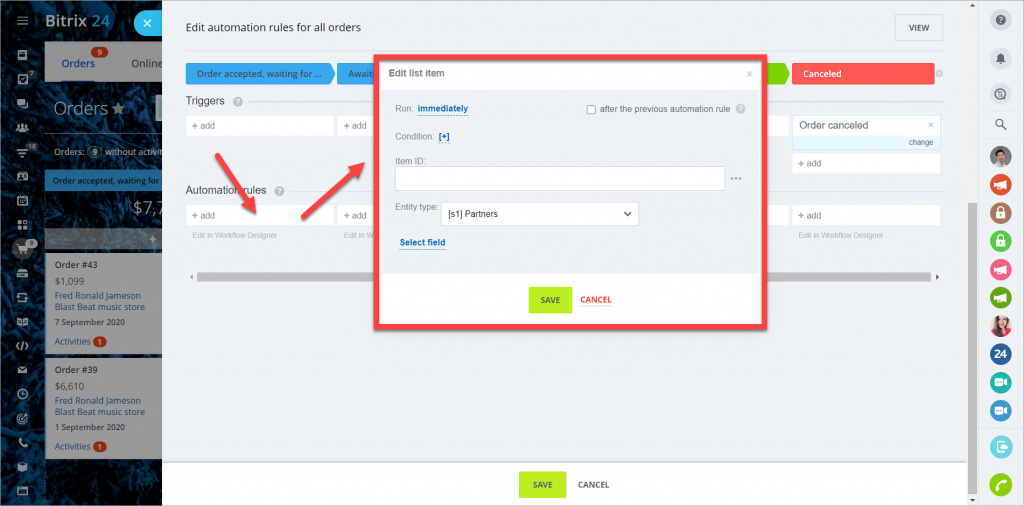
Edit list item
The automation rule edits the item in the selected list.
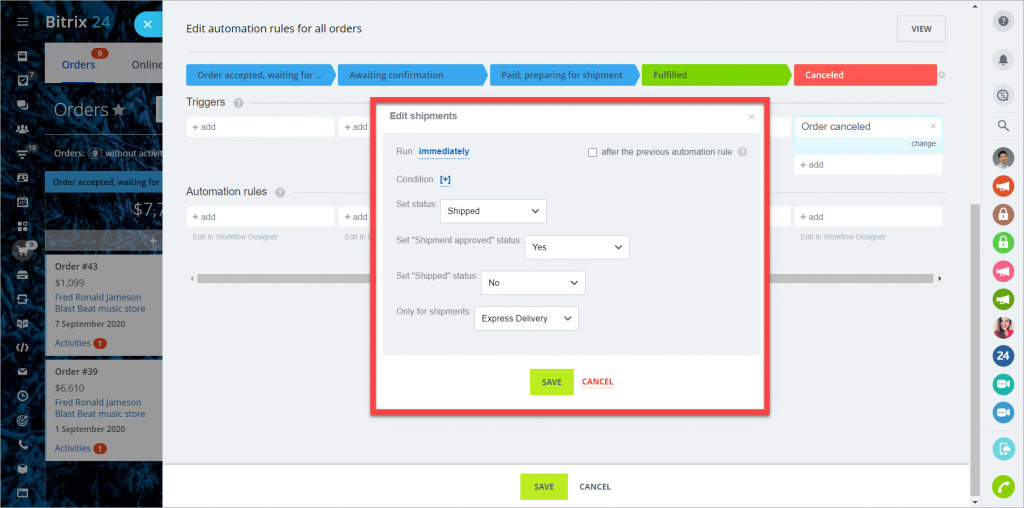
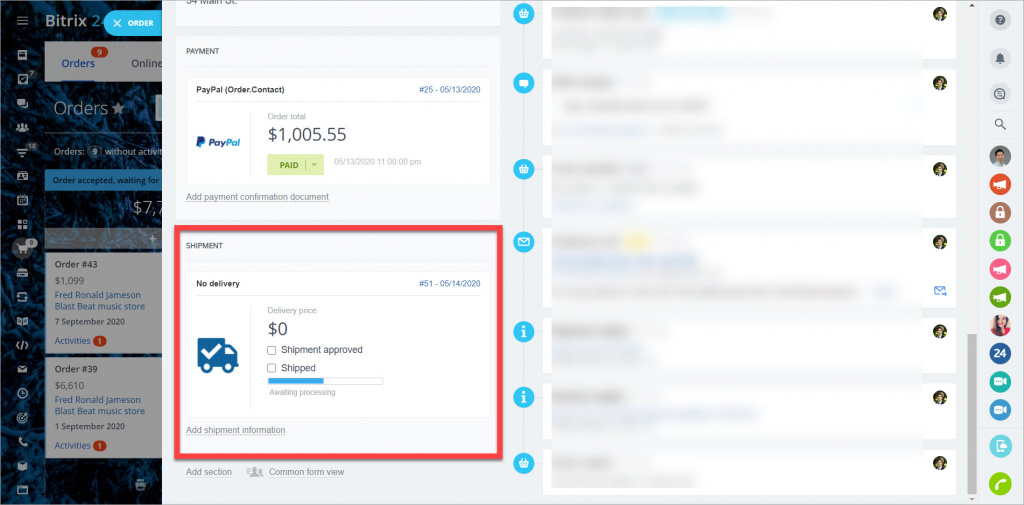
Edit shipments
The automation rule edits the Shipment field in the order card.
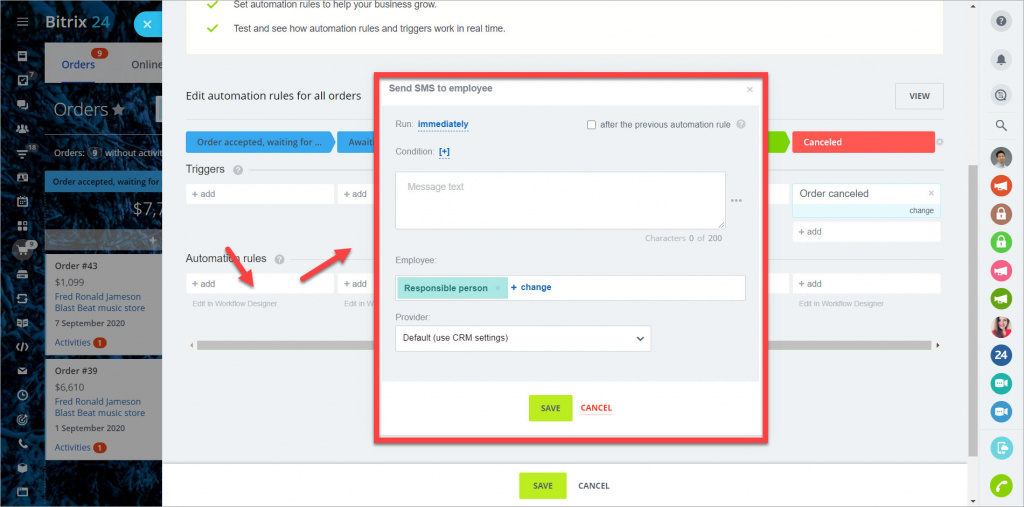
Send SMS or email to an employee
The automation rule sends an SMS or email to an employee. For client communications, use the same automation rules but in the
Client communications section.
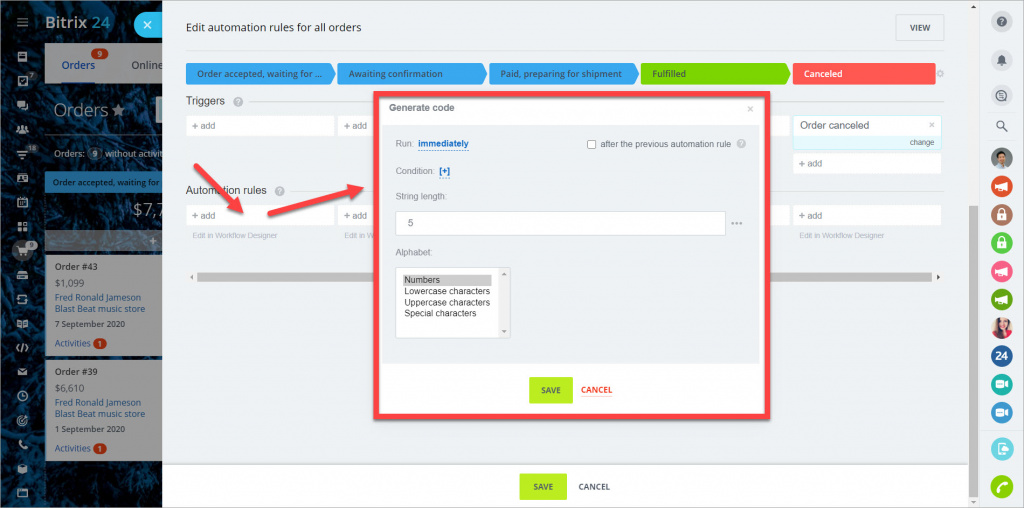
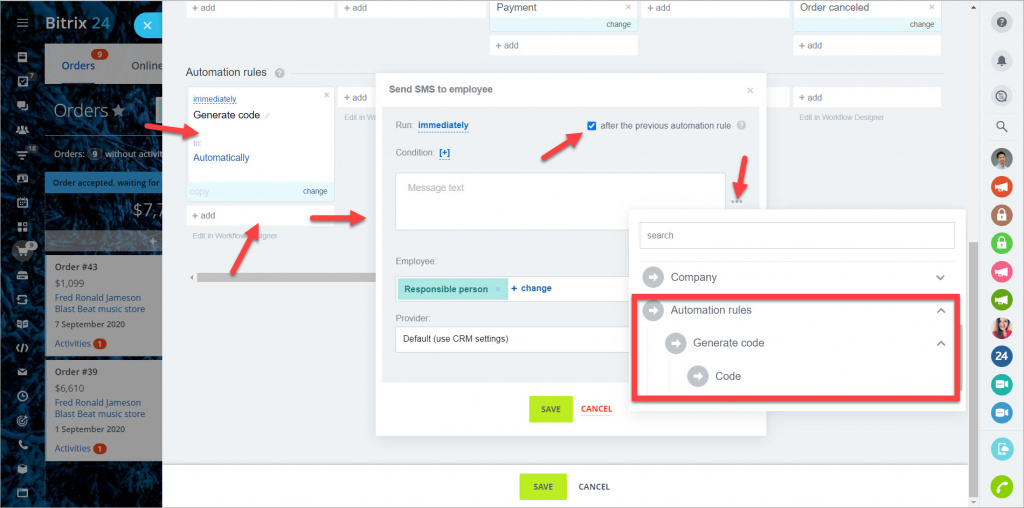
Generate code
The automation rule generates the code according to the specified rules.
This code can be used if another automation rule is added to the same order status and after the previous automation rule option is enabled.
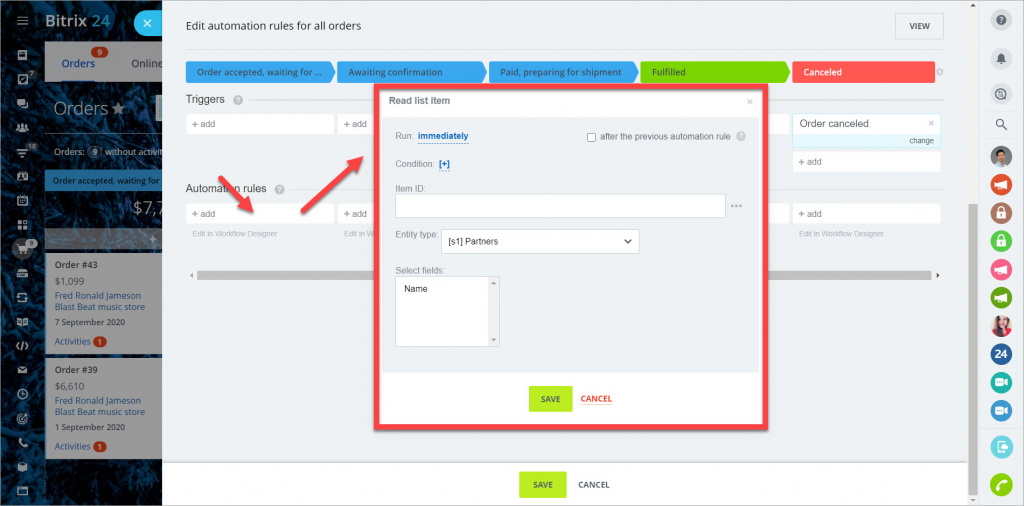
Read list item
The automation rule reades list item in the selected list.
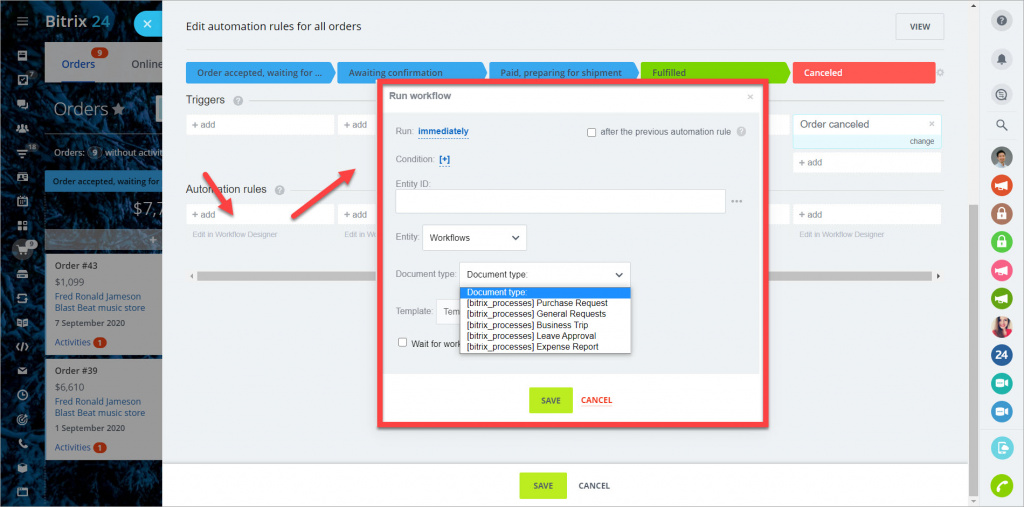
Run workflow
The automation rule runs the selected workflow.
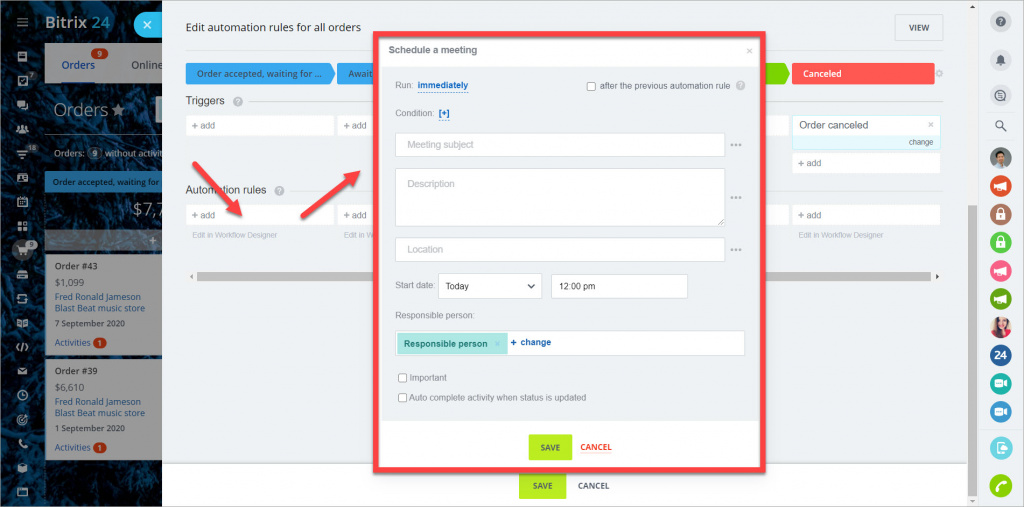
Schedule a call, Schedule a meeting
The automation rule schedules a call or a meeting. It can be displayed in the
Activities section.
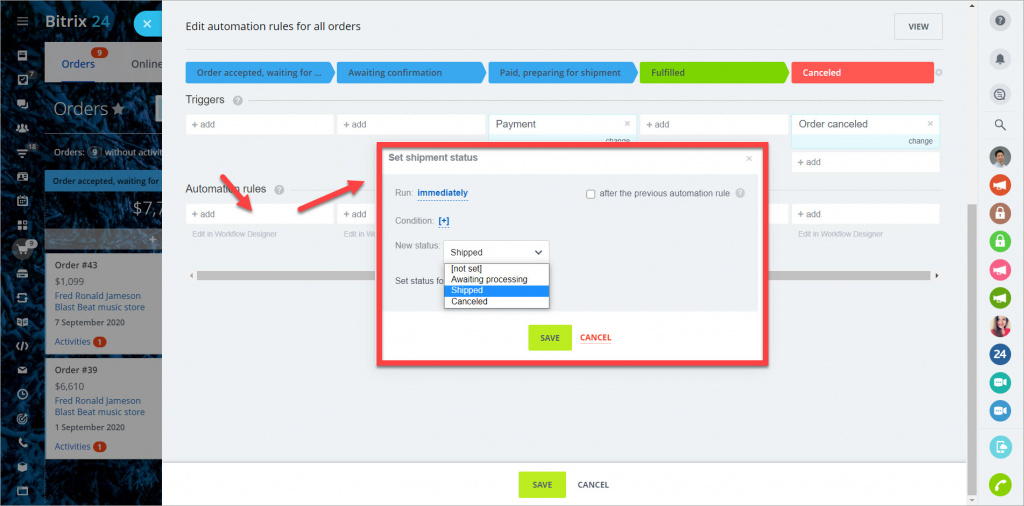
Set shipment status
The automation rule sets a shipment status.
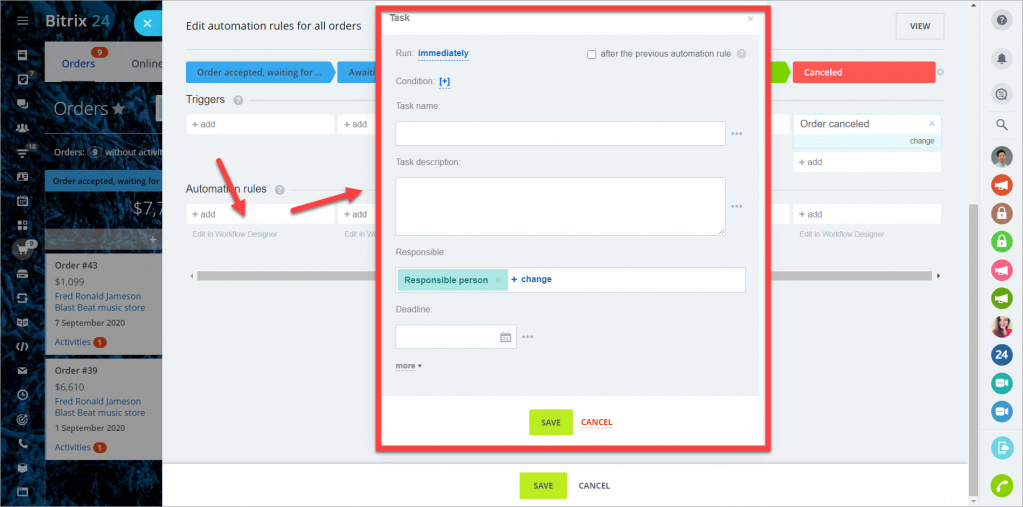
Task
The automation rule creates a task.
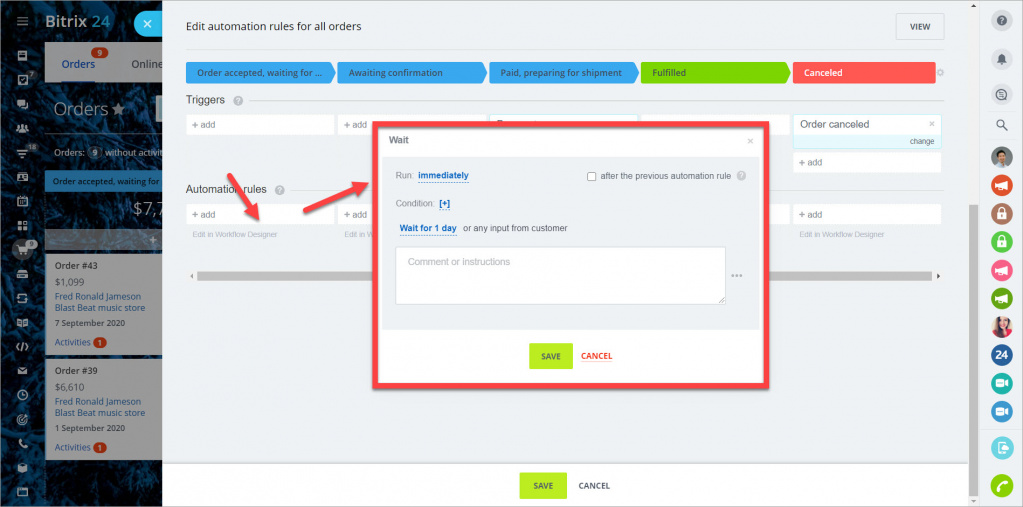
Wait
The automation rule is triggered by any activity from the client or after a specified time and sends a notification to the responsible employee.

