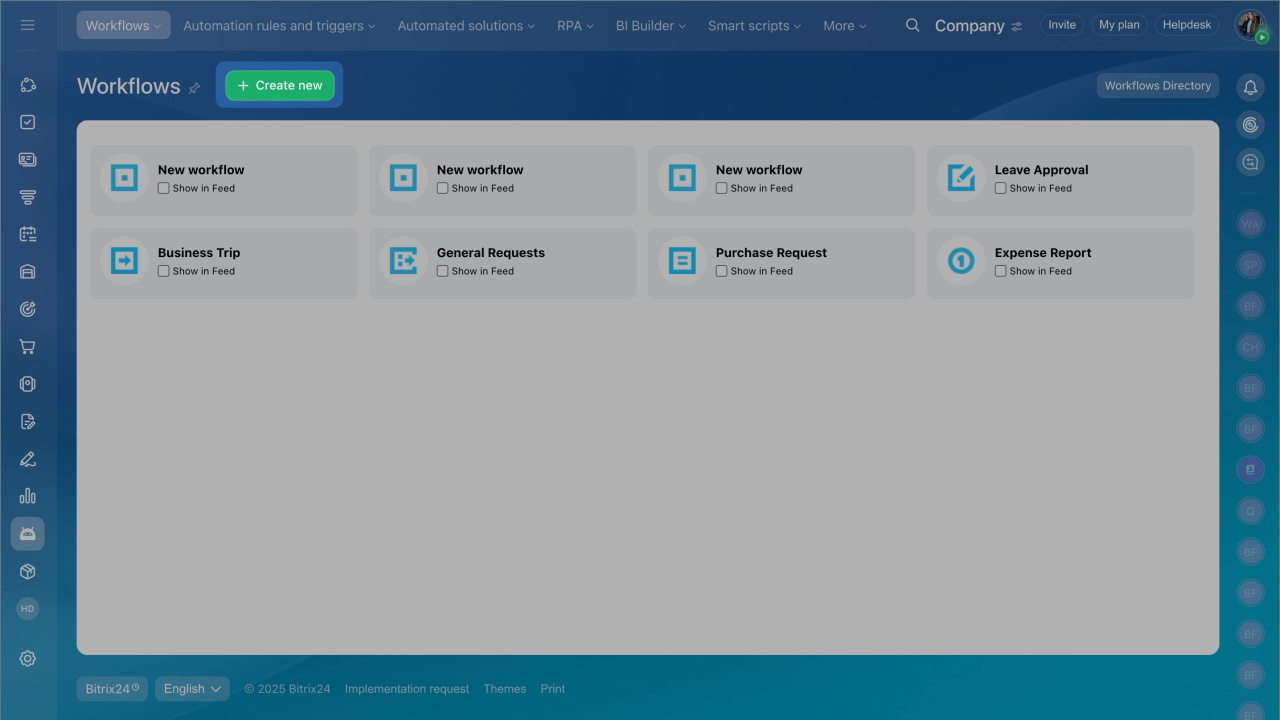
By default, Bitrix24 provides five types of workflows:
- Leave Approval
- Business Trip
- General Requests
- Purchase Request
- Expense Report
Create new workflows to automate routine tasks like purchasing products or negotiating contracts. Employees can launch these workflows in the Feed.
This article explains how to create a new workflow form.
If you need to add new fields to an existing workflow, check out the article:
Add a new workflow field.
If you need to customize the workflow activities, refer to these articles:
Sequential Business Process Template
Status Driven Business Process Template
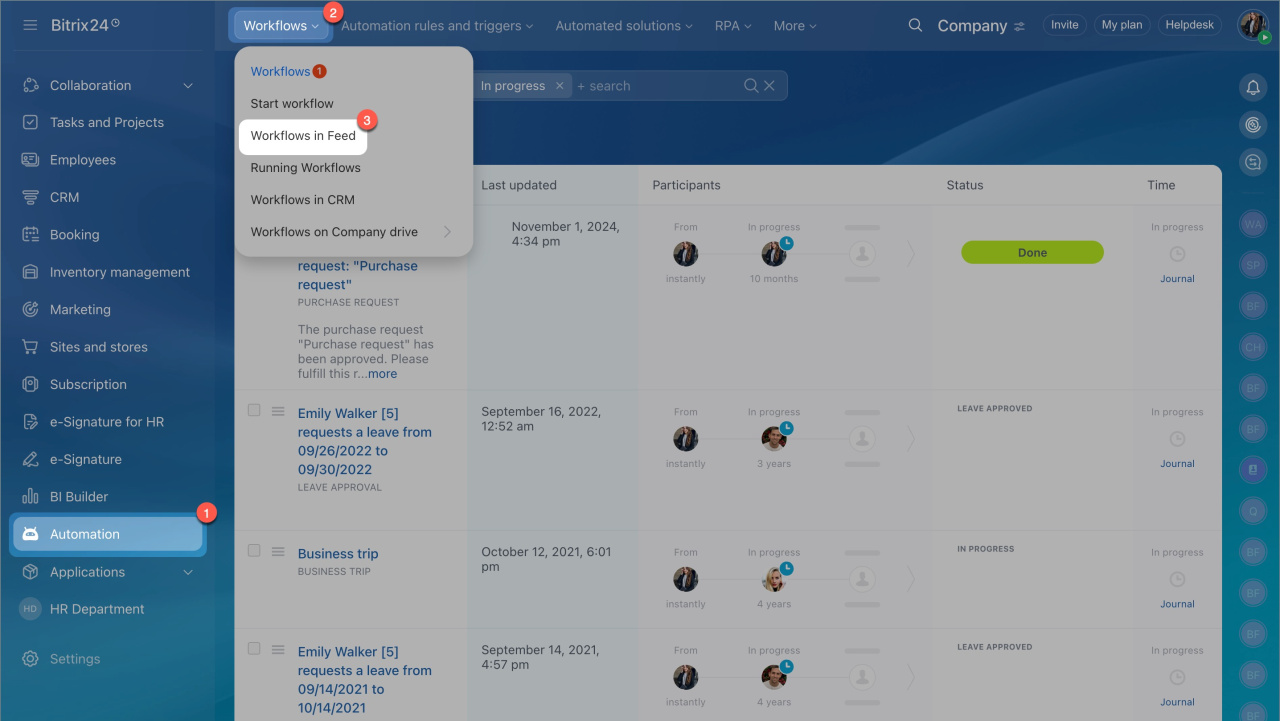
- Go to the Automation section > Workflows > Workflows in Feed.
- Сlick Create New.
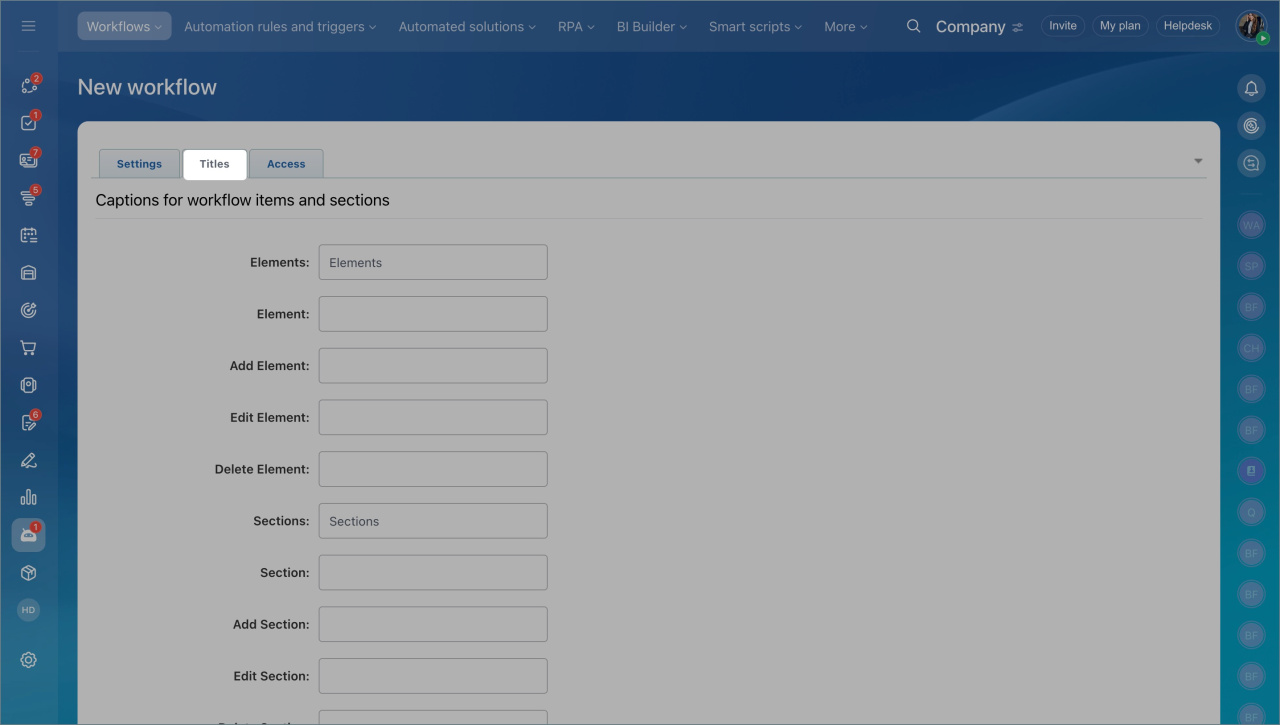
- Complete the tabs of the workflow form: Settings, Titles, and Access.
Settings. Provide basic information about the workflow.
- Workflow name. Displayed in the list of workflows.
- Workflow description. Explain the purpose of the workflow.
- Sort. Determines the order in the list (lower numbers appear higher).
- Image. Upload an image for easy recognition.
- Auto lock when editing. Locks an element if multiple employees try to edit it simultaneously.
Titles. In this tab, you can rename elements and sections. An element is what appears when an employee starts a workflow. A section is a folder that holds these elements.
Access. Configure permissions for employees who will work with the workflow elements and sections.
- Click Add.
- Select a user or department.
- Assign permissions.
Types of permissions:
- Access denied. The user can't see the workflow in the list.
- Read. The user can view the workflow.
- View in Control Panel. The user can view the workflow elements.
- Add.The user can add elements to the workflow.
- Create in Control Panel. The user can add and view elements.
- Edit. The user can add elements, edit and run the workflow.
- Limited edit. The user can't delete sections, create subsections, or edit sections and elements.
- Full access. All actions are allowed.
When all settings are complete, click Save. The new workflow form will appear in the list.
In brief
- Bitrix24 provides five default workflows: Leave Approval, Business Trip, General Requests, Purchase Request, and Expense Report.
- Go to Automation > Workflows > Workflows in Feed and click Create New.
- Complete the tabs of the workflow form: Settings, Titles, and Access.
- In the Settings tab, specify the workflow name and description, upload an image, and adjust the sorting.
- In the Titles tab, rename elements and sections.
- In the Access tab, configure permissions for employees who will work with the workflow elements and sections.


