
Status-driven workflows are different from sequential workflows. They work best for large, complex processes, so setup takes a little more time. Once you understand the structure, the setup is simple.
This article explains how to create and configure a status-driven workflow.
How status-driven workflow creation works
Creating a status-driven workflow includes two main stages:
- Create statuses.
- Configure activities within each status, define transitions between statuses, and set access permissions.
The sections below explain each stage step by step.
Create statuses
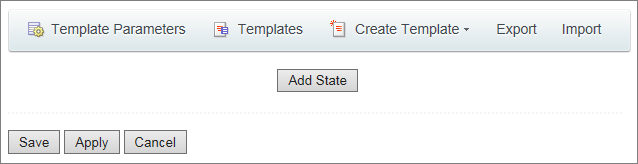
Open the template editor and click Add status.
When you create a status, you can also define access permissions for the workflow at that stage. By default, the workflow inherits the same permissions as the item it is created for. If needed, you can change these permissions.

You can grant access to individual employees, departments, or user groups.
Configure a status
After creating statuses, configure the elements inside each one.
Each element represents a separate sequential process. Once you understand how they work, setup becomes much easier.
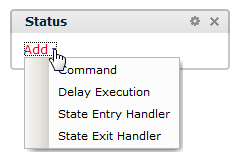
- Status Entry Handler: Runs automatically every time the workflow enters the status.
- Status Exit Handler: Runs immediately when the workflow moves to another status.
Use the Set status activity to define transitions between statuses.
In most cases, the entry and exit handlers are enough. The elements below are optional but provide more flexibility.
- Command: A process that a user starts manually when needed. Use commands when the workflow path depends on the situation. For example, an order from a large wholesale customer may follow one process, while an order from an individual customer follows another.
- Delay Execution: A process that starts automatically after a specified period. Use timed execution when an activity should run without user interaction.
Keep in mind that when the workflow reaches the Set status activity, it immediately switches to the exit handler. If the entry handler already changes the status, any configured Command or Delay Execution in that status will not run.