
Bitrix24 supports several file types, including text documents, boards, spreadsheets, and presentations. These files help teams work together, plan projects, organize ideas, and present results.
You can set access by user type. The same link can give different permissions to different people. For example, employees can edit a document, while clients and external experts can only view it. This helps you work with external participants without risking unwanted changes or data loss.
In this article:
- Access settings location
- Grant access to an external user
- Grant access to an employee
- Access to attached documents
Access settings location
You can set file access from the file list or while working in a file.
From the file list.
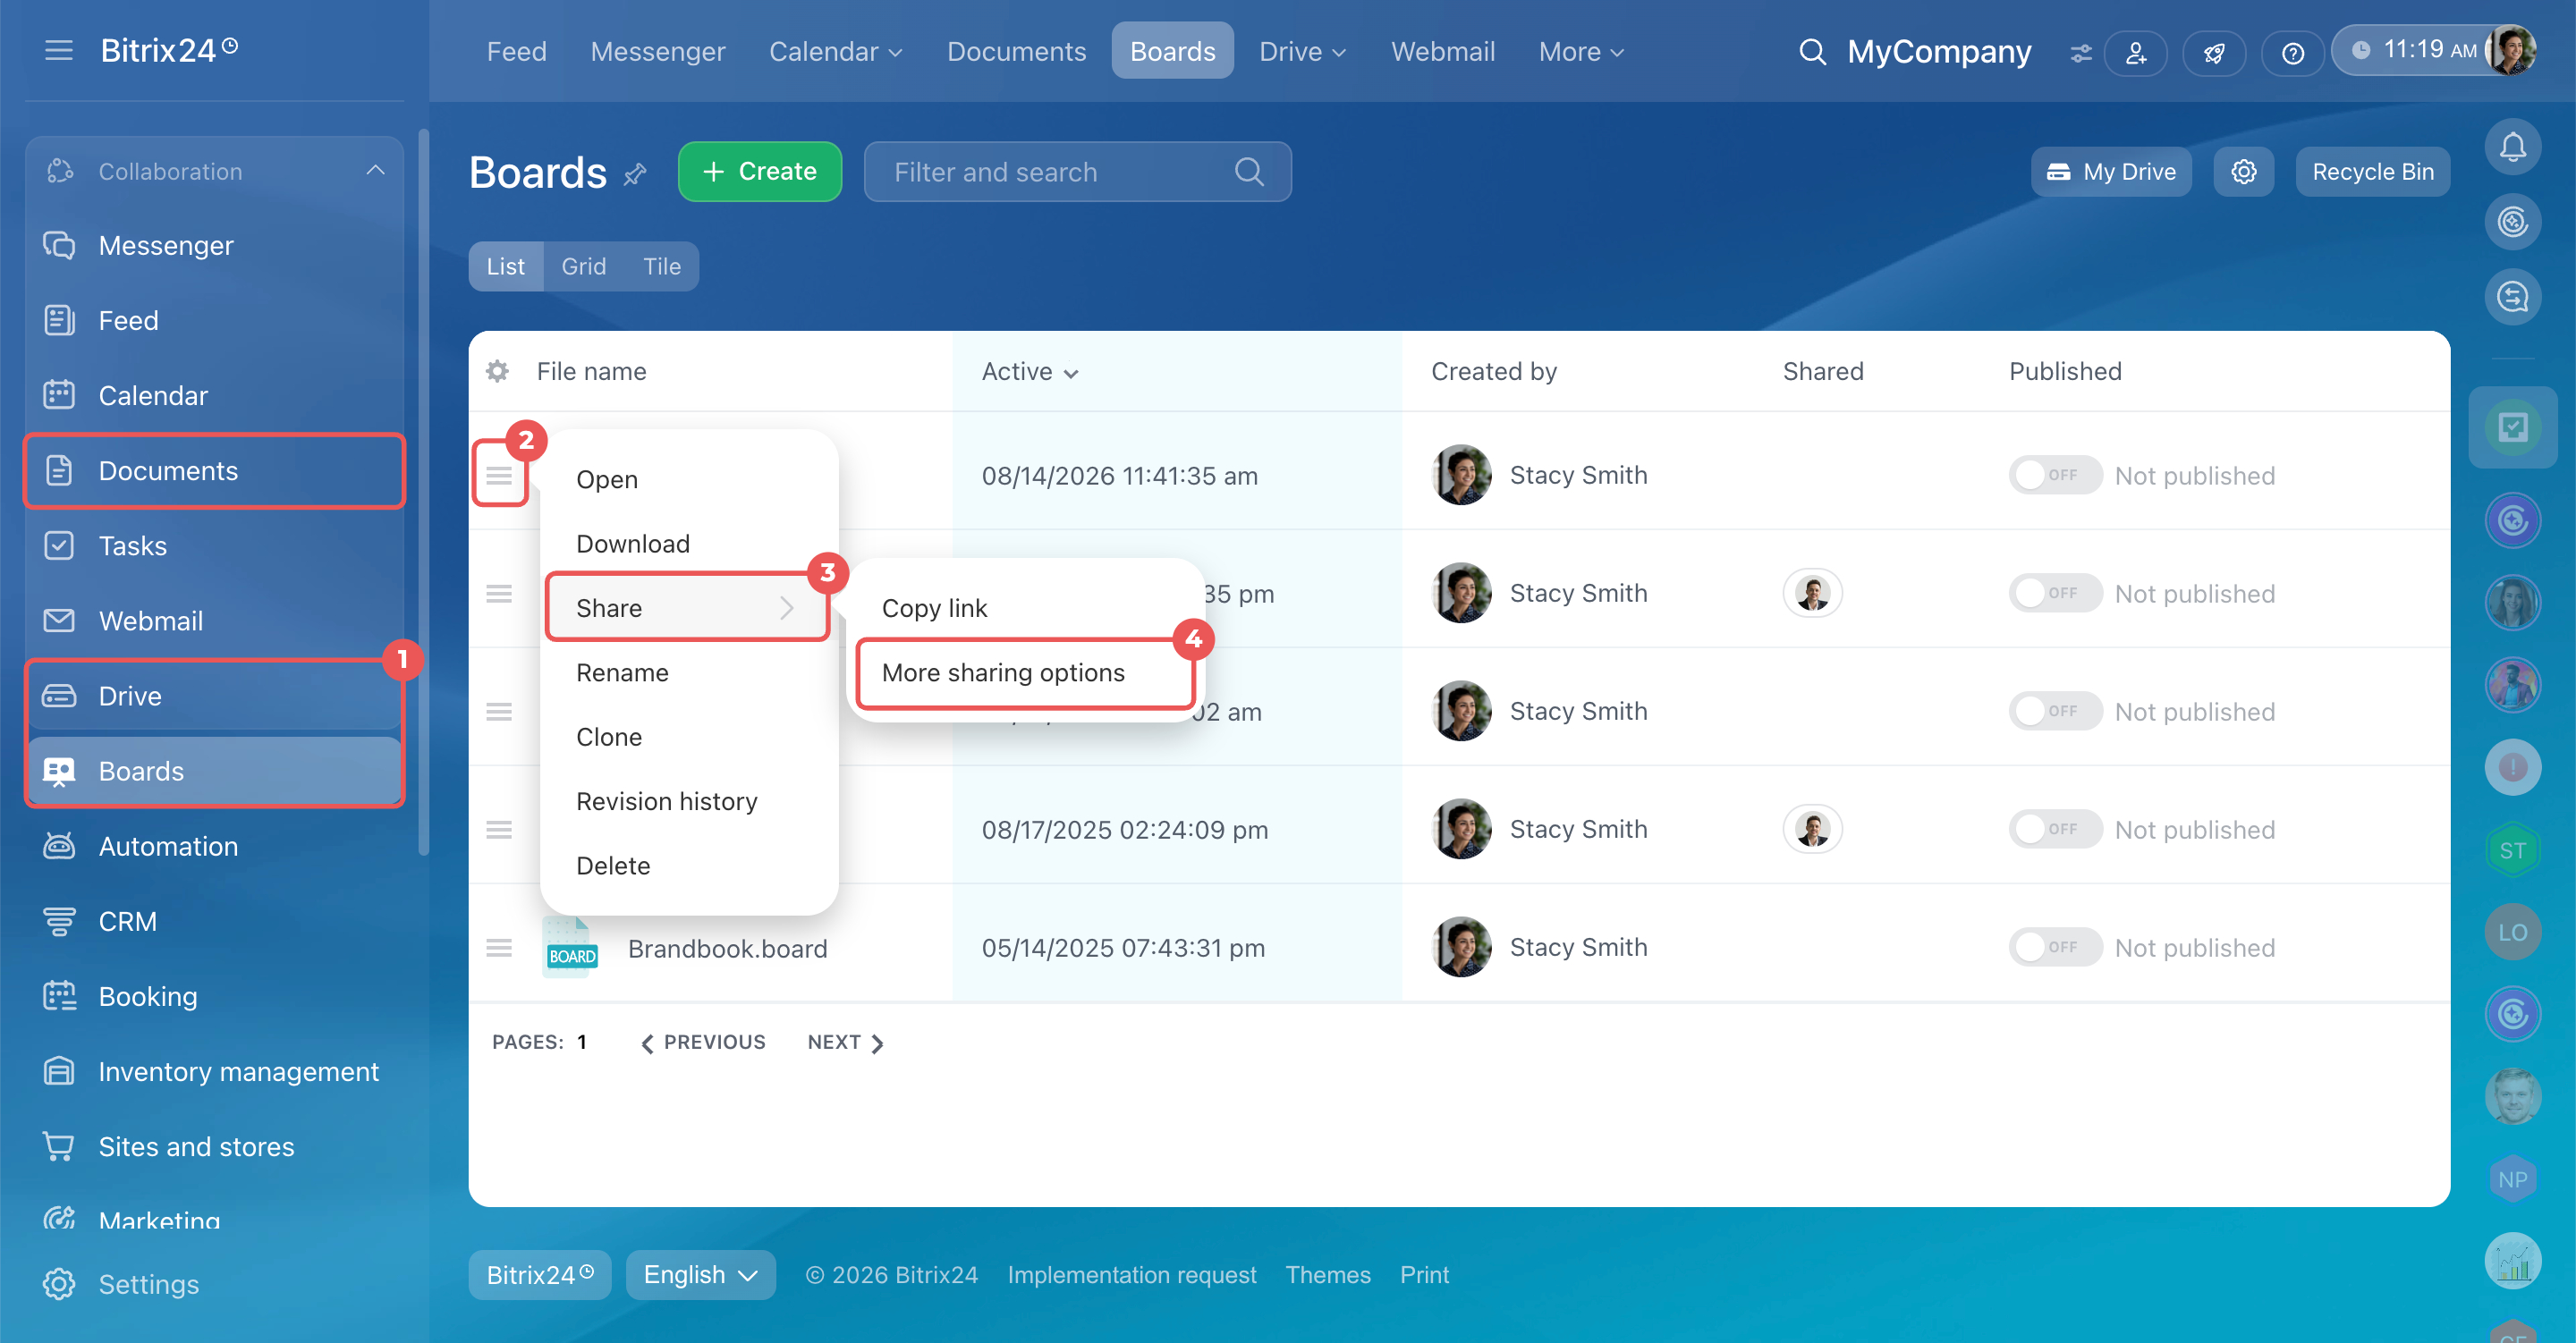
1. Open Drive, Documents, or Boards and find the file.
2–4. Next to the file name, click Menu (≡) > Share > More sharing options.
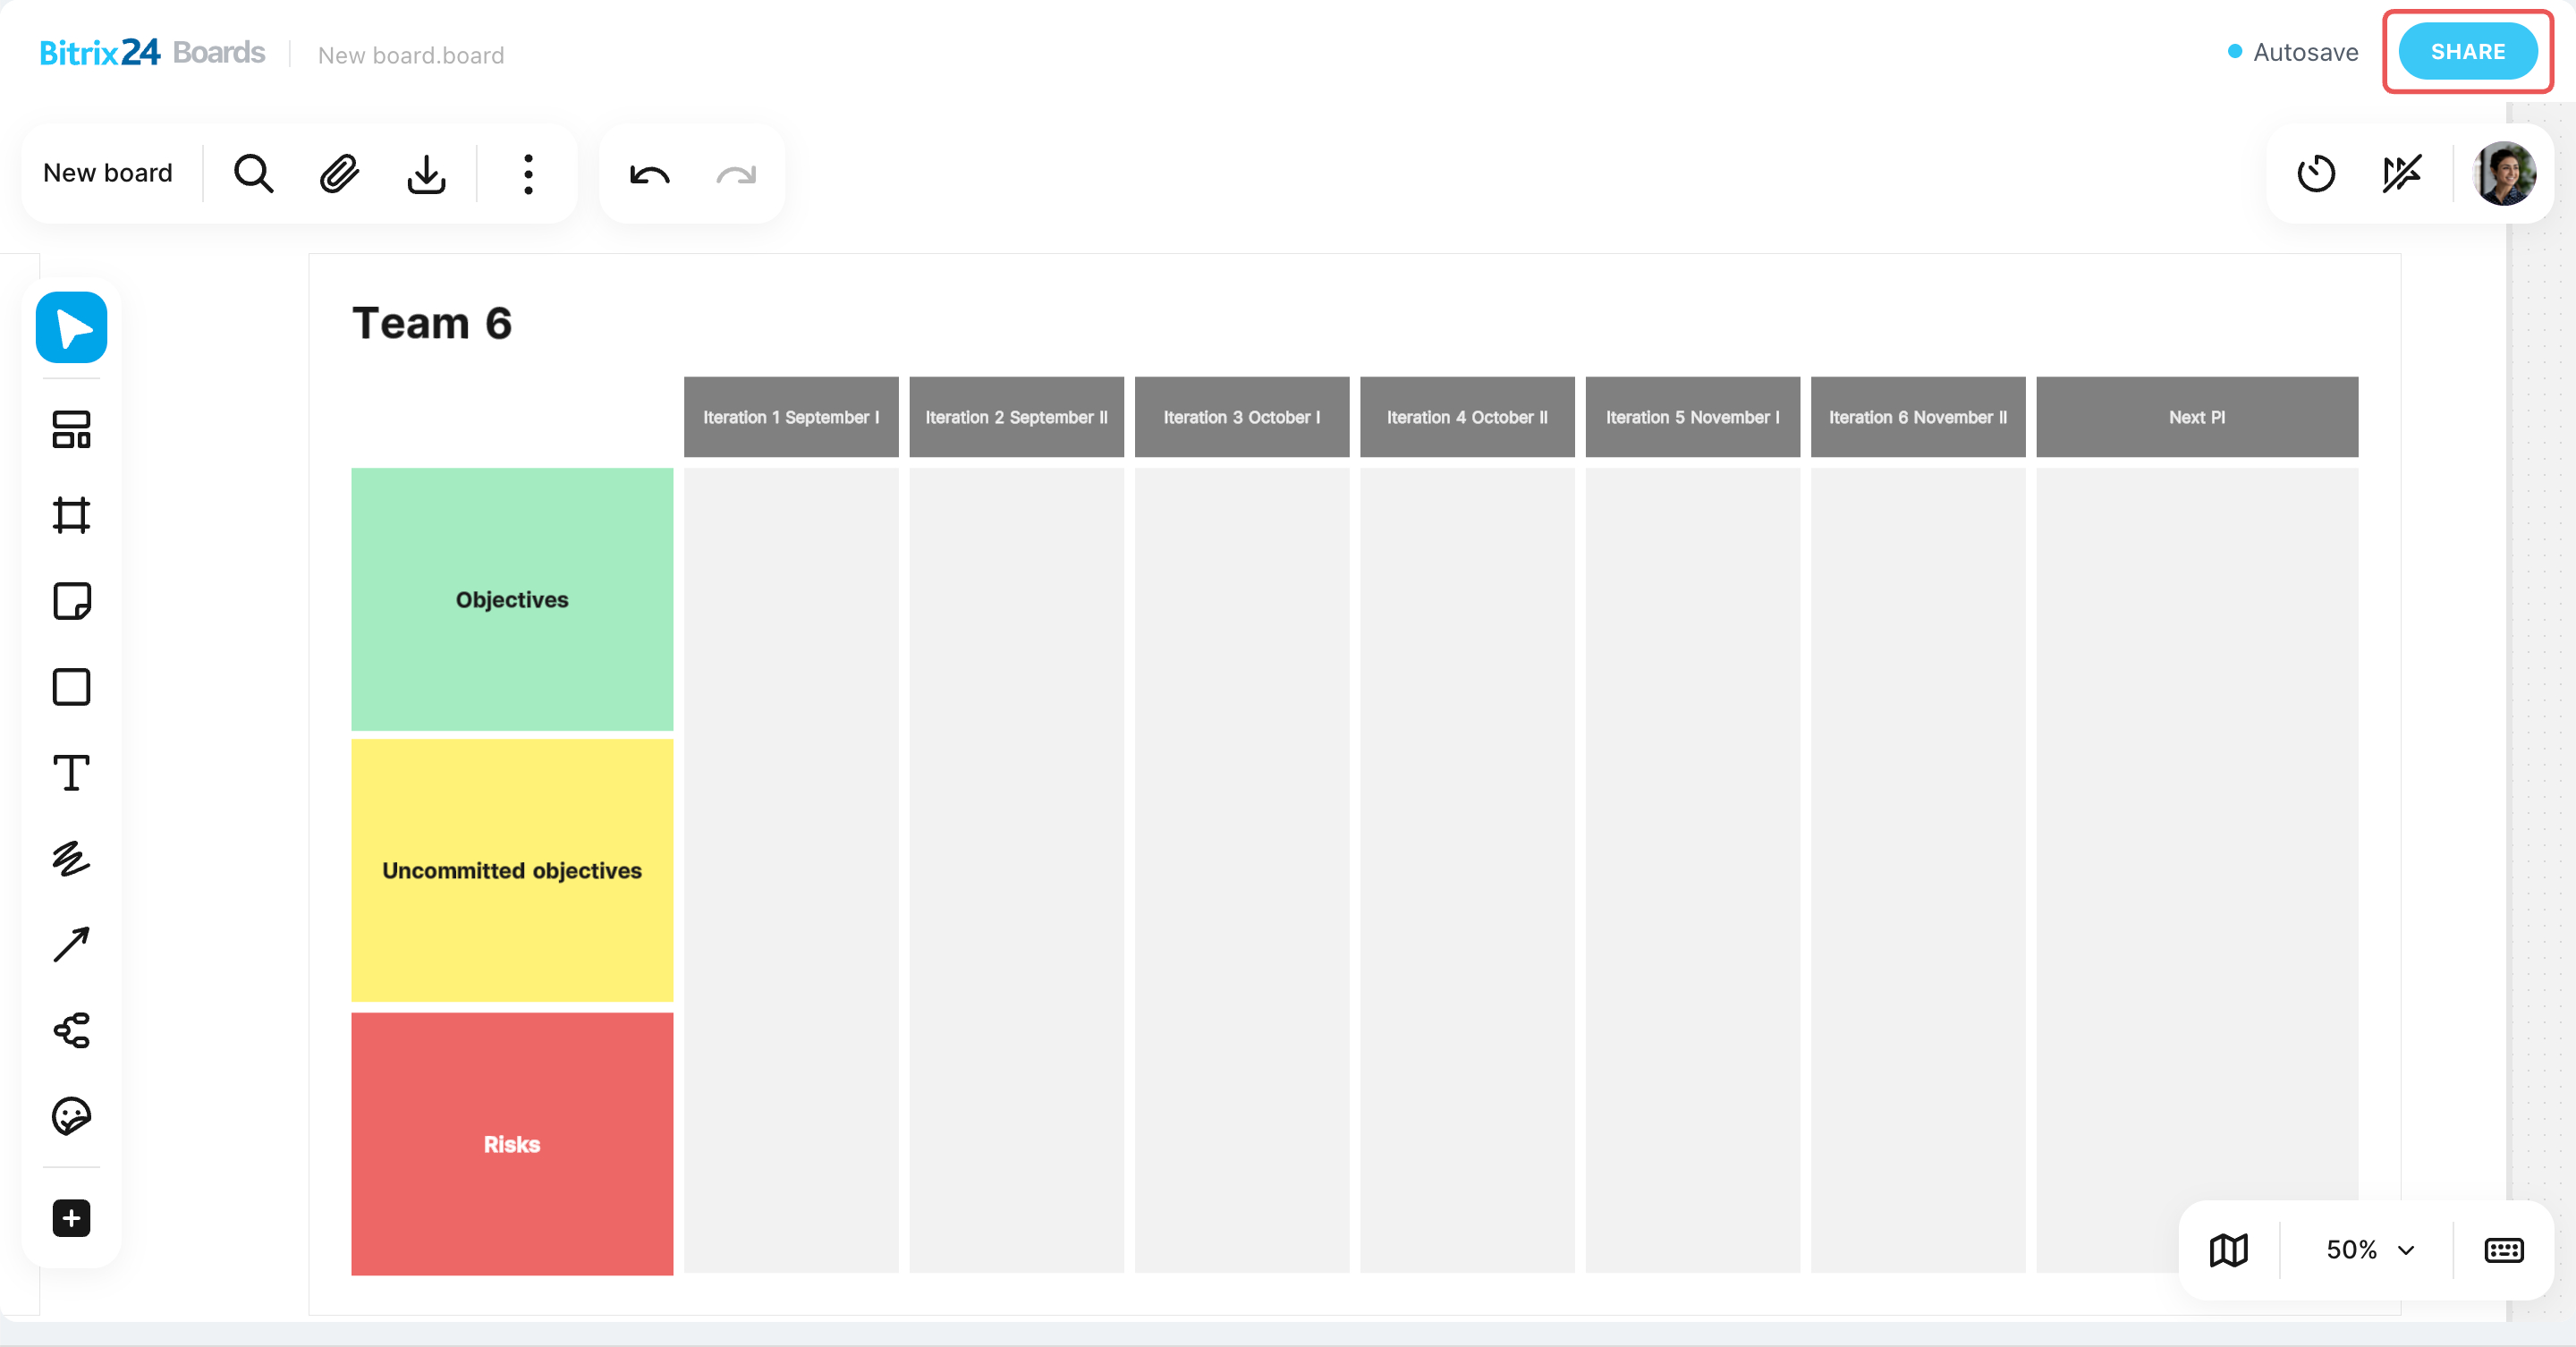
In the document or board editor. If you are already working in a document, board, spreadsheet, or presentation, click Share in the upper-right corner.
Grant access to an external user
To share a document with a client or invite a specialist who does not have access to your Bitrix24, turn on public access. Copy the link and send it by SMS, chat, or email. Anyone with the link can open the file in a browser. Both external users and employees can use the link.
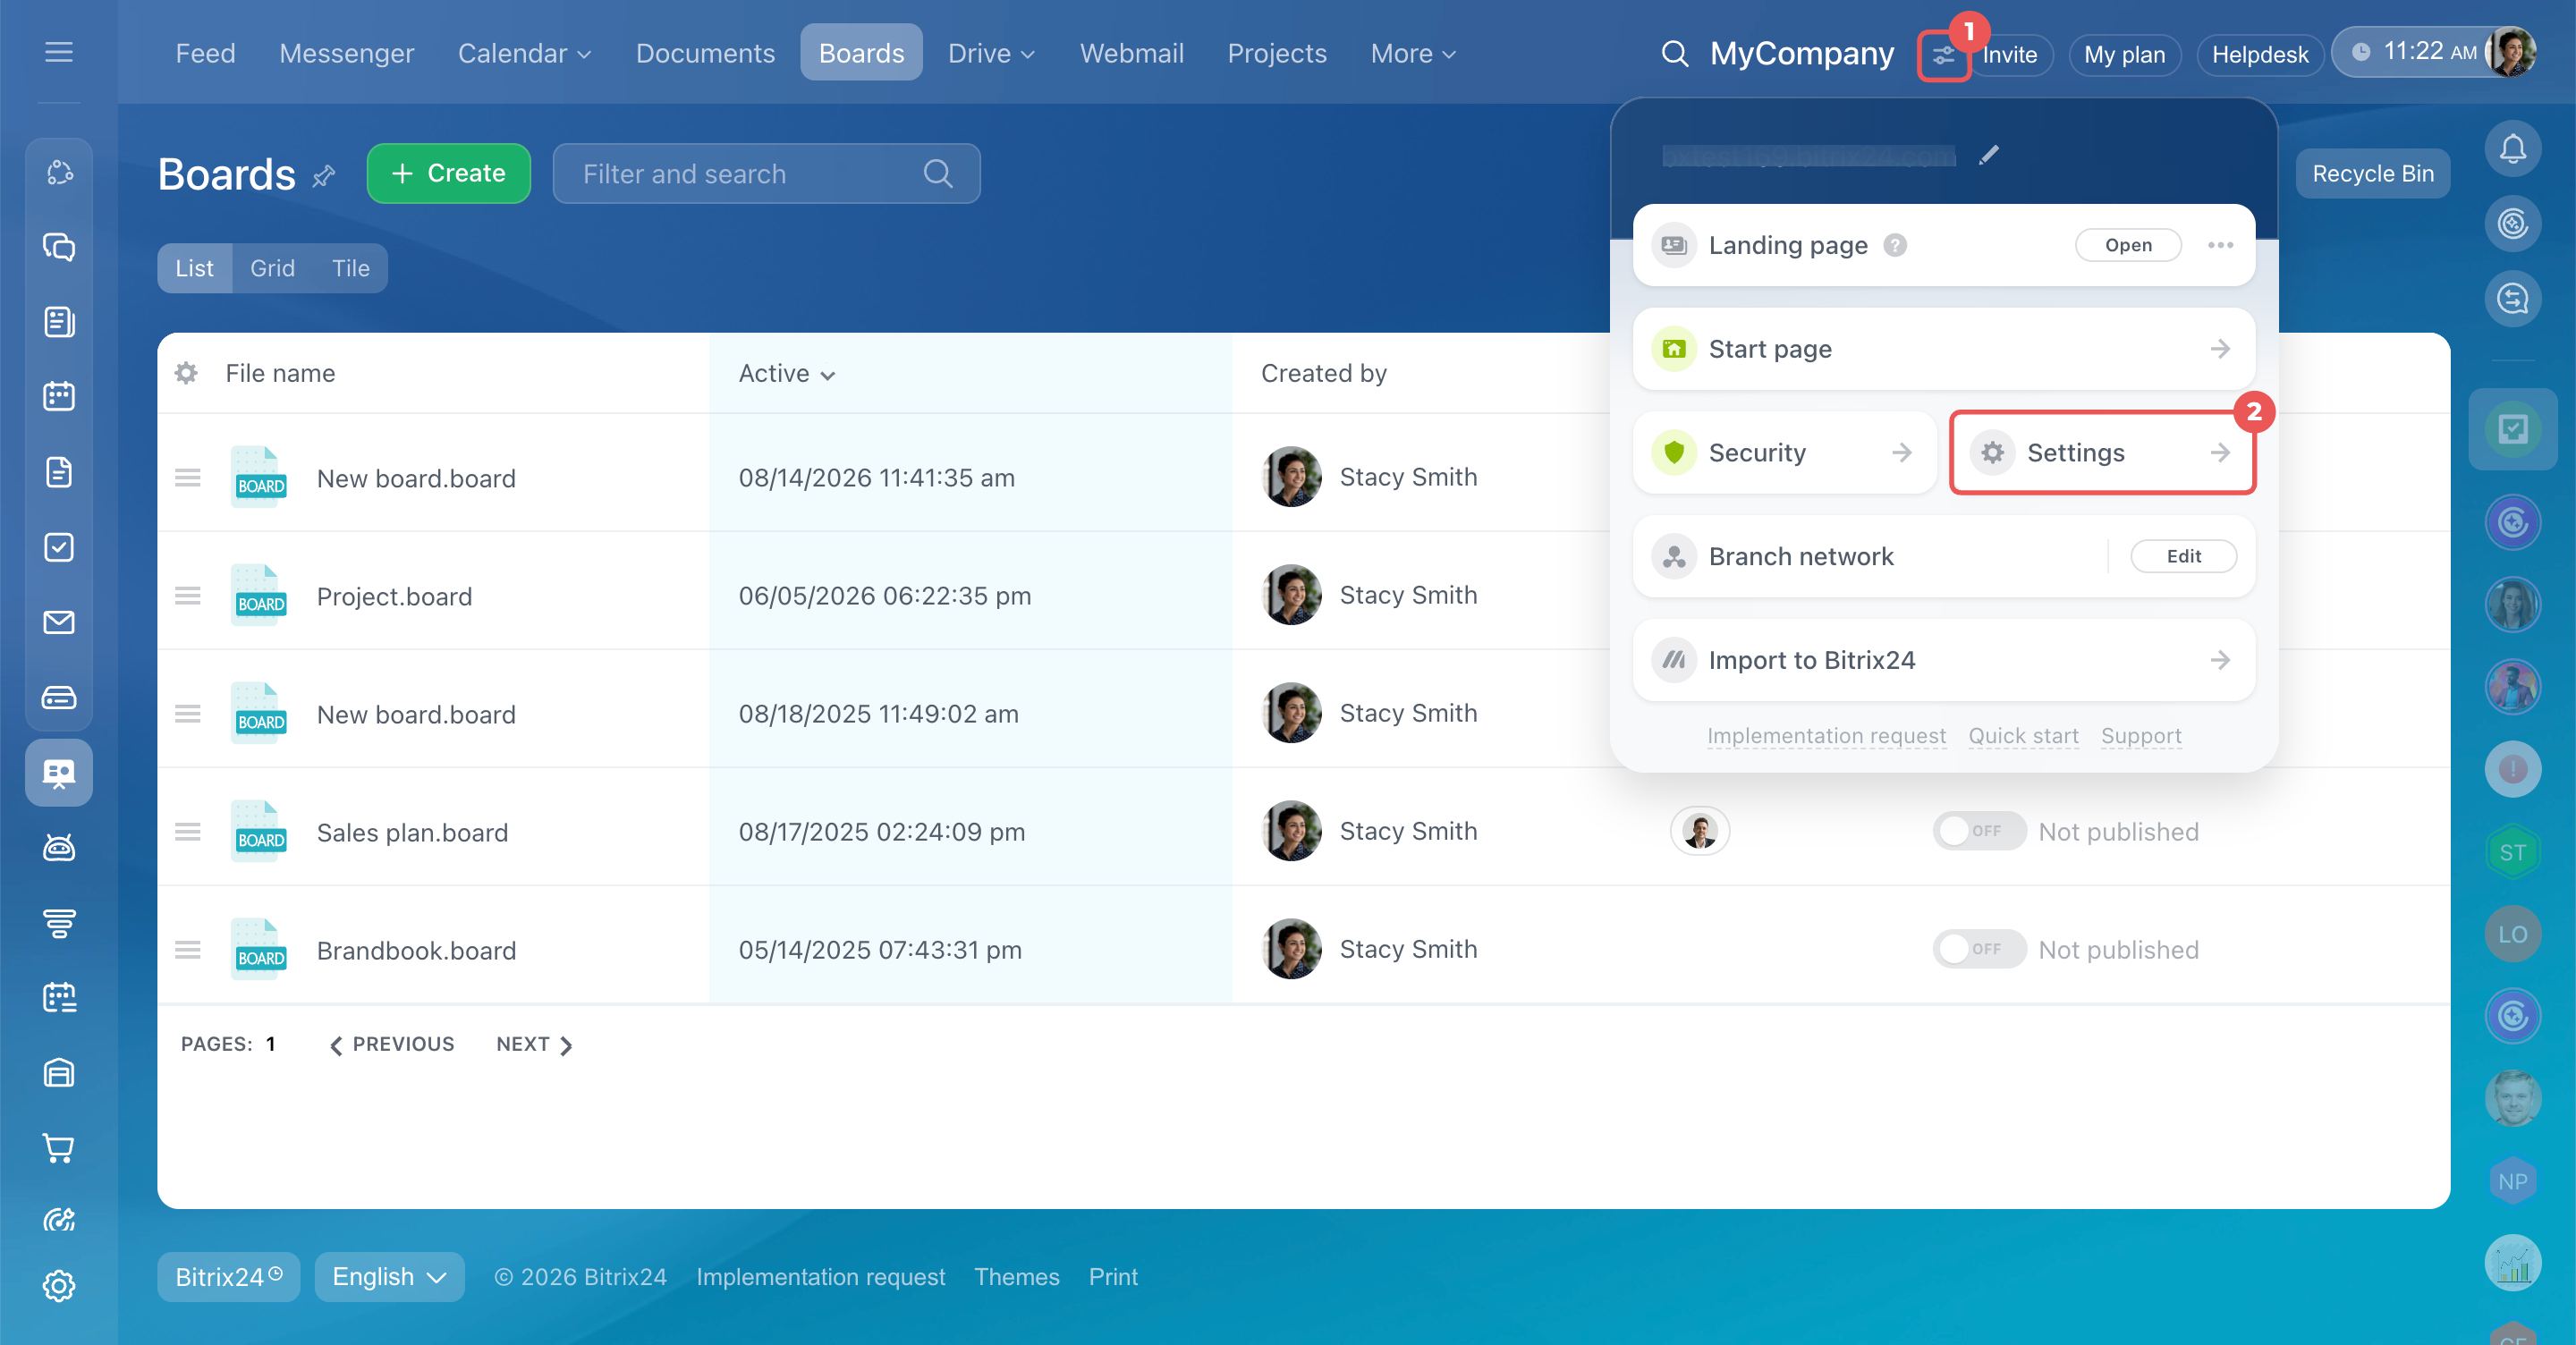
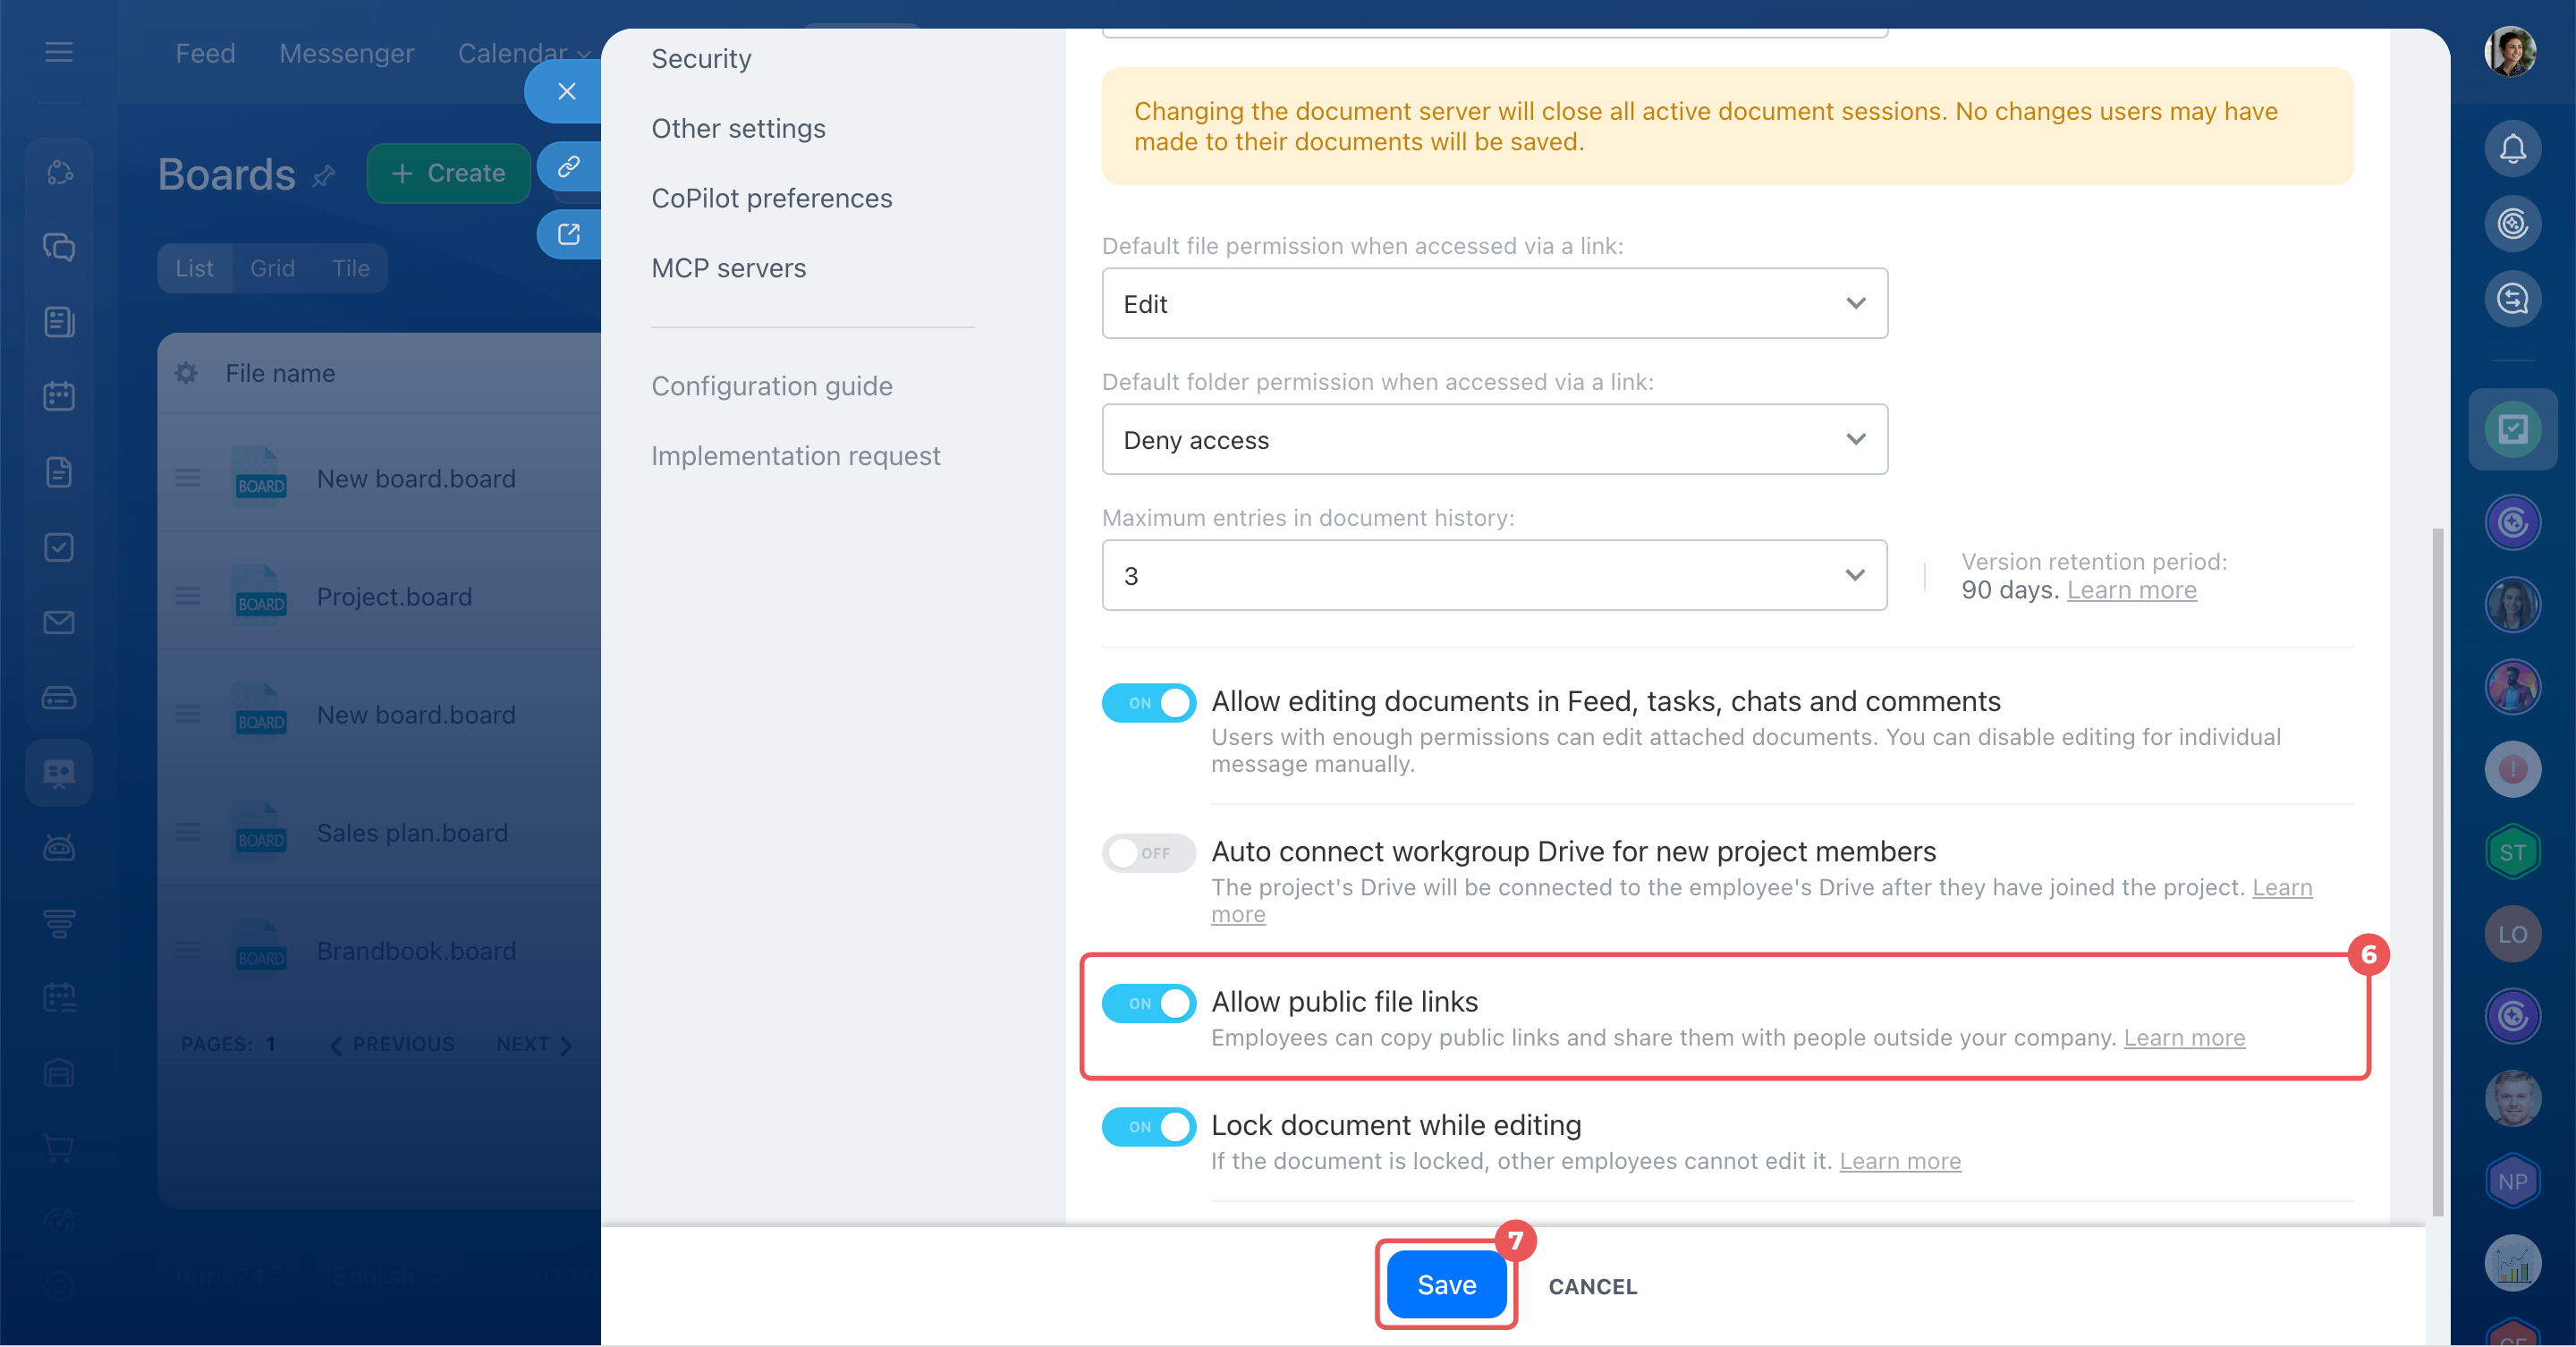
Allow public access. Whether you can turn on public access depends on your Drive settings. This option is enabled by default, but a Bitrix24 administrator can restrict it.
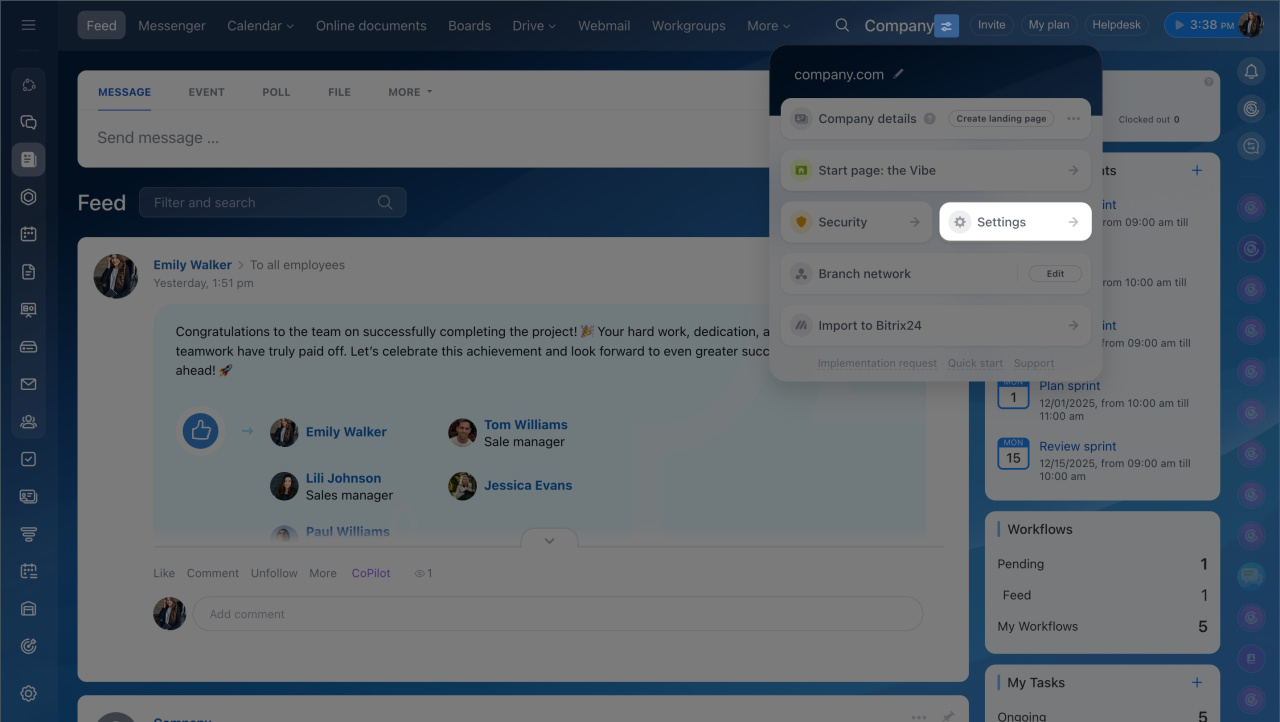
1–2. Click the icon next to your Bitrix24 name or logo and go to Settings (⚙️).
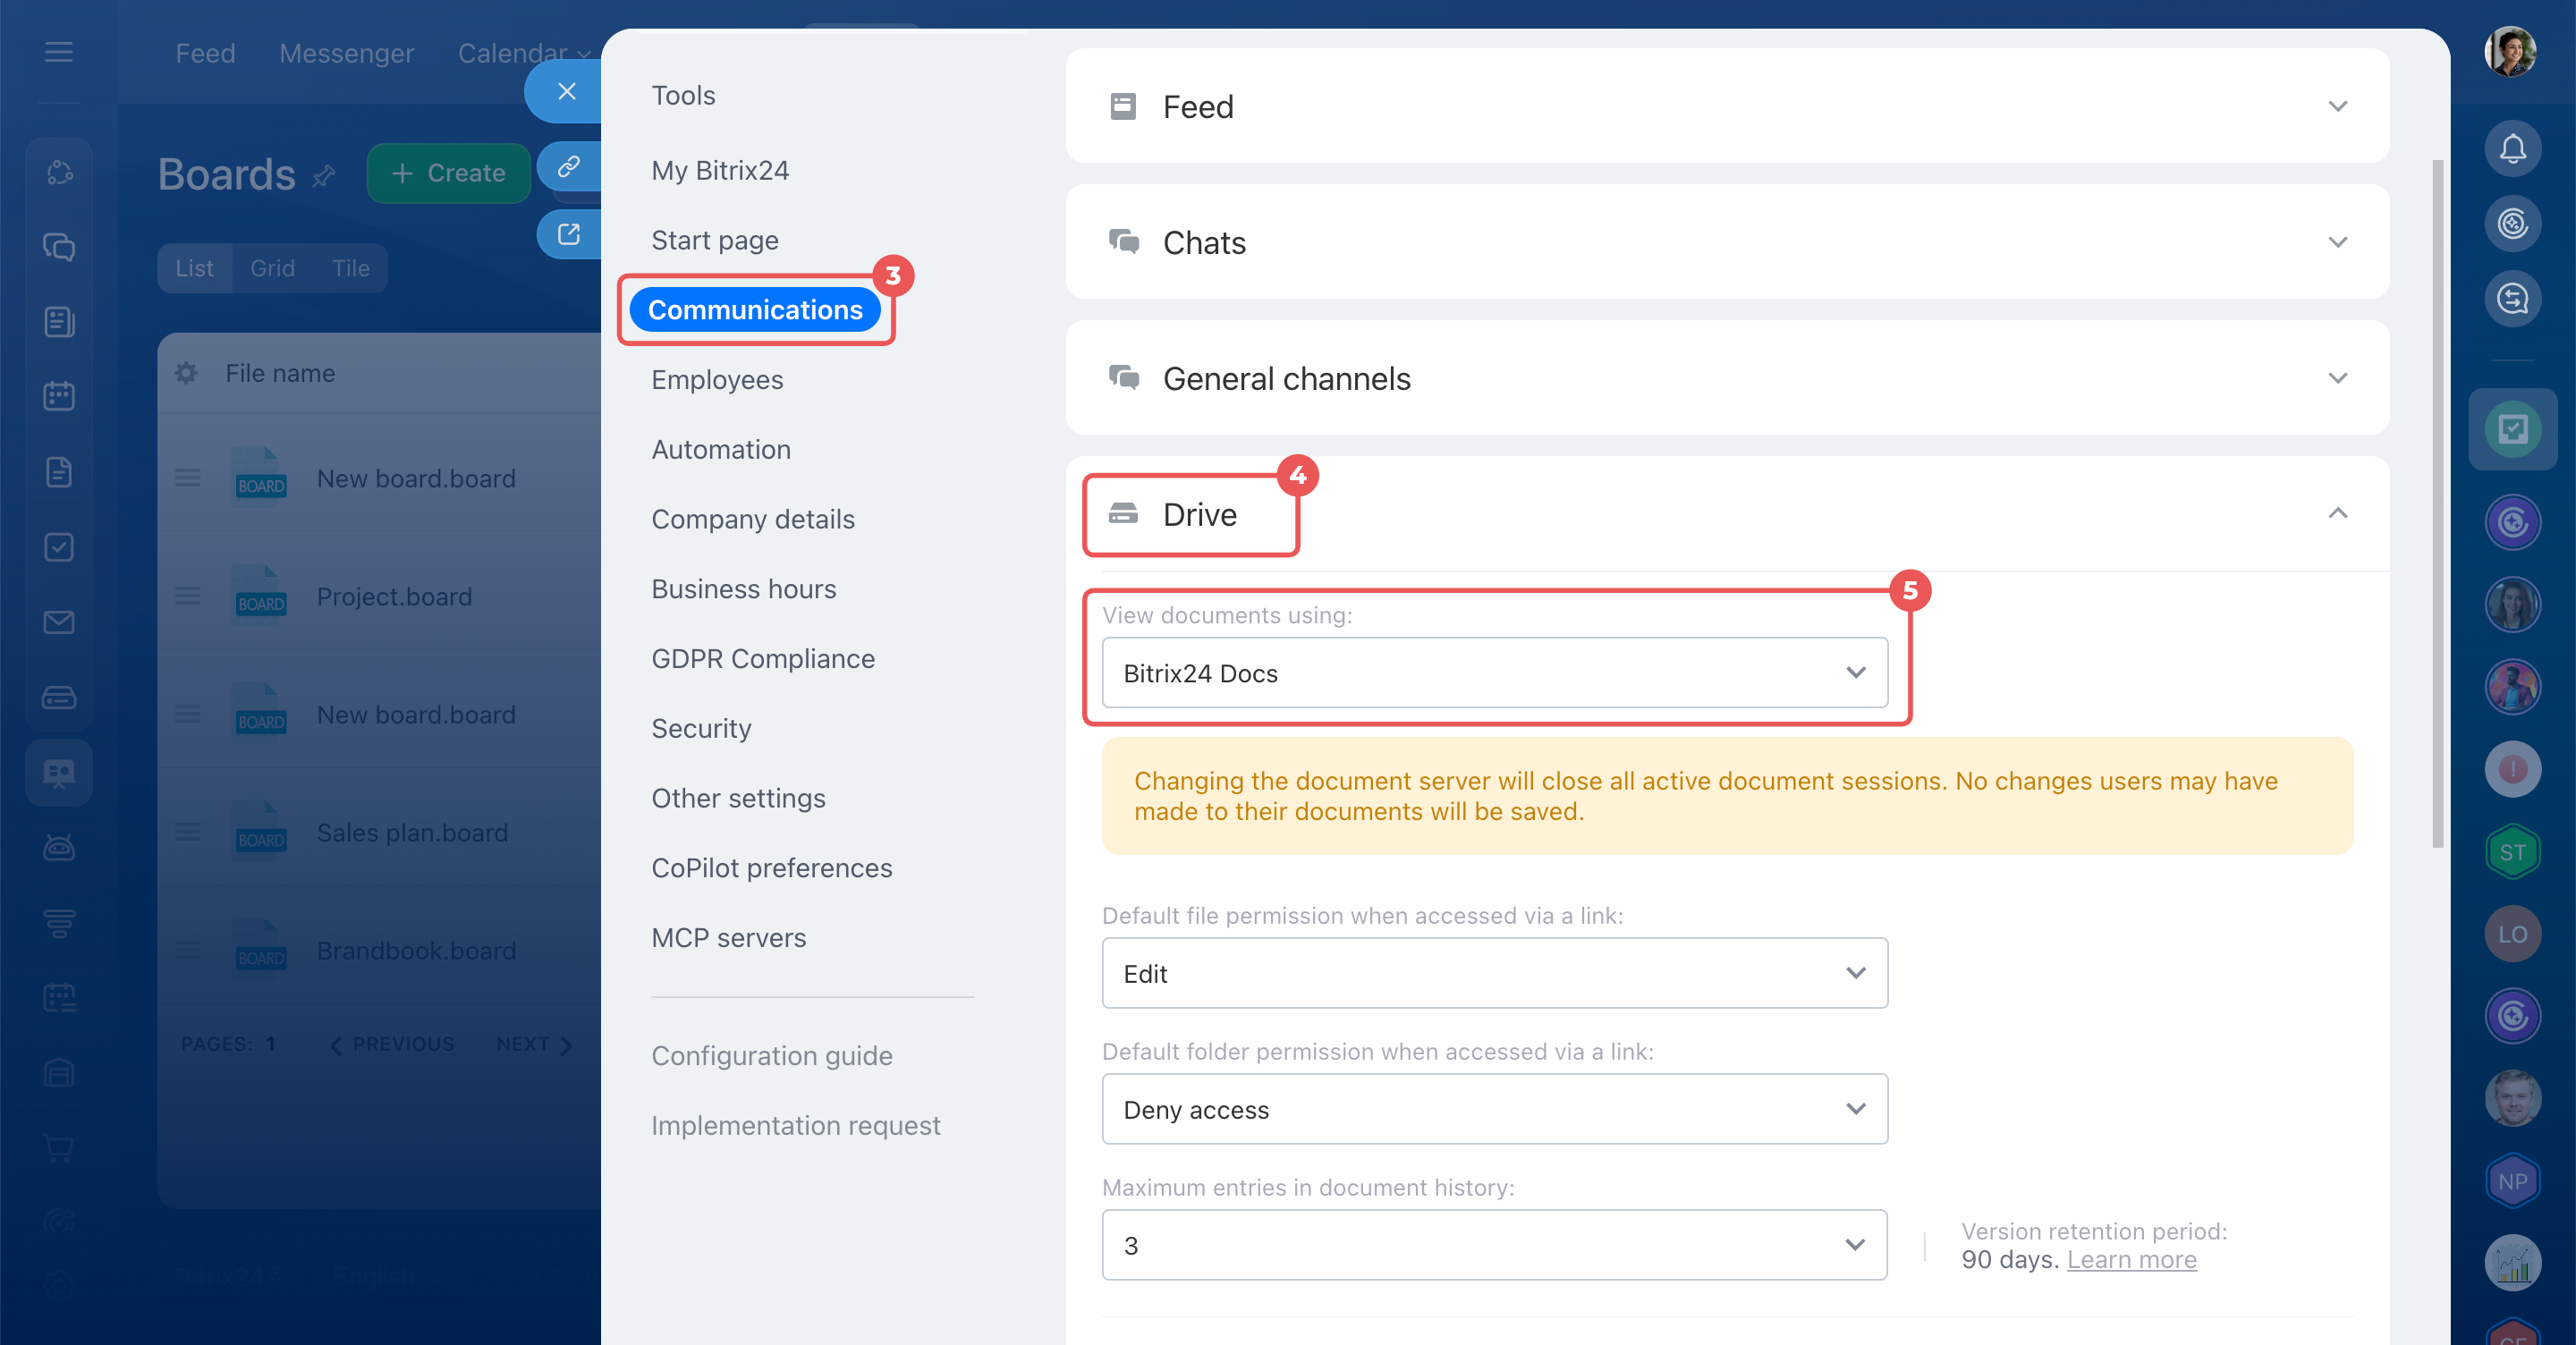
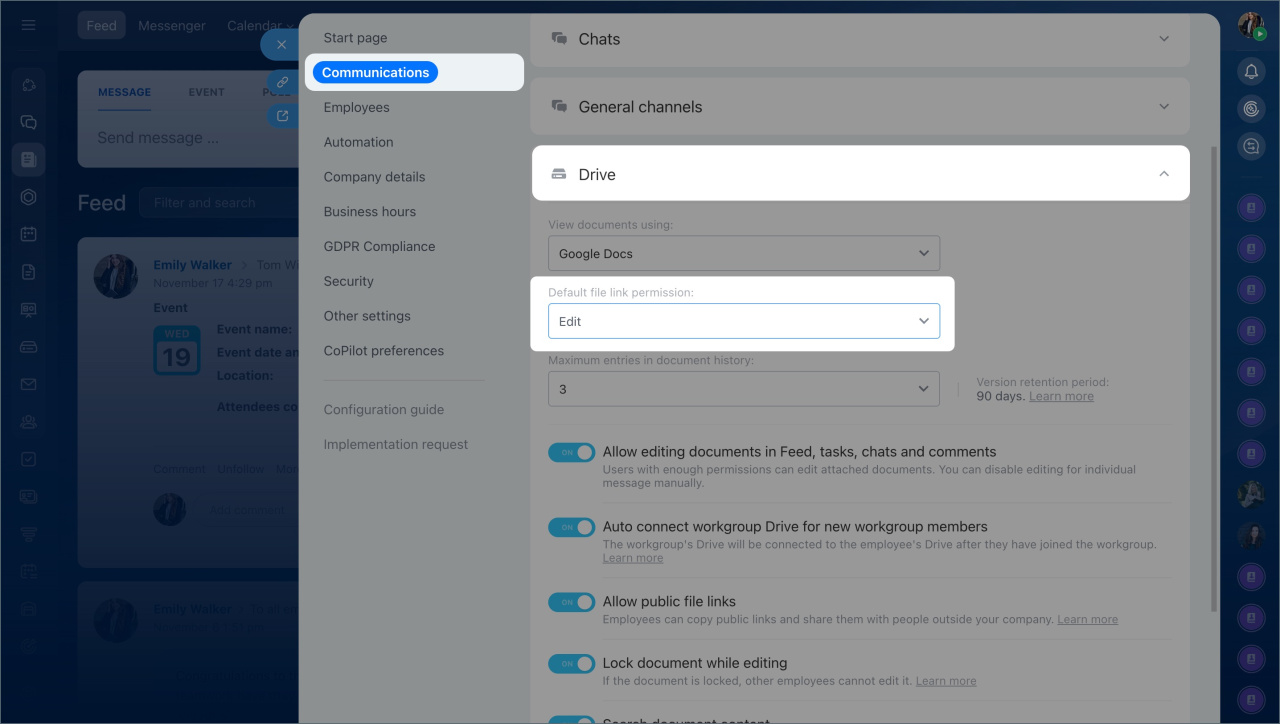
3–6. Click Communications > Drive and configure these settings:
- Allow public file links — turn this on so users can share files with a public link.
- View document using — select Bitrix24 Docs. Only this service lets you enable editing in public access settings.
7. Save your changes.
Bitrix24 plans and pricing
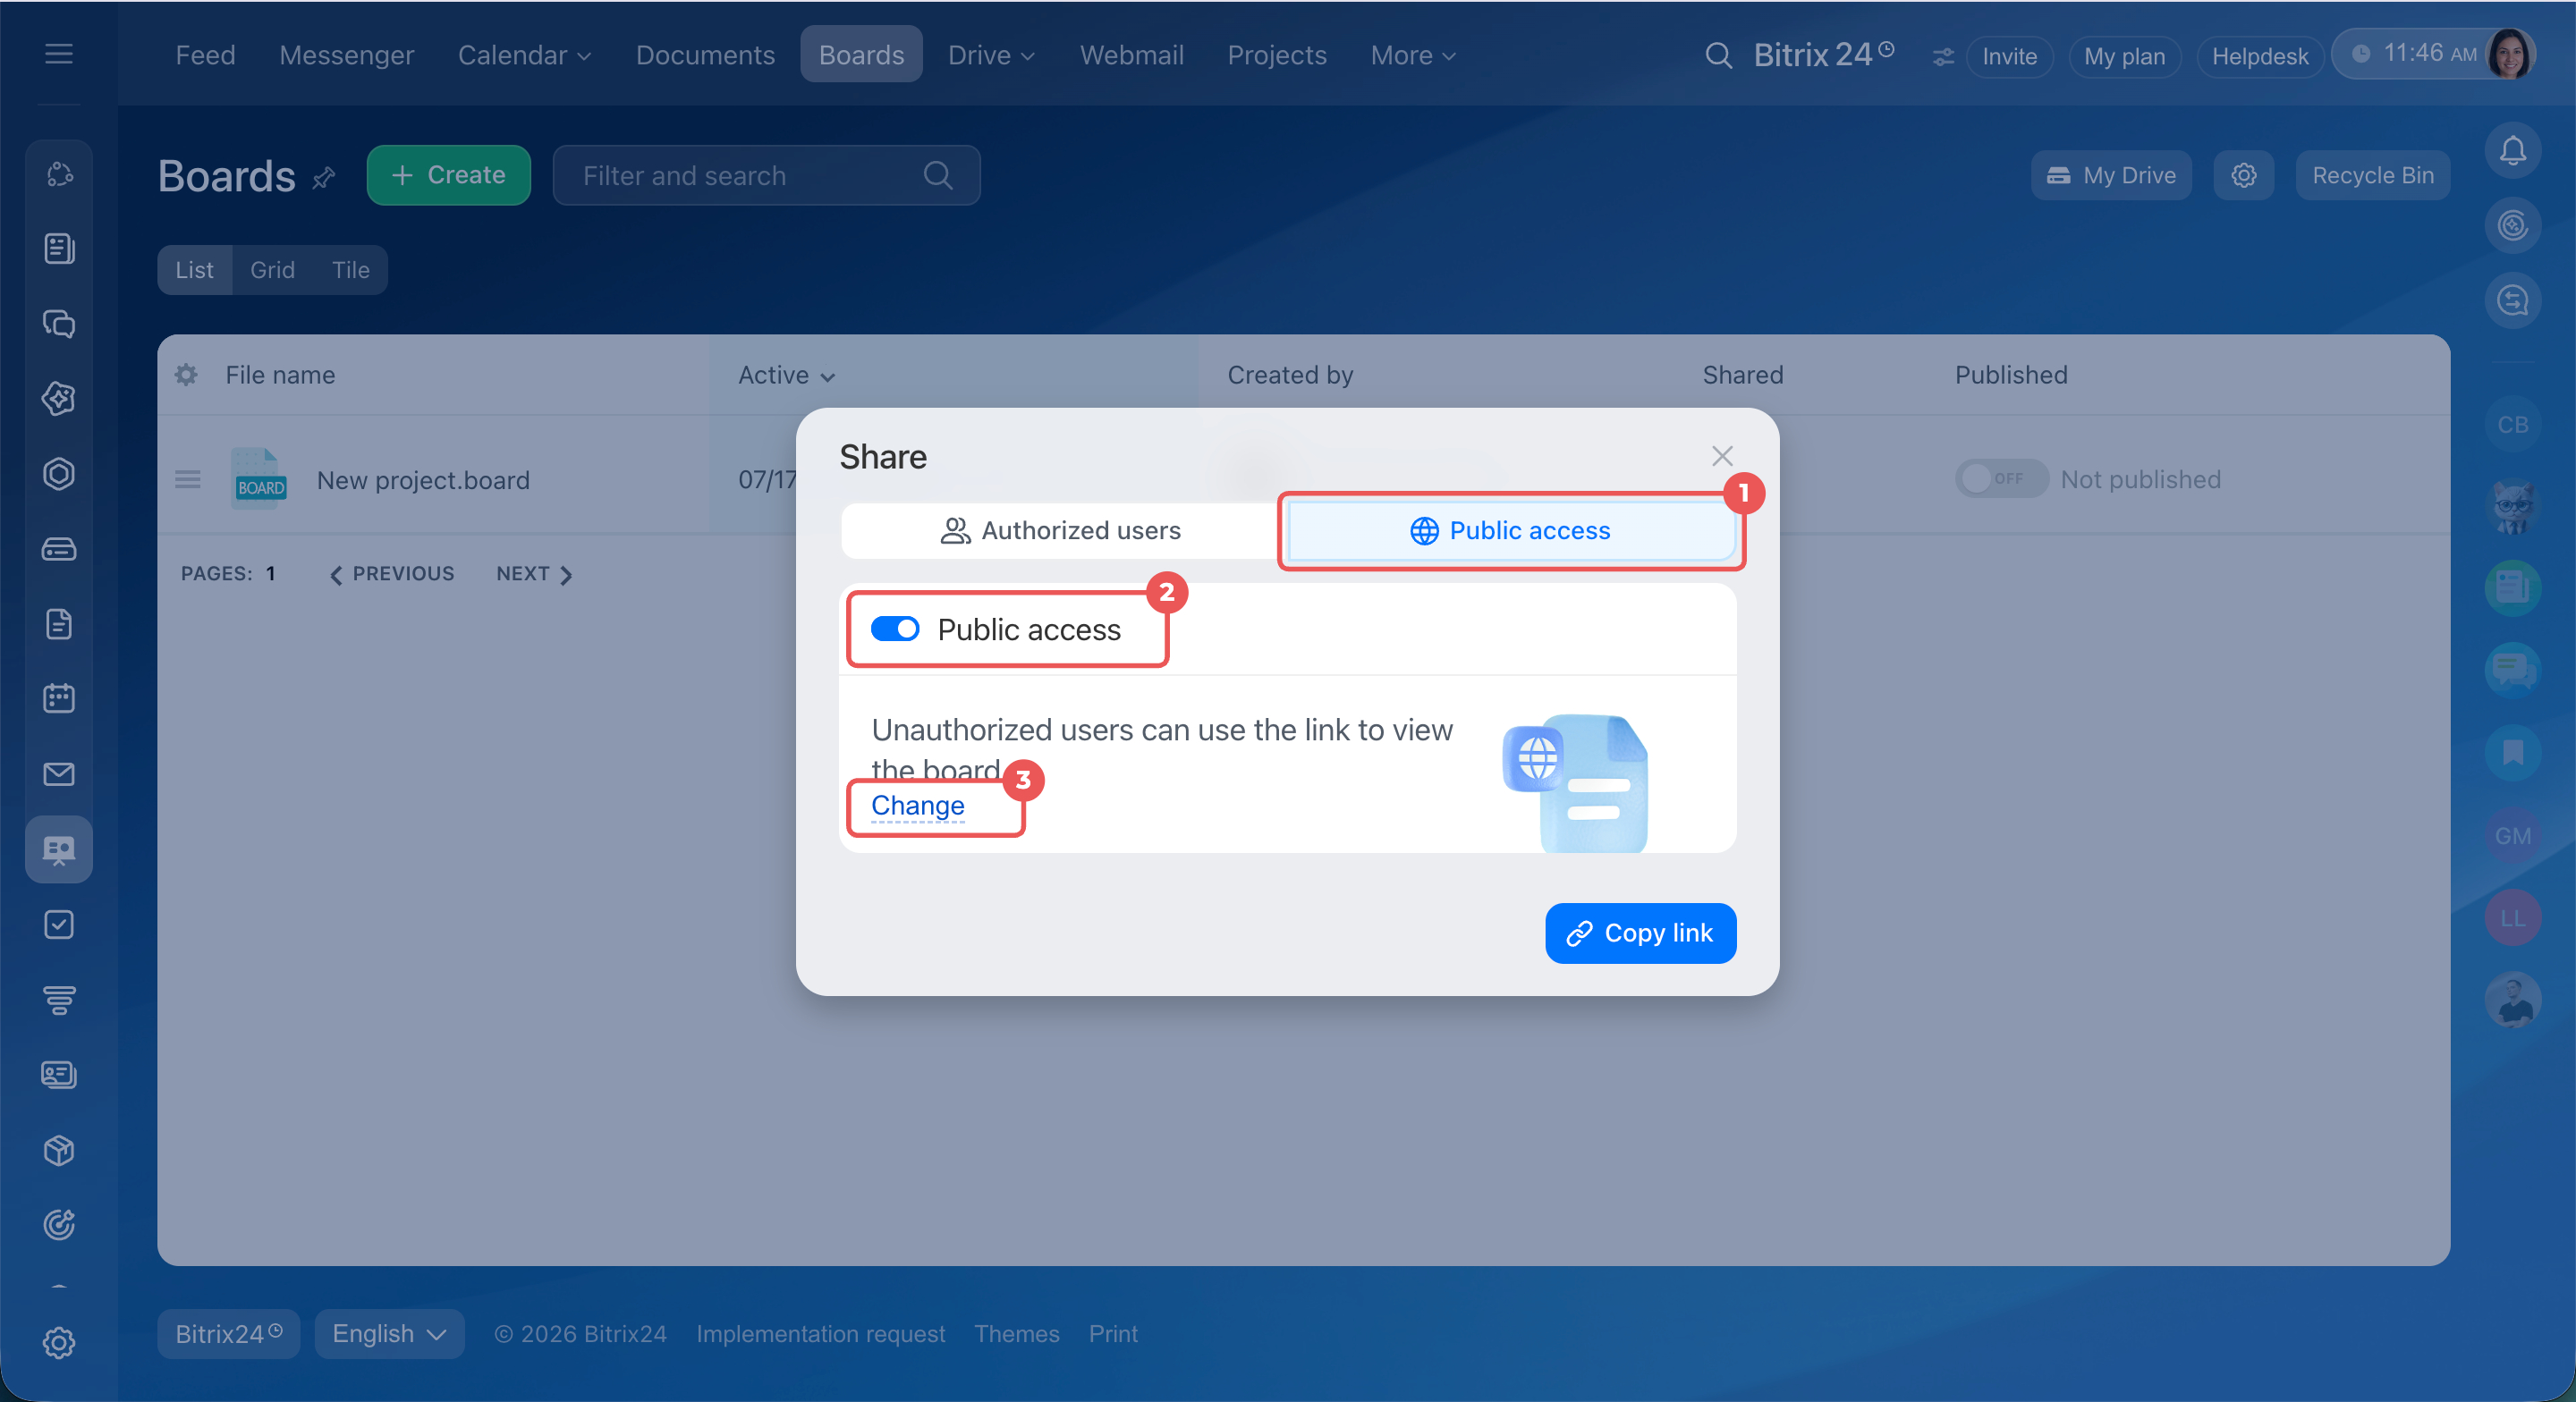
Configure public access. By default, the link opens the document in view-only mode, with no password and no expiration date. You can change these settings.
1–2. Open the Public access tab and turn on Public access.
3. Click Change to change the settings.
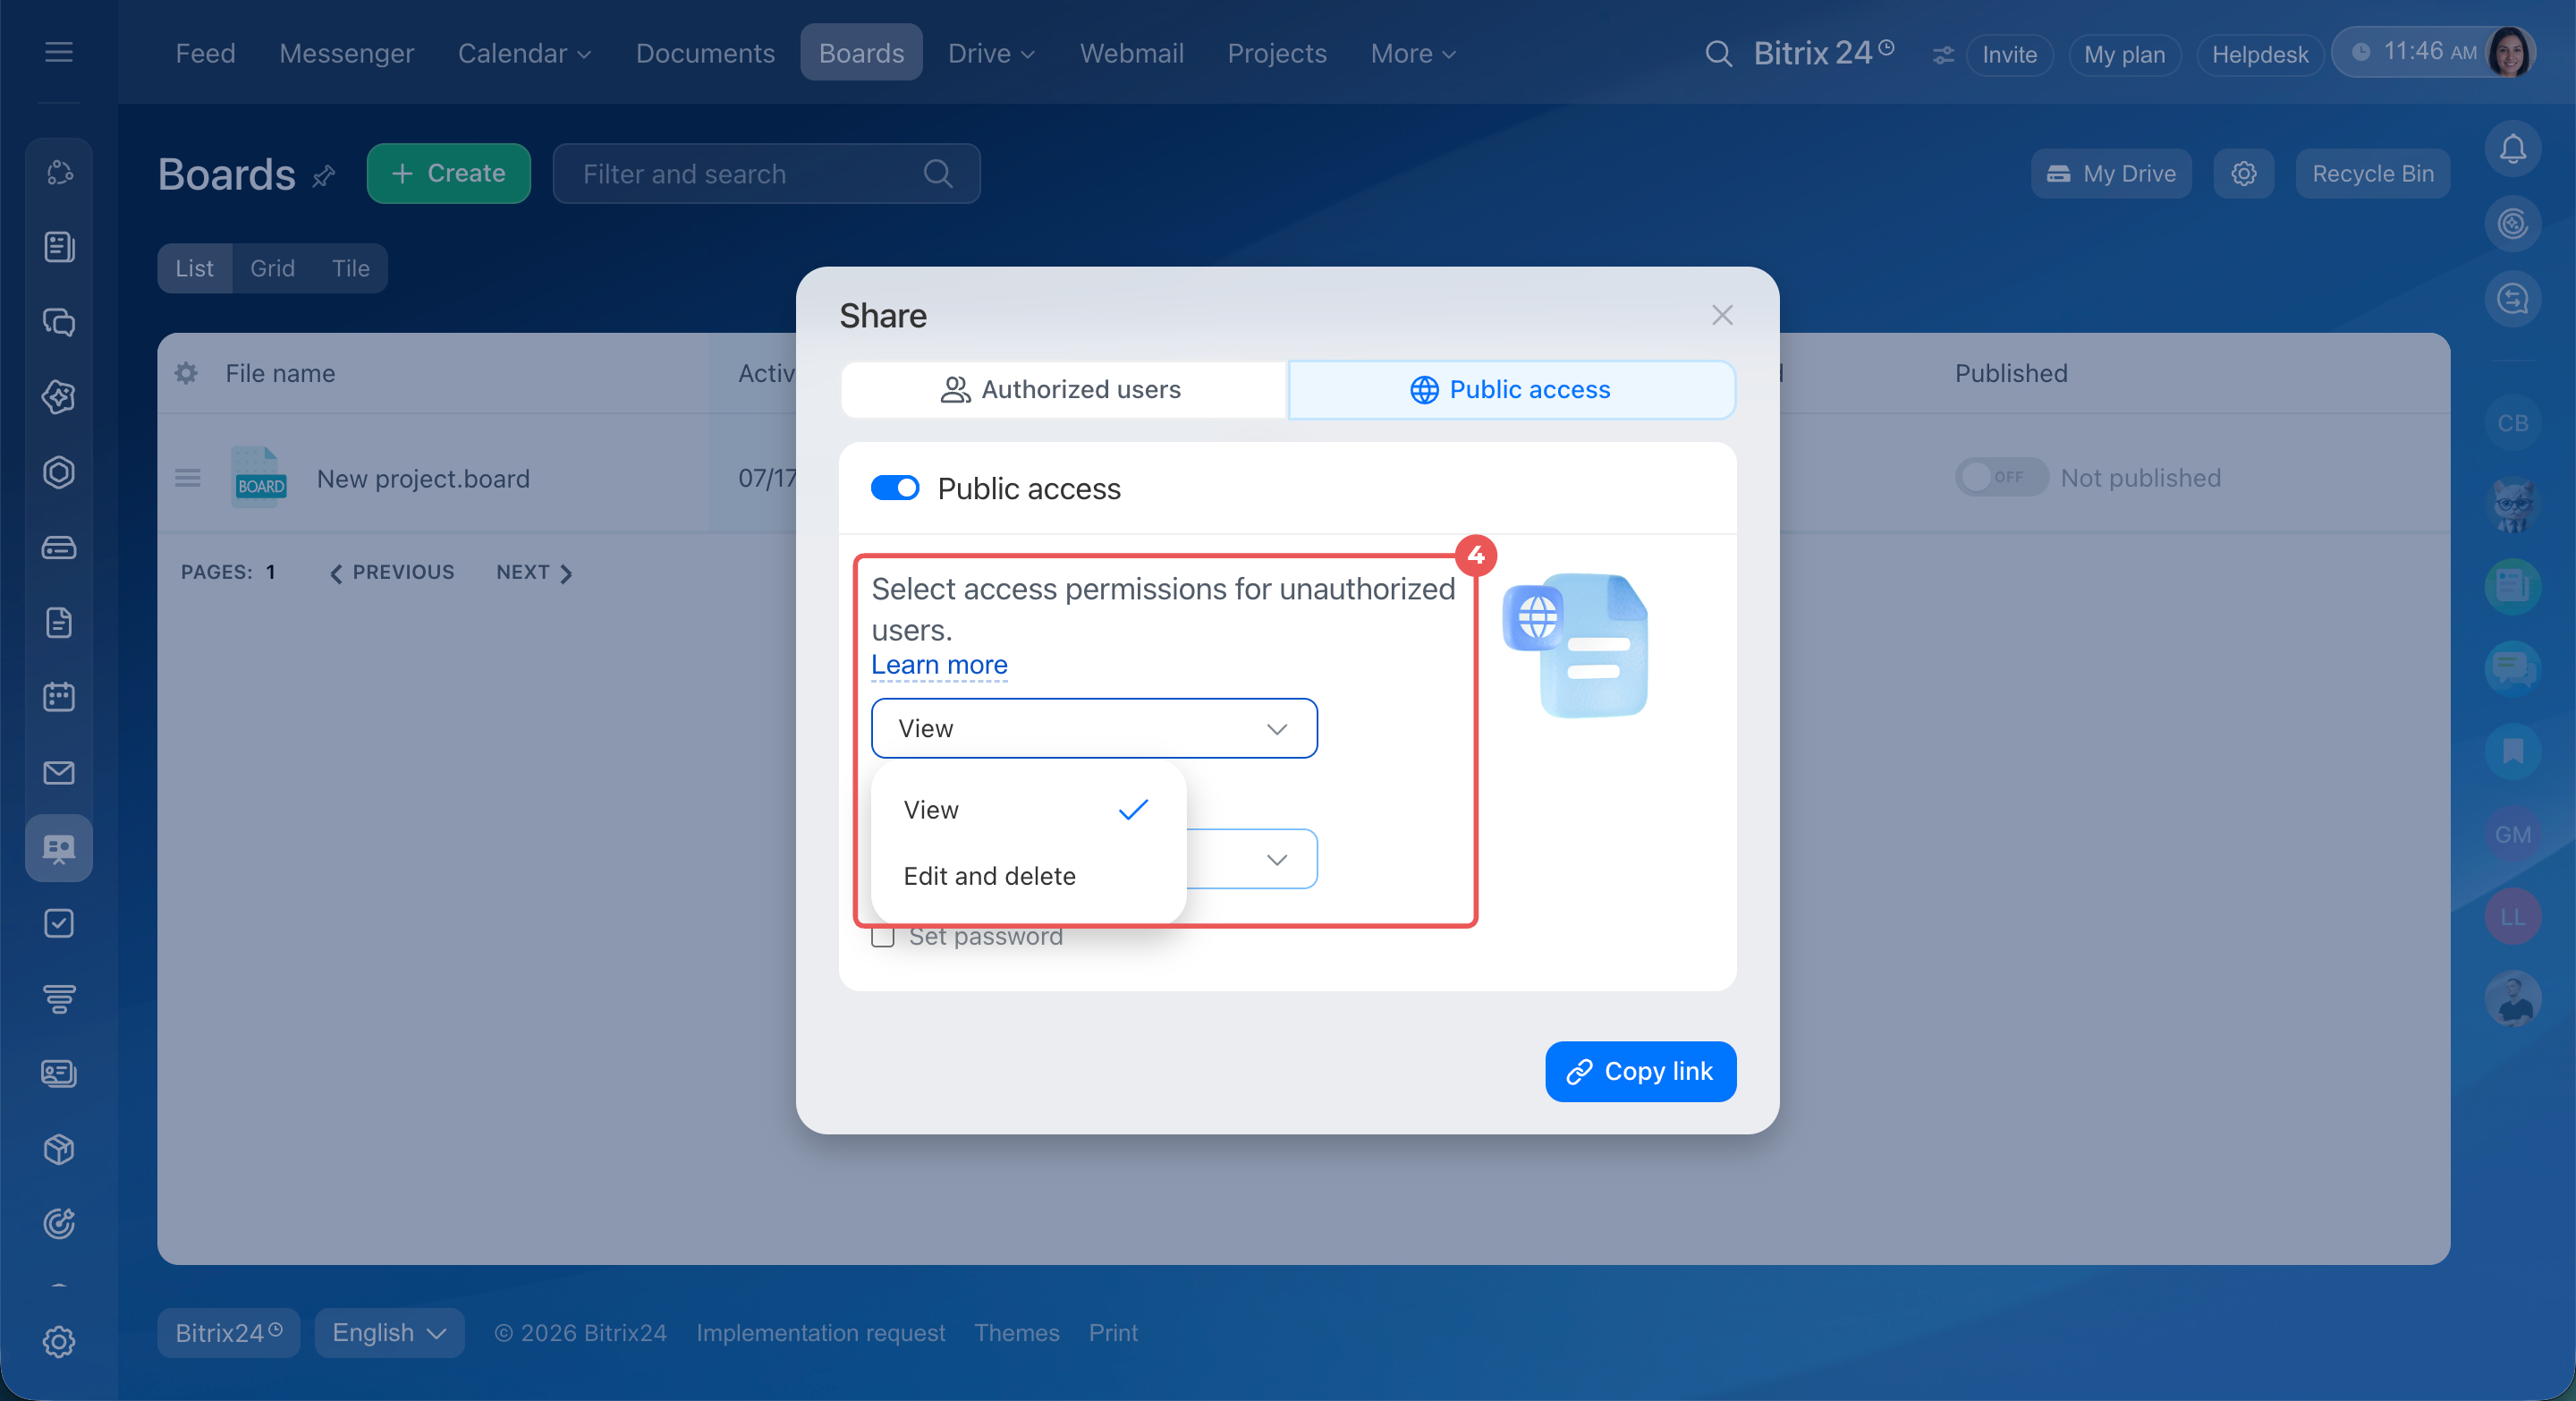
4. Choose what users with the link can do: View or Edit and delete. If you allow editing, turn it off after the work is done to protect the final version.
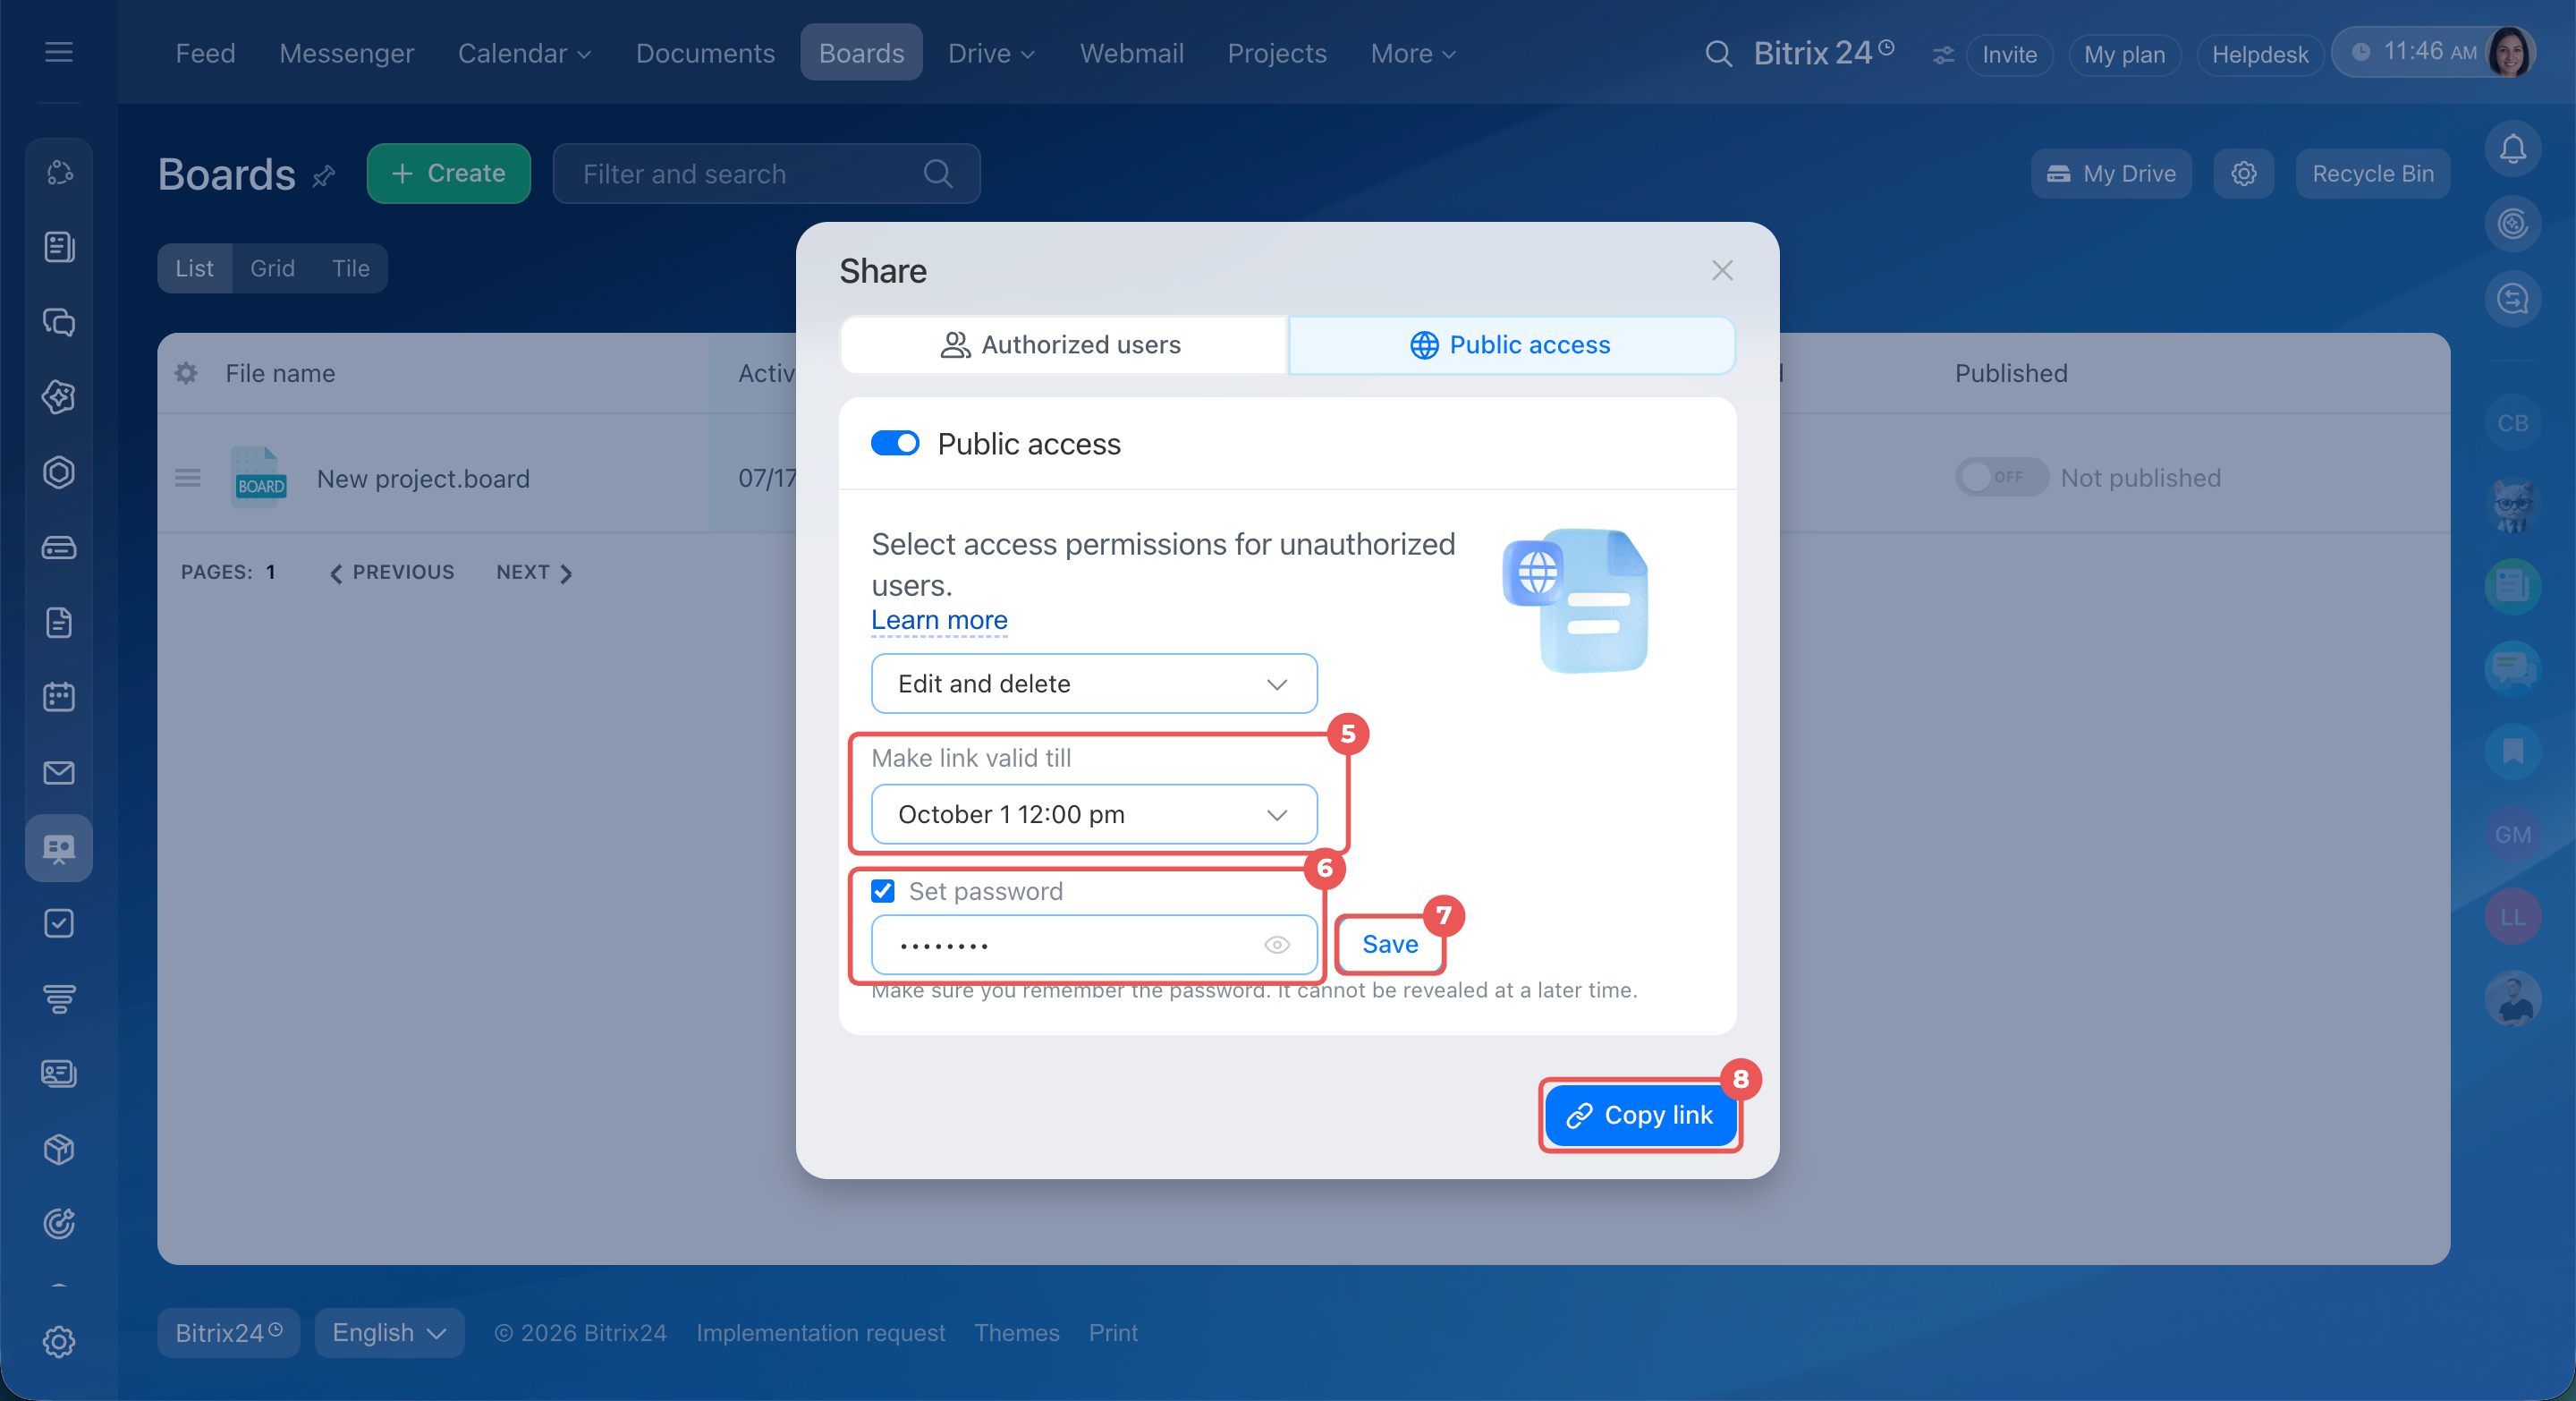
5. Set the link expiration: permanent or time-limited. Set the date and time when the link will stop working automatically. The user gets temporary access to the document or board, and you do not need to close it manually.
6–7. Set a password — users must enter it to open the document or board, then save the changes. Change the password when the contractor finishes work to protect the final result from accidental edits.
8. Copy the link and share it.
Changes are saved automatically.
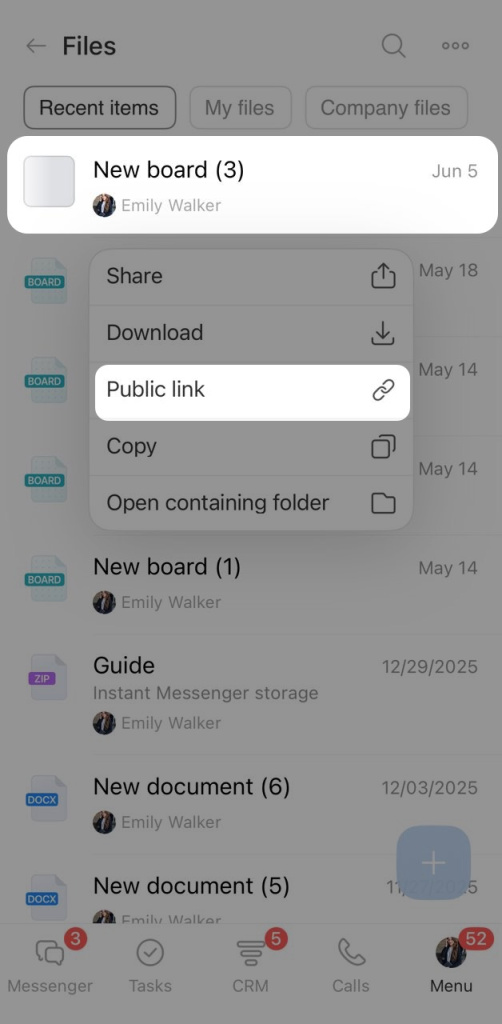
1–2. Press and hold the file, then select Public link from the menu.
3–4. Turn on link access and copy the link.
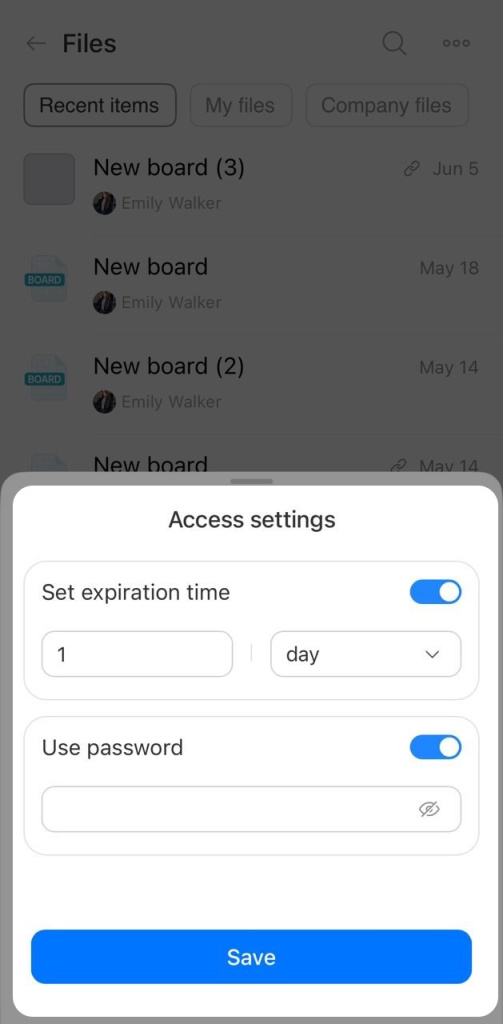
5–7. If needed, tap Access settings, change the settings, and save the changes.
Grant access to an employee
Open the Authorized users tab to see the current access level. Click Change to open the settings.
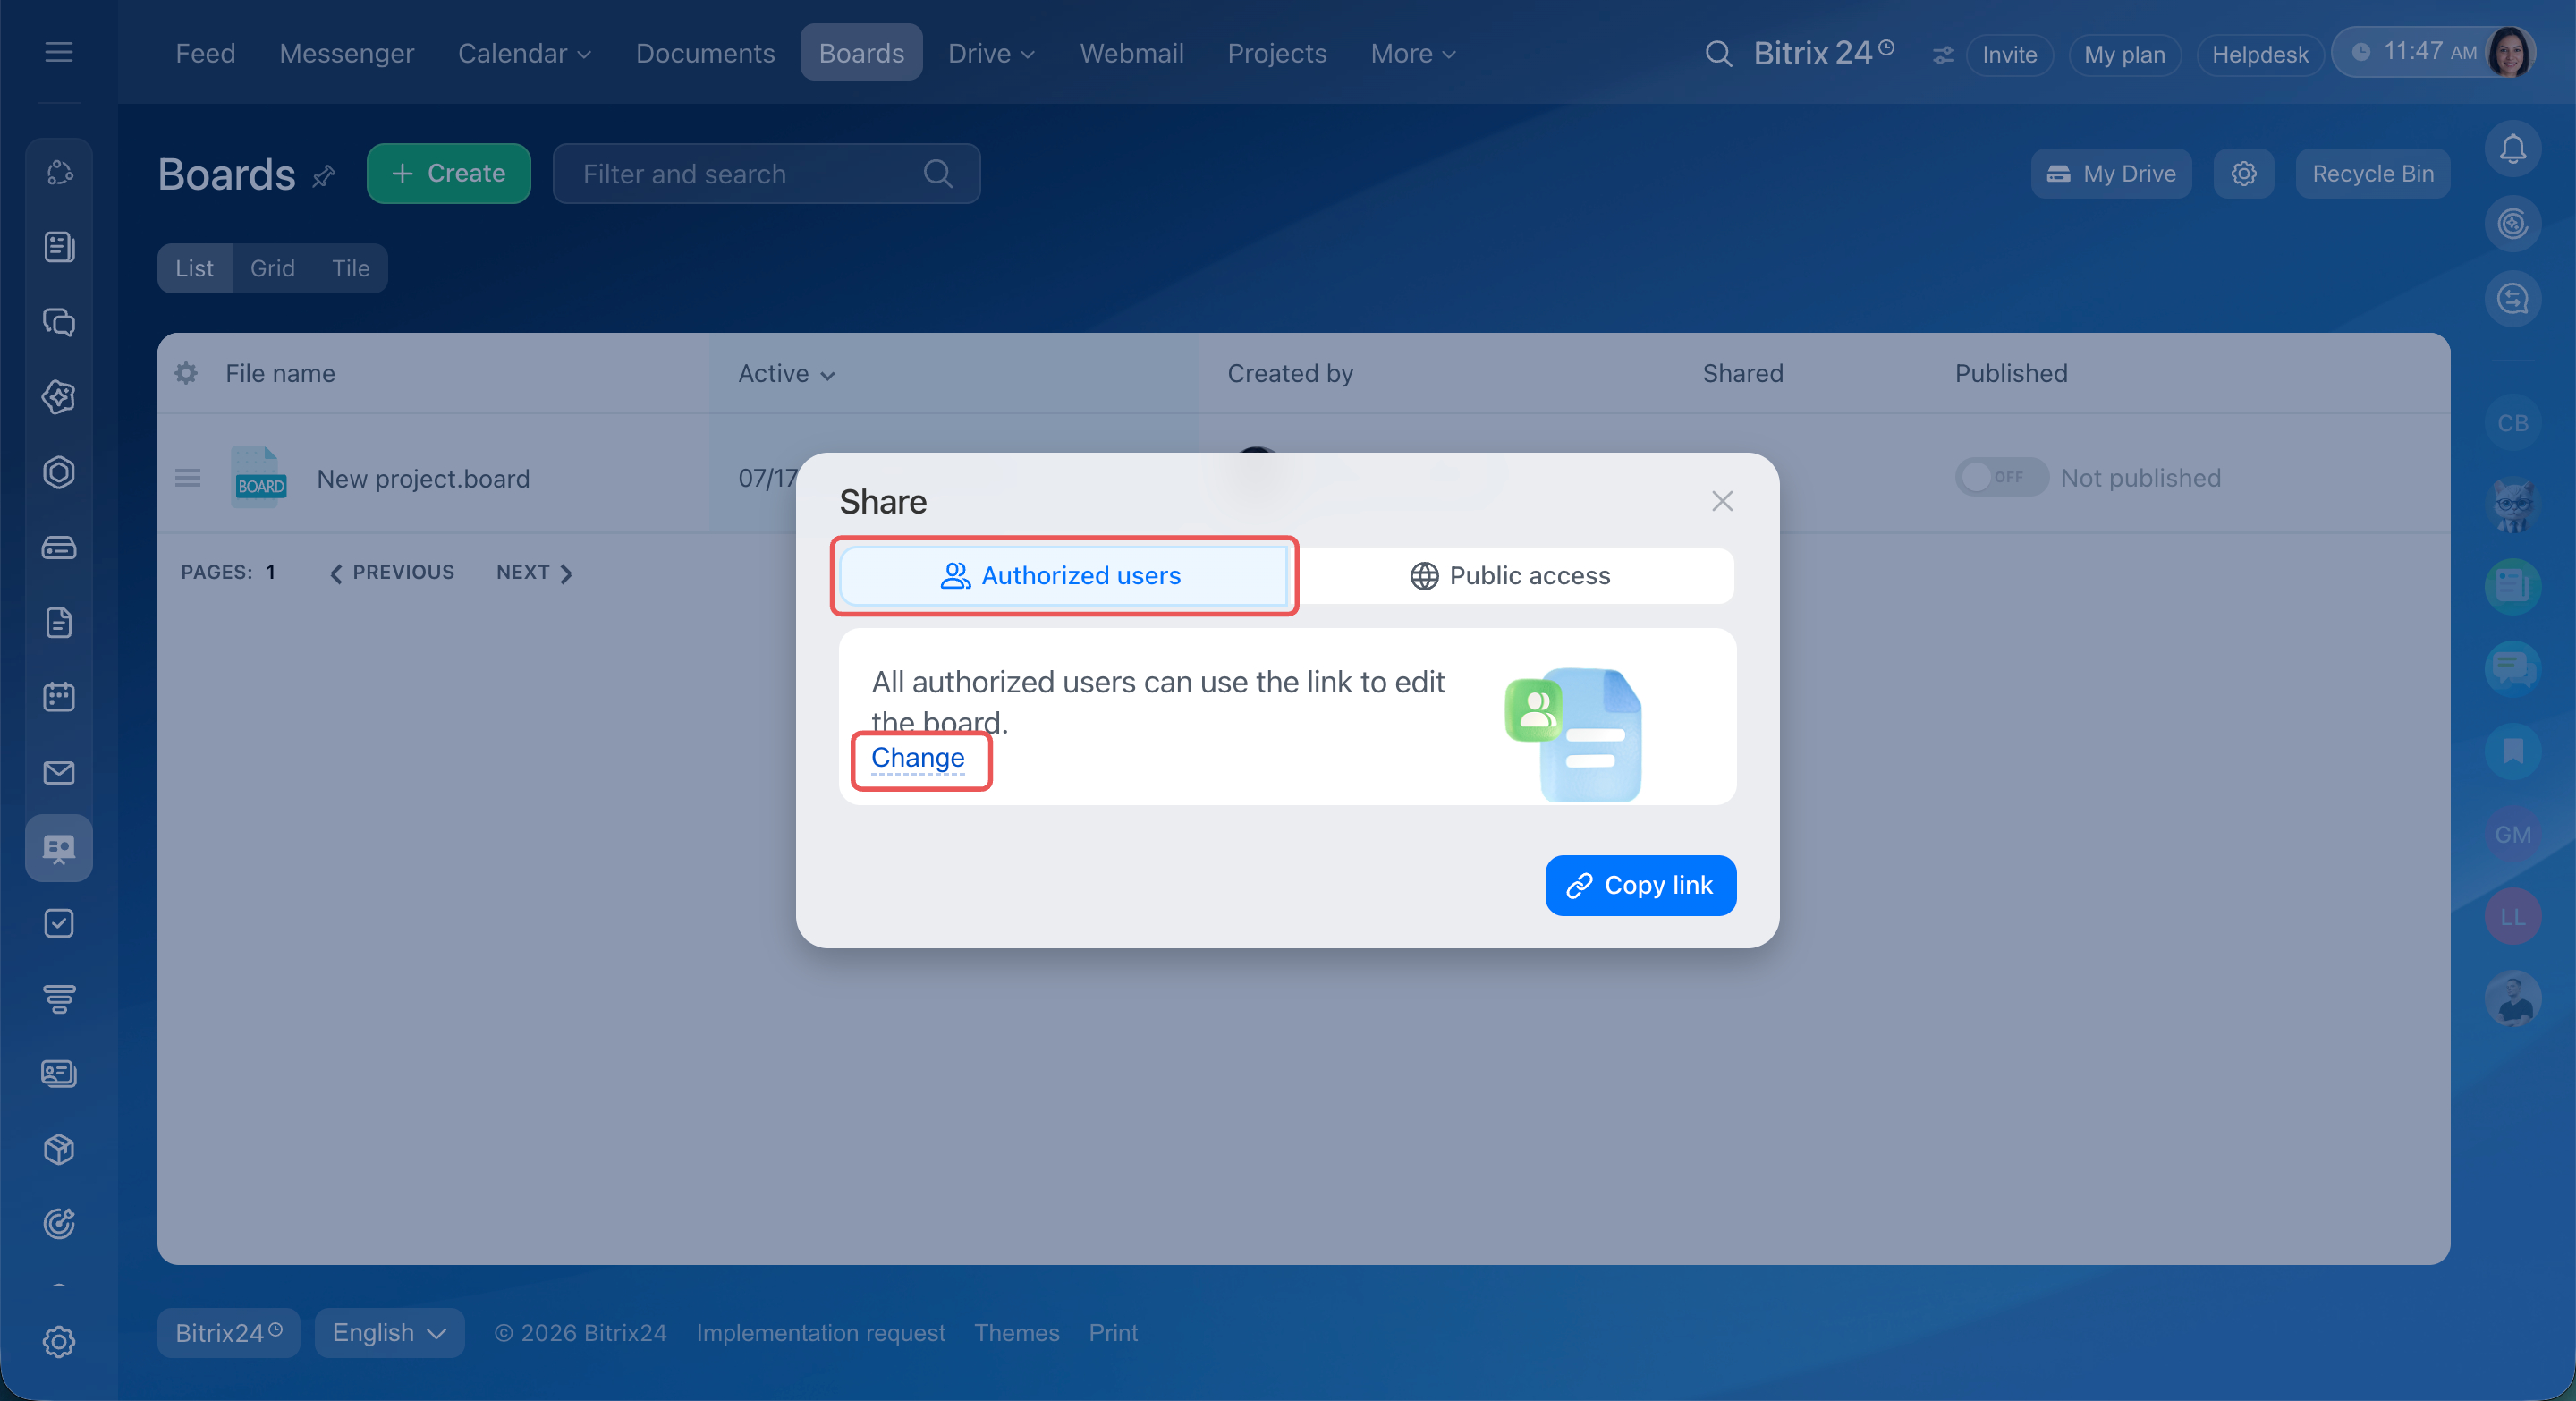
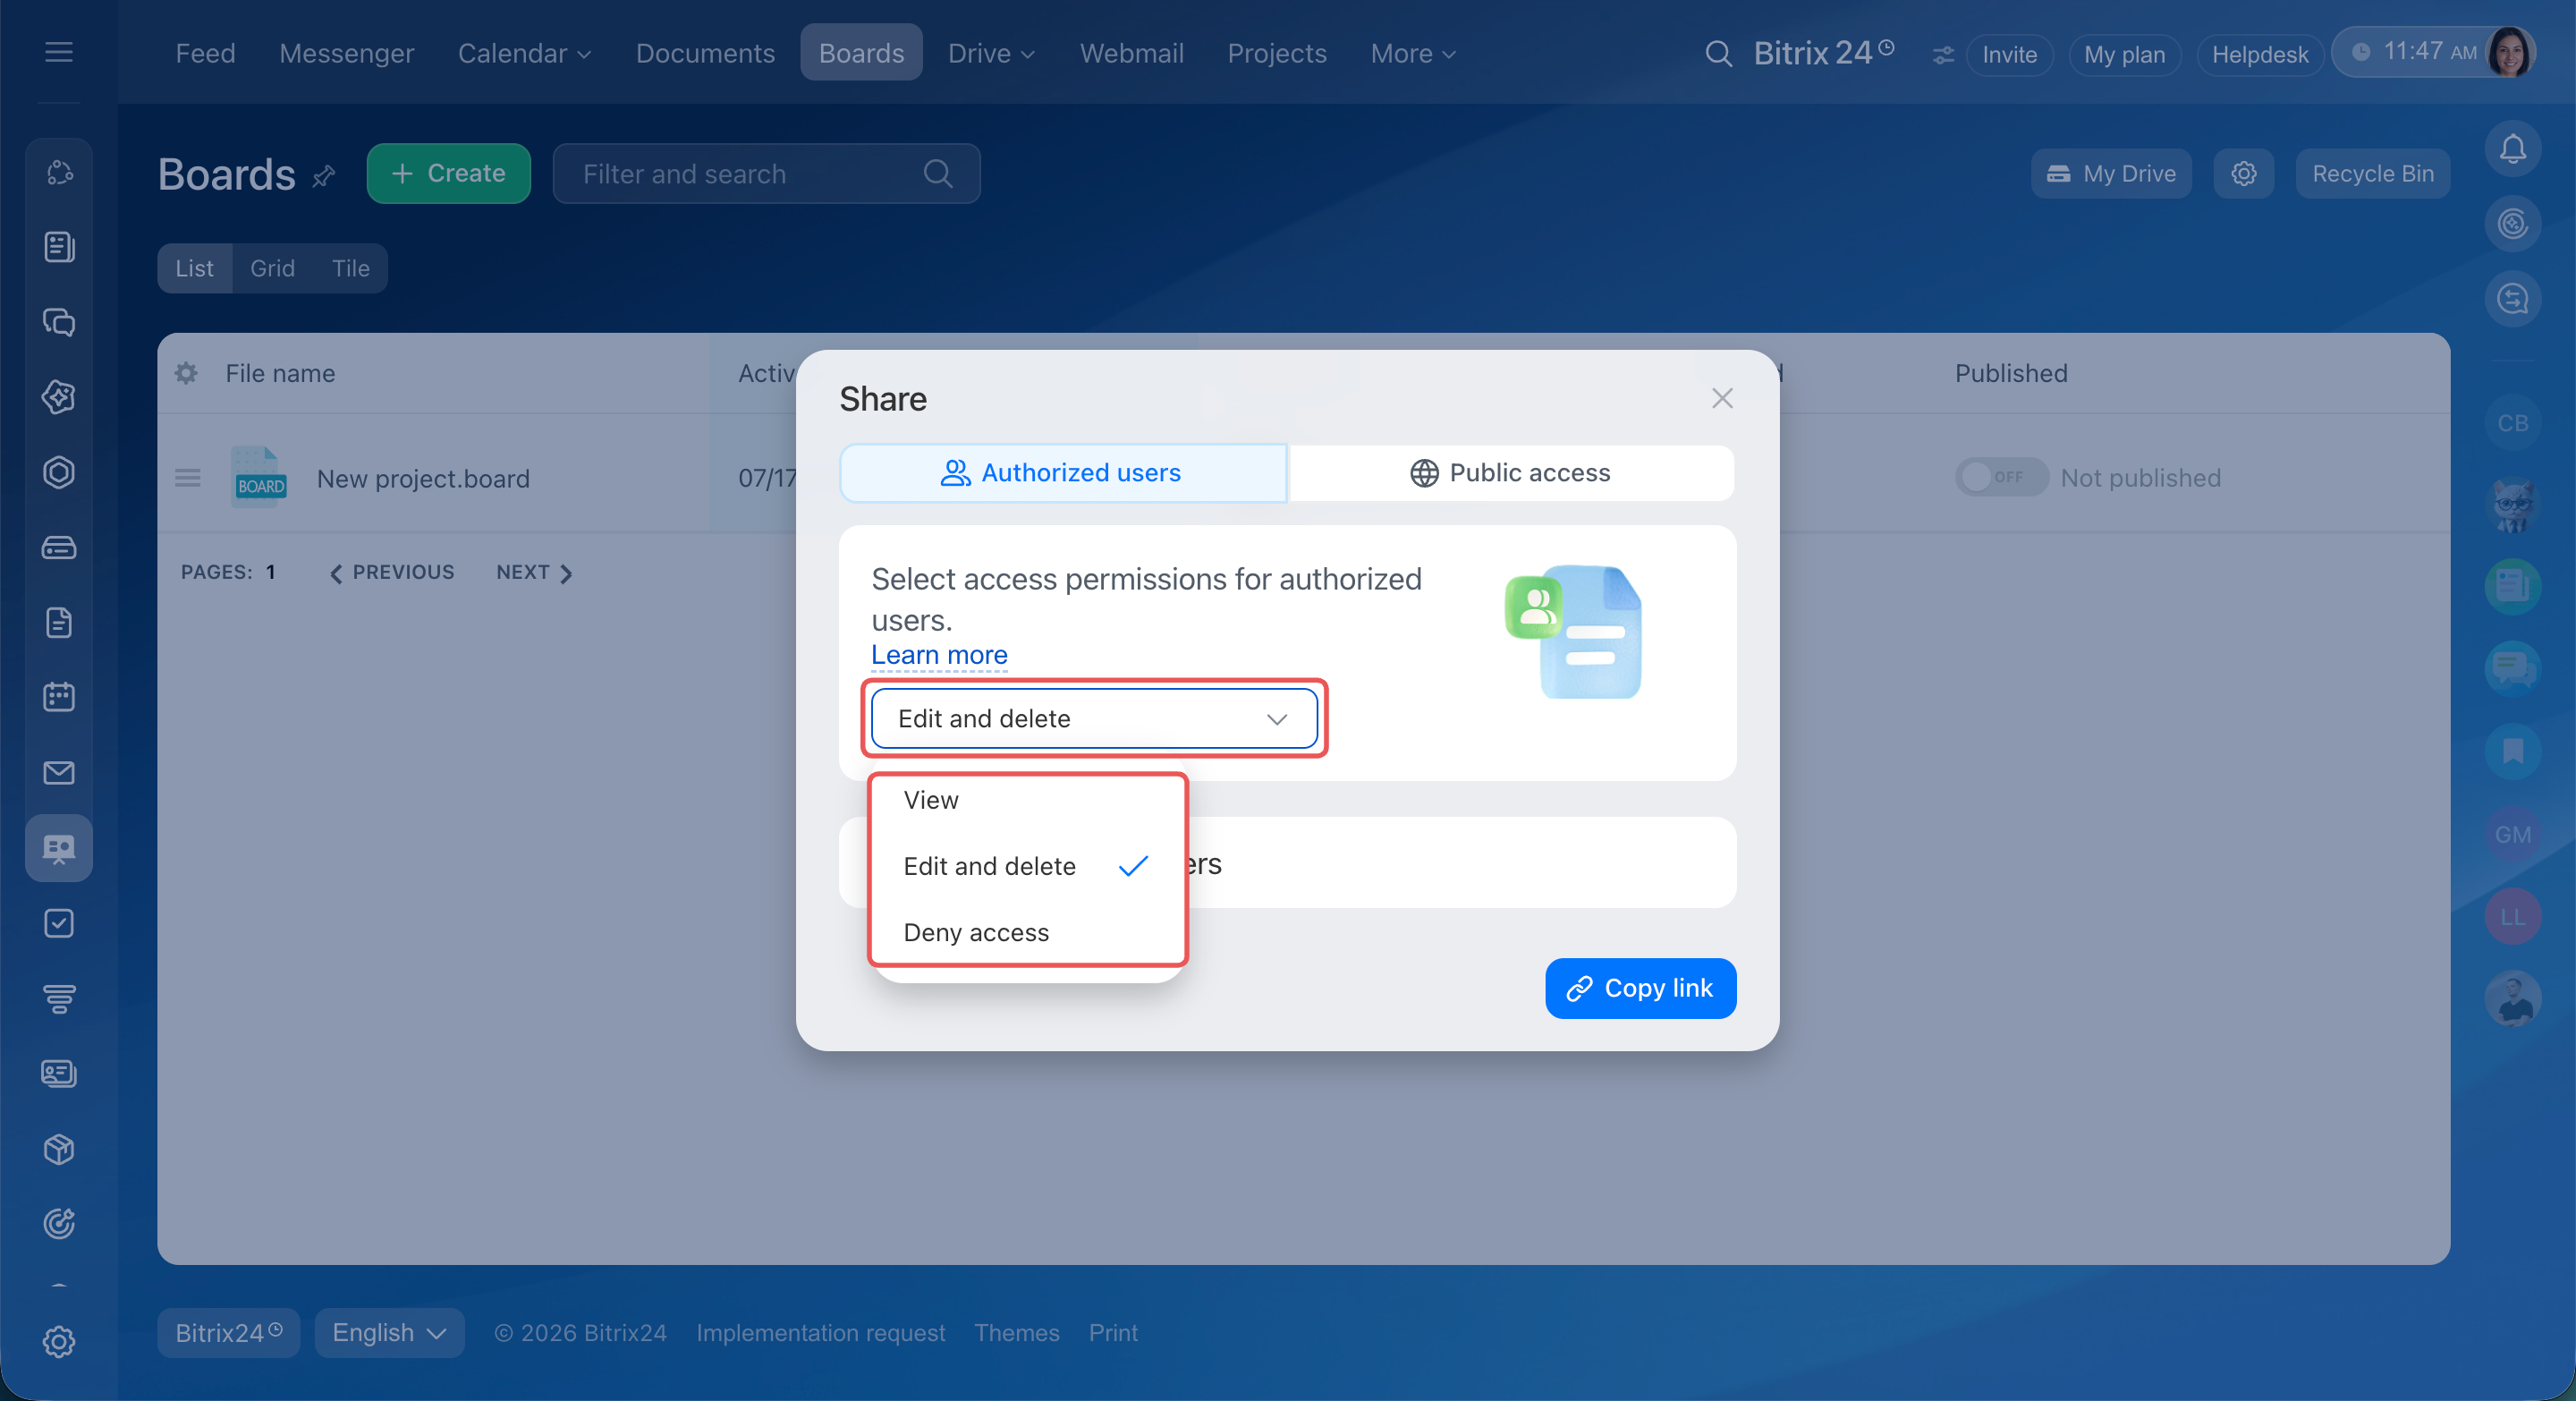
Configure shared access. By default, all employees who have an internal document link can edit the file. To change this, click the current access level and select one of these options:
- View — the user can open the document and use tools that do not change its content. For example, on a board, they can show or hide other participants' cursors on their screen.
- Edit and delete — the user can view and edit the document.
- Deny access — only the owner can access the document.
To protect confidential documents, you can set the default shared access level for internal links. Only a Bitrix24 administrator can do this.
1. Click the the icon next to your Bitrix24 name.
2–4. Go to Settings (⚙️) > Communications > Drive.
5. In the Default file link permission field, select the access level you need.
6. Save the changes.
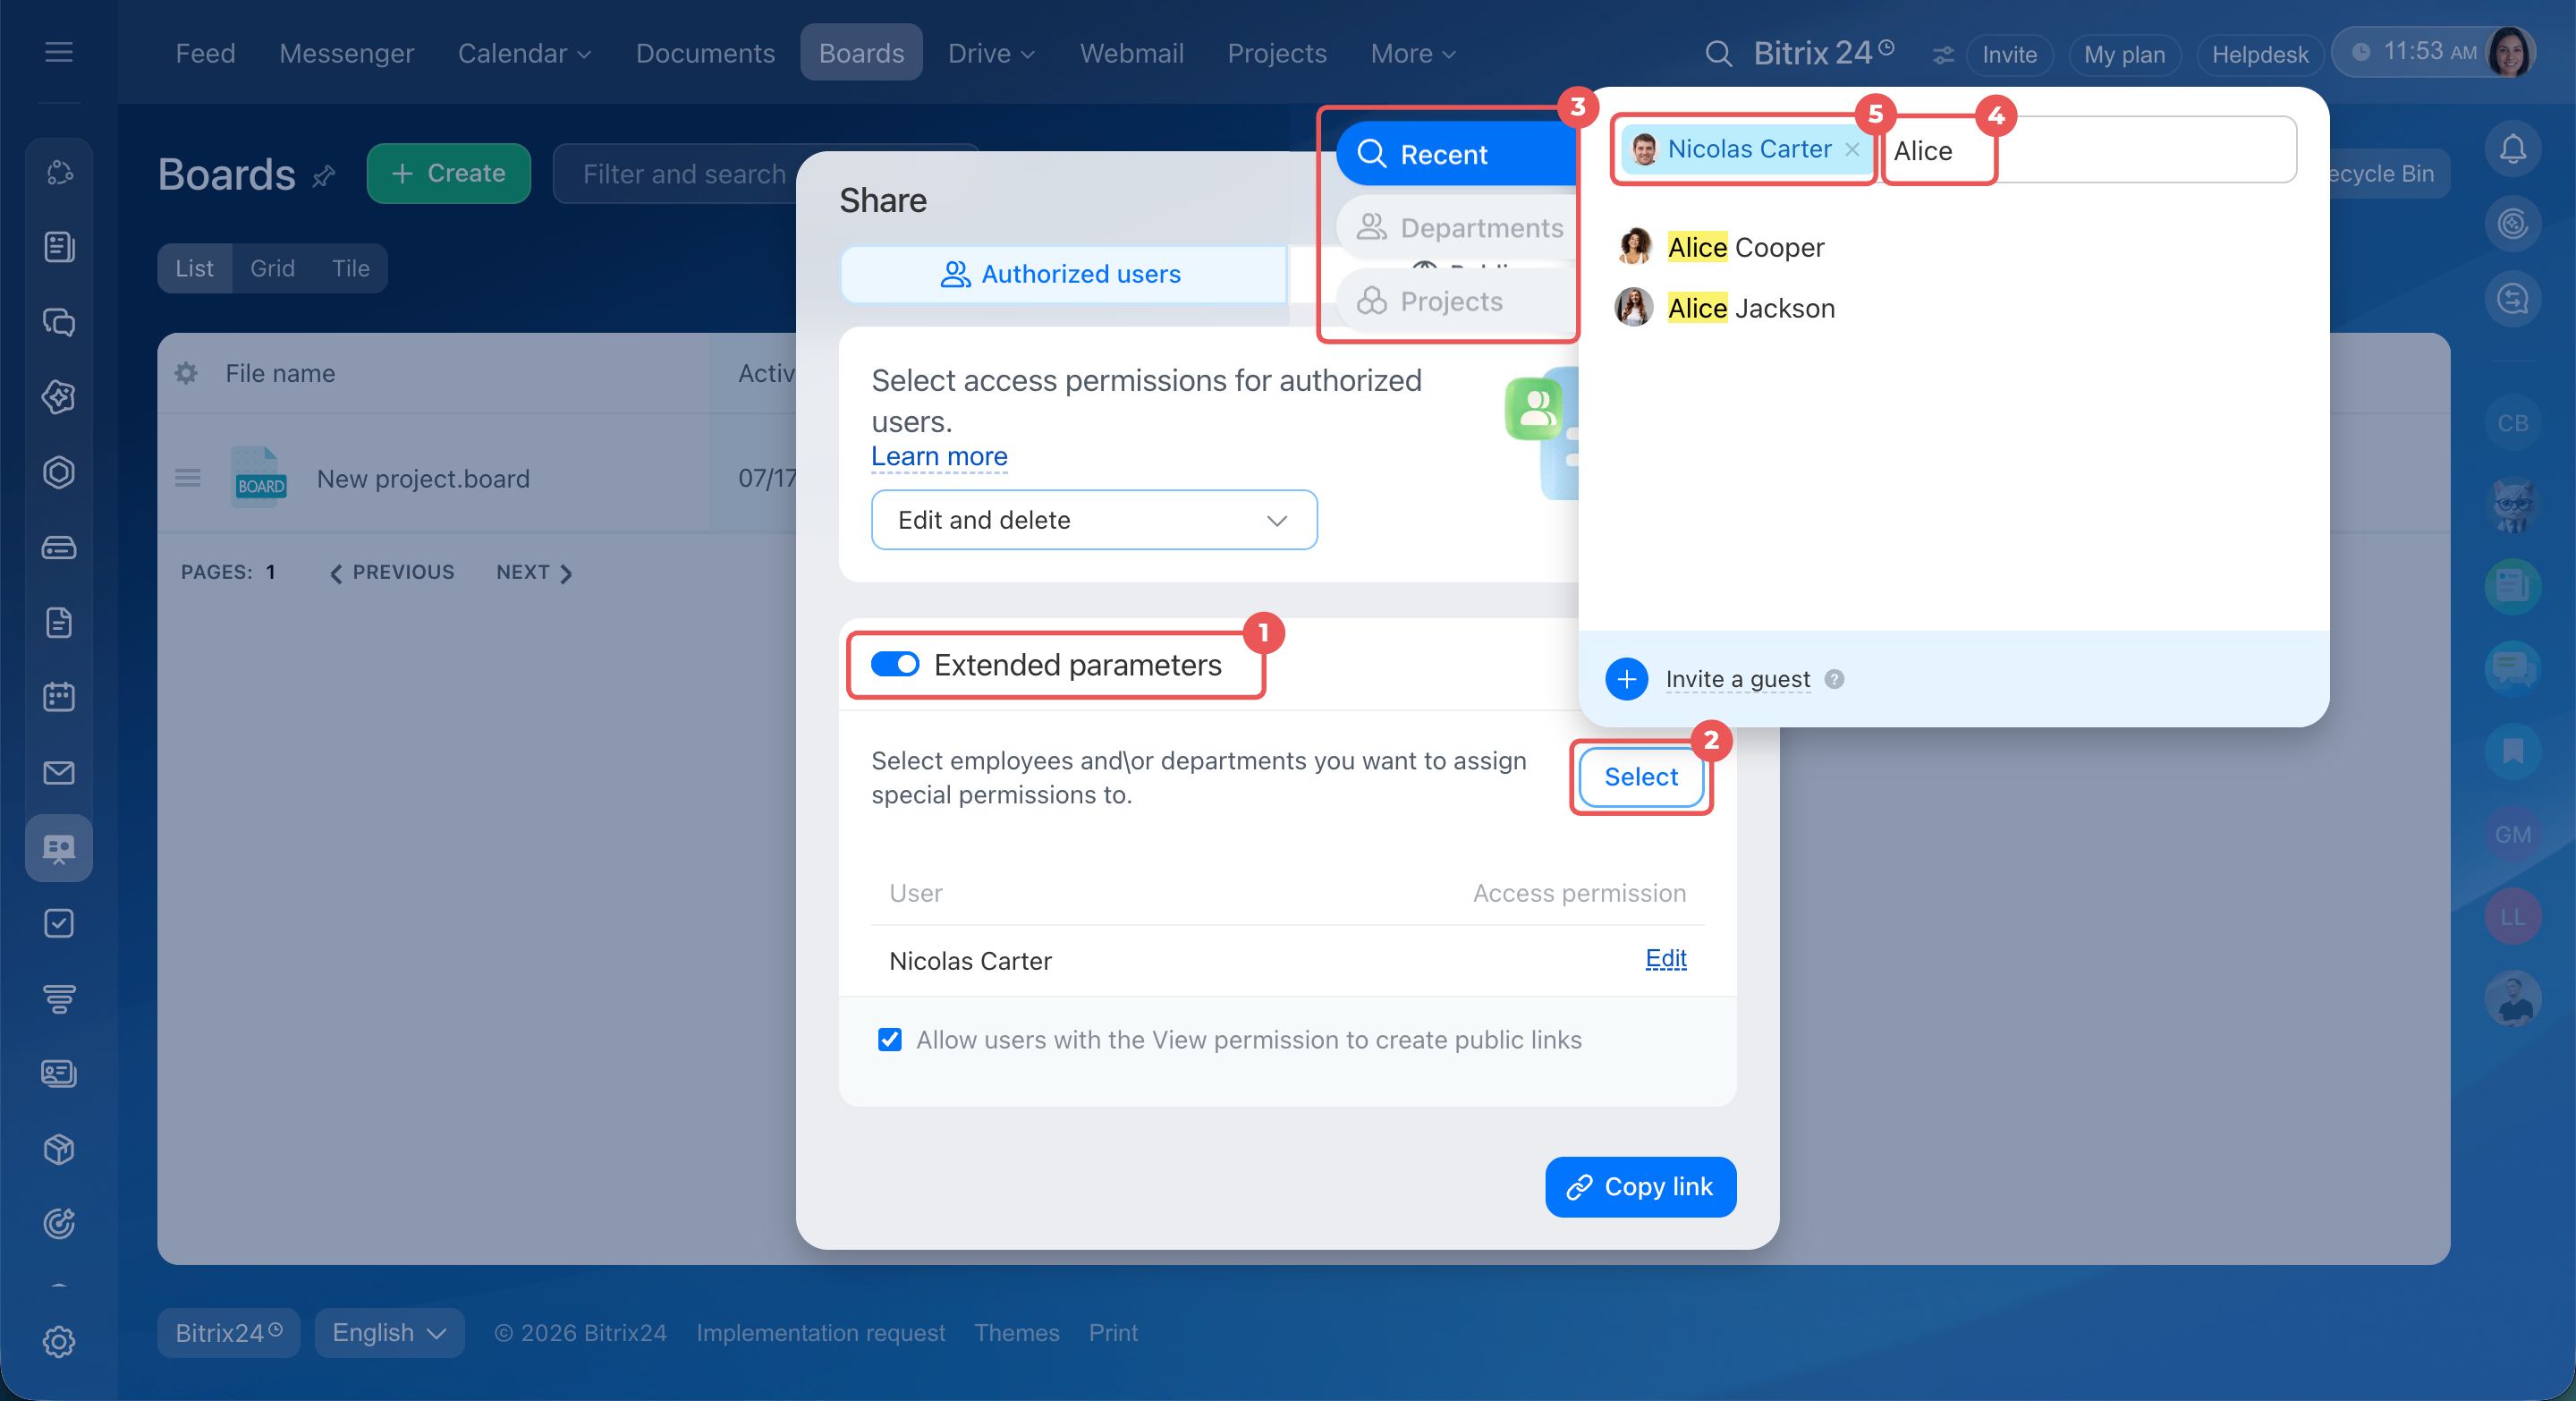
Configure personal access. You can give a higher access level to specific employees, subdepartments, or workgroups.
1–2. Click Extended parameters > Select.
3–4. Enter the name of an employee, subdepartment, or workgroup in the search field. You can also switch to the needed tab and add users there. Selected users appear in the list right away.
5. To remove an employee, workgroup, or subdepartment from the list, click the X in the selection field.
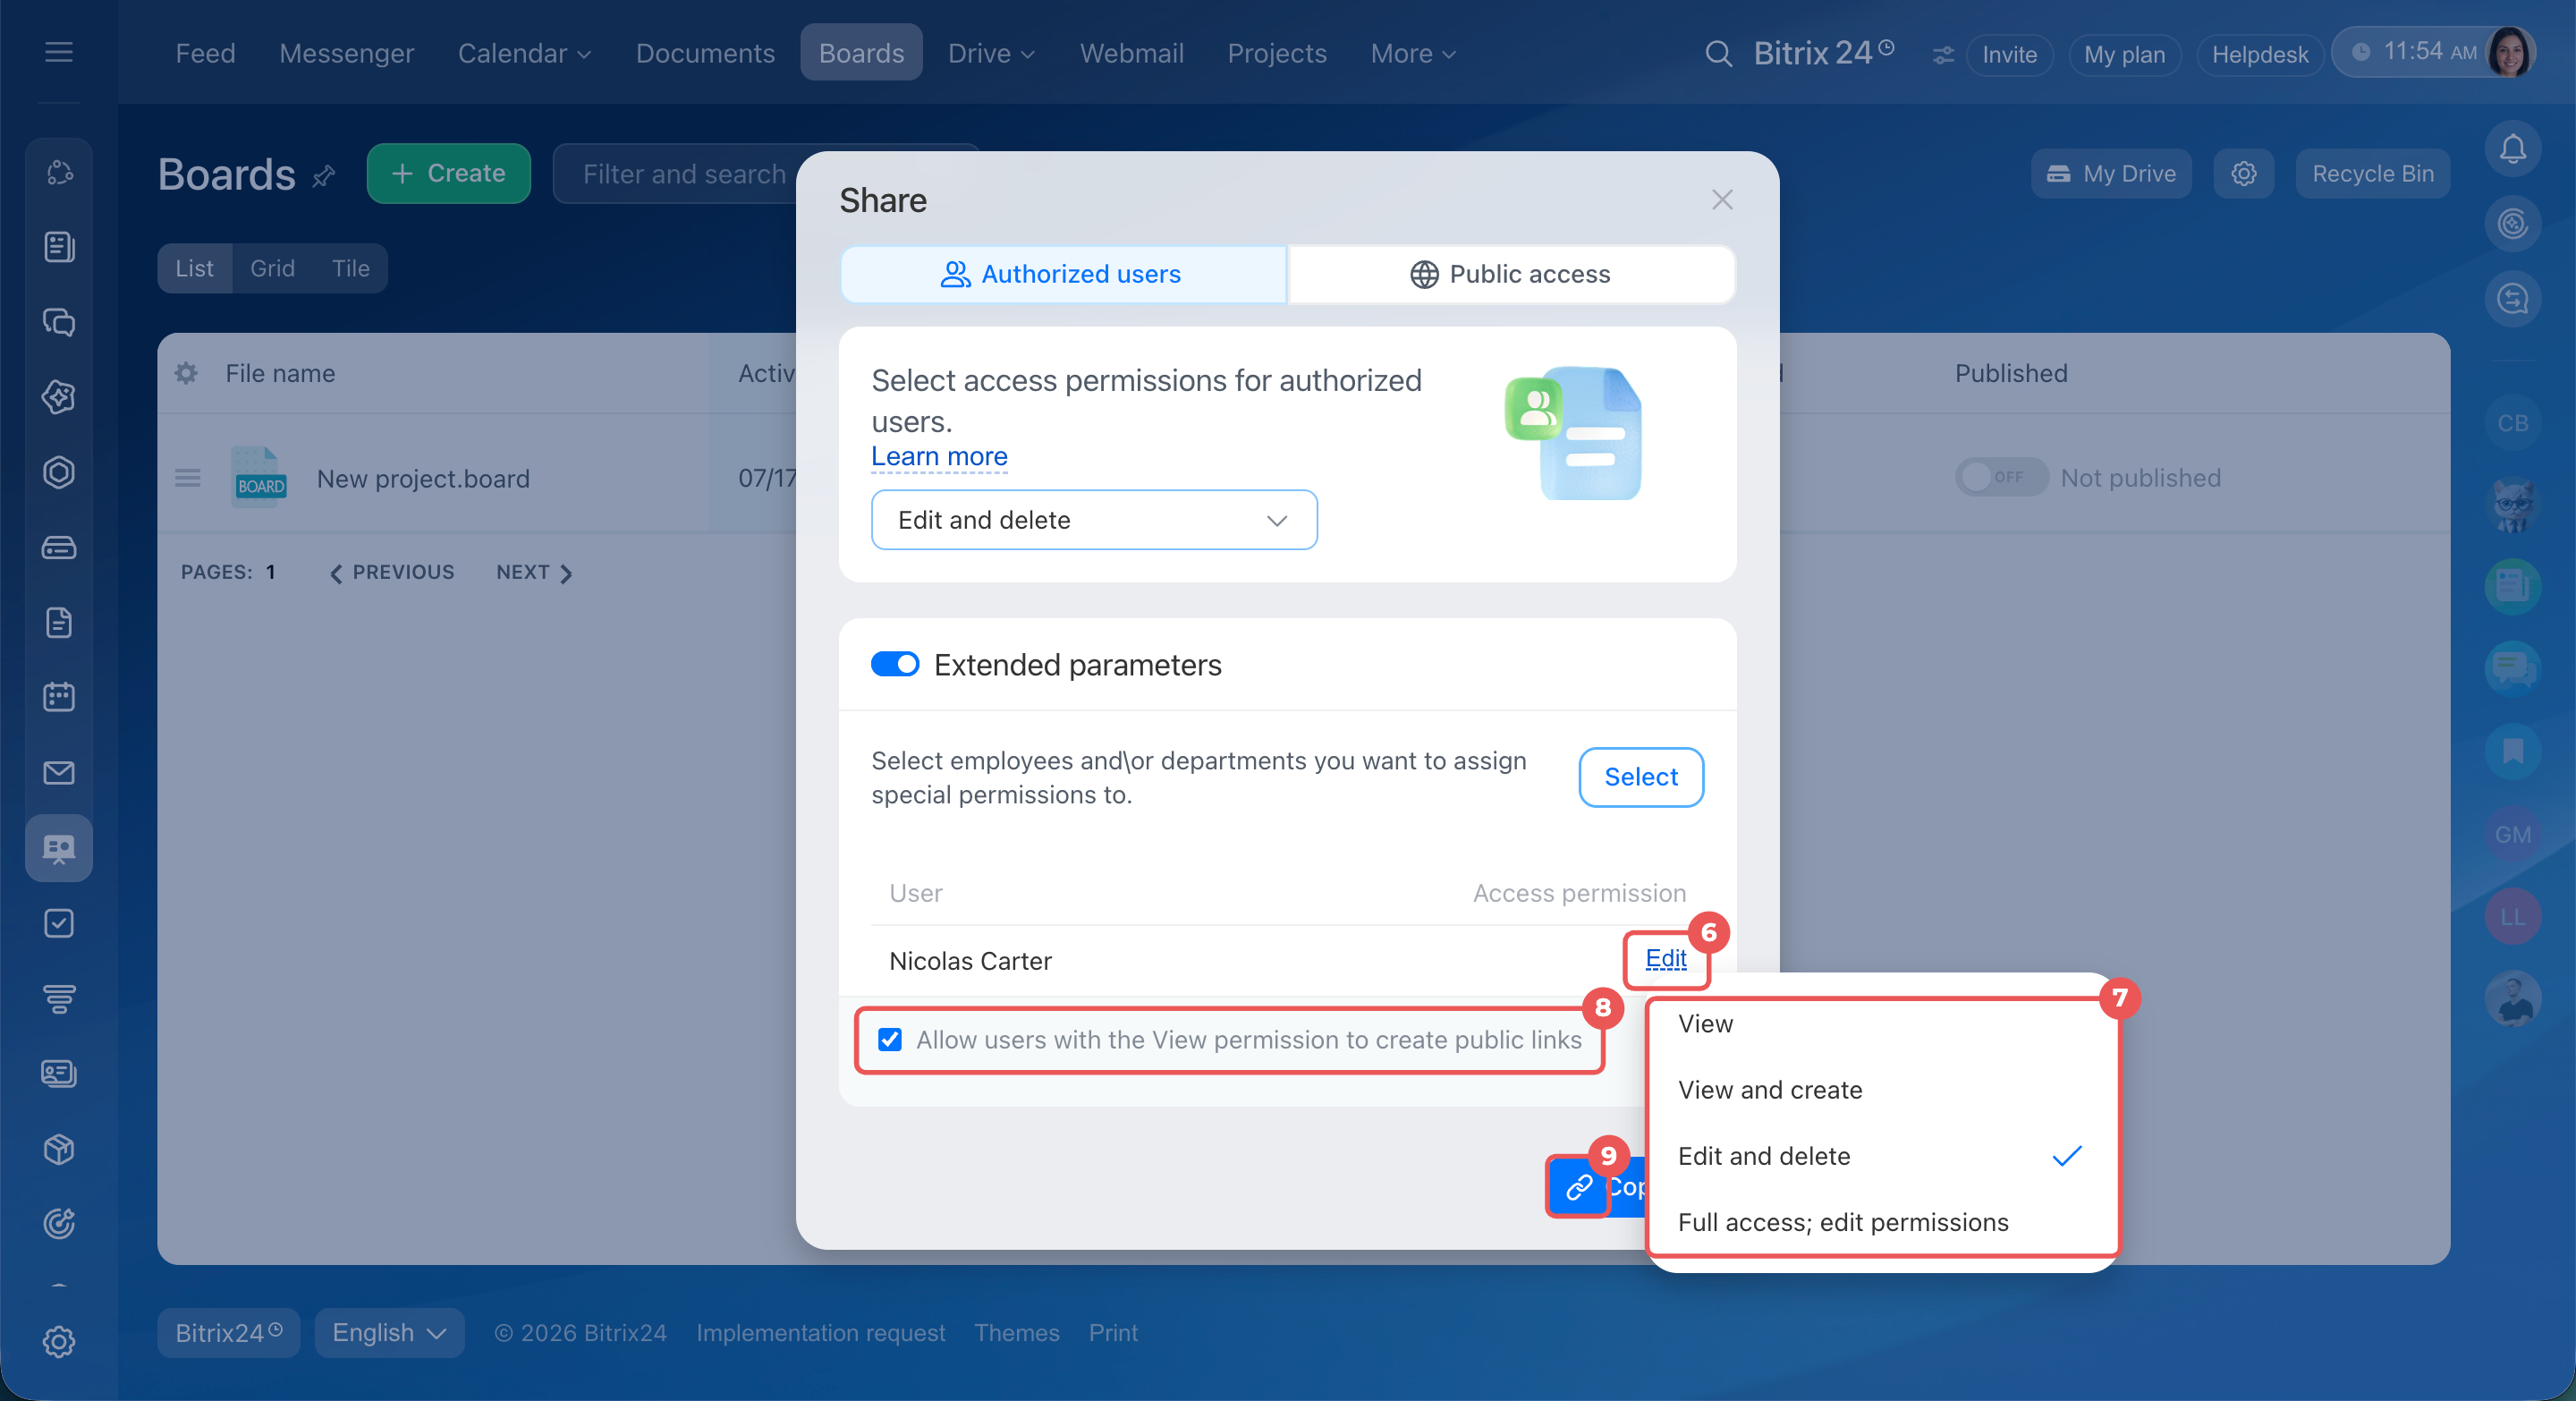
6–7. Set the access level — by default, the document is open for editing. To change this, click the current access level and select the one you need.
- View and View and create — the user can open the document and use tools that do not change its content. For example, in a spreadsheet, they can change the display theme or zoom level on their screen.
- Edit and delete — the user can view and edit the document: change the name, add or remove elements, and so on.
- Full access and edit permissions — the user can do everything above and configure document access for other participants.
8. Select Allow users with the View permission to create public links to expand personal permissions for all selected employees.
9. Copy the link to send it to your colleagues.
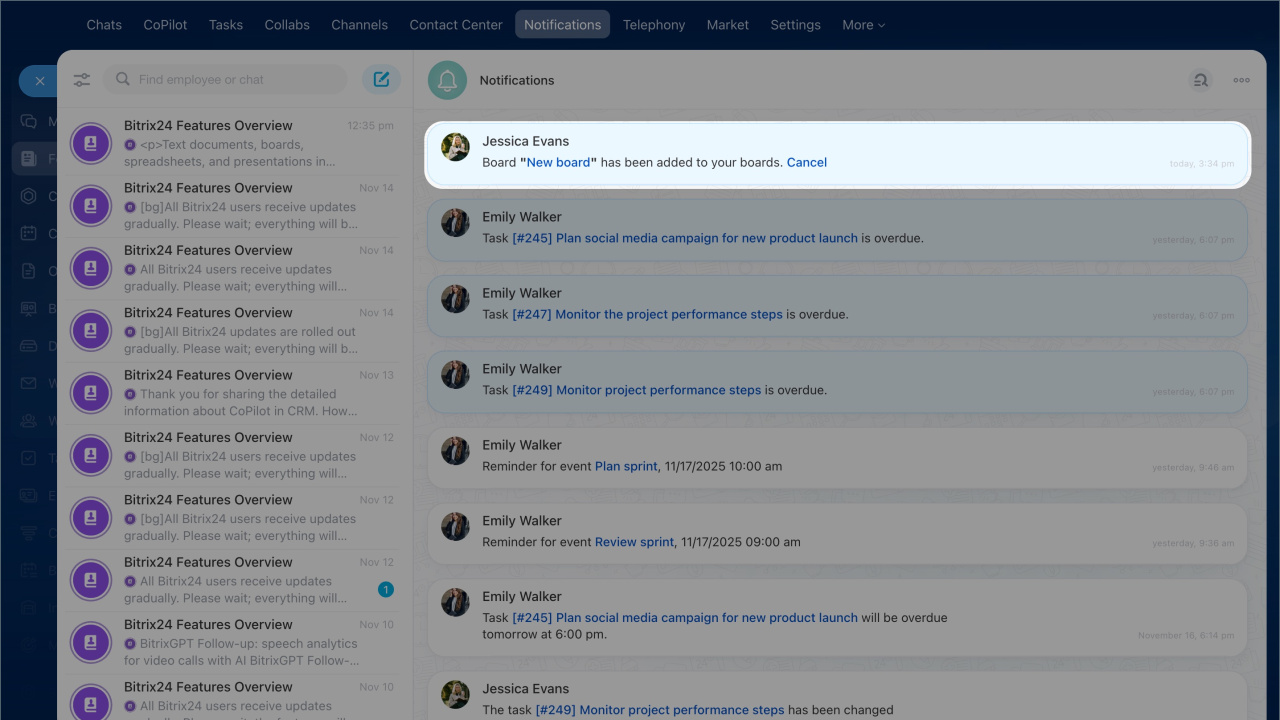
When you set up personal access to a document, the employee receives a notification. Depending on the document type, they are prompted to add the board to their board list or connect the file to their drive. If the employee:
- Confirm — the document appears in their list with expanded access.
- Decline — the employee keeps the shared access level. Only the document owner or a user with full access can restore the expanded access.
Access to attached documents
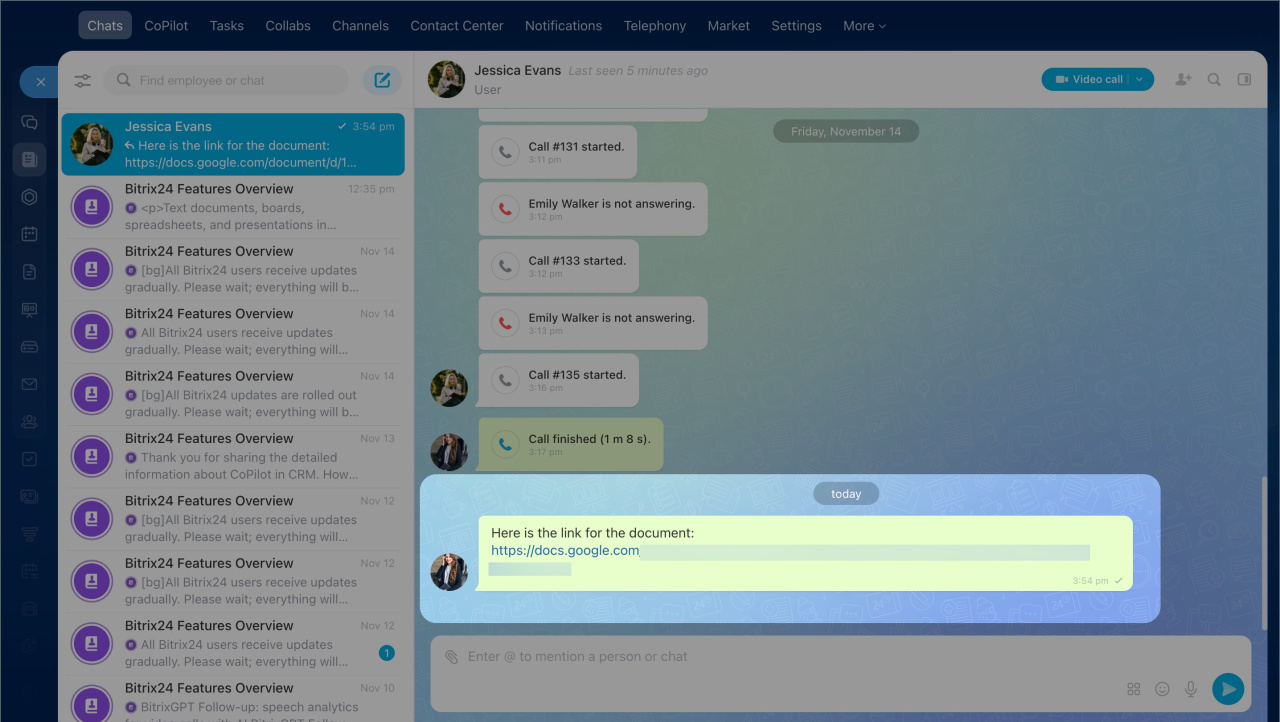
In Bitrix24 on desktop and in the Bitrix24 mobile app, you can share a document with colleagues by attaching it to a message, task, news feed post, and so on. Everyone who has access to those items can edit the file.
For example, if you add a spreadsheet with restricted access to a group chat, all chat members can edit it. This is useful when you need to quickly open a document for collaborative editing without setting up access manually.
If you want to keep the document's access settings unchanged, share a link instead of attaching the file.
In brief
- Bitrix24 supports several file types. For example, you can collaboratively edit text documents, boards, spreadsheets, and presentations. The same link can give different access levels to different users.
- By default, all employees with a document link can edit it. If public access is enabled, the link opens the document in view-only mode with no password and no expiration, but you can change this.
- To set access from the file list, go to Drive or Documents, find the file, and click Menu (=) > Share > More sharing options. Select a tab: Company employees or Public access.
- To set access while working in a document, click Share. Select a tab: Authorized users or Public access.
- You can set access for company employees and expand it for specific users — the colleague will need to connect the document to their drive.
- If an employee has multiple access levels, the one that gives more permissions applies.
- If you attach a document to a task, chat message, or news feed post, everyone who can access that item can edit the document.