
CRM + Online store is a ready-made online store connected to Bitrix24 CRM. It includes a product catalog, checkout, and a mobile-friendly design. You can start selling online without building a site from scratch.
When a customer places an order, Bitrix24 automatically creates a deal with the ordered products and customer details. Employees can then contact the customer to confirm the order or arrange delivery.
In this article:
Create a CRM + Online store
You can create a CRM + Online store in a few minutes. Bitrix24 automatically builds a site with ready-made pages and sample products. You can open the store immediately and test how customers place orders.
Set up access permissions for sites and online stores
To accept online payments, connect a payment system after creating the store.
Connect payment systems in Sales Center
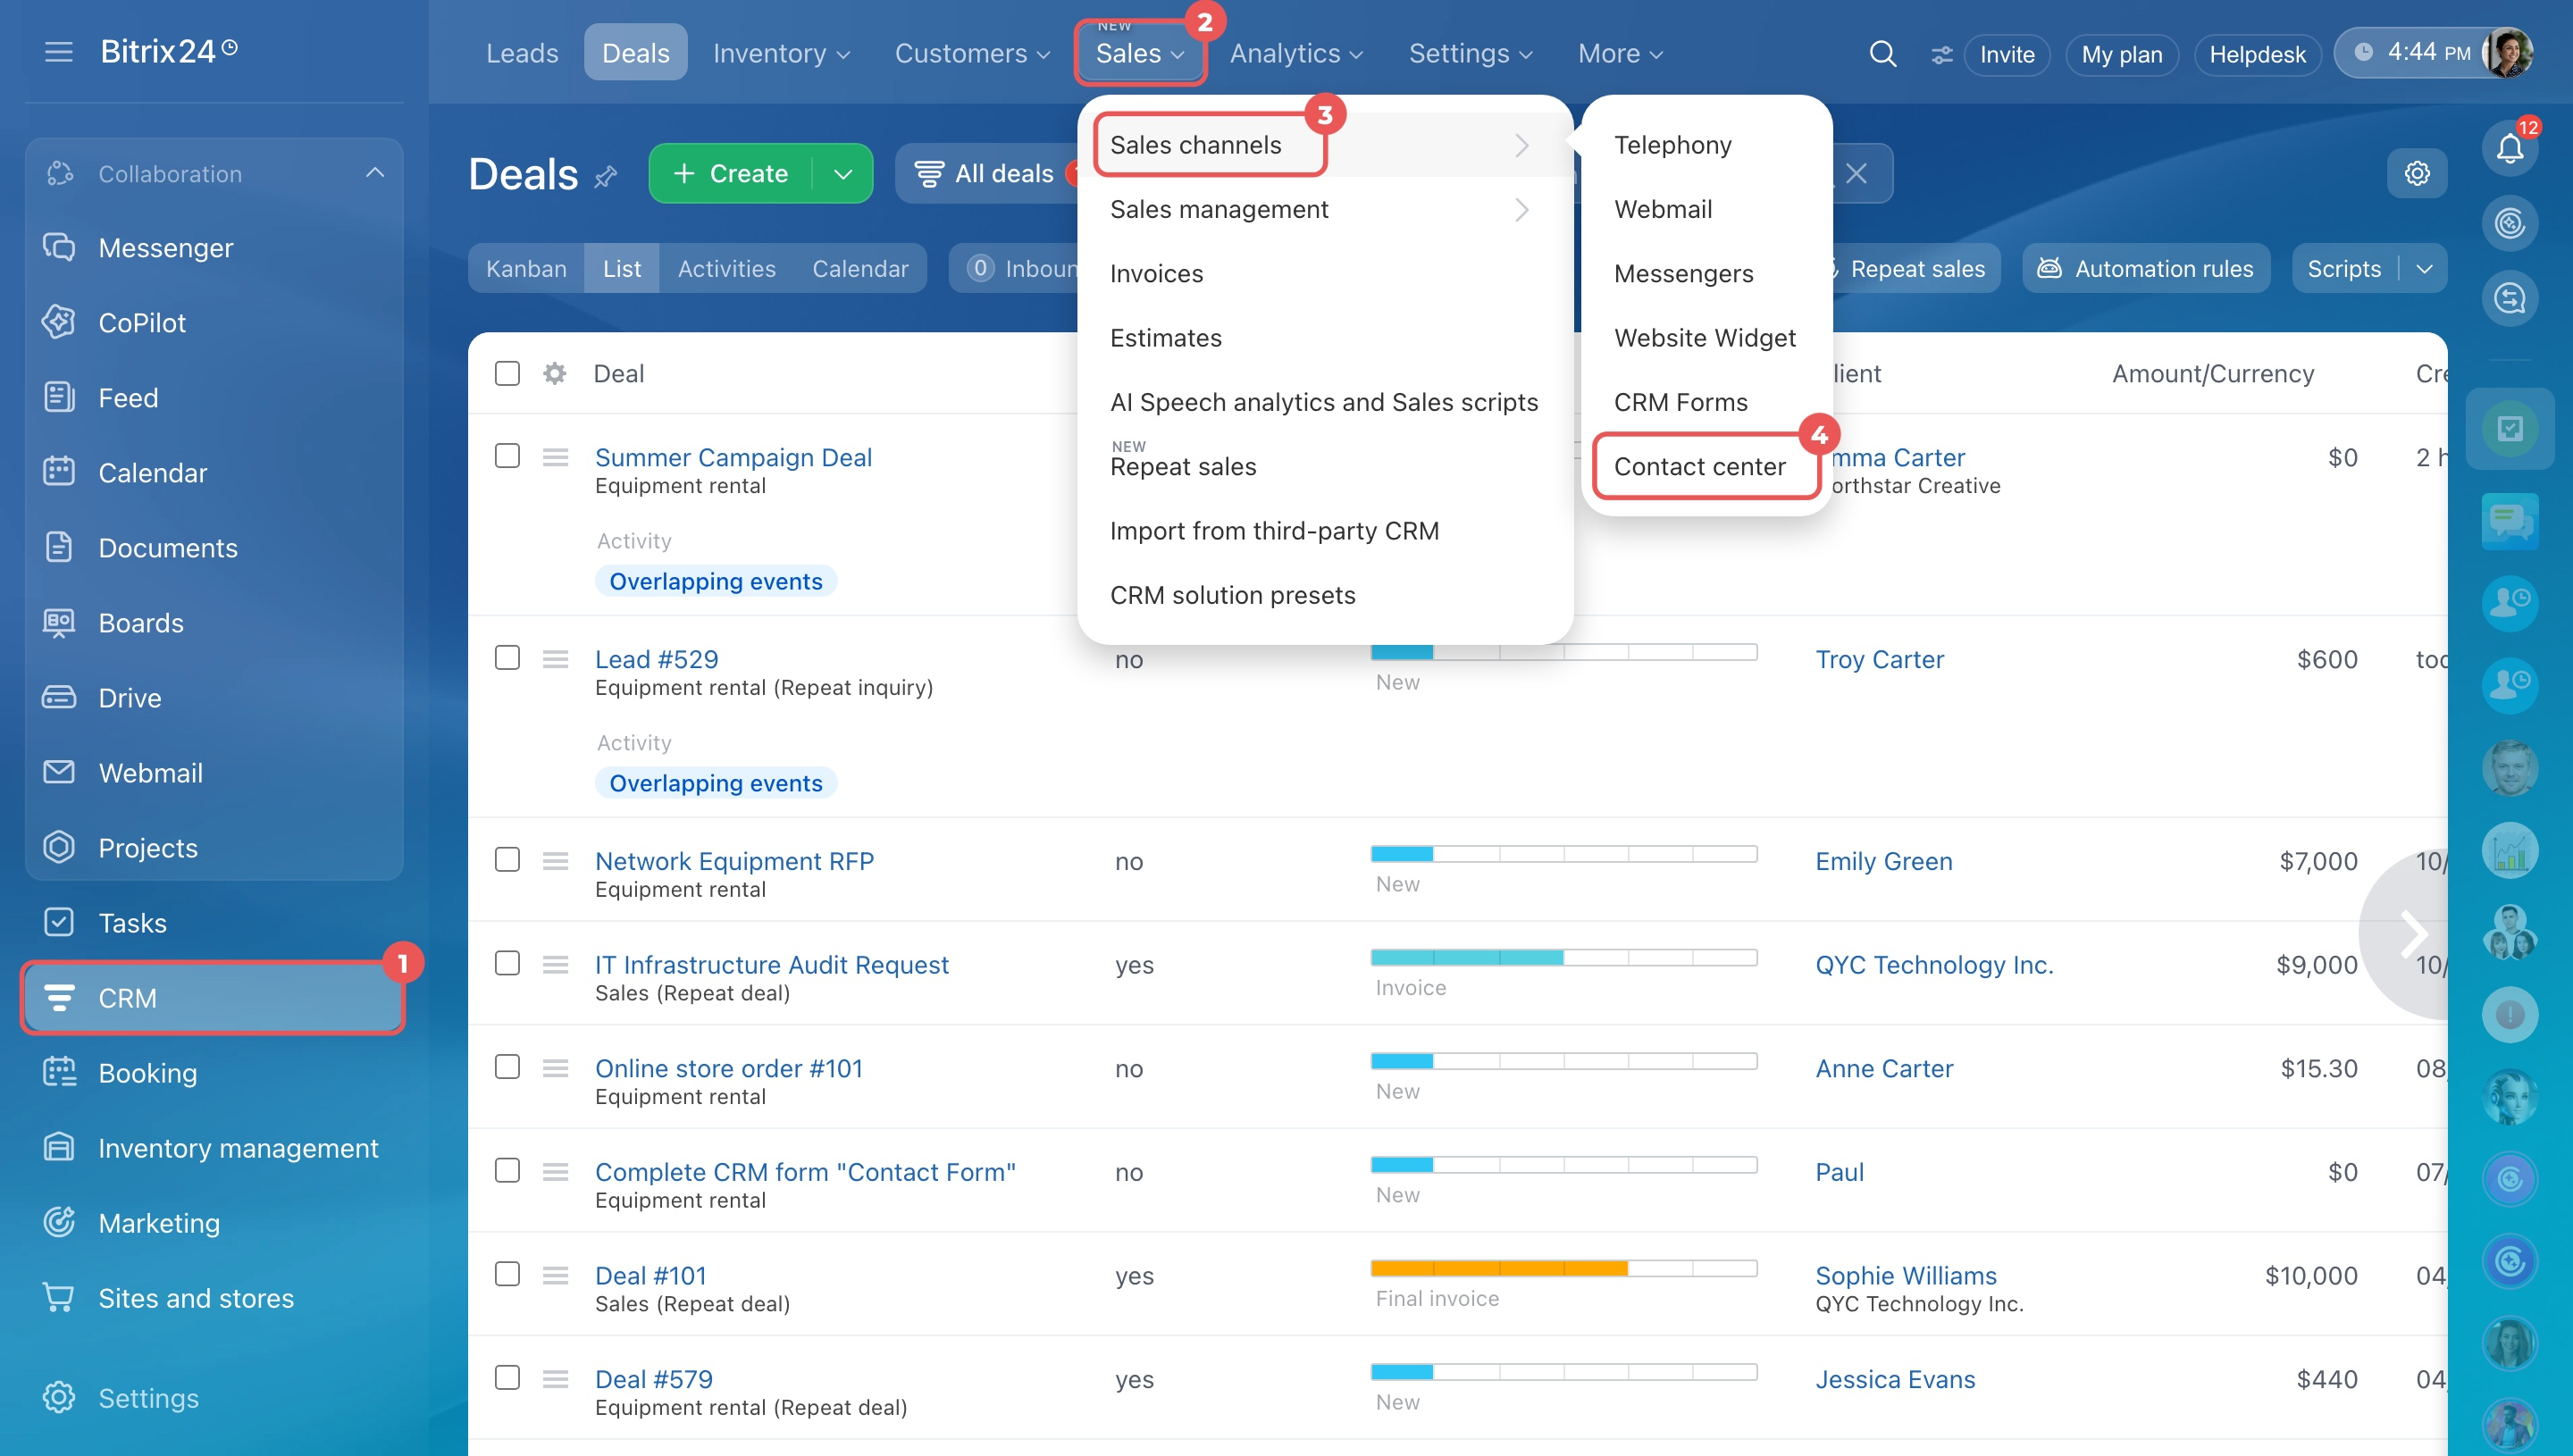
- Go to CRM > Sales > Sales channels > Contact center.
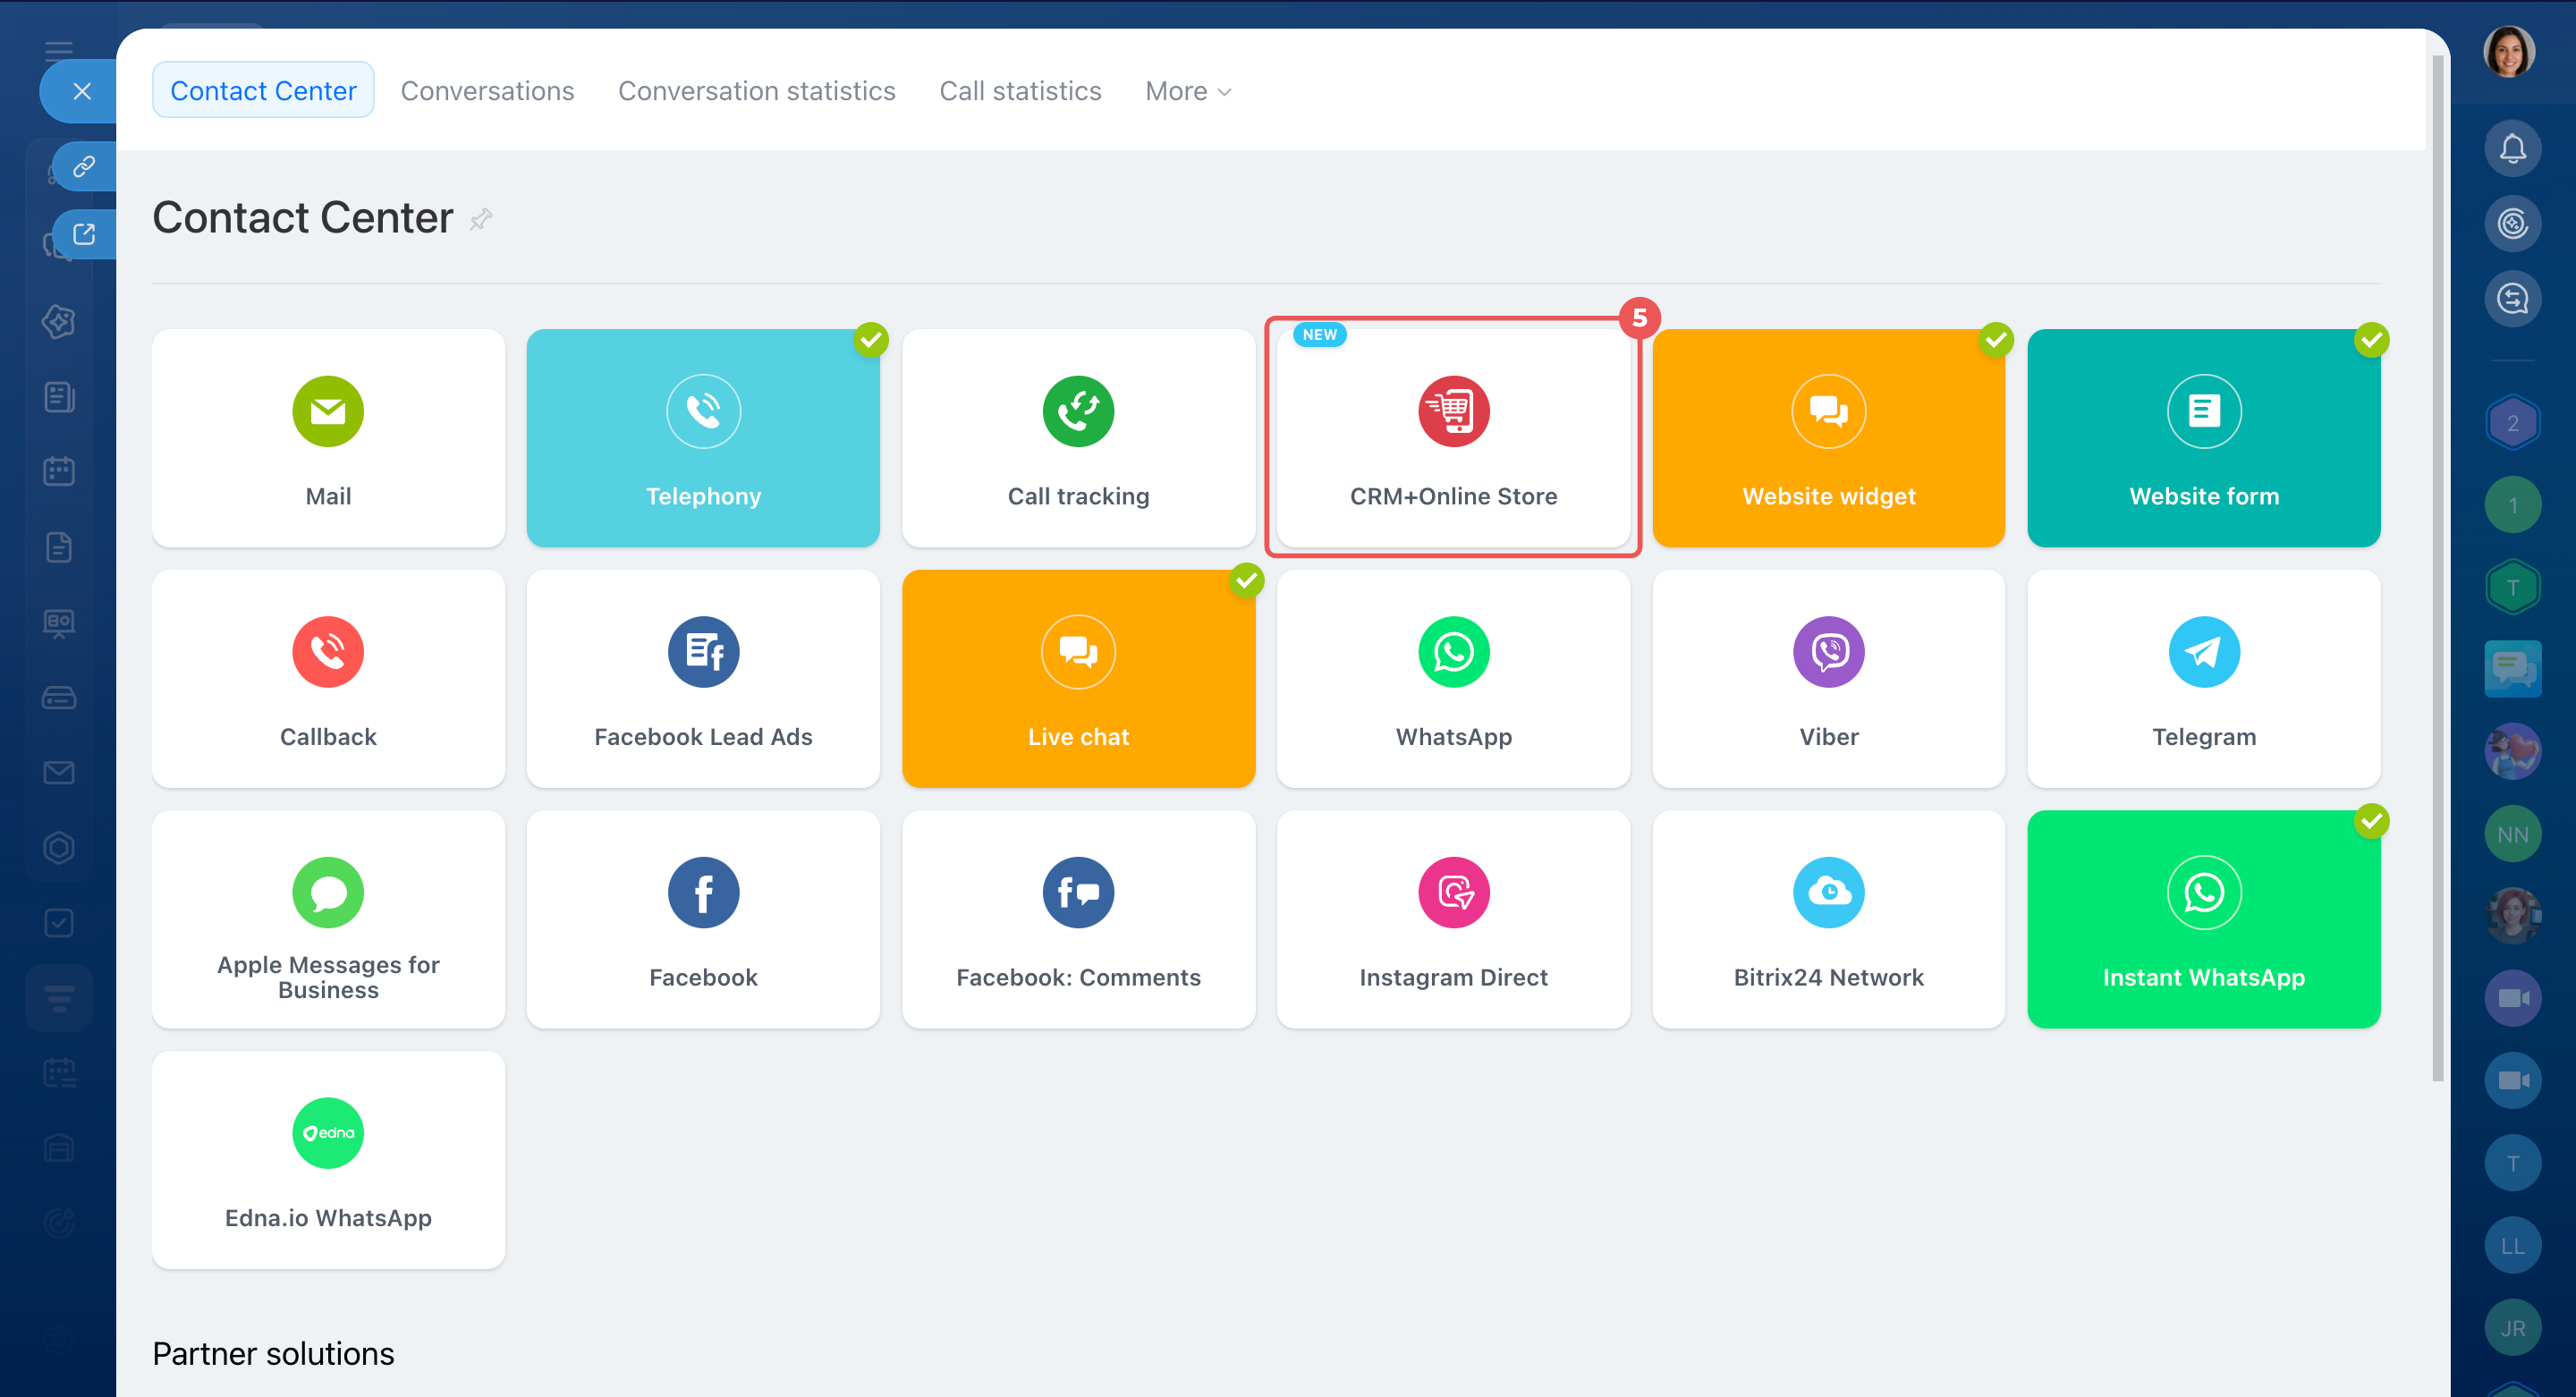
- Open the CRM + Online store block.
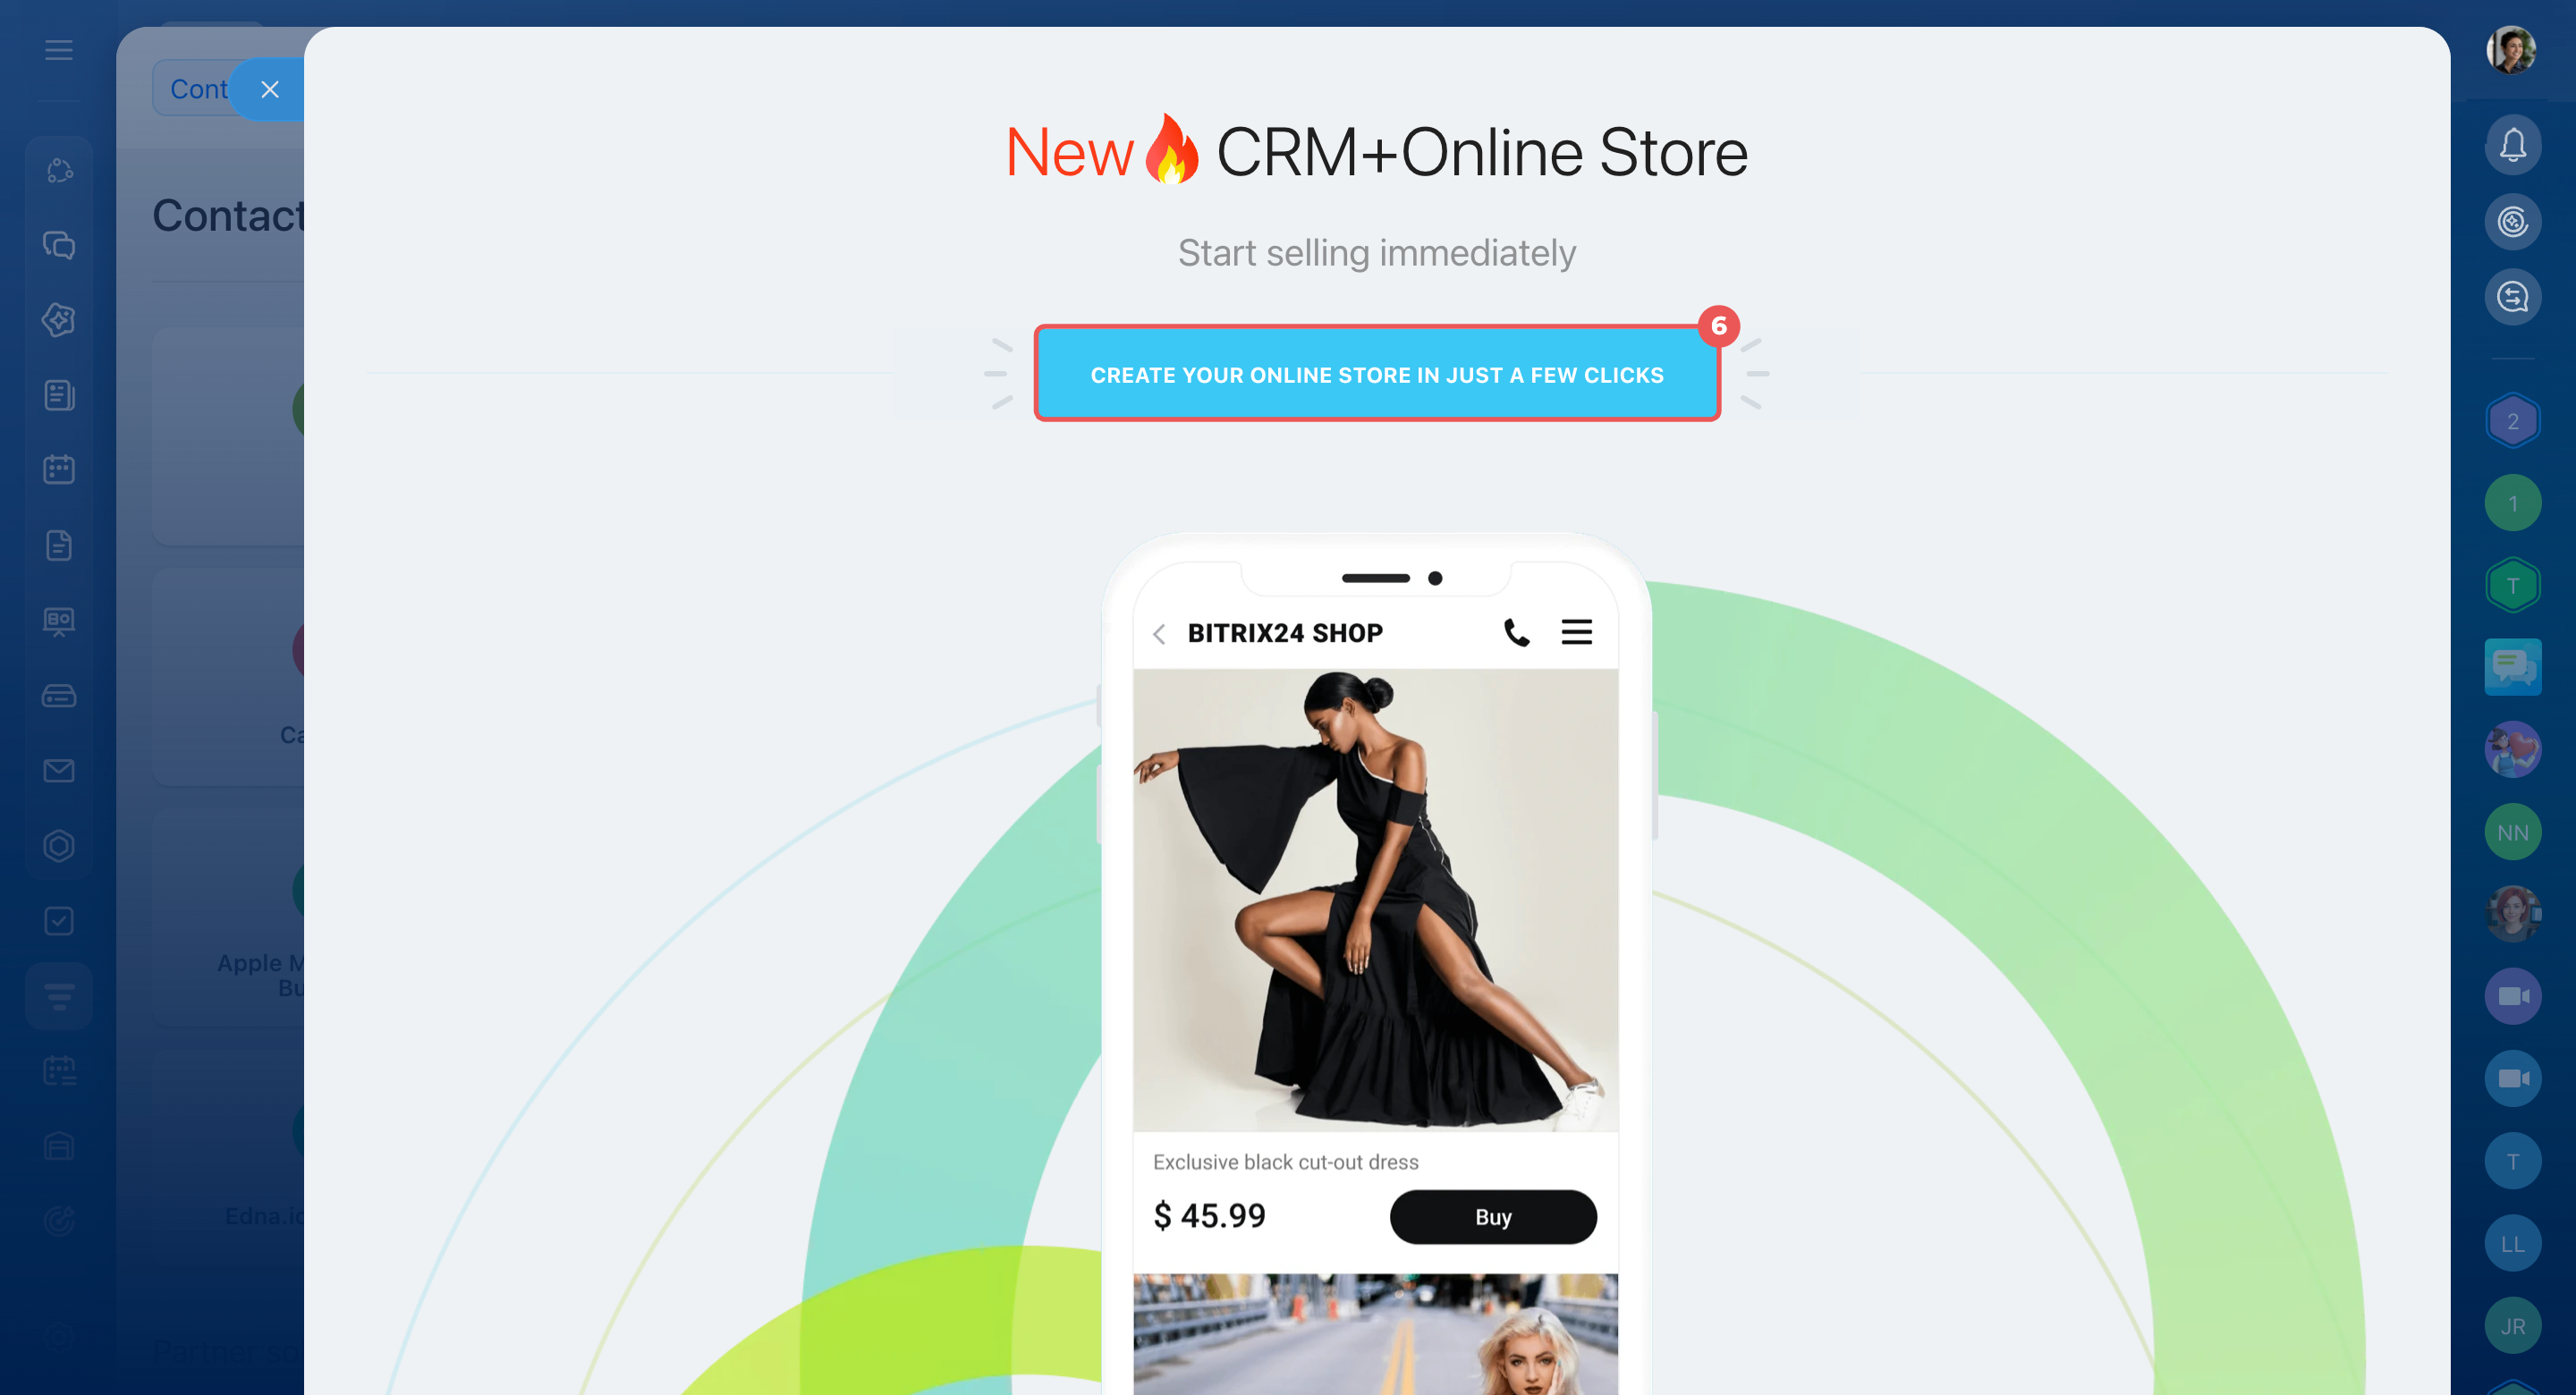
- Click Create your online store in just a few clicks. Wait for Bitrix24 to create the store.
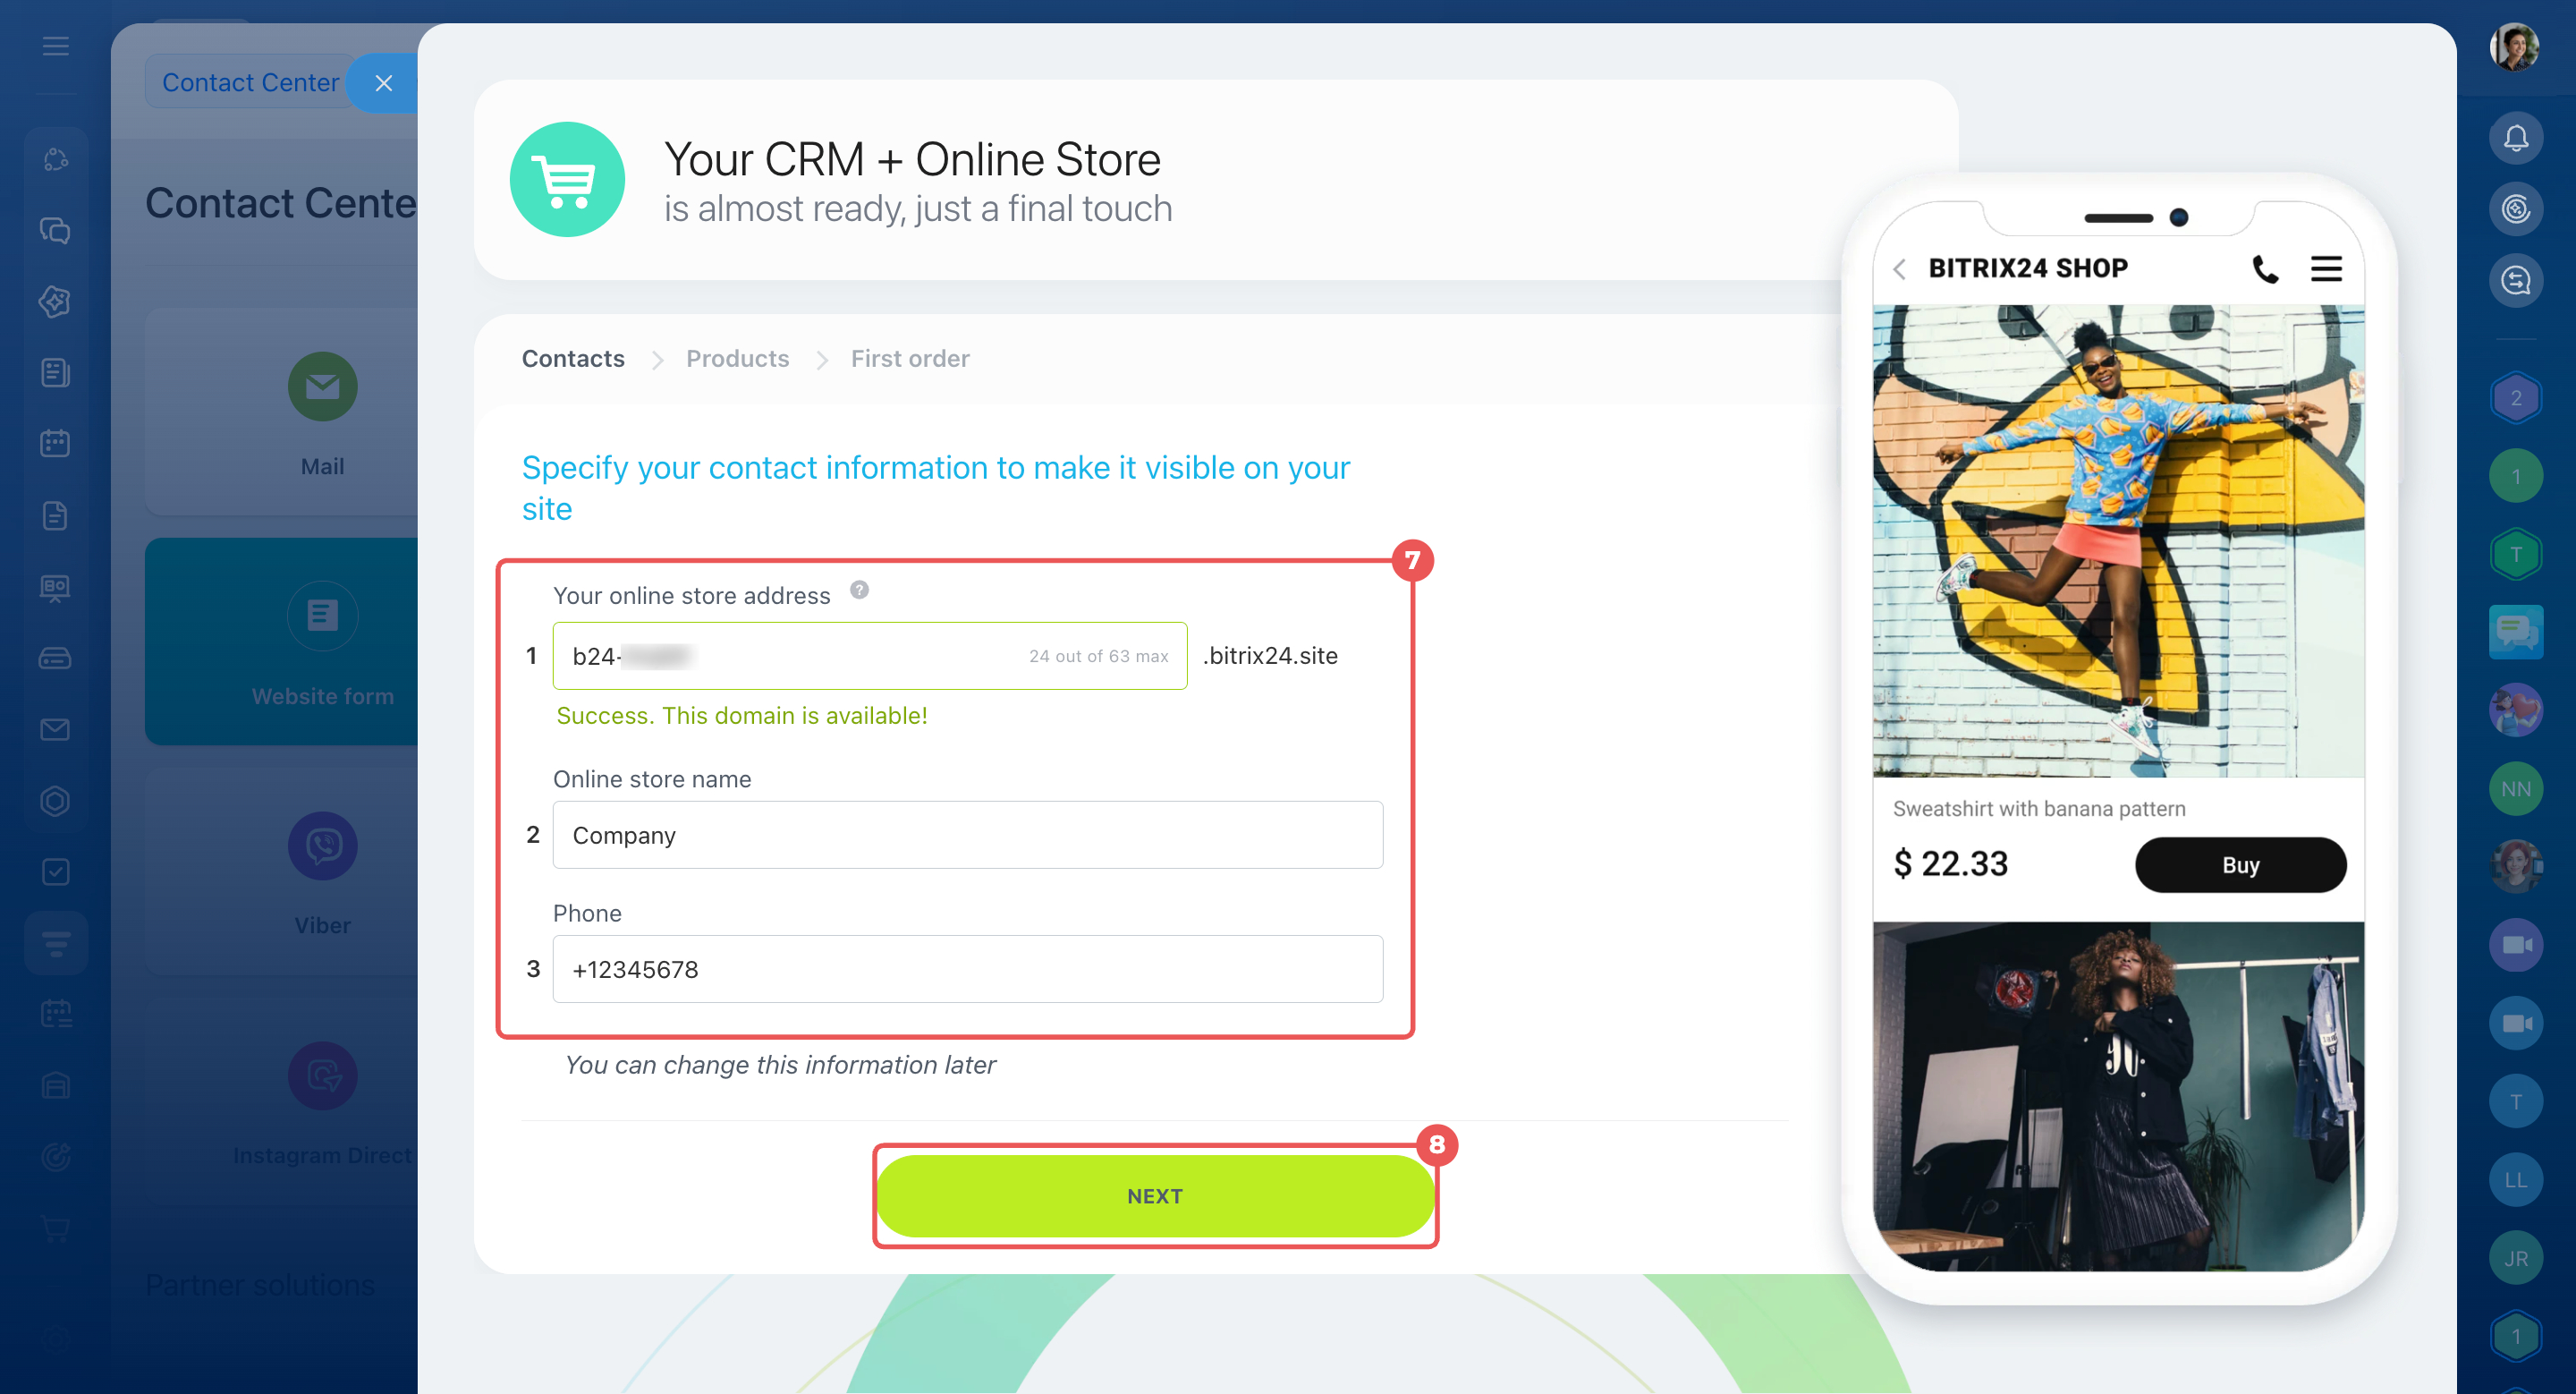
- Enter the store details:
- Store address
- Name
- Contact phone number
- Click Continue.
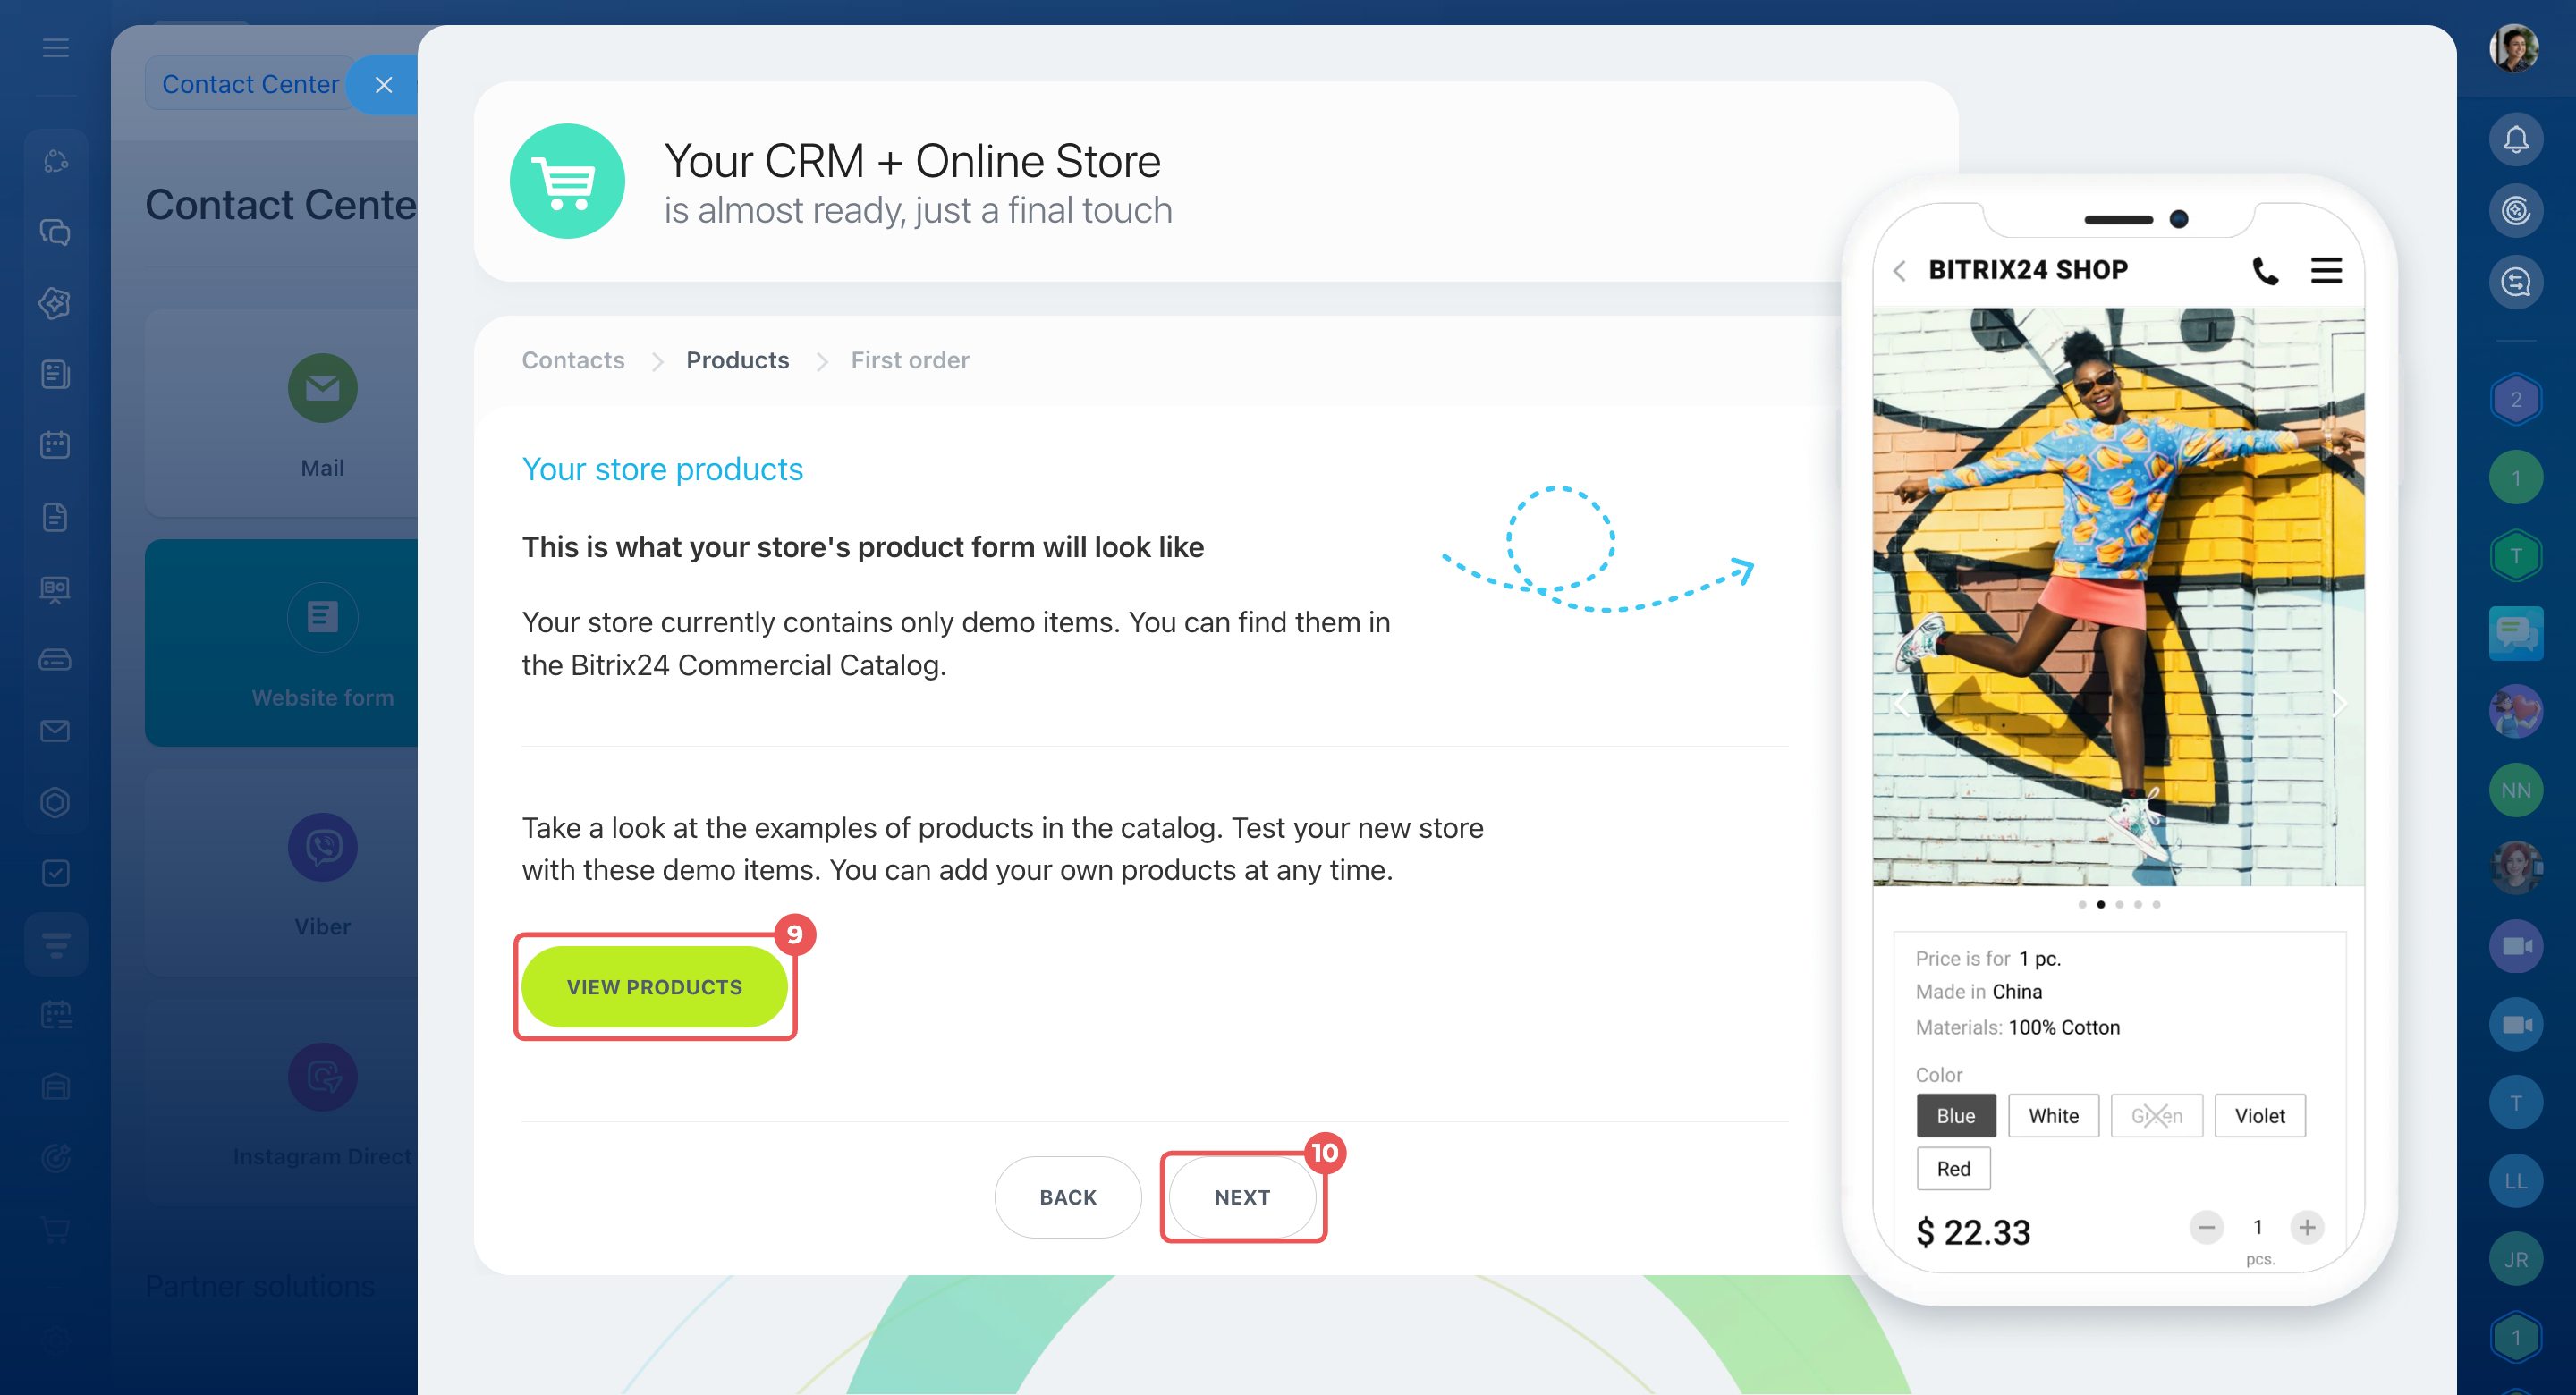
- Click View products to see the sample products.
- Click Continue.
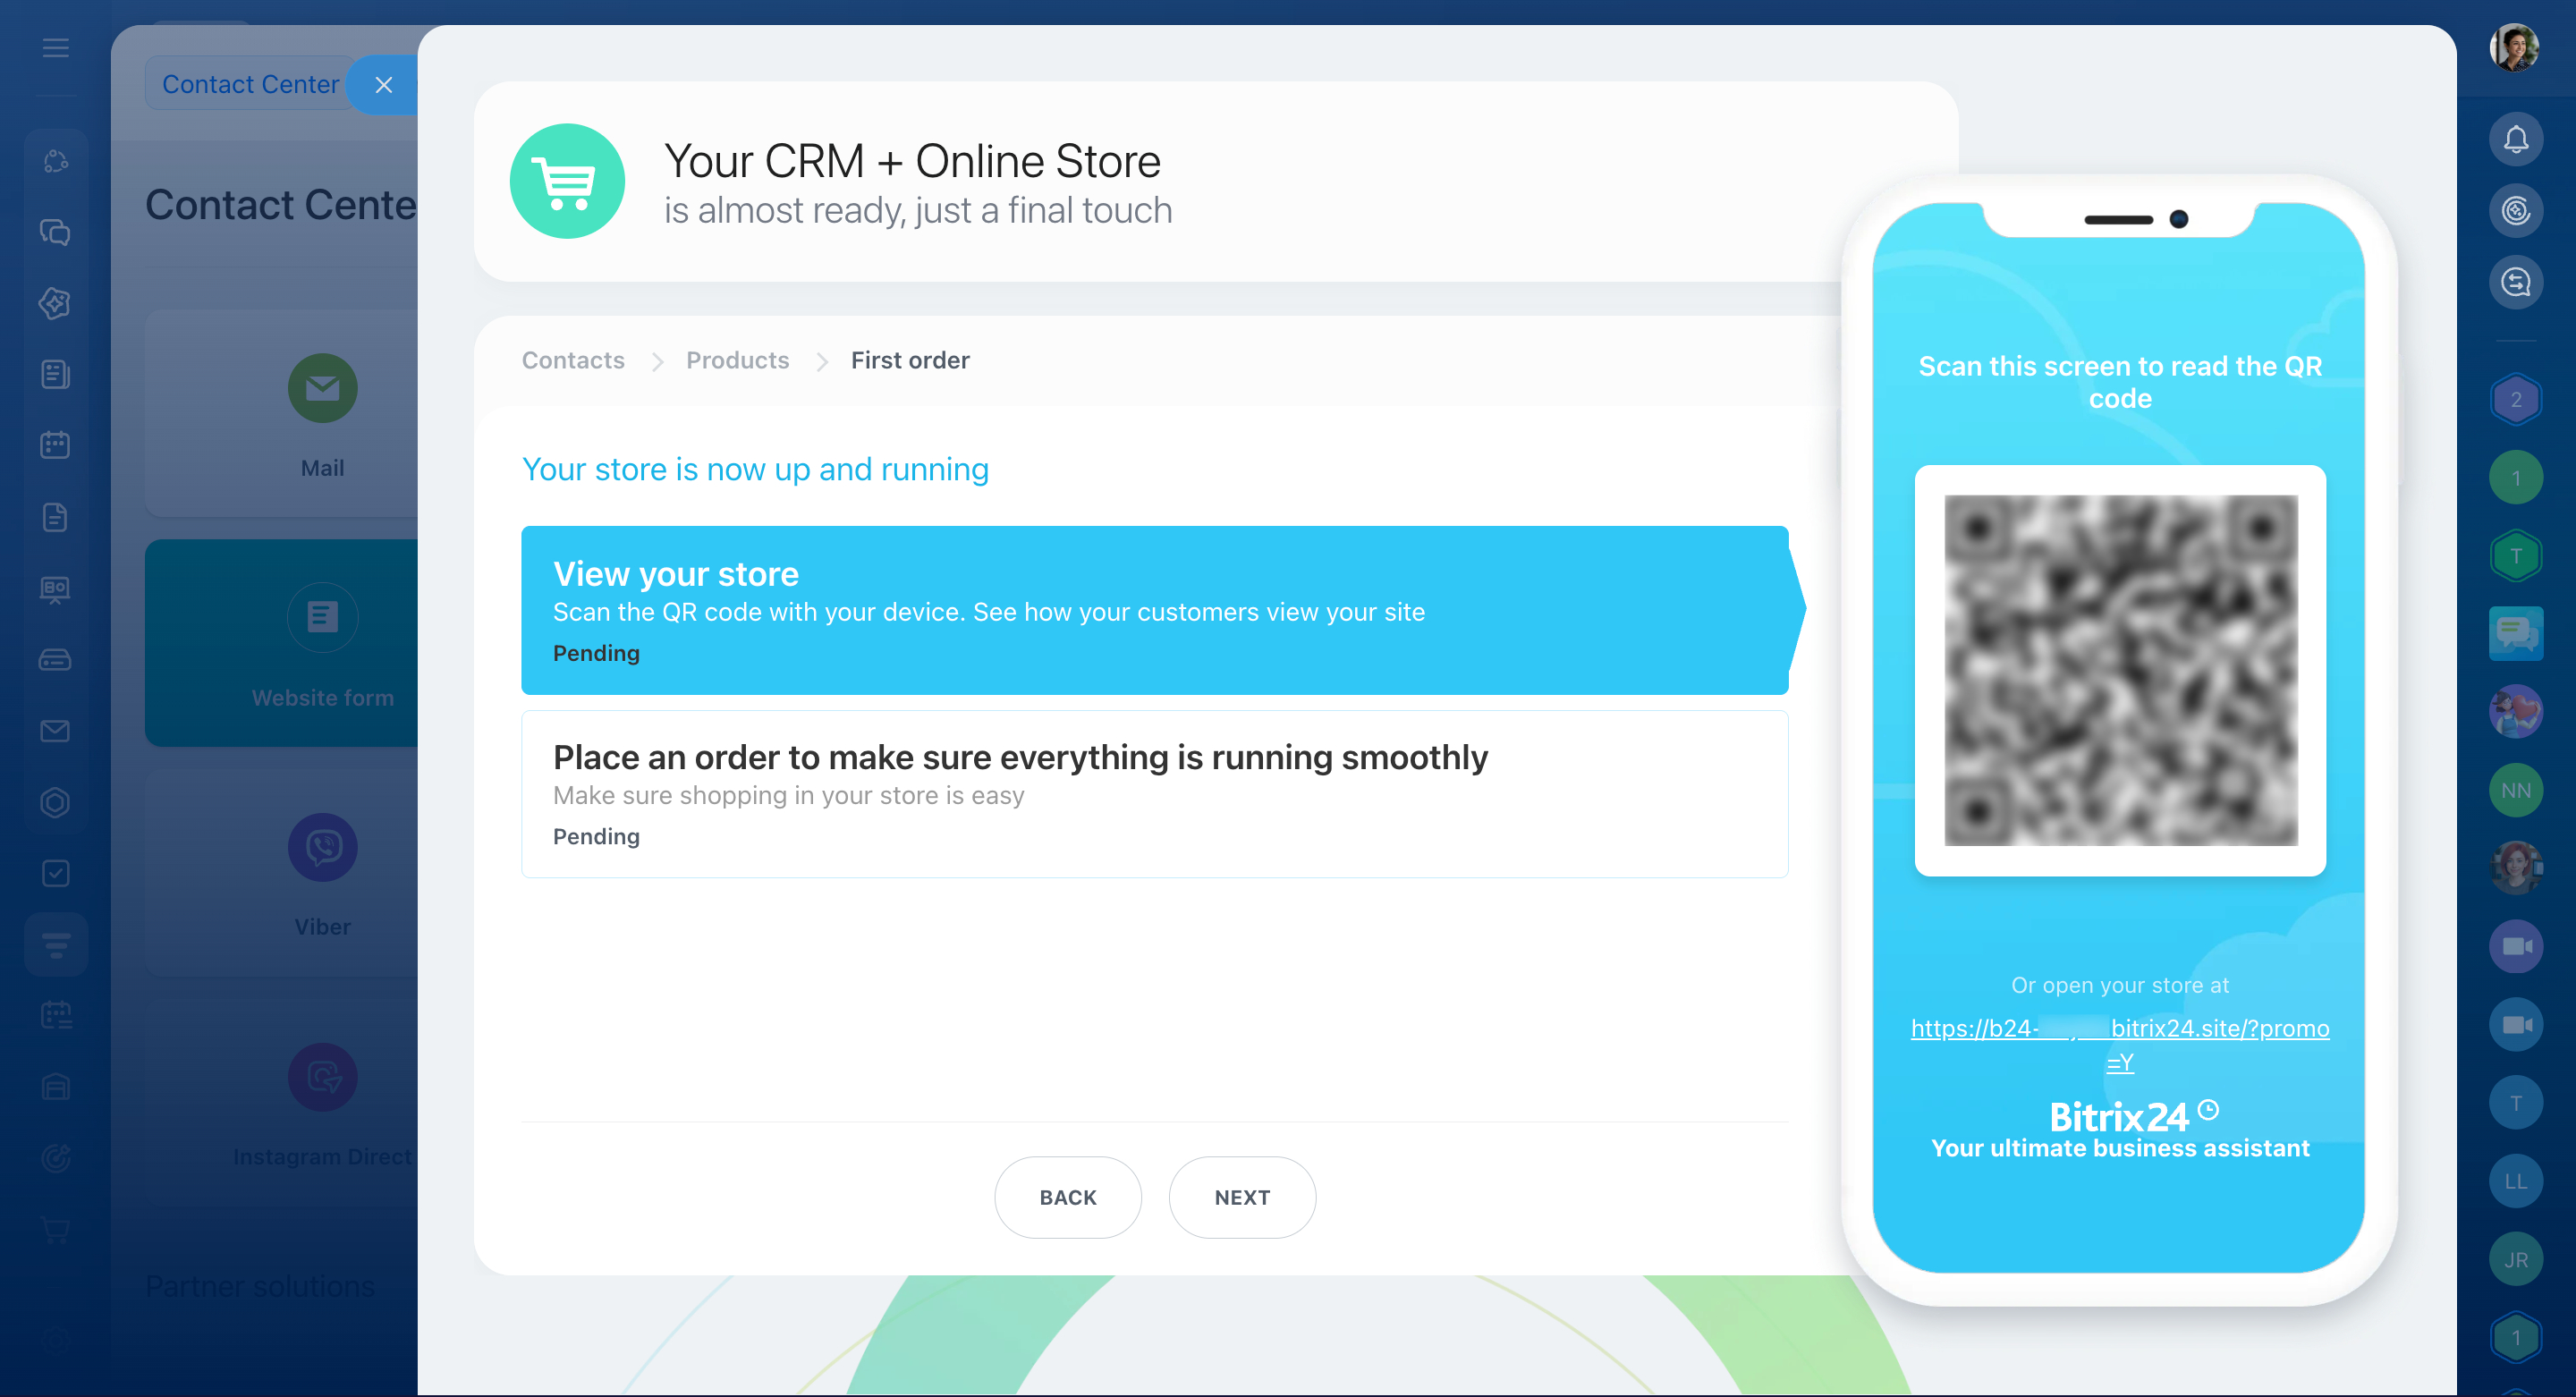
- Test how customers place orders. On your phone:
- Scan the QR code to open the store.
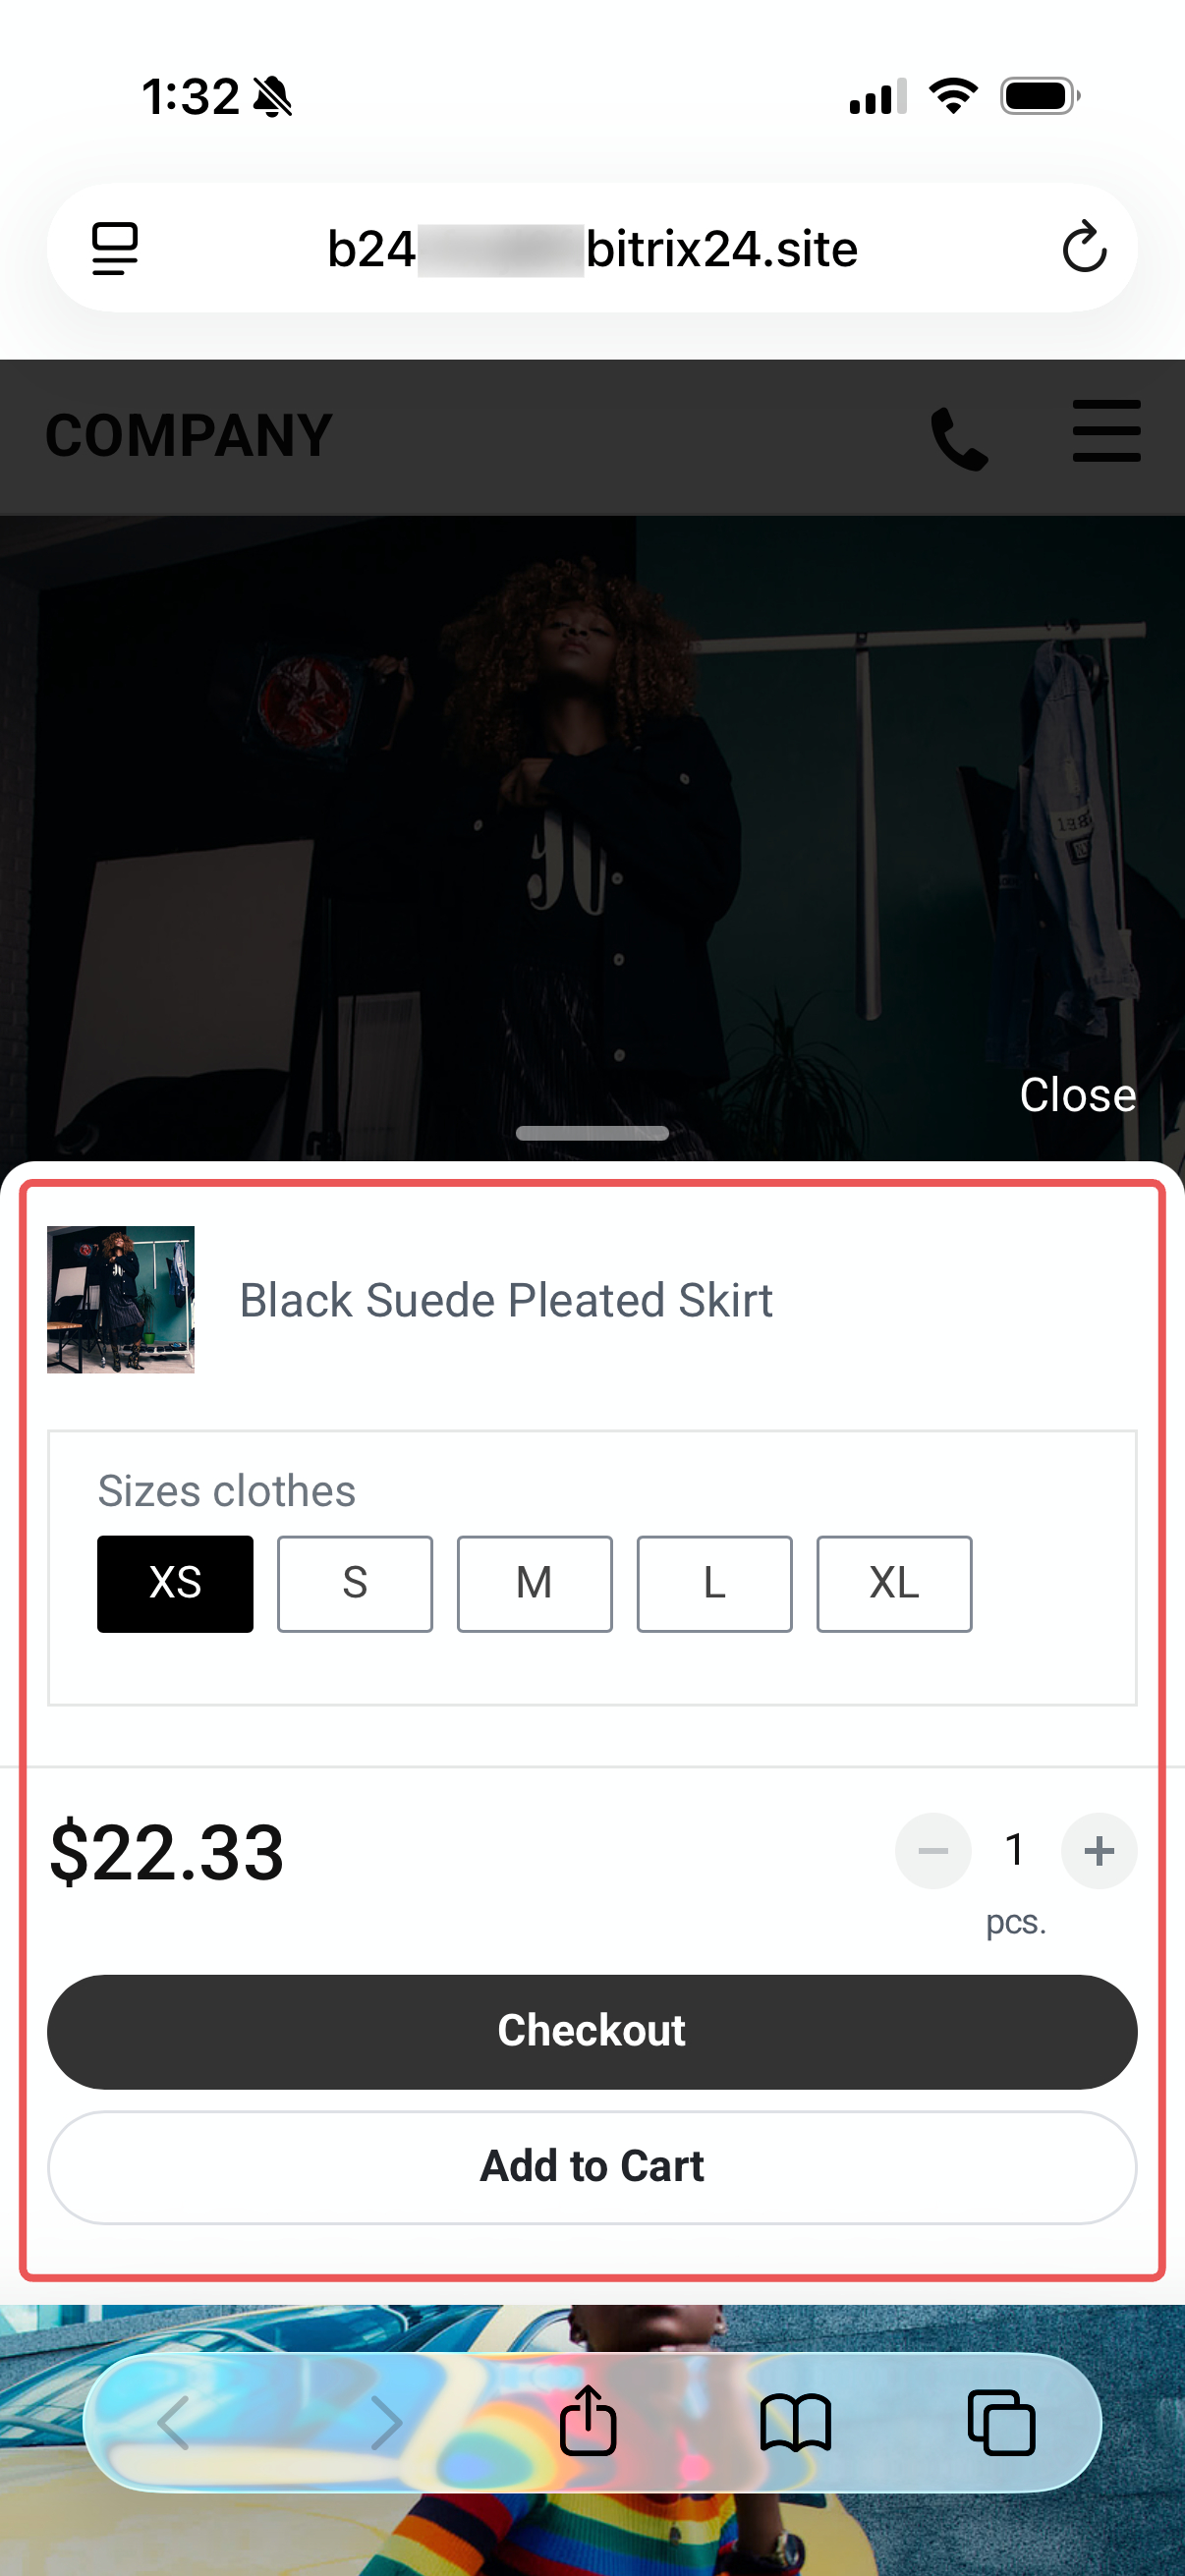
- Add a product to the cart.
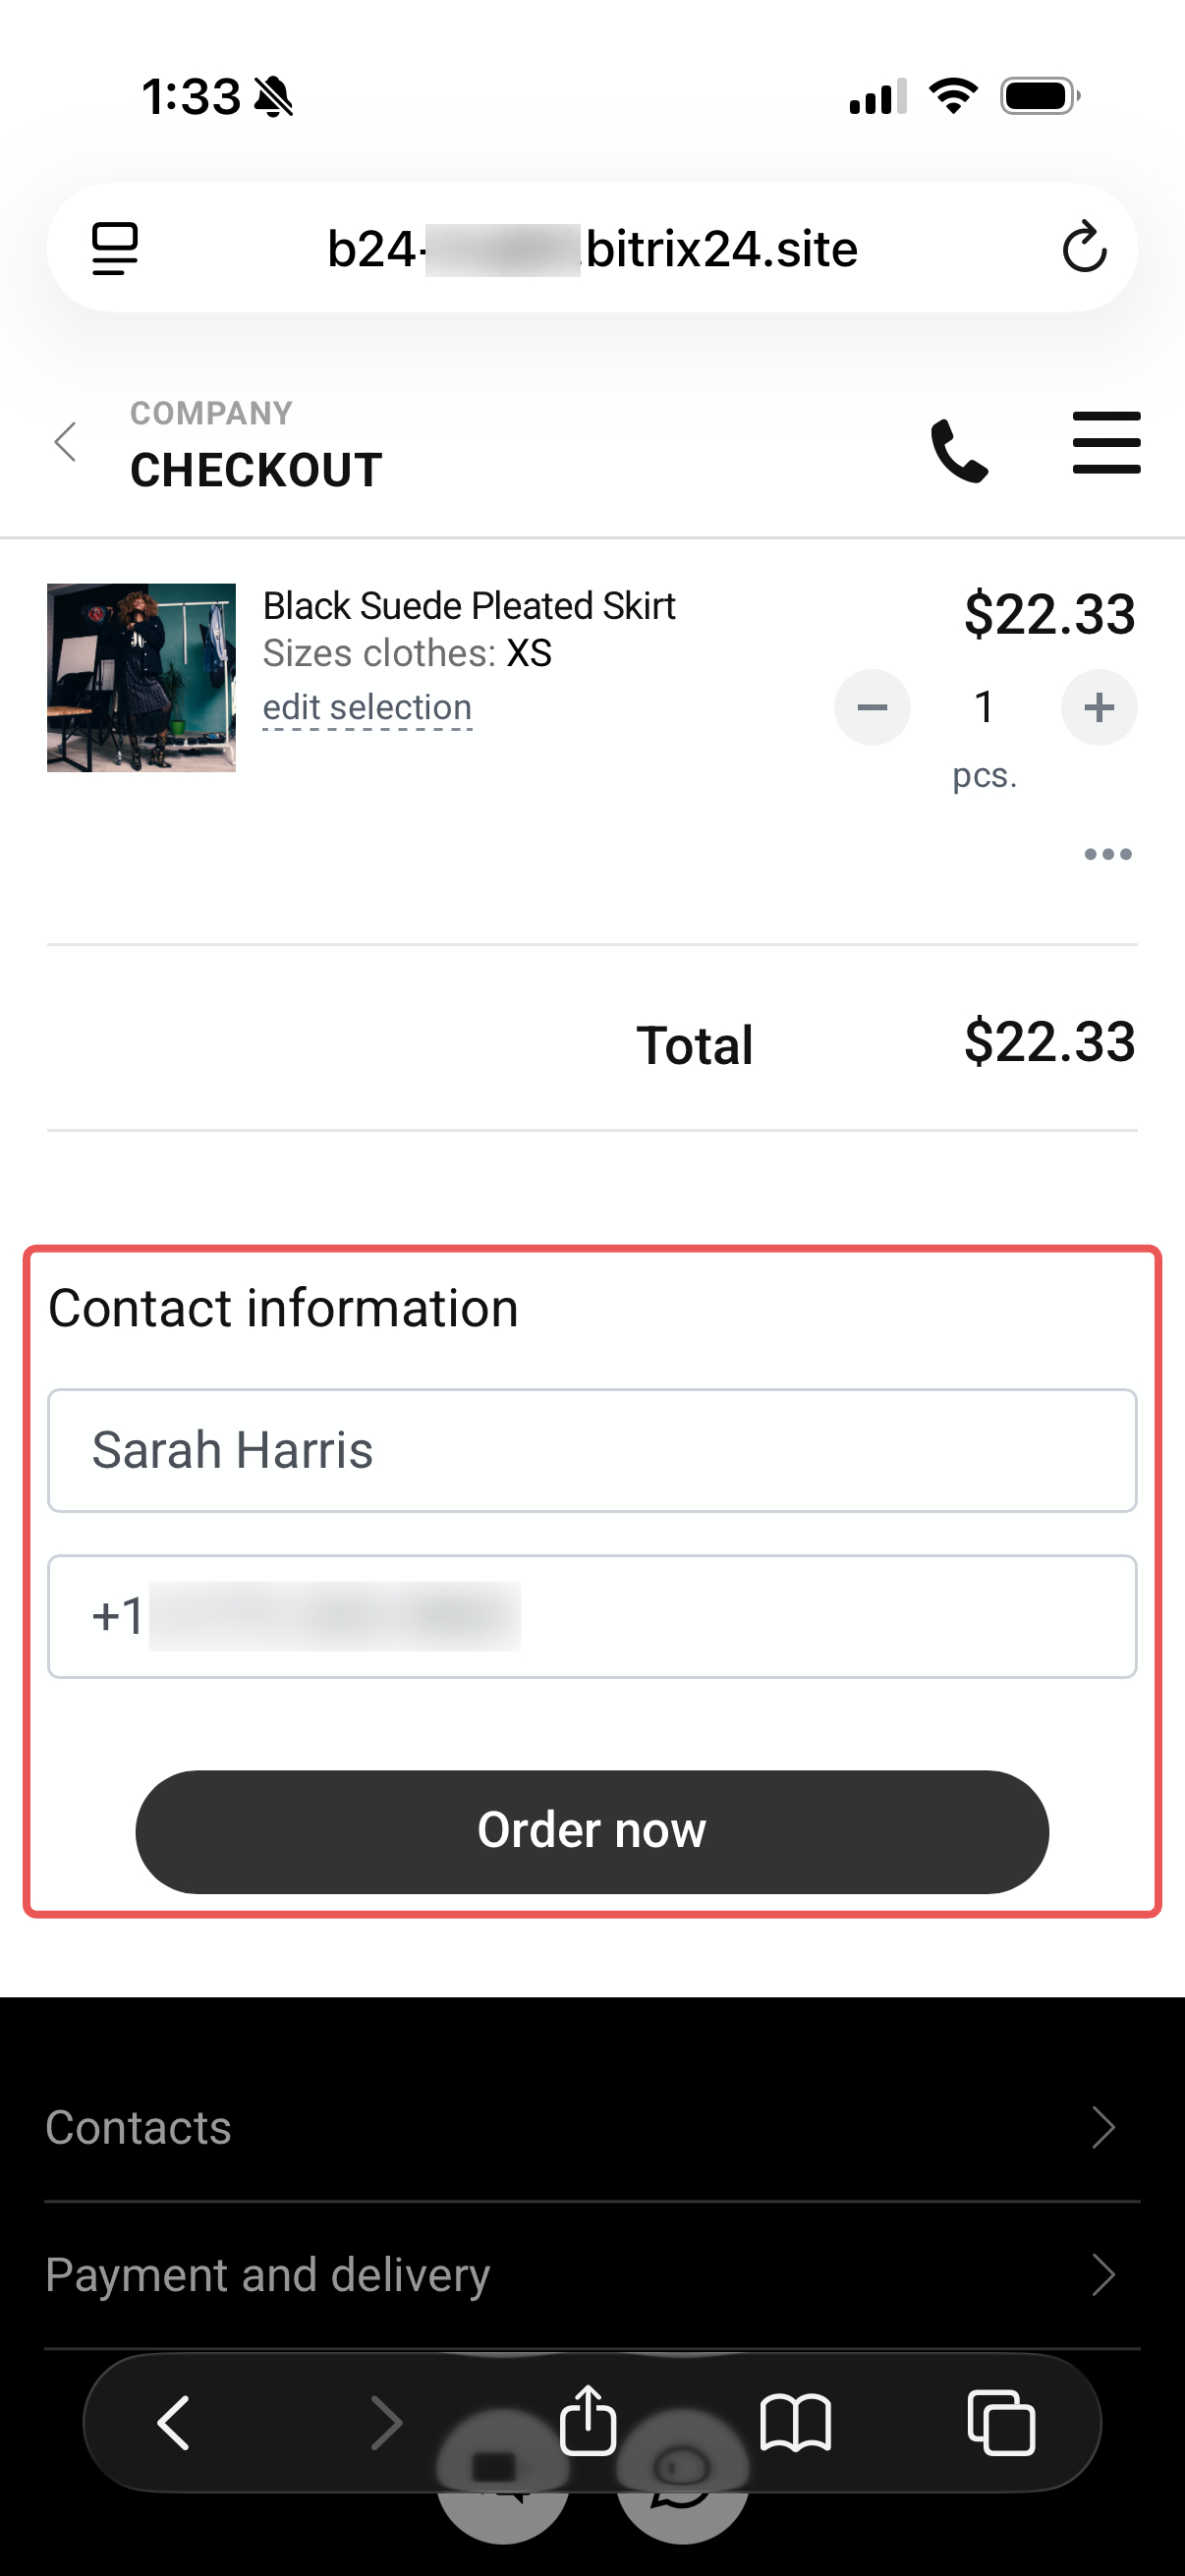
- Complete checkout.
This test lets you check the entire process, from choosing a product to placing an order. After checkout, the customer receives a confirmation text message. Bitrix24 also creates a deal with the customer's details and ordered products.
Return to Bitrix24 and click Continue.
Your new store contains sample products. Remove them and add your own catalog before you start selling.
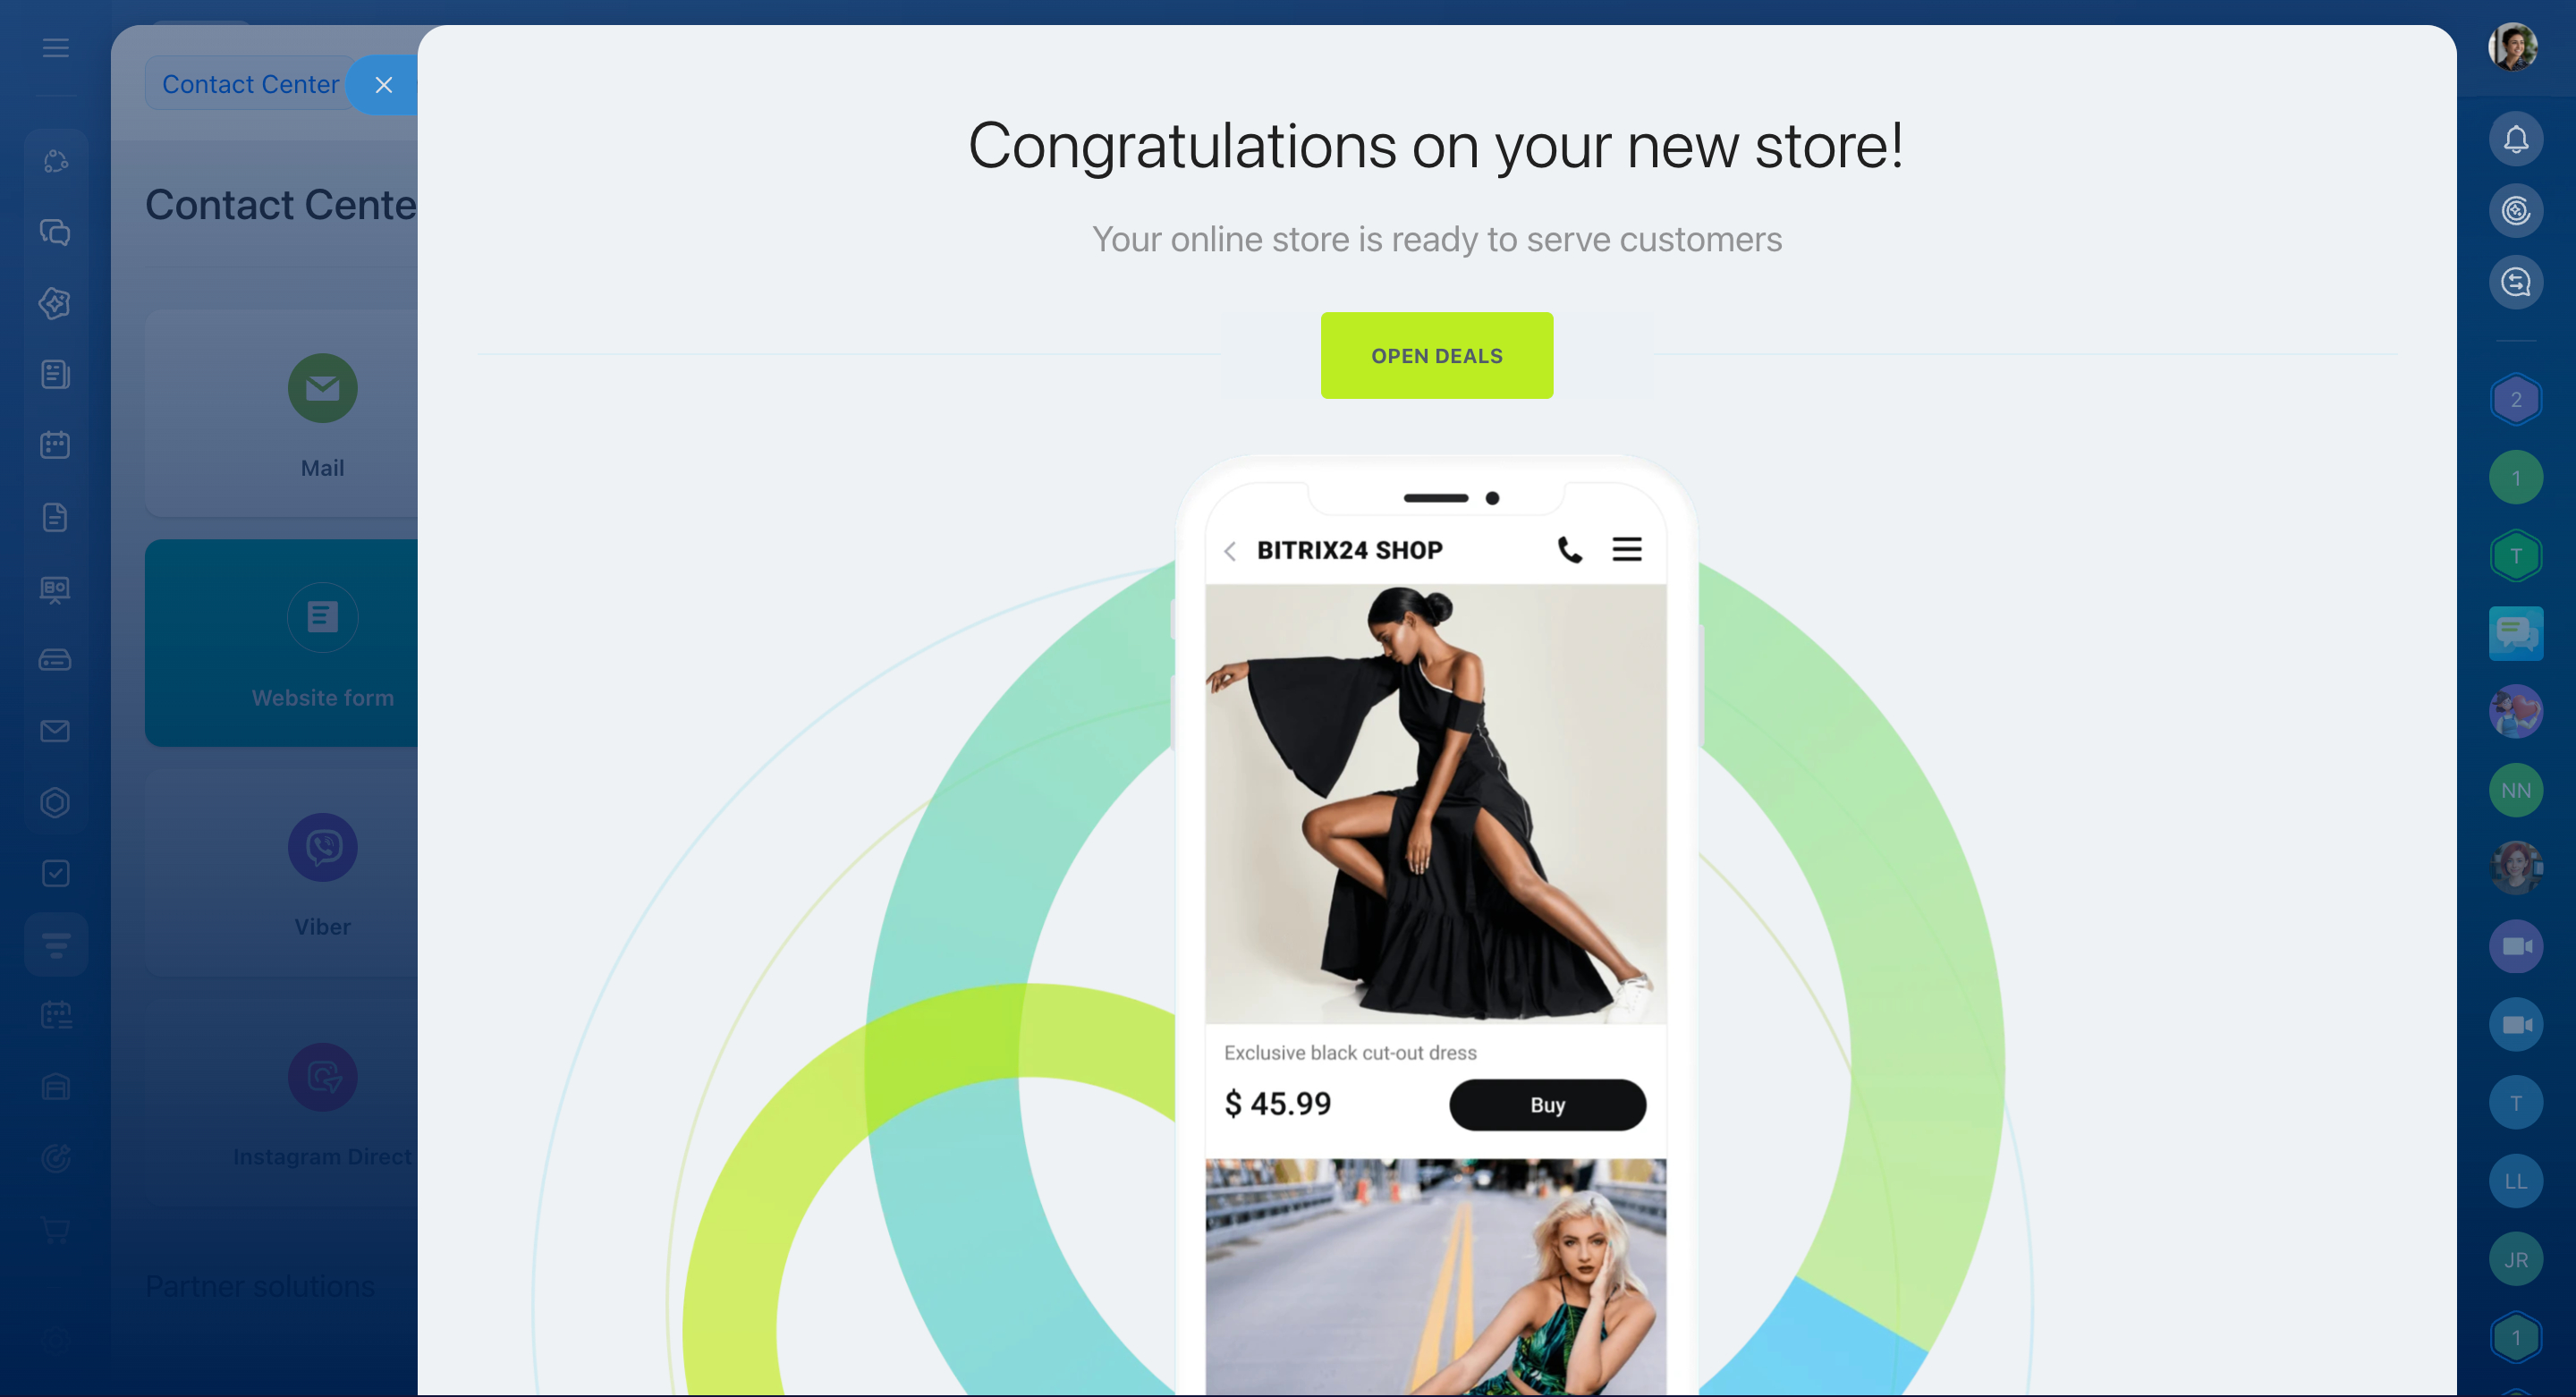
Set up a CRM + Online store
Once you've created the store, you can customize it. For example, connect your own domain, edit pages, or change the design.
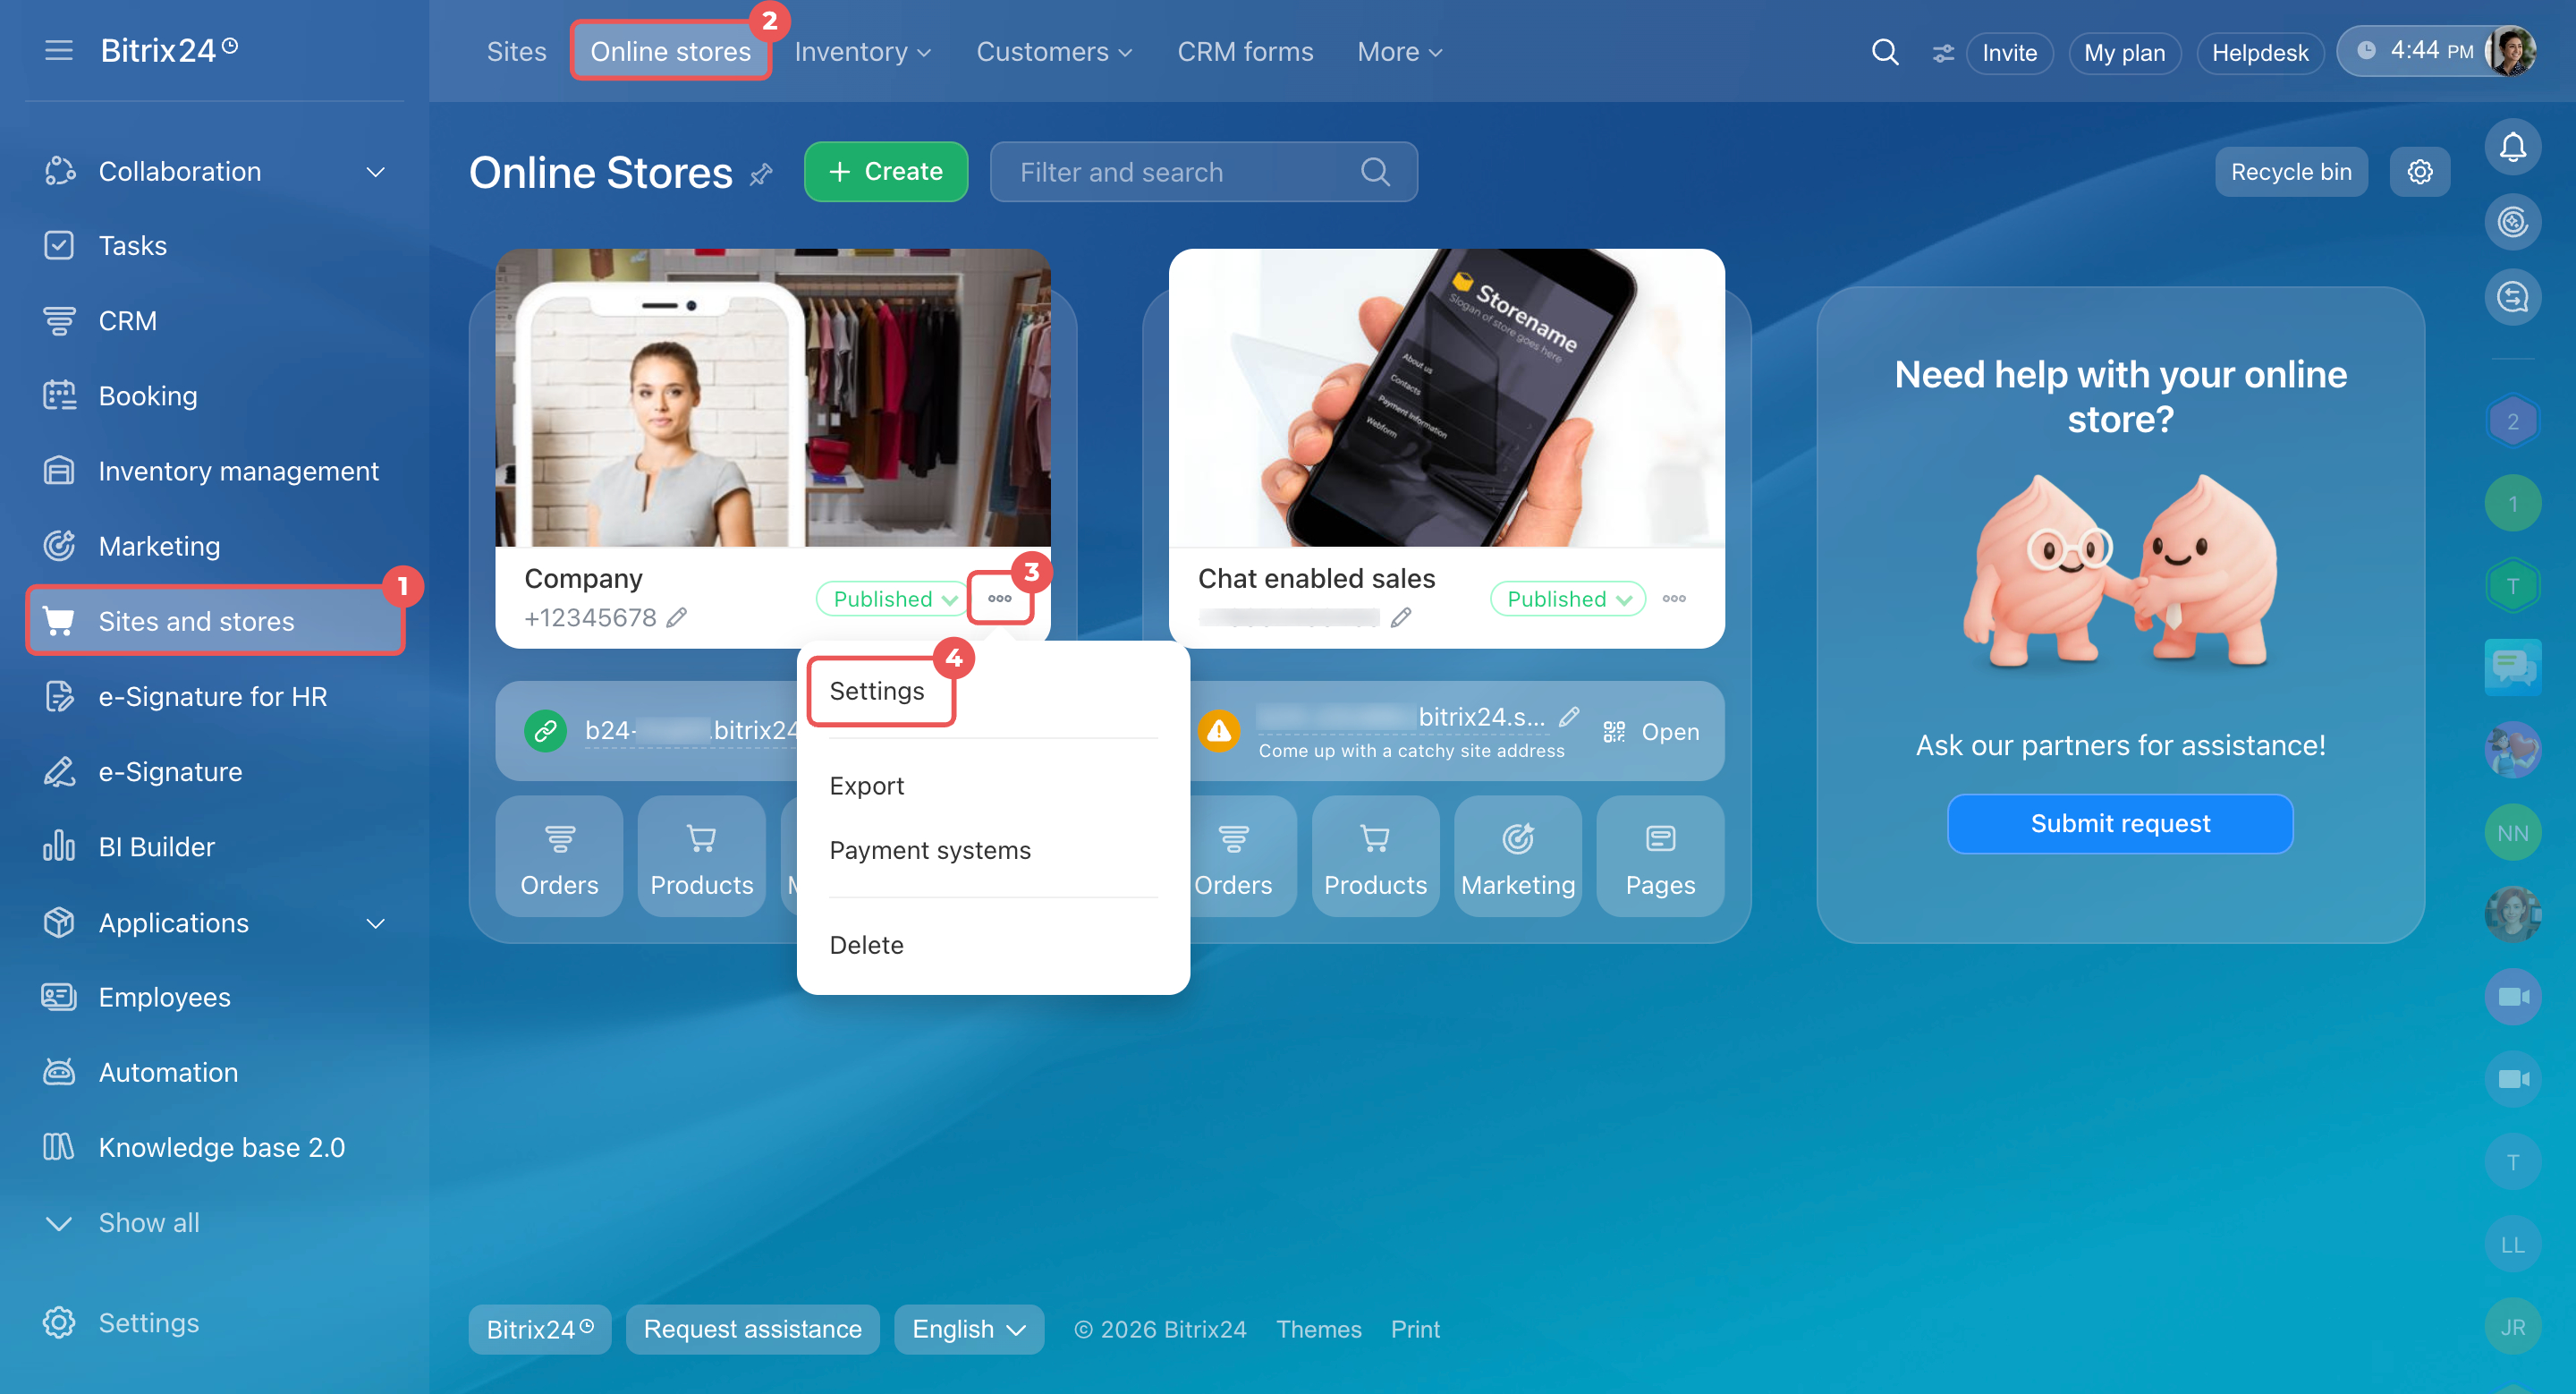
- Go to Sites and stores > Online stores.
- Find your store and click Three dots (...) > Settings.
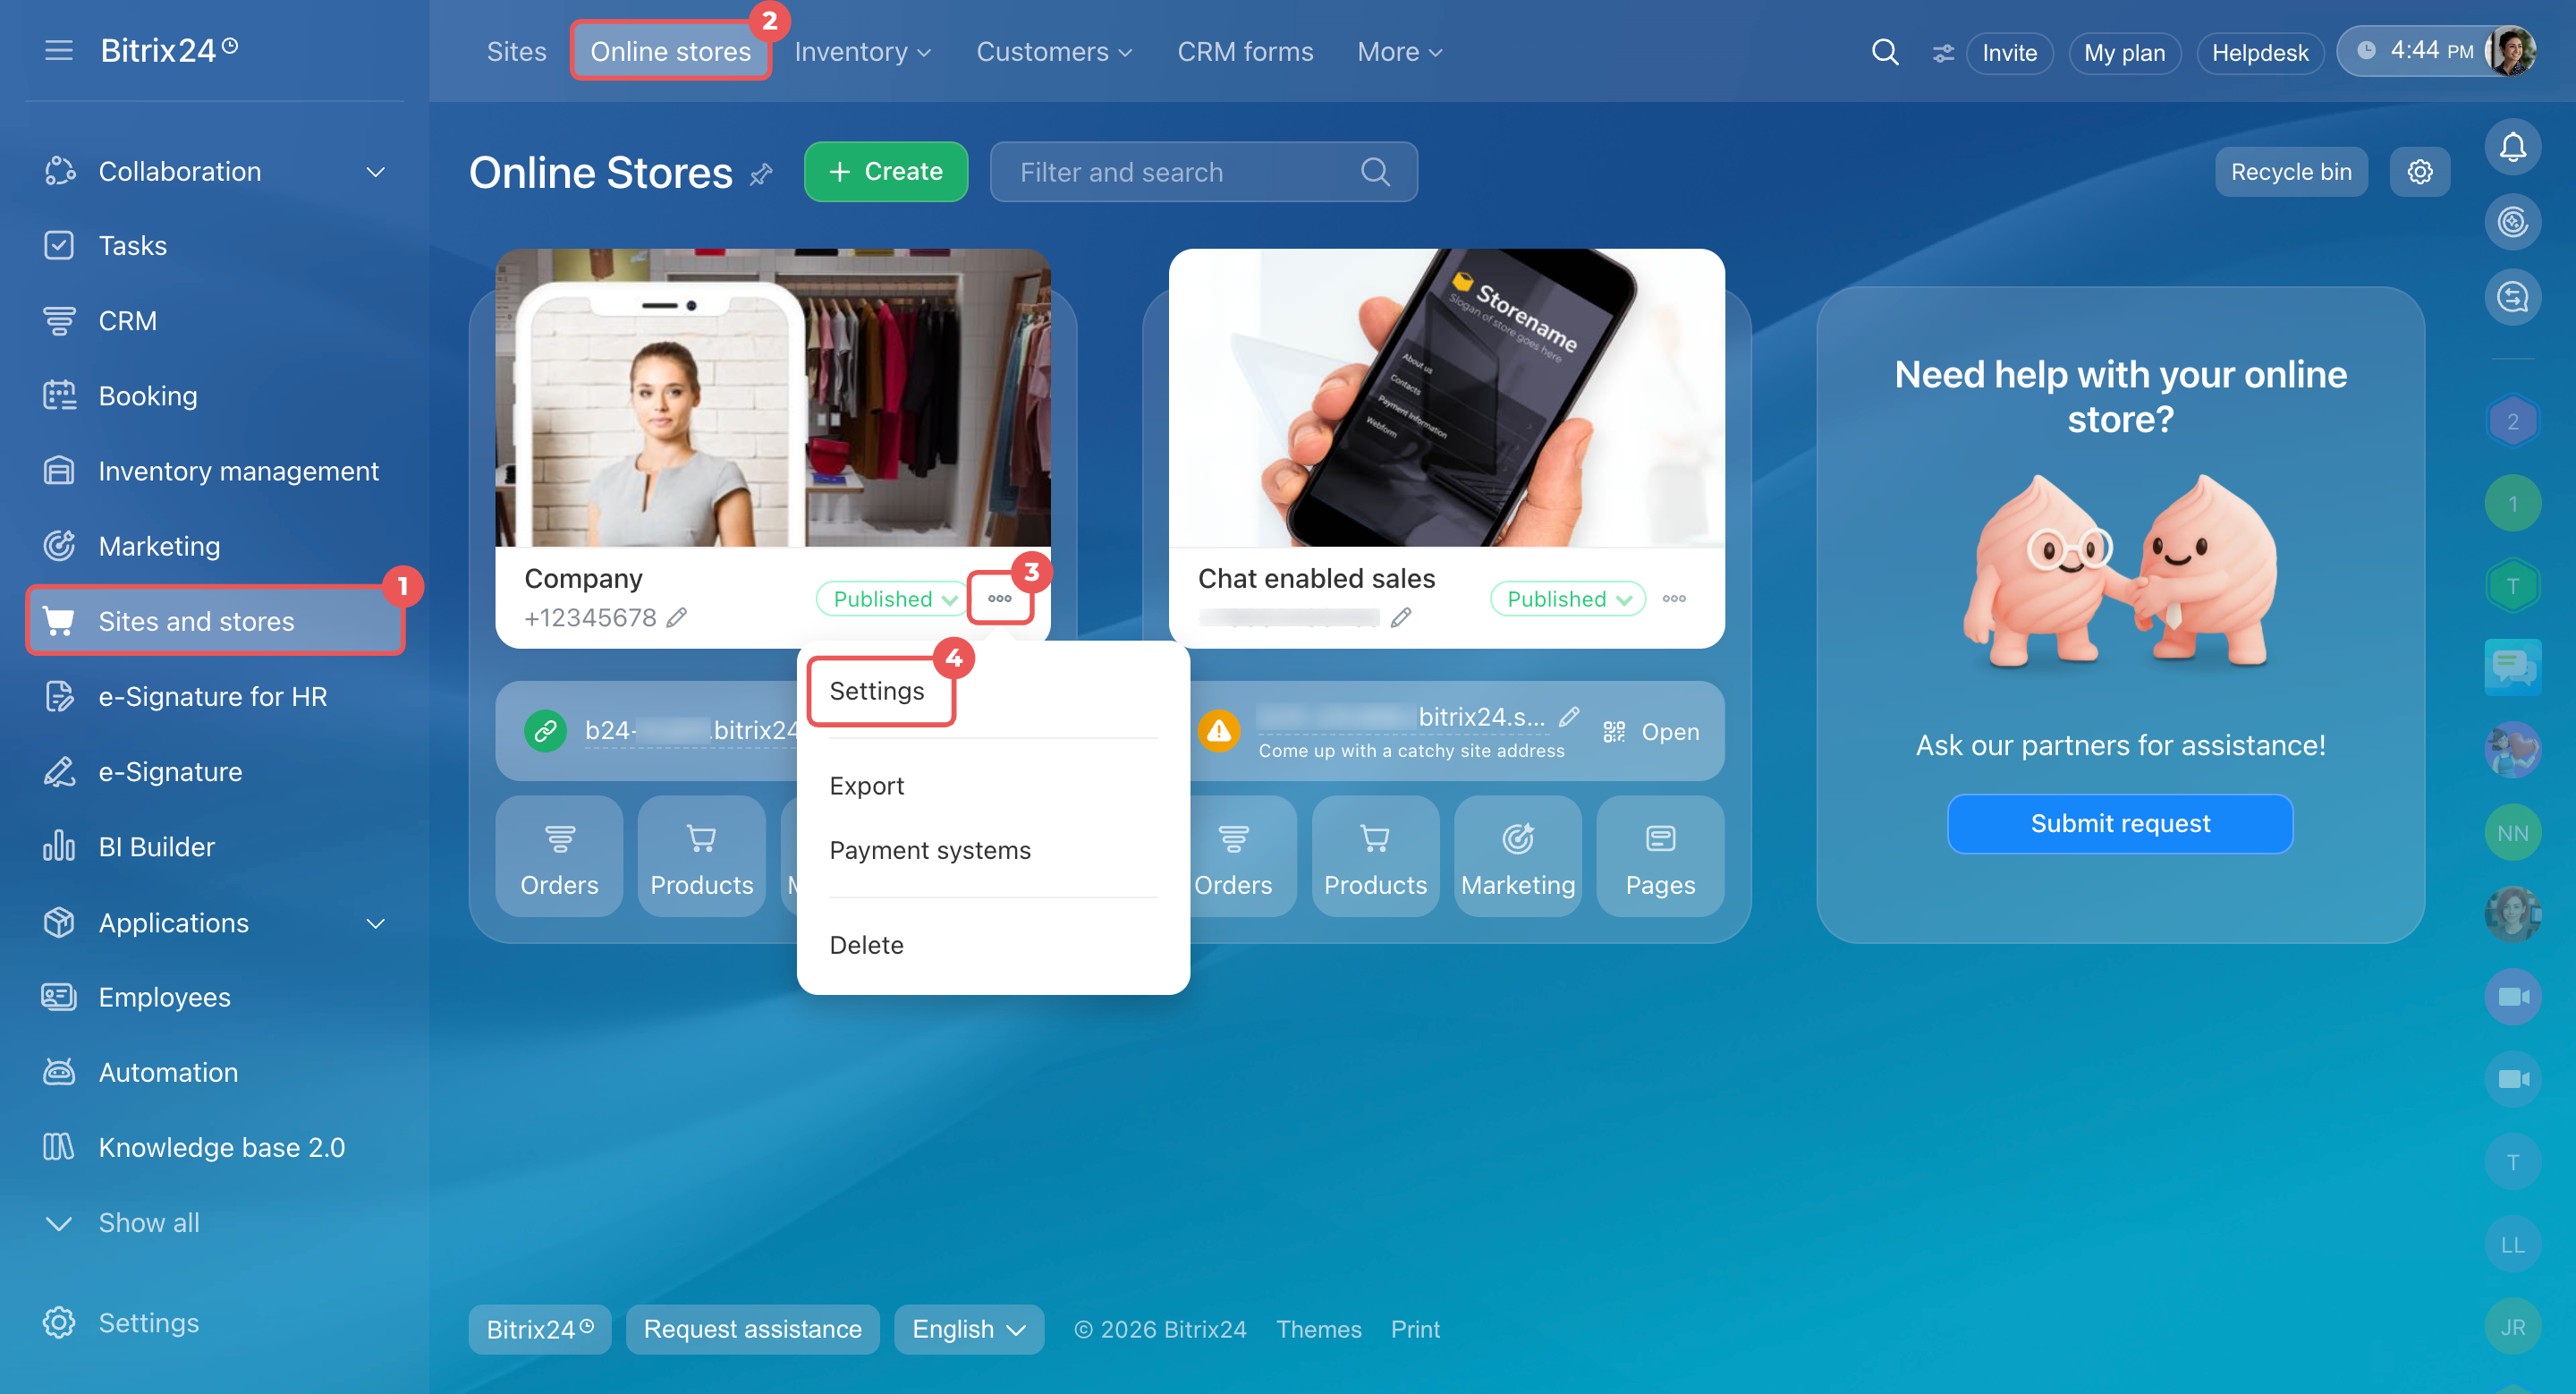
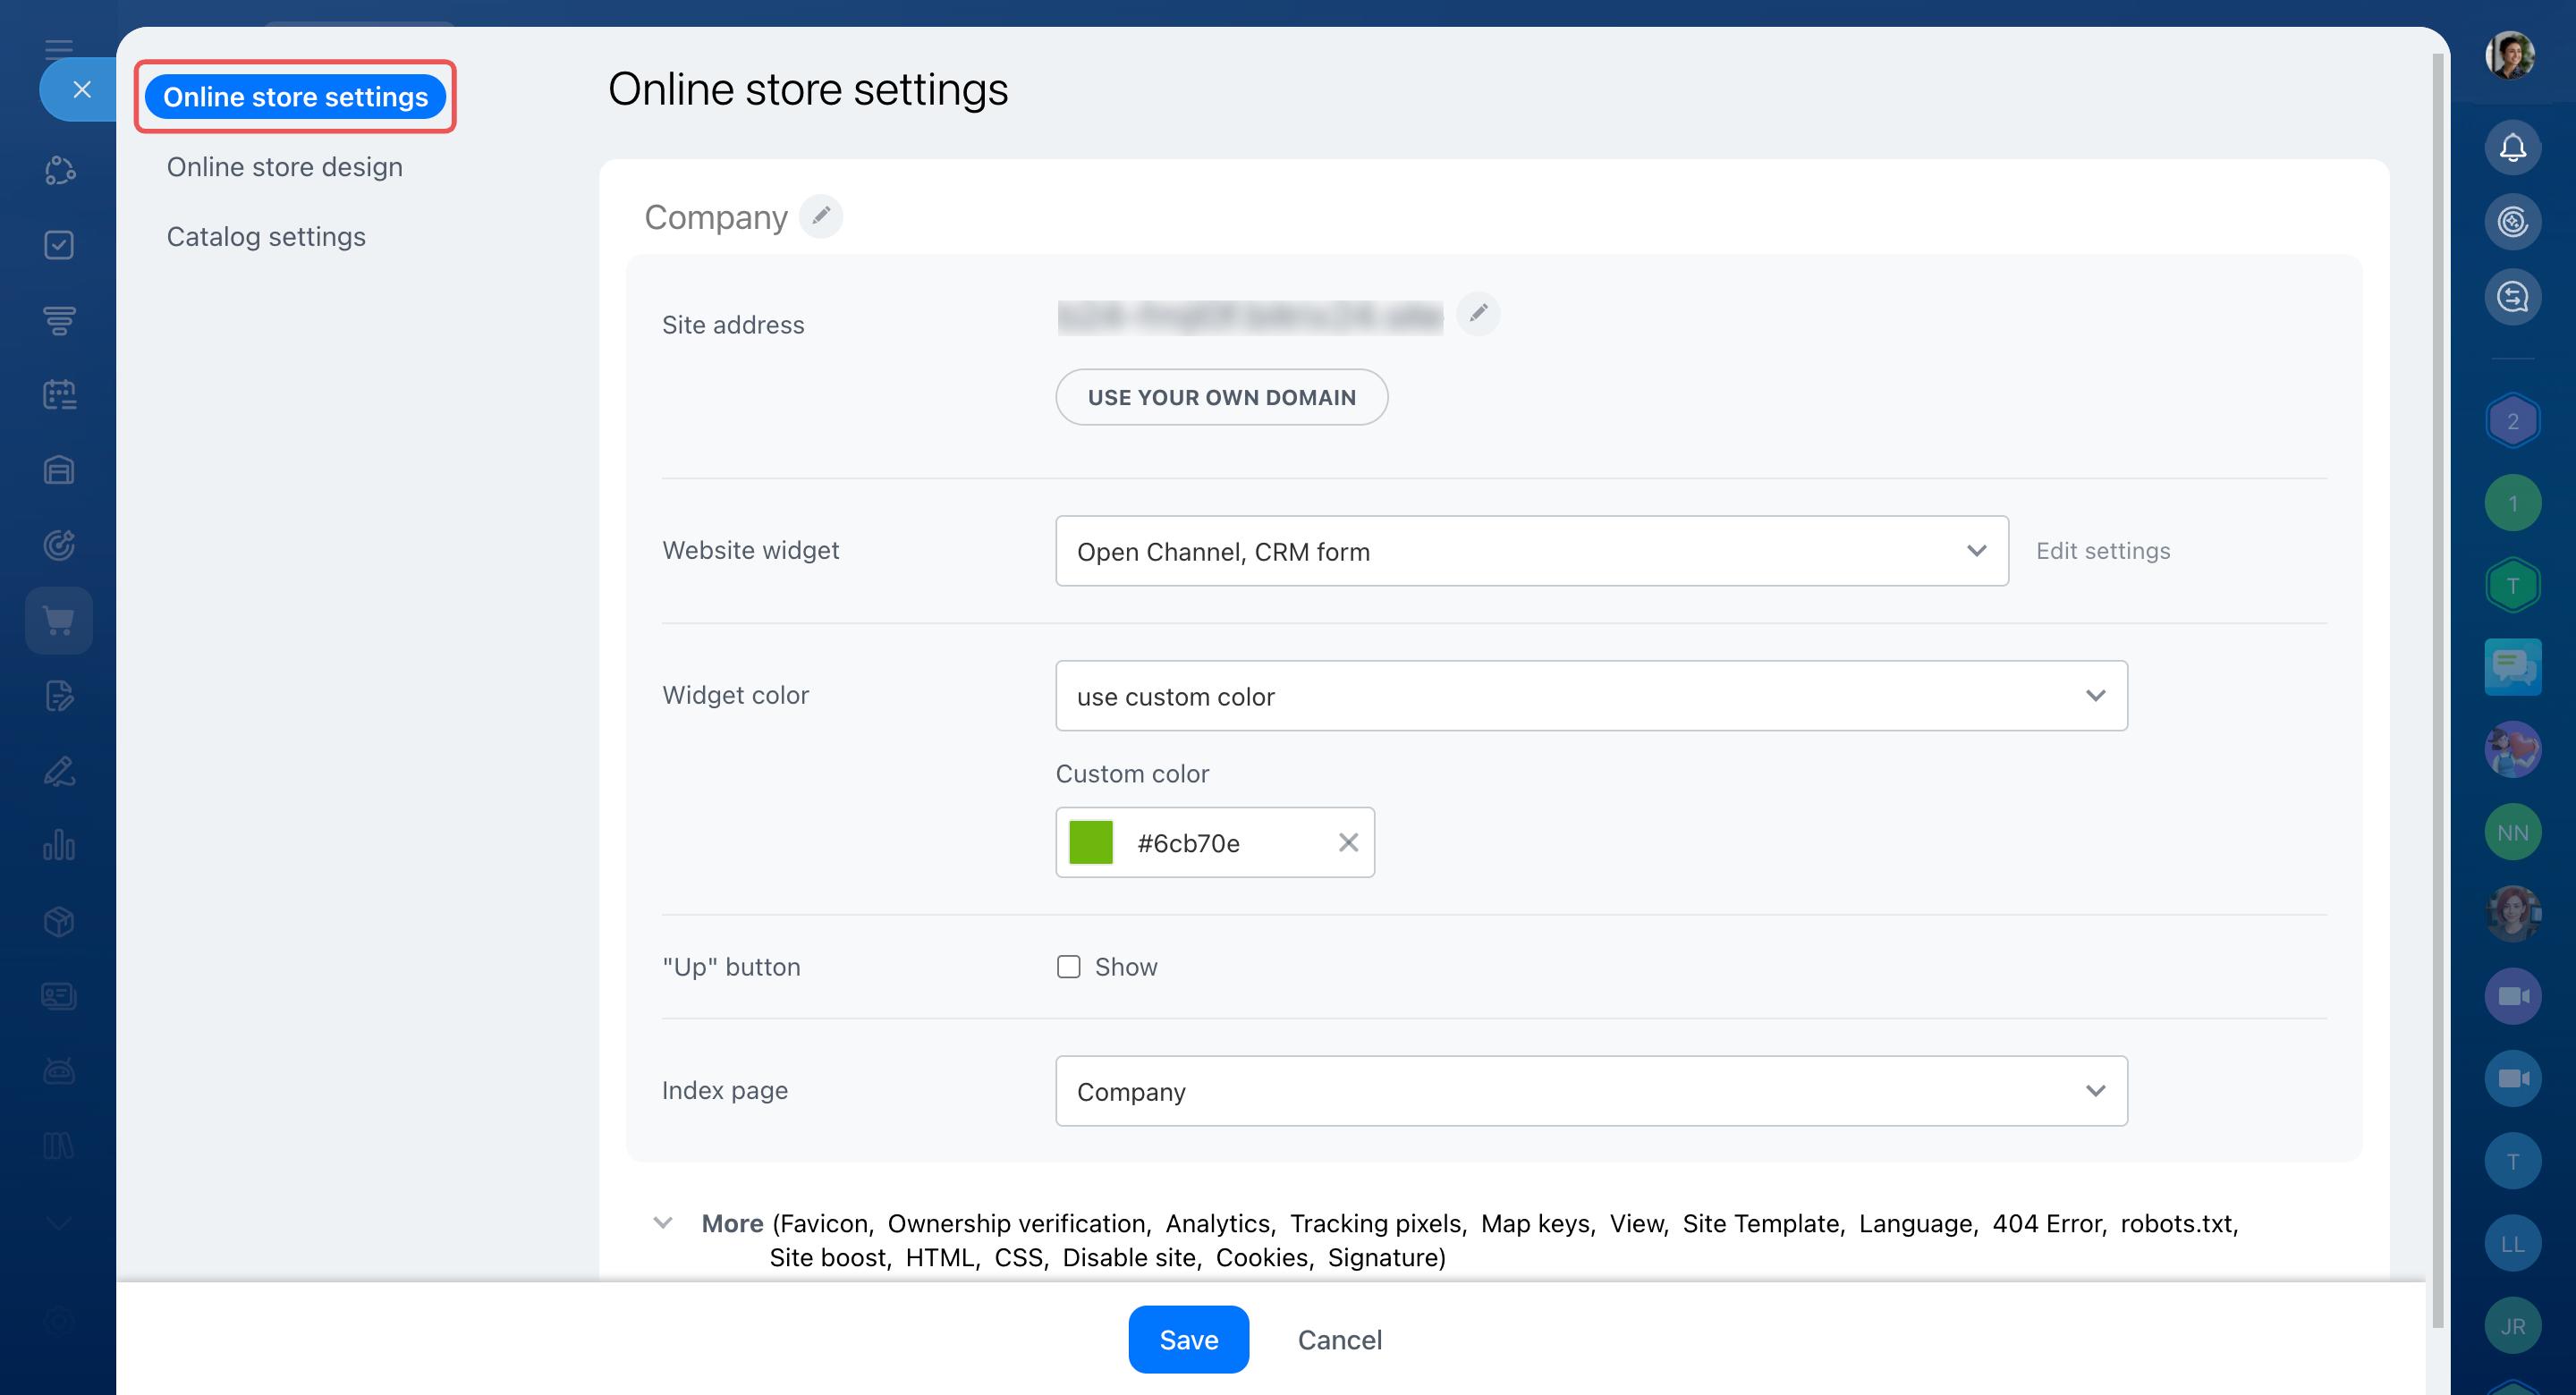
Online store settings. Use this tab to change the main store settings:
- Site address — connect your own domain instead of using the default Bitrix24 subdomain.
- Index page — choose which page customers see first, such as the catalog or a page with special offers.
- Website widget — add a widget so customers can chat with you or submit inquiries.
Site and page settings
Change Bitrix24 site and store subdomain
Website widget
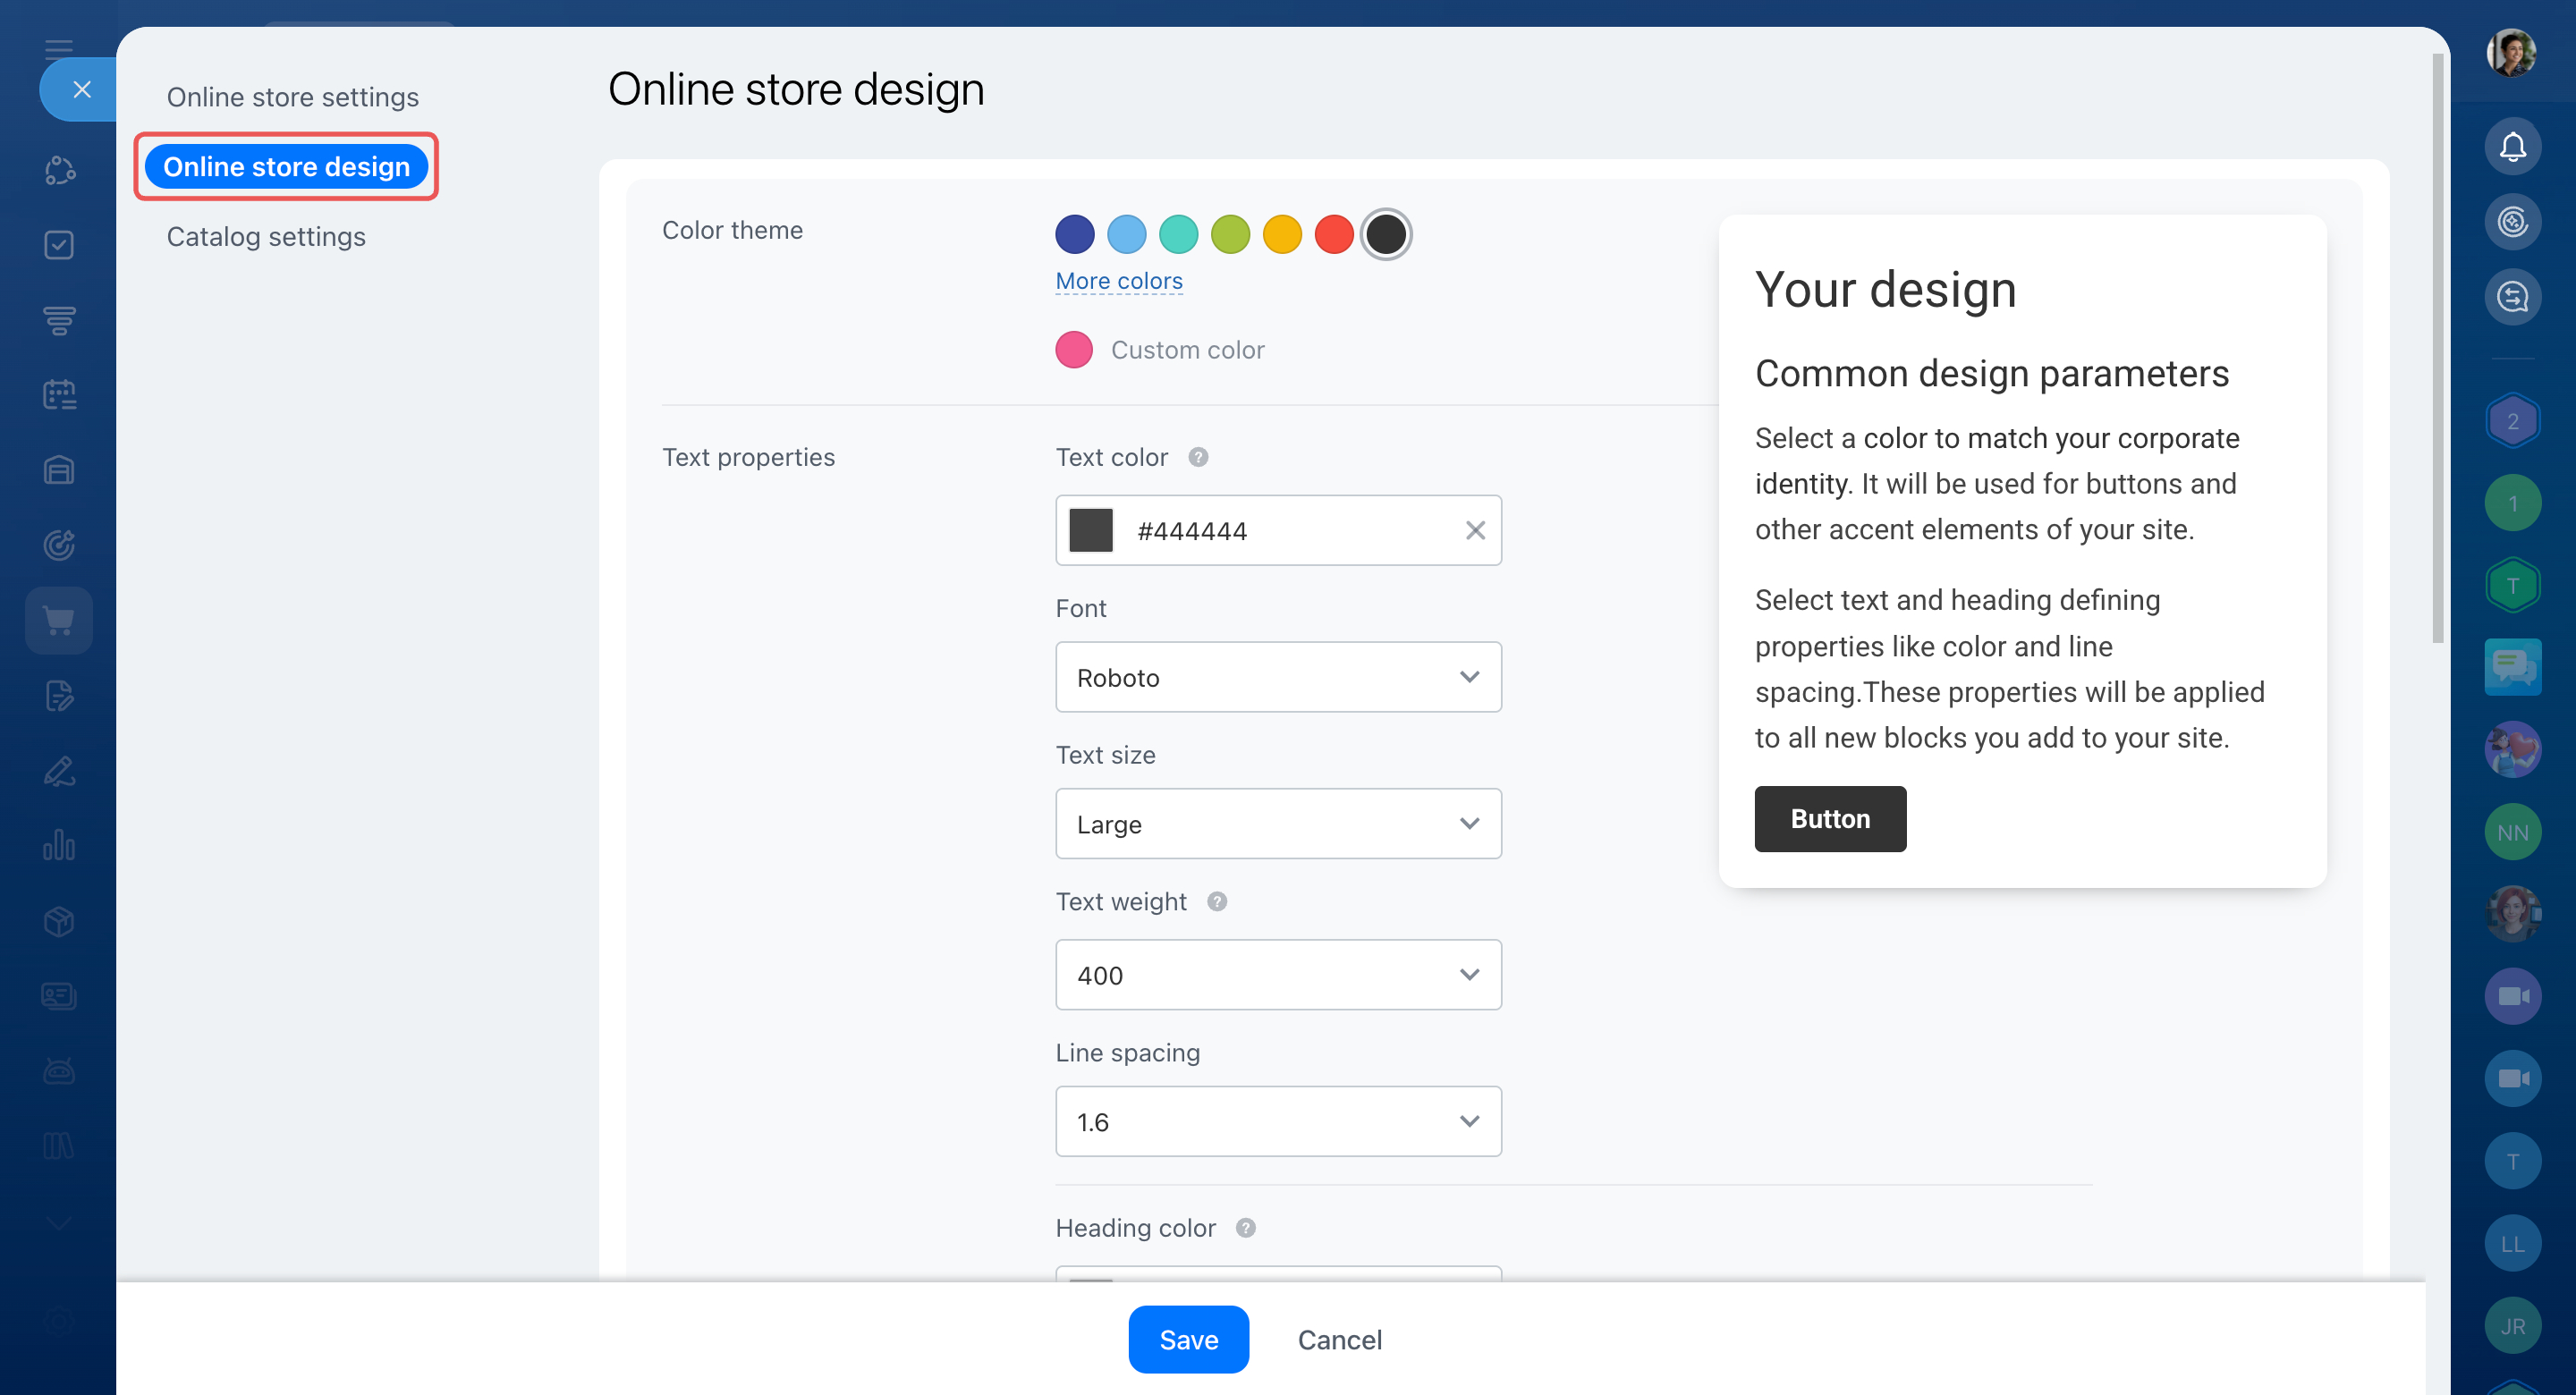
Online store design. Use this tab to customize how your store looks:
- Apply your brand colors and fonts.
- Change backgrounds and transitions between sections.
Change design in Sites and Stores
Set up the product catalog in an online store
The catalog is where customers browse and choose products. You can select which products to show and customize how they appear.
- Go to Sites and stores > Online stores.
- Find your store and click Three dots (...) > Settings.
- Open the Catalog settings tab.
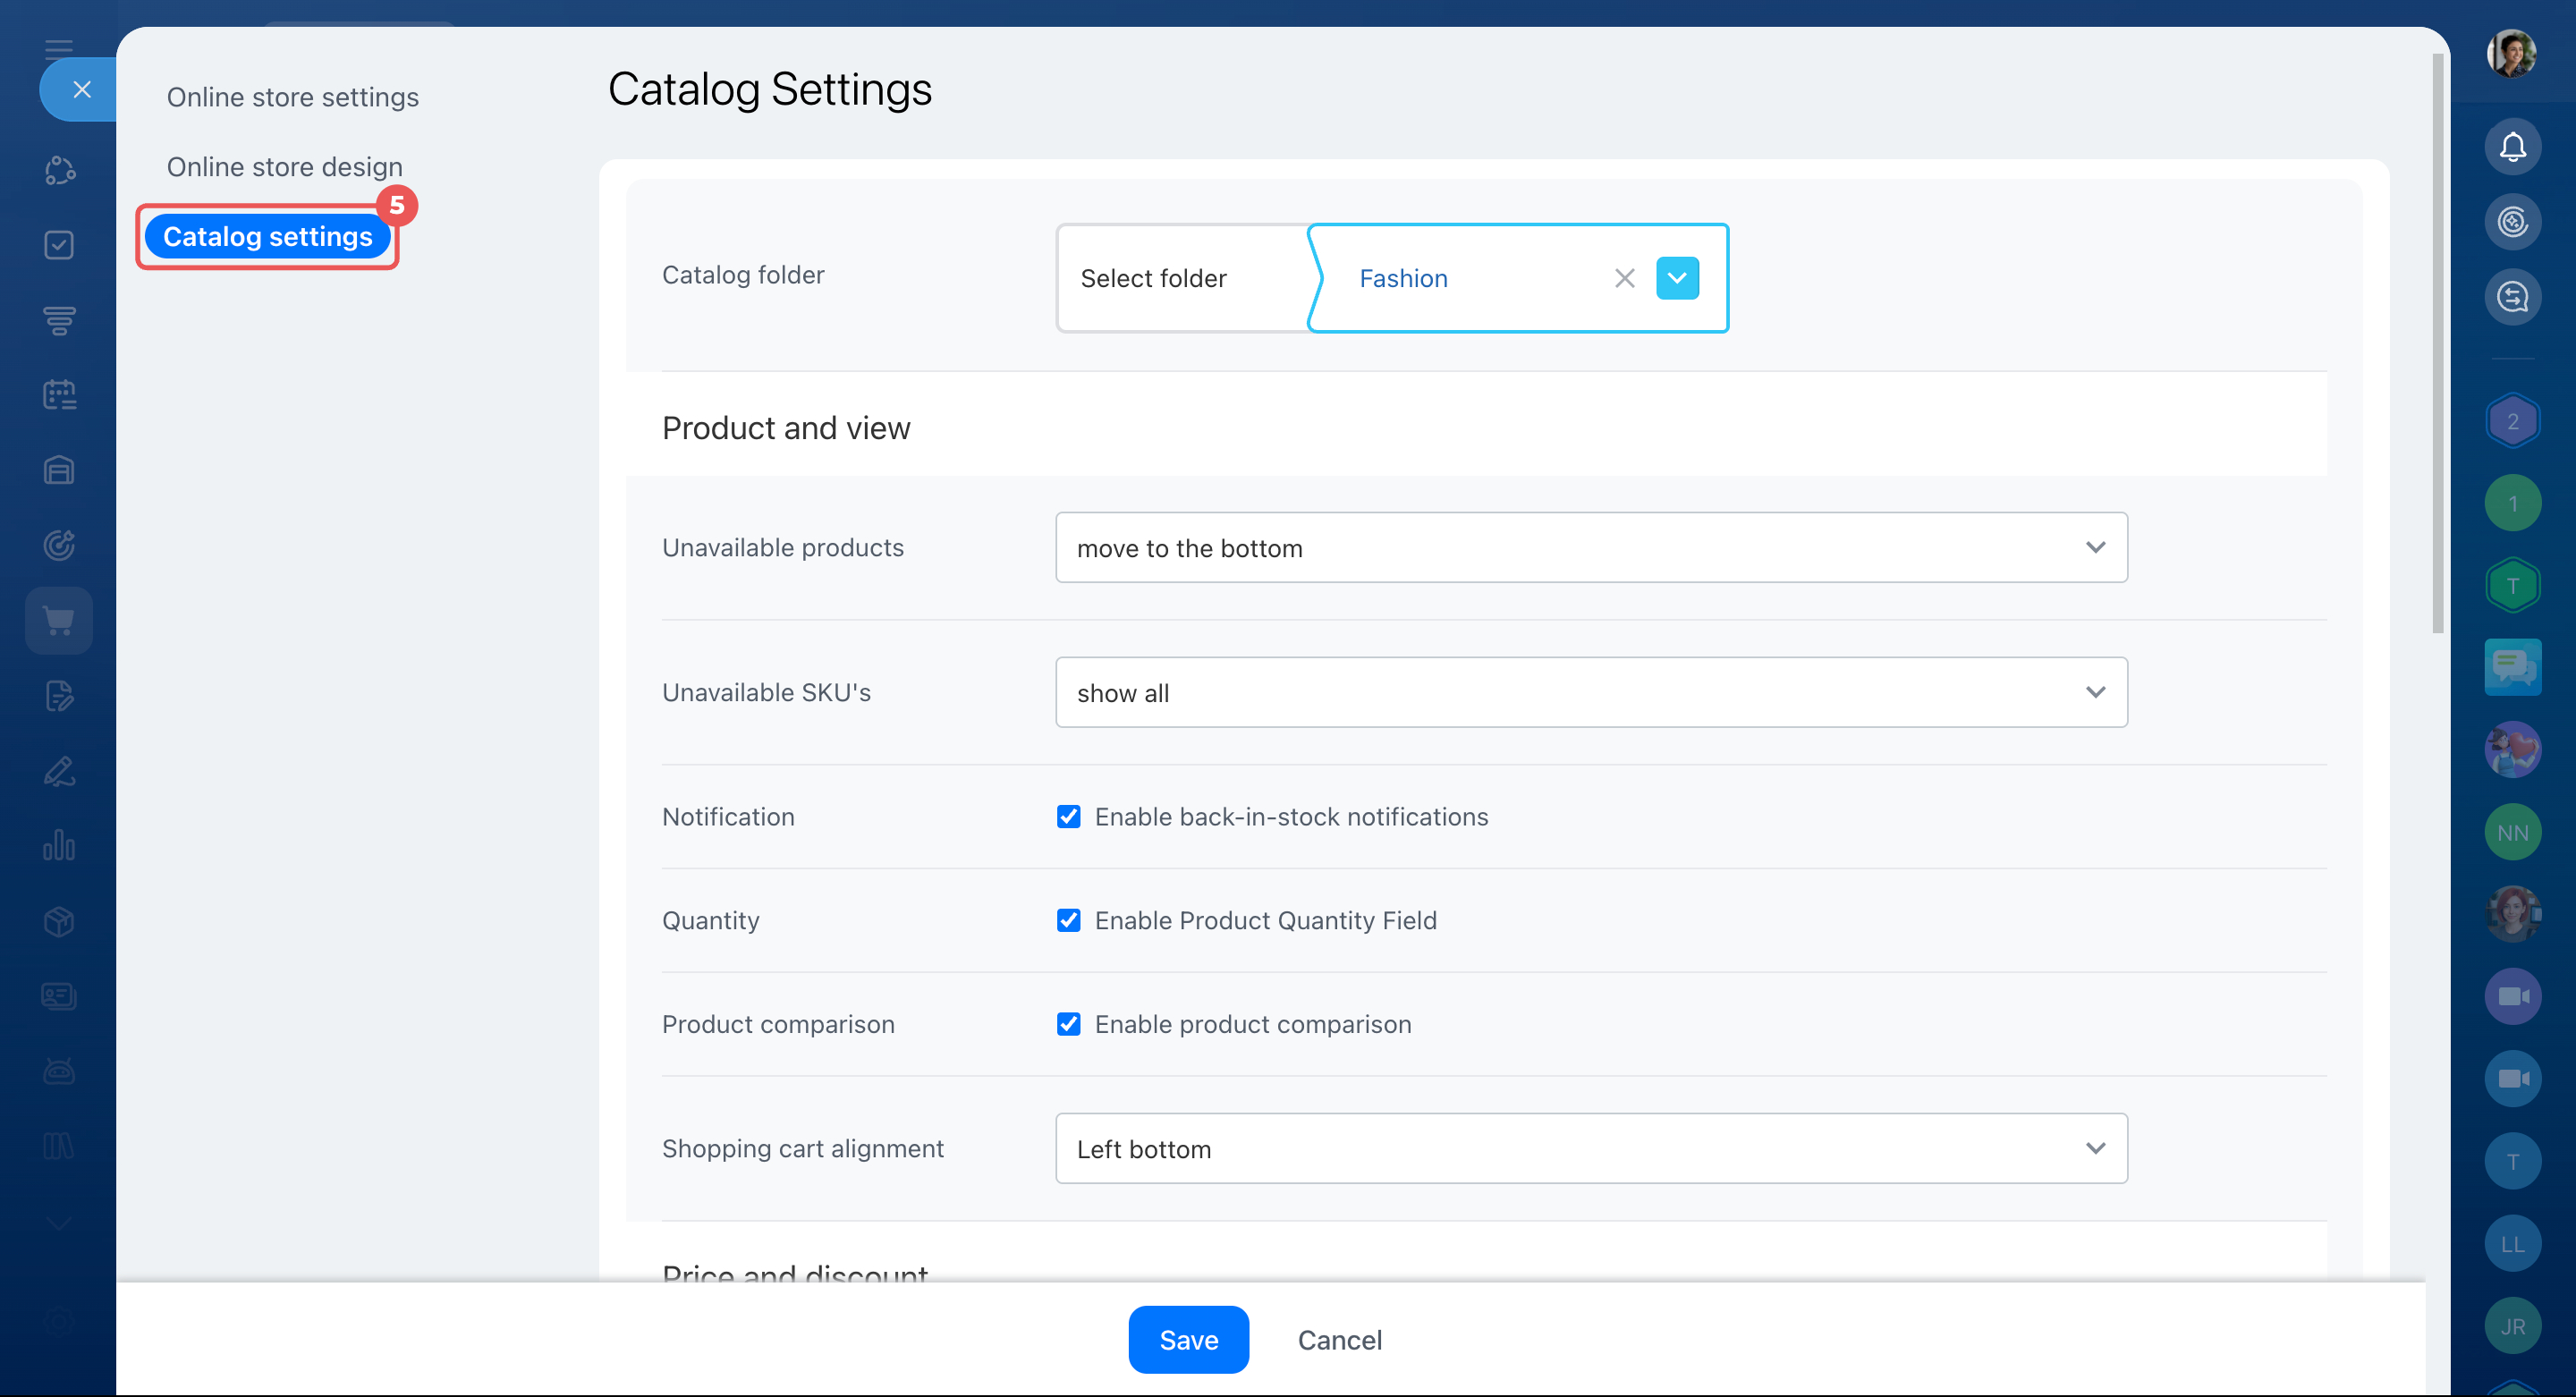
Catalog folder. Choose which part of your product catalog to display in the store.
Create and configure product catalog
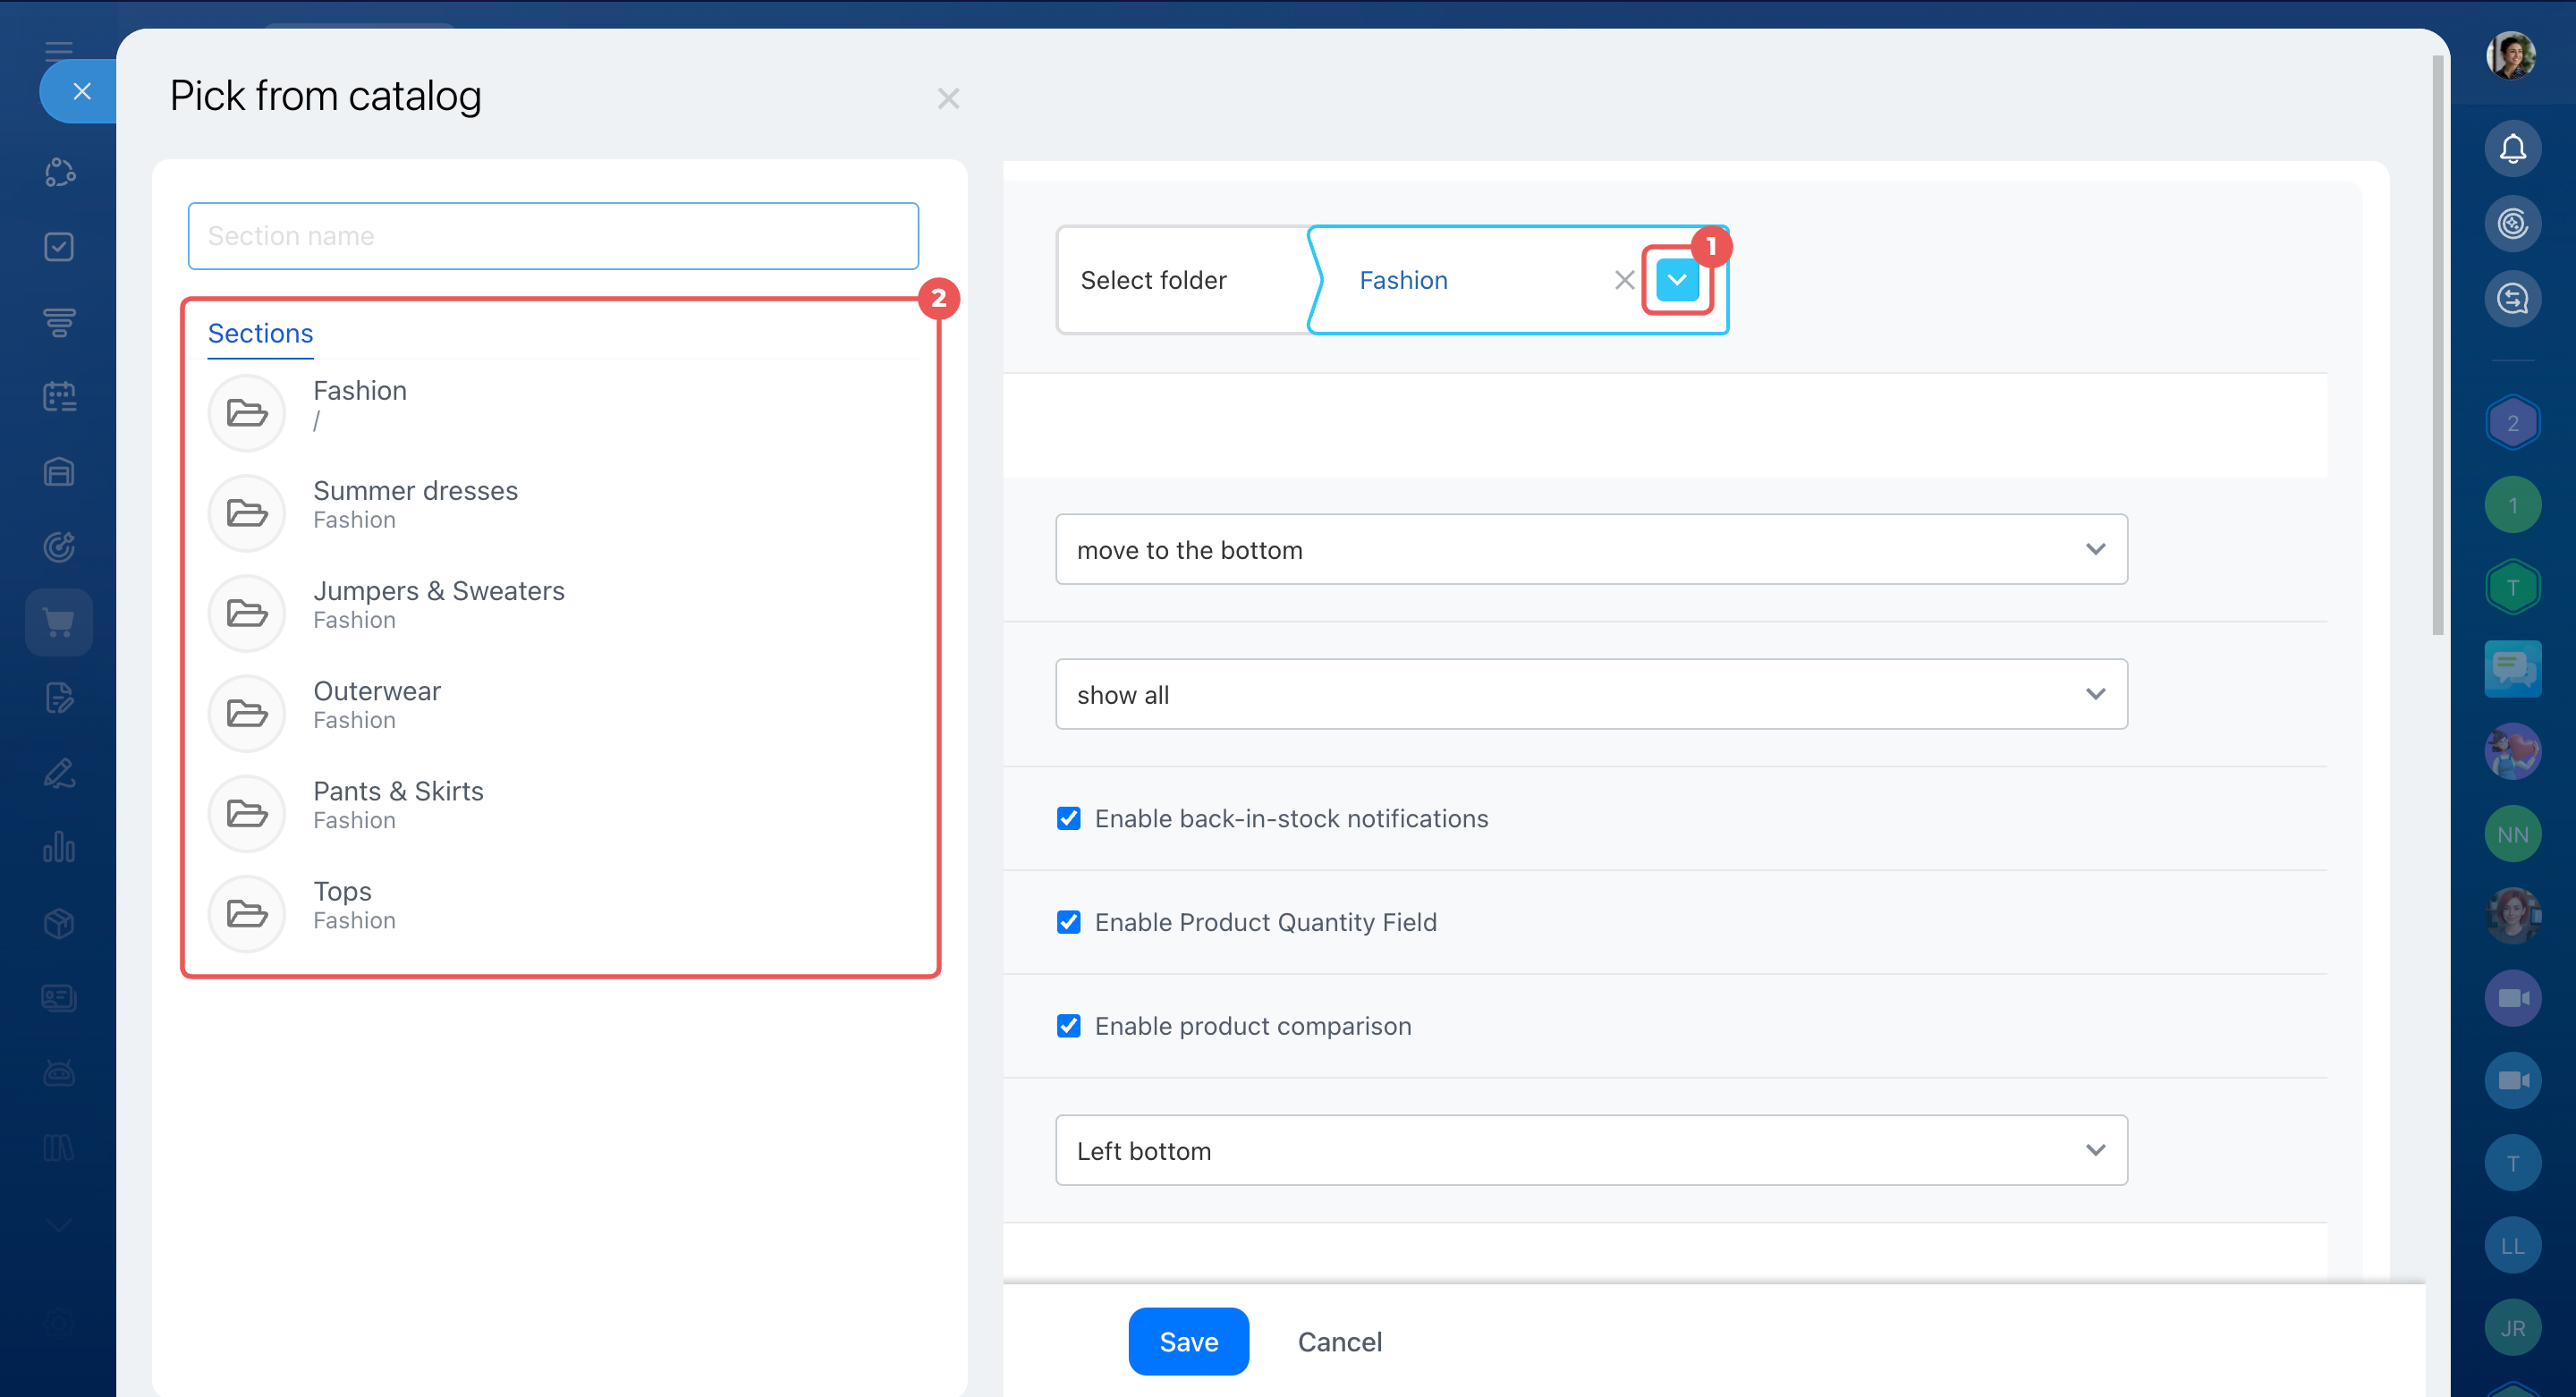
- Click the
 icon next to the folder name.
- Select a catalog section. For example, choose Tops to show only products from that category.
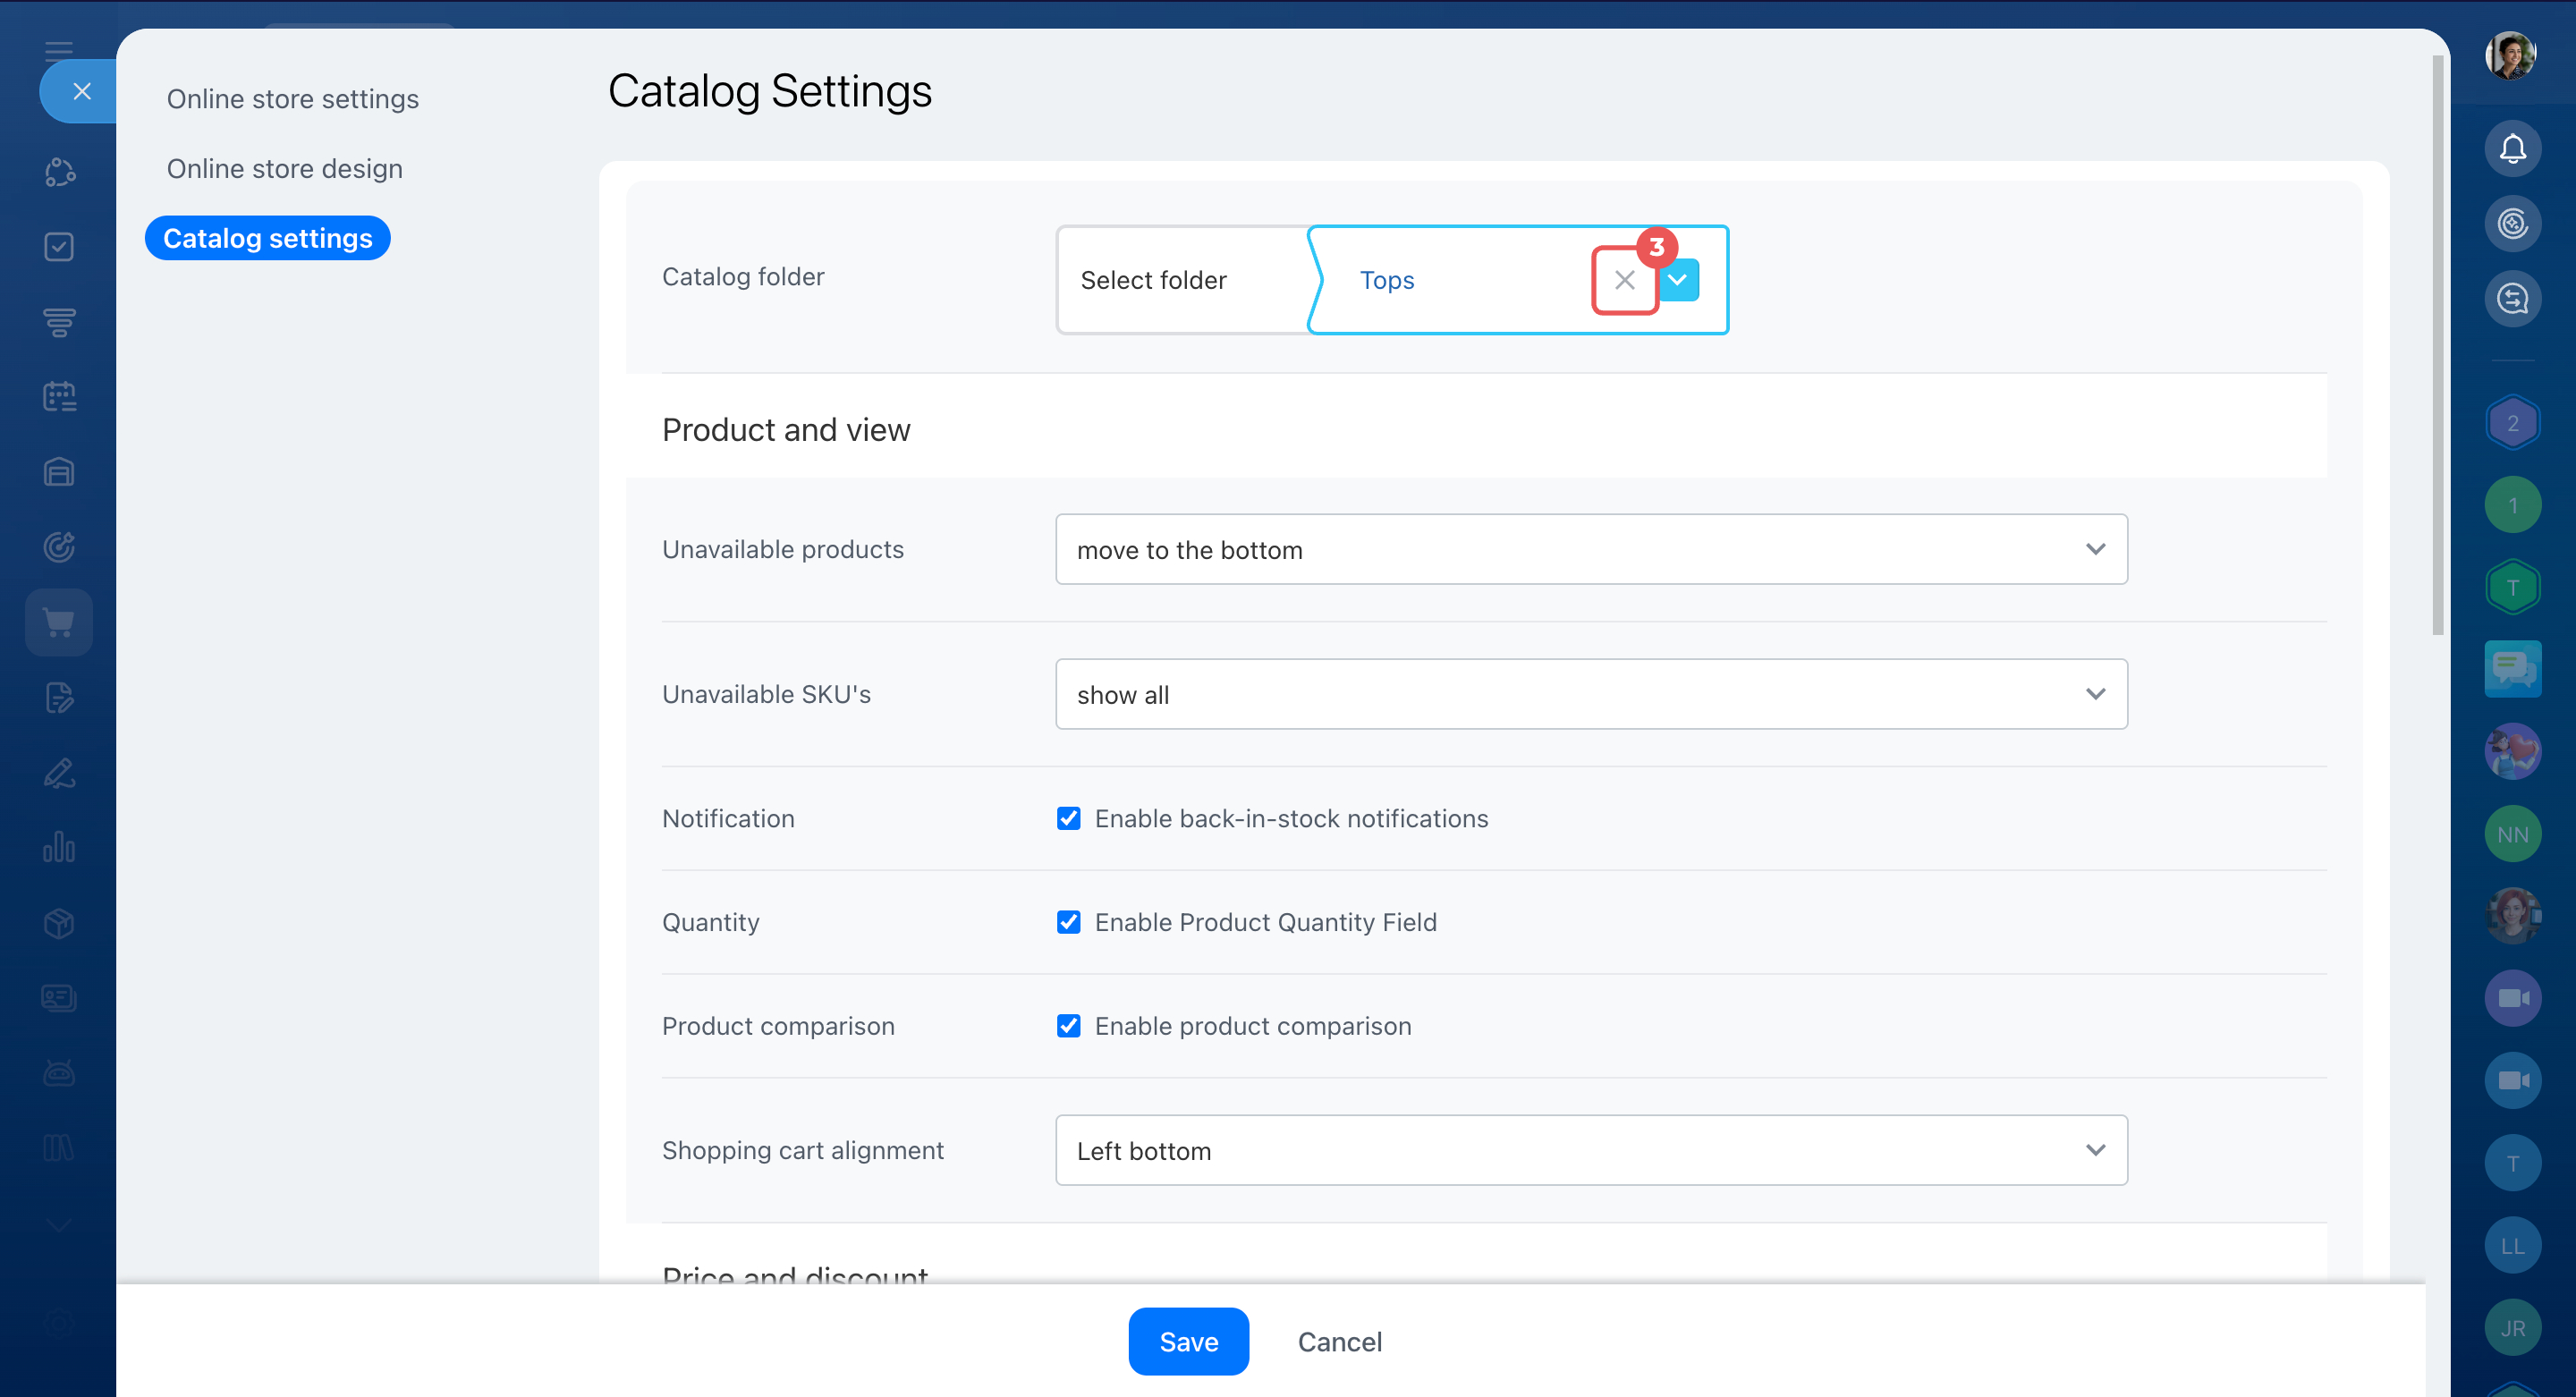
- To display the entire catalog, click X next to the selected section.
When you select a different section, the products displayed in your store change accordingly.
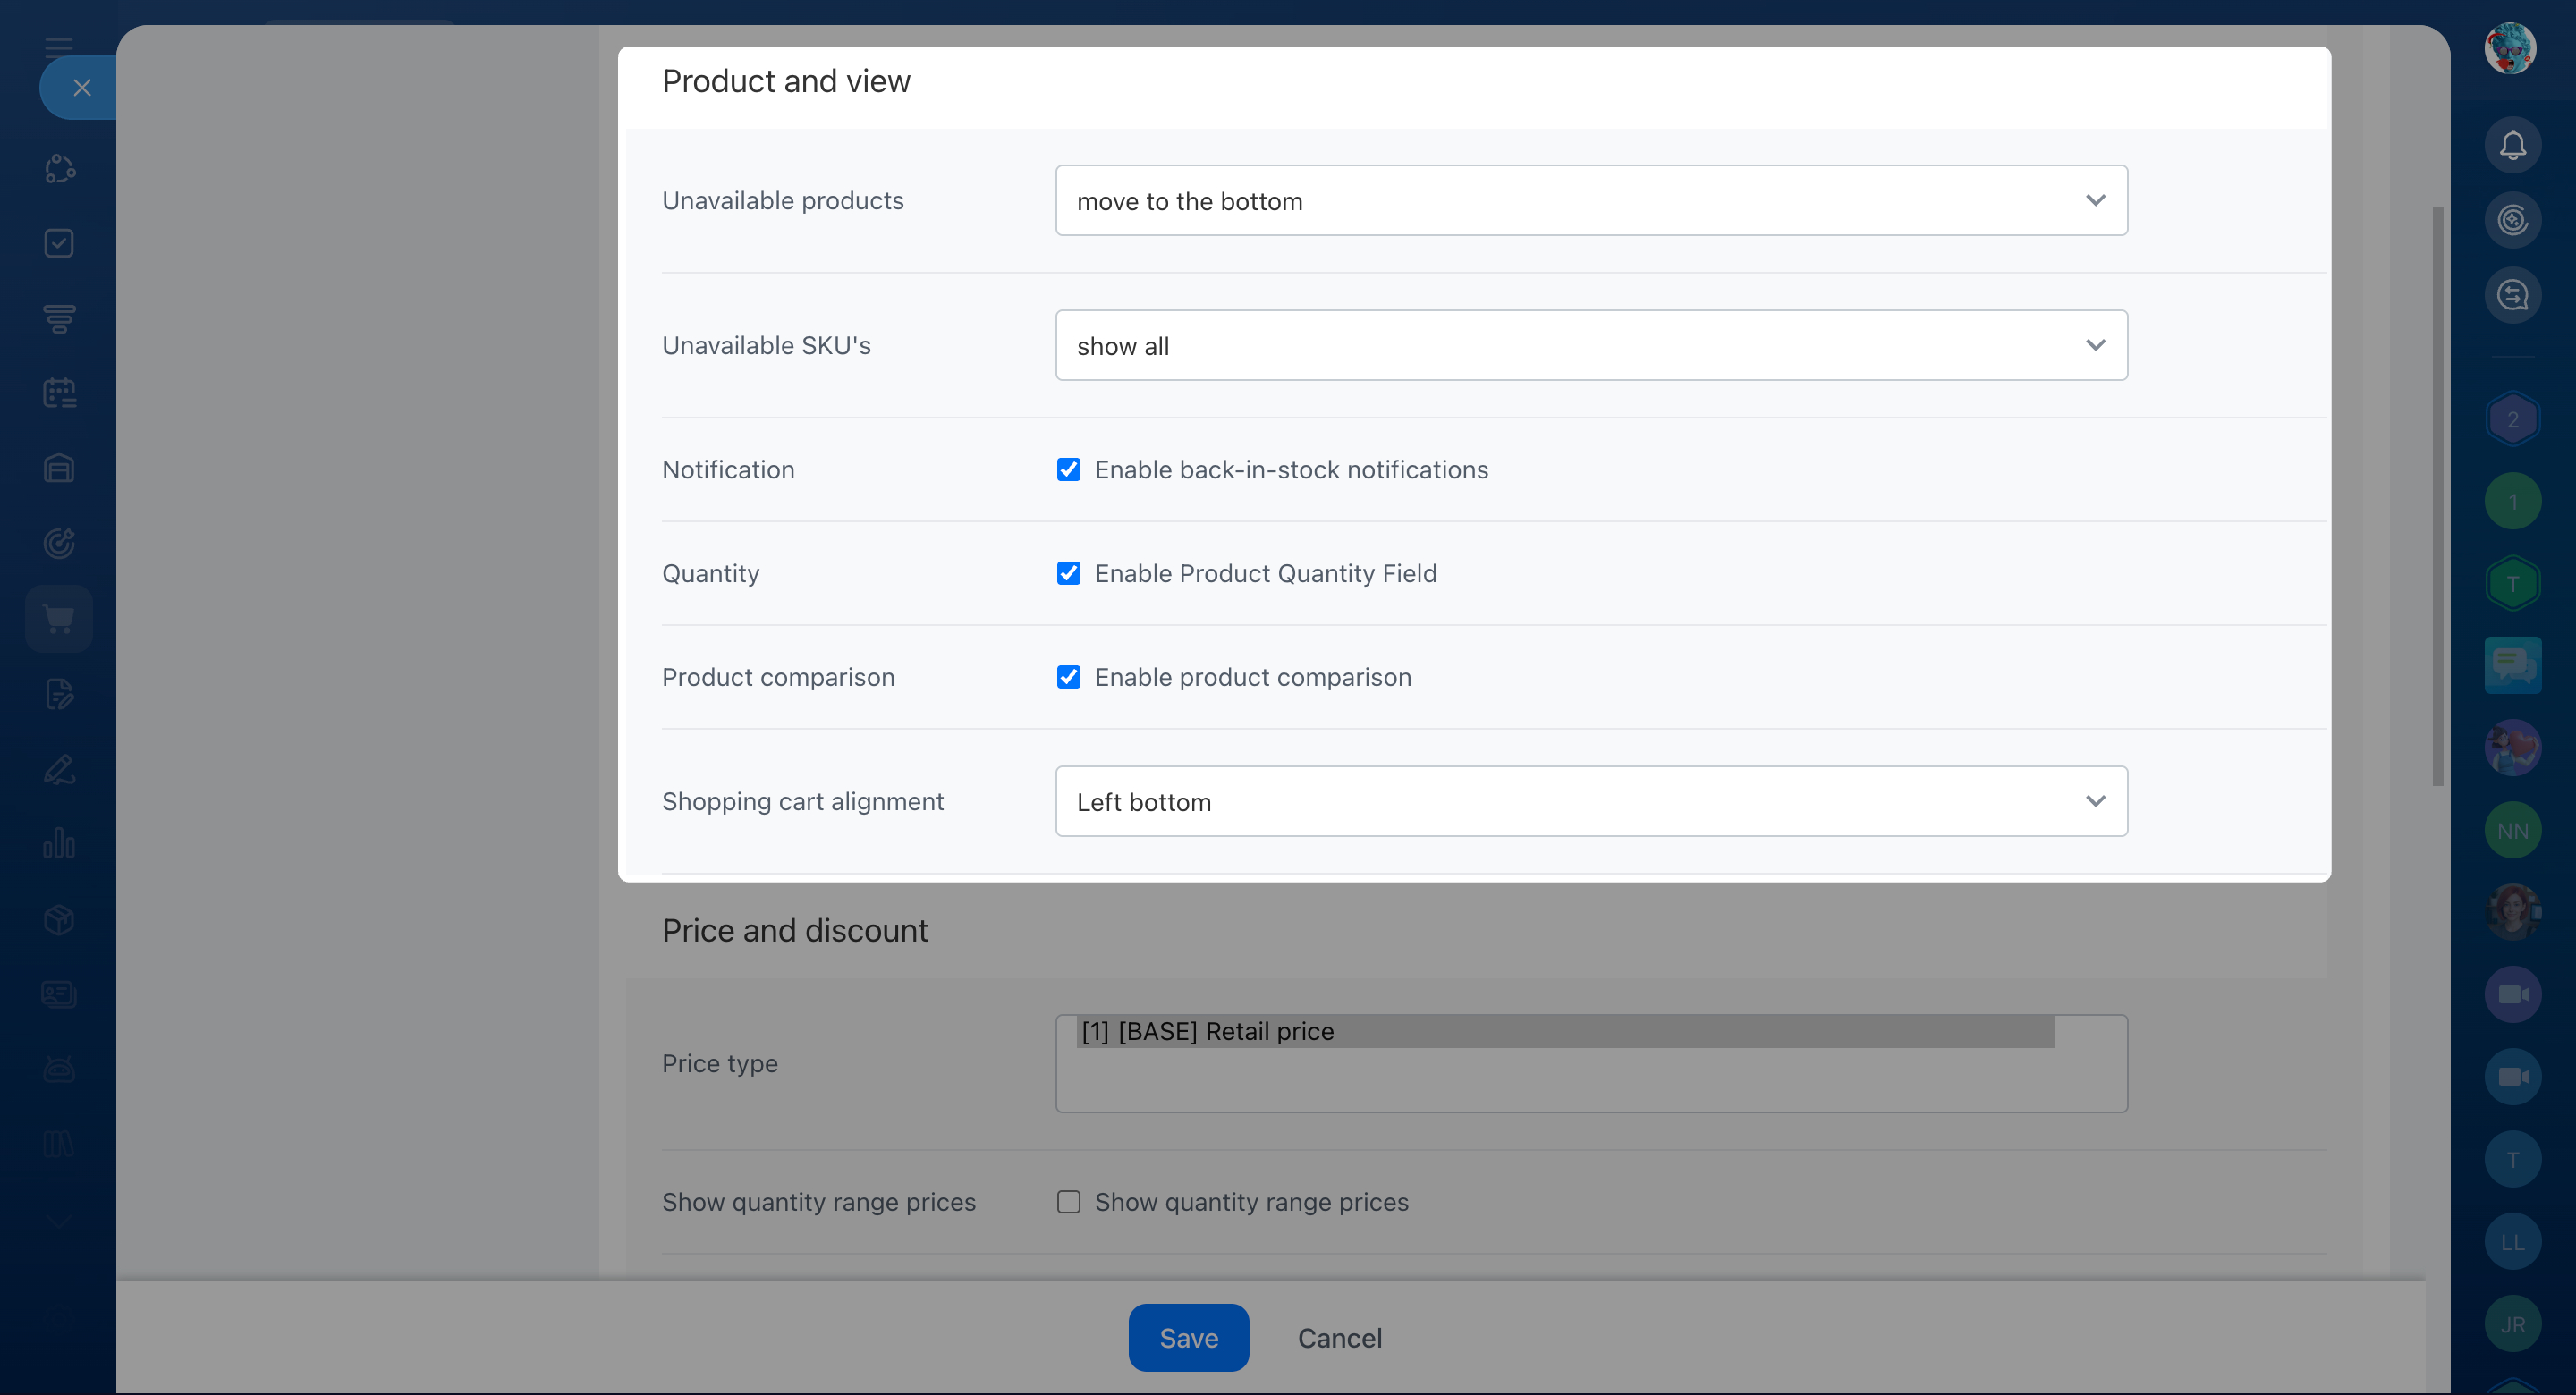
Product and view. Choose how products appear in the catalog and product forms.
- Unavailable products — hide out-of-stock products or keep them visible in the catalog.
- Unavailable SKU's — choose how to display out-of-stock variants.
- Notification — let customers subscribe to alerts when products are back in stock.
- Quantity — let customers select how many units to order.
- Product comparison — let customers compare products.
- Shopping cart alignment — choose where the cart appears on the page.
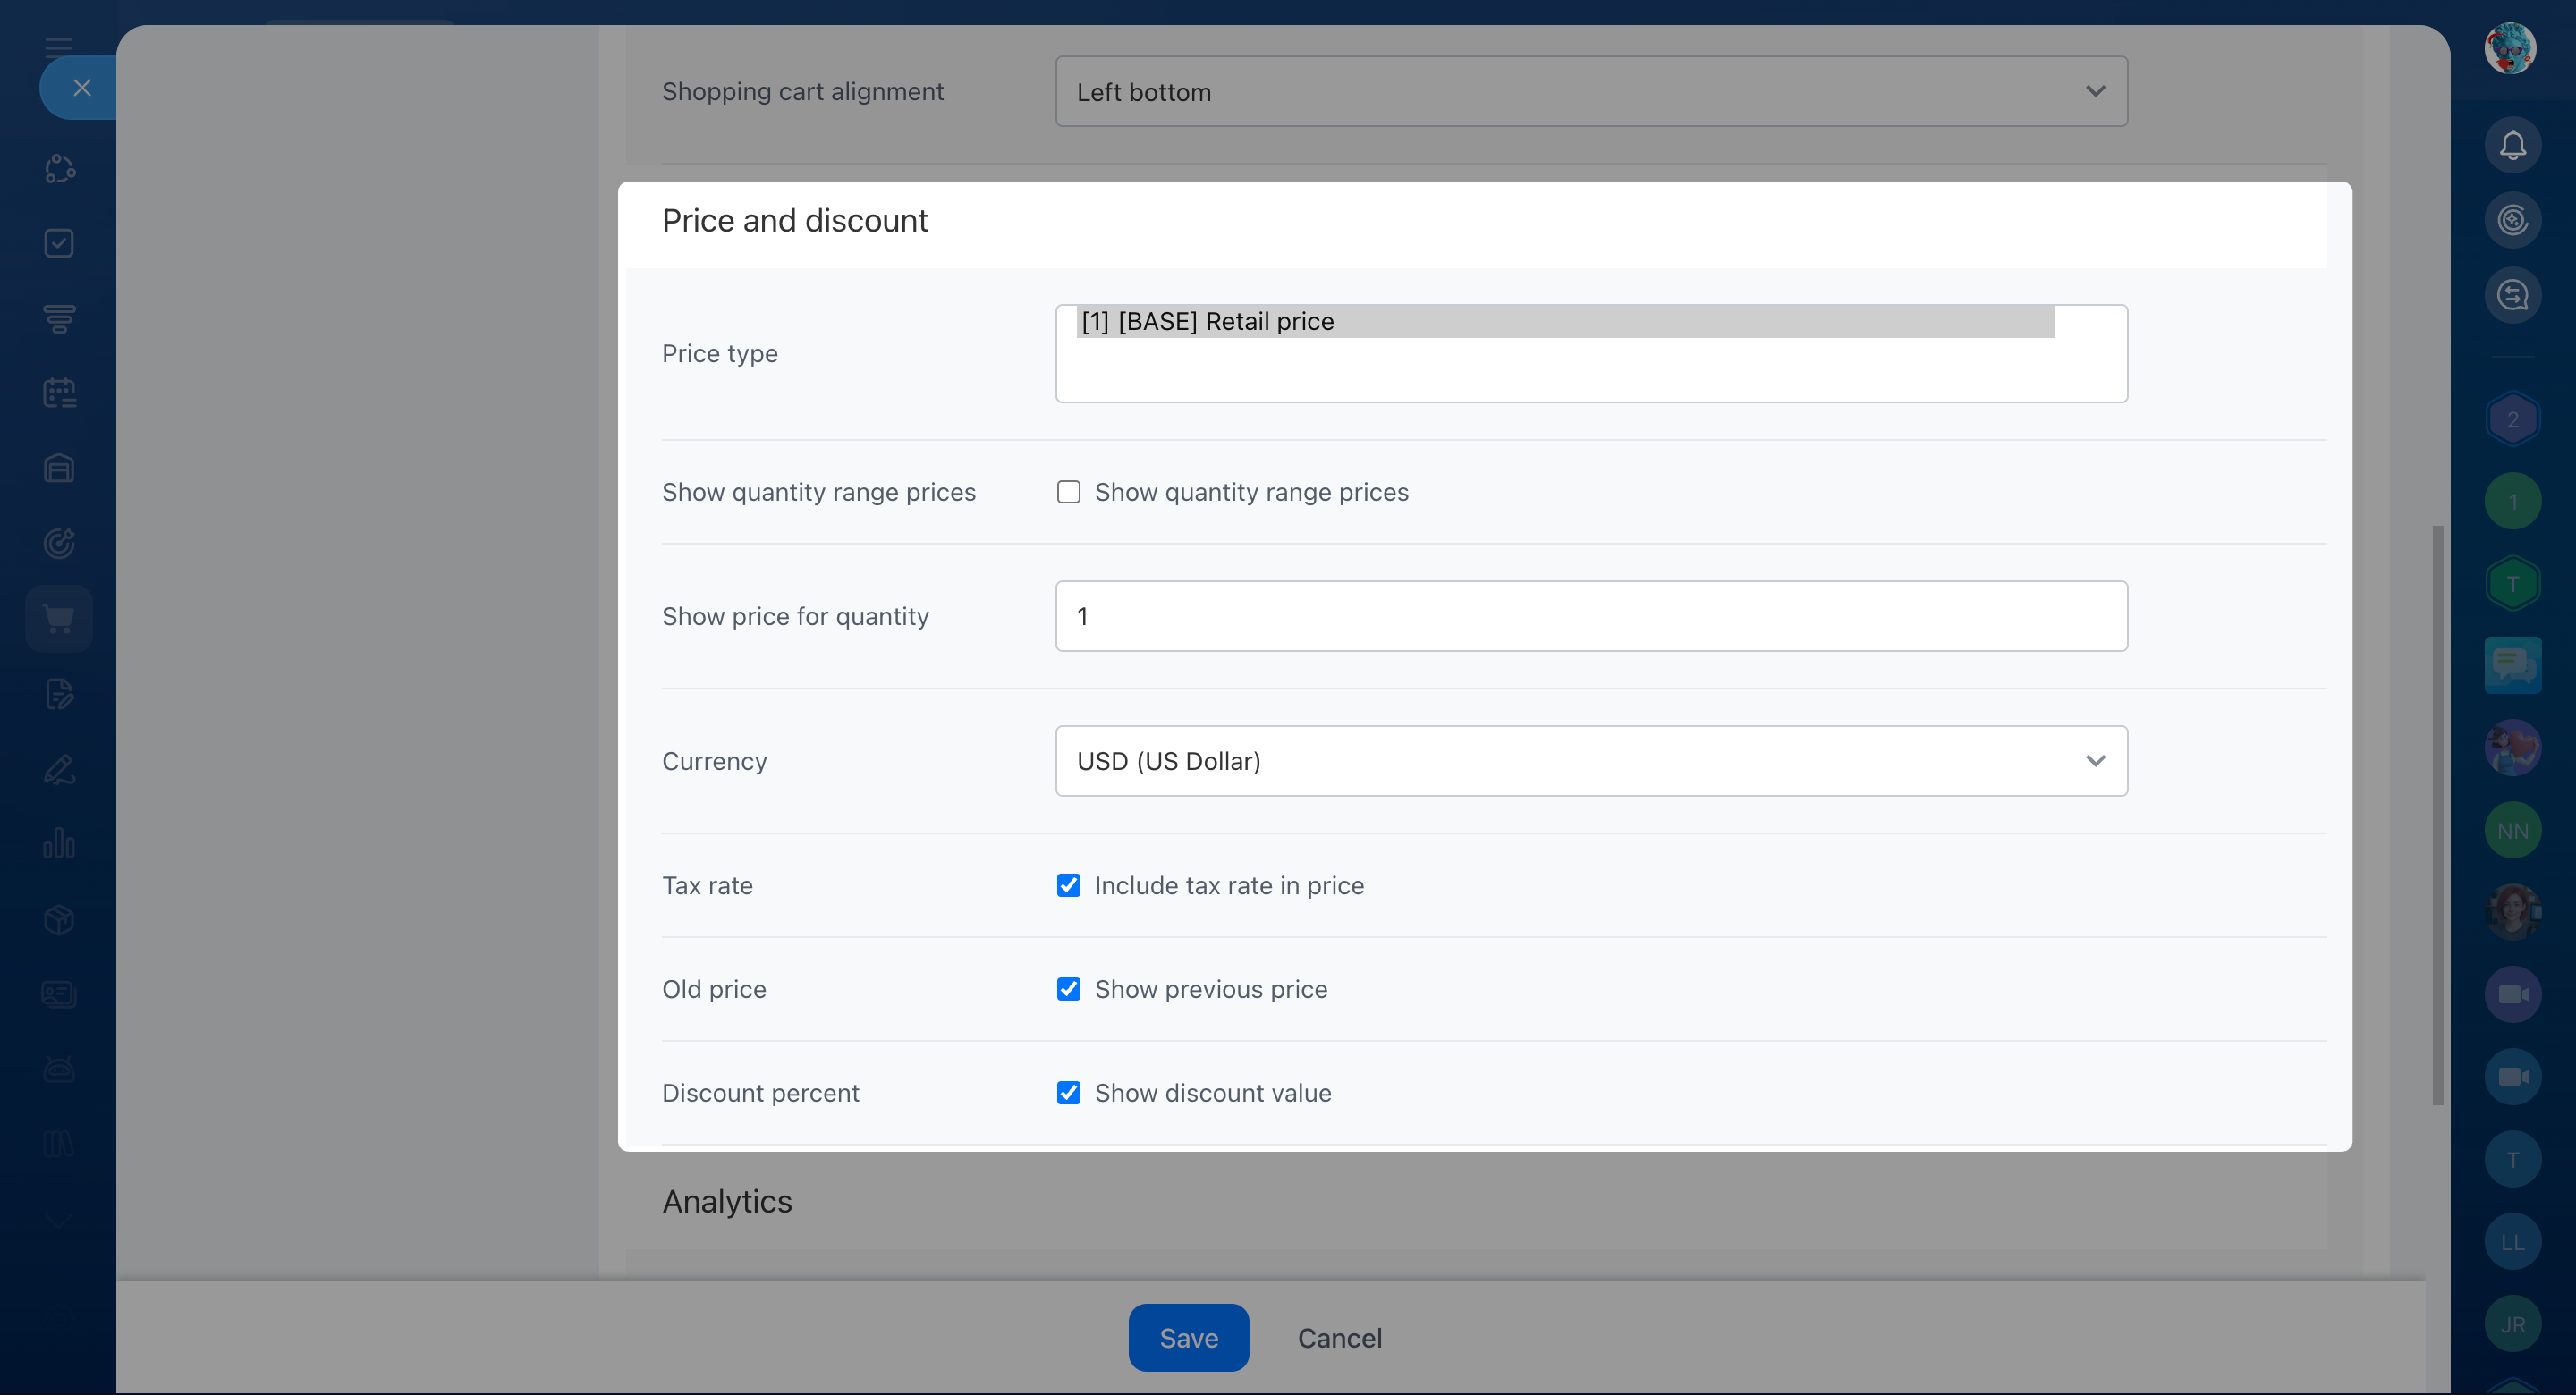
Price and discount. Choose how your store displays prices and discounts.
- Price type — select which product price to use.
- Show quantity range prices — display a price range for products with variants.
- Currency — choose the store currency.
- Tax rate — include tax in displayed prices if needed.
- Old price — show the product's previous price.
- Discount percentage — show the discount as a percentage.
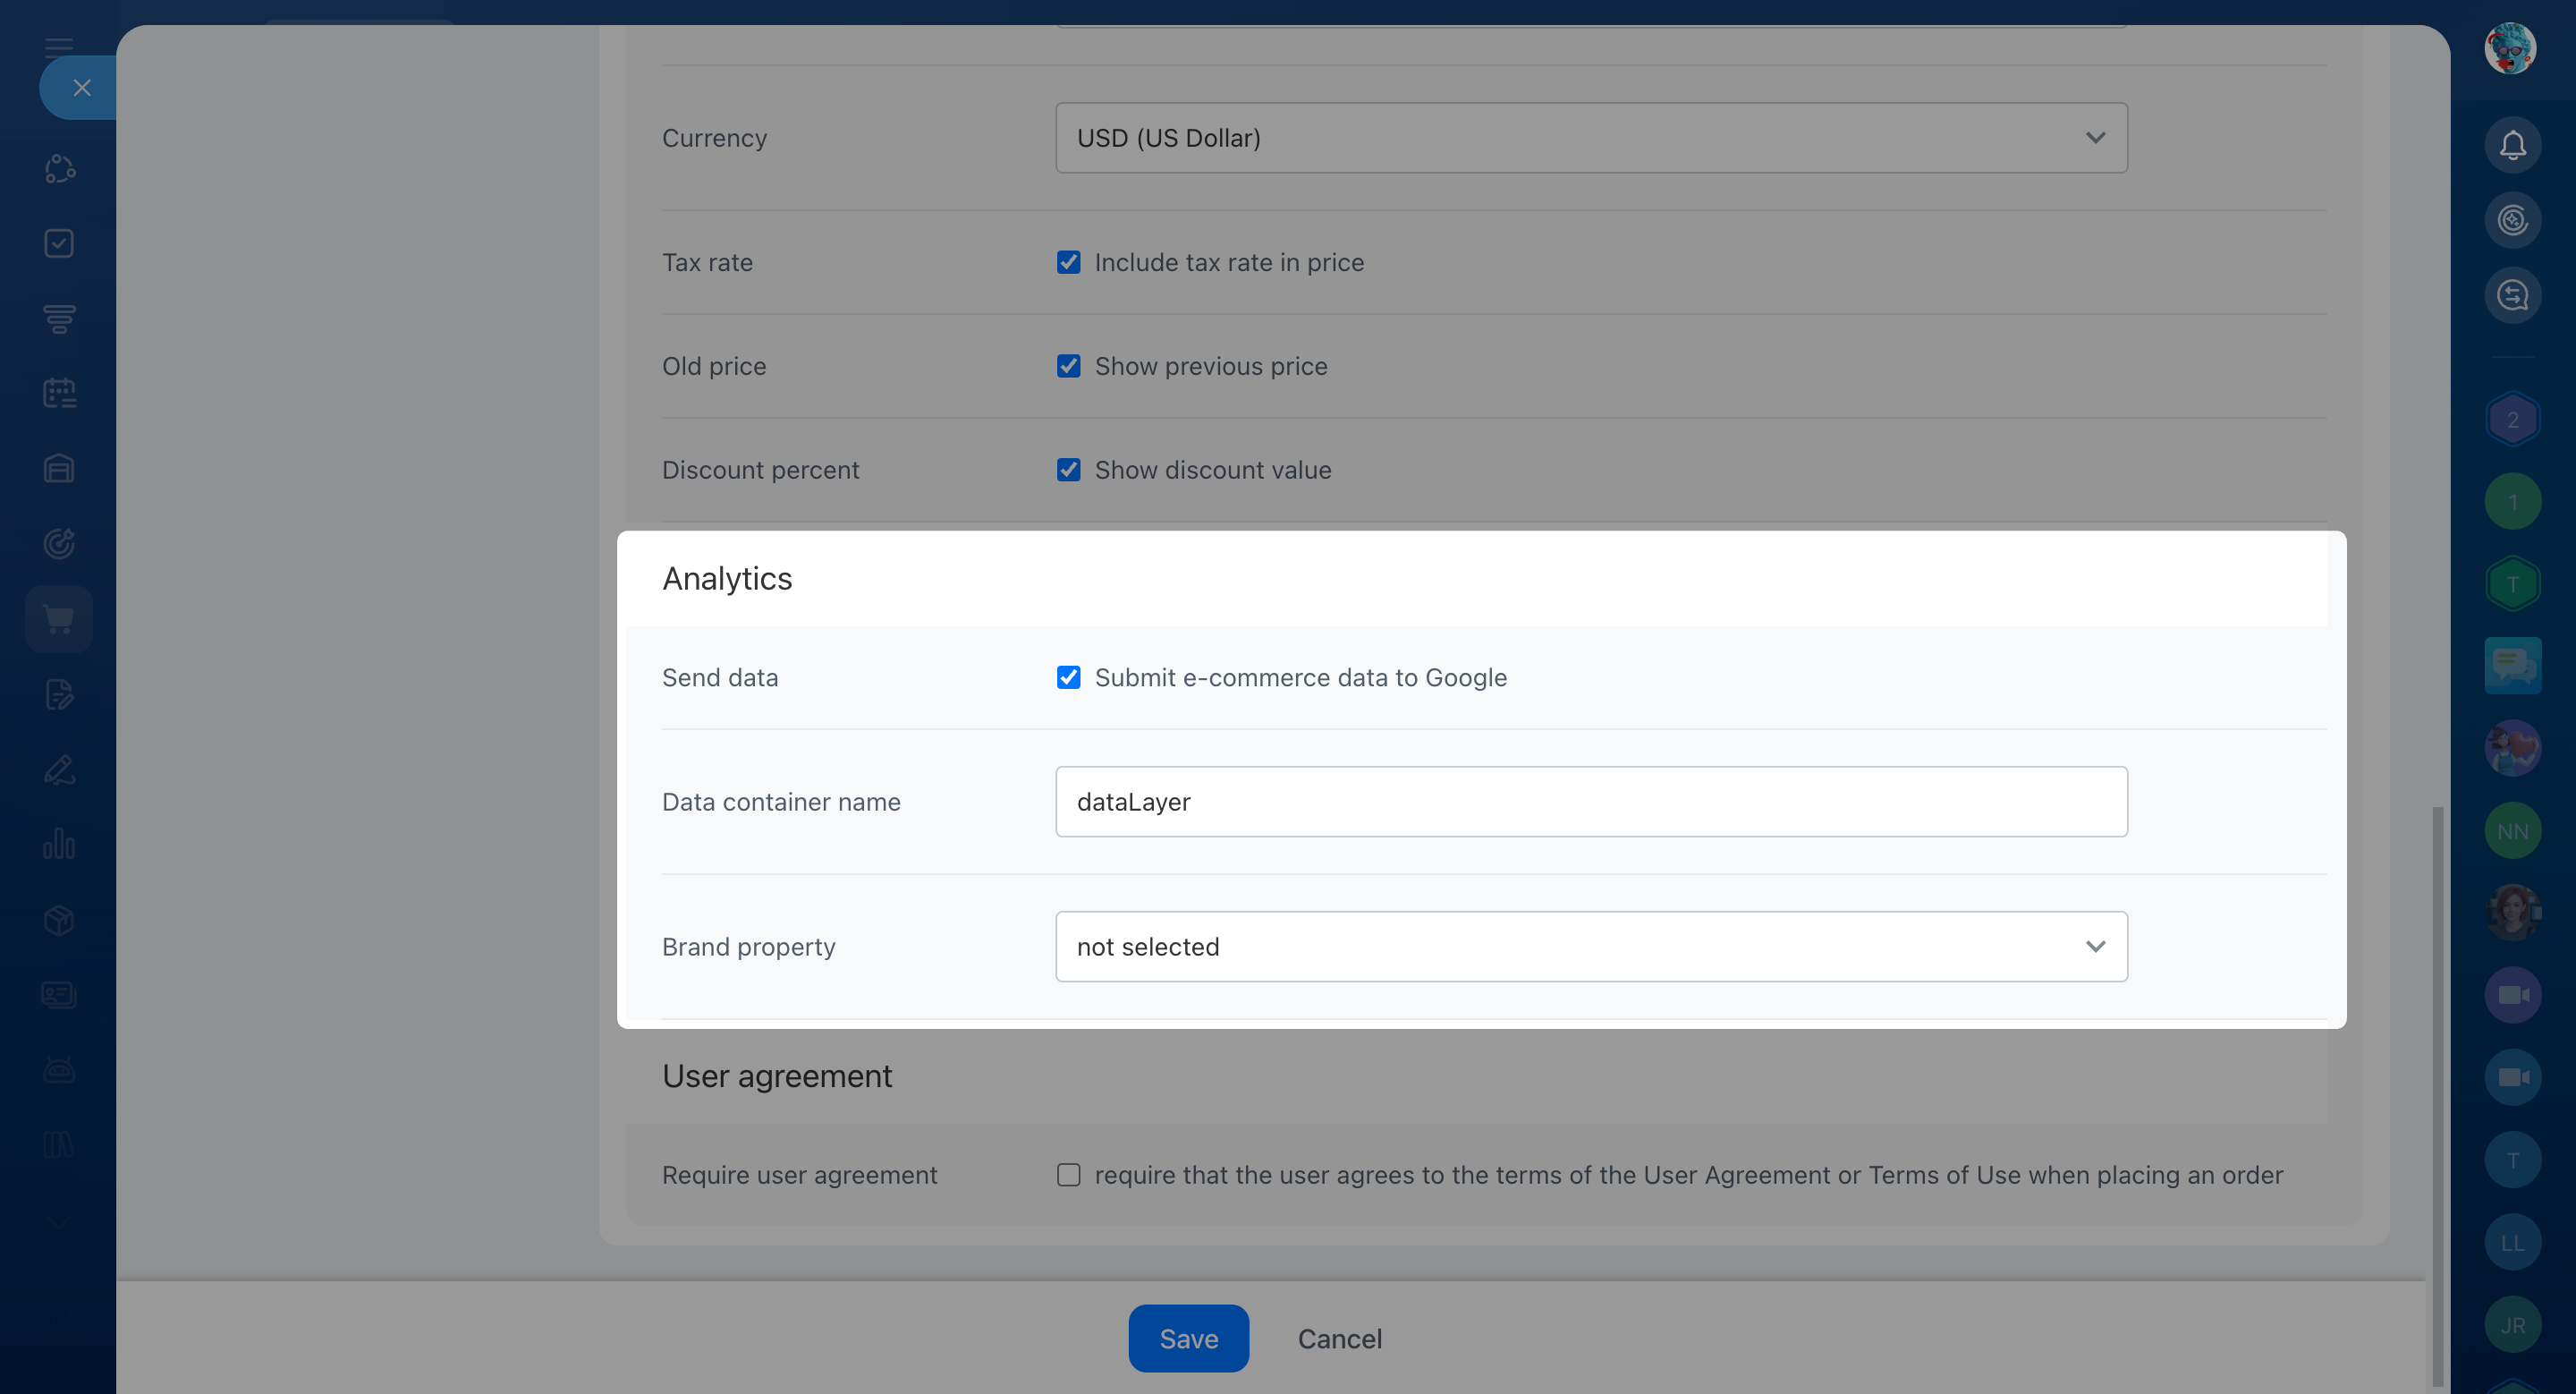
Analytics. Send order and customer activity data to Google Analytics.
- Send data — send e-commerce data to Google.
- Data container name — specify the container used to send data to analytics systems.
- Brand property — choose which product field identifies the brand.
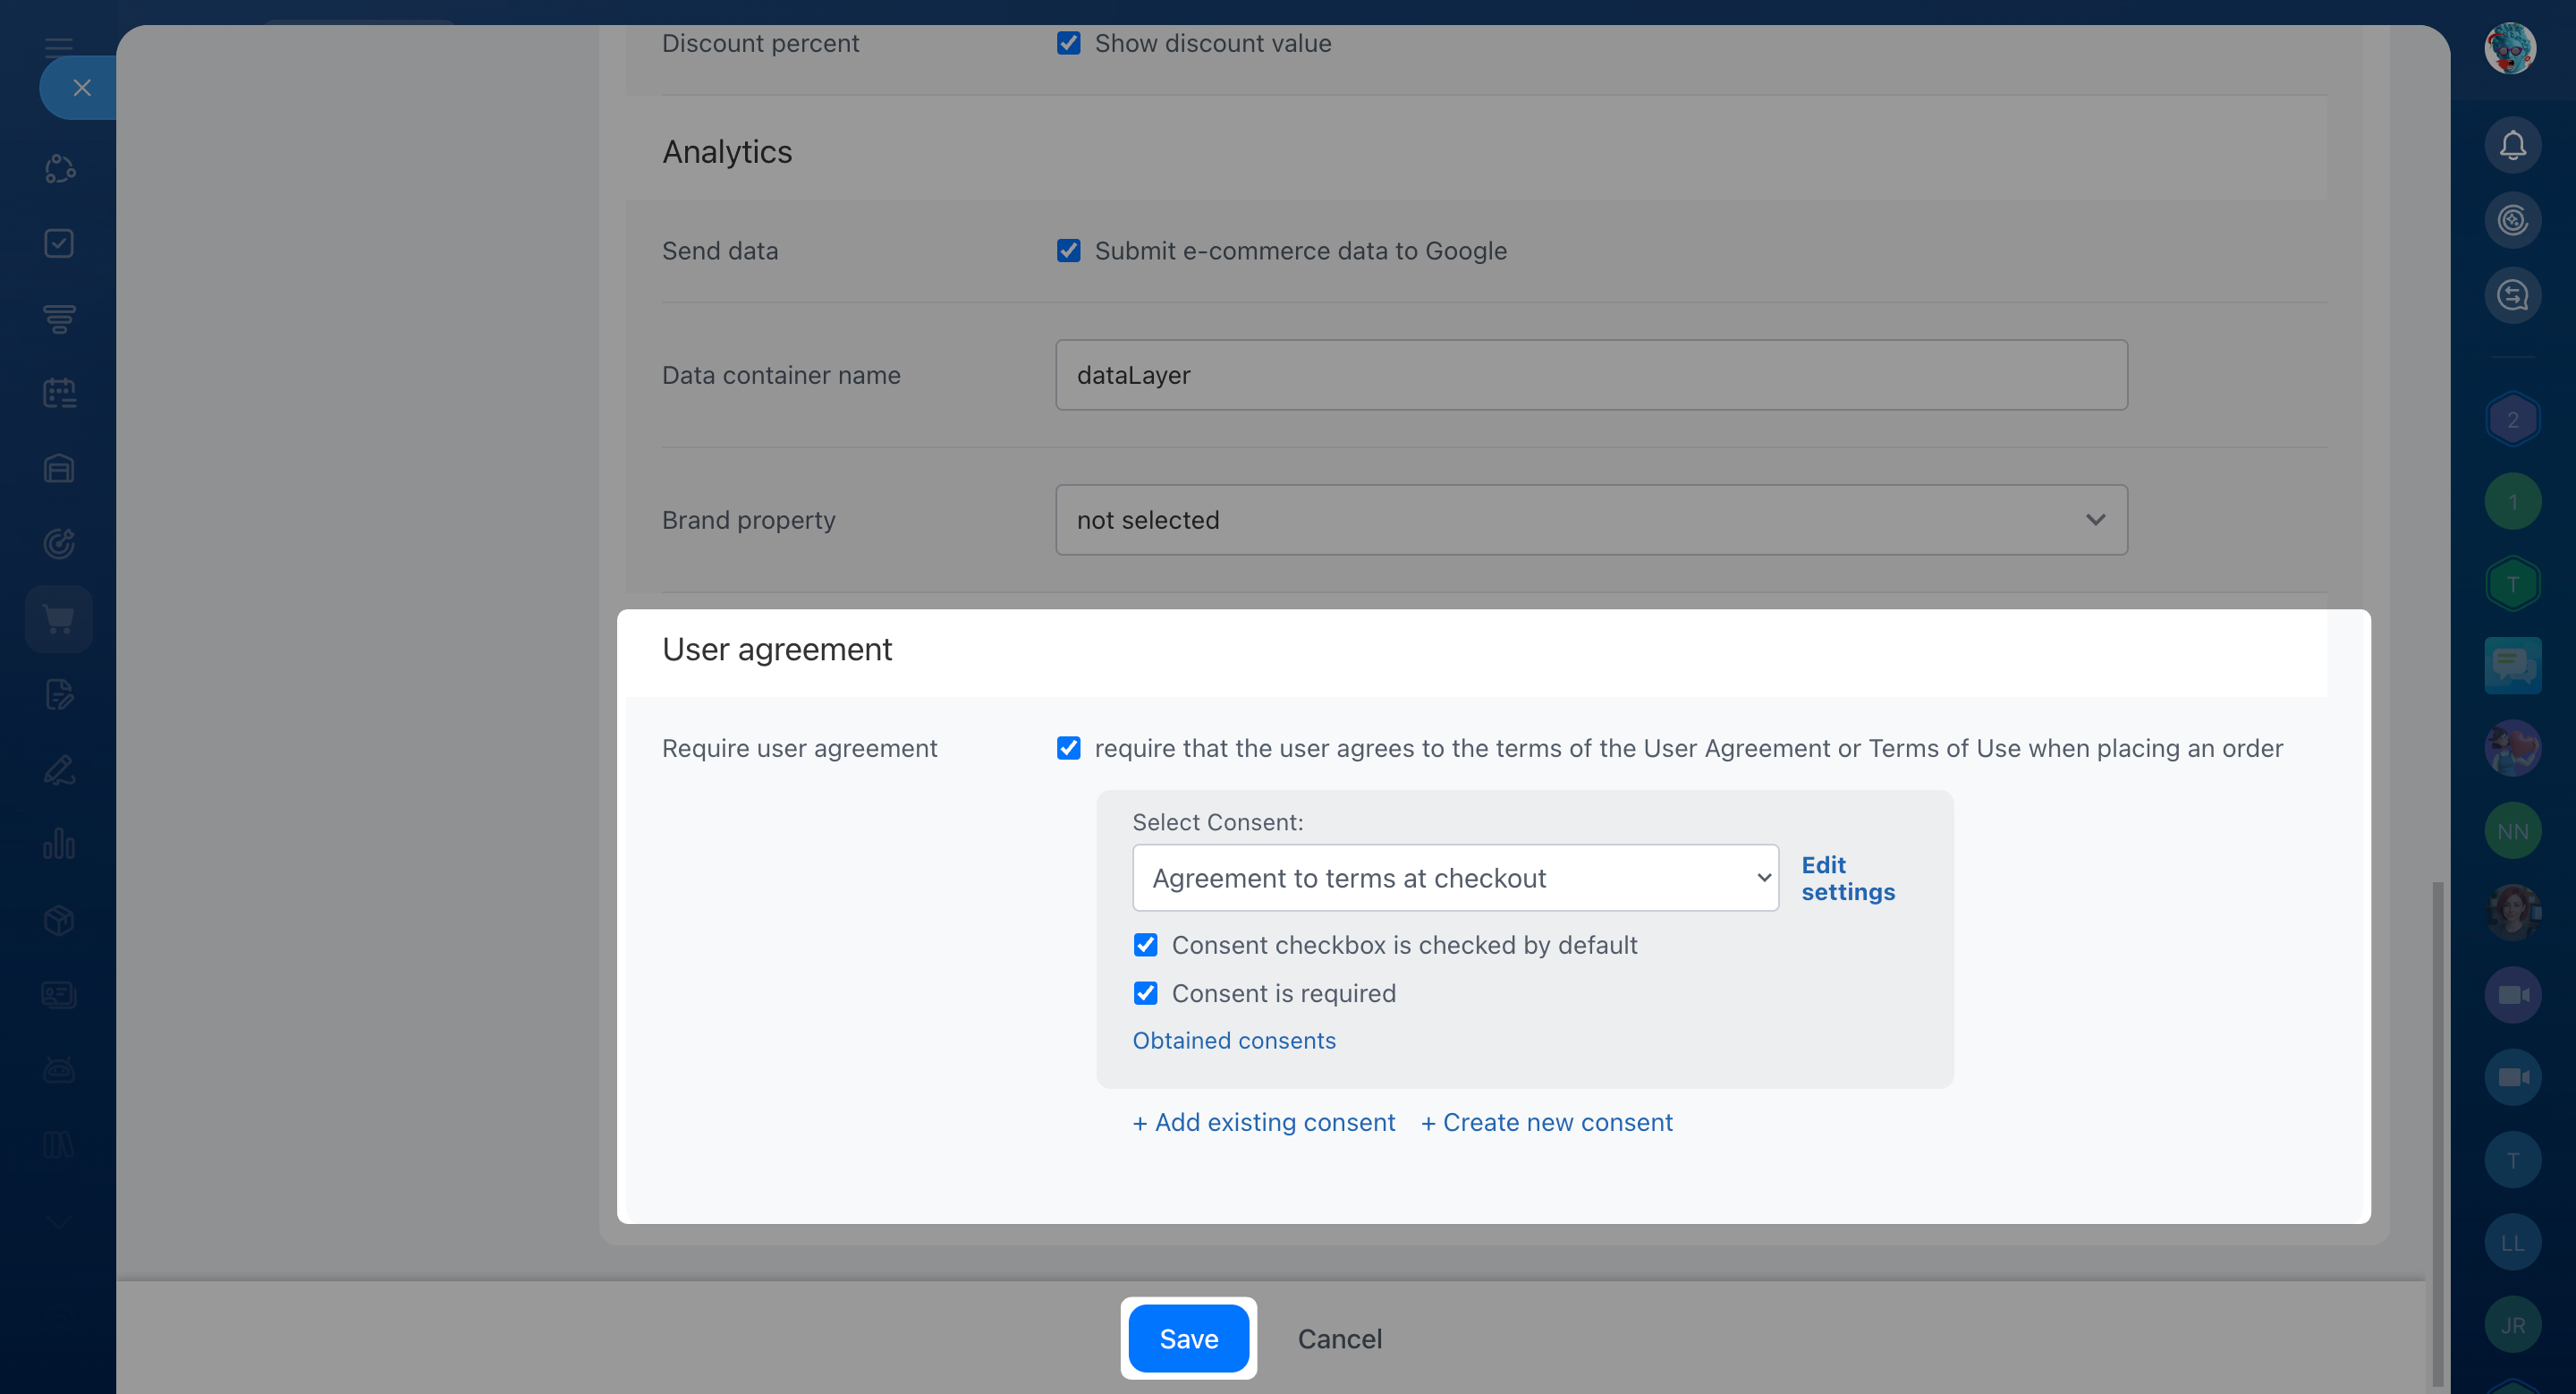
User agreement. Ask customers to agree to your terms when they place an order. This can help you meet personal data processing requirements.
- Enable the option to show a consent agreement at checkout.
- Select the agreement you want to use.
- Configure the options:
- Consent checkbox is checked by default — preselect the consent checkbox.
- Consent is required — prevent customers from completing checkout until they agree to the terms.
- Add another agreement or create a new one if needed.
After setup, click Save.
Customize how products appear in the catalog
Bitrix24 automatically adds a product catalog page when you create a store. You only need to change it if you want products to appear differently.
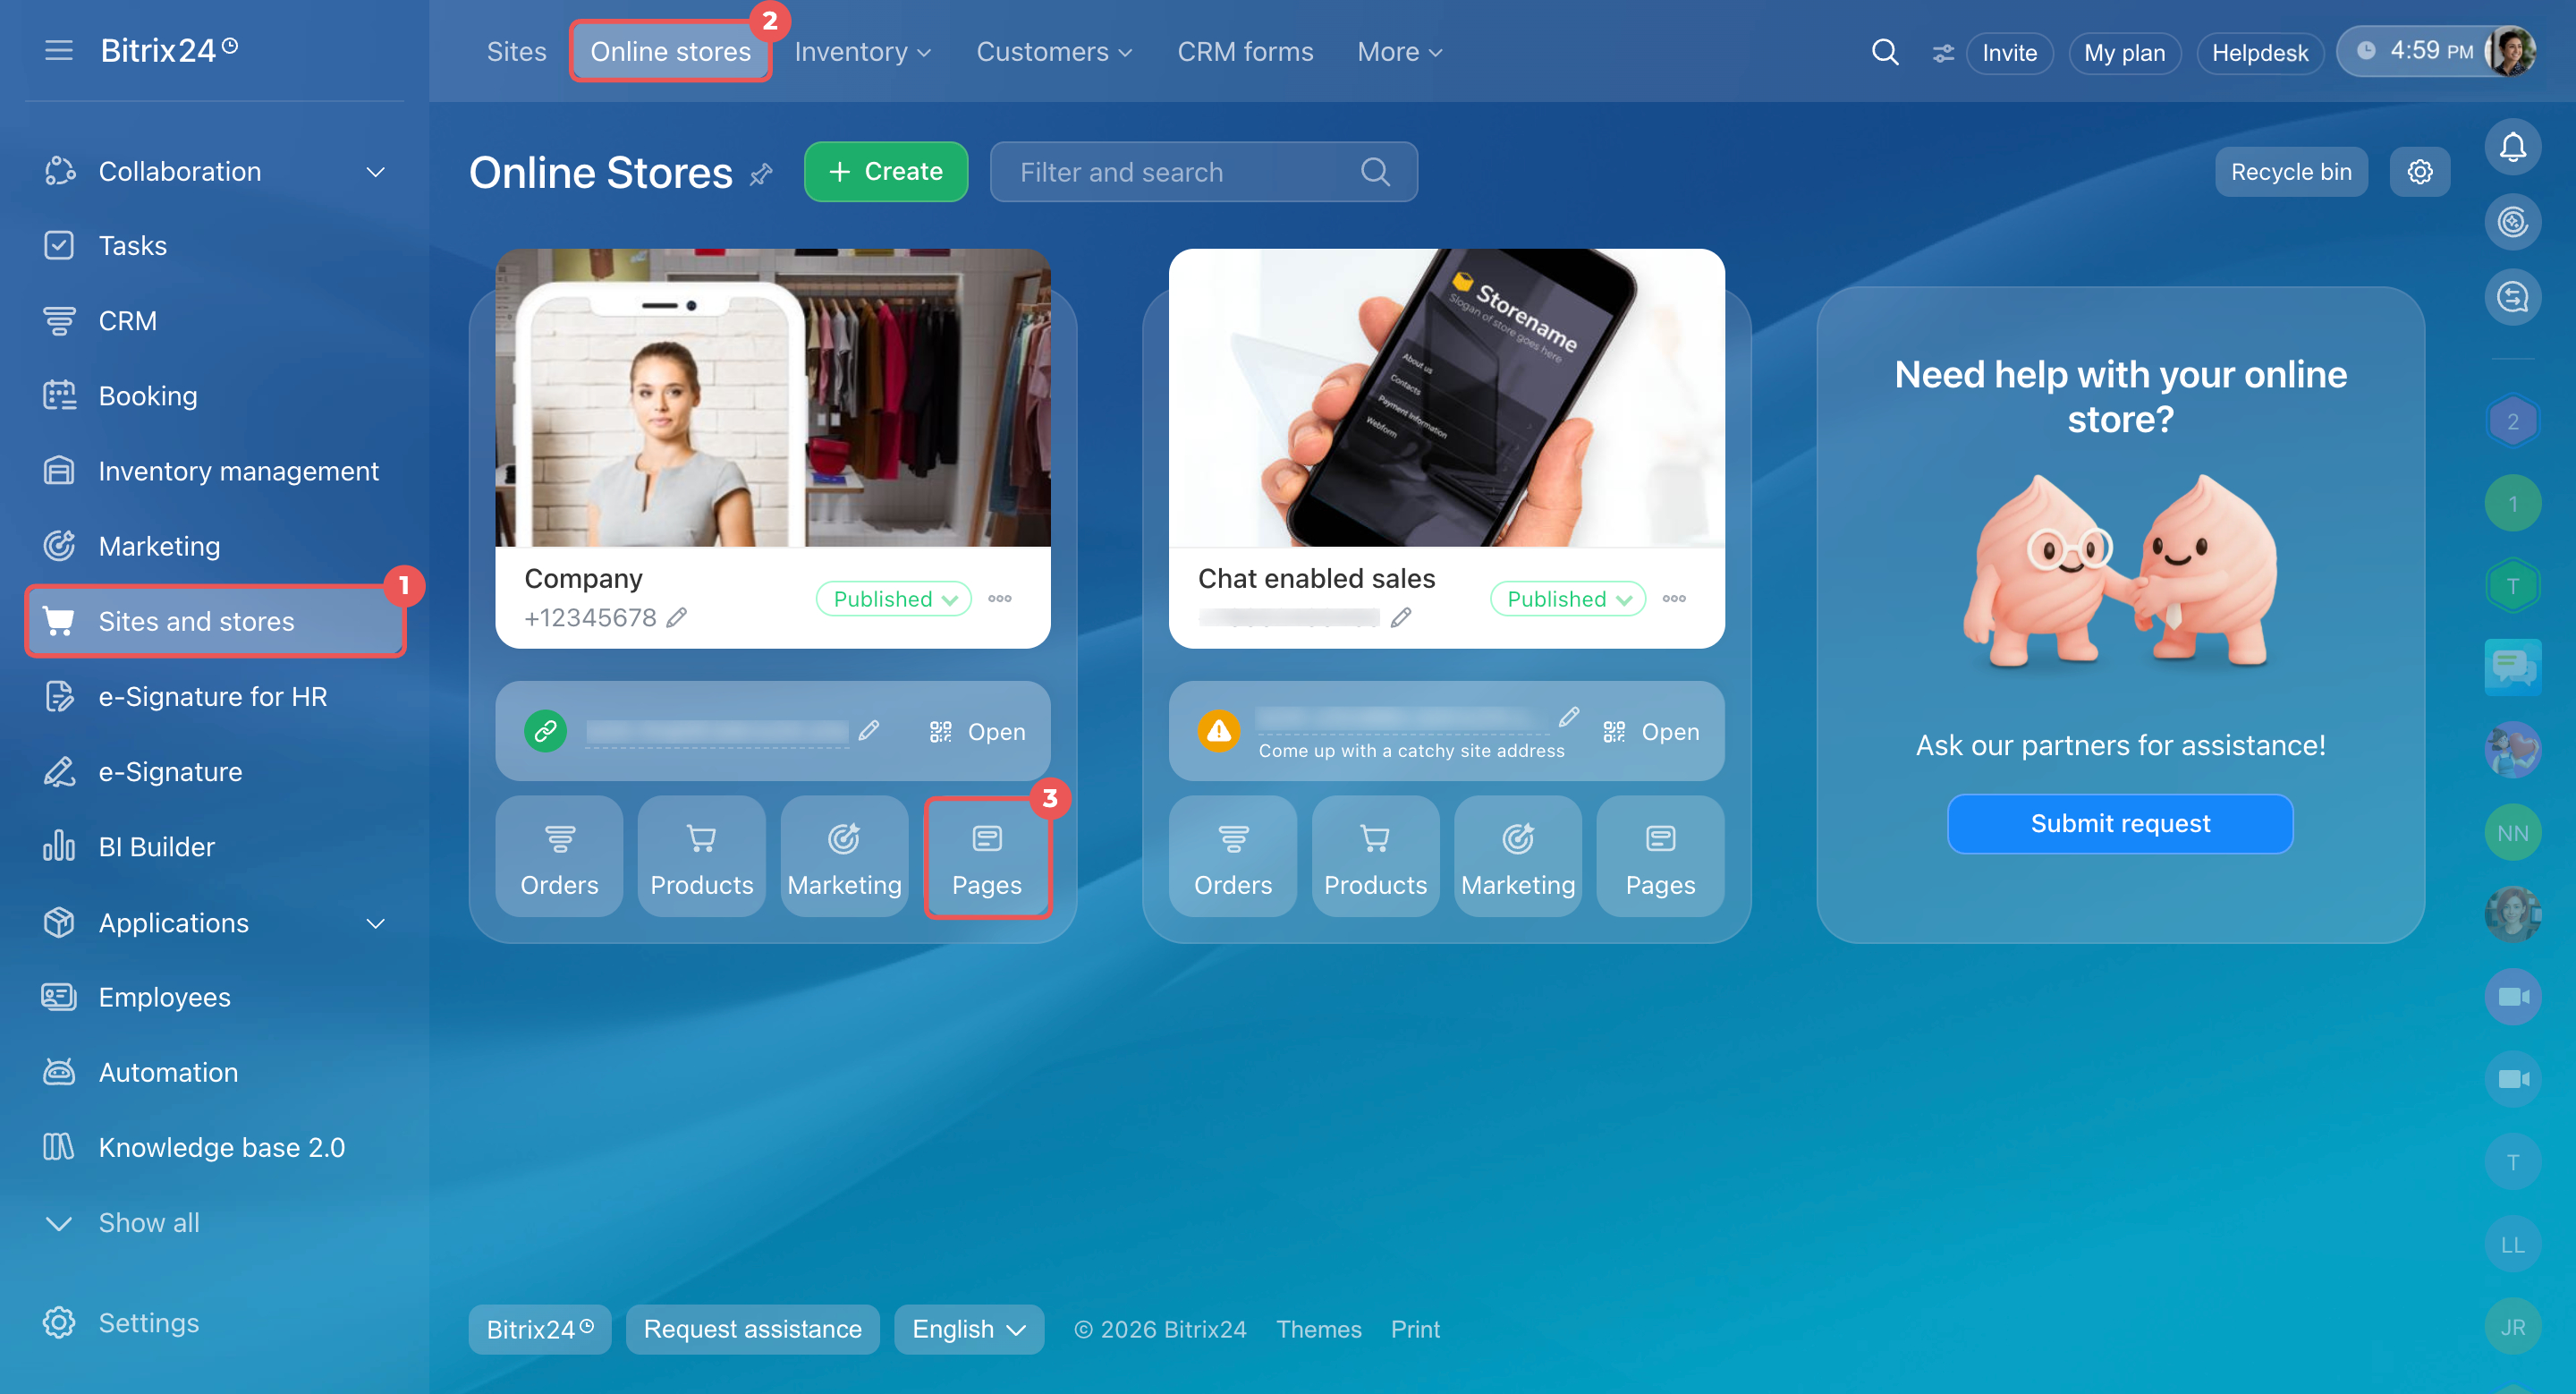
- Go to Sites and stores > Online stores.
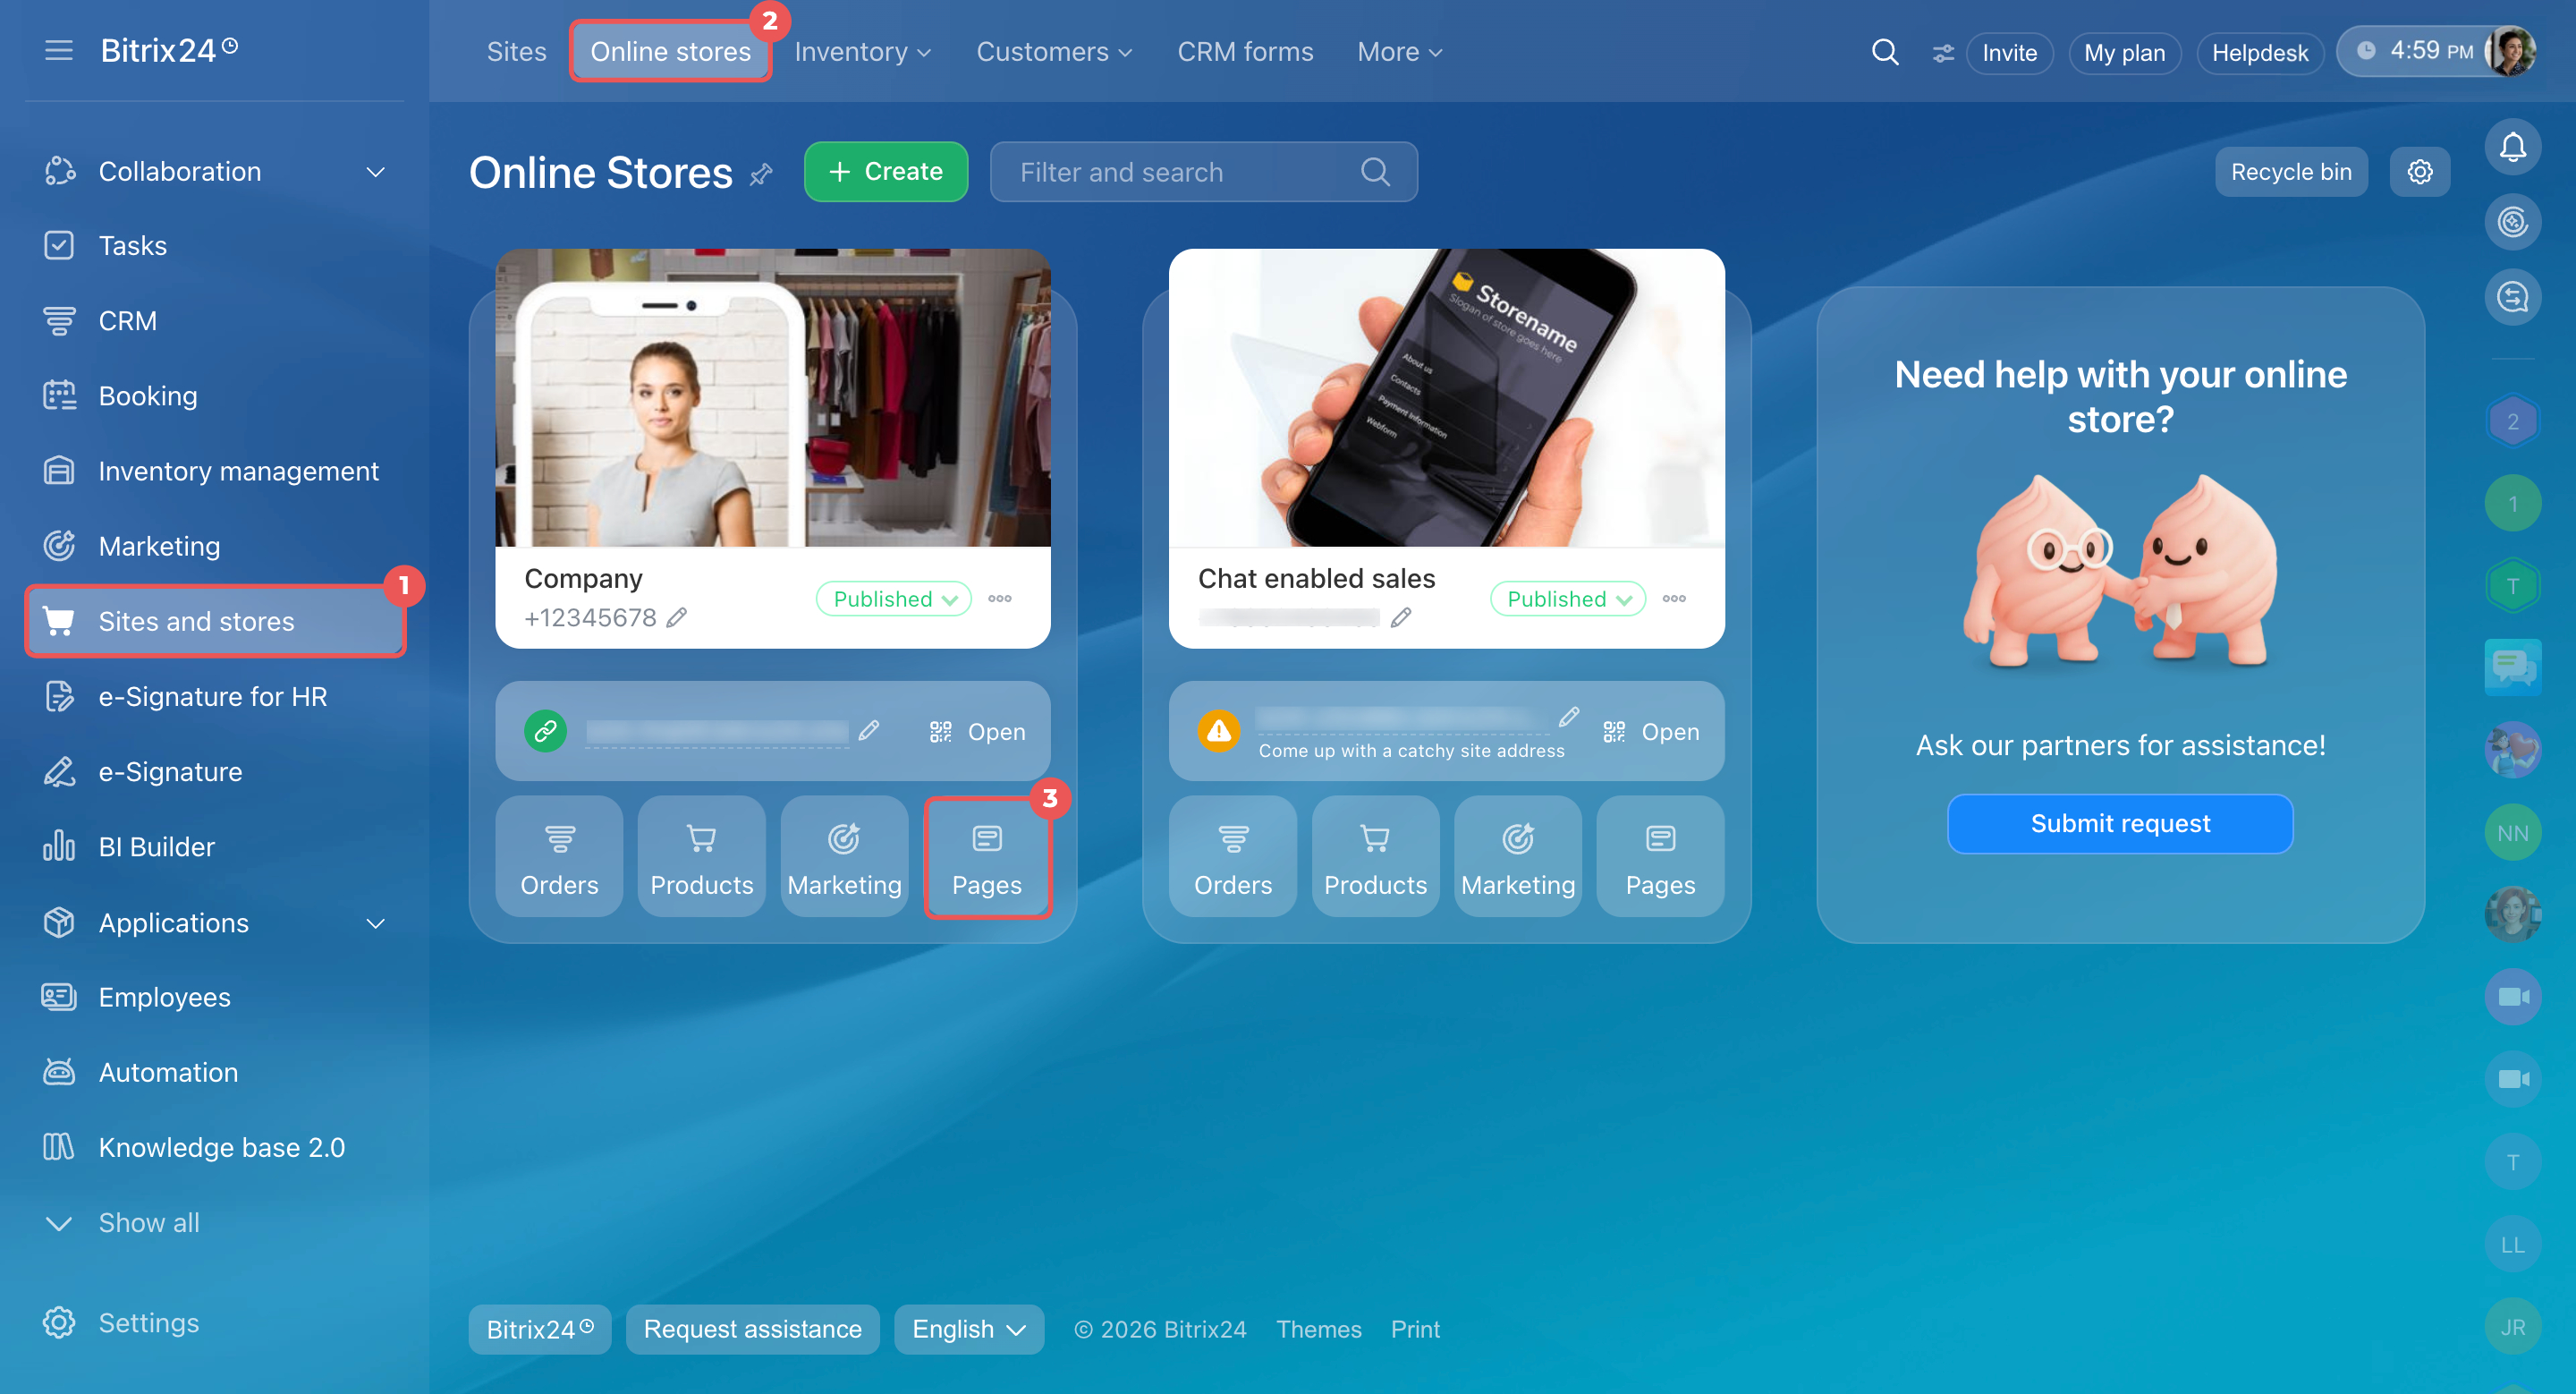
- Find your store and click Pages.
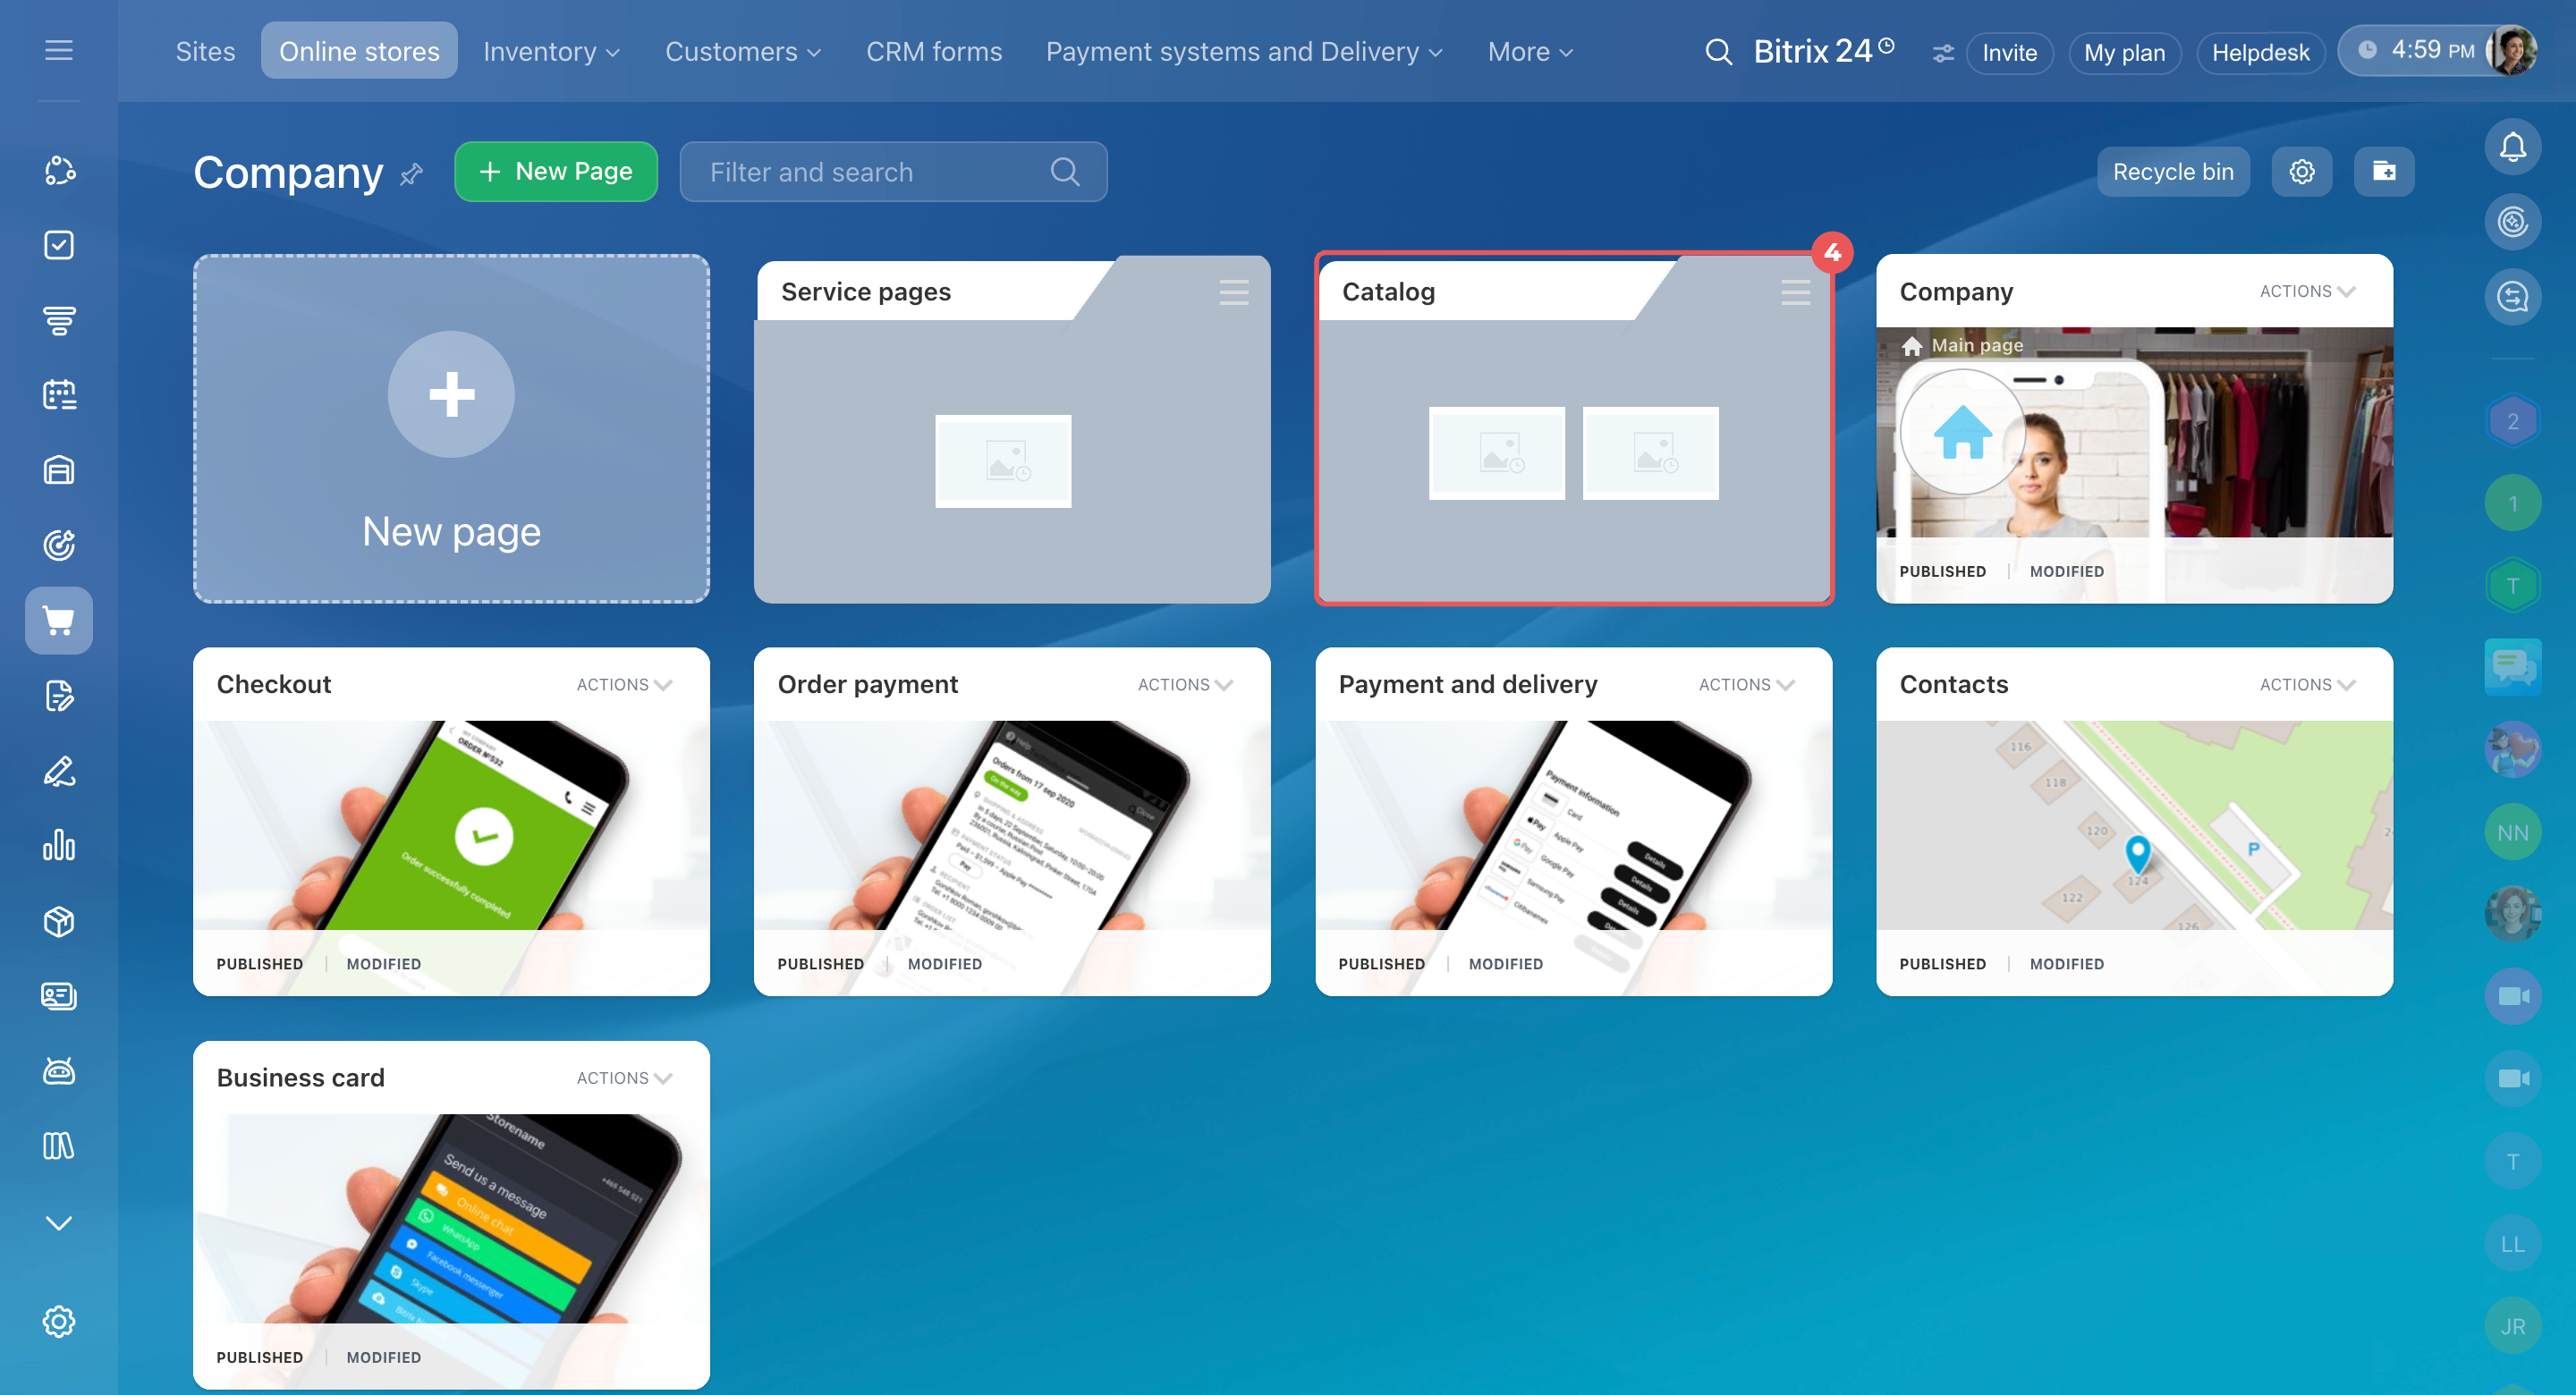
- Open the Catalog folder.
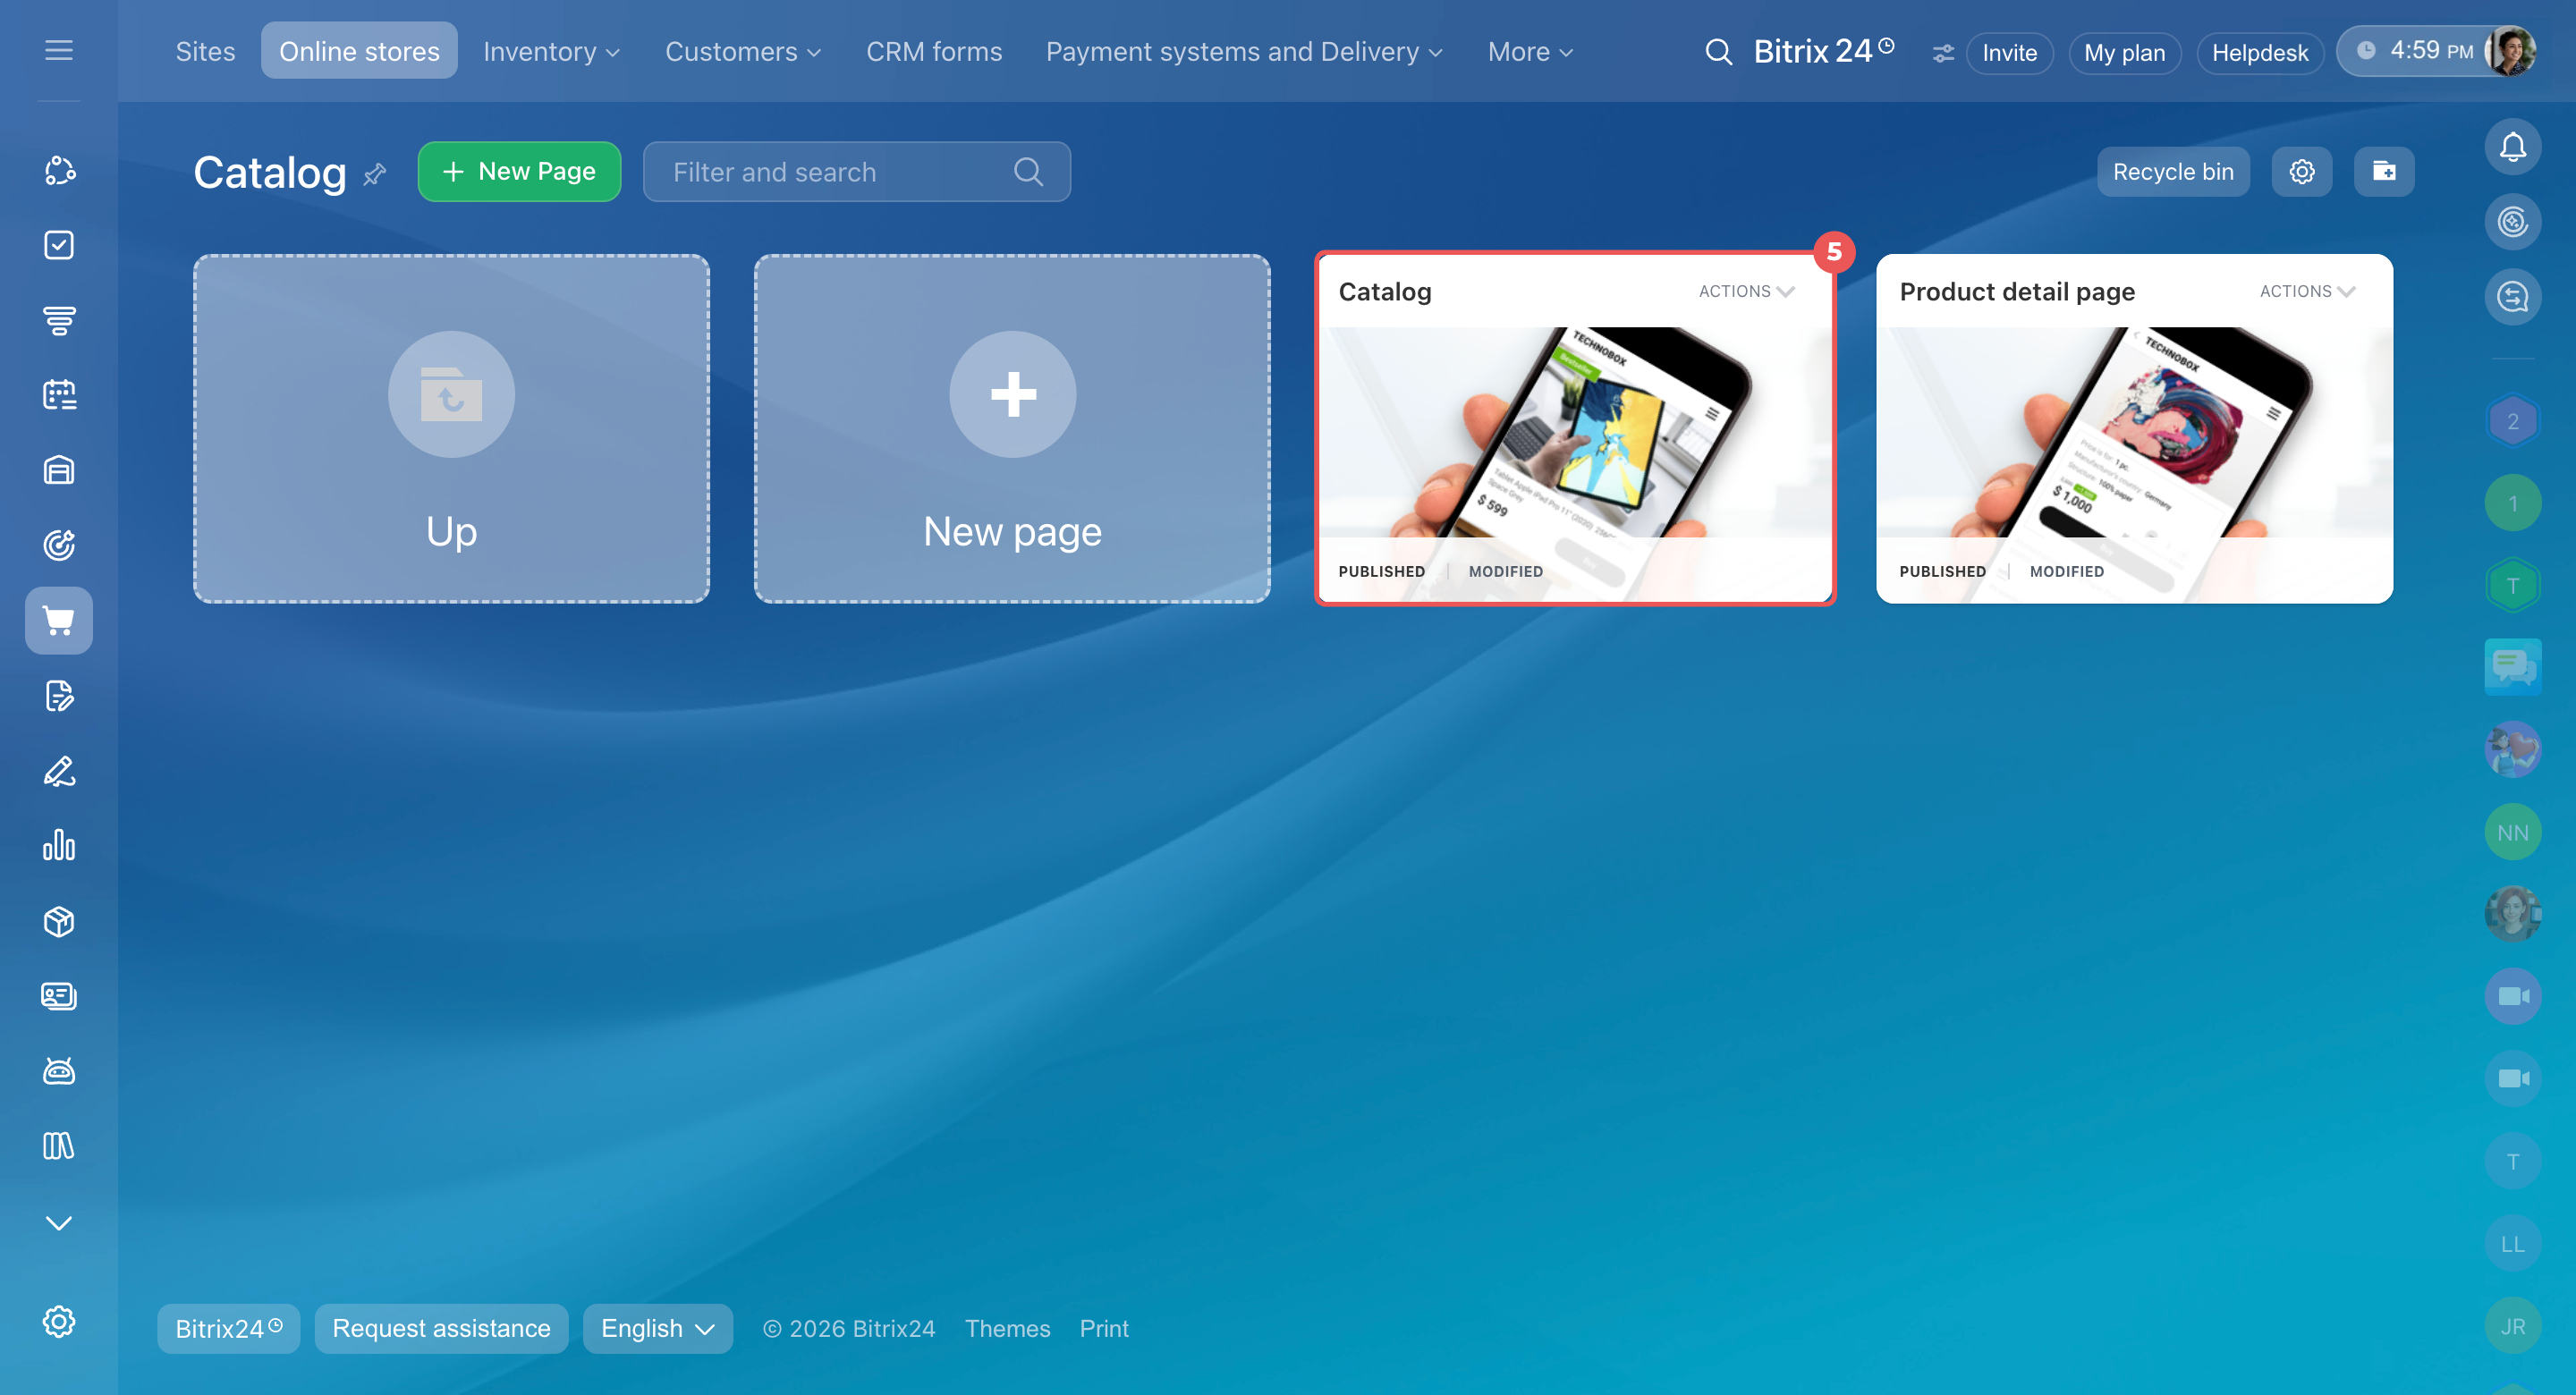
- Open the Catalog page.
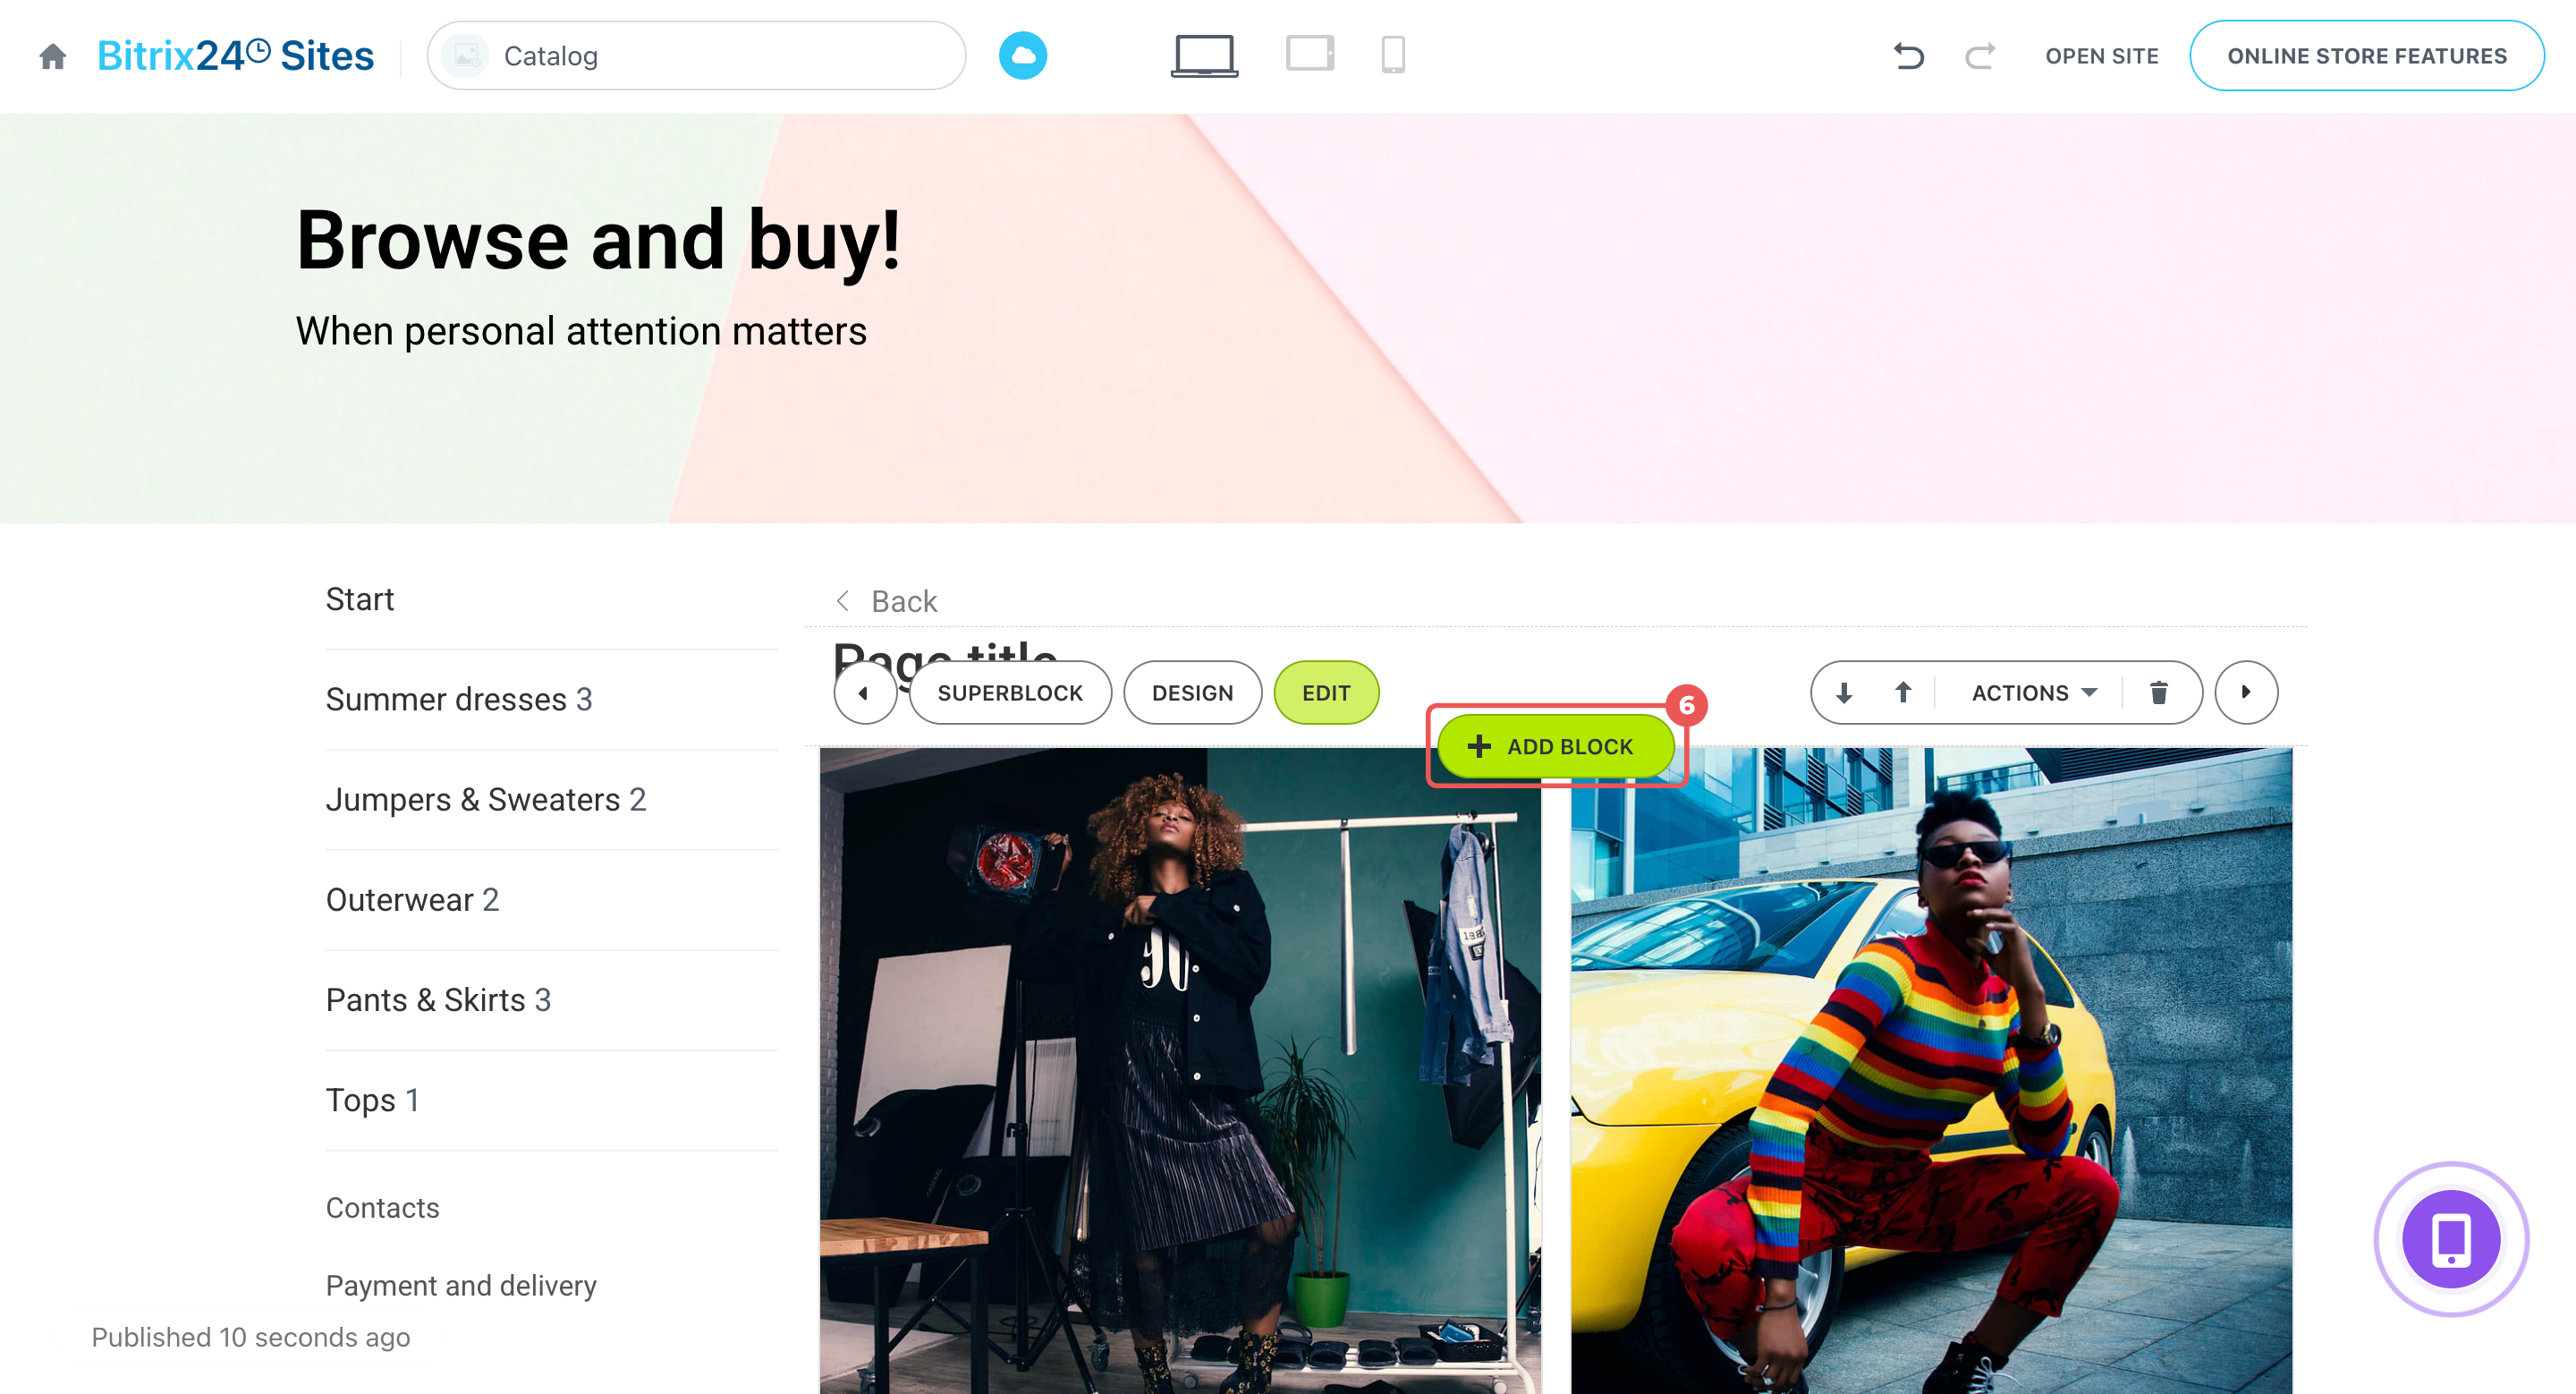
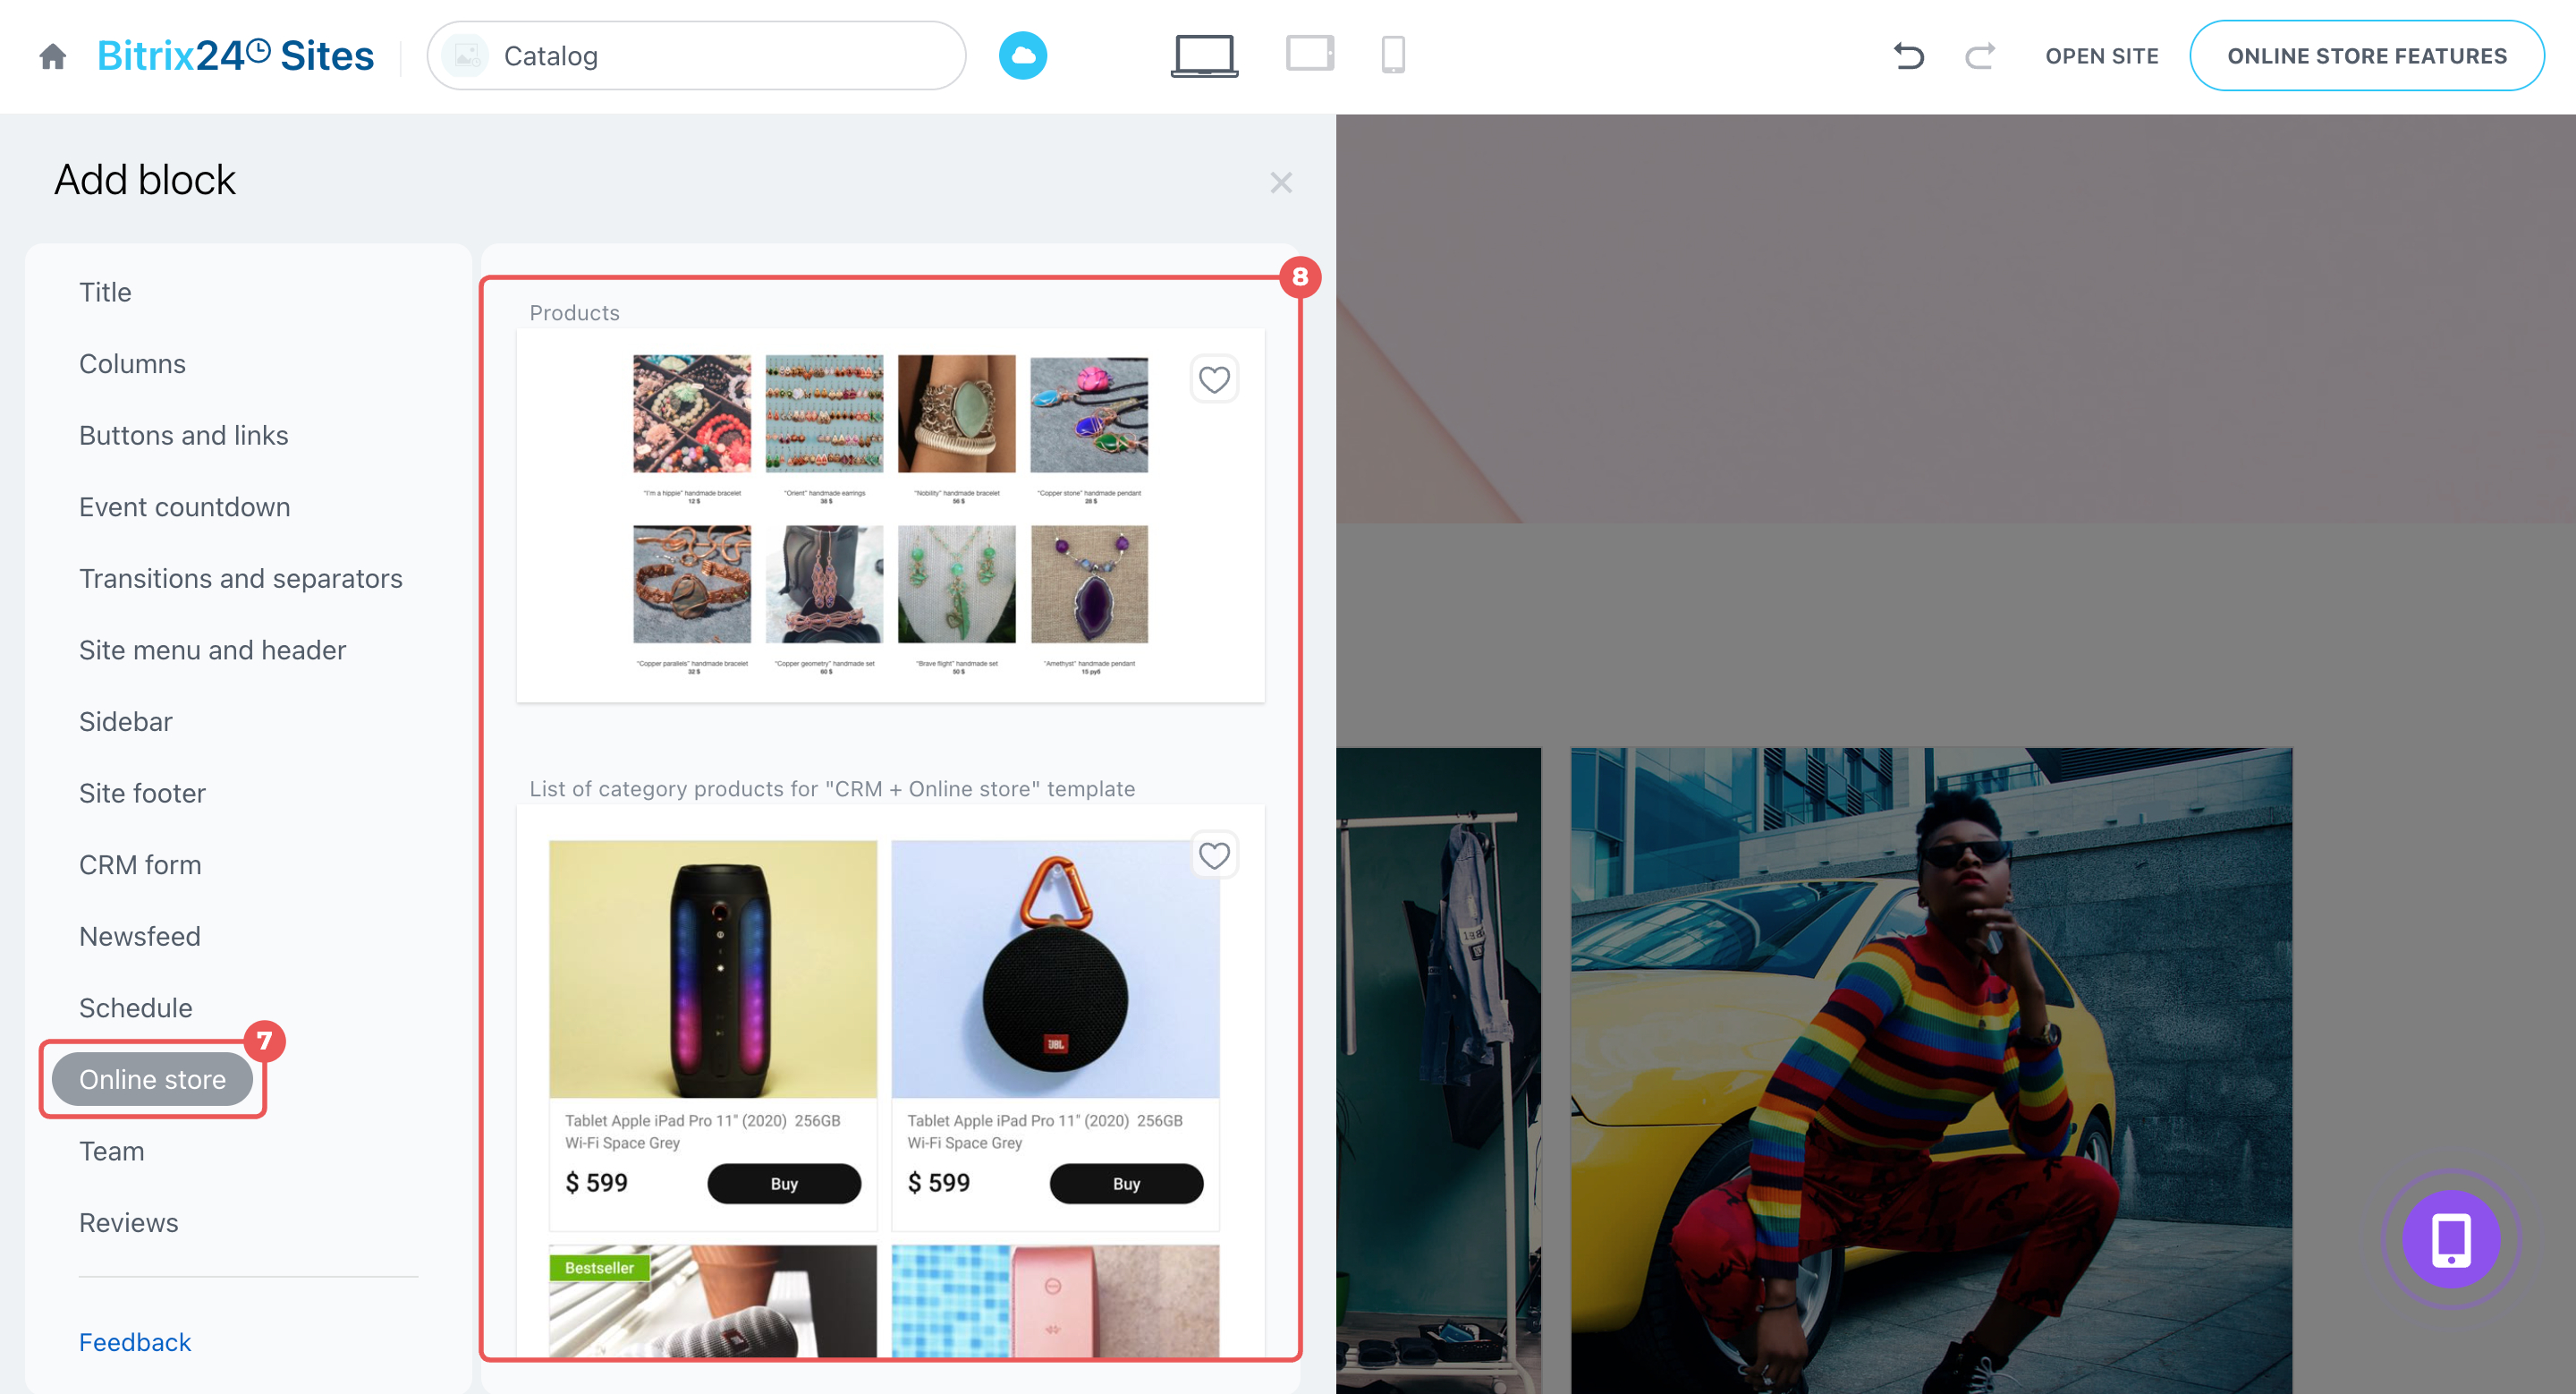
- Click Add block.
- Open the Online store tab.
- Choose a block:
- Products — customers can select product variants, such as sizes or colors, directly in the catalog.
- List of category products for "CRM + Online store" template — displays products in a list. Customers must open the product form to choose a variant.
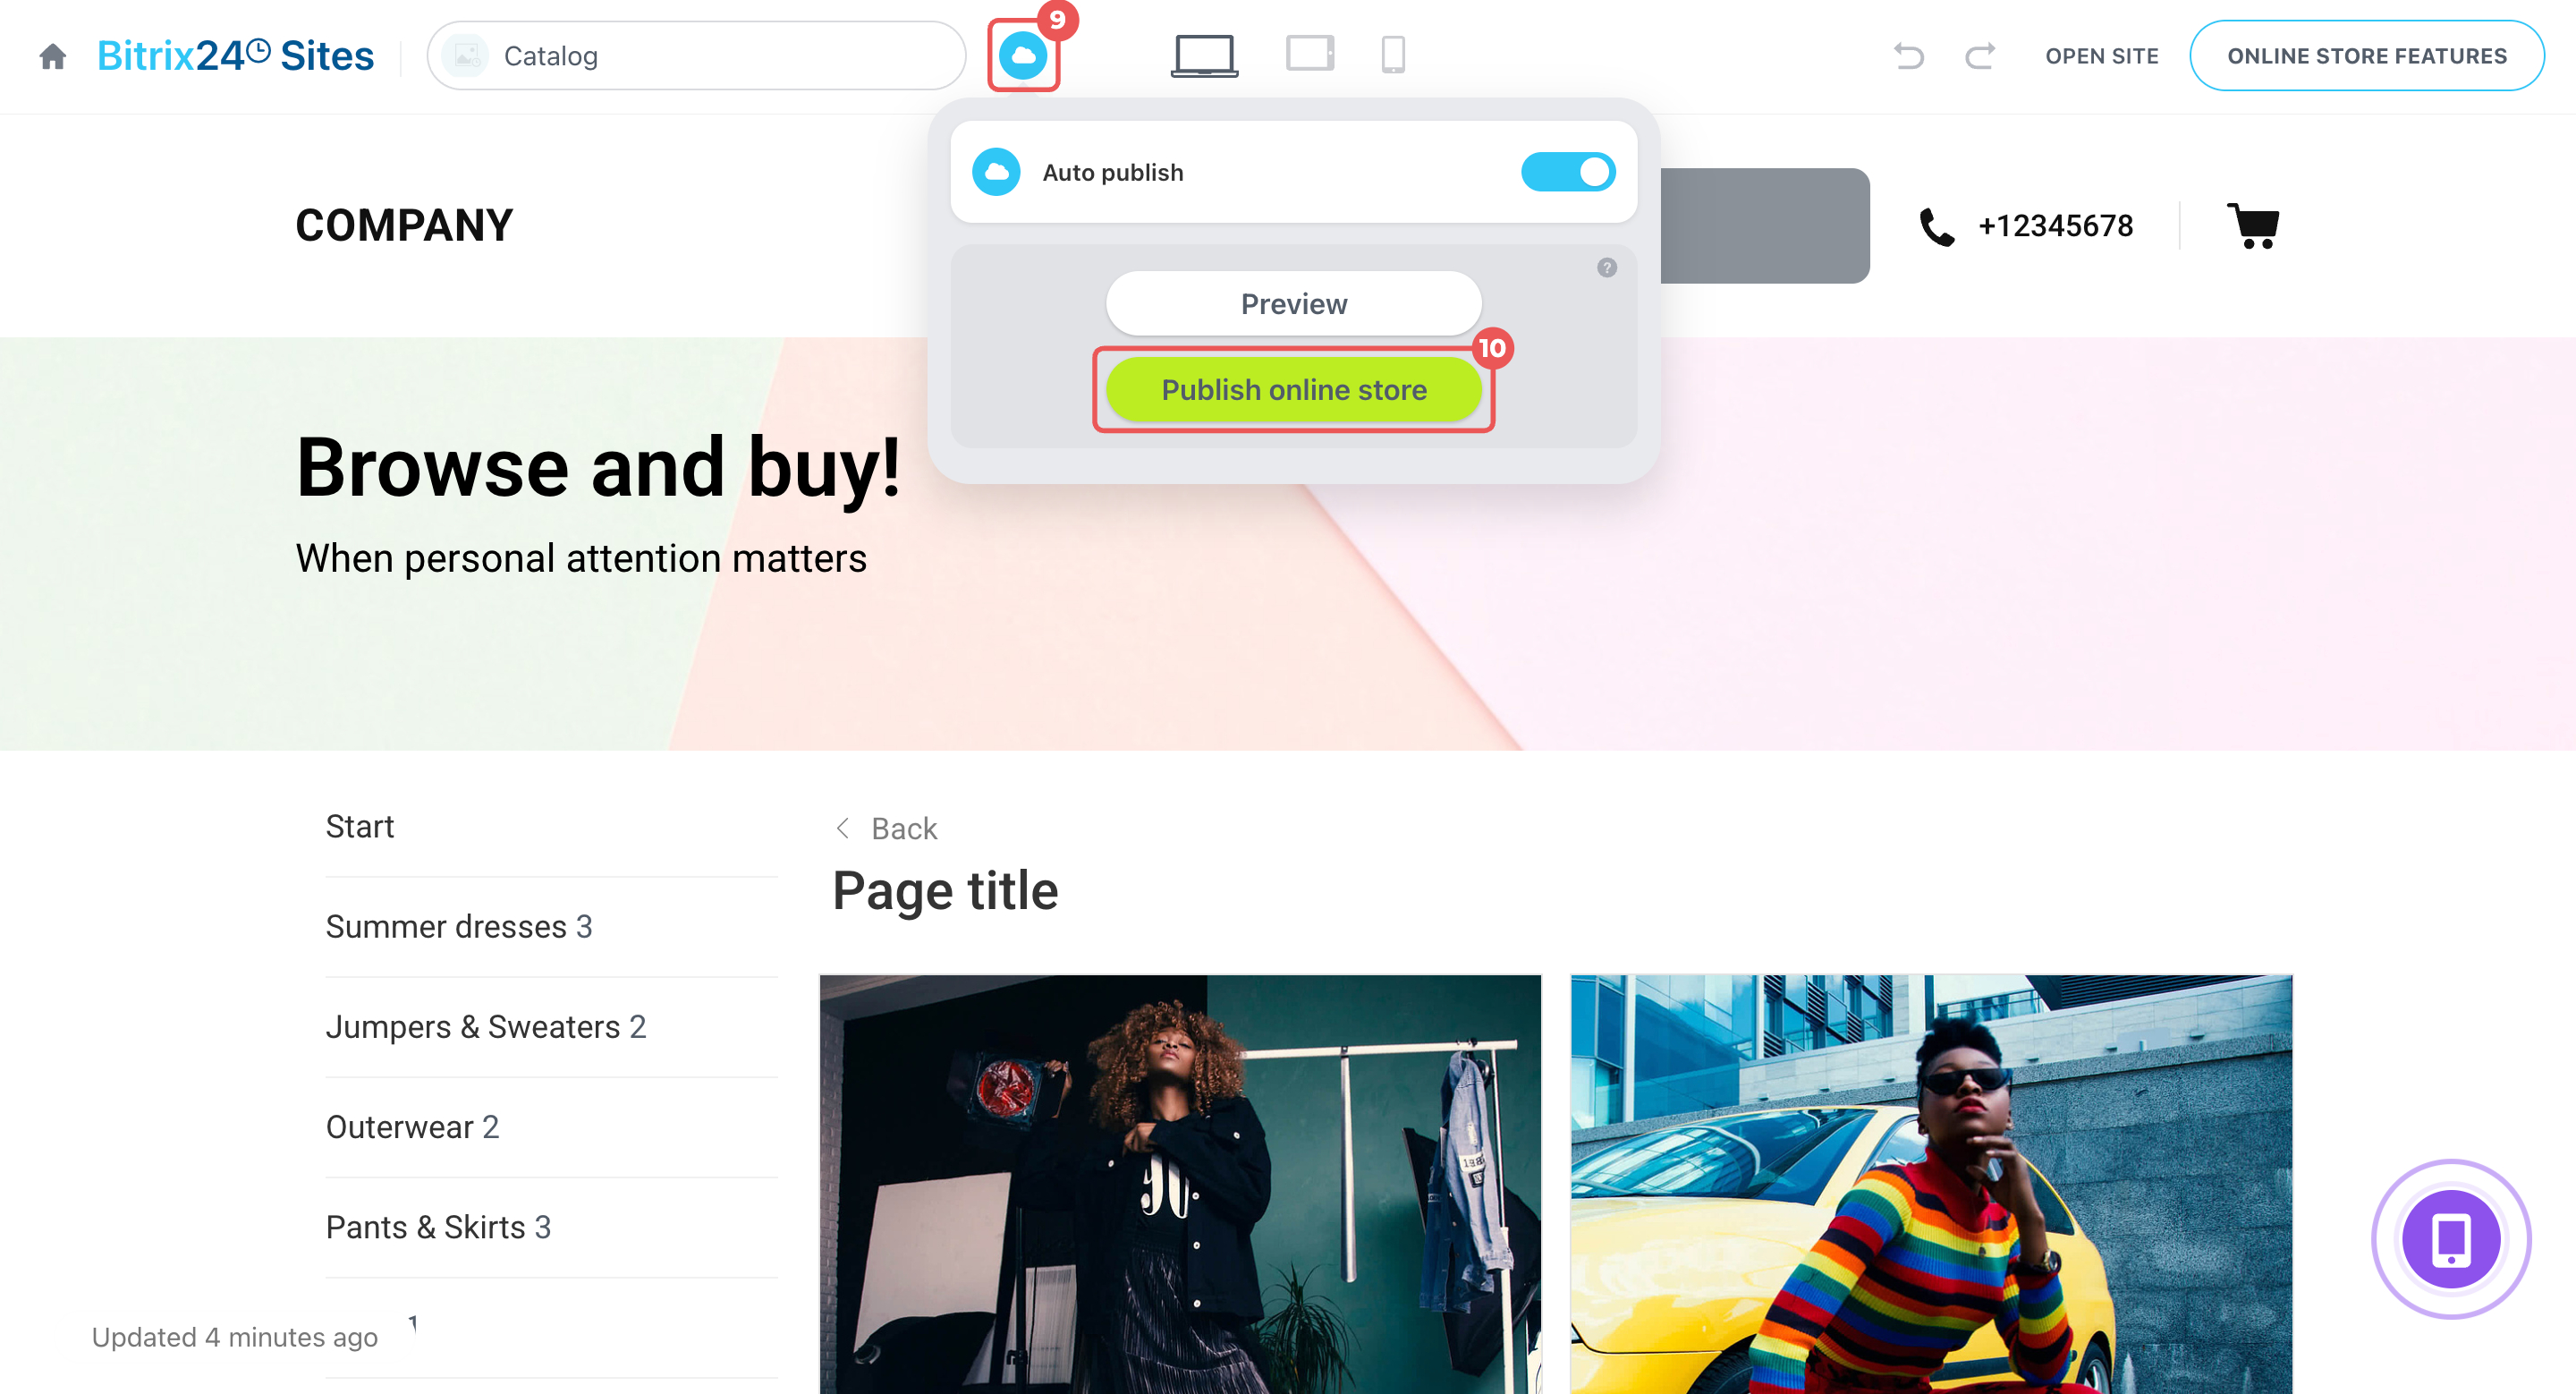
- Click the cloud icon and select Publish online store.
The block you choose determines how customers select products in your store.
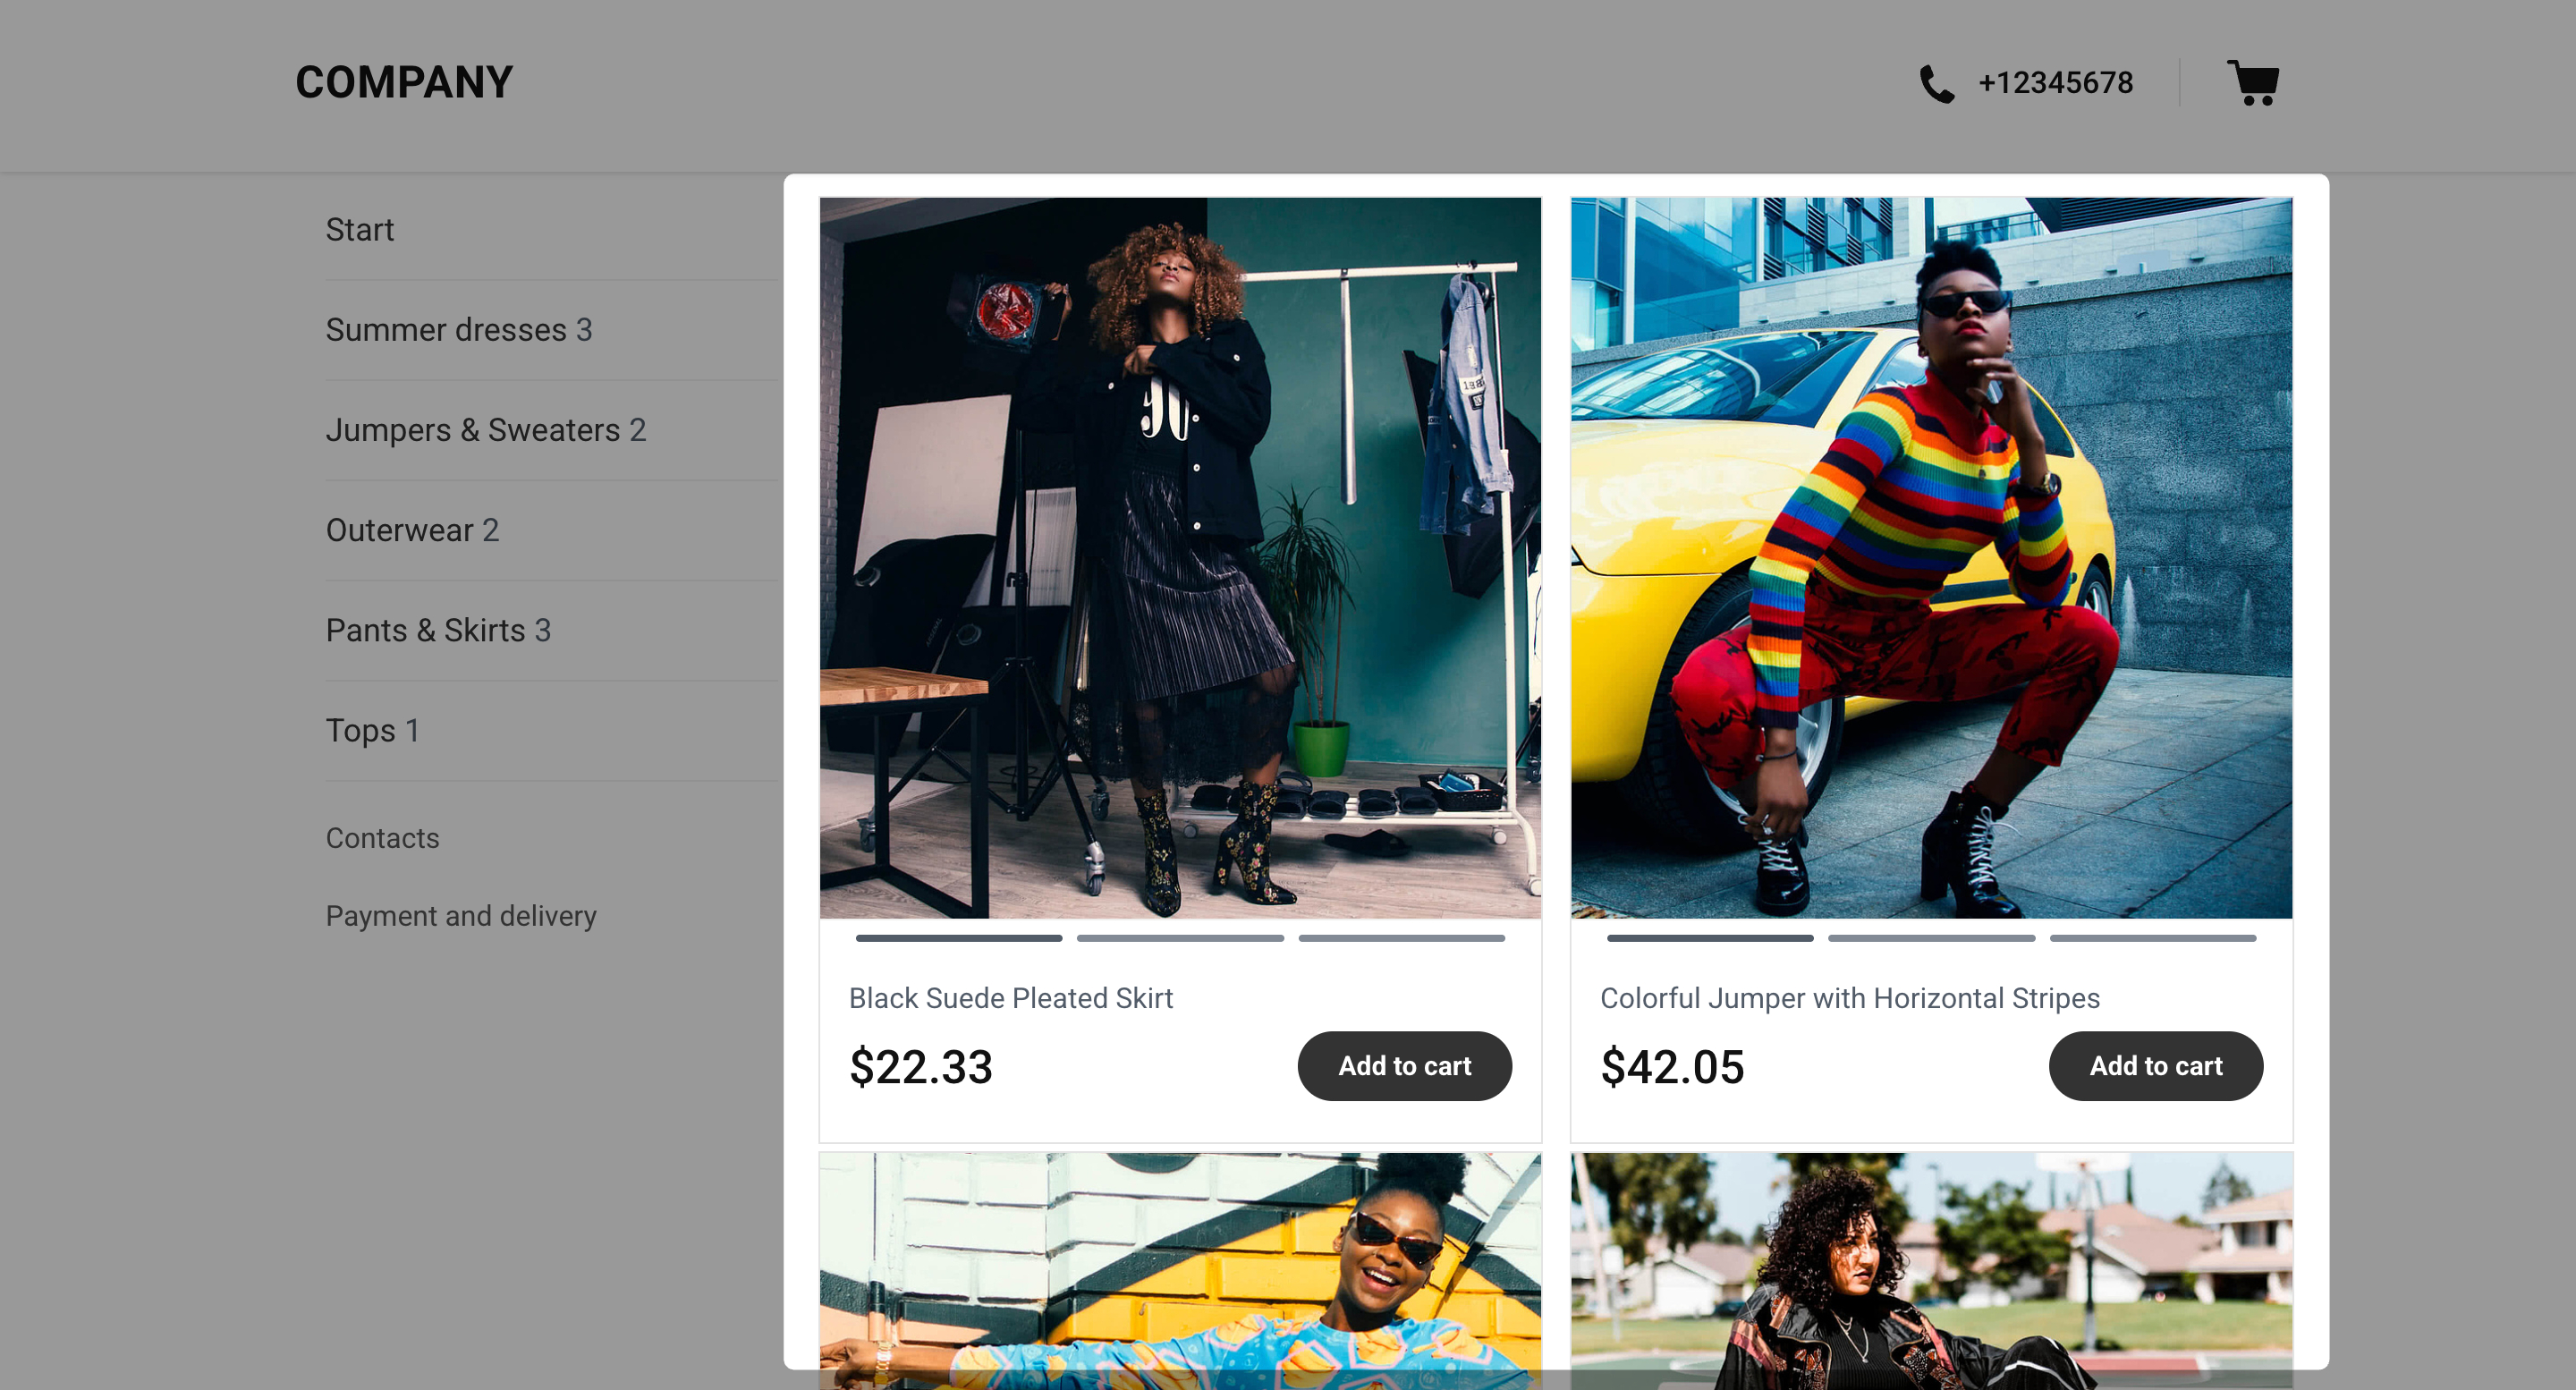 List of category products for "CRM + Online store" template block
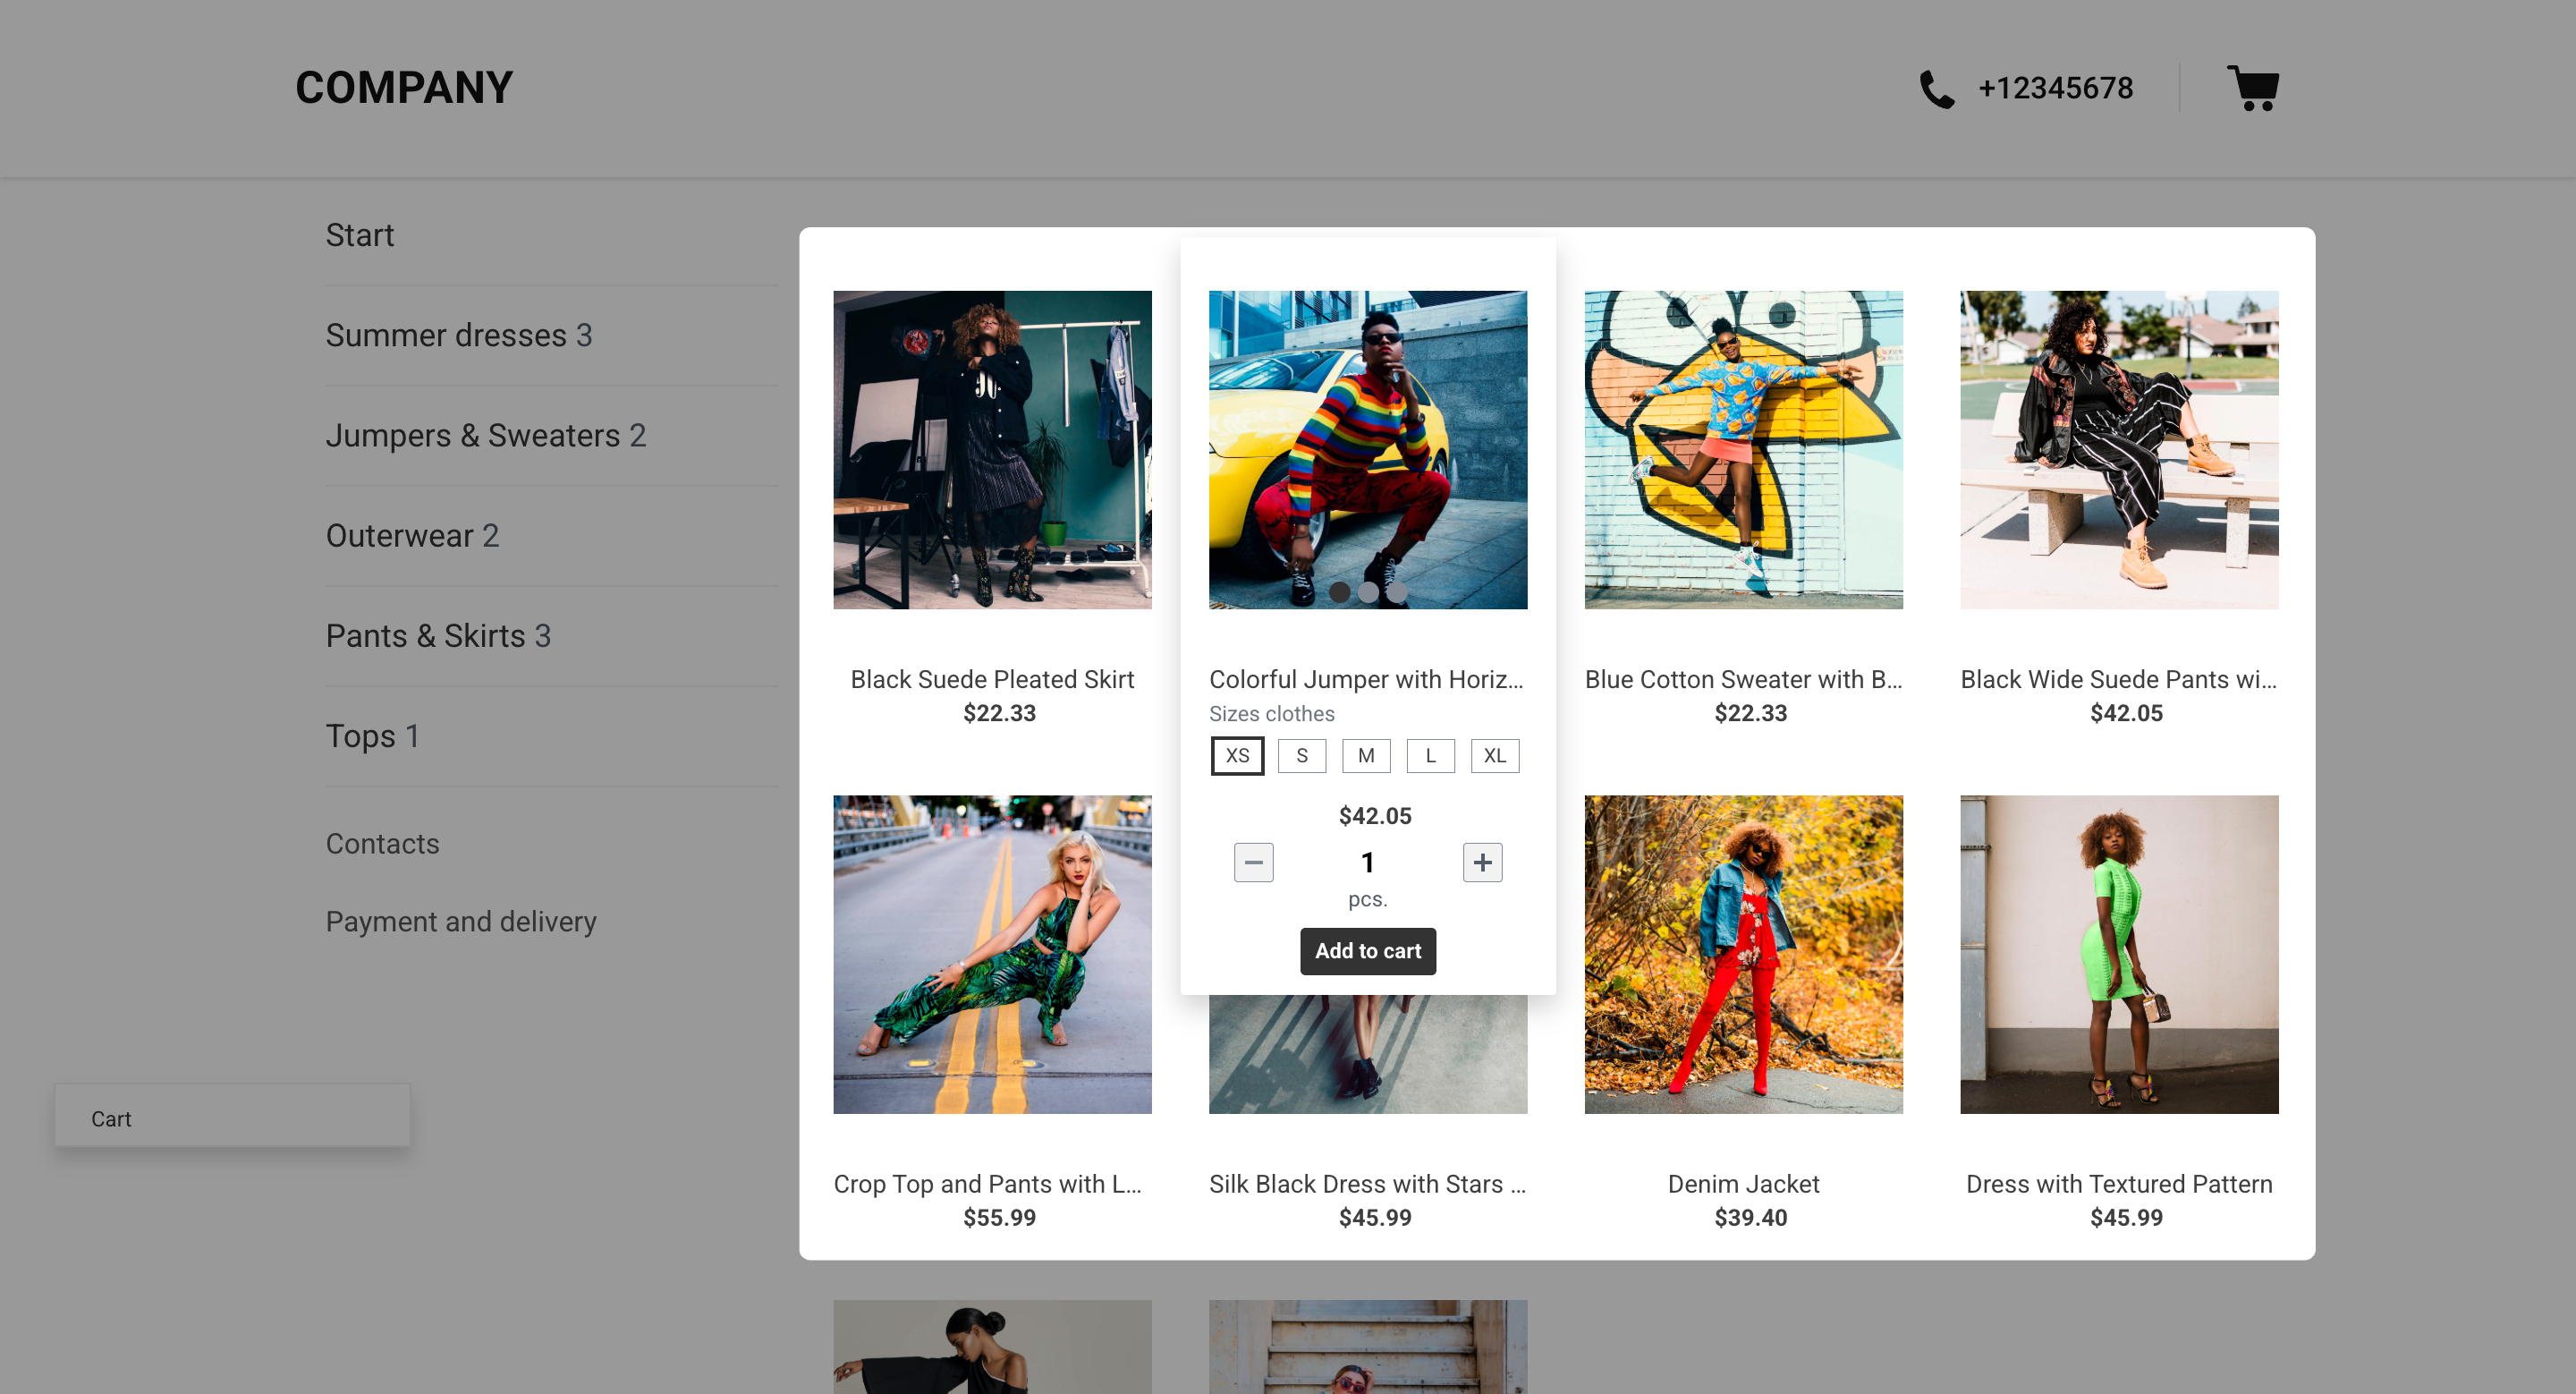 Products block
Manage store pages
Your online store includes separate pages for the catalog, product forms, checkout, and other content. You can edit existing pages, add new ones, or change their design.
- Go to Sites and stores > Online stores.
- Find your store and click Pages.
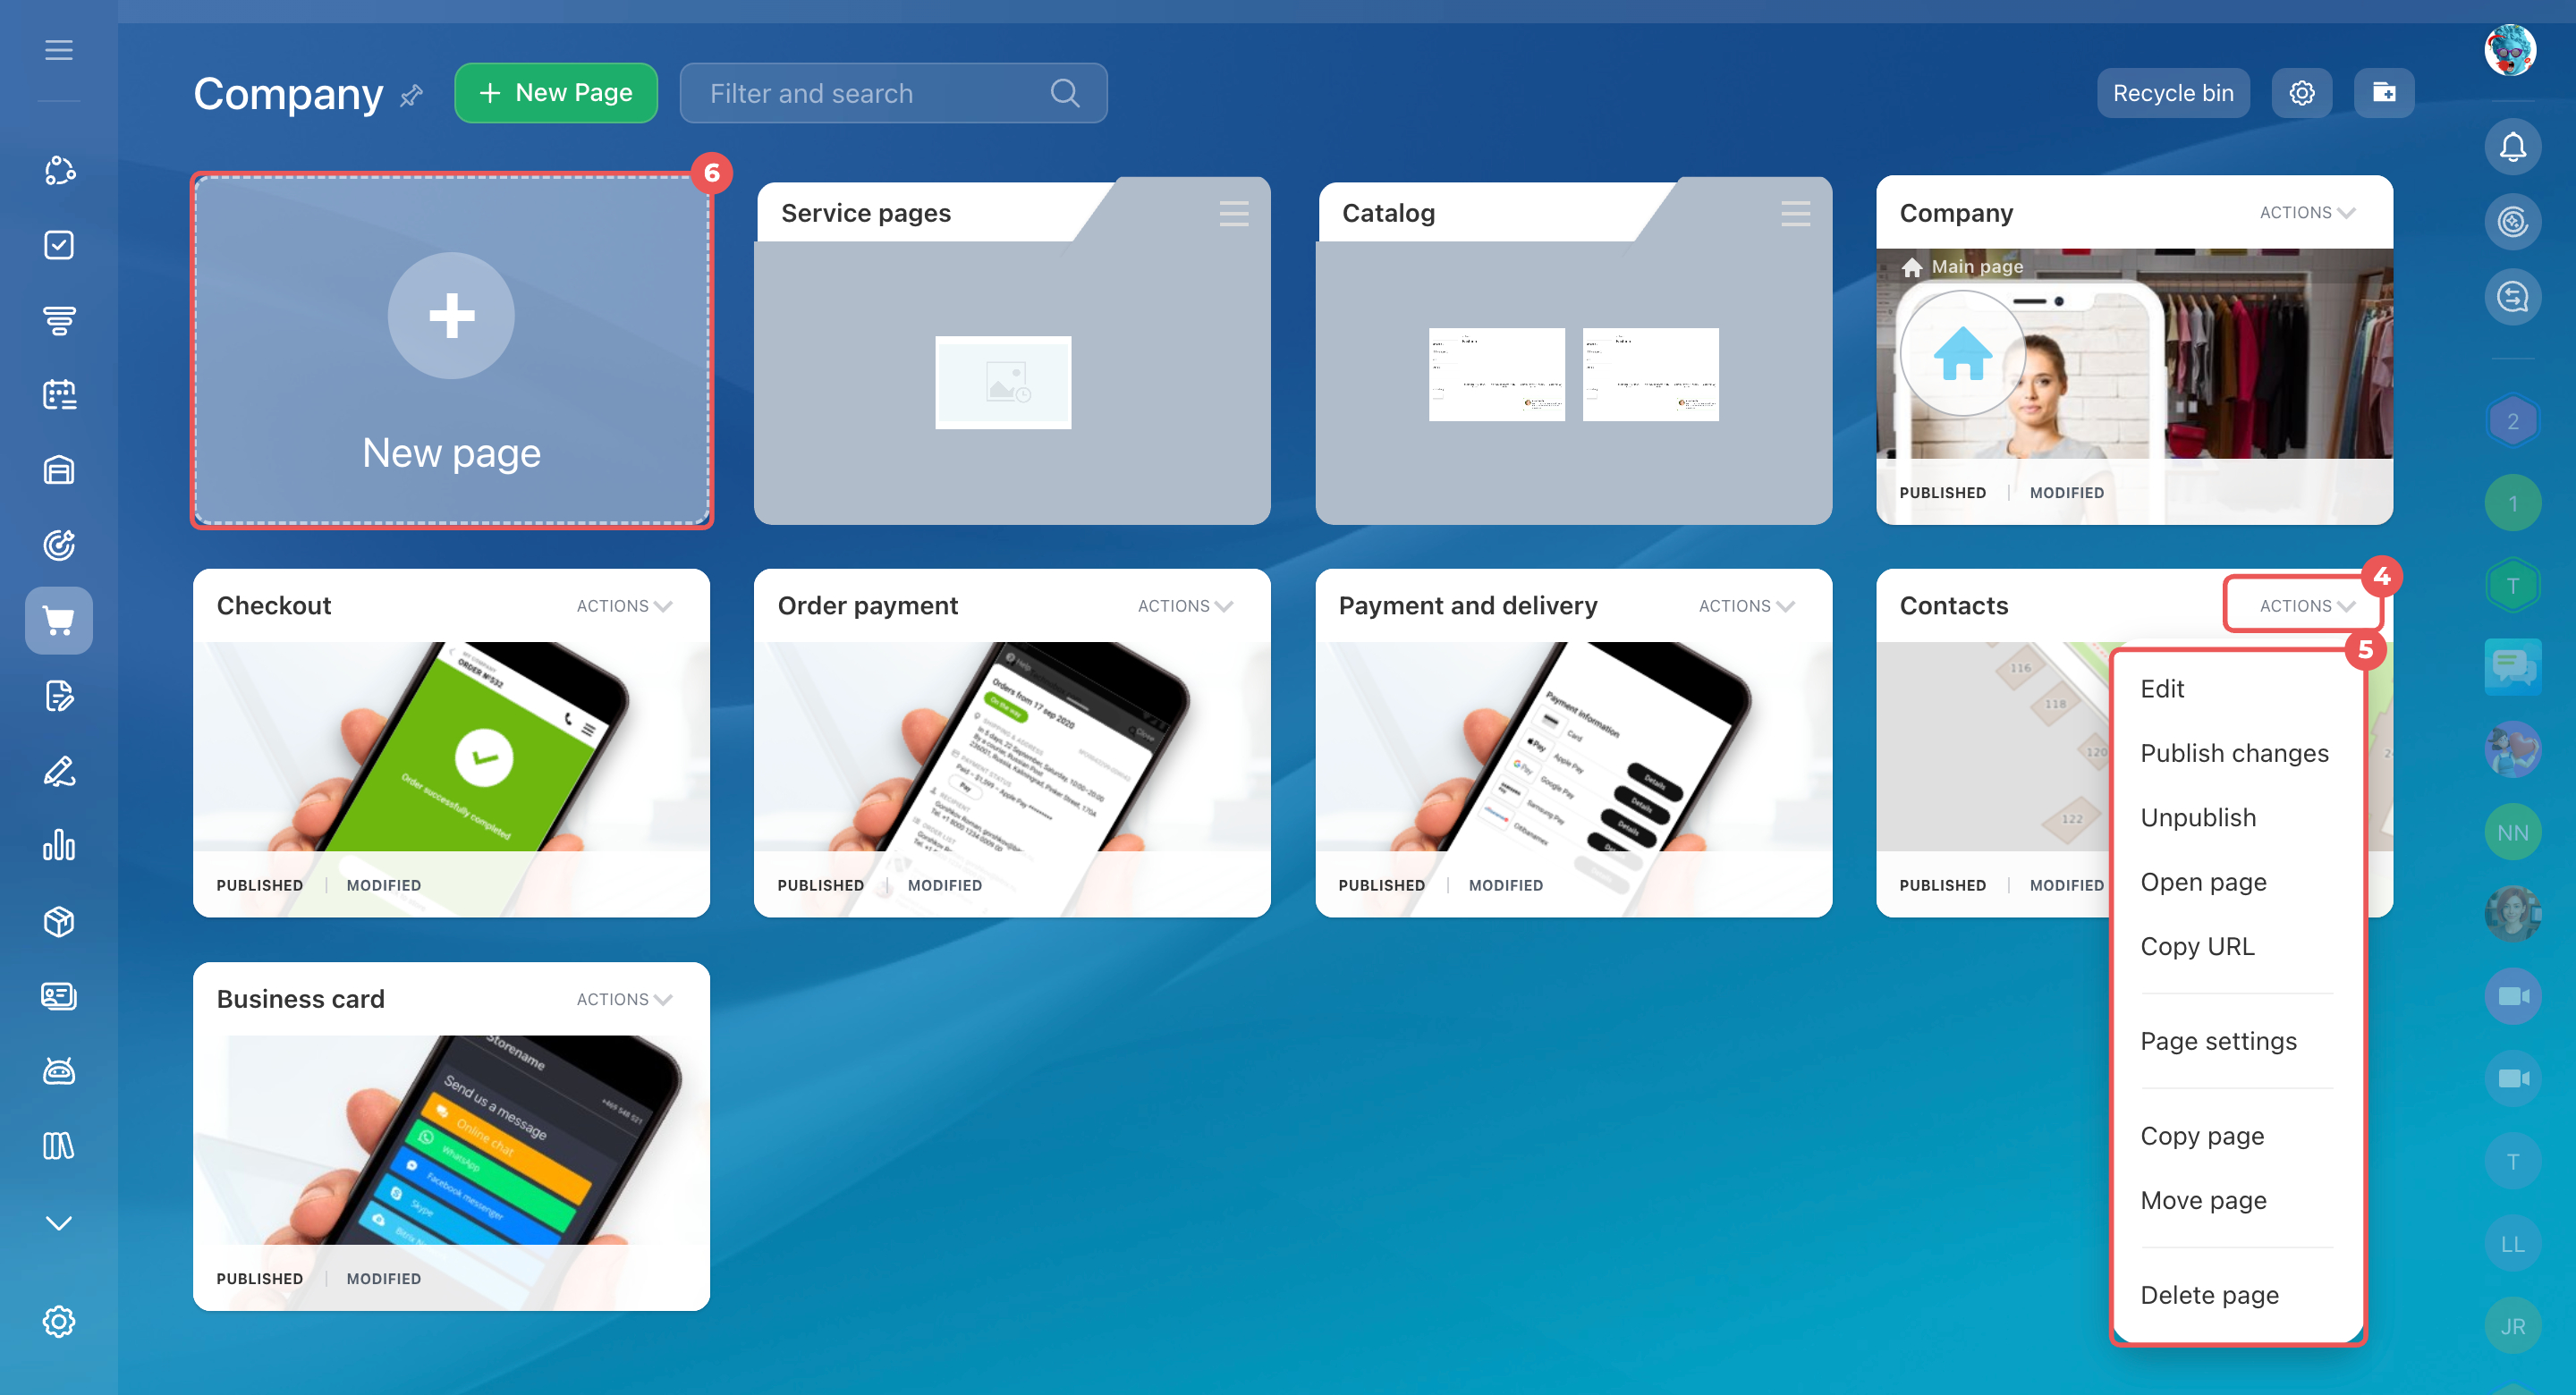
- Next to the page you need, click Actions.
- Choose an action:
- Edit — change the page content, such as adding or removing blocks.
Set up site blocks and design - Publish changes — make updates available to customers after editing.
- Unpublish — hide the page from customers.
- Open page — open the page as a customer sees it.
- Page settings — change parameters, such as the page address, page title, or analytics settings.
- Copy page — create a copy of the page in this or another section.
- Move page — move the page to another section.
- Delete page — delete the page.
- To create a new page, click New page.
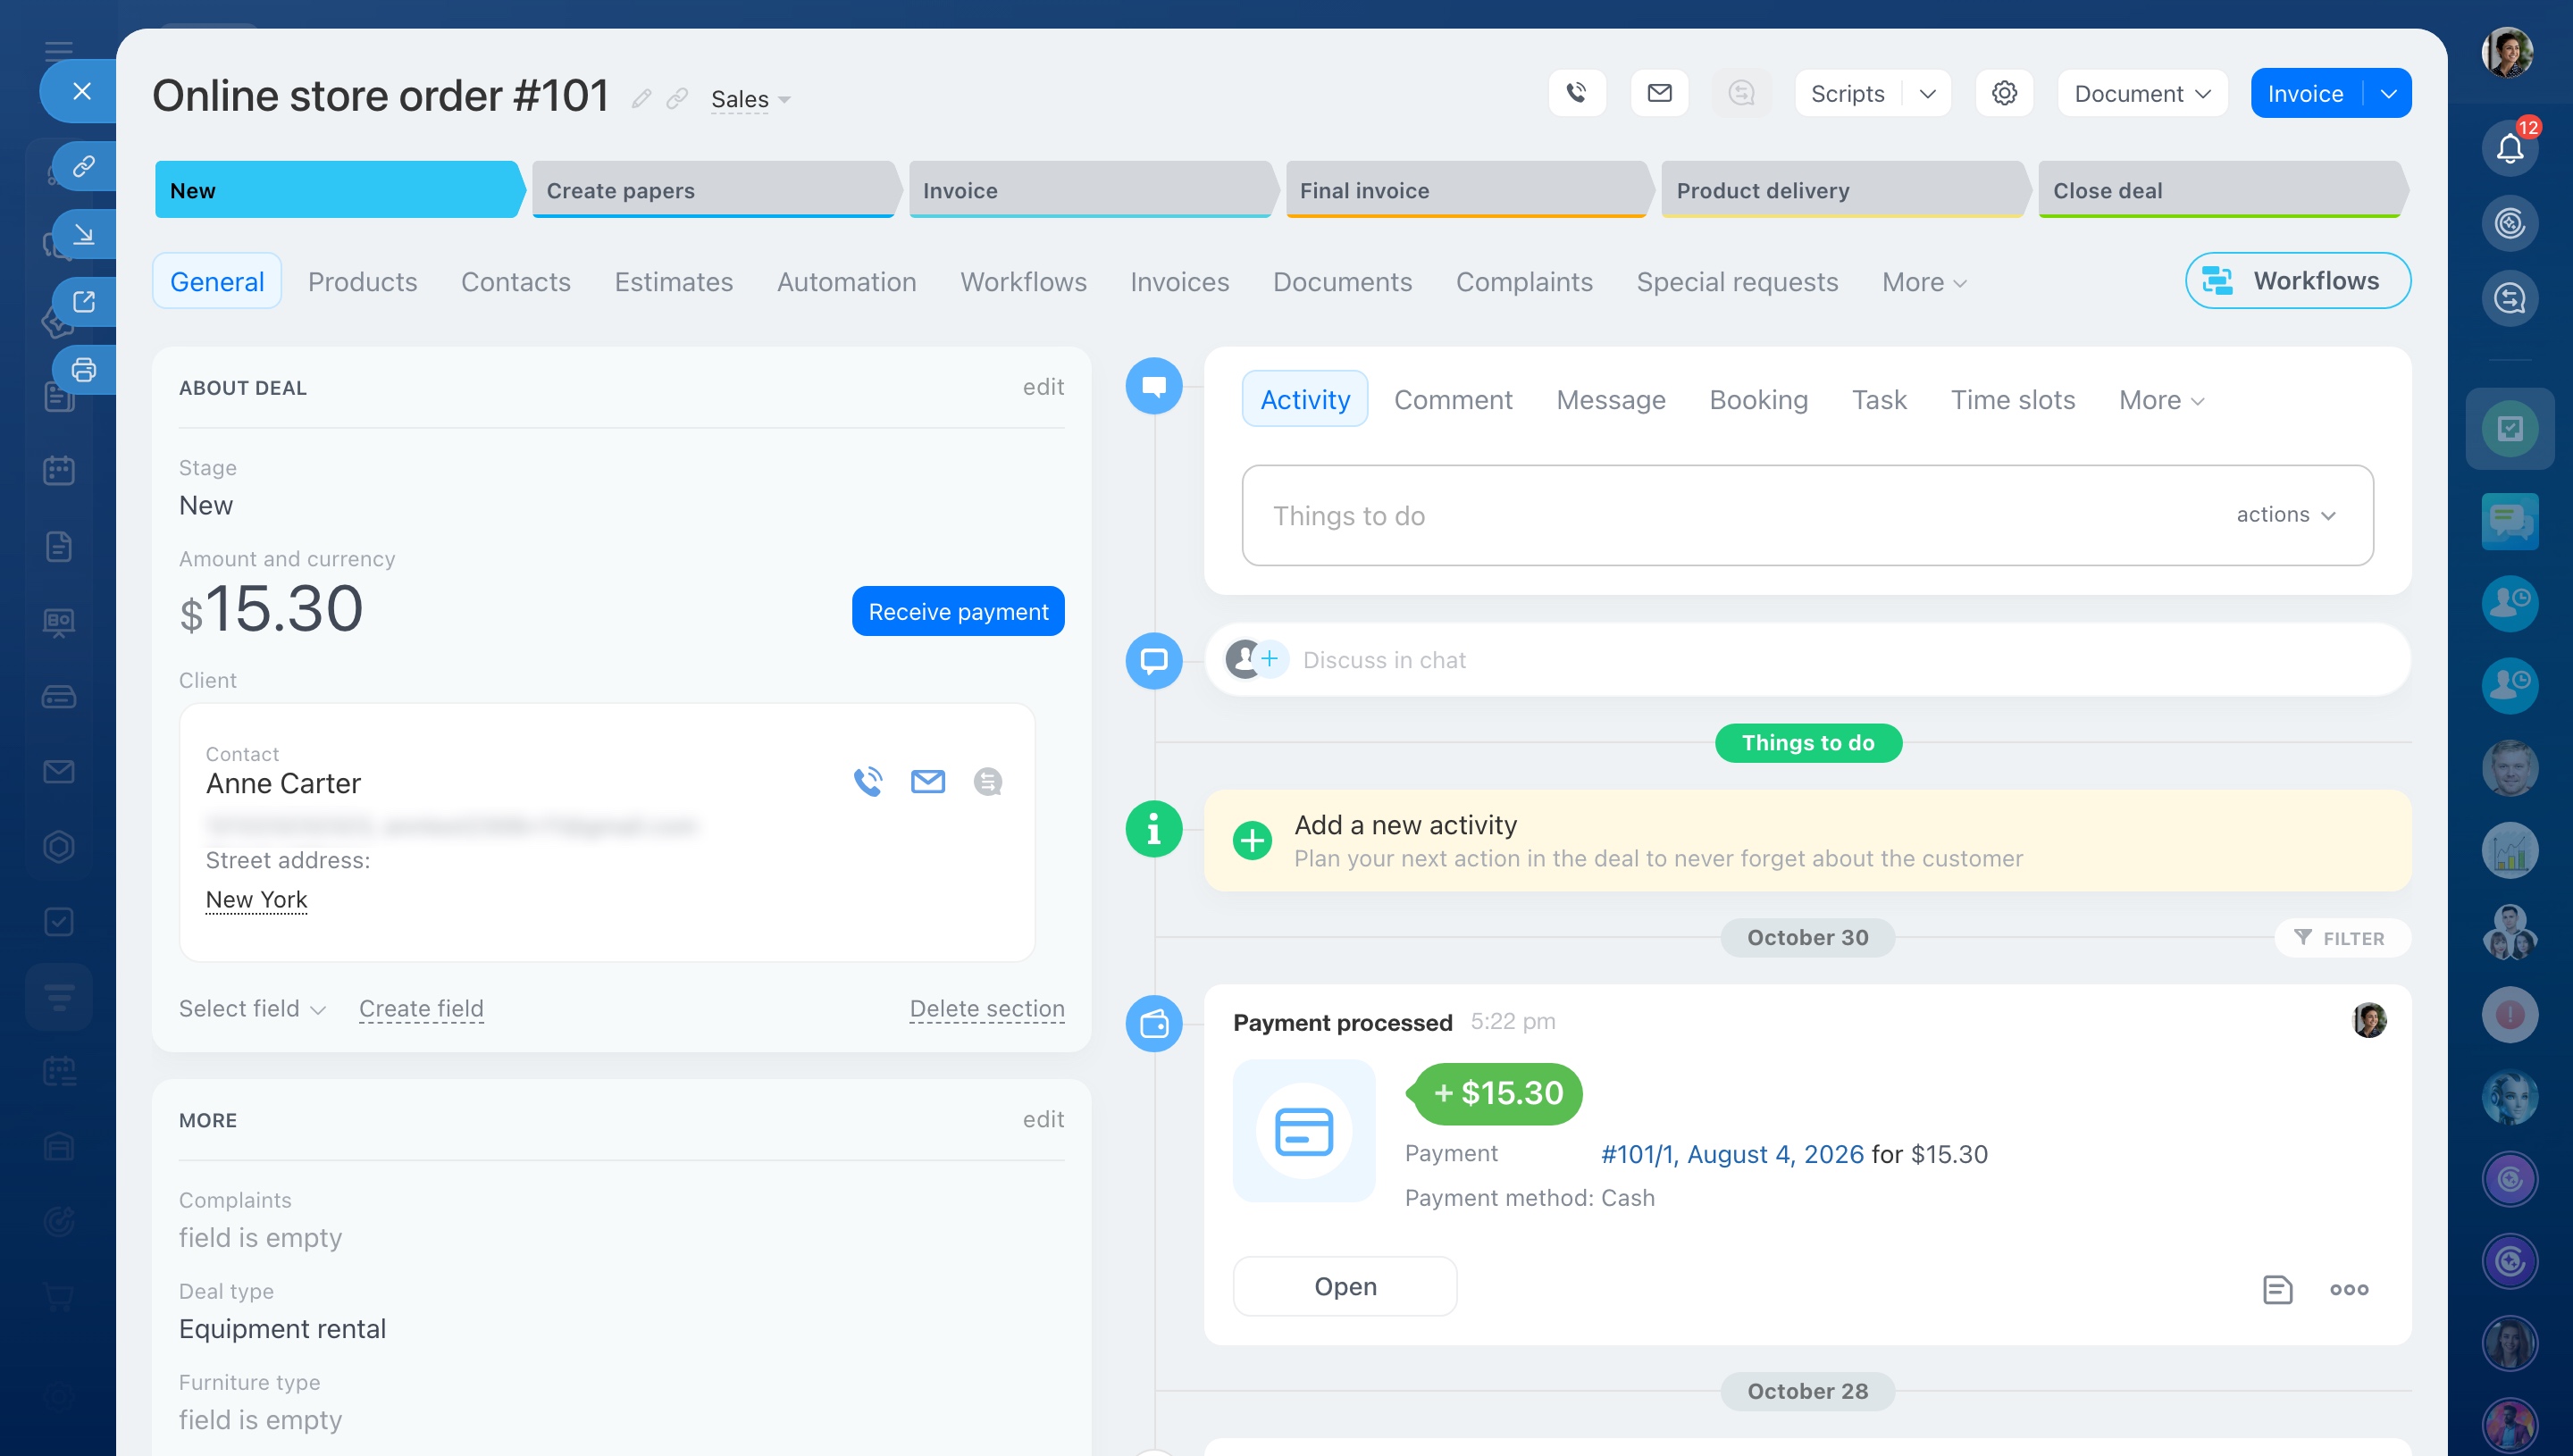
Once your store is ready, customers can place orders, and Bitrix24 automatically saves them in CRM.
Here's how it works:
- A customer opens your store, browses the catalog, and places an order.
- The customer can pay online if you've enabled payments.
- Bitrix24 creates a deal with the ordered products, total amount, and customer's contact details.
- An employee opens the deal to confirm the details or arrange delivery if needed.
You don't need to enter orders into CRM manually. Your team can start processing them as soon as customers complete checkout.
Place an order in the Bitrix24 online store
In brief
- CRM + Online store is a ready-made online store connected to Bitrix24 CRM. When customers place orders, Bitrix24 automatically creates deals.
- Create an online store in a few minutes in CRM > Sales > Sales channels > Contact center. You can test it immediately by placing an order.
- To change store settings, go to Sites and stores > Online stores. Next to the store you need, click Three dots (...) > Settings.
- Use Online store settings to change the domain, index page, and customer communication widget.
- Use Online store design to customize colors, fonts, backgrounds, and other design elements.
- Use Catalog settings to choose which products appear in your store and how customers see them.
- To manage individual pages, go to Sites and stores > Online stores. Next to the store you need, click Pages. You can edit, publish, copy, move, or delete pages.
- Once your store is ready, customers can place orders online. Bitrix24 automatically creates deals with the ordered products and customer details.