
CRM + Online store lets you create an online store and manage orders in Bitrix24 CRM. You can launch a site with a product catalog, accept orders, and process them in CRM.
With CRM + Online store, you can:
- Launch your store in minutes. Bitrix24 creates a mobile-friendly store without any coding or design skills.
- Accept orders online. Customers can place orders and pay directly on your site. They can also request a call to discuss the order details.
- Manage orders in CRM. When a customer places an order, Bitrix24 automatically creates a deal with the ordered products and customer details. Your team doesn't need to enter this information manually.
In this article, we'll cover the main steps to launch your online store.
For more detailed instructions, see these articles:
Create a store
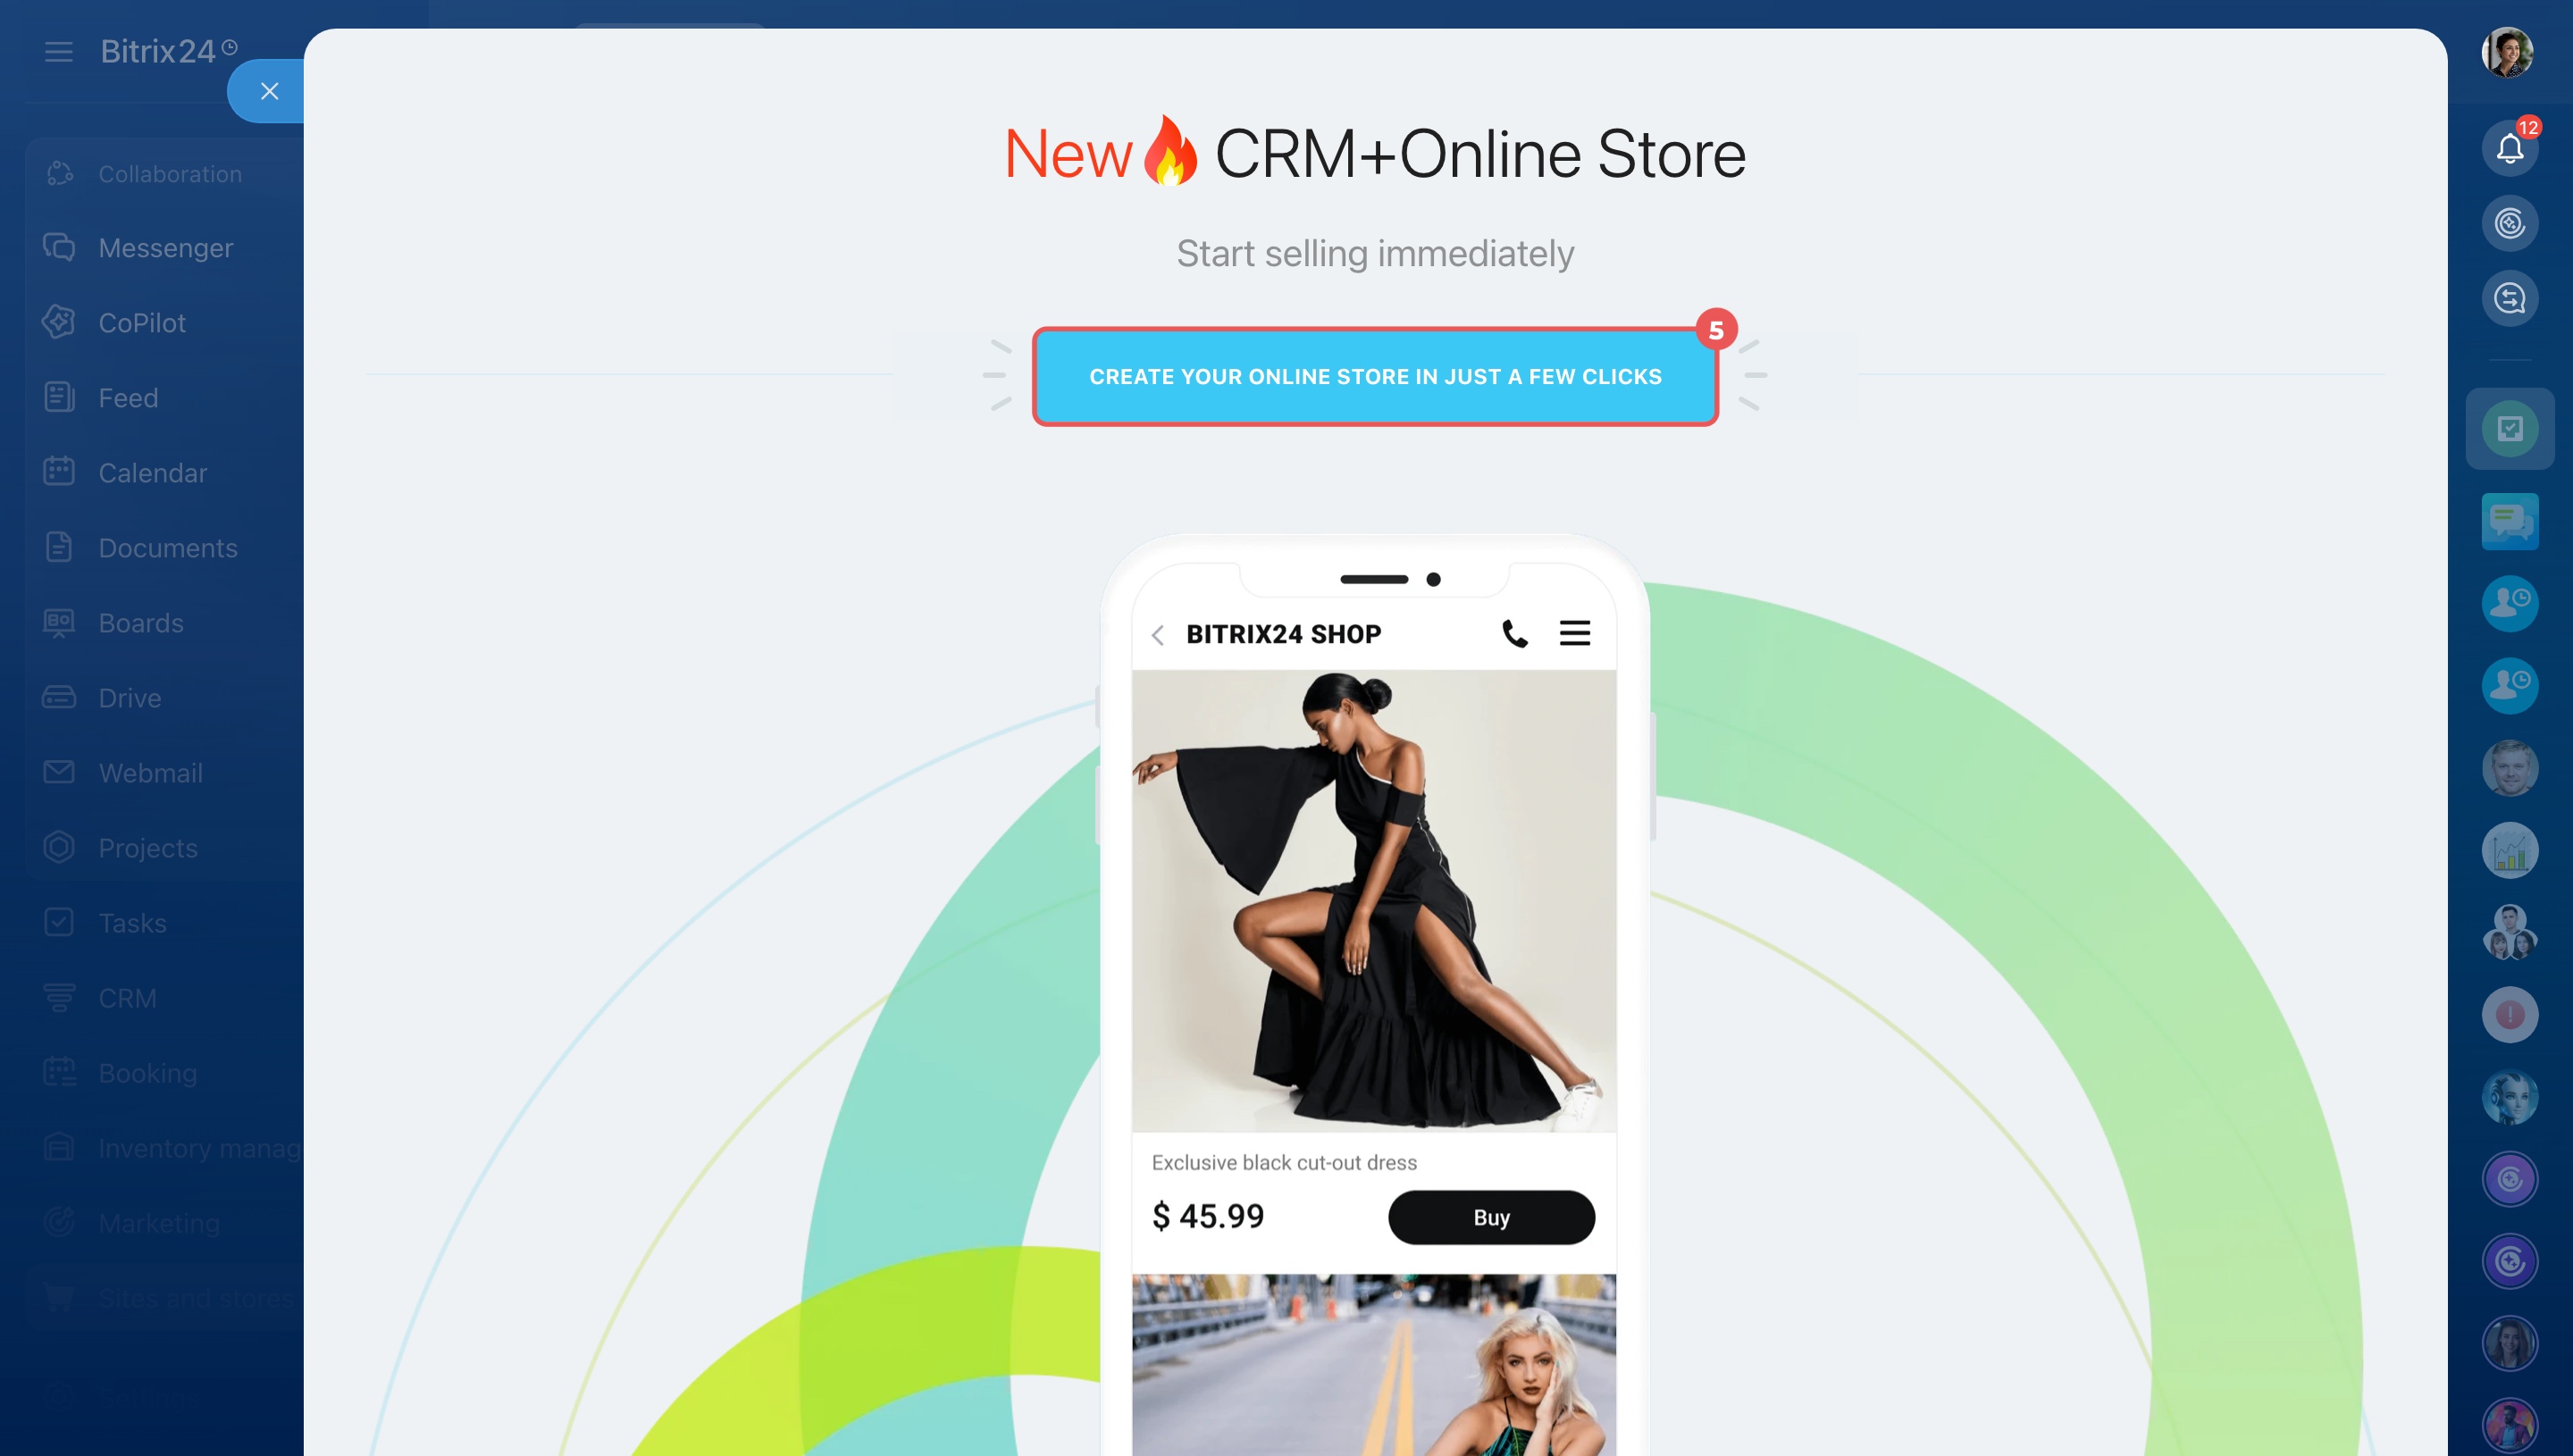
You can create a CRM + Online store in minutes. Bitrix24 automatically builds a site with ready-made pages and sample products. You can open the store right away to see how customers place orders.
Set up access permissions for sites and online stores
Create a store from CRM. Open CRM > Sales > Sales channels > Contact center. Find the CRM + Online store block and click Create your online store in just a few clicks.
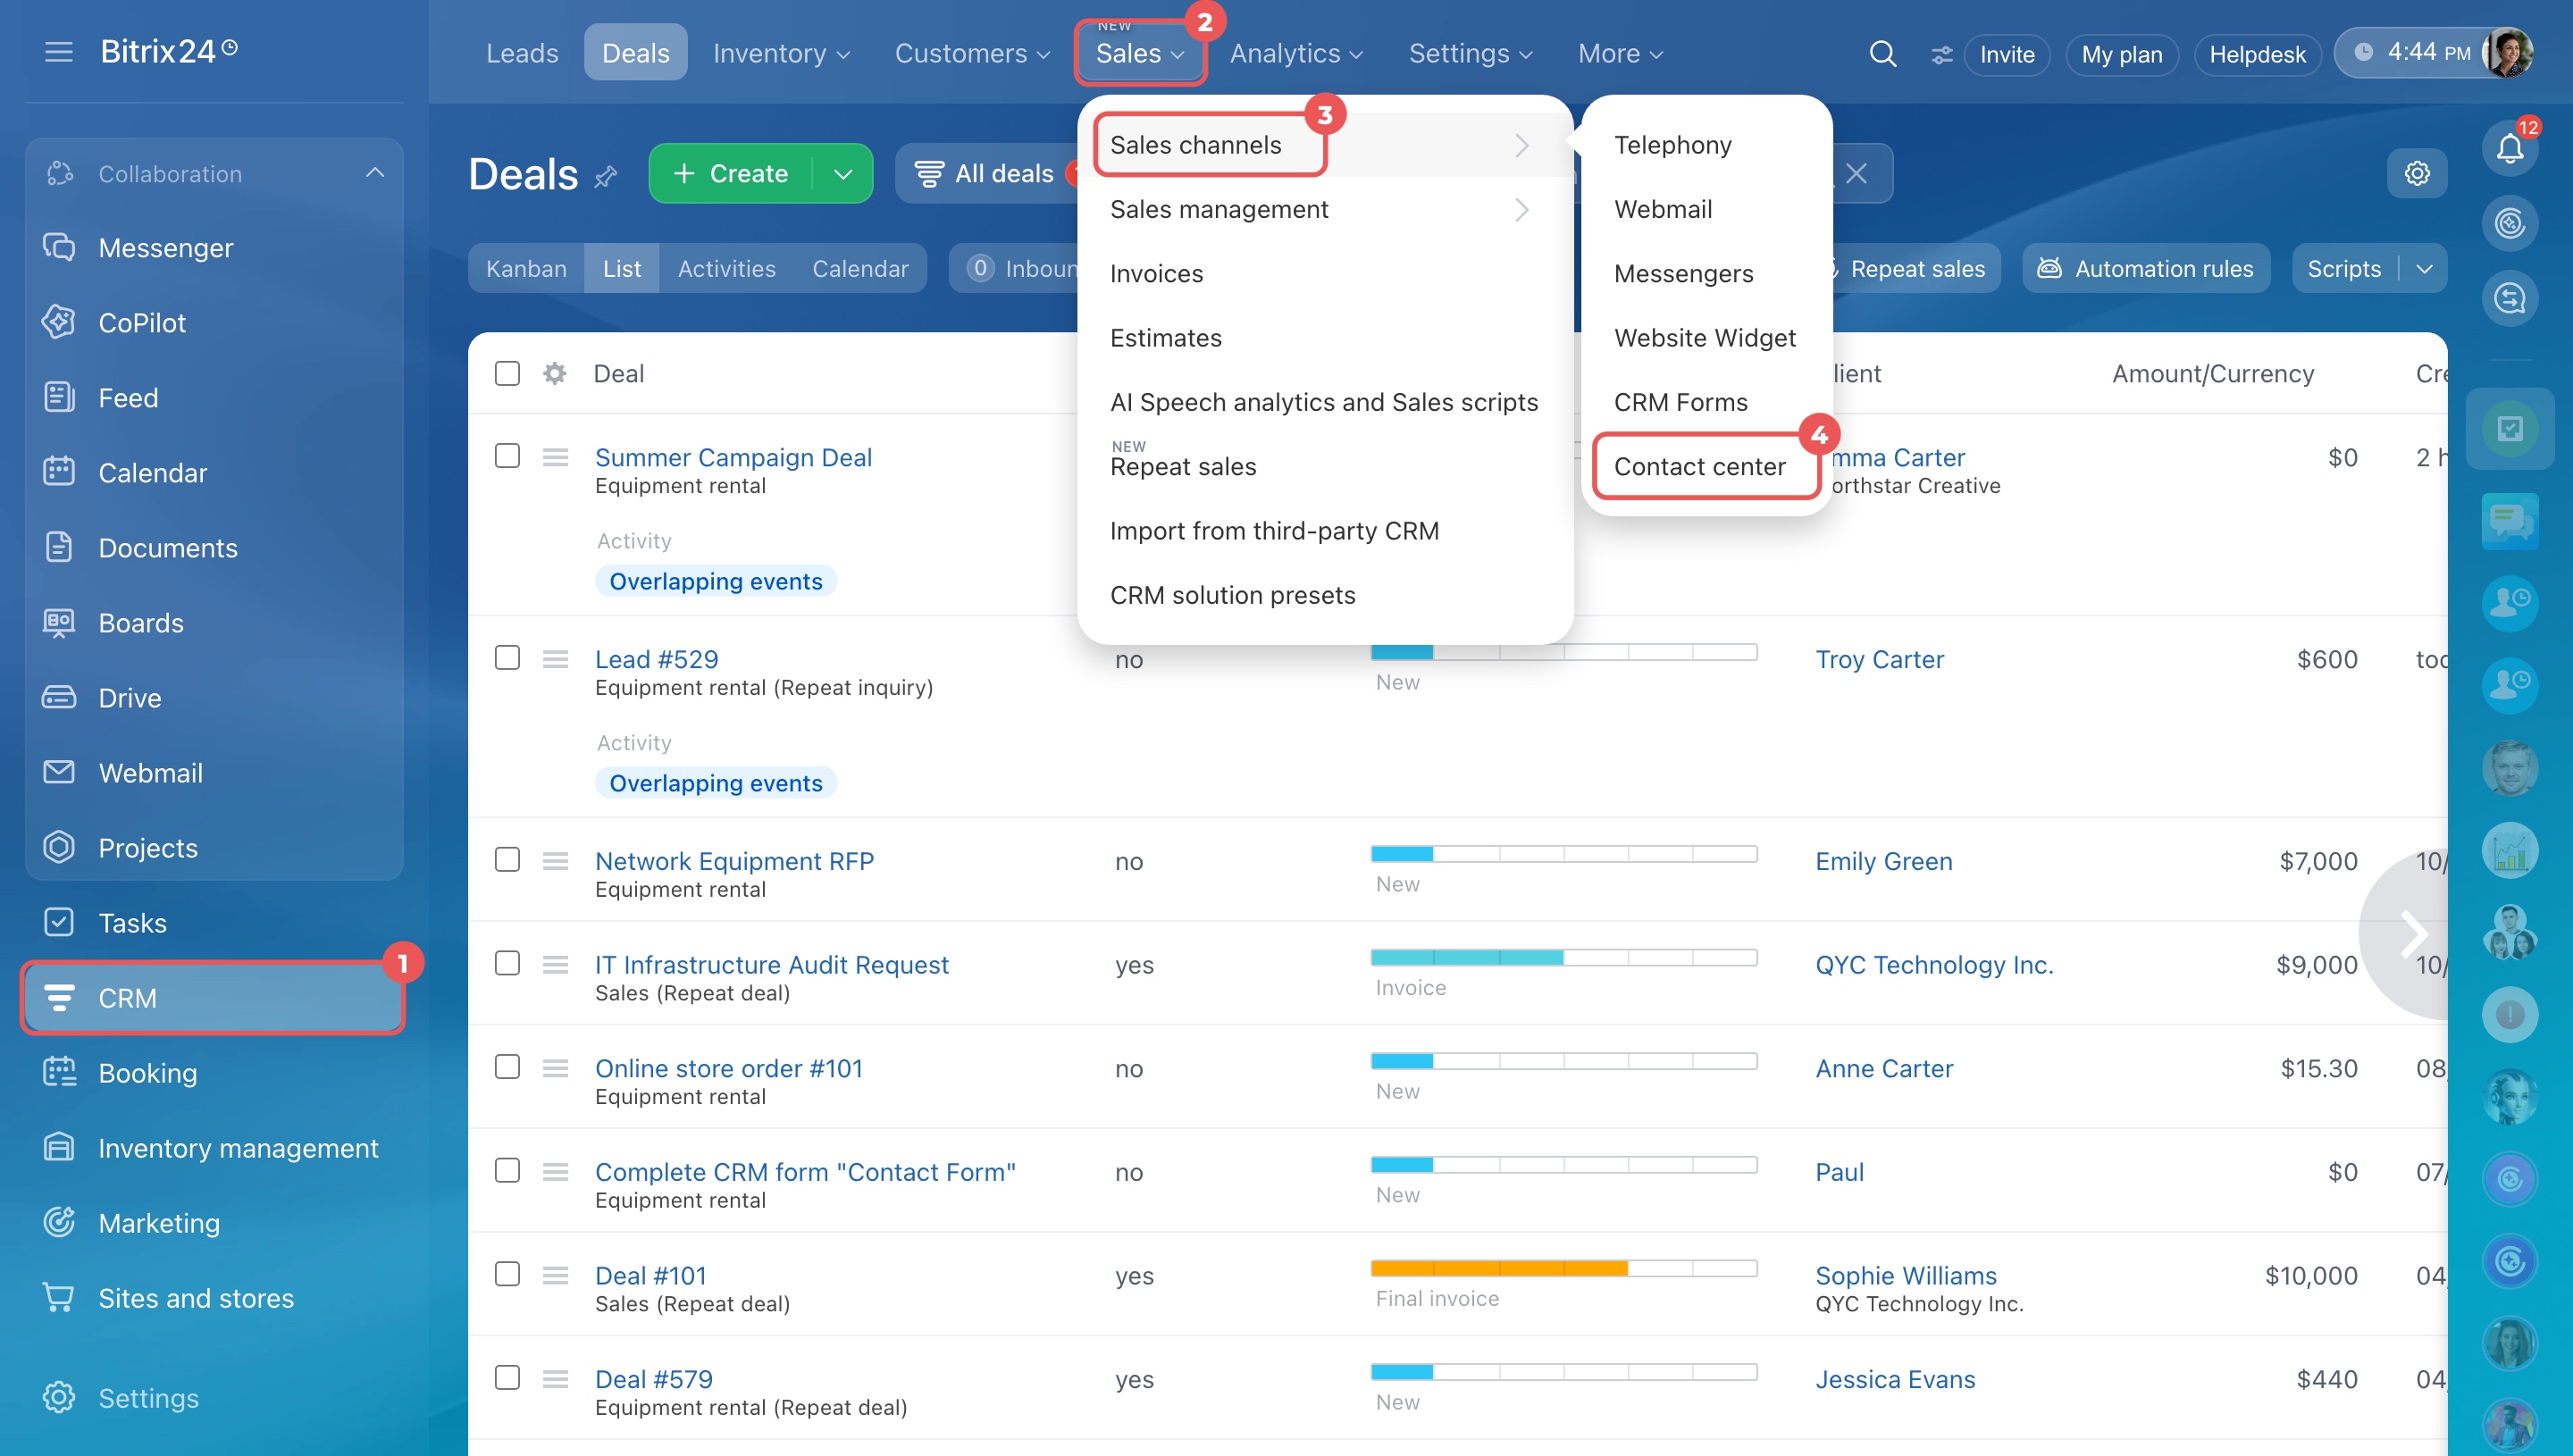
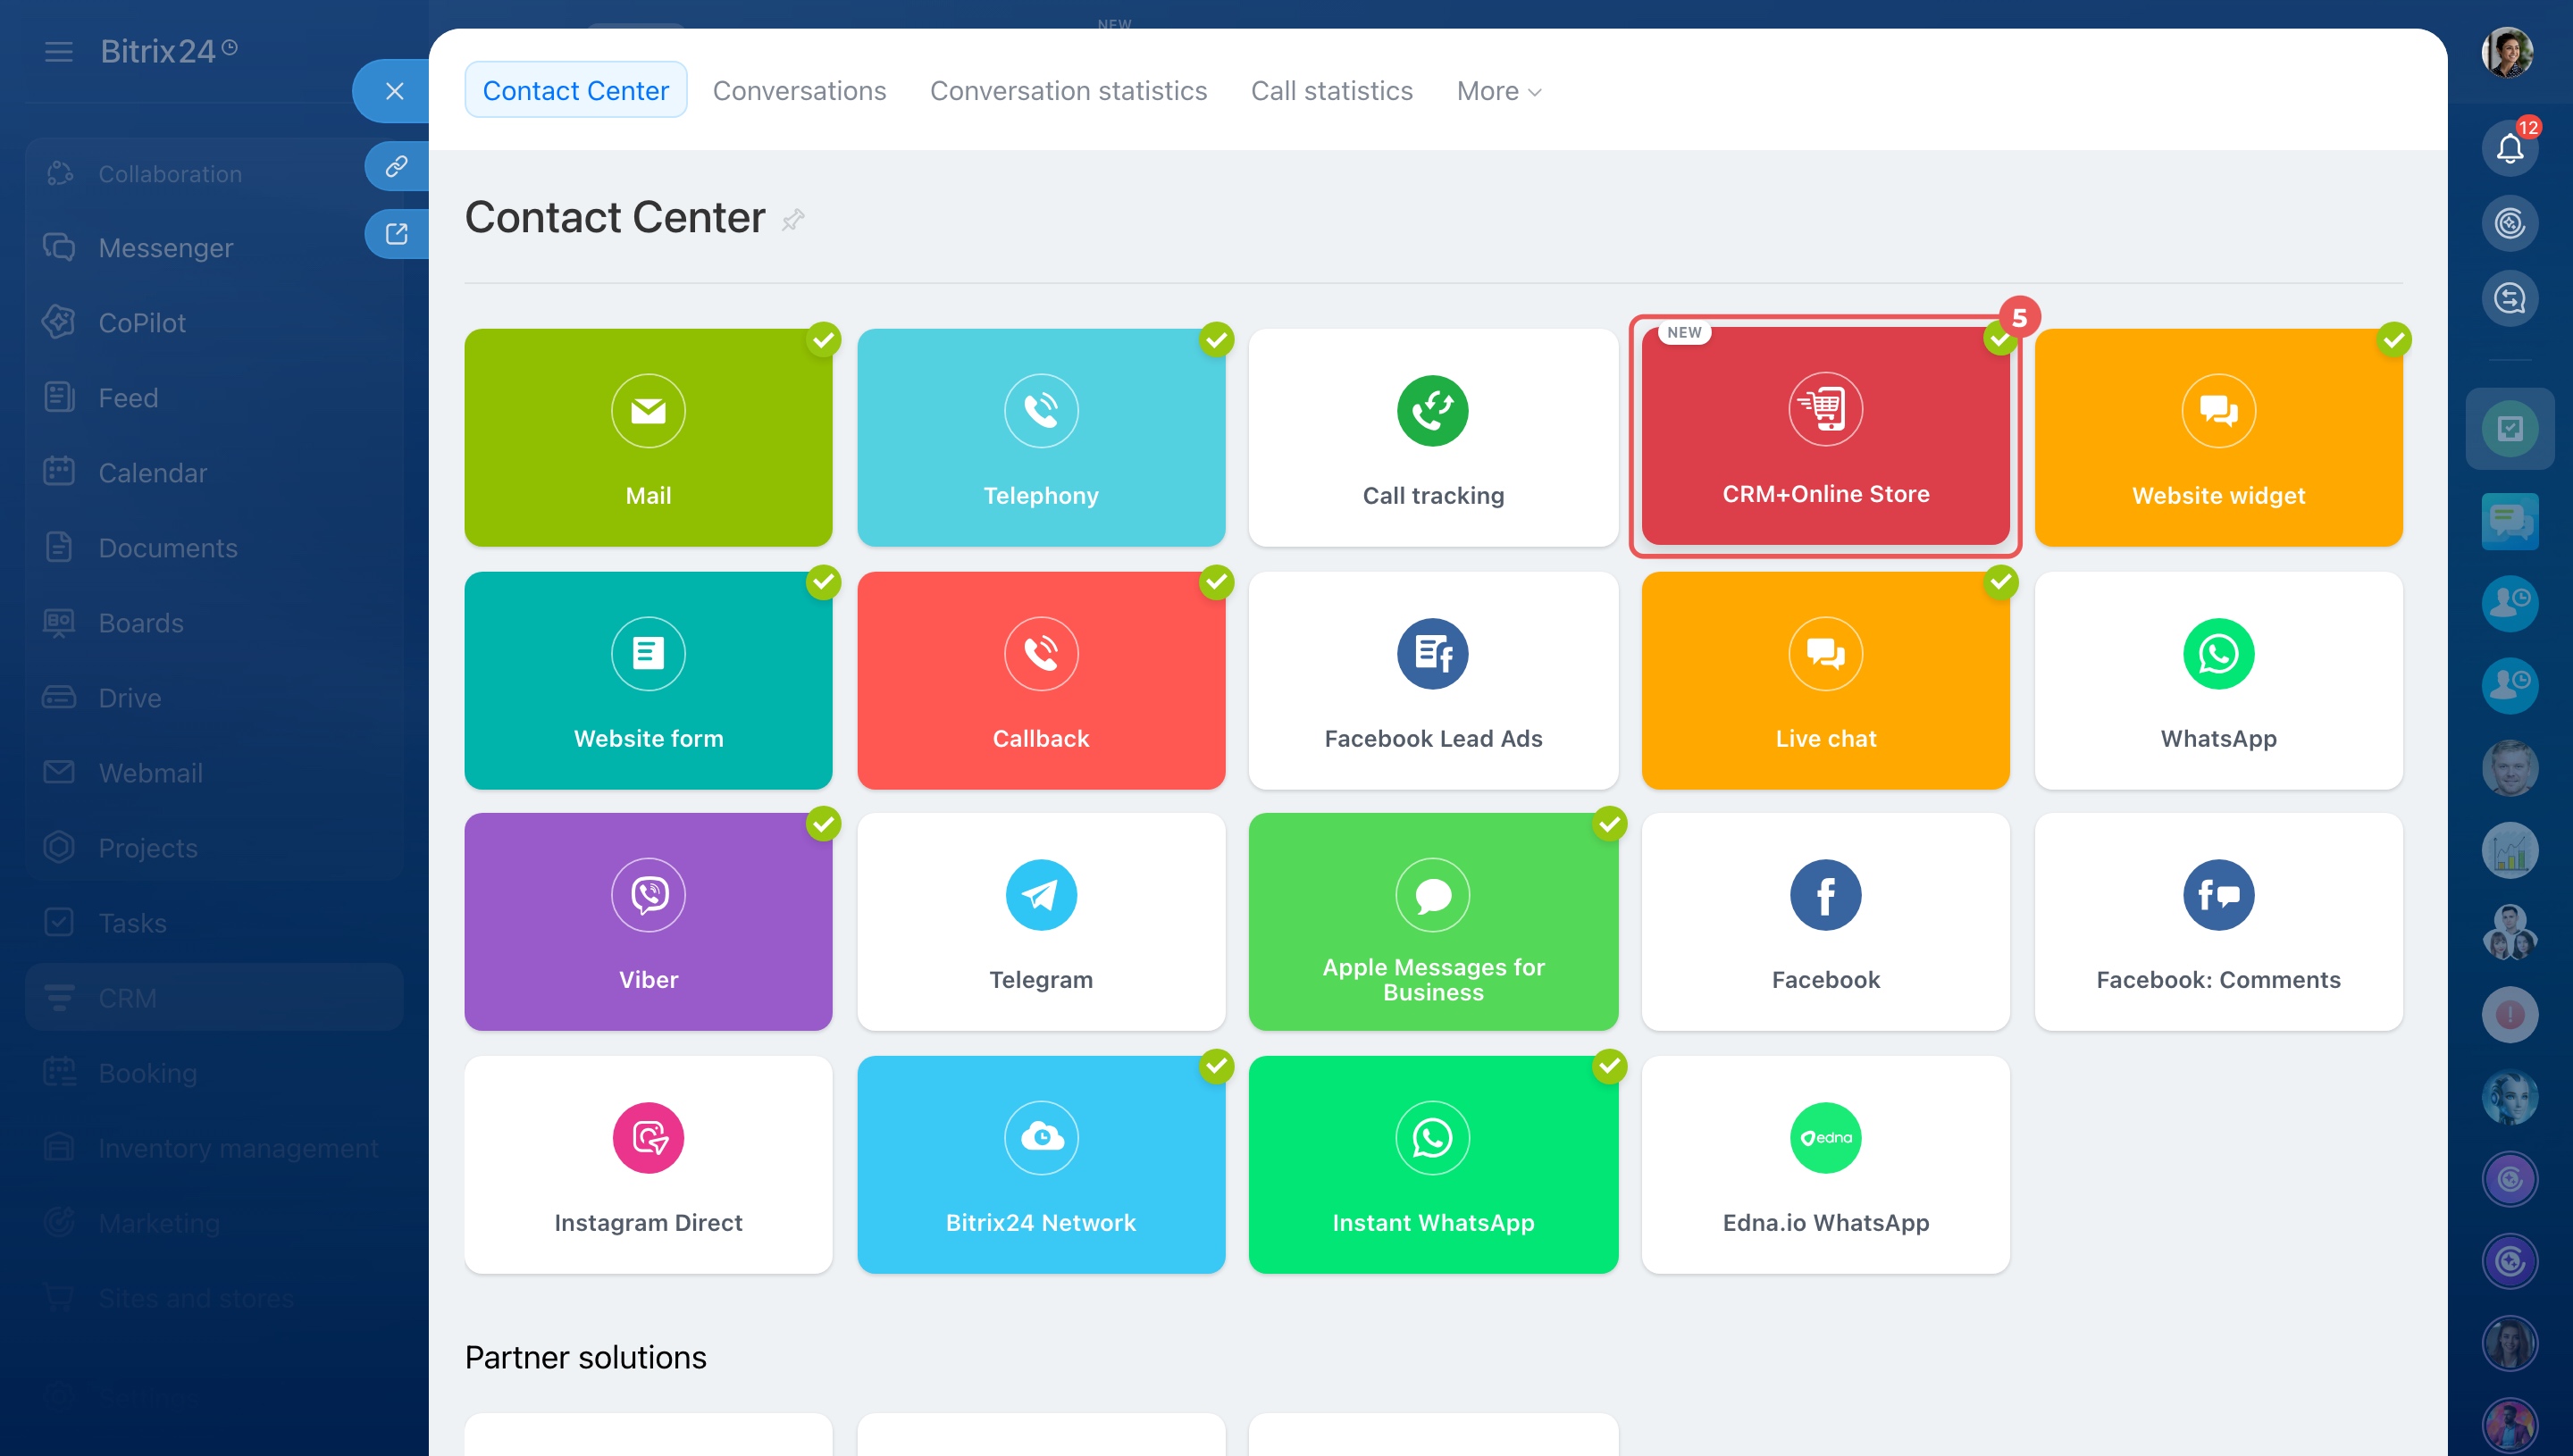
Create a store from Sites and stores. Open Sites and stores > Online stores > Create. Select the CRM + Online store template and click Create your online store in just a few clicks.
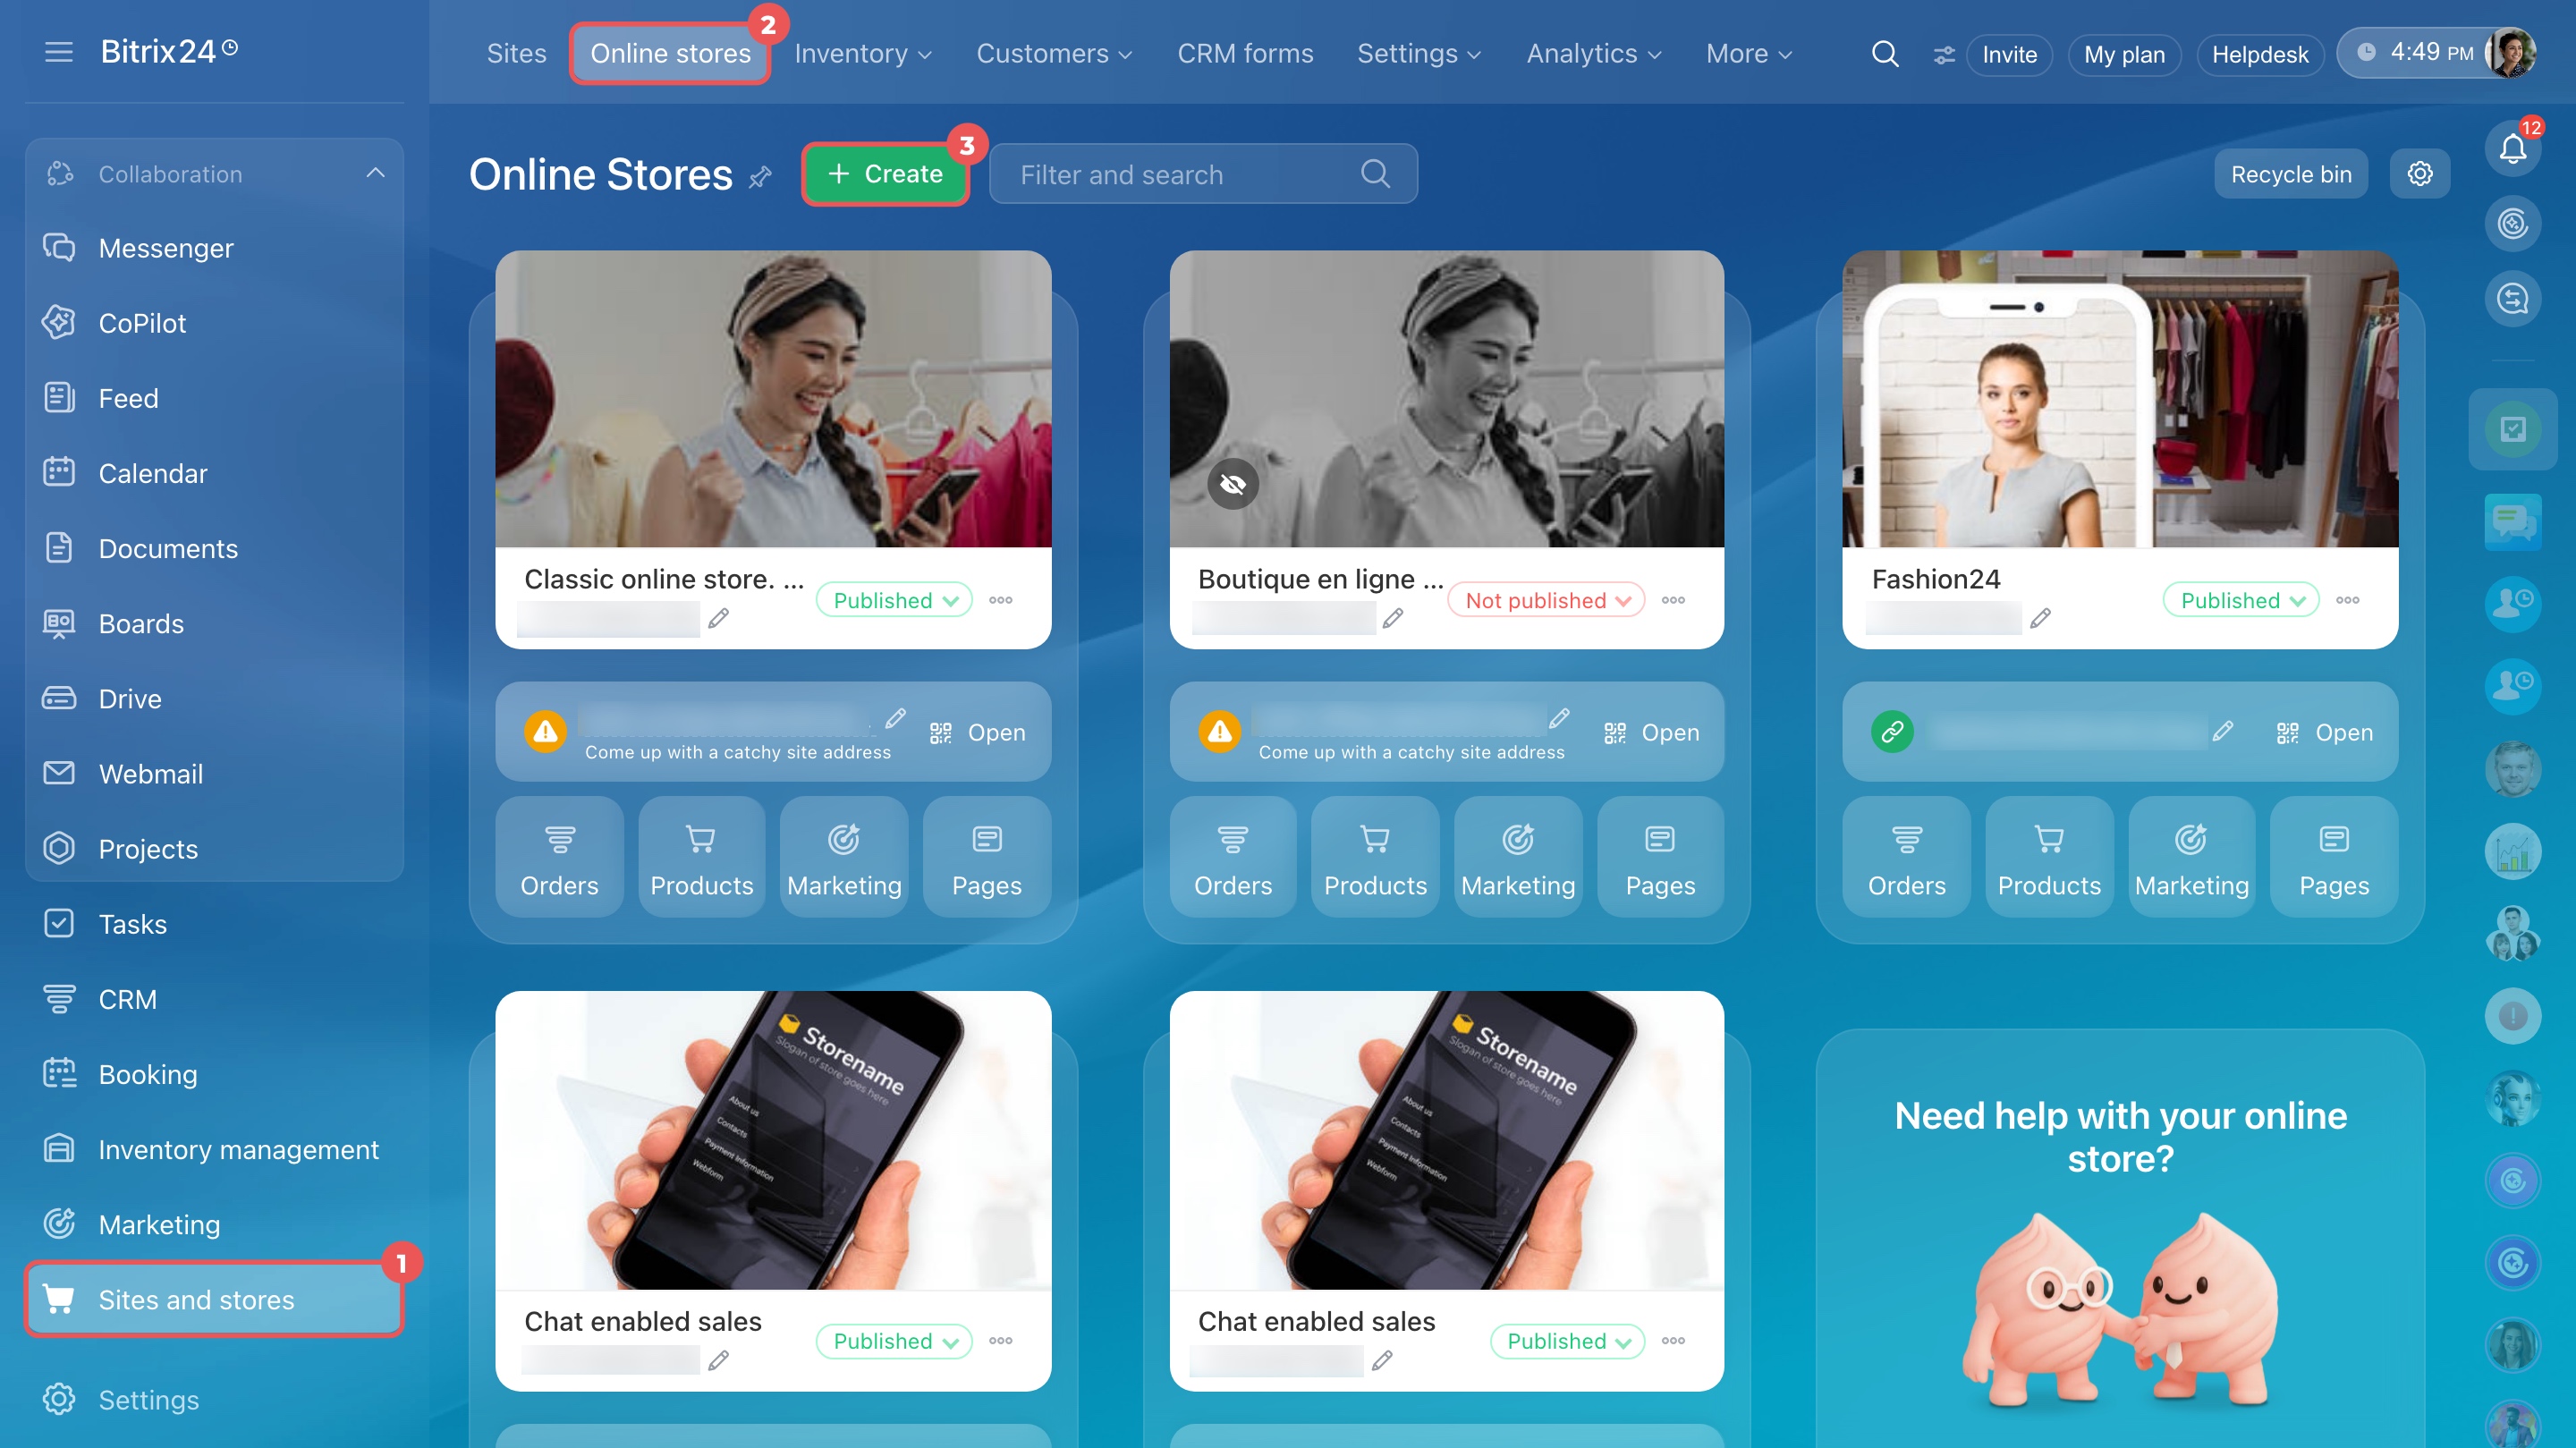
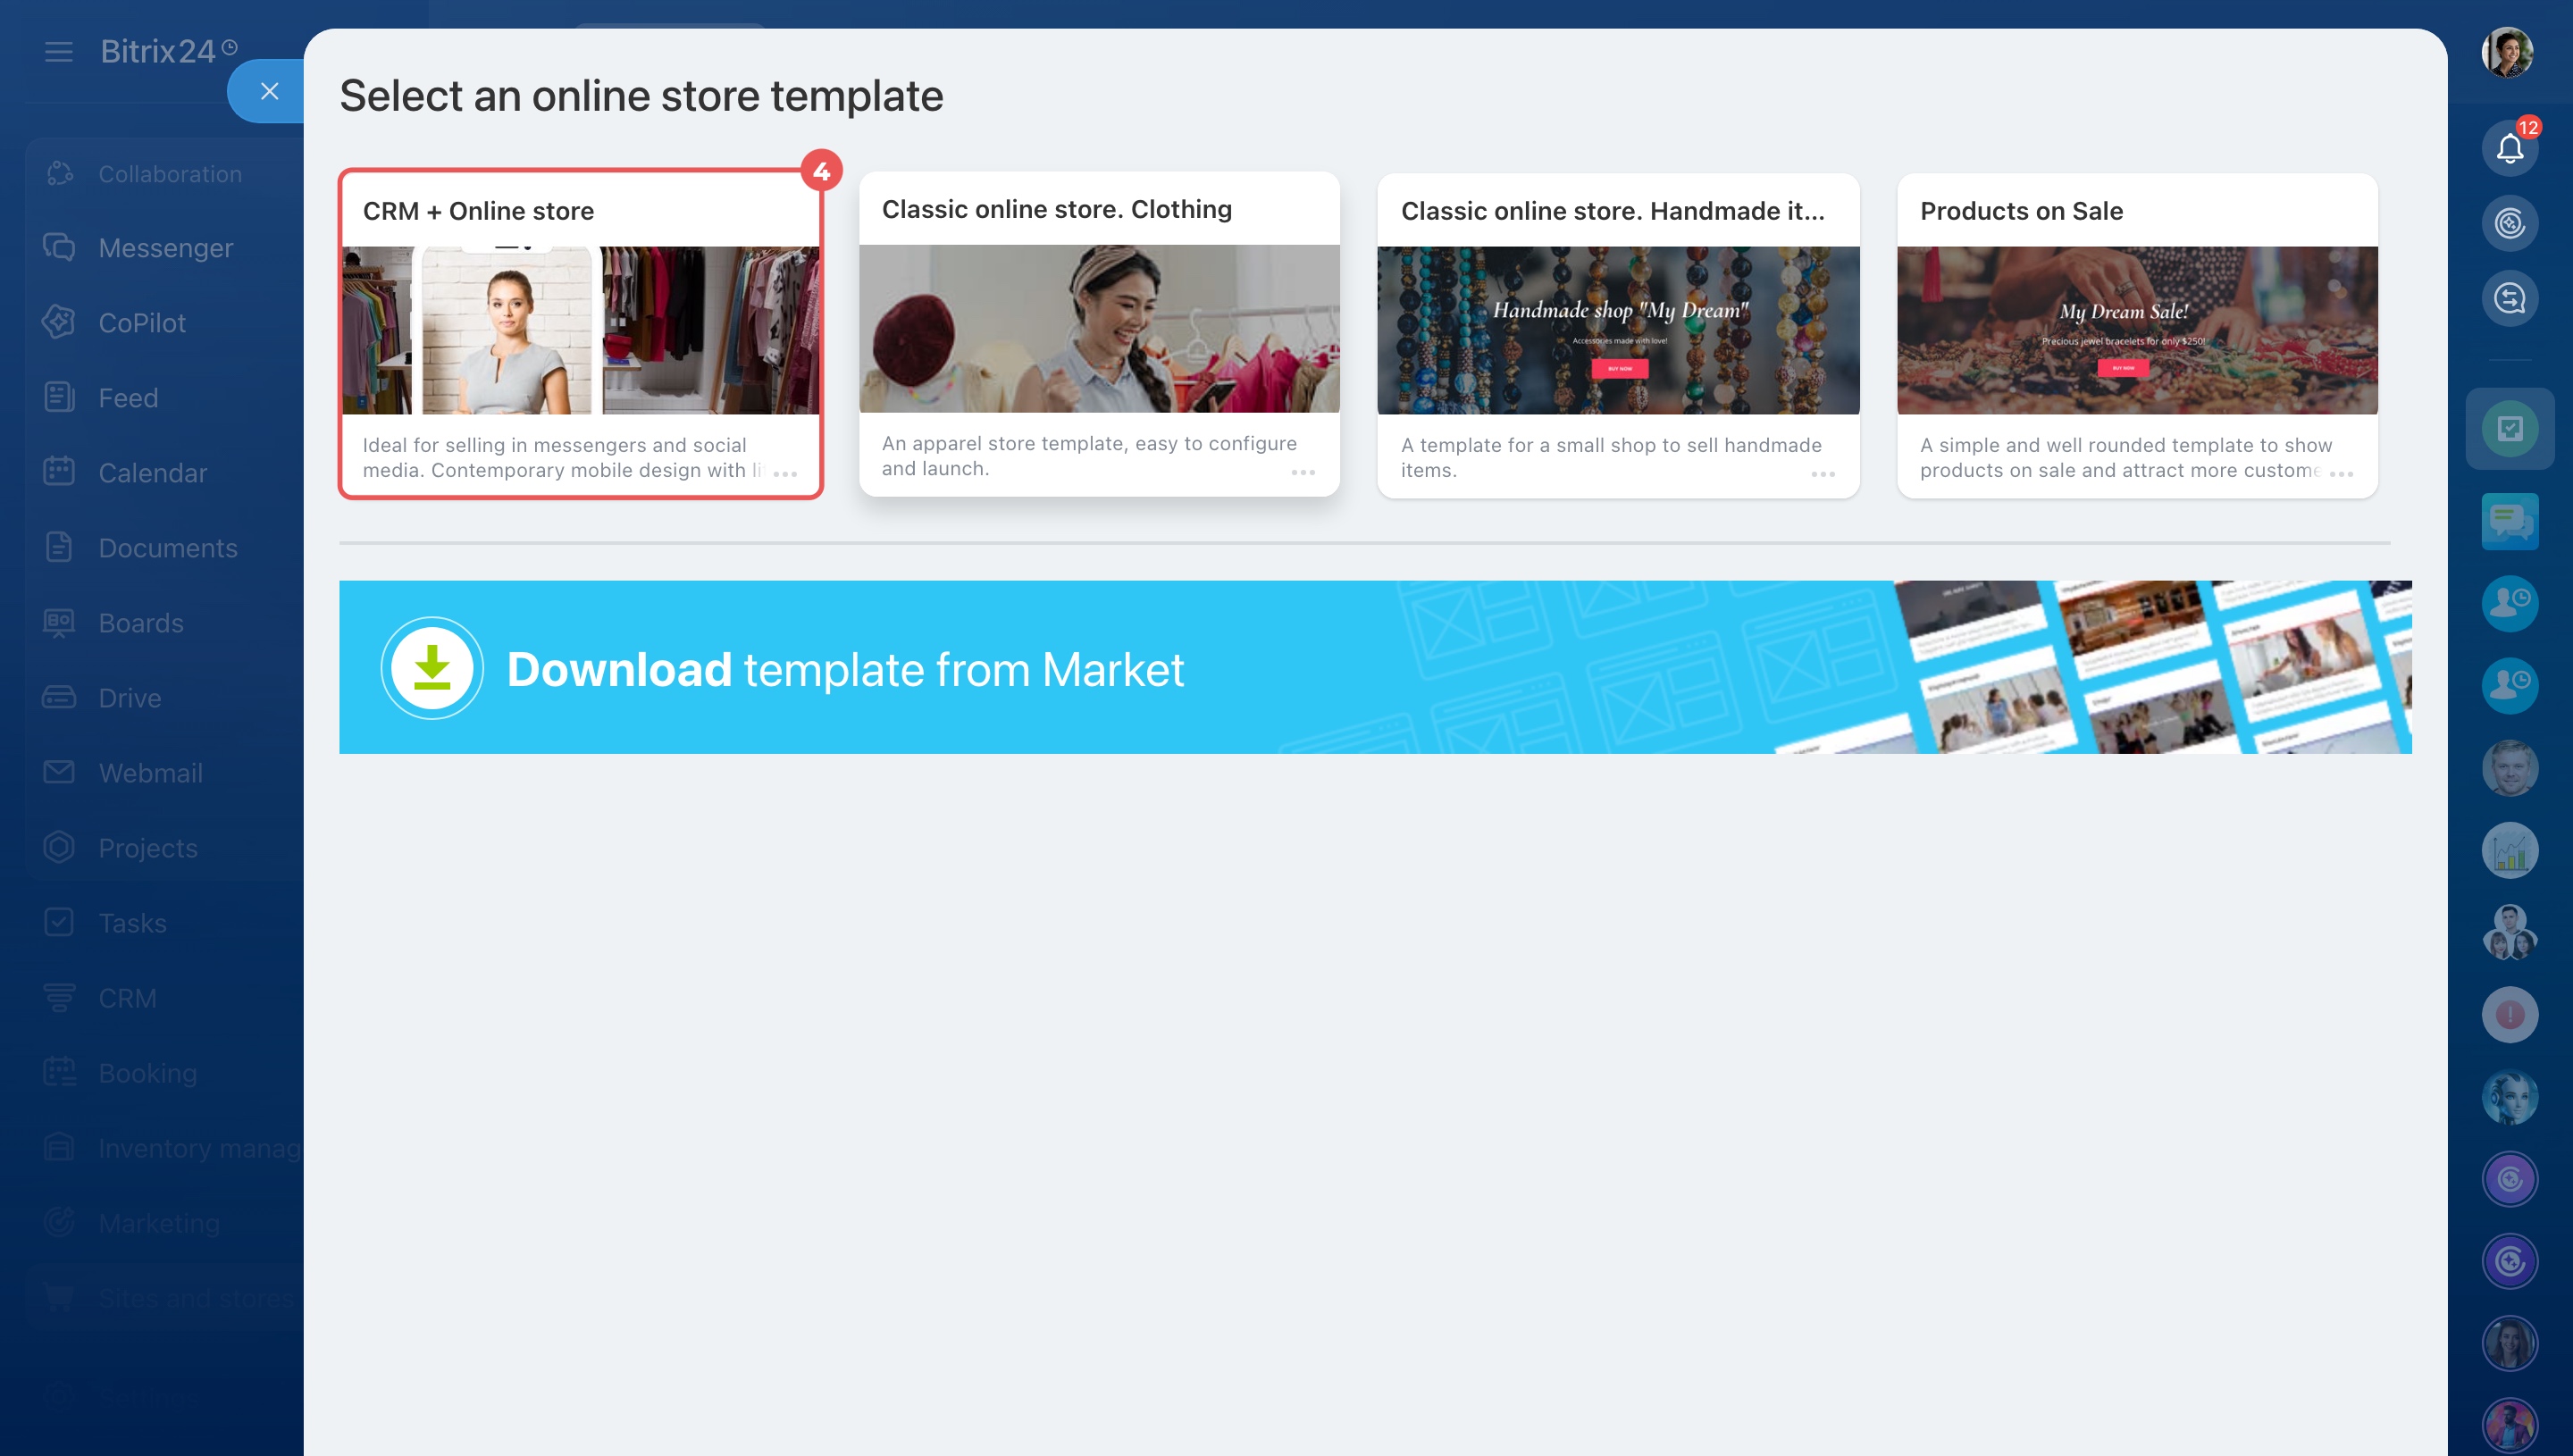
Set up your store
Once you've created your store, configure its basic settings.
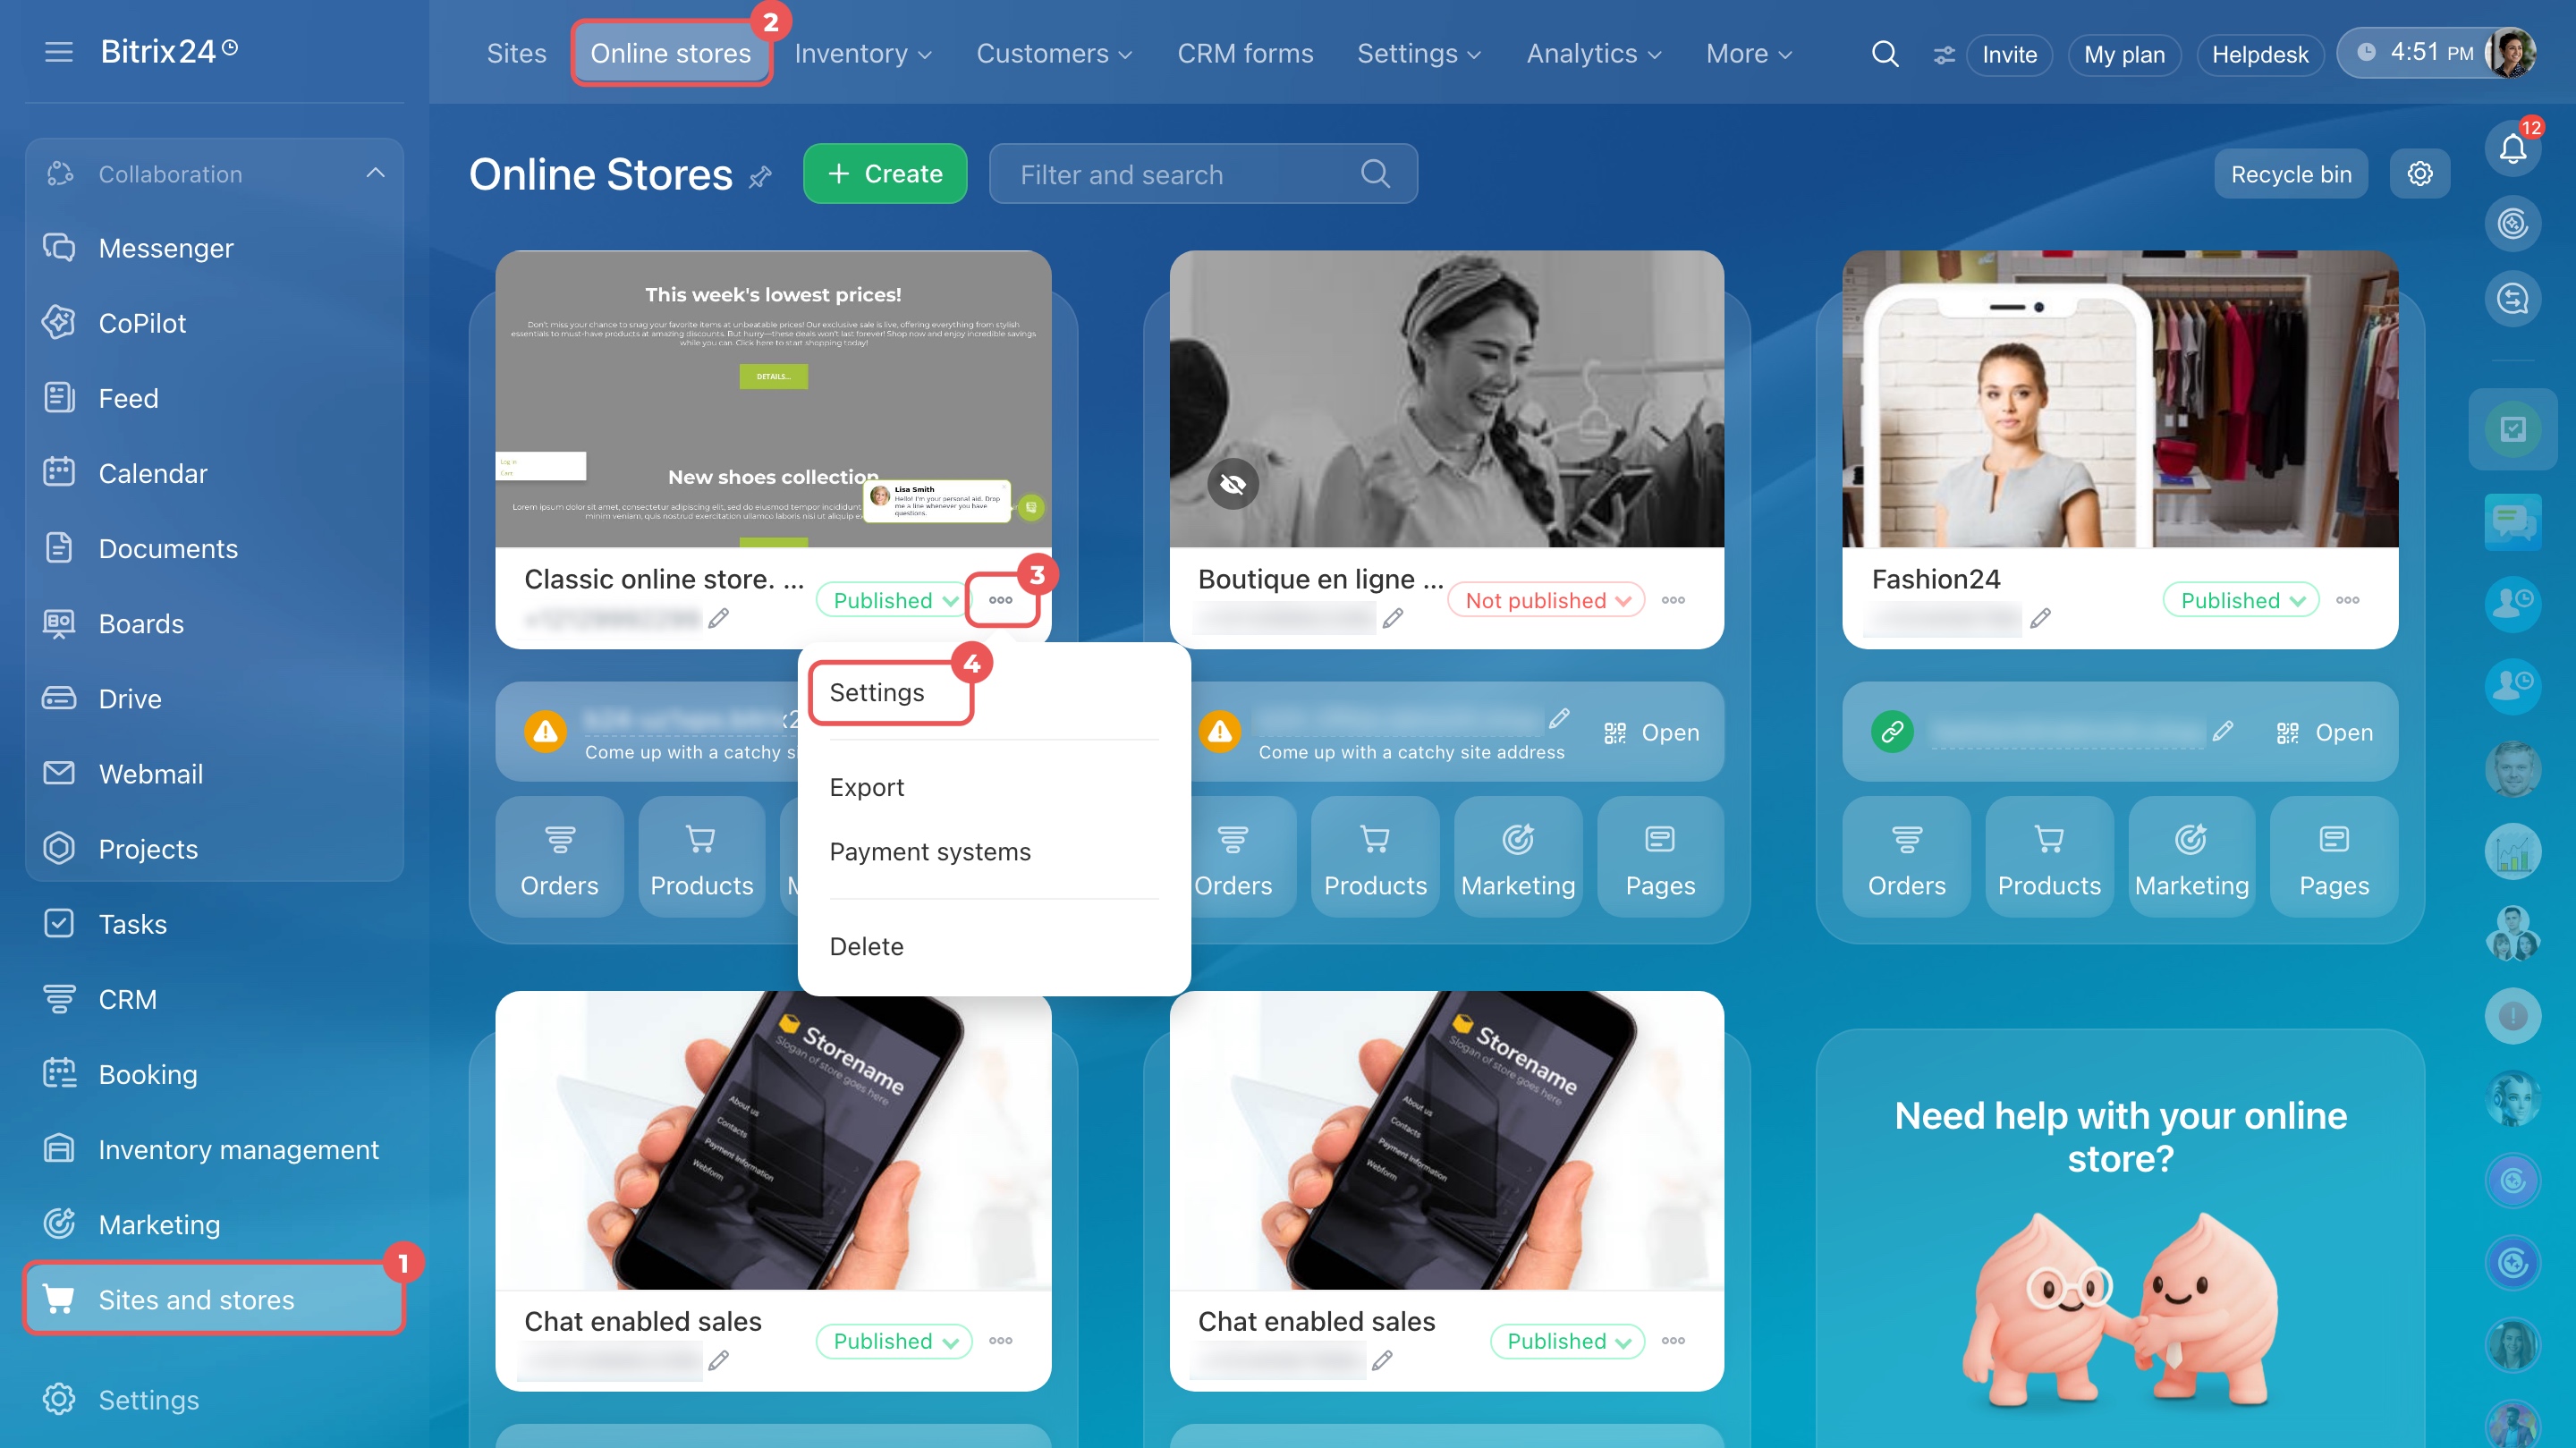
Go to Sites and stores > Online stores. Find your store, click Three dots (...) > Settings.
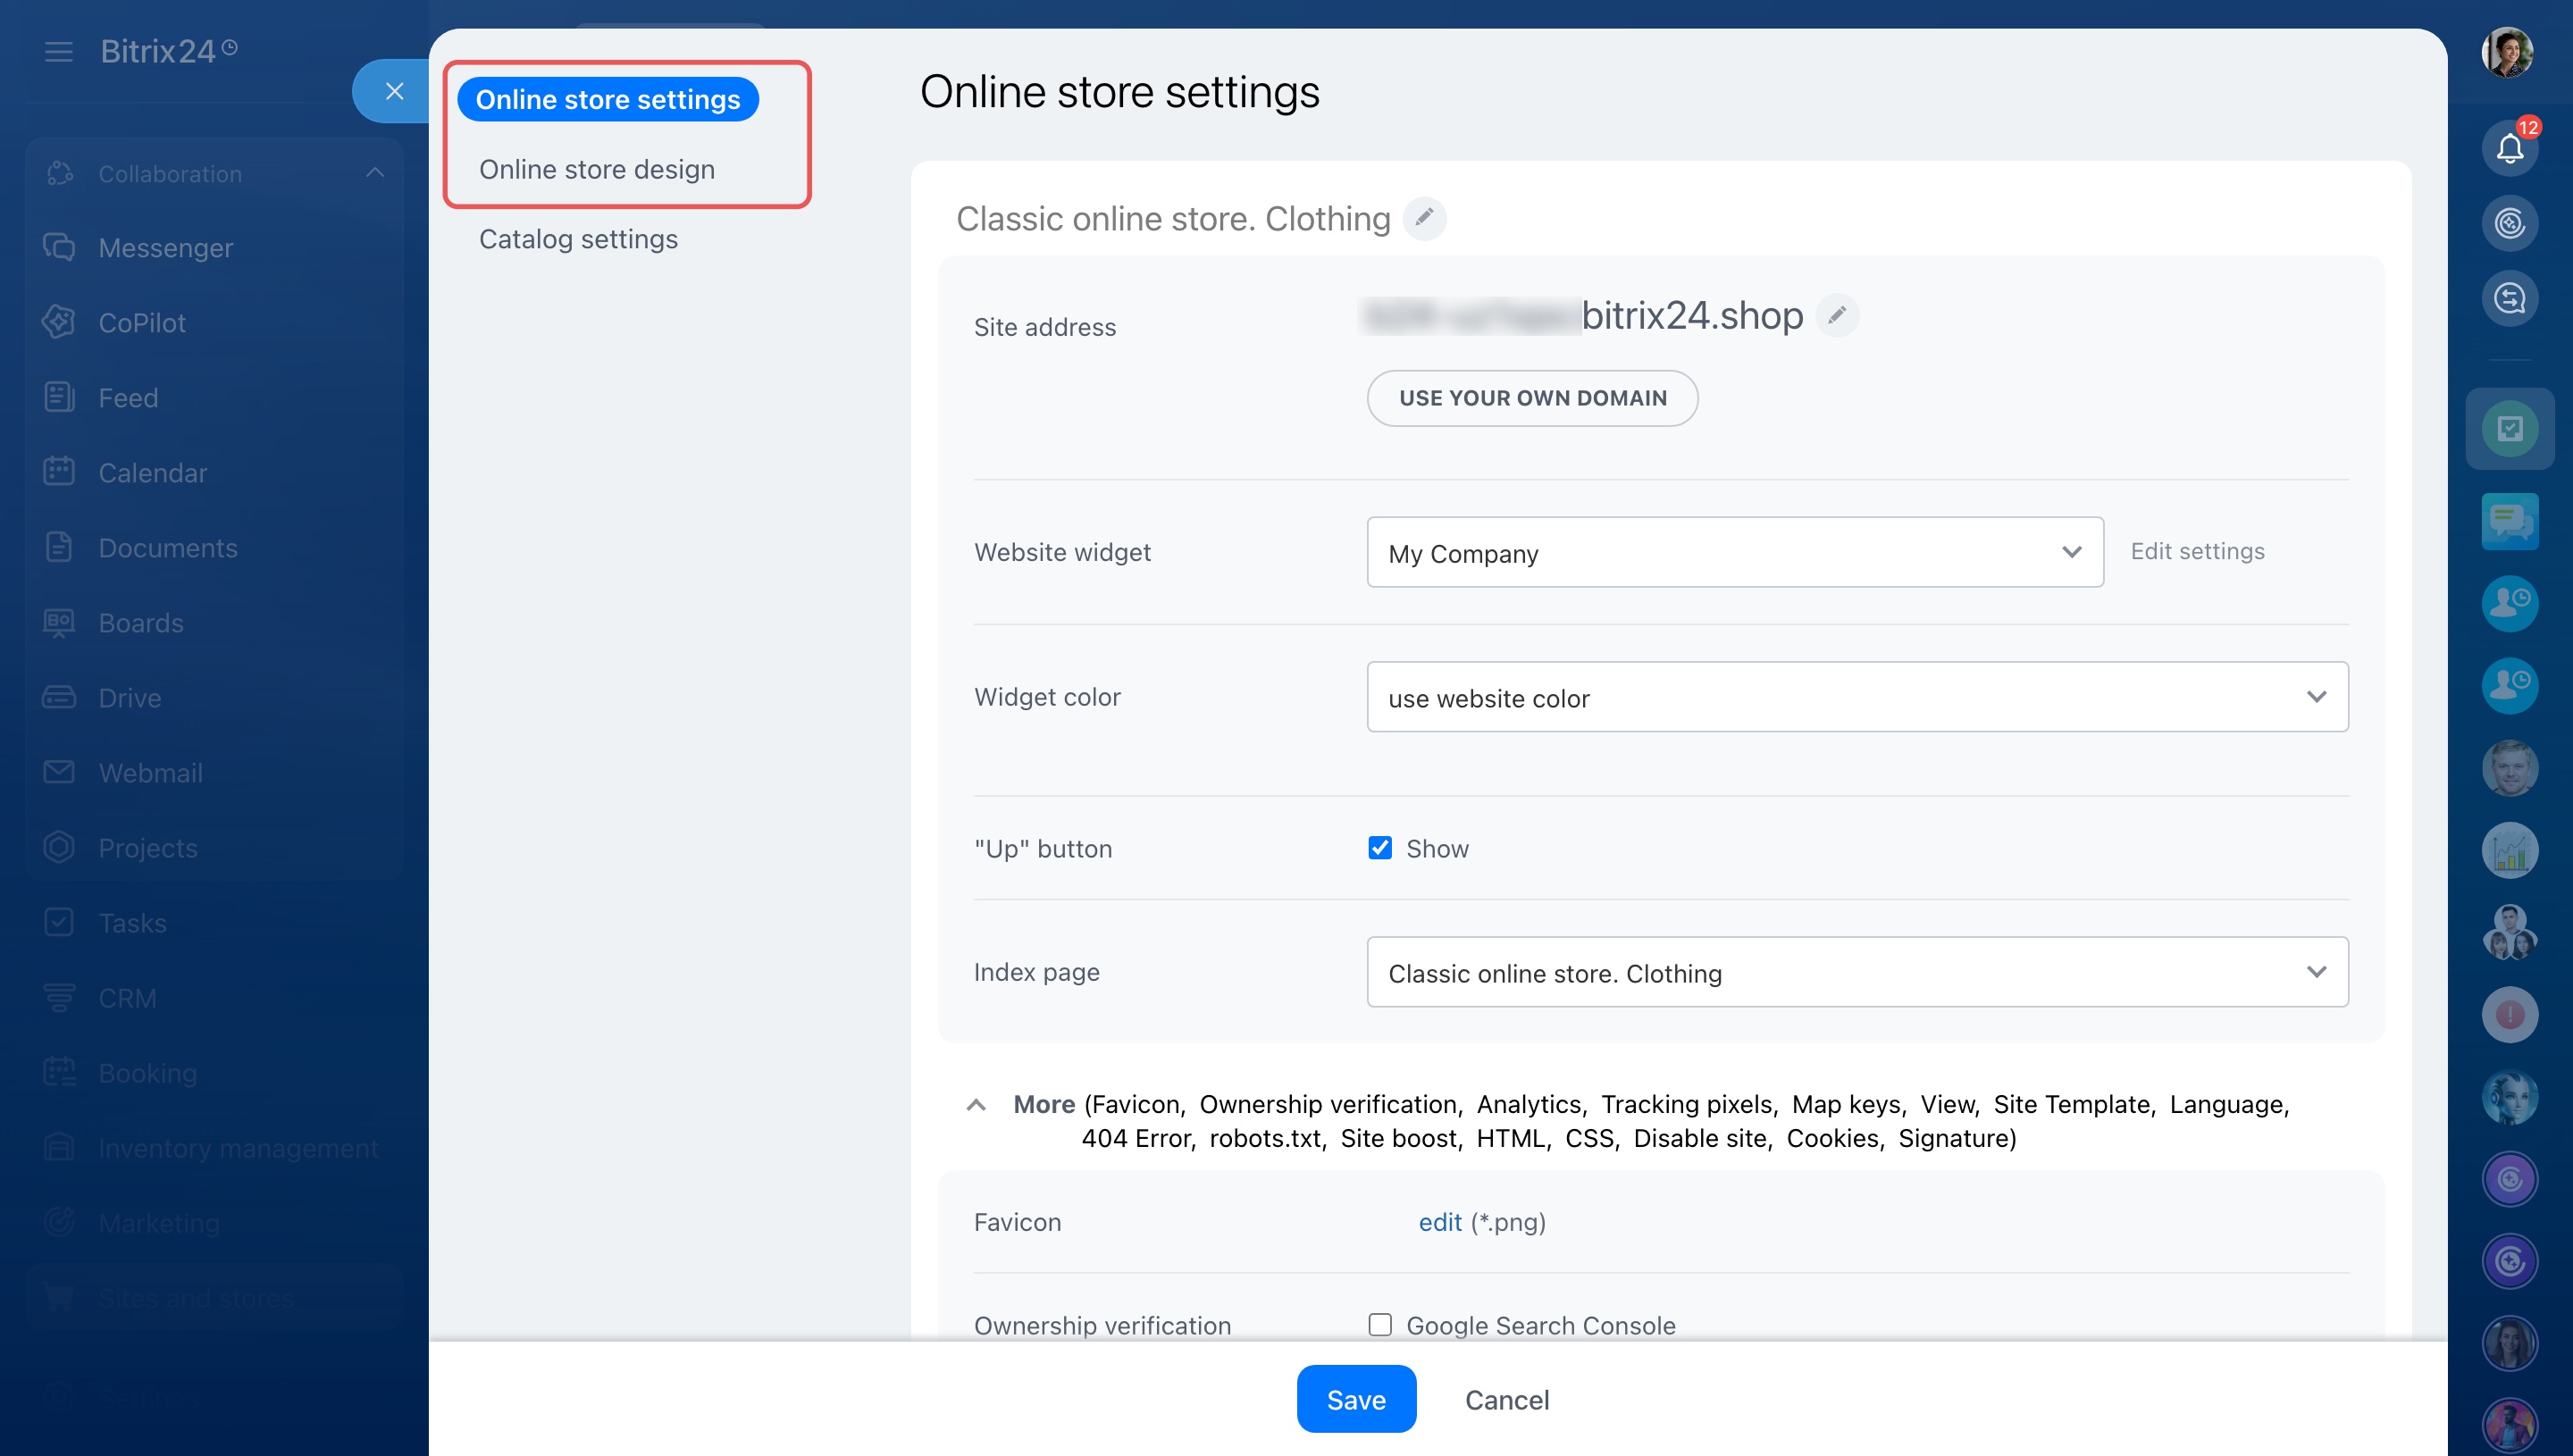
Here, you can:
- Change the domain
- Choose the index page
- Add a widget to communicate with customers
- Change the store's design
These settings let you tailor the store to your business. For example, you can make a promotions page your home page instead of the product catalog.
Connect Bitrix24 Live Chat to your site
Set up the product catalog
Next, configure your product catalog. This is where customers browse products and choose what to buy.
You can control which products appear in your store and how customers see them.
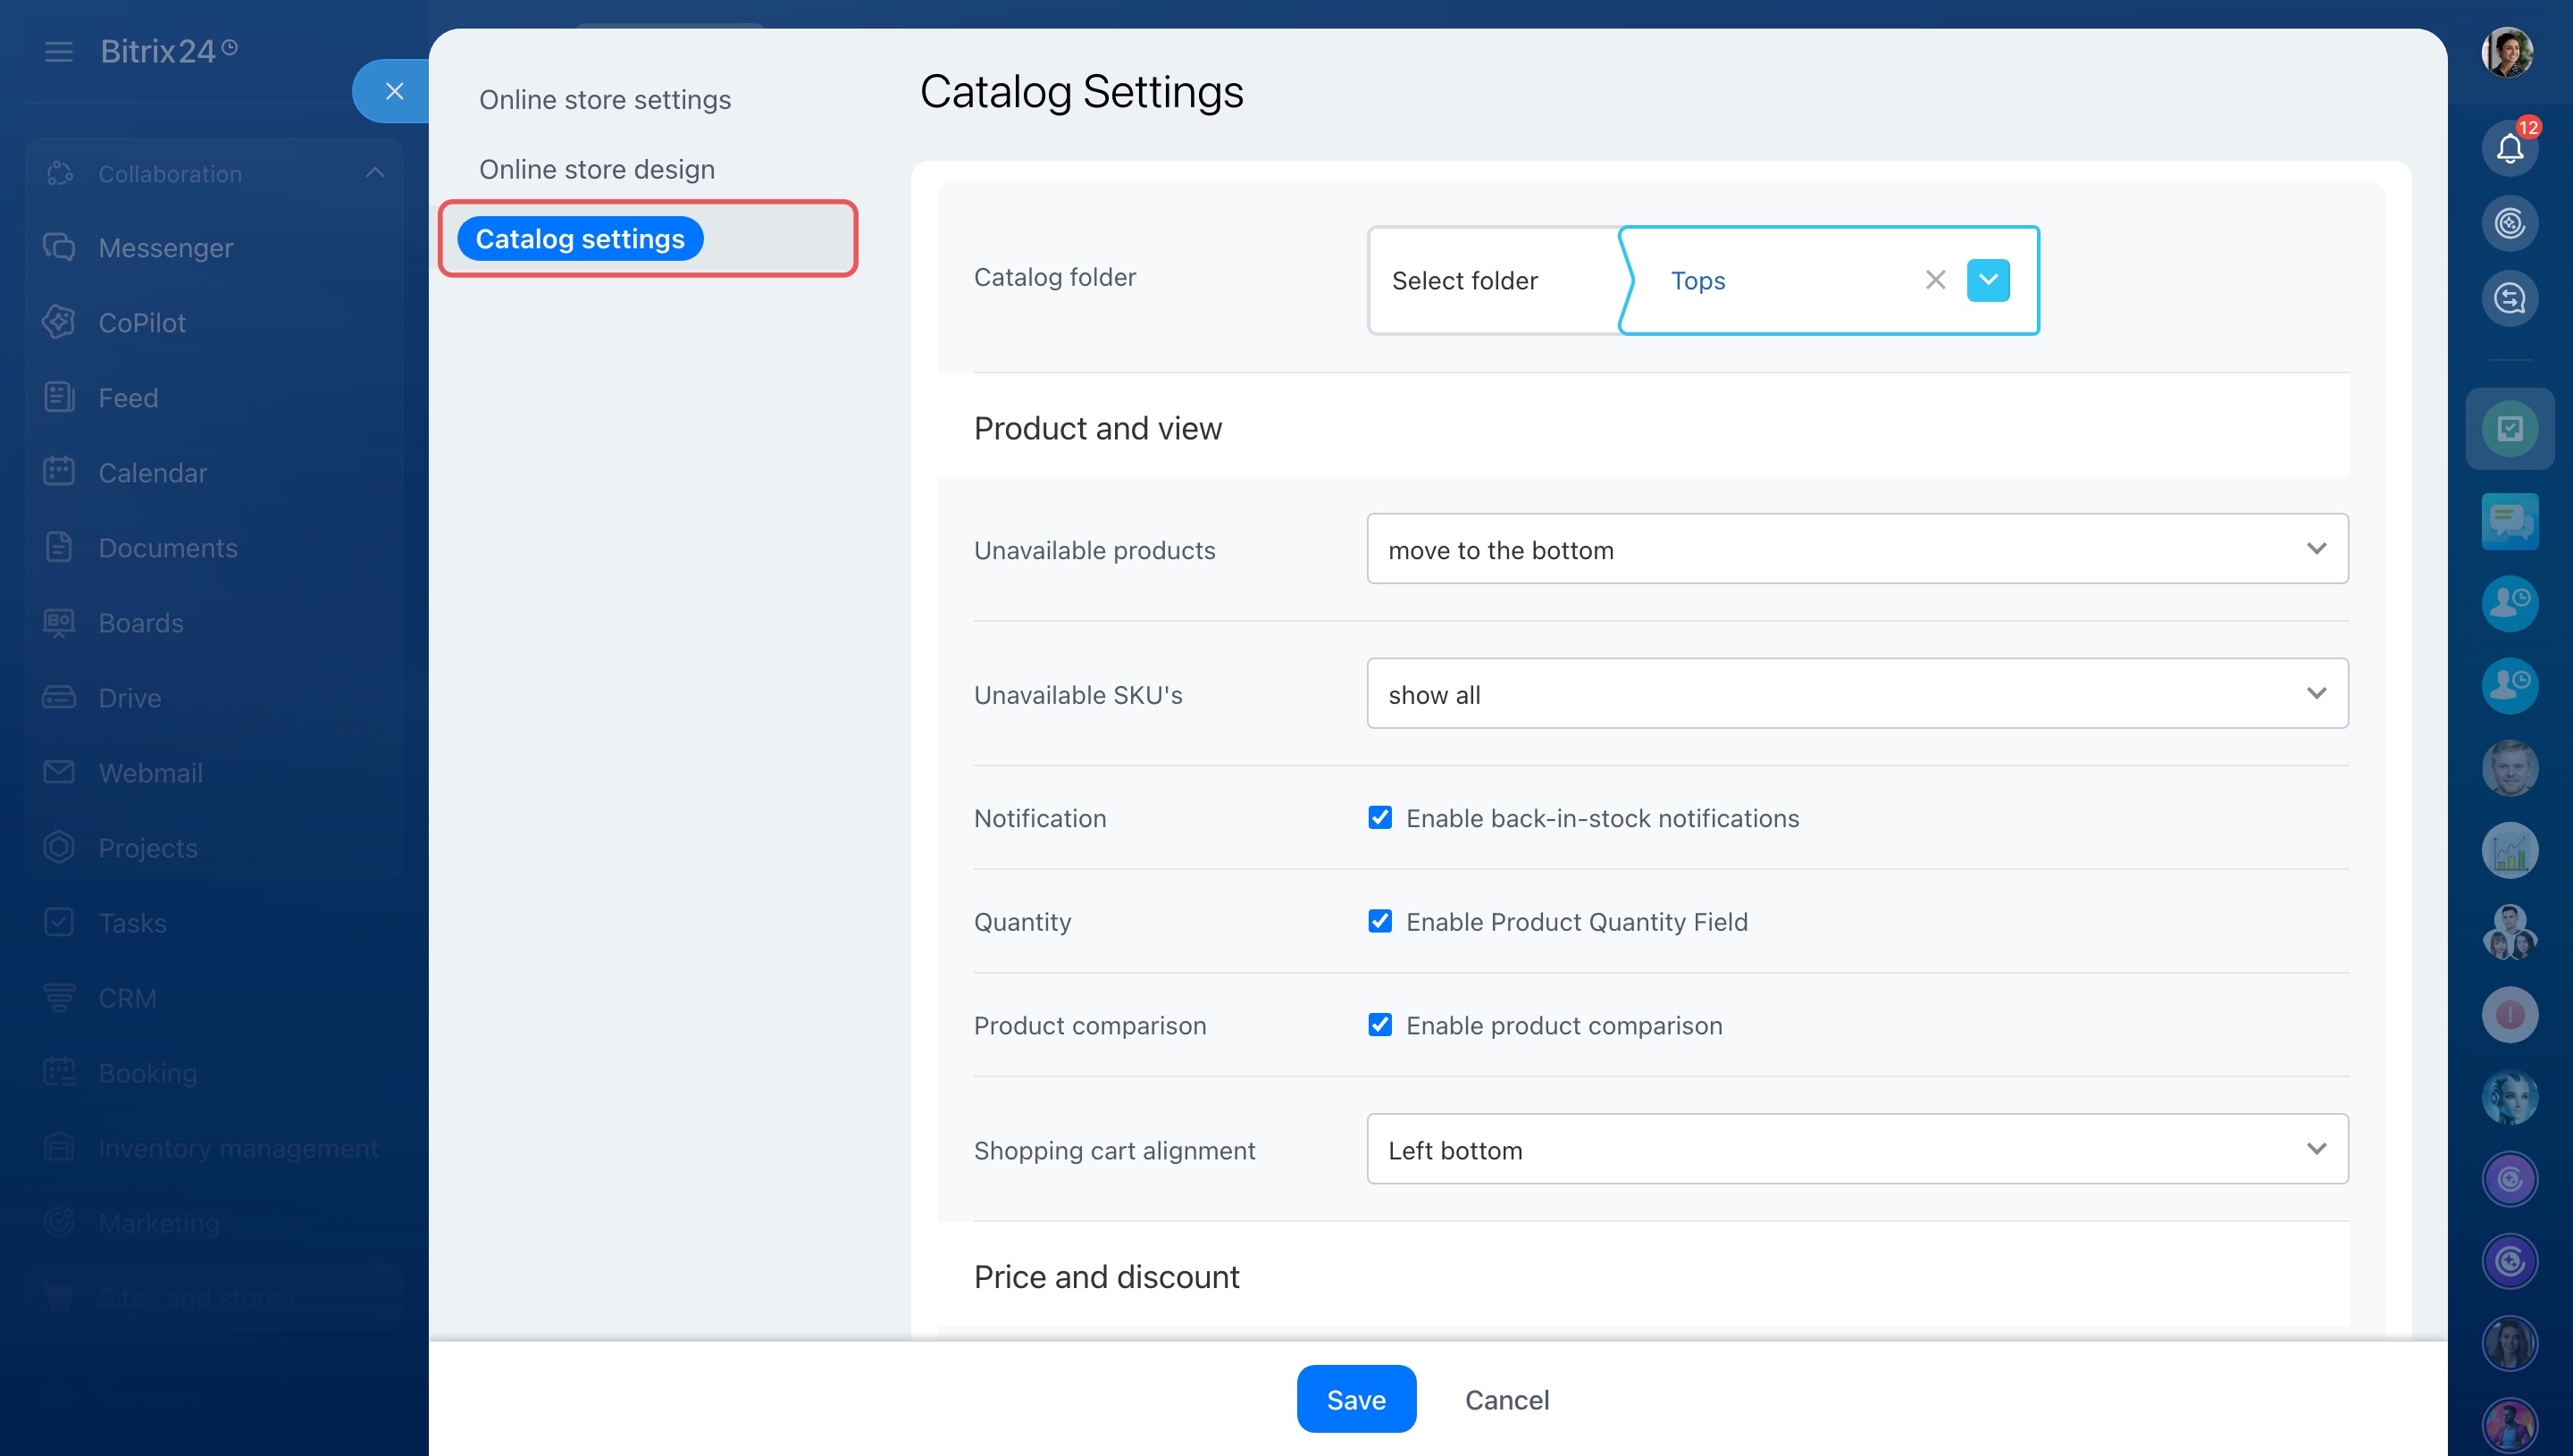
In the catalog settings, you can:
- Choose how to display unavailable products and product variants
- Let customers subscribe to notifications when products are back in stock
- Allow customers to select product quantities
- Enable product comparisons
- Configure prices, currencies, VAT, original prices, and discounts
- Send data to analytics systems
- Add a user agreement to the checkout page
For example, if a product is temporarily out of stock, you don't have to remove it from the catalog. Enable stock notifications so customers can enter their email addresses and get notified when the product becomes available.
Edit store pages
You can customize your store pages to match your business needs.
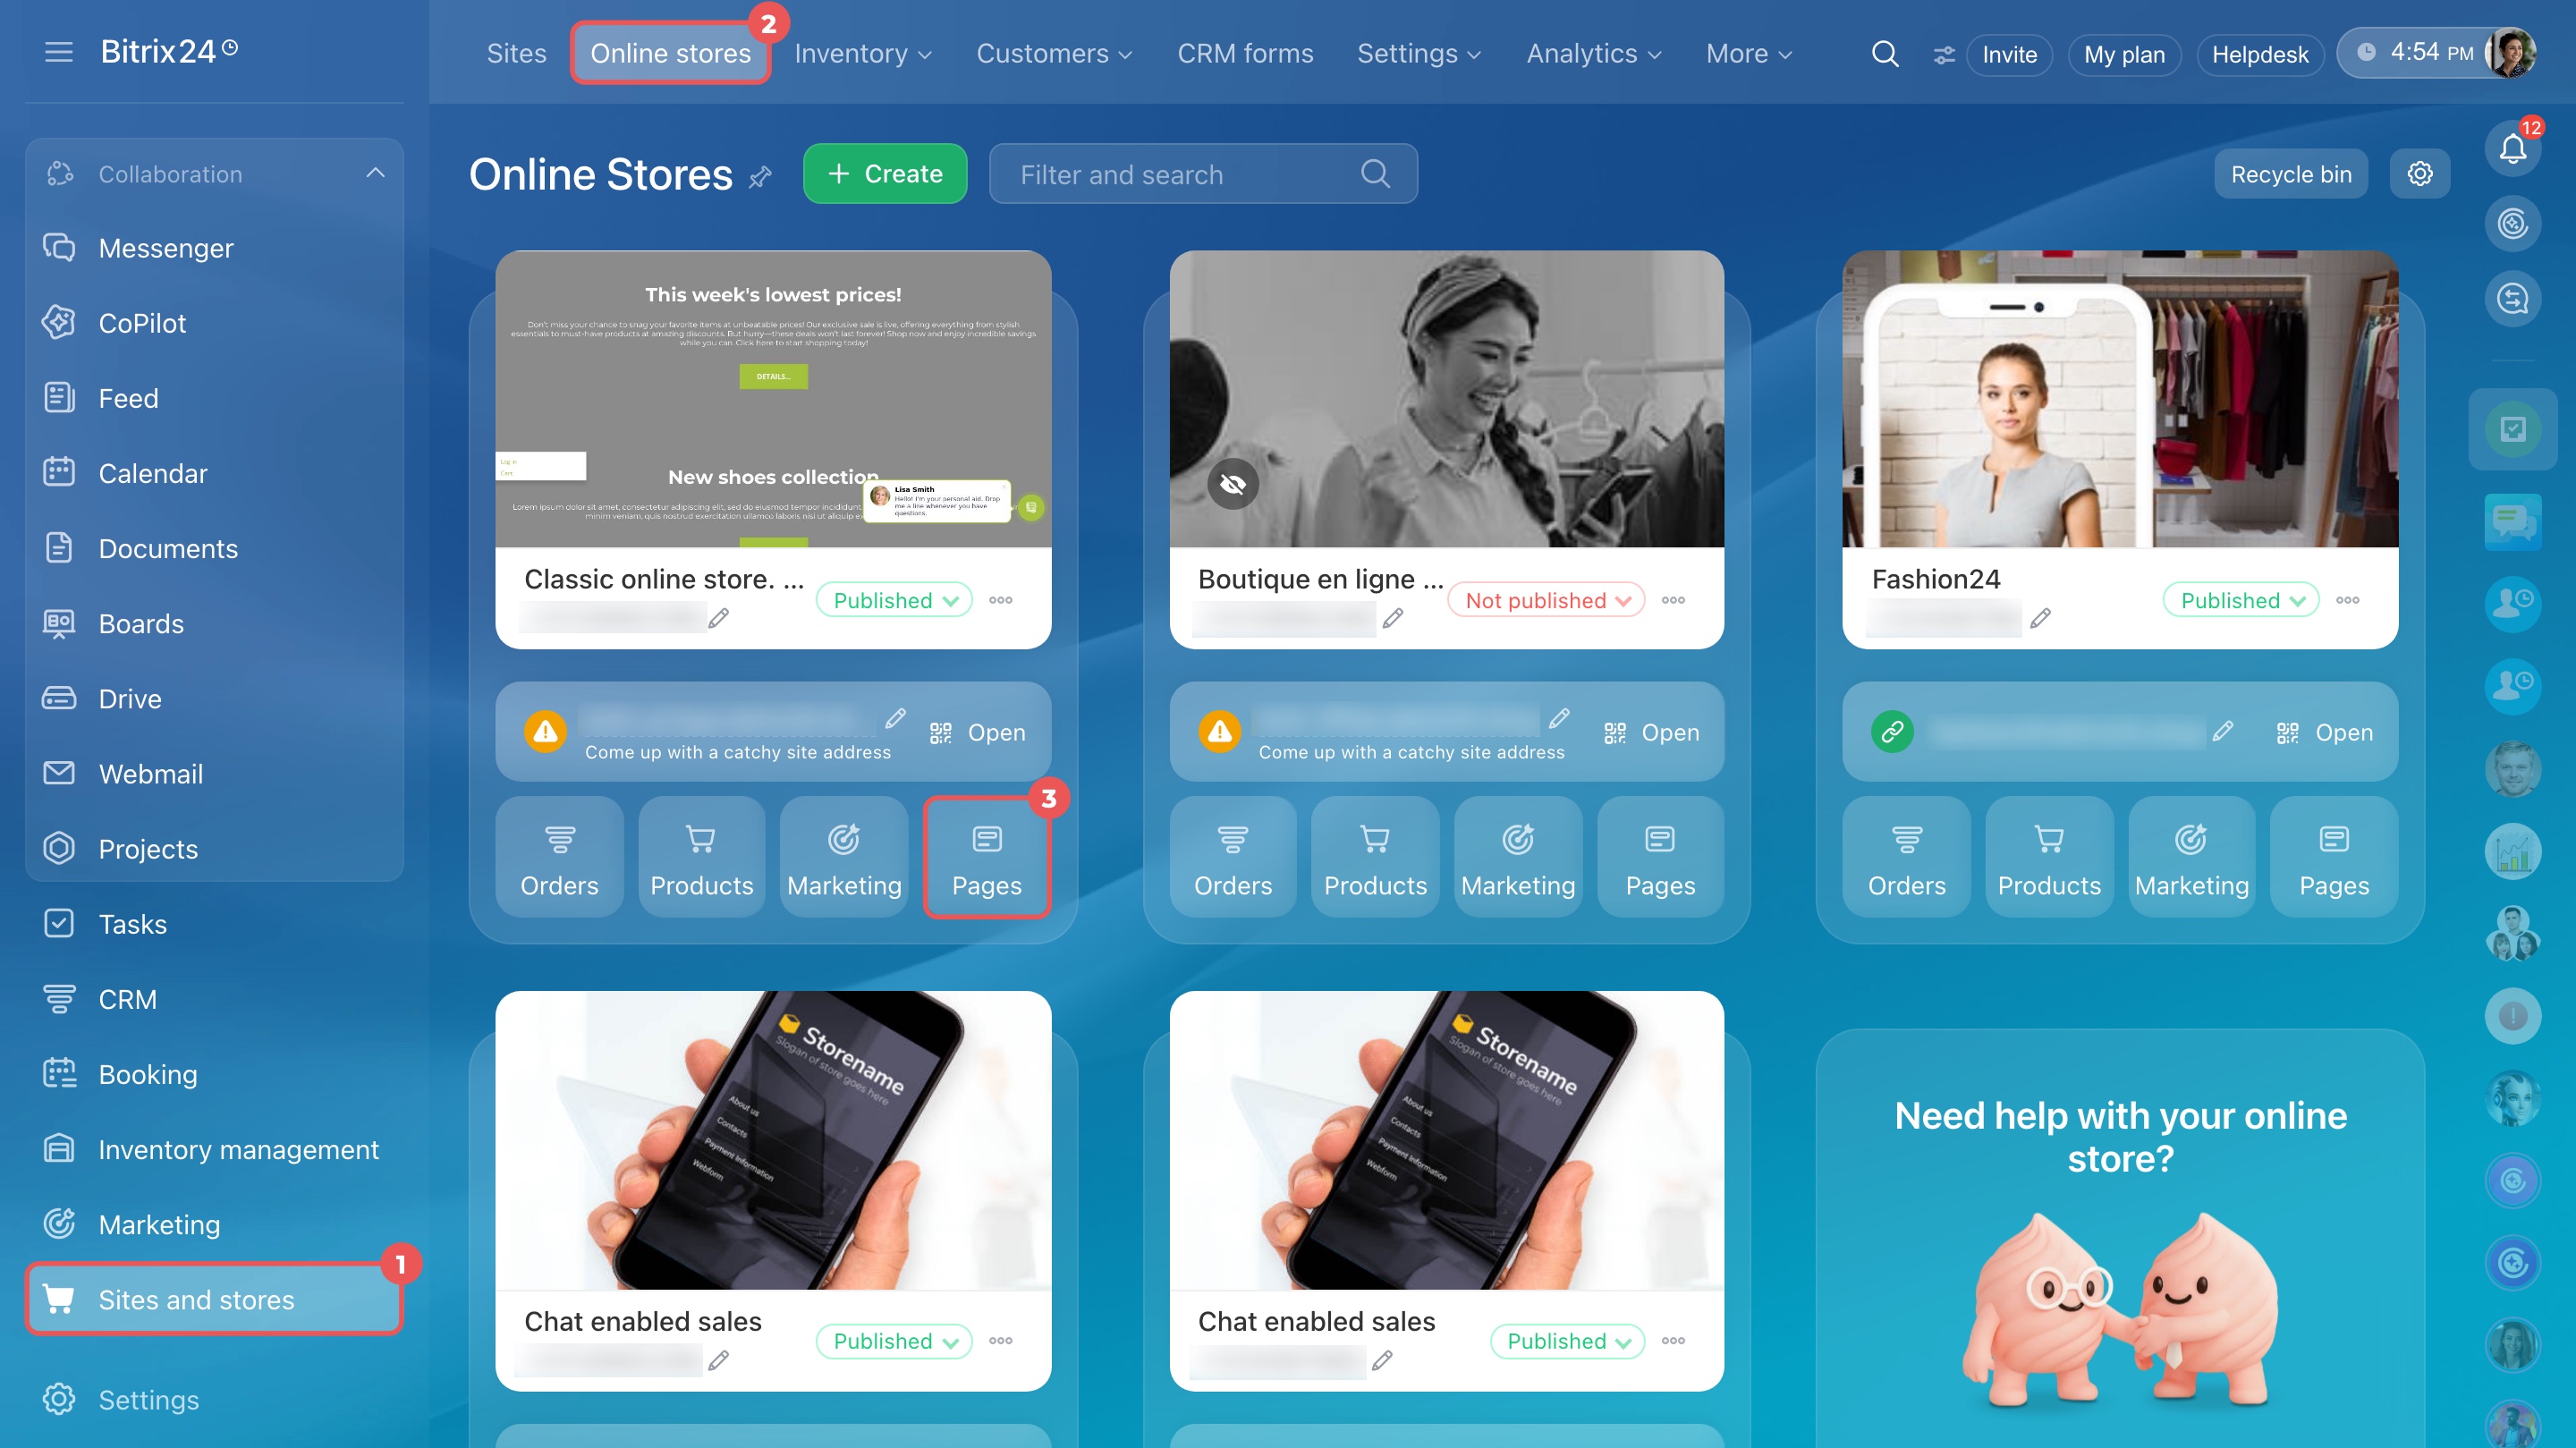
Go to Sites and stores > Online stores and click Pages next to your store.
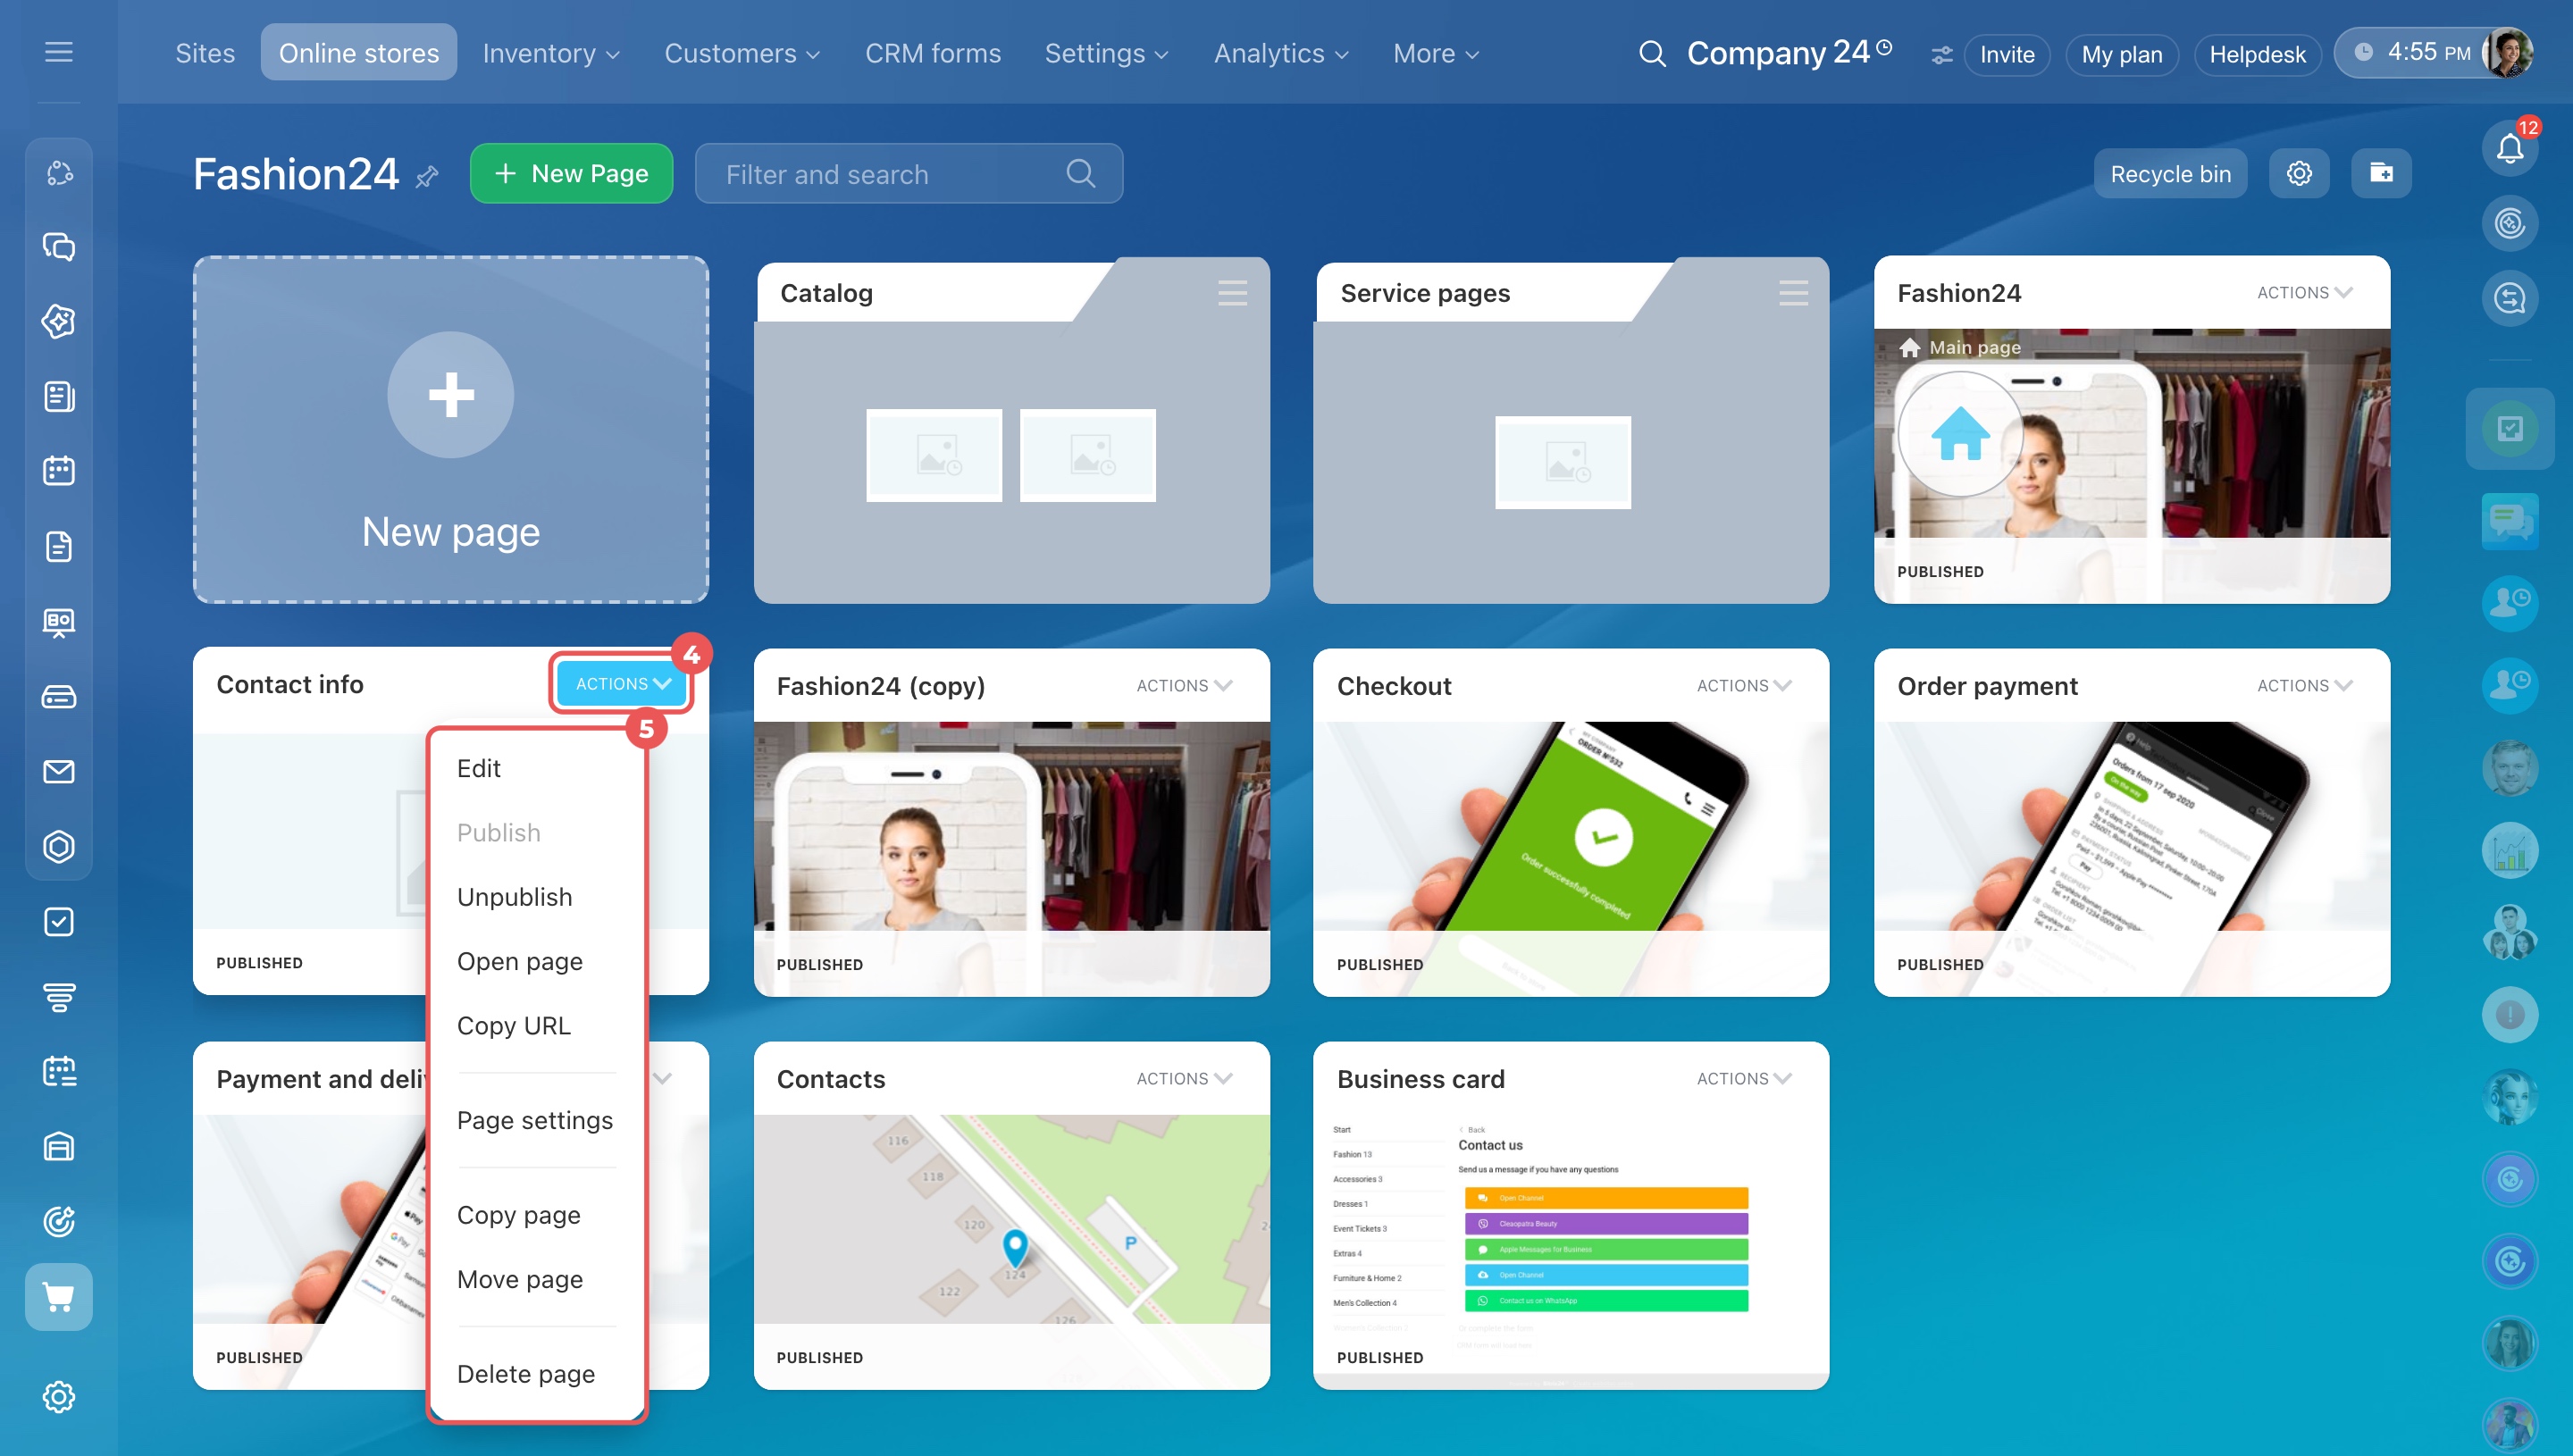
From here, you can edit the product catalog, product form, checkout page, and other pages. You can also change content, add or remove blocks, publish updates, hide pages, and create new ones.
For example, you can add a page with delivery terms or place a promotional banner on the home page.
Set up payment systems
Connect payment systems so customers can choose how to pay and receive their orders.
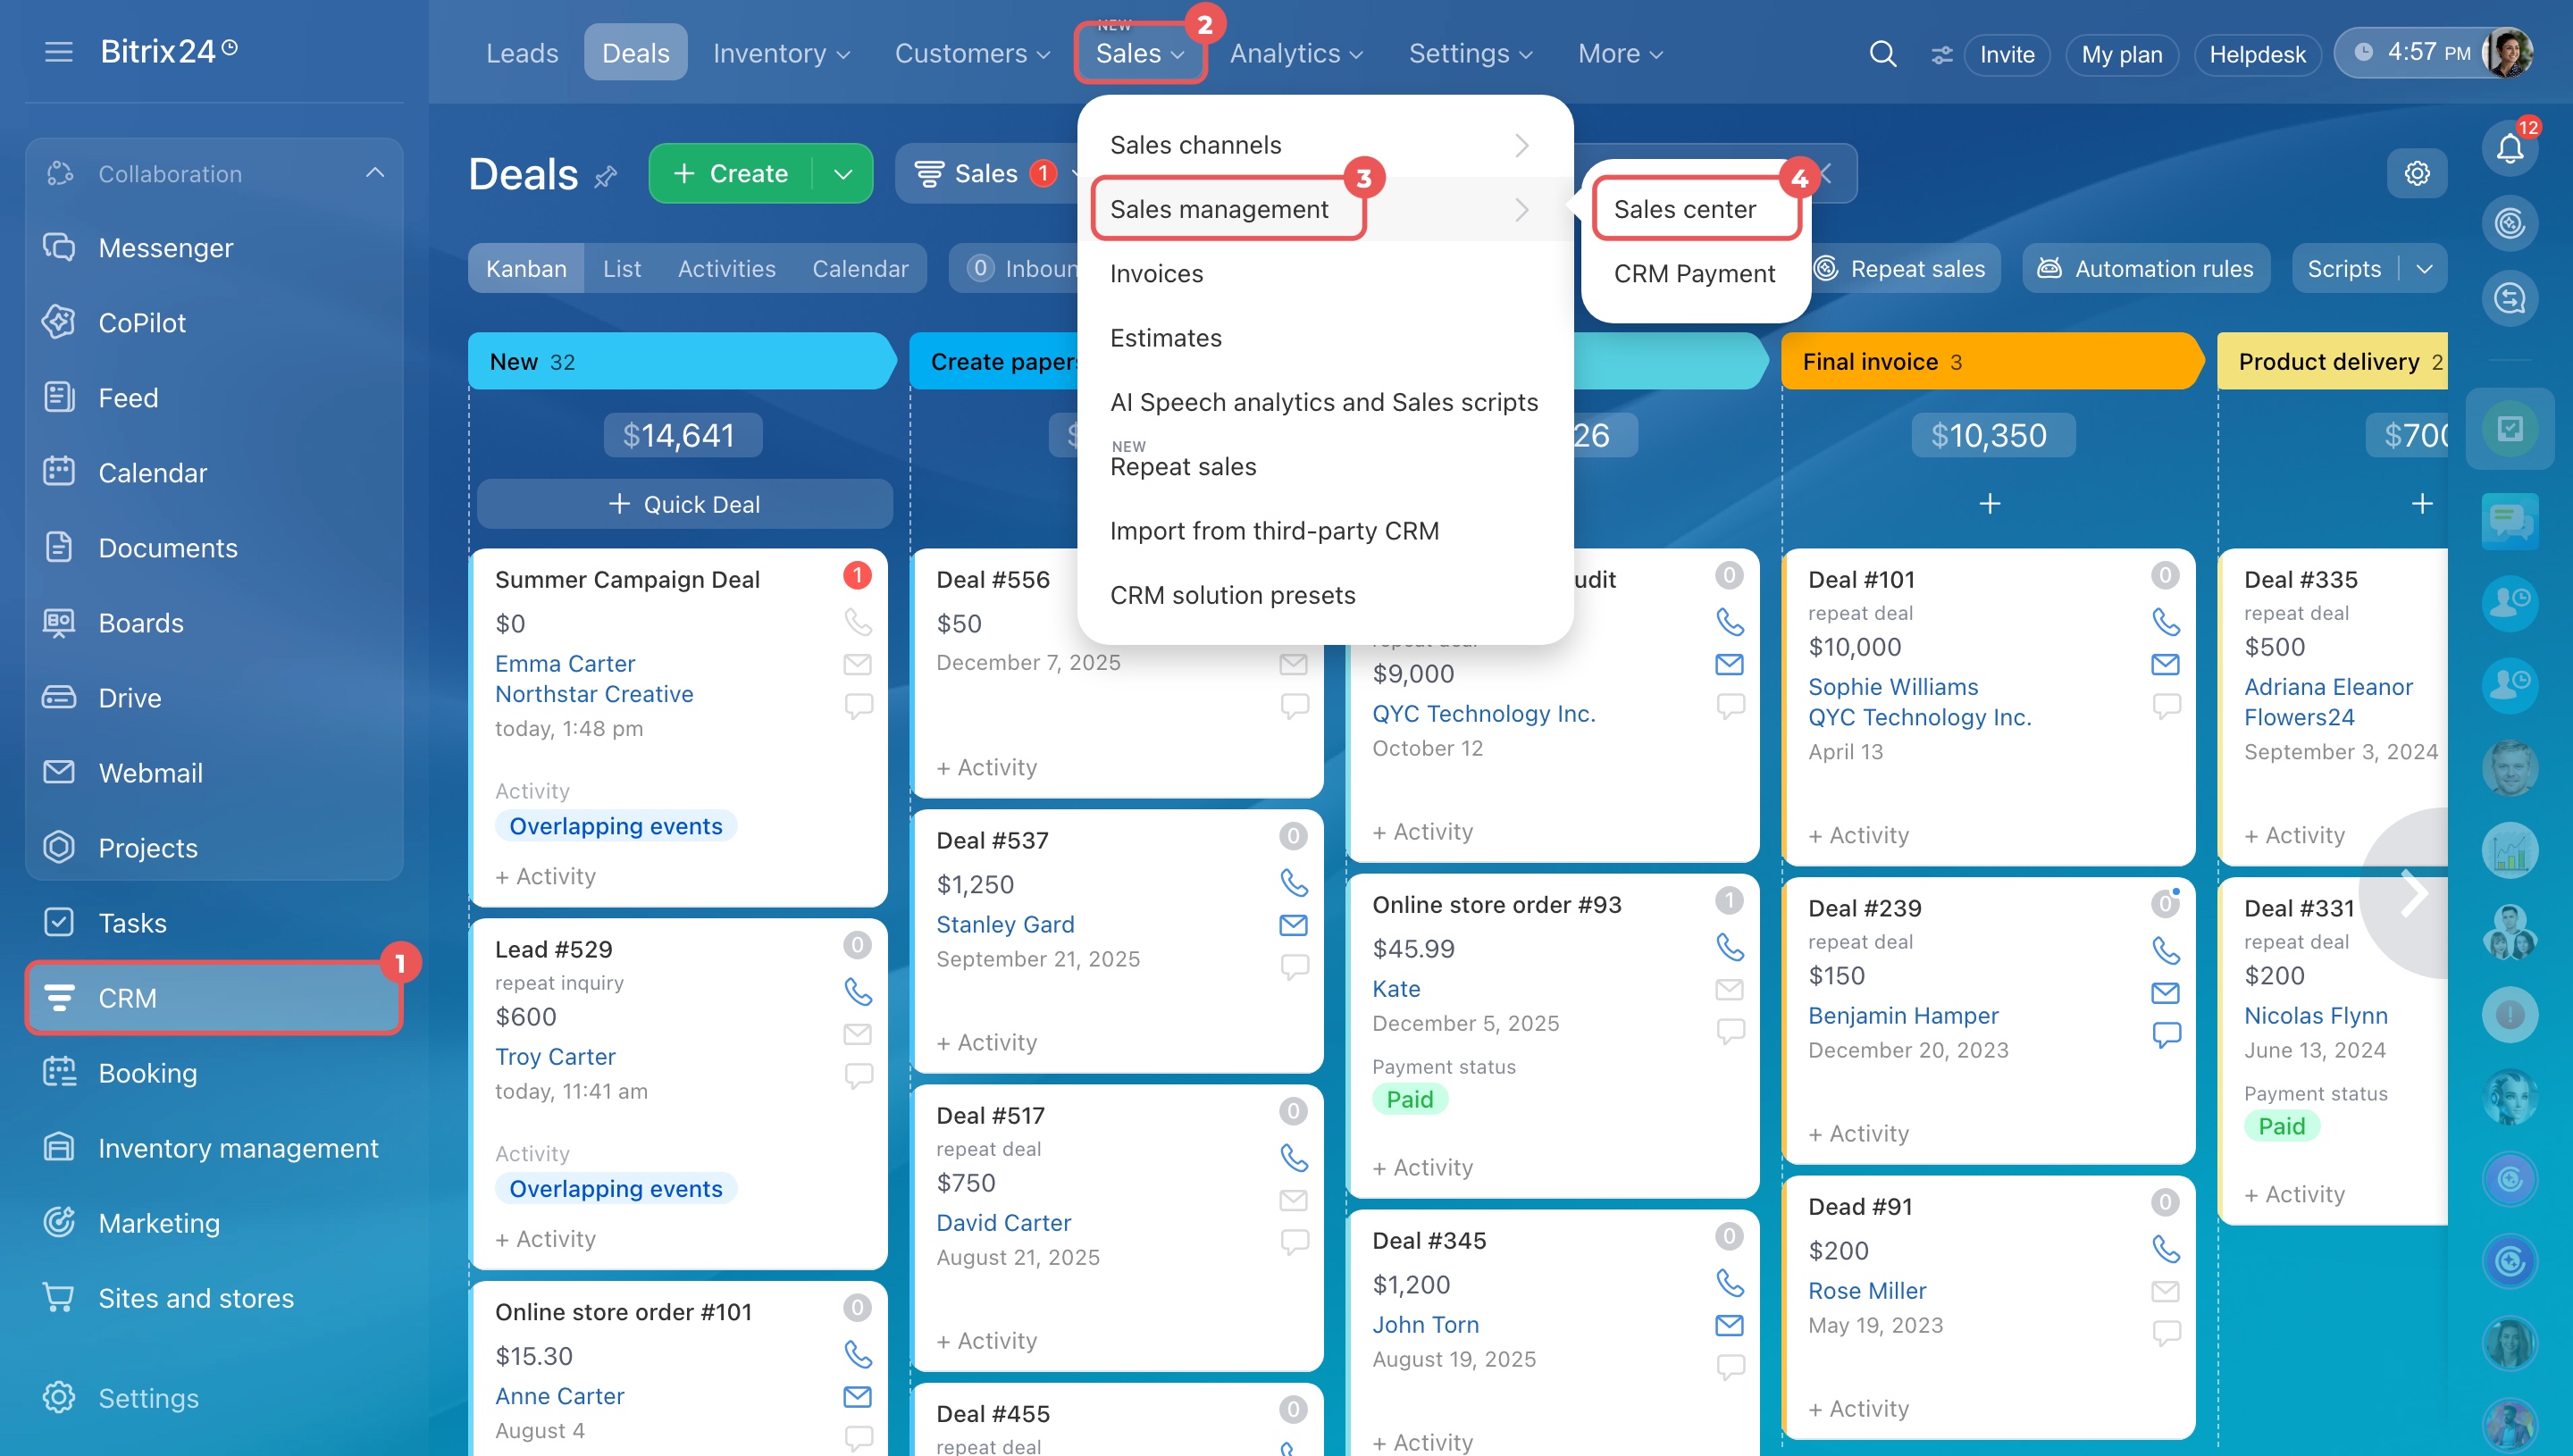
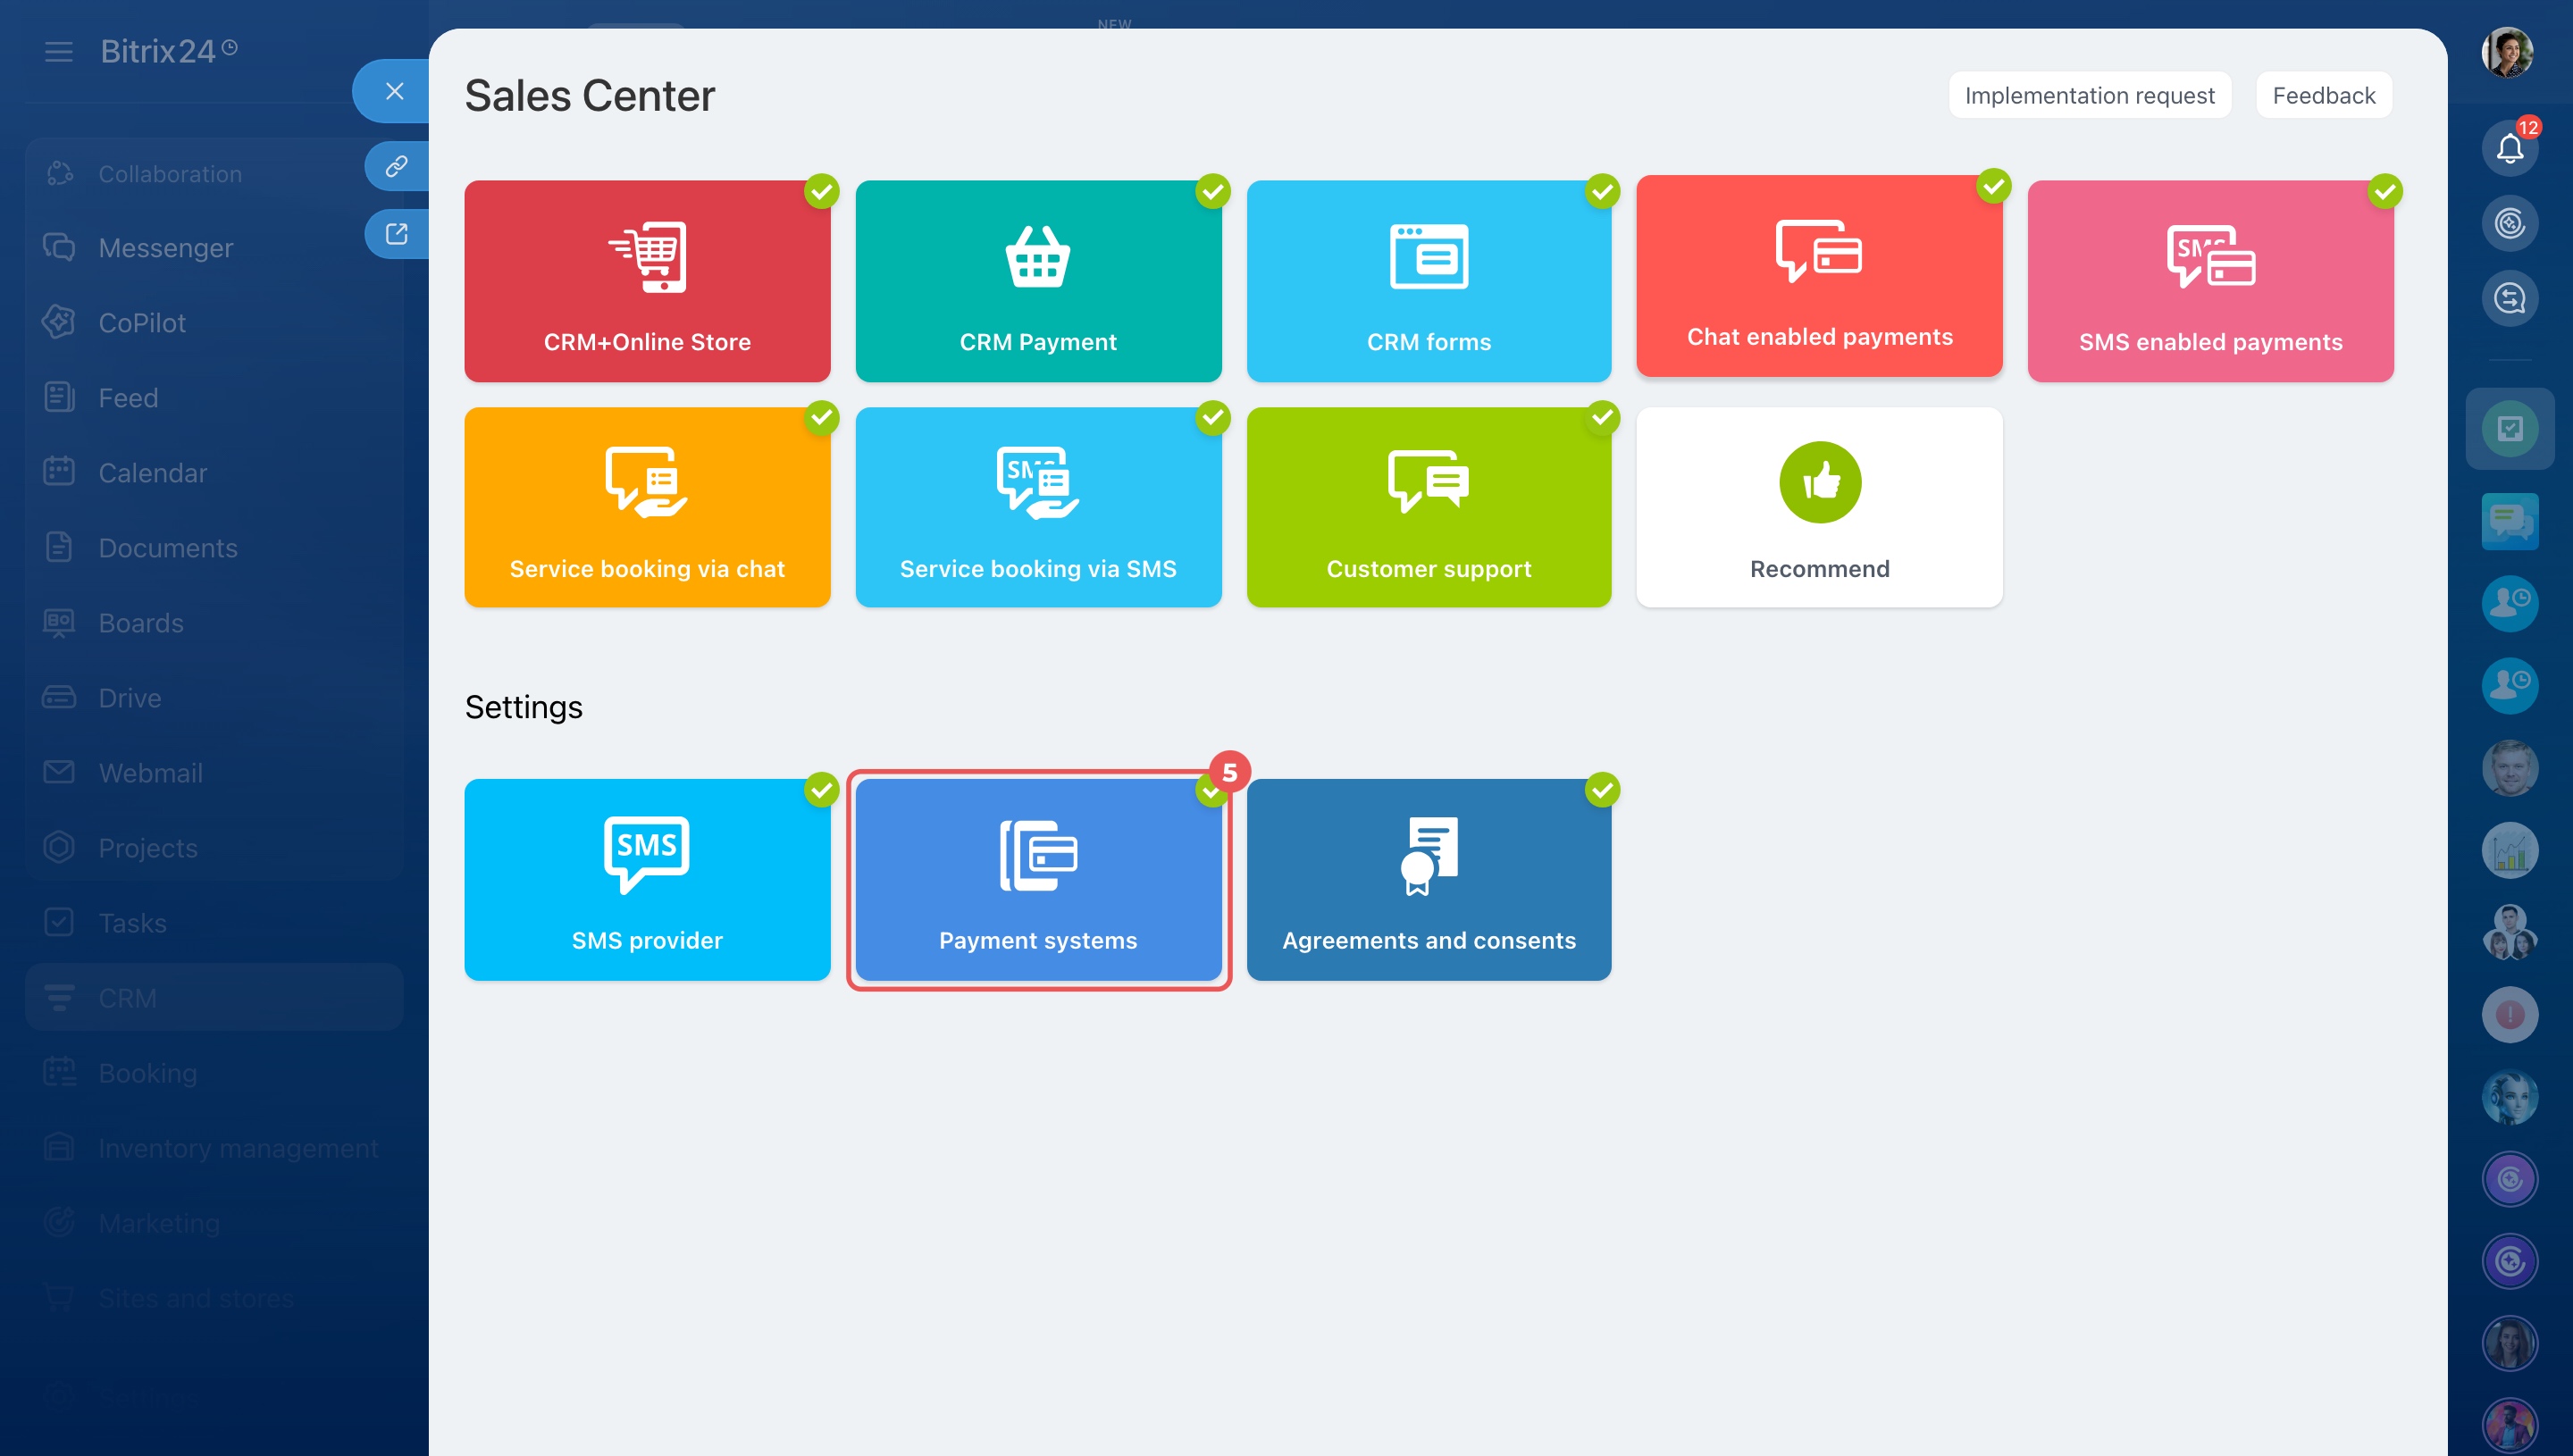
Open CRM > Sales > Sales management > Sales Center. Open Payment systems and connect the payment methods you want to offer.
Connect payment systems in Sales Center
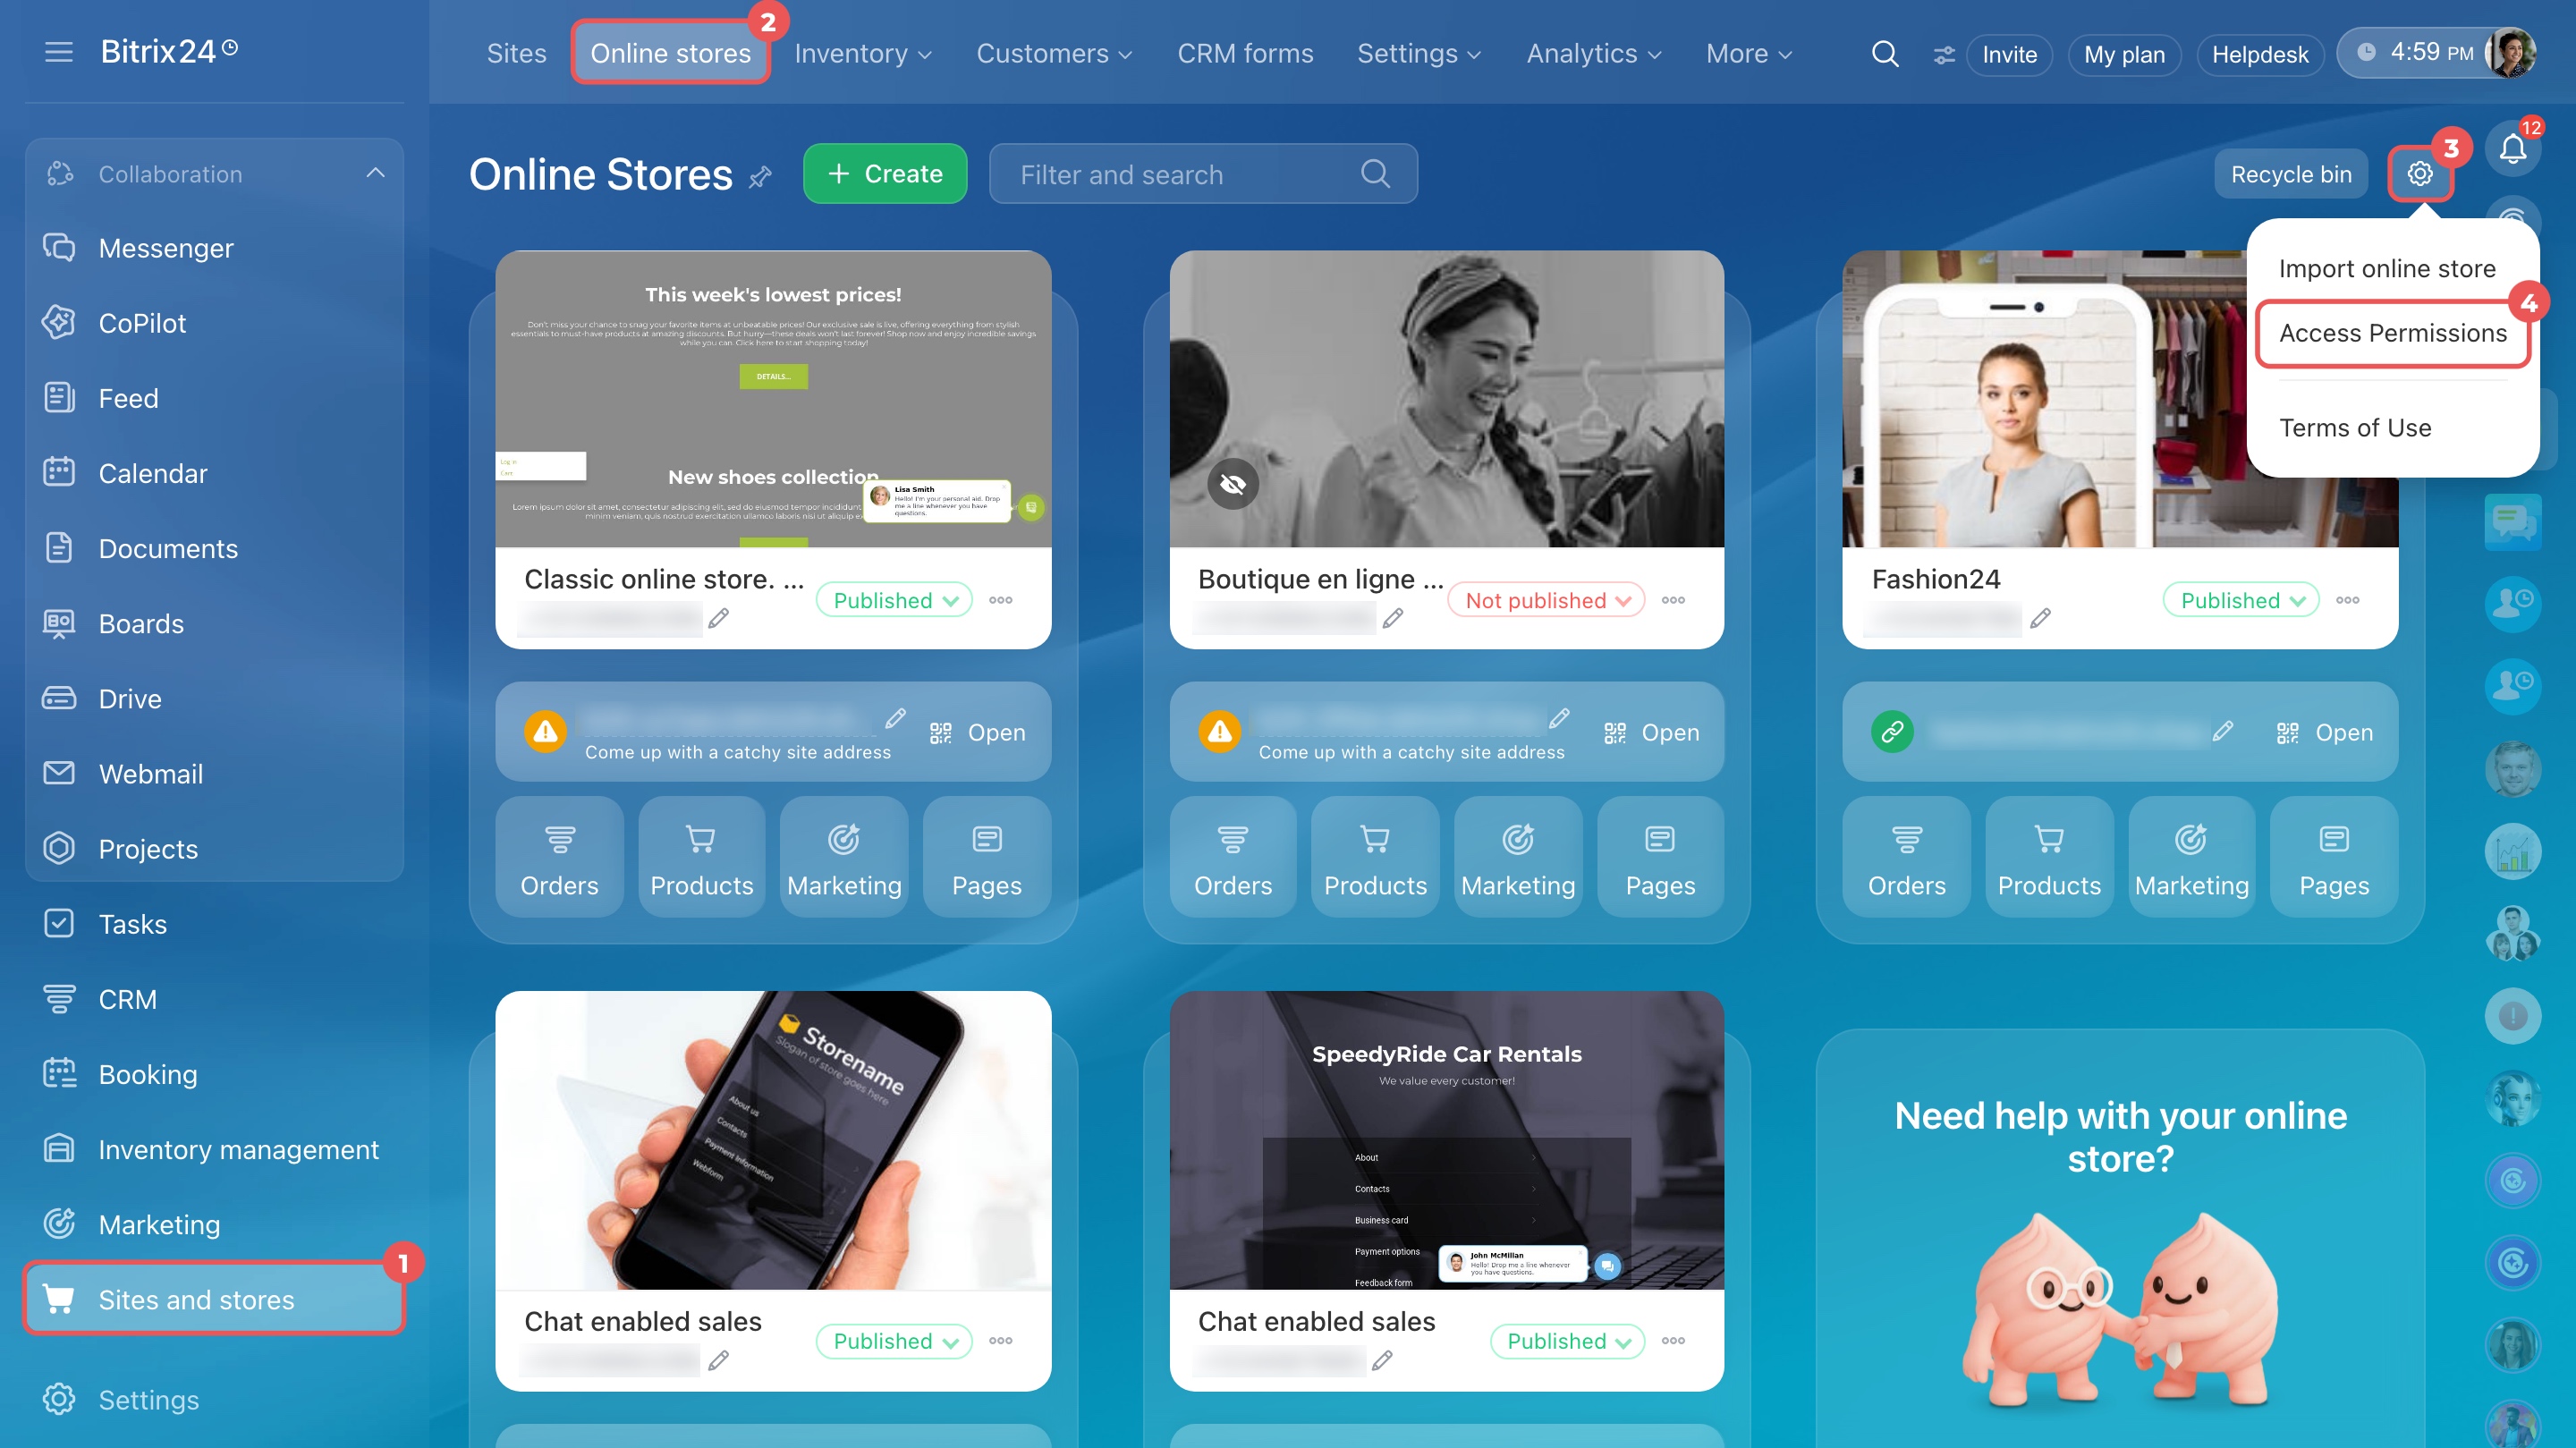
Set up store access permissions
If several employees manage your store, set up access permissions so everyone has the access they need.
Go to Sites and stores and select the Sites or Online stores tab. Click Settings (⚙️) in the top-right corner and select Access permissions.
You can control access to the entire Online stores section or individual stores. Assign existing roles or create custom ones. For example, give content managers permission to edit pages and publish changes. Give administrators full access to manage store settings and operations.
Set up access permissions for sites and online stores
Manage orders in CRM
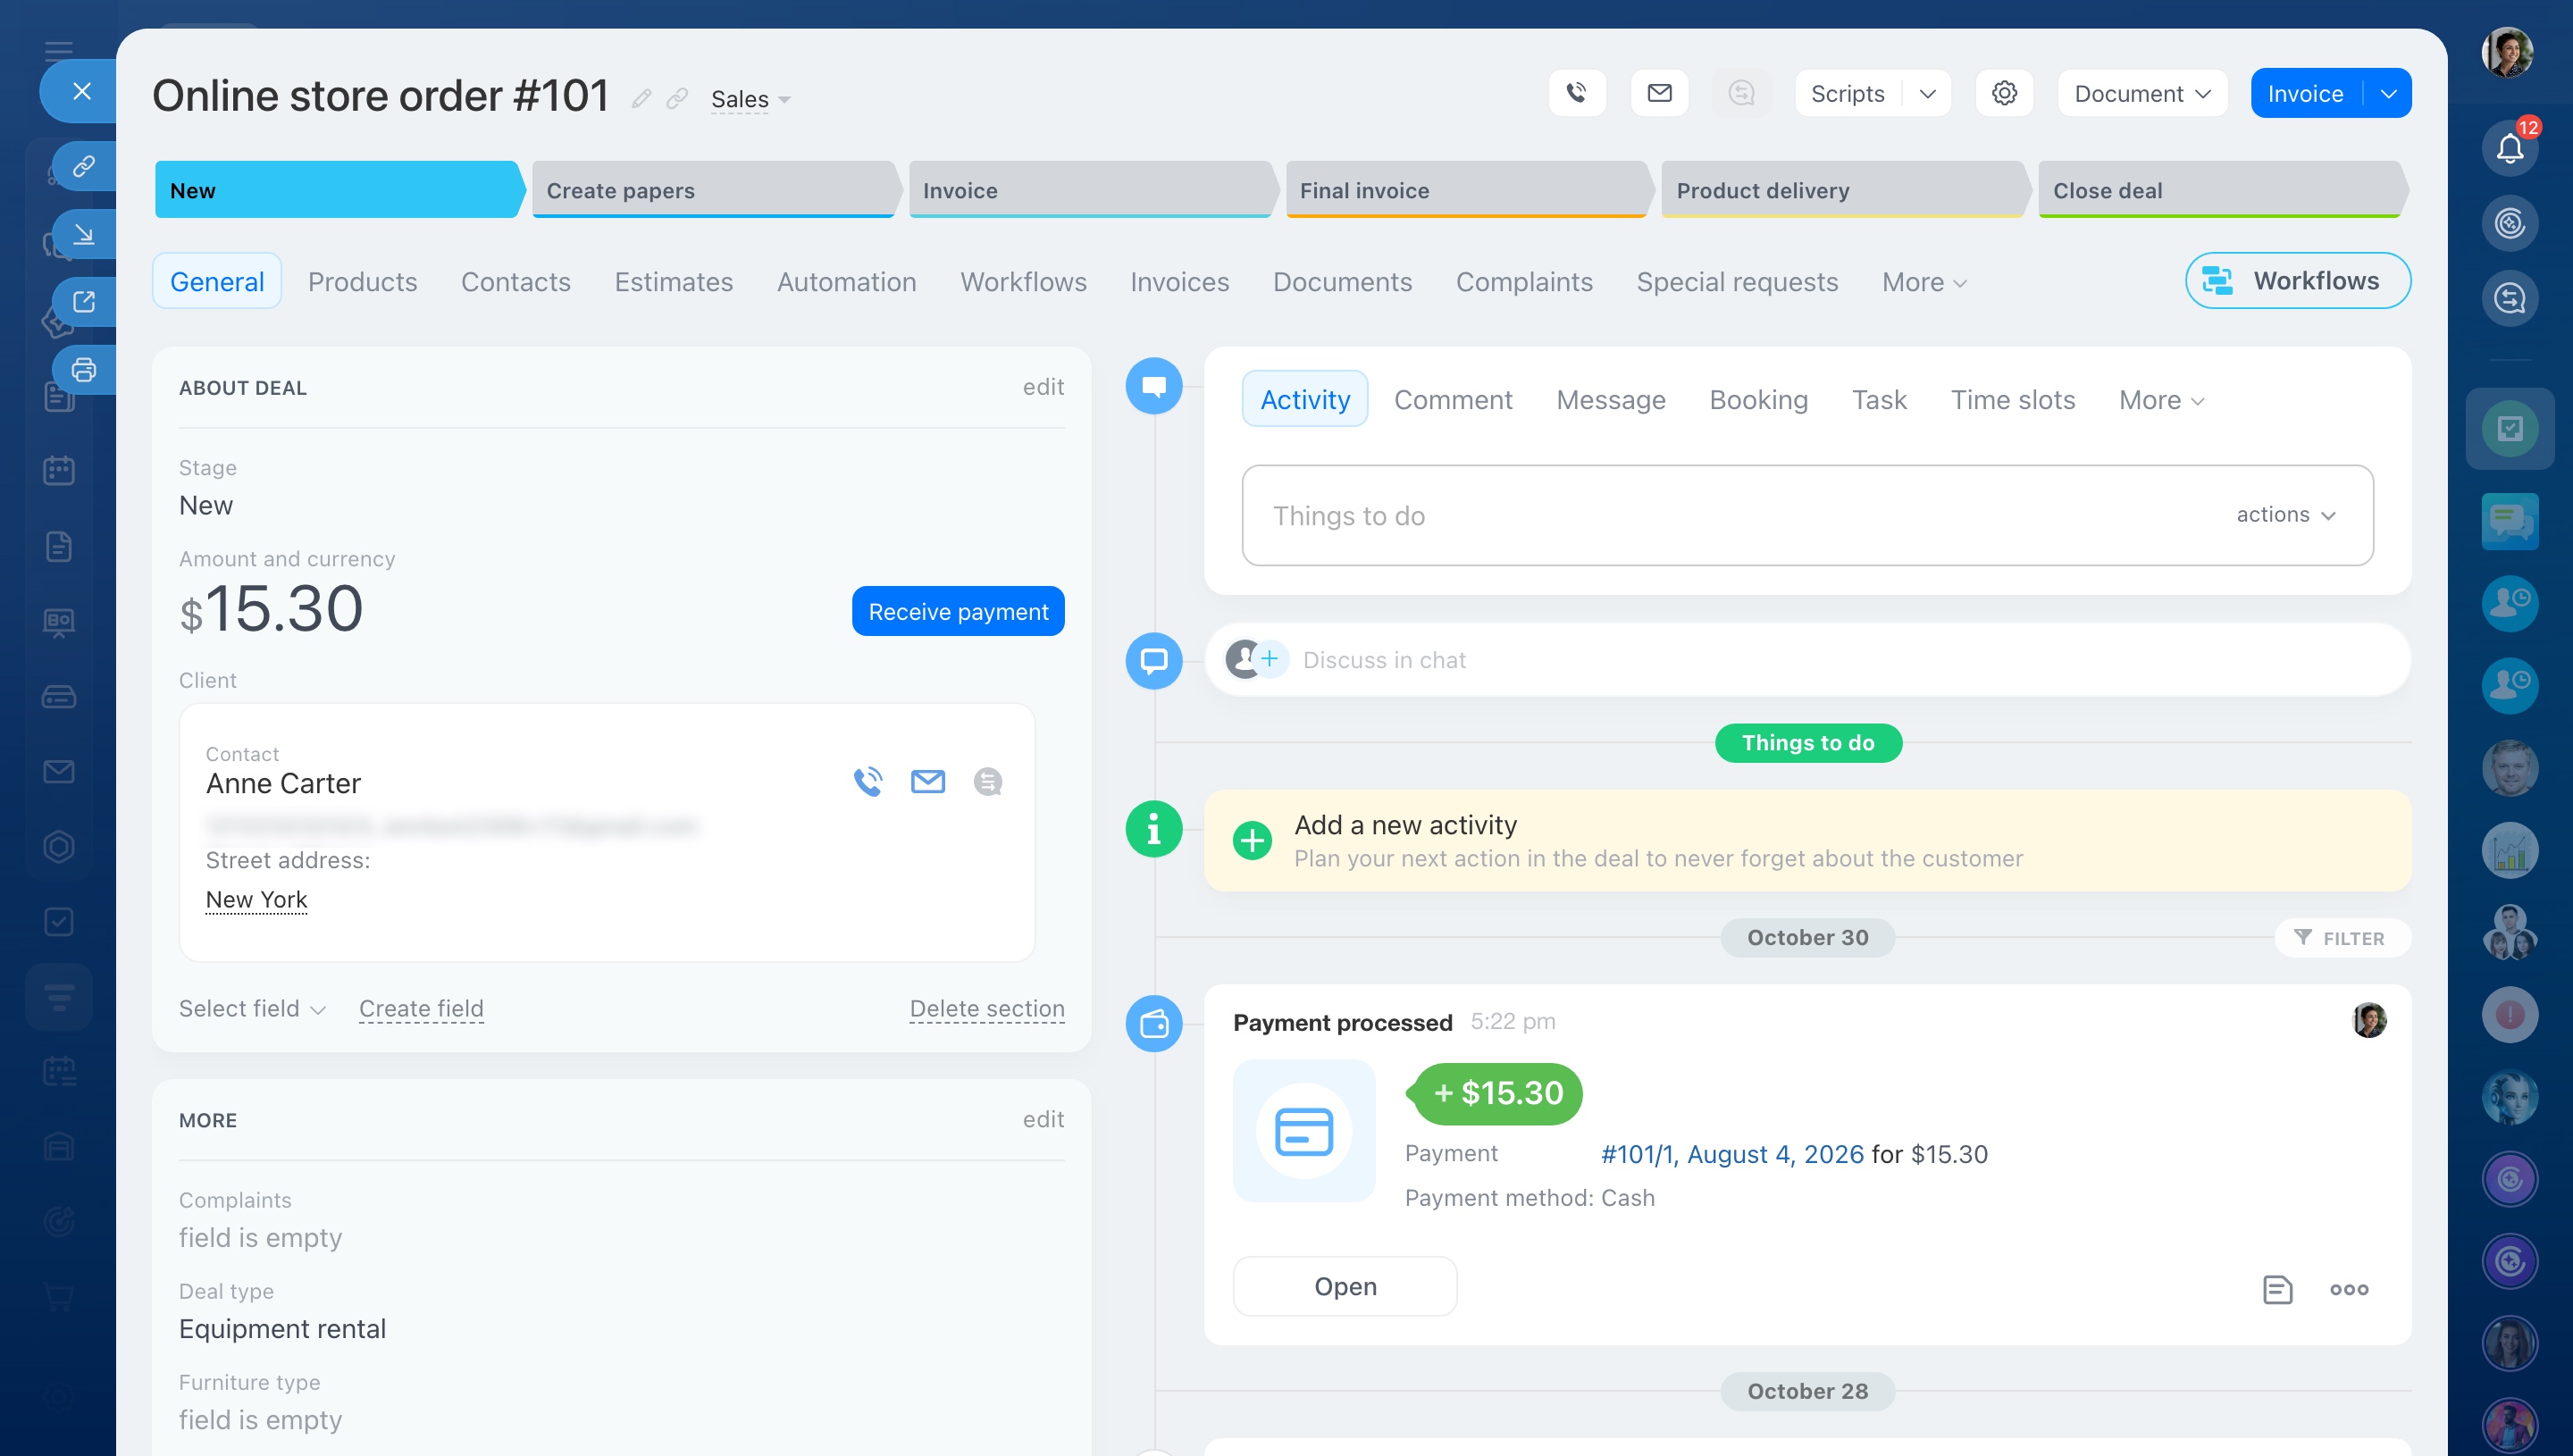
Once your store is ready, customers can start placing orders. Bitrix24 automatically sends order details to CRM.
Here's how it works:
- A customer opens your store, browses the catalog, and places an order.
- The customer can pay for the order directly on the site.
- Bitrix24 automatically creates a deal in CRM with the ordered products, total amount, and customer's contact details.
- An employee opens the deal to confirm the order details or arrange delivery if needed.
Your team can manage orders directly in CRM without copying information from the store.
Place an order in the Bitrix24 online store
Change the domain and add the store to search engines
Once your store is ready, you can connect your own domain and help customers find it through search engines.
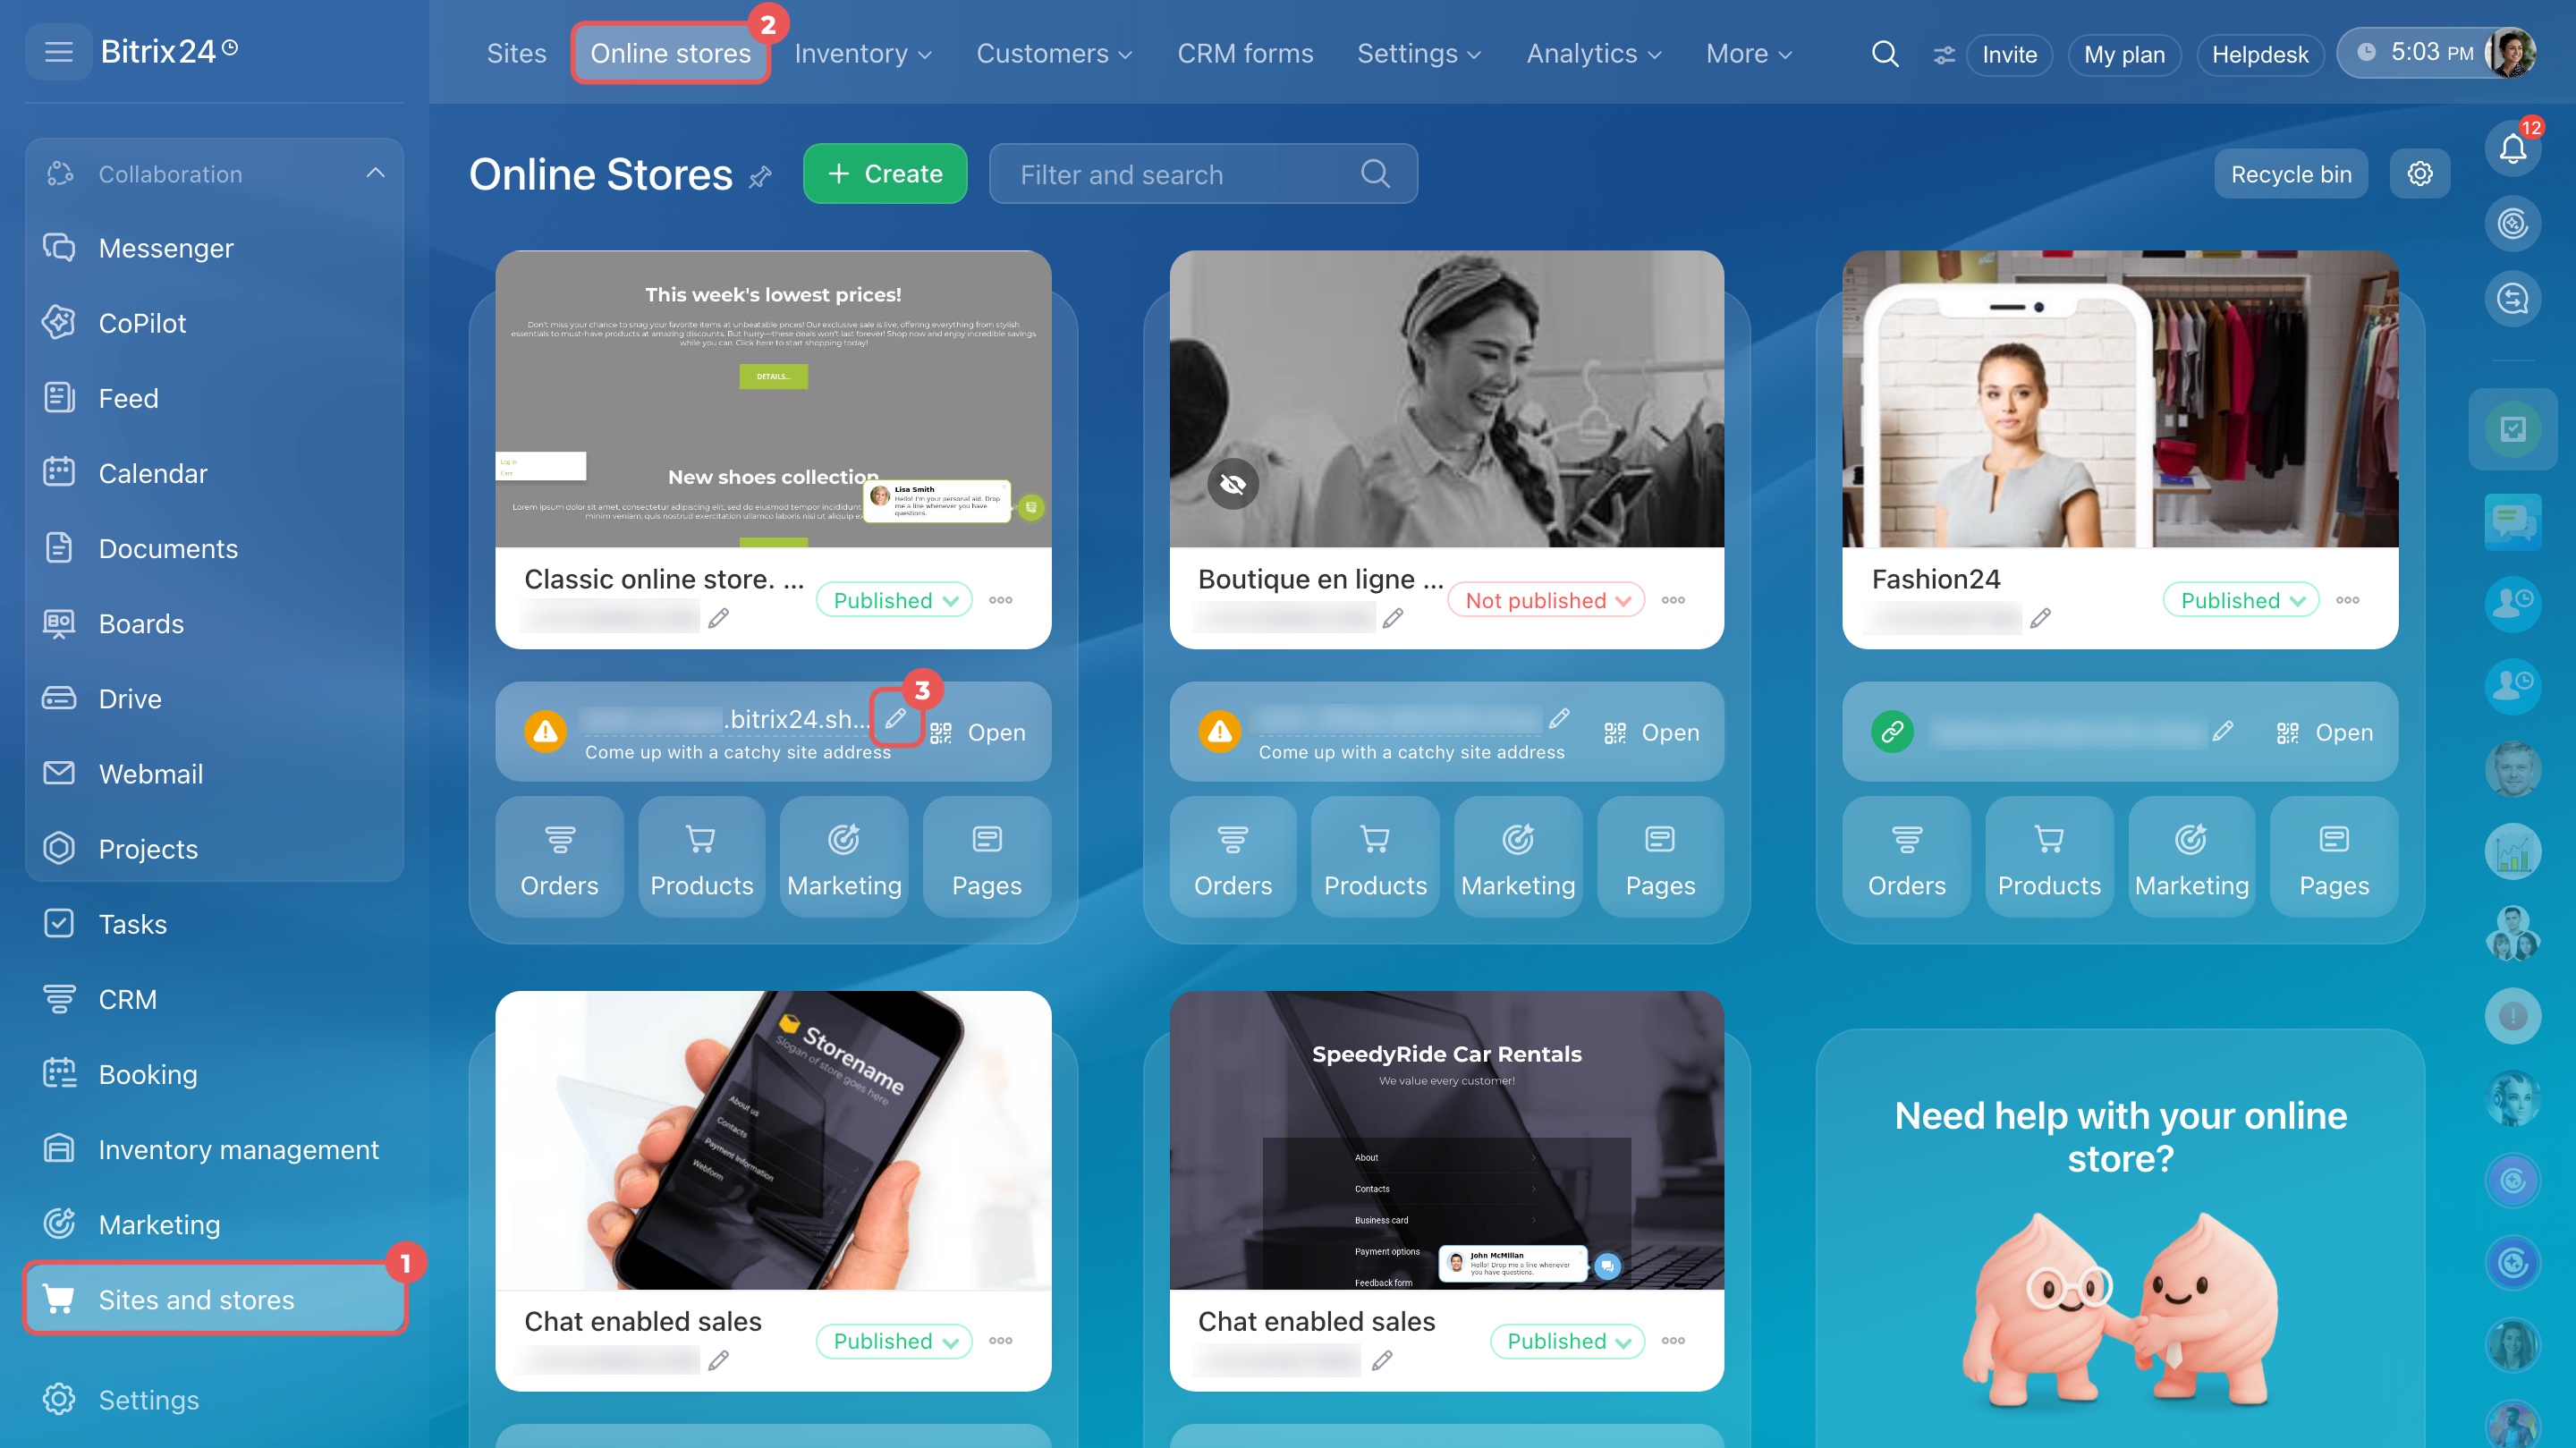
Change your store's domain. By default, Bitrix24 gives your store an address on a Bitrix24 subdomain. You can replace it with your own domain.
How to change the Bitrix24 subdomain for your site
Open Sites and stores > Online stores and click the pencil icon next to your store's address.
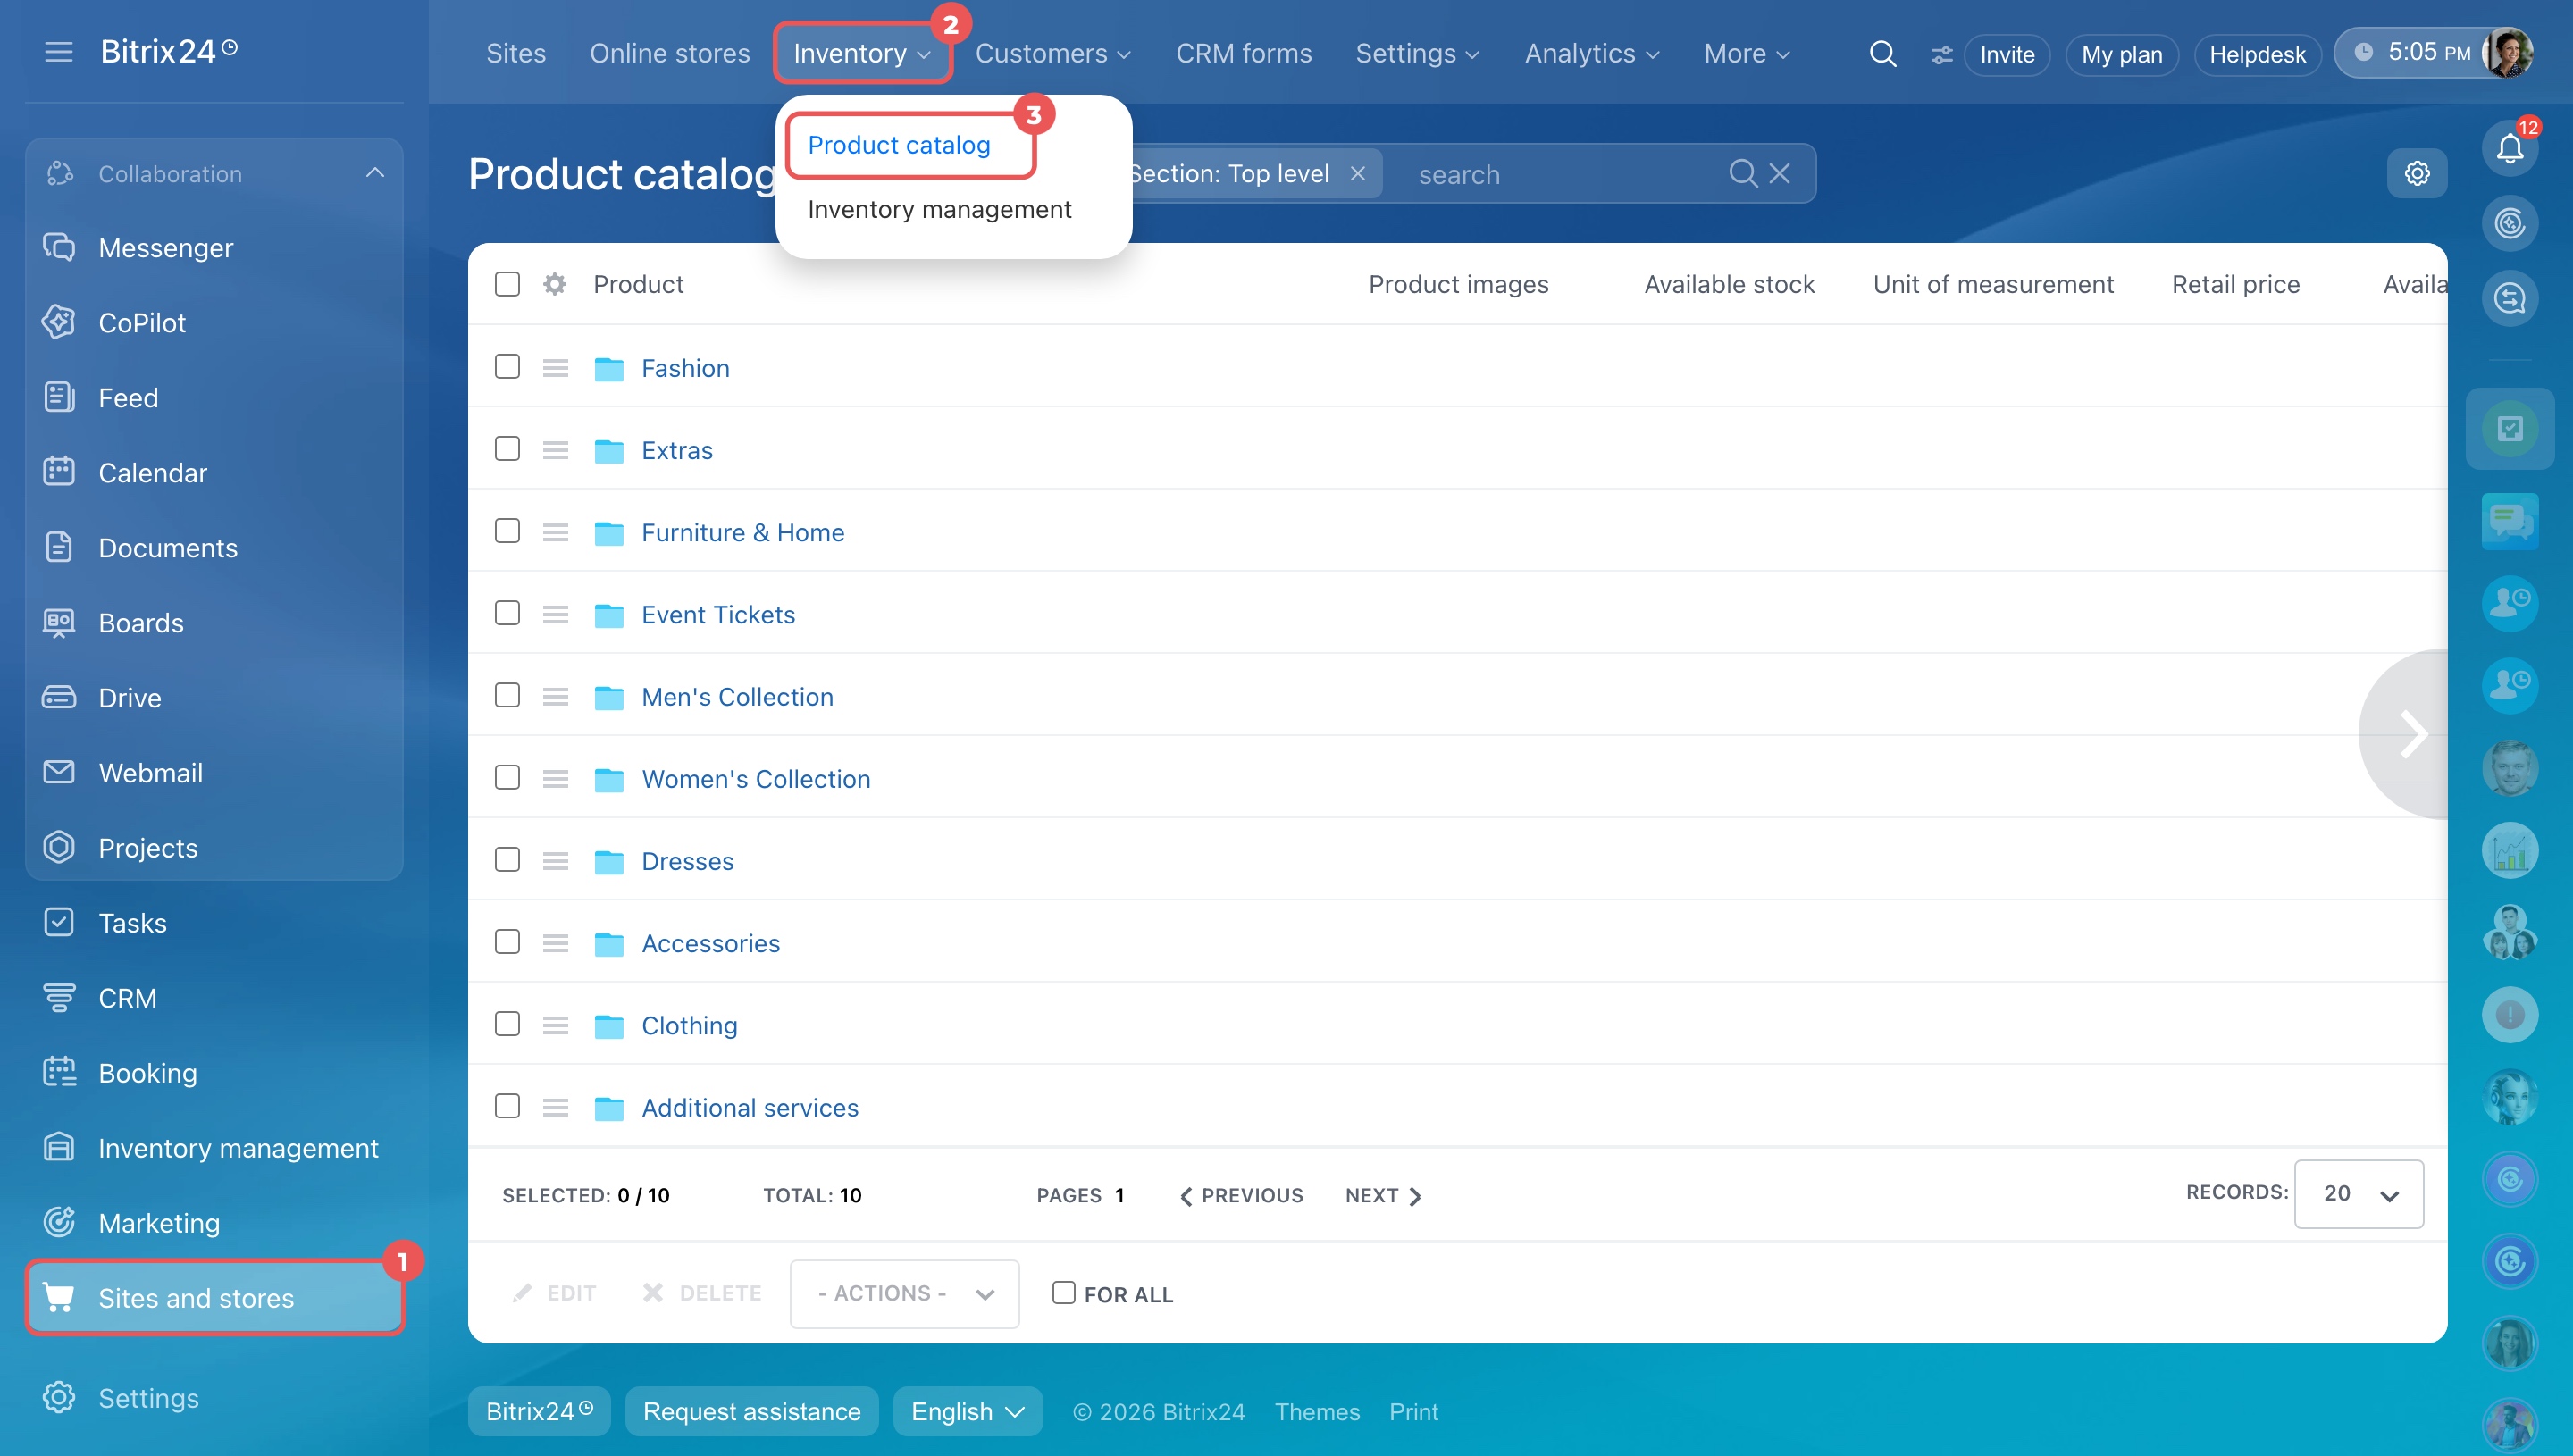
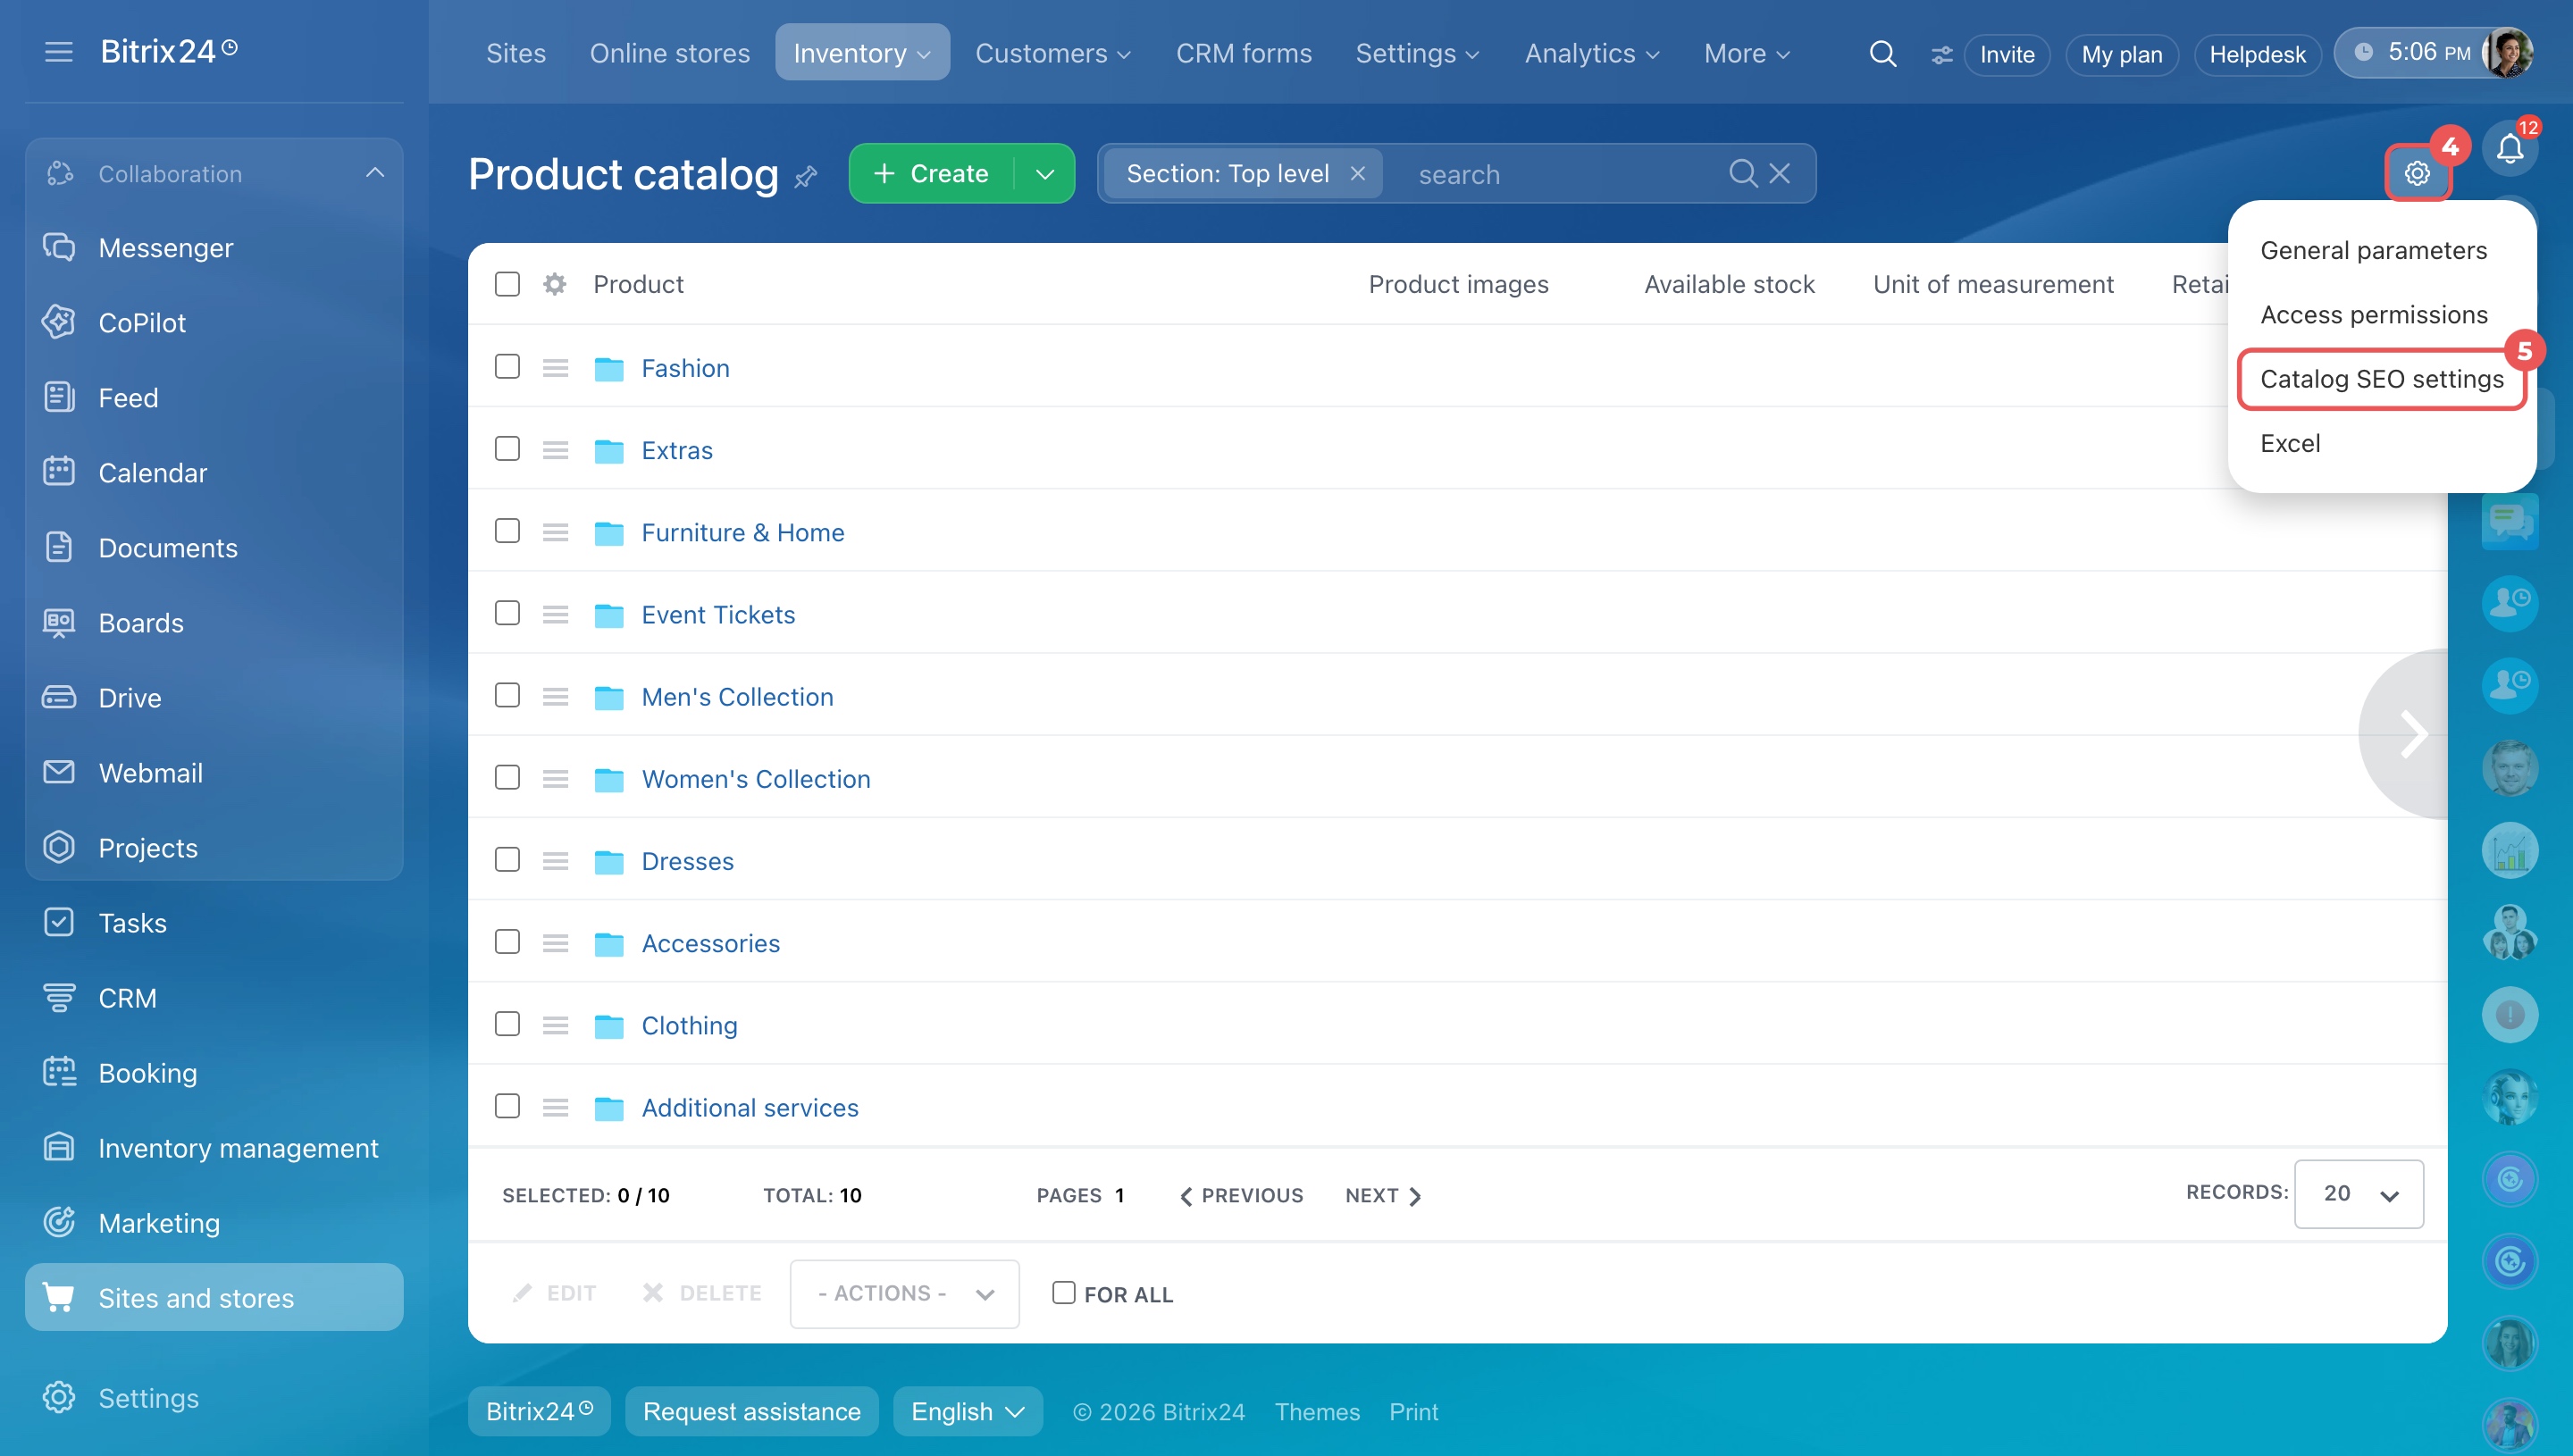
Set up SEO. To help new customers find your store through search engines, configure SEO settings for your product catalog.
Open Sites and stores > Inventory > Product catalog. Click Settings (⚙️) in the top-right corner and select Catalog SEO settings.
Setting up SEO parameters for the product catalog
You can also add your site to Google to make it easier for customers to find your products.
Add your website to Google
In brief
- CRM + Online store lets you launch an online store connected to Bitrix24 CRM. When a customer places an order, Bitrix24 automatically creates a deal with the order and contact details.
- Create a store in minutes from CRM > Sales > Sales channels > Contact center or Sites and stores > Online stores.
- After you create the store, configure its basic parameters: the index page, a widget to communicate with customers, and the design.
- Set up the product catalog to control which products appear, how prices and discounts work, and what customers see at checkout.
- Edit store pages to add your own content, promotional banners, and other pages.
- Connect payment systems to make purchases easier for customers.
- Set up access permissions if several employees work with the store.
- Make your store easier to find by connecting your own domain, adding the site to Google, and configuring SEO settings.