Read FAQ
NEW
Bitrix24 Support
Registration and Authentication
How to start
My Profile
Feed
Chats and Calls
Calendar
Bitrix24.Docs
Bitrix24.Drive
Bitrix24.Mail
Workgroups
Tasks and Projects
CRM
CoPilot - AI in Bitrix24
Contact Center
Sales Center
CRM Analytics (beta)
BI Builder
Sales Intelligence
Inventory Management
Marketing
Sites
Online Store (beta)
CRM + Online Store
CRM Store (beta)
Bitrix24.Sign
Company
Knowledge base (beta)
Automation
Workflows
Telephony
Market
Subscription
Settings
Enterprise
Mobile App
Desktop App
General questions
Bitrix24 On-Premise
Log In
Your Bitrix24
Authorize to enter
your company's Bitrix24.
Enter

Bitrix24Care

Send event invitation by email

The main calendar function is scheduling events. Events within the company are easy to schedule in seconds, because the scheduler displays each employee's free time.

But there are also meetings with customers and partners who are not users of your Bitrix24.

For such cases, the calendar has the Invite a guest function.


How to send event invitations to a guest by email

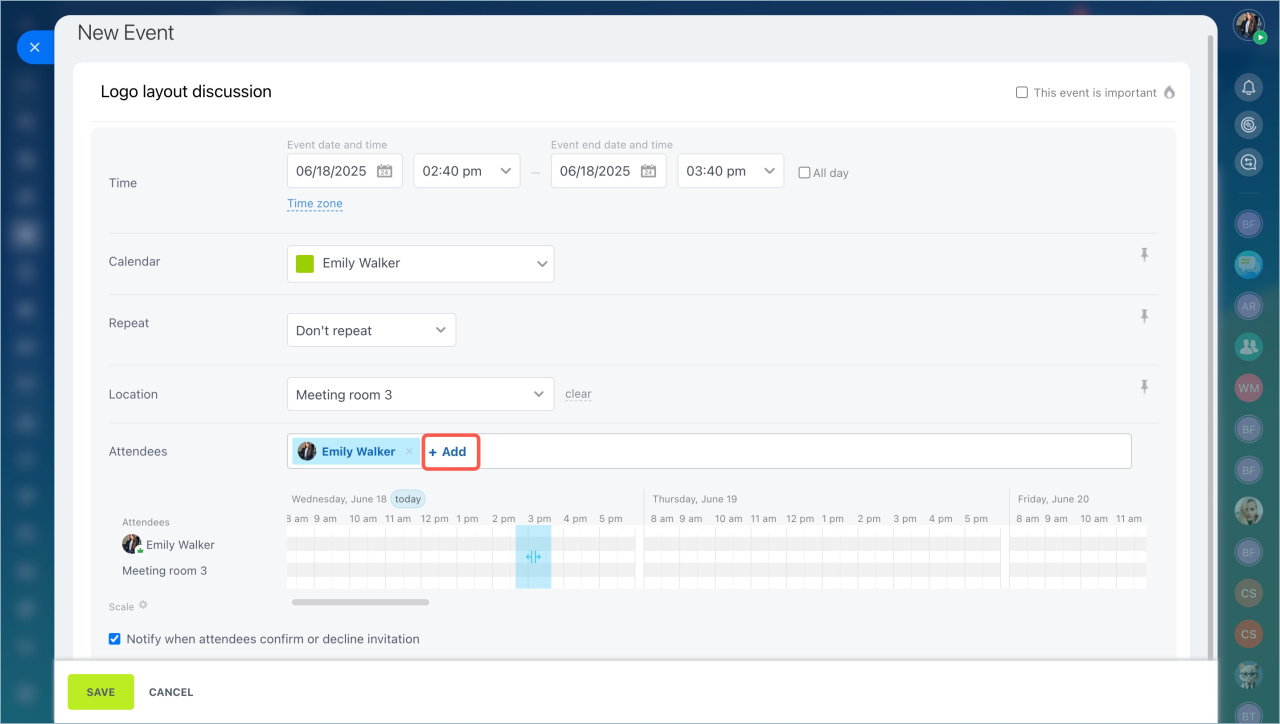
  1. Select a day in your calendar and add an event. Specify the event parameters.

  2. In the Attendees section, click the Change button > select users that will participate in the event.

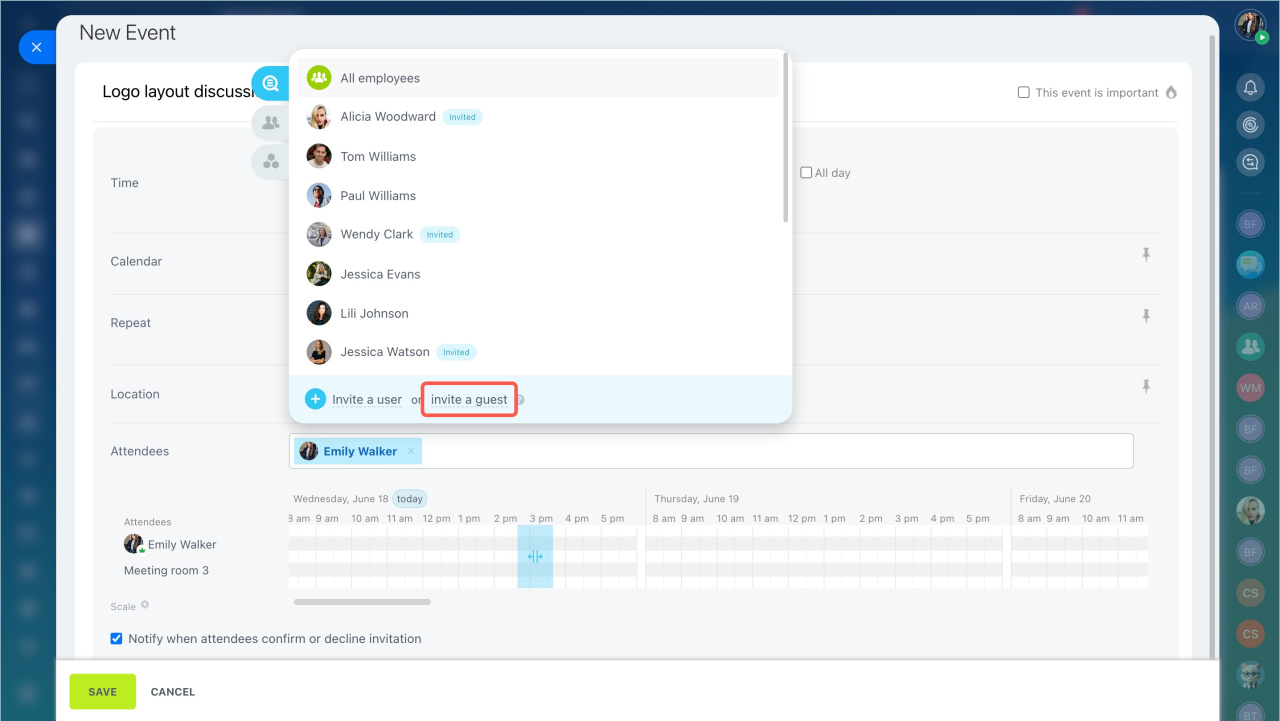
  3. Click the Invite a guest button.

  4. Specify the email, first name and last name of the guest and click Invite.

    When you click Invite, the guest will be added to the event's attendee list. But the invitation will still not be sent.
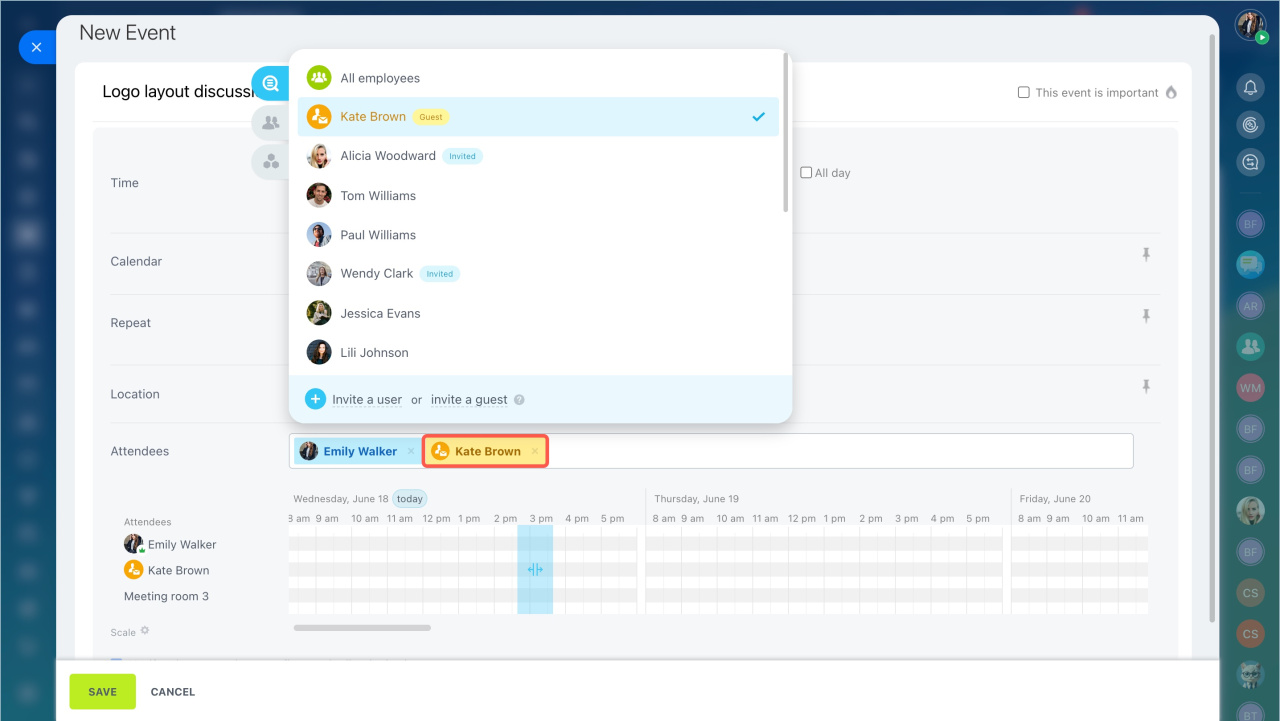
  5. The guest is added to the attendees' list, saved to your account, and is displayed in the yellow color. Select the guest from the list and press Enter.

    Mail users have no access to your account, so they cannot be deleted or deactivated. They are not internal or external users.
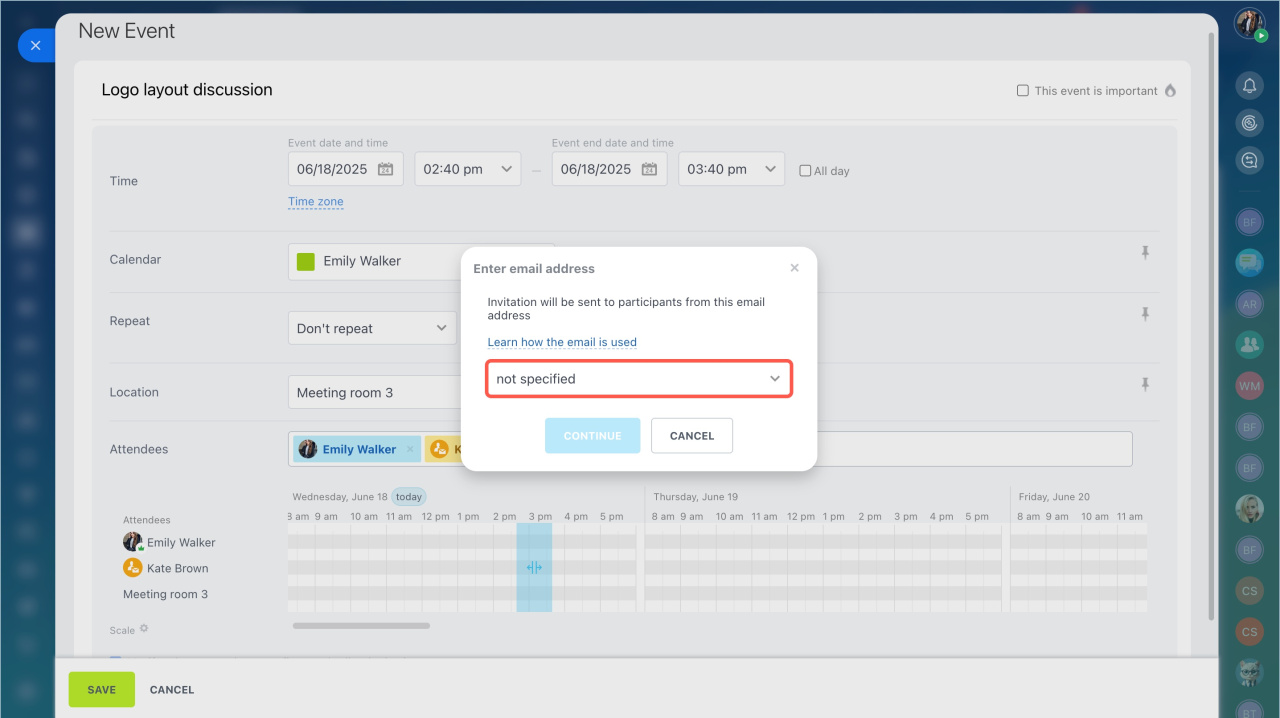
  6. How to add a new sender email

    Fill out the form: specify your name and email. You can make this email Available to everyone by enabling the corresponding option.

    You'll get the verification code to the specified email.

    Copy and paste it to the corresponding field in your Bitrix24 > click Save.

  7. Make sure to enable the Notify of decision option. If this option is enabled, you'll get the notification if the event's attendee has accepted or declined the invitation.

  8. Click Create.

  9. The event is added to your calendar.


FAQ

How do I check if the guest has received my invitation?

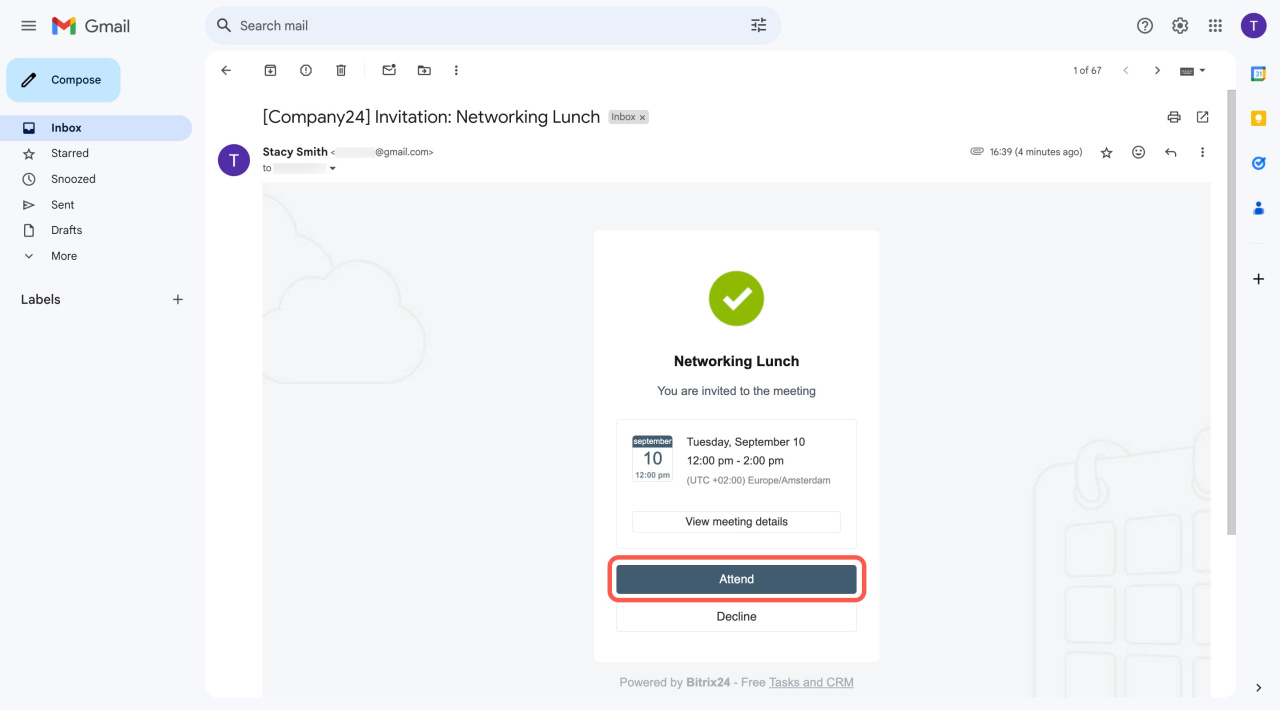
After creating the event in your calendar, the guest will get an invitation by email.

Once the guest has made a decision on the event participation, you will get a notification.

Is it possible to edit the event if the invitation has already been sent?

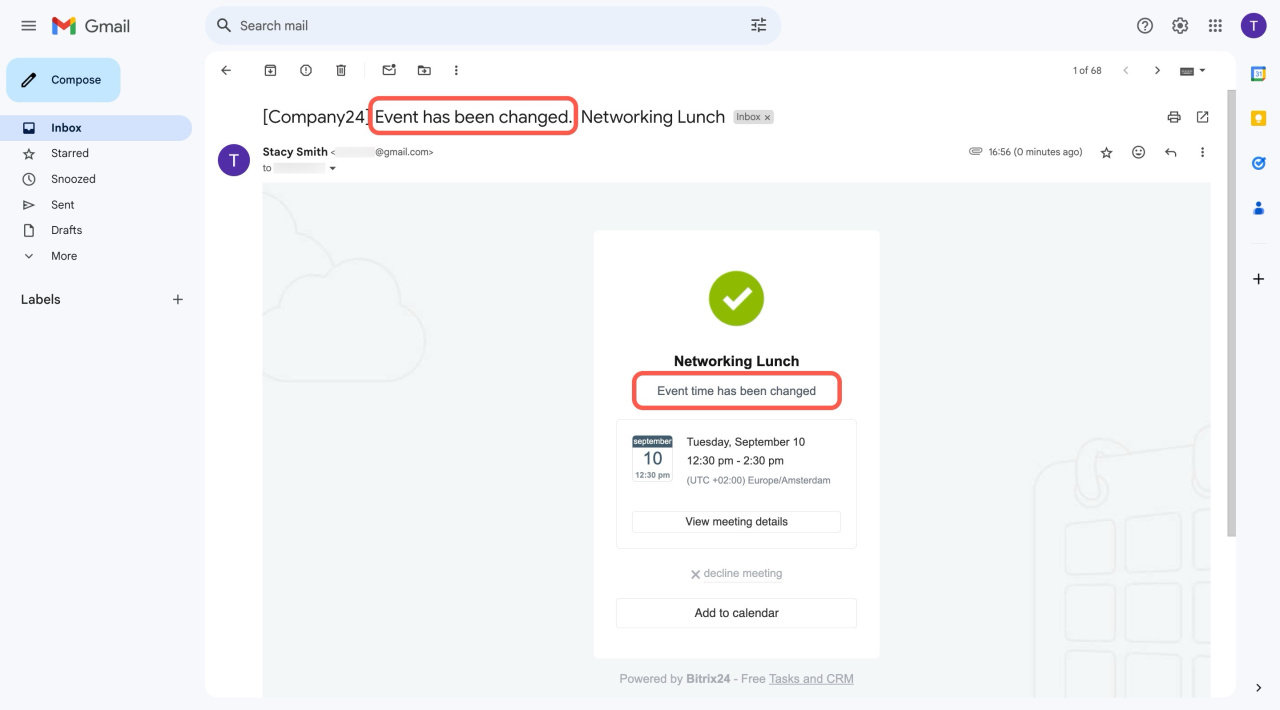
You can edit the time and location of the event, as well as the list of attendees.

The guest will be notified of updates via email.

Also, the guest will be notified if you've canceled the planned event.

The guest will see all the details about the meeting in the calendar.

Will the guest see the attachments?

The invitation contains all the information added to the event. If there is an attachment, the guest can download it. There is no need to send attachments separately.

How many invitations can I send?

For Free plan subscribers, you can send invitations by email for up to 10 events. This limitation applies to the entire Bitrix24 account.

Commercial plans subscribers can send an unlimited number of invitations.

For Bitrix24 On-Premise:

To make it work properly you need:

  1. configure the mail server.
  2. MX record of the Bitrix24 mail server -mail-001.bitrix24.com- must be specified for the account domain. Contact your domain administrator to do this.
Was this information helpful?
Integration specialist assistance
That's not what I'm looking for
Complicated and incomprehensible text
The information is outdated
It's too short. I need more information
I don't like the way this tool works
Go to Bitrix24
Don't have an account? Create for free
Related articles
Create a new calendar Company calendar Open slots in Bitrix24 calendar Configure favorite calendars Add event to calendar Access permissions to calendars My calendar Calendar settings