You can create email templates, for example, with company details, in Bitrix24 CRM. Use templates to save time when creating emails for clients and partners.
Create email template
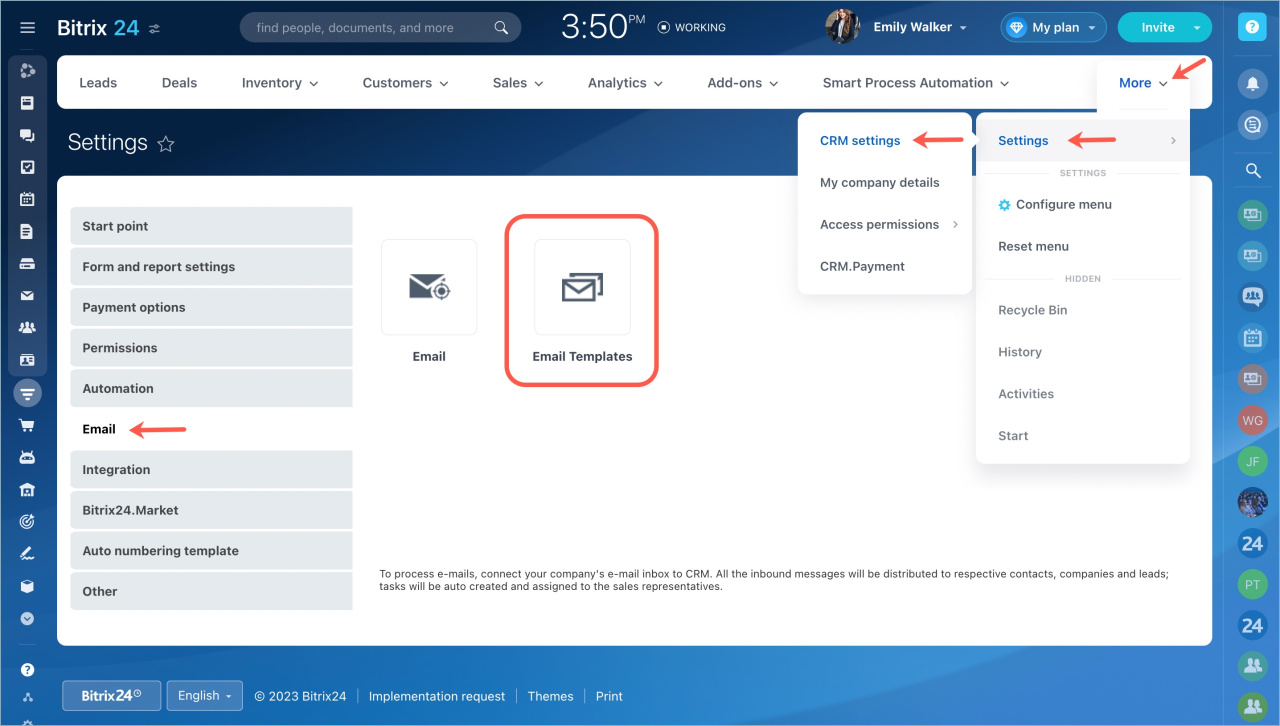
To create a template, go to the CRM section - Settings - CRM settings - Email - Email templates.
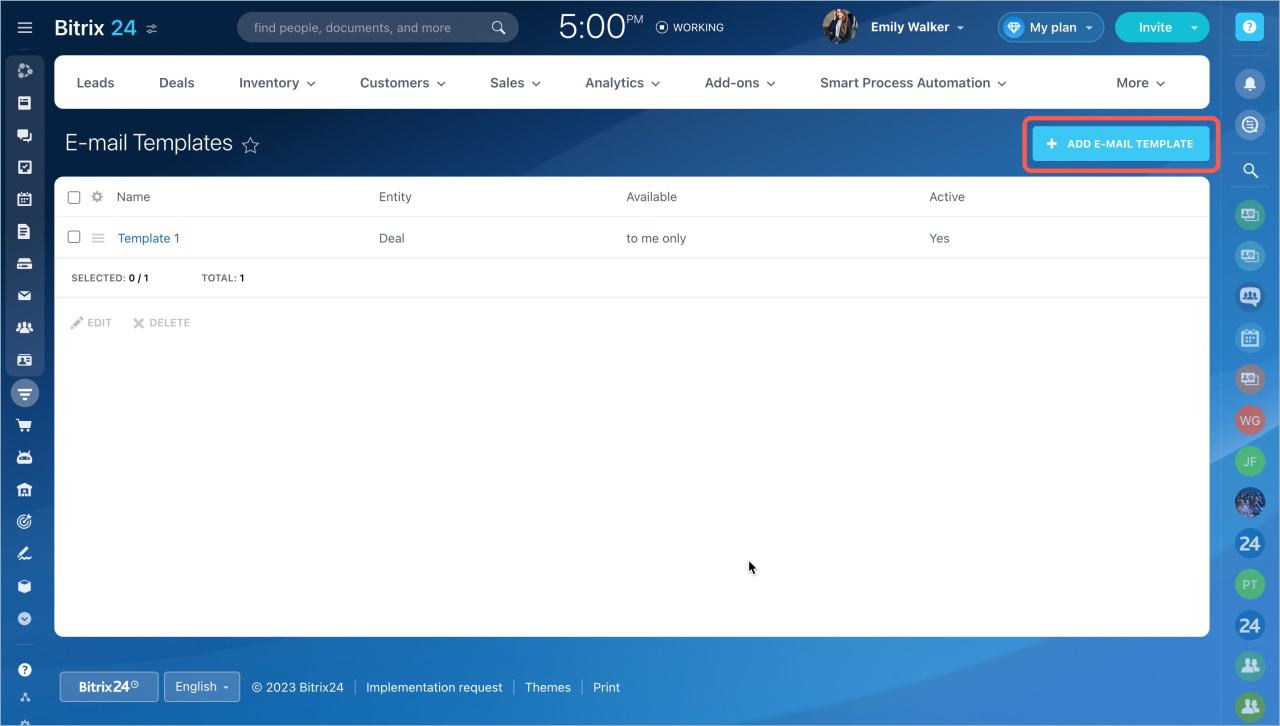
Click the Add email template button.
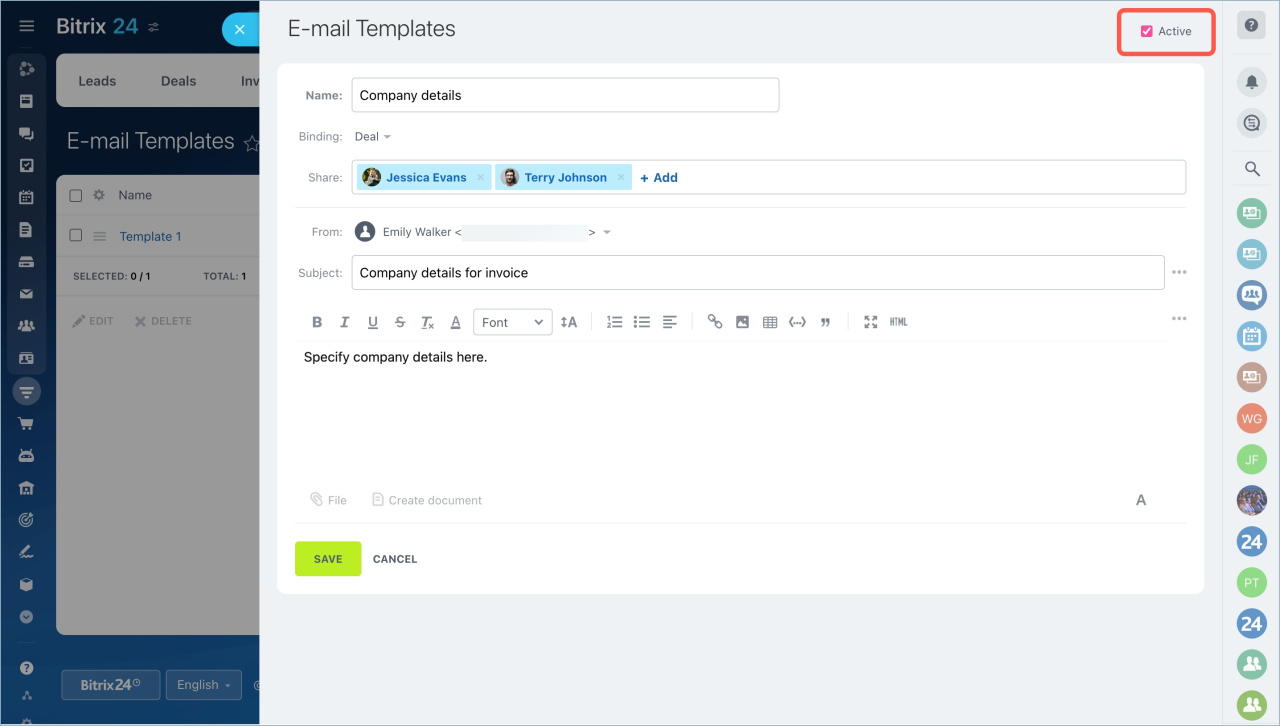
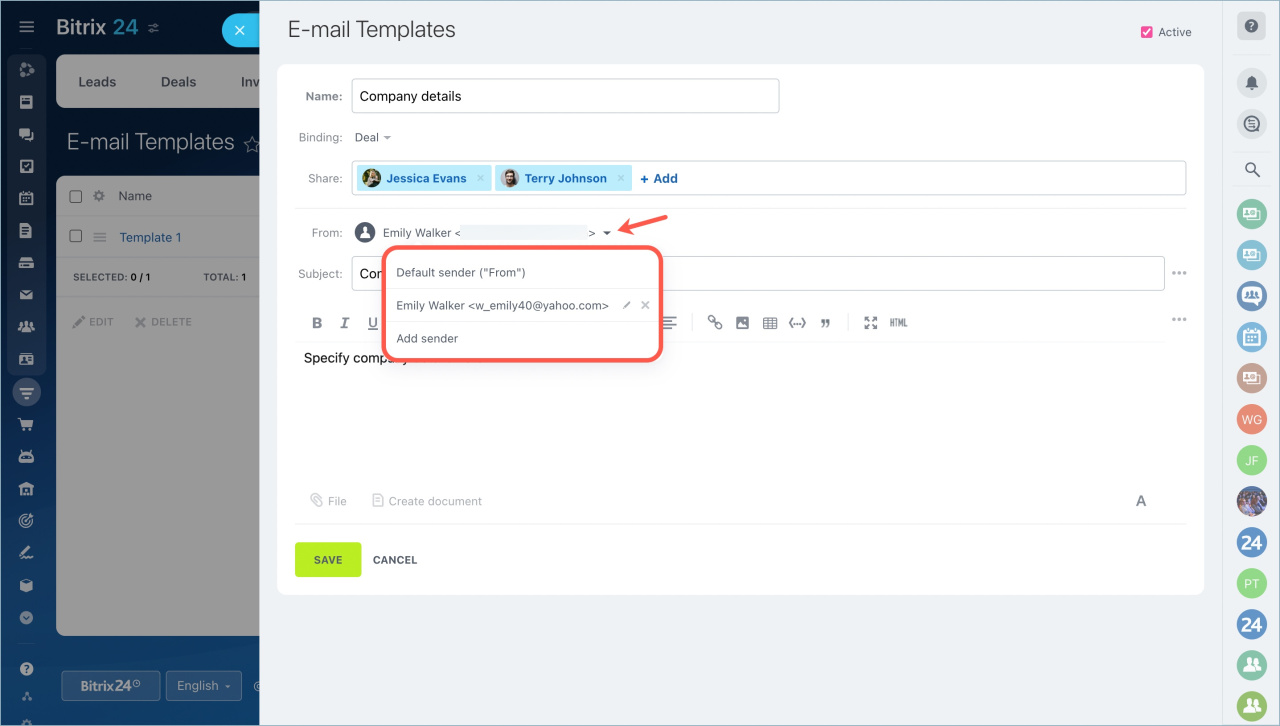
Fill in the body of the email. For example, create an email template with company details. You can add files and links to the template.
The Active checkbox in the upper right corner means that the template will be displayed in the list of templates. Uncheck it if you do not plan to use the template in the near future.
Fill in the following fields:
- Name — give a name to the template. The name will be visible to everyone who has access to the template.
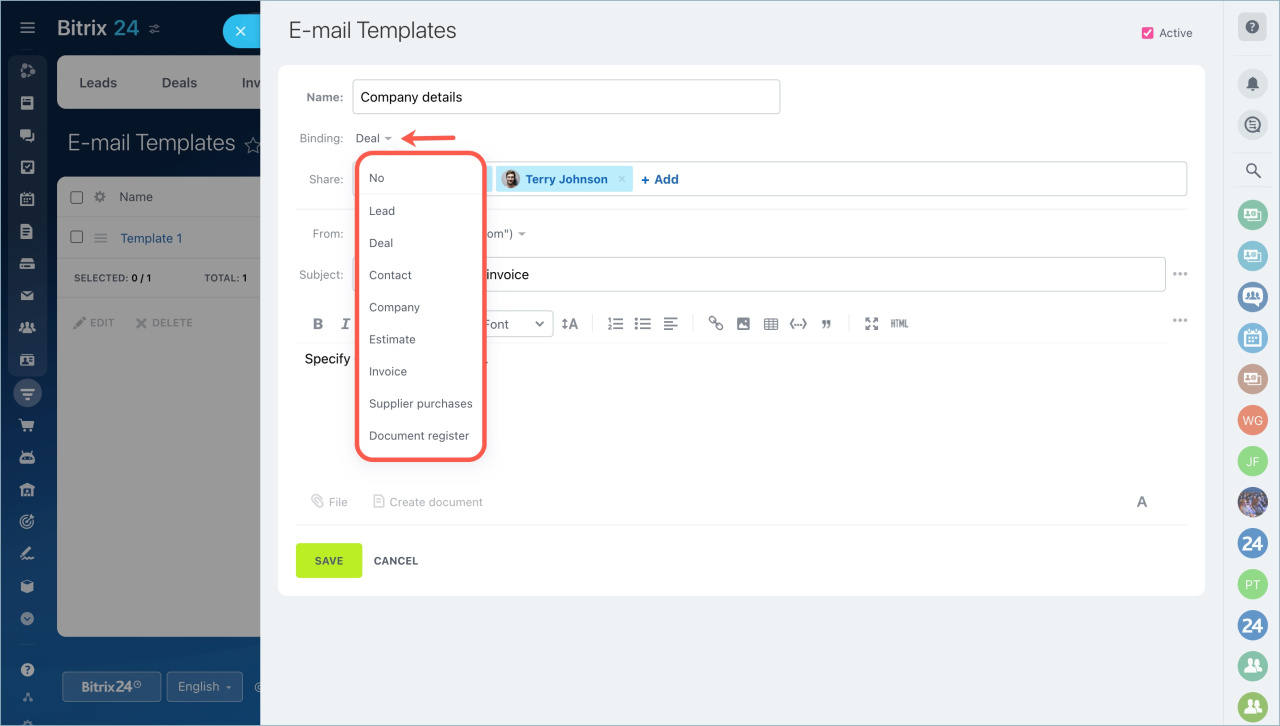
- Binding — bind the email to a CRM entity, for example, to a deal. In this case, you will be able to write an email using this template only from the deal form. You can use the template from any CRM entity without binding.
- Share — give access to your template to several colleagues or to all employees. To make the template available only to you, leave the field blank.
- From — select a sender. This can be the default sender or a new one.
- Subject — specify the subject of the email. The recipients will see it.
Create email template from CRM entity form
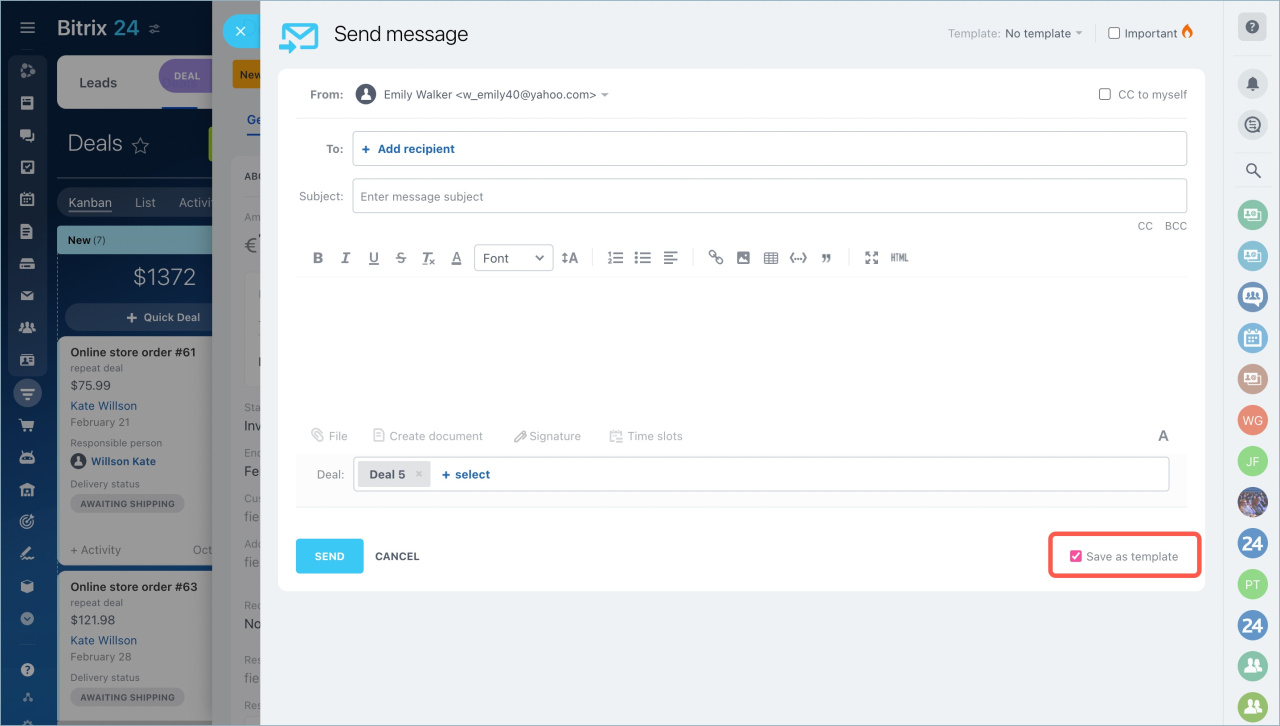
Any new email you write from a CRM entity form can be saved as a template. Select Email in the CRM form timeline and check the Save as template box in the email.
The template will be available when sending an email from the CRM entity form and on the page of email templates.
Edit or delete email template
Go to the CRM section - Settings - CRM settings - Email - Email templates.
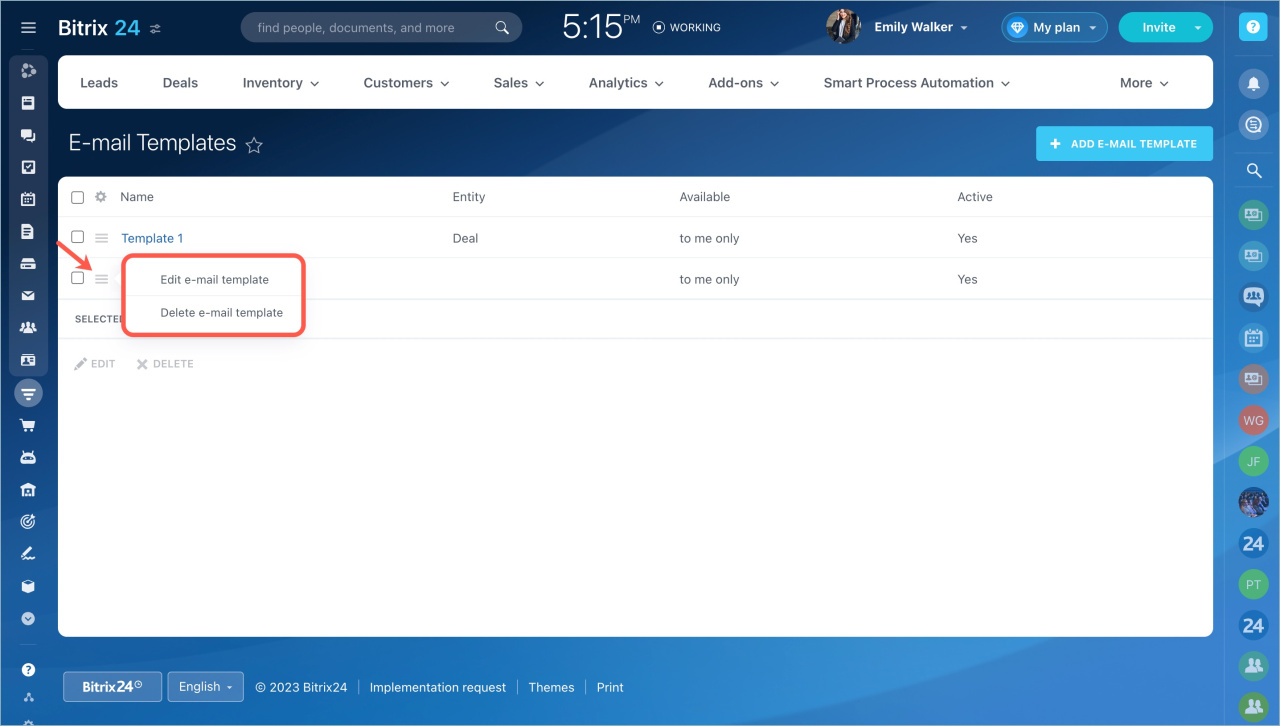
Select the template, click the menu icon next to the template name and select the necessary option.
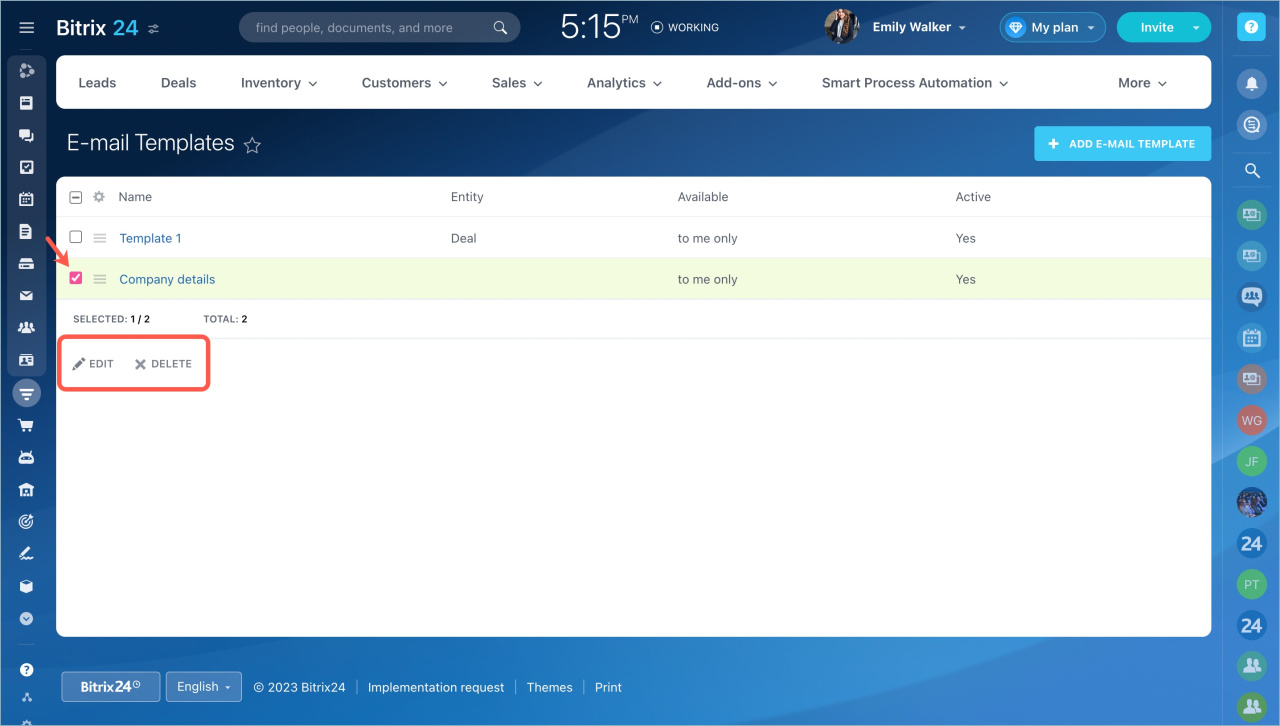
If you need to edit or delete several email templates at once, check the boxes next to them and select the option below.
- You can create email templates in Bitrix24 CRM.
- A template can be edited or deleted by the person who created it and by the account administrator.
- To create a template, go to the CRM section - Settings - CRM settings - Email - Email templates.
In brief:
Read also:

