
You can accept online payments directly from a deal form, with or without delivery. Bitrix24 automatically calculates the order total and sends the customer a payment link. There's no need to create an invoice or manually check whether the customer has paid. All payment details appear in the deal timeline. This saves time and helps prevent errors.
Role-based access permissions in CRM
In this article:
Send a payment link
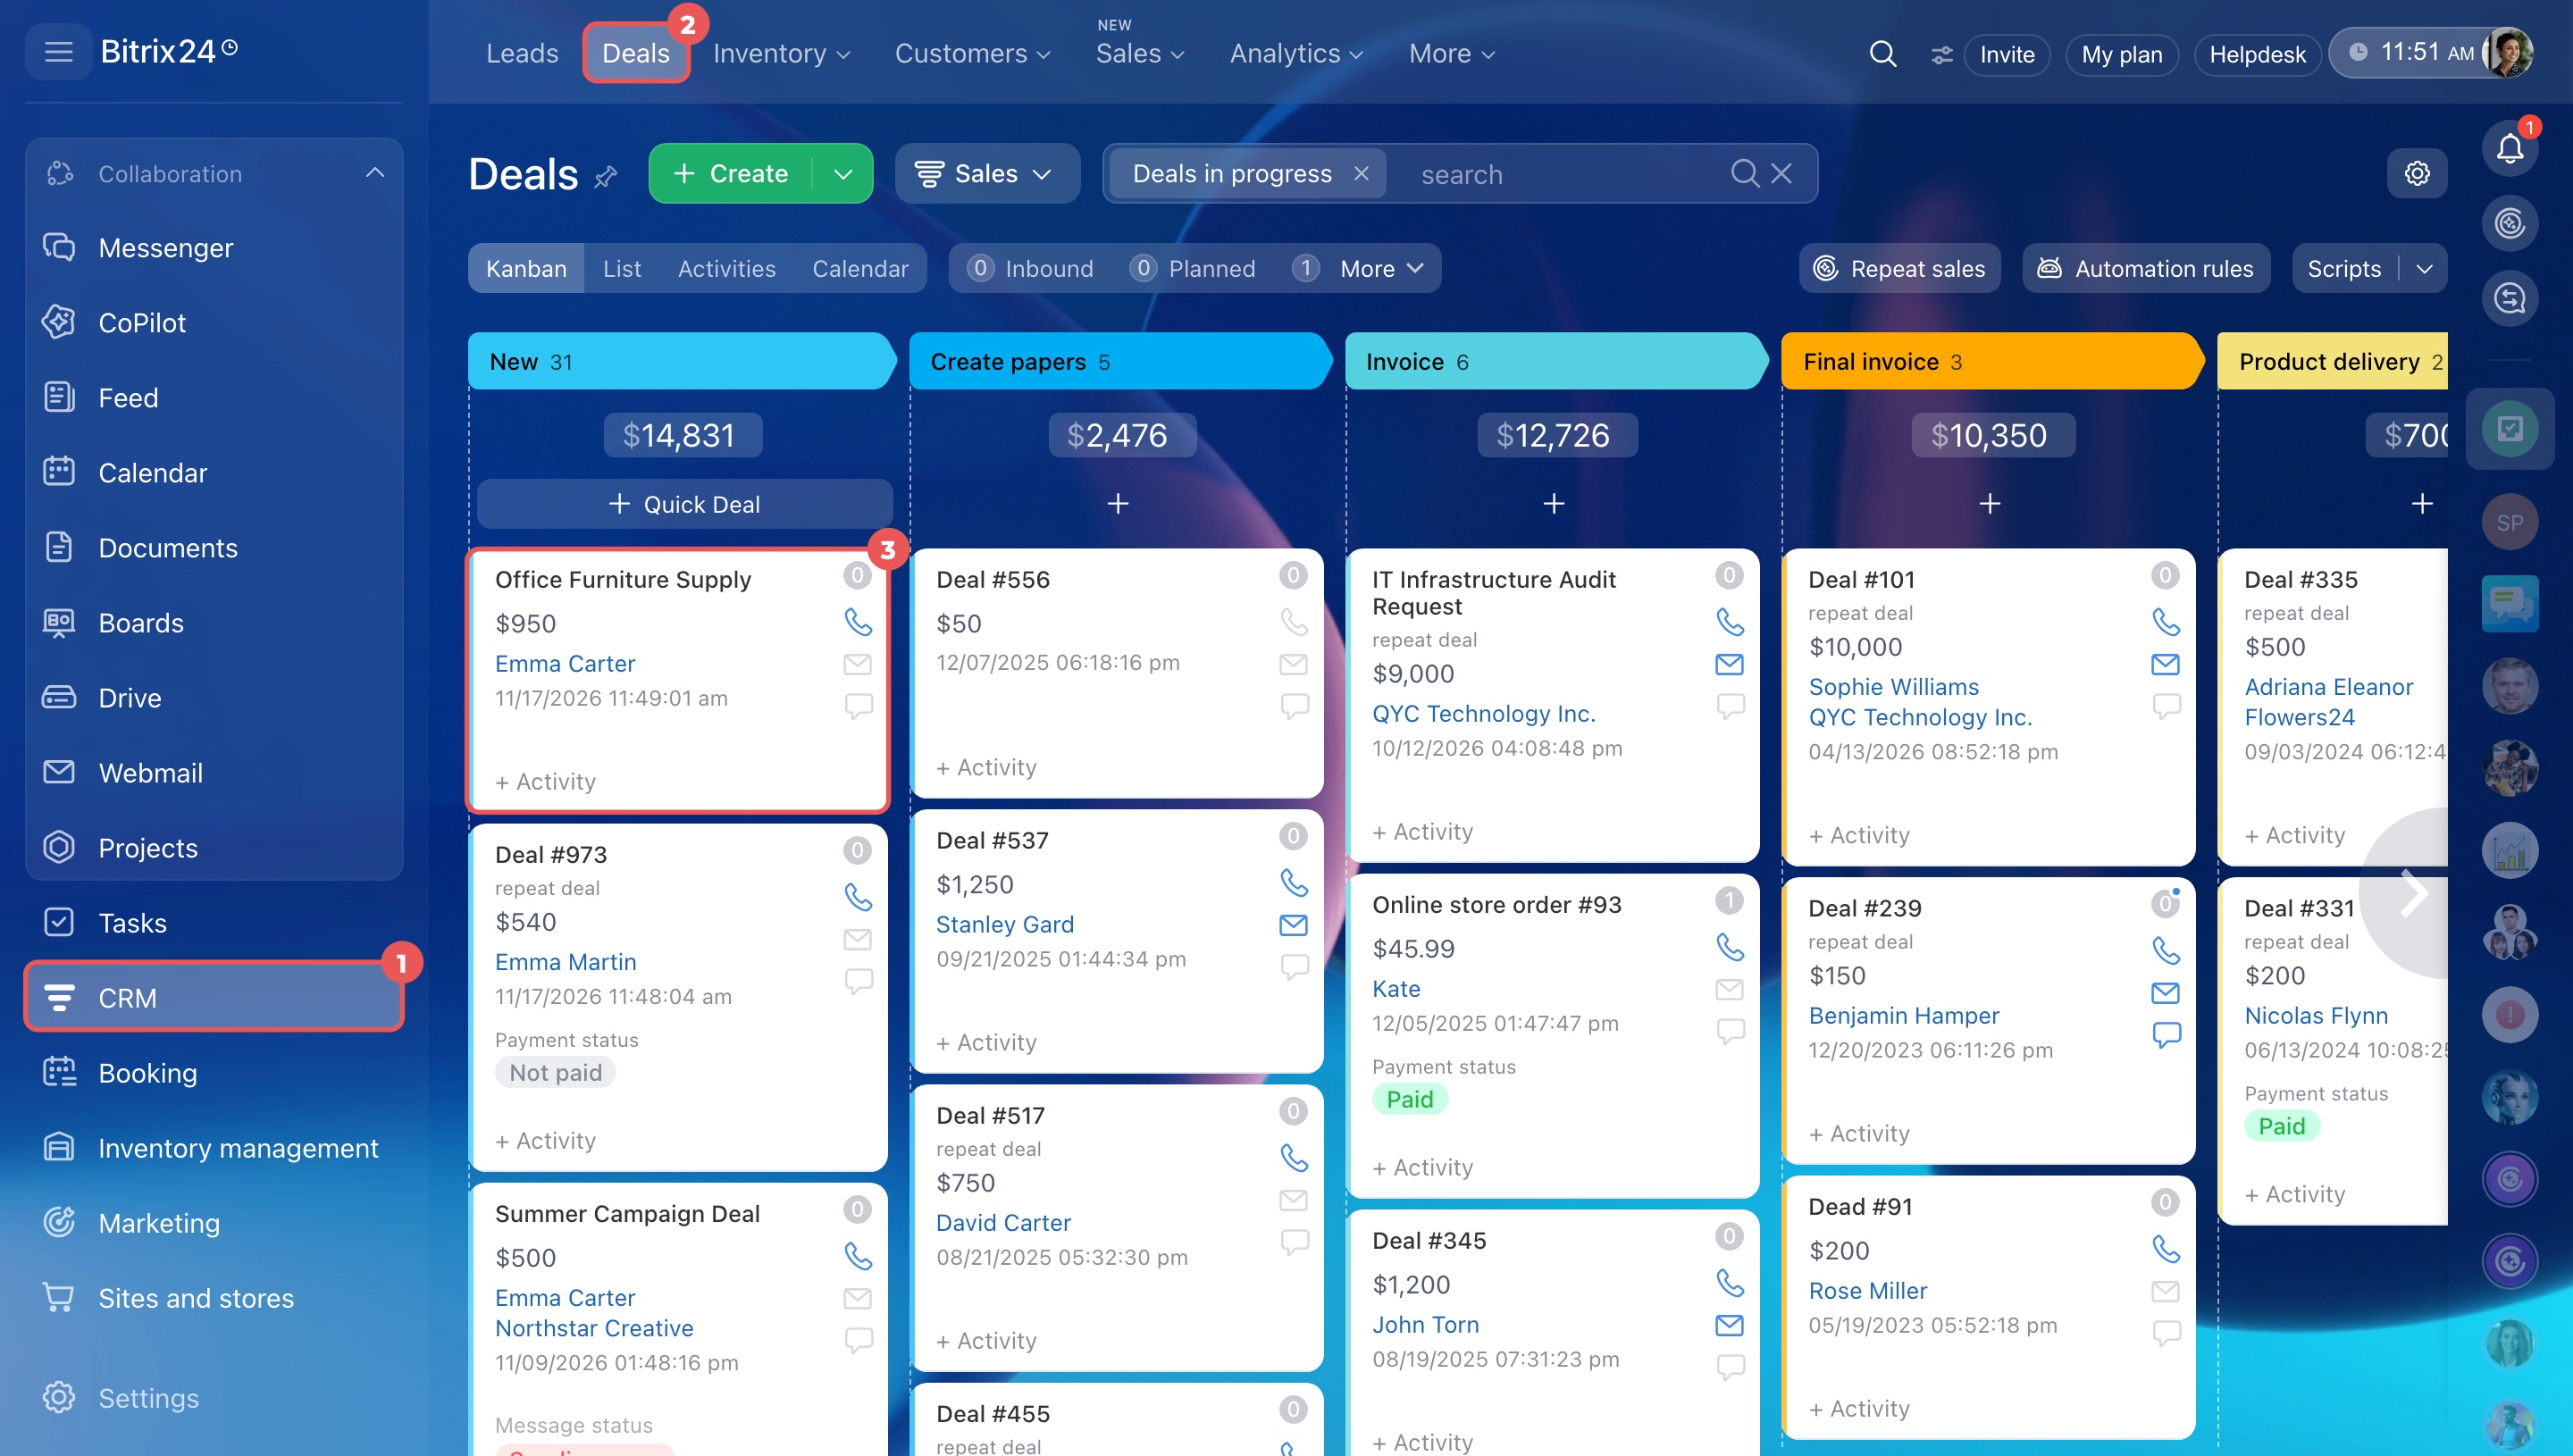
- Go to CRM > Deals and open a deal.
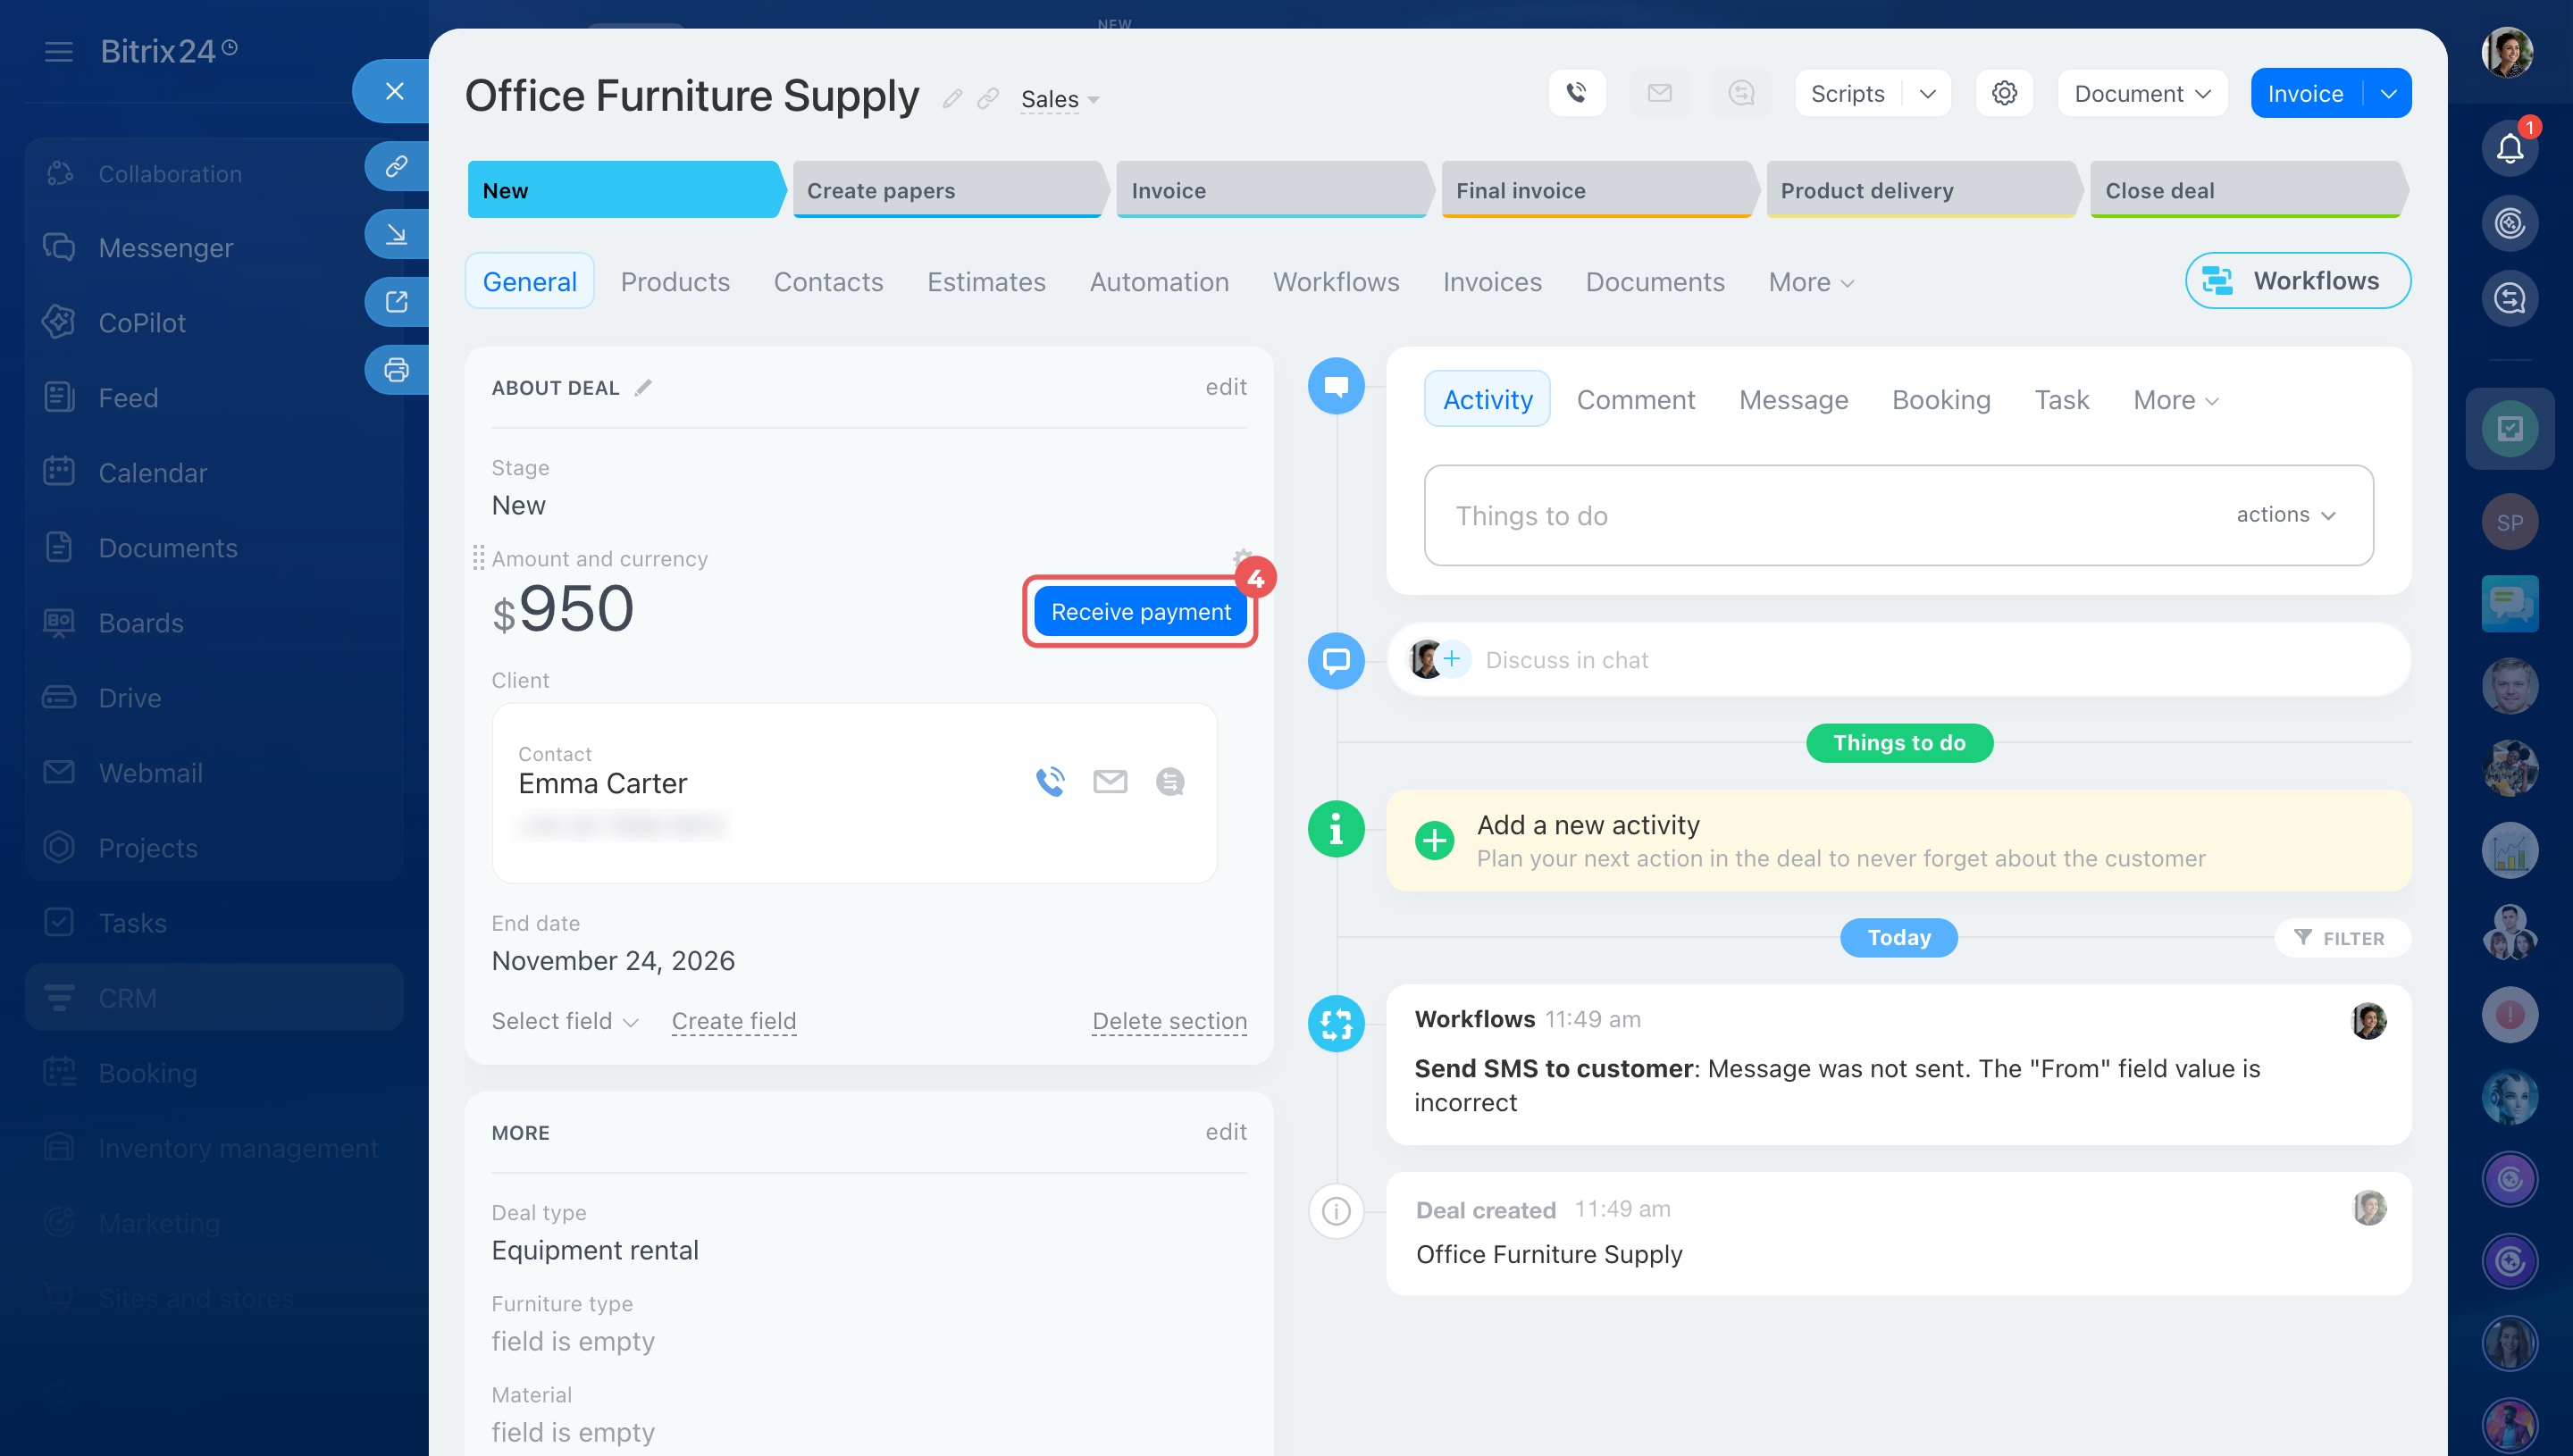
- Click Receive payment.
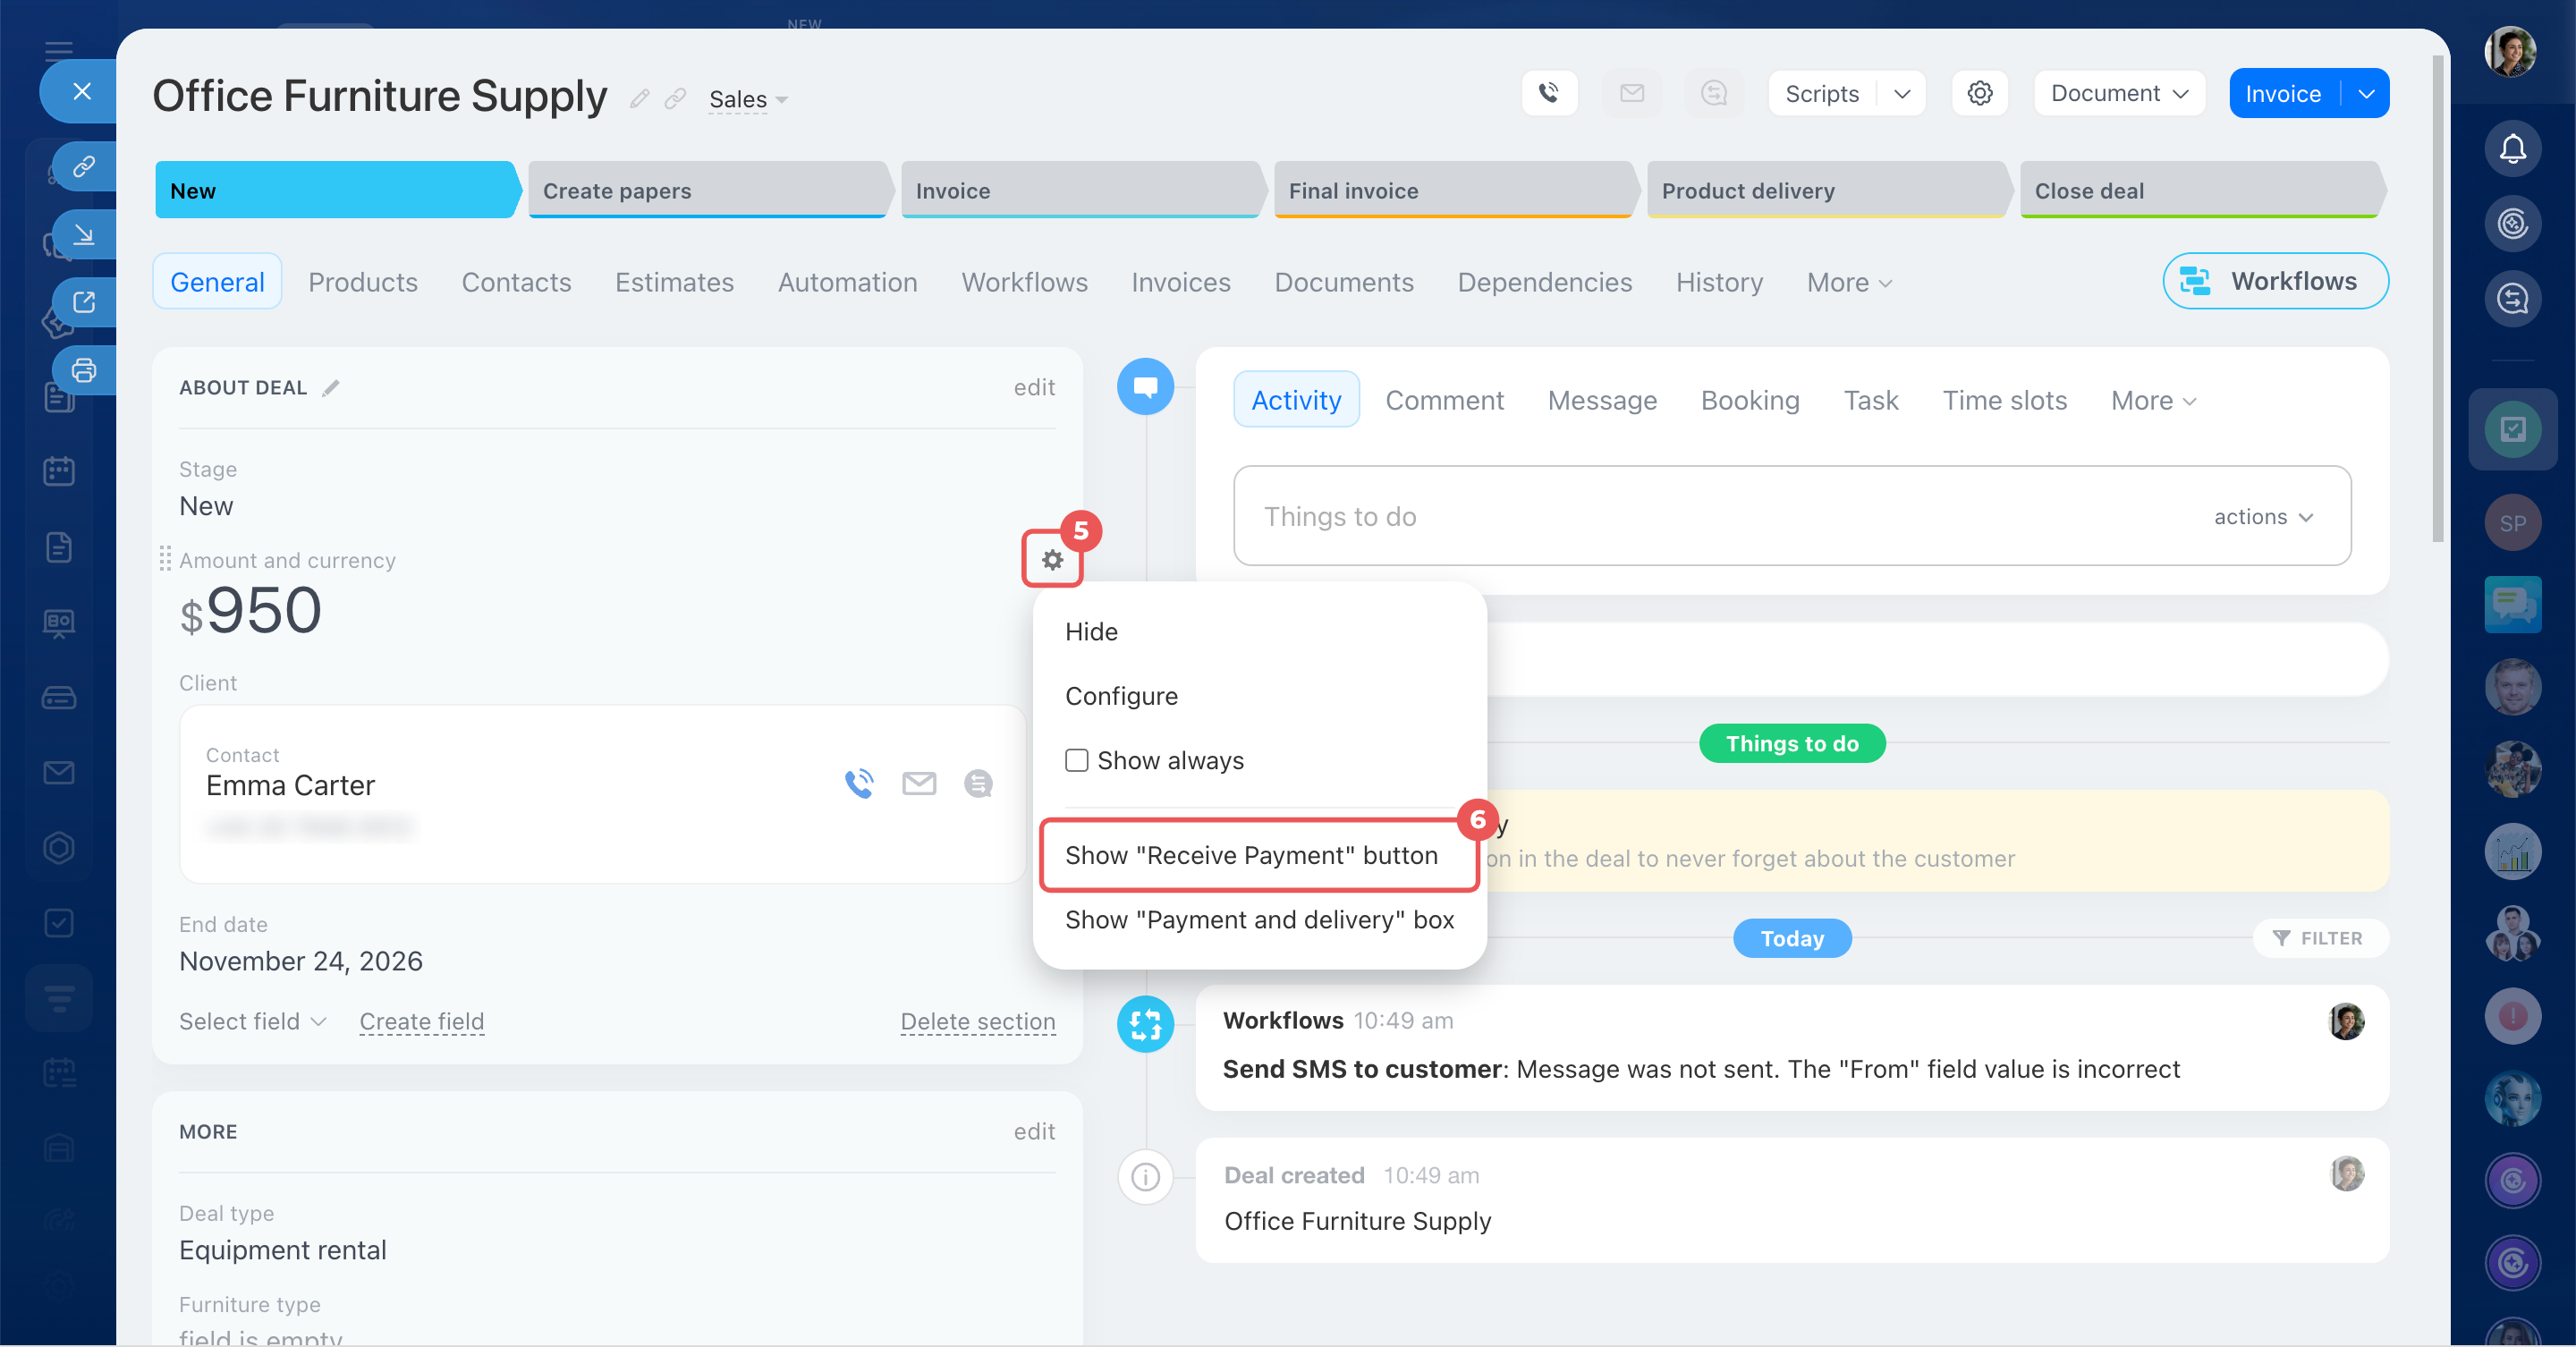
- If the button isn't visible, hover over the Amount and currency field and click Settings (⚙️) > Show "Receive Payment" button.
- In the side panel, select the Payment tab and configure the settings.
You only need to complete the initial setup once. The next time you accept payment, your connected services will appear automatically.
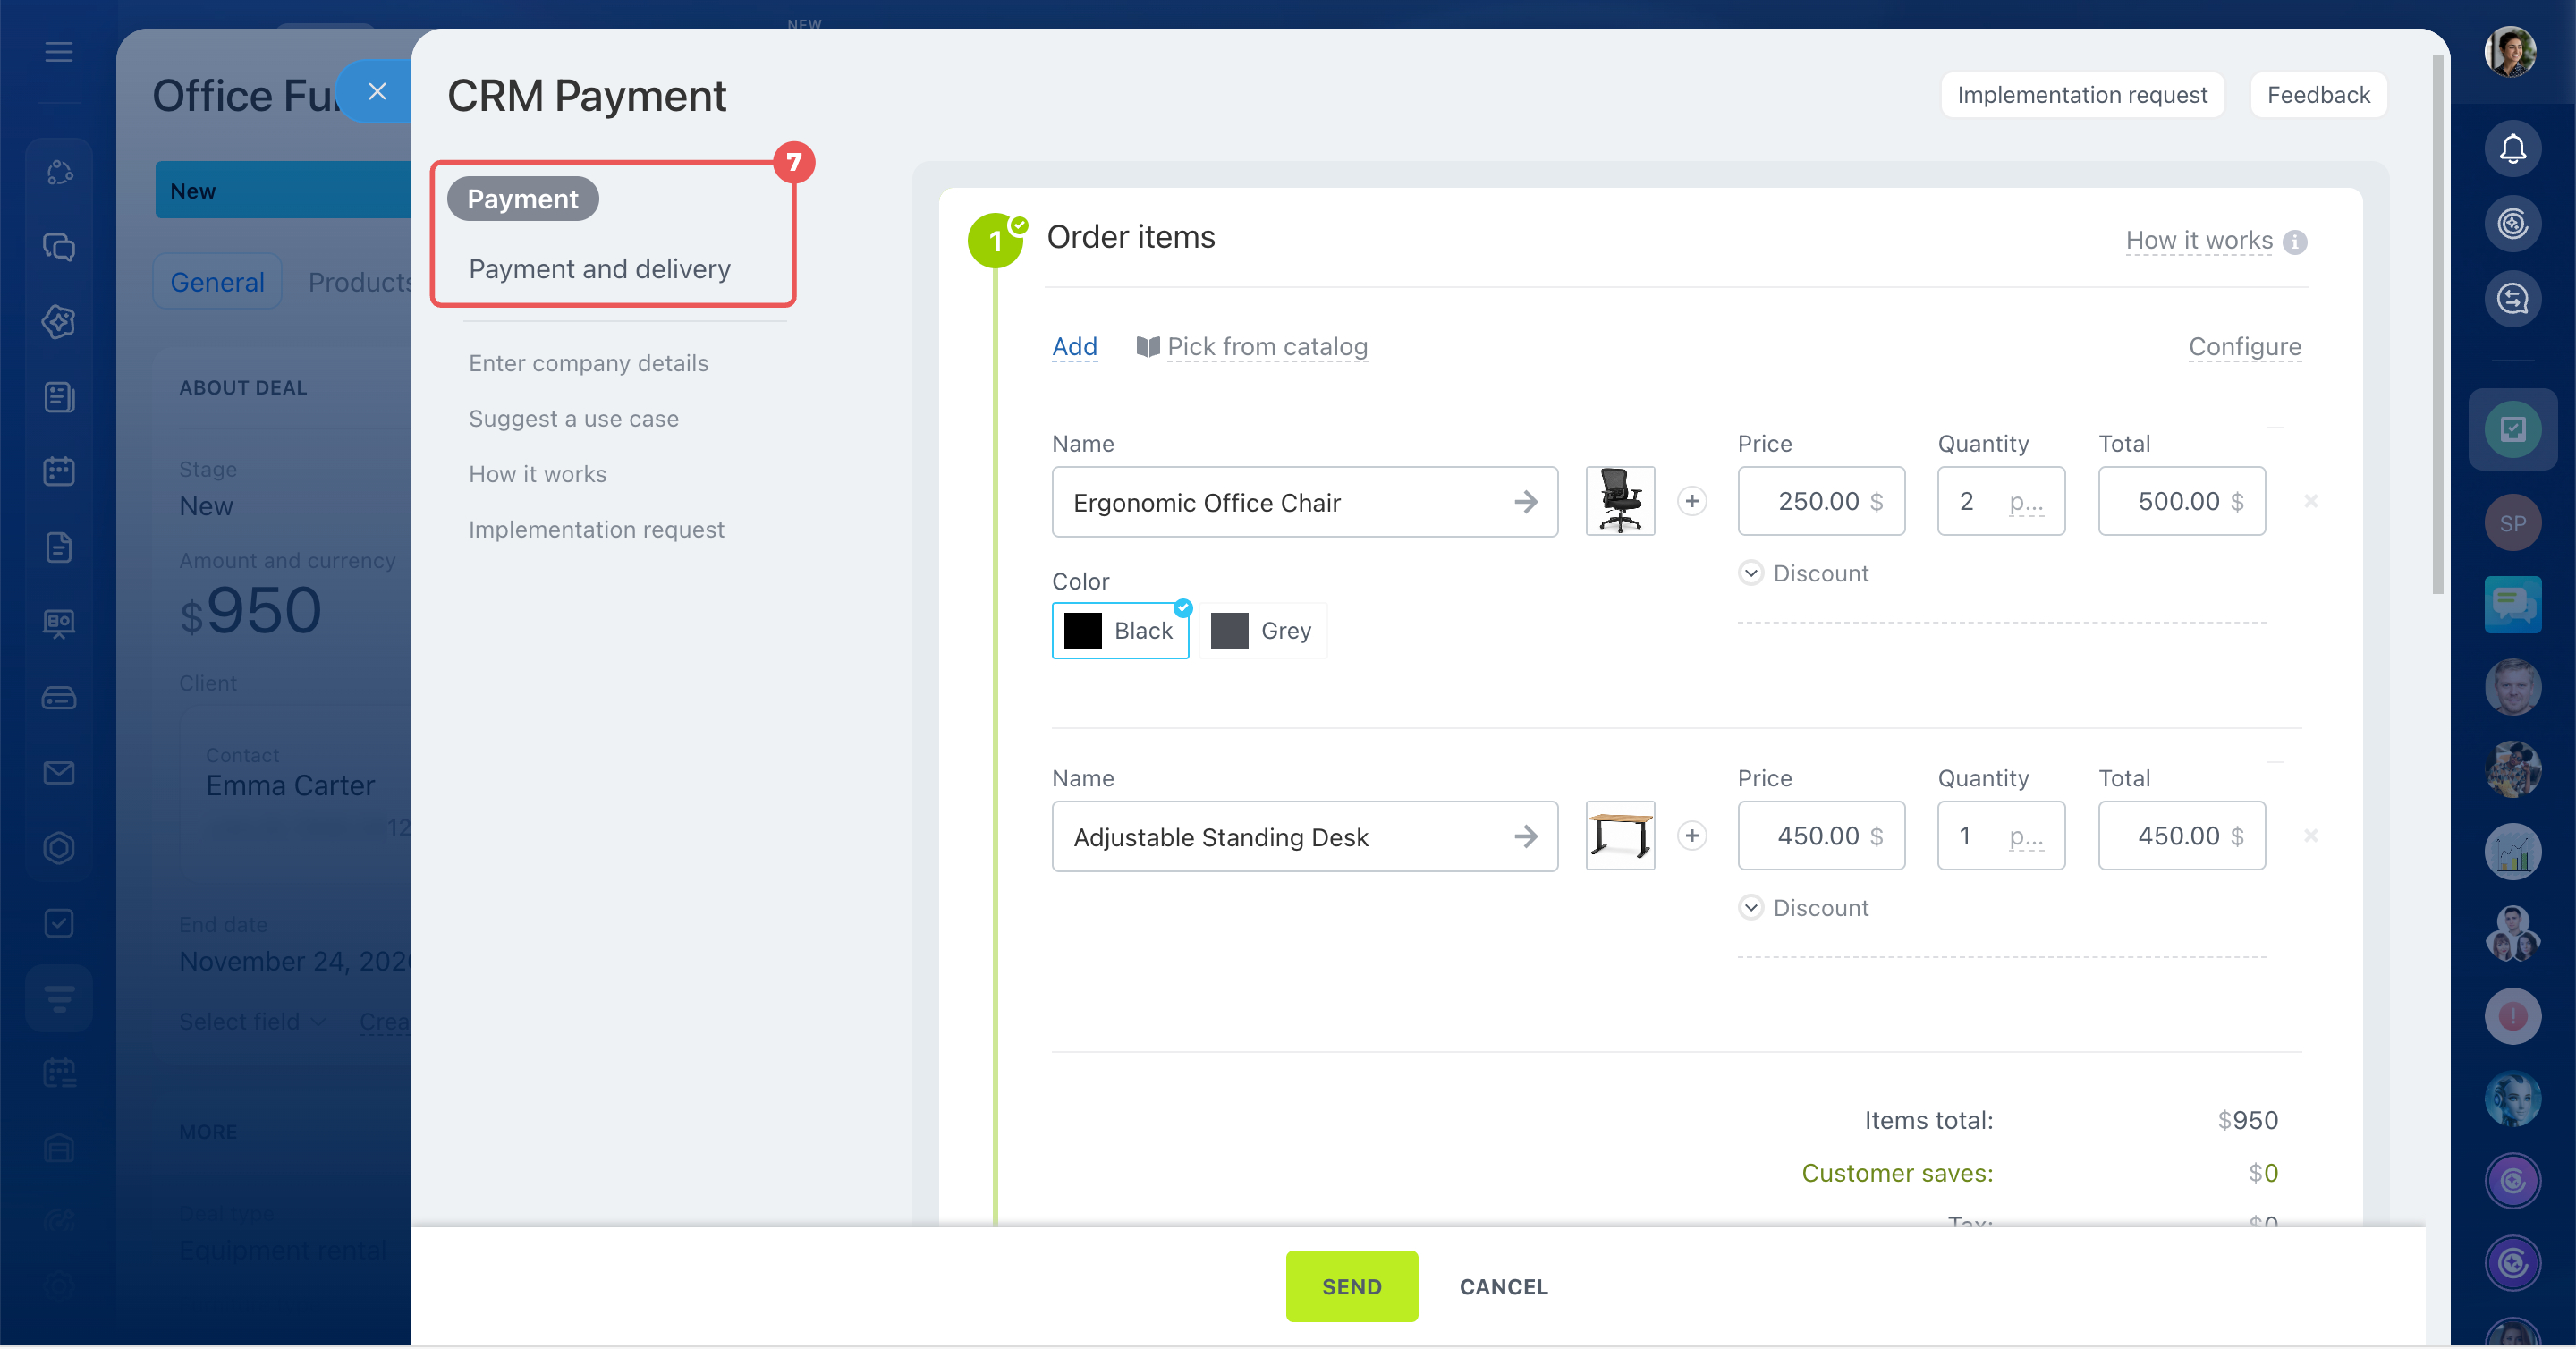
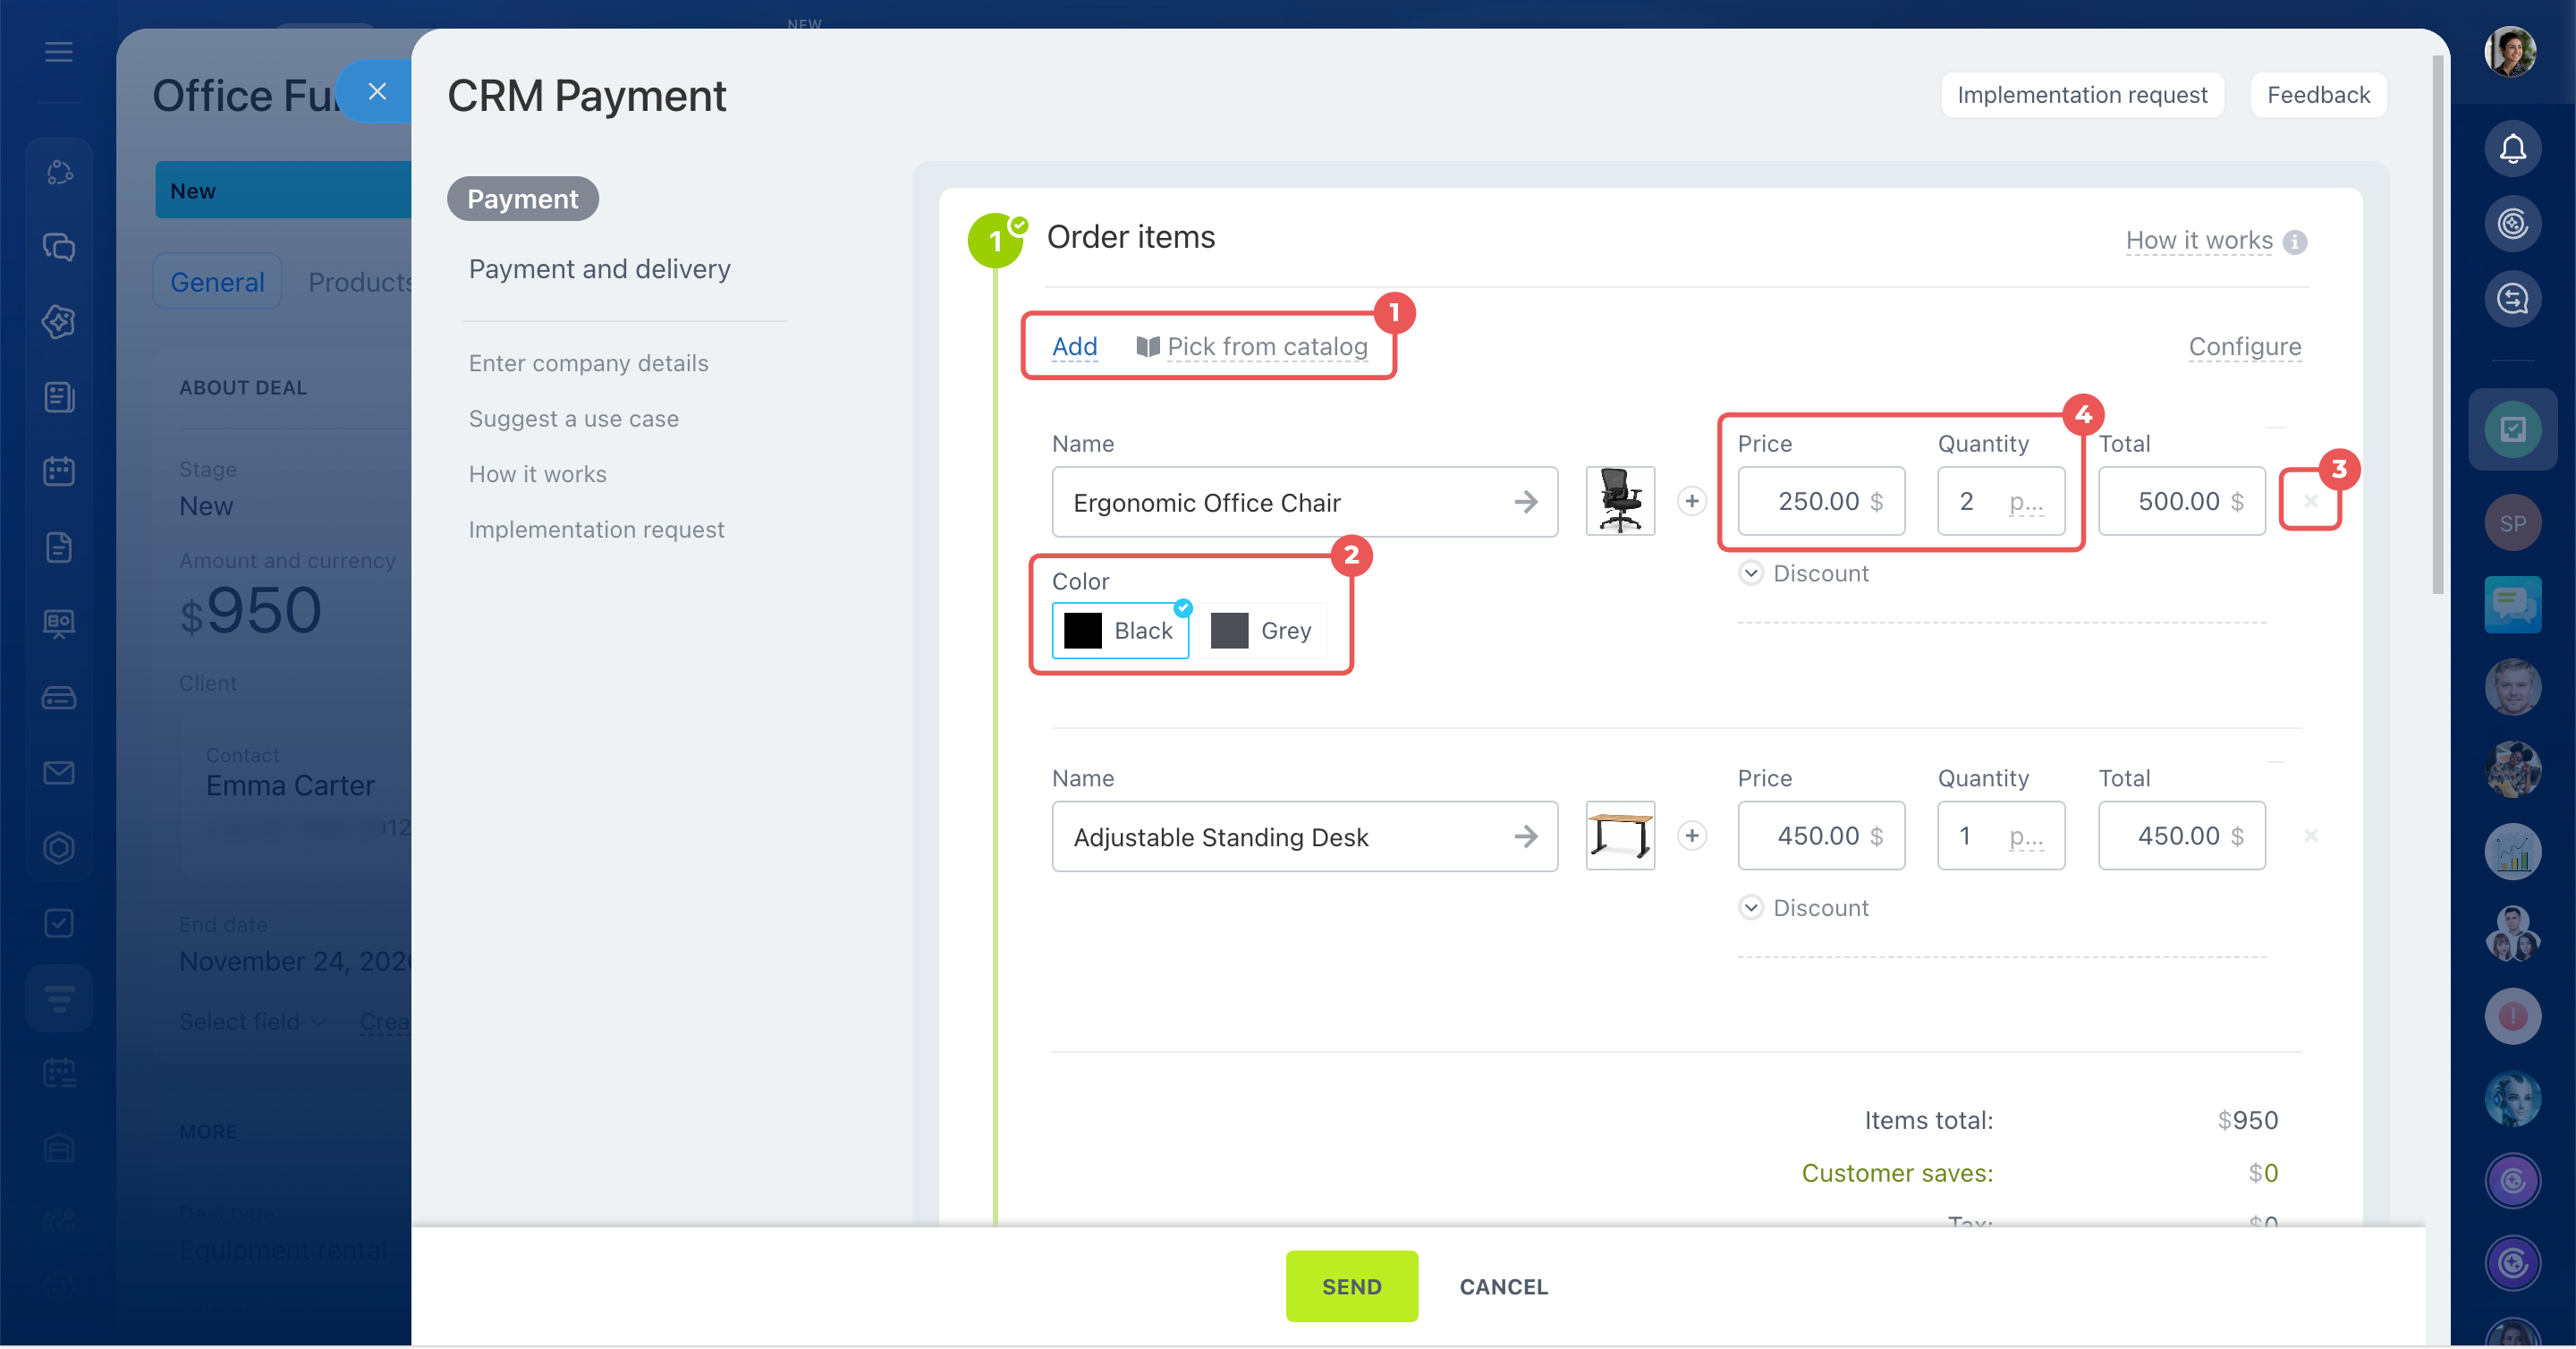
Order items. This block shows the products added to the deal. You can use the existing list or make changes.
- Click Add or Select from catalog to add products to the order. If a product has variants, select the one you need.
Add products to lead, deal, estimate and invoice forms - Click the X at the end of a row to remove a product.
- Edit the quantity or price if needed. Price changes in the order don't affect the product catalog.
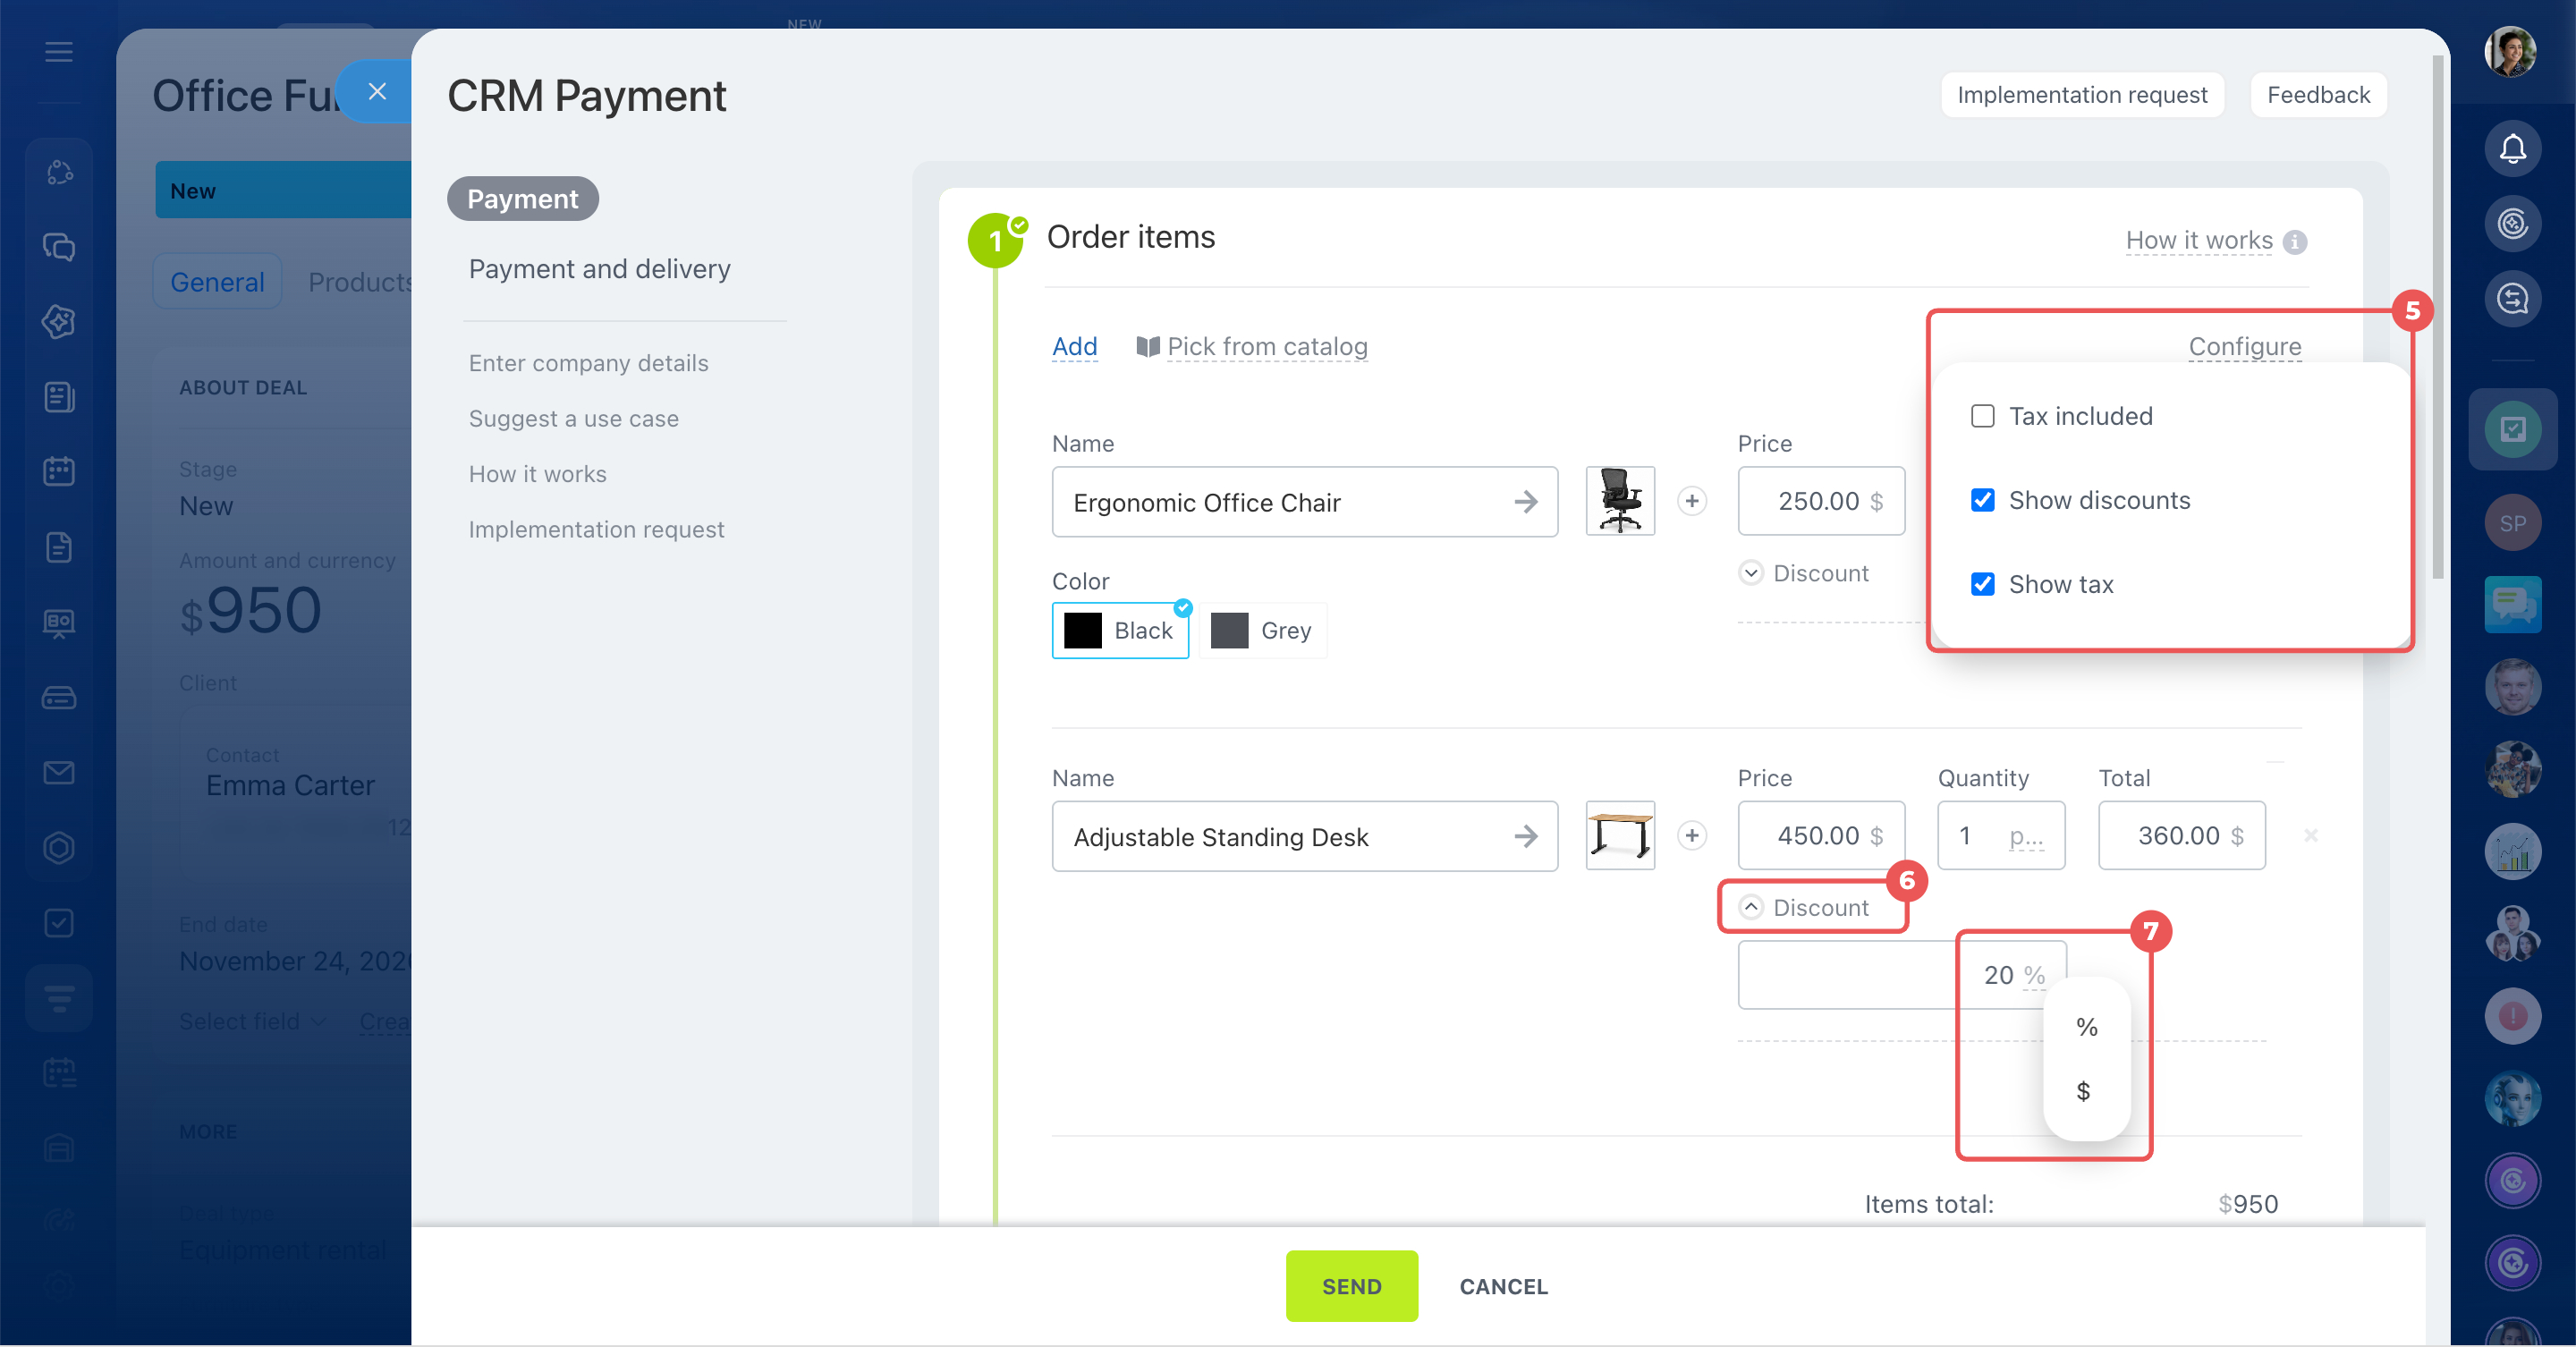
- To offer a discount, click Configure in the top-right corner of the block and enable Show discounts. Expand the Discount field below the price, select a unit, and enter the discount amount. The customer will see both the original and discounted prices on the payment page.
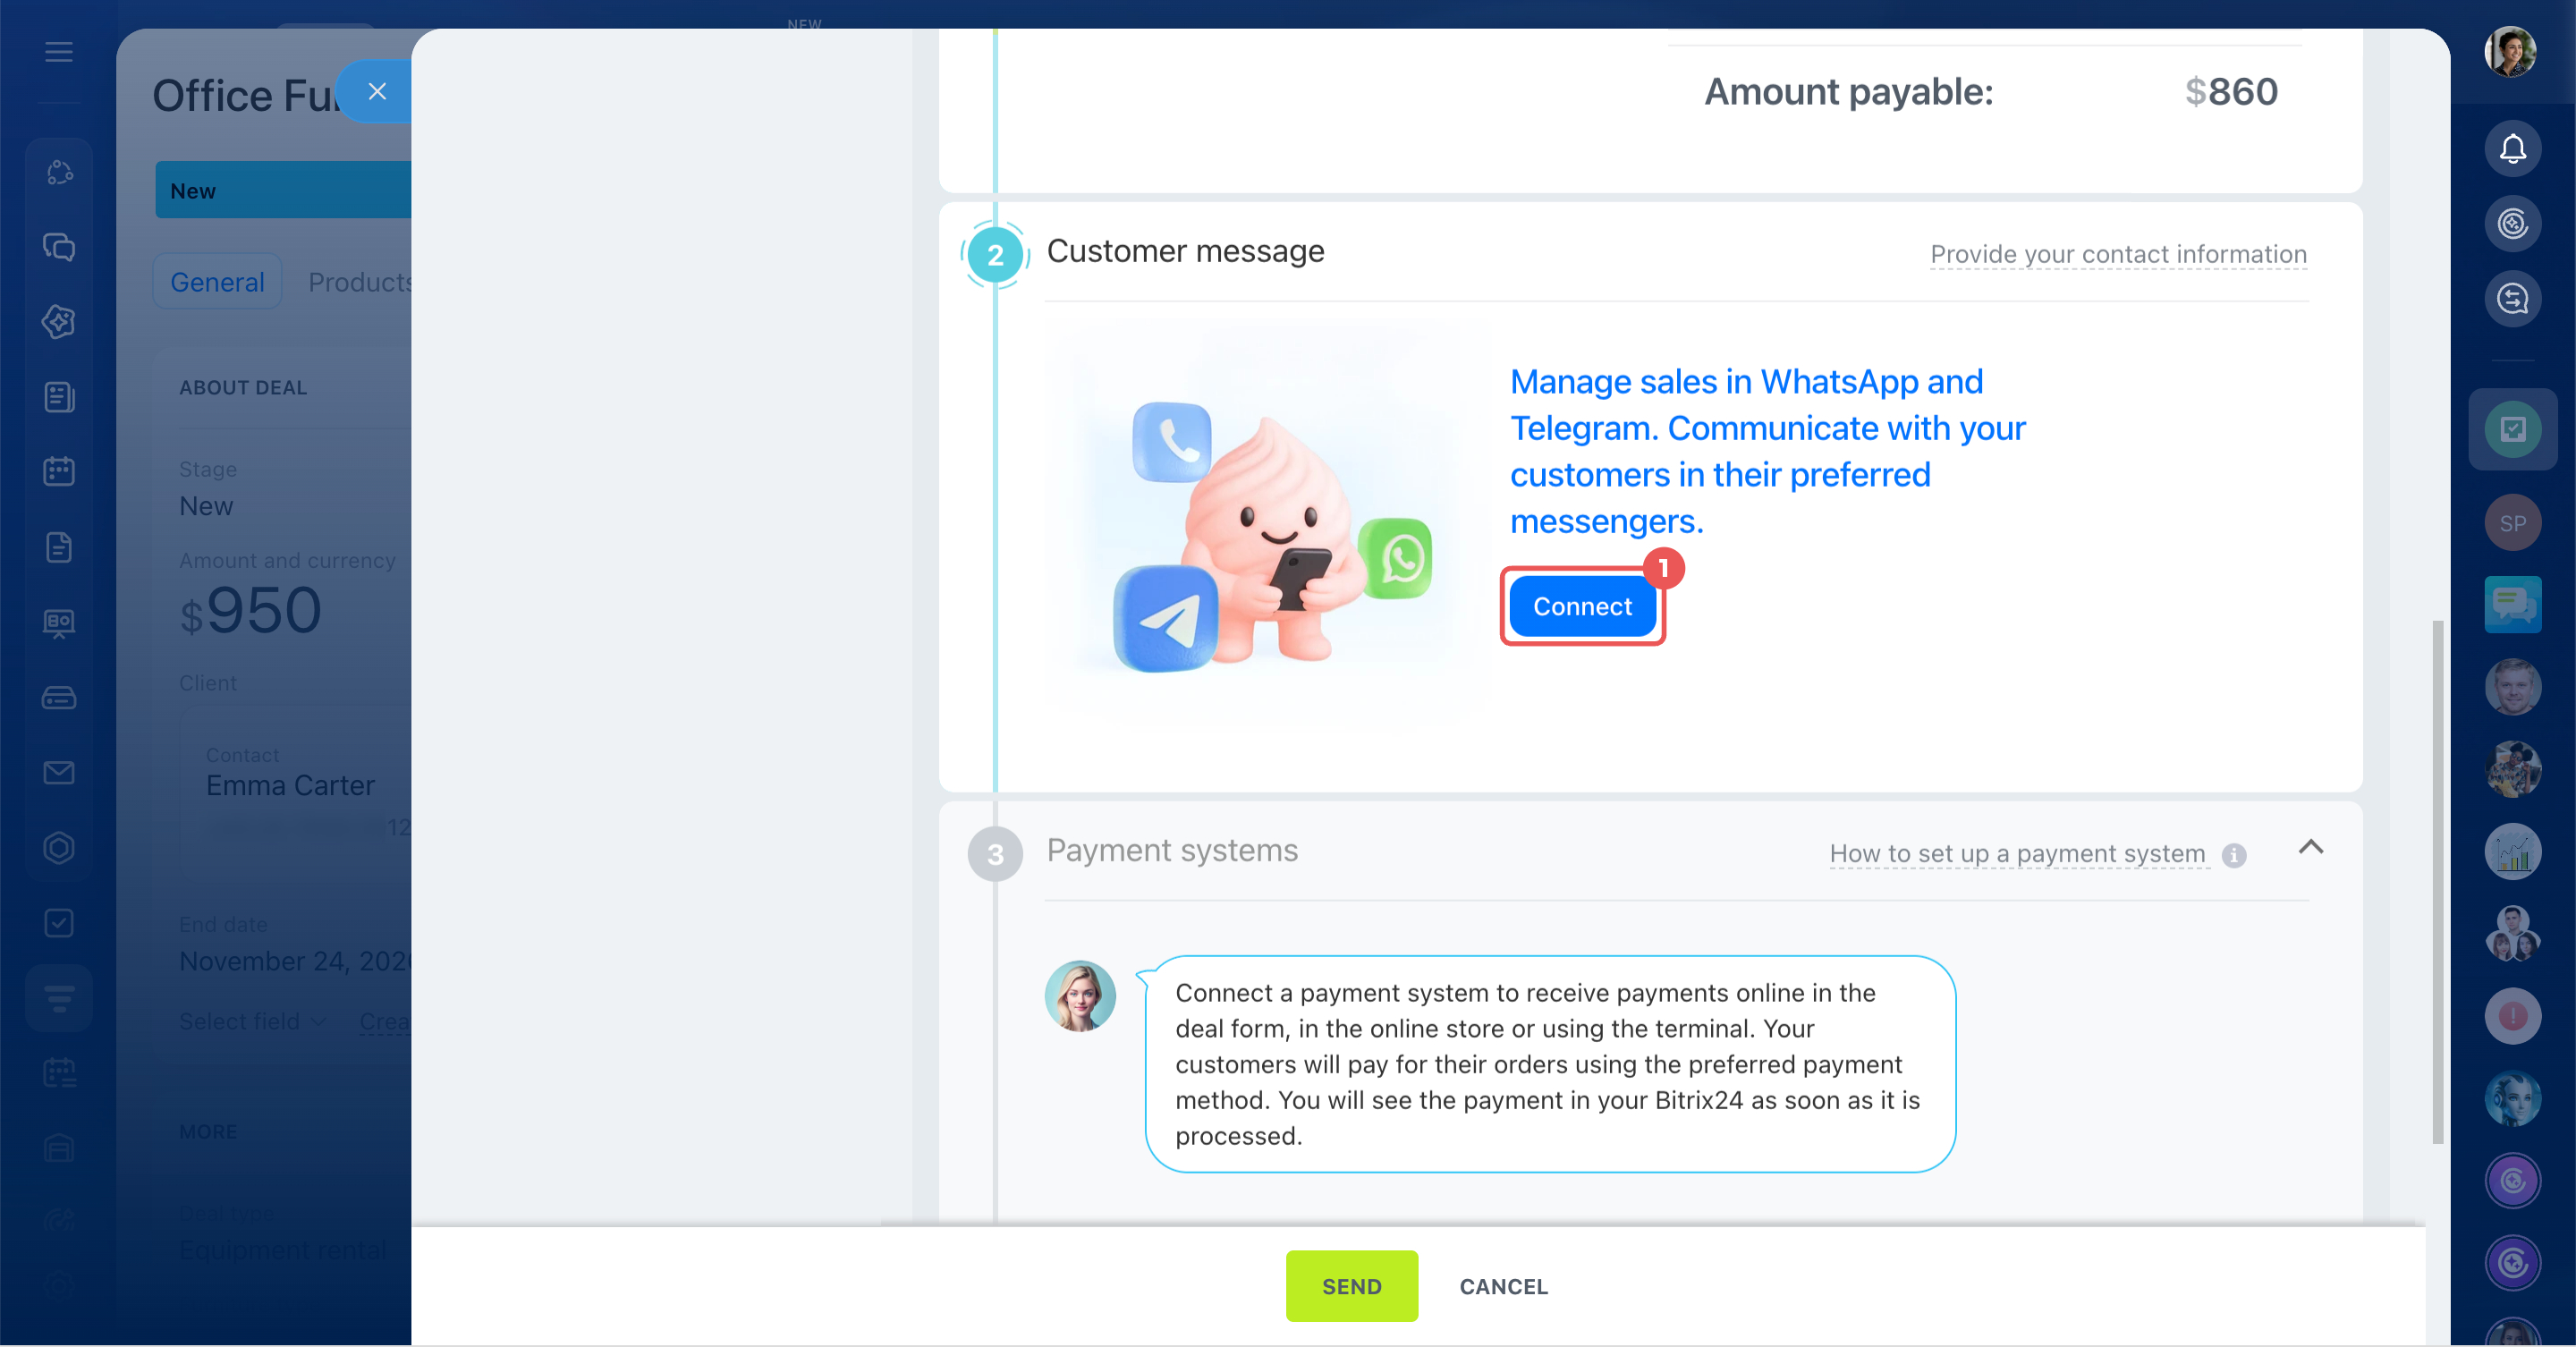
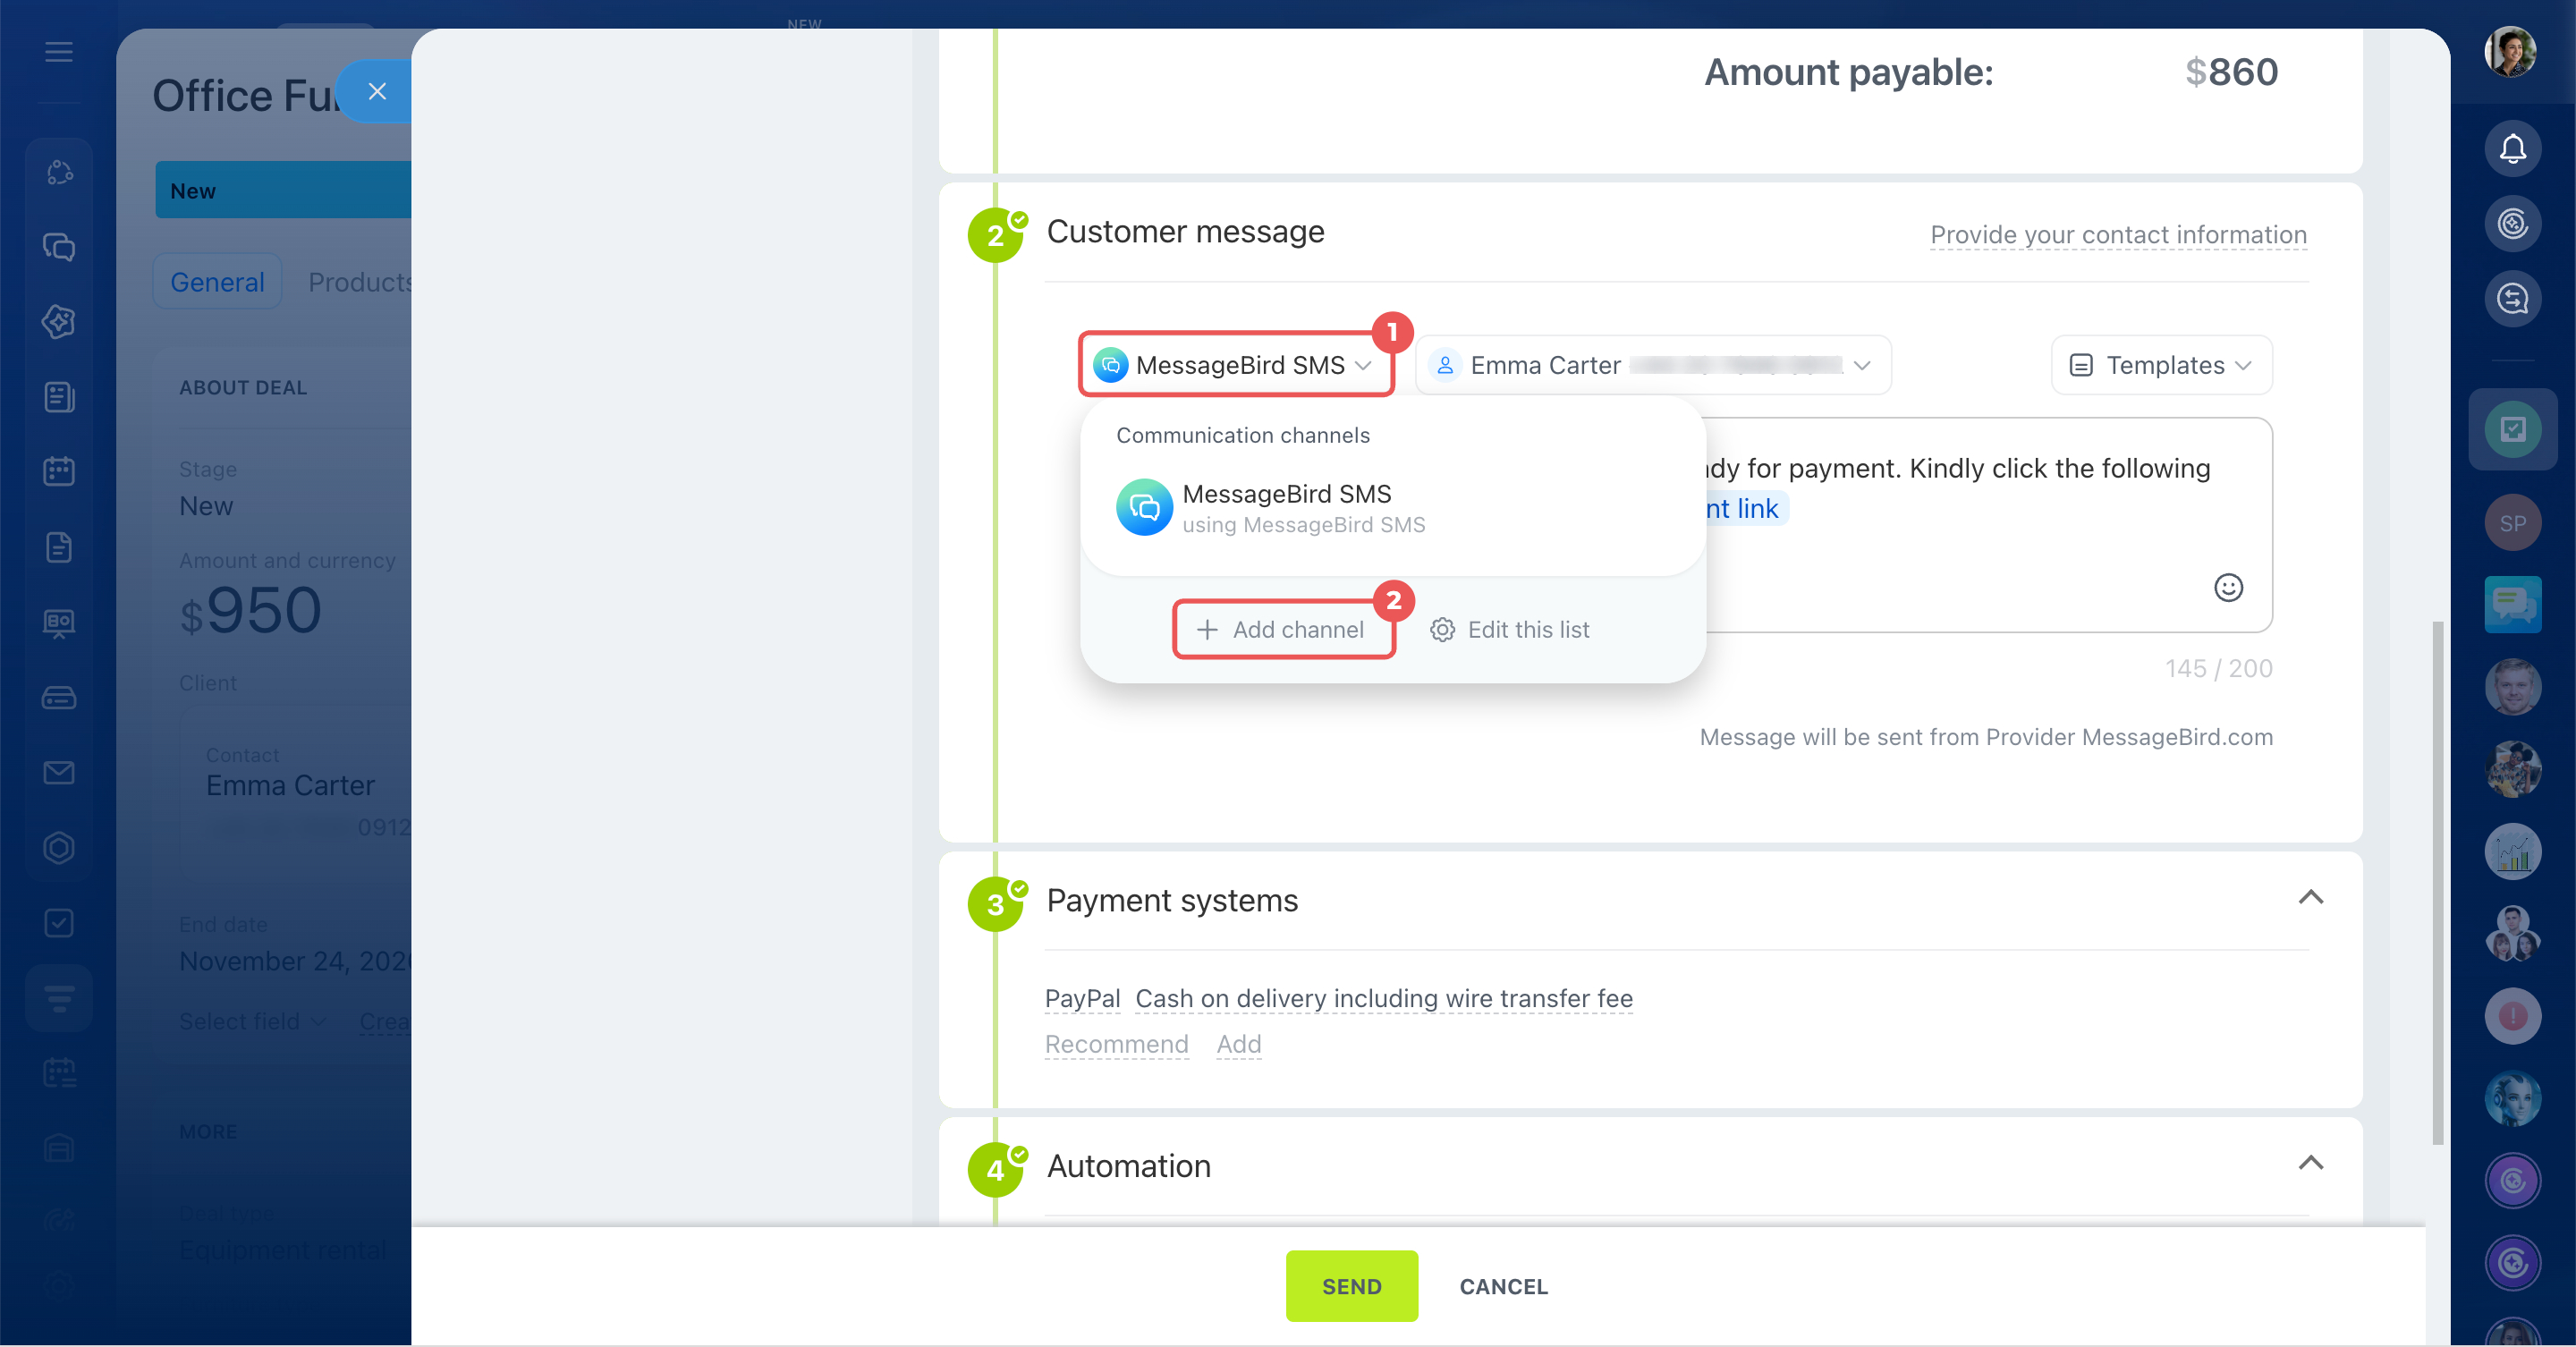
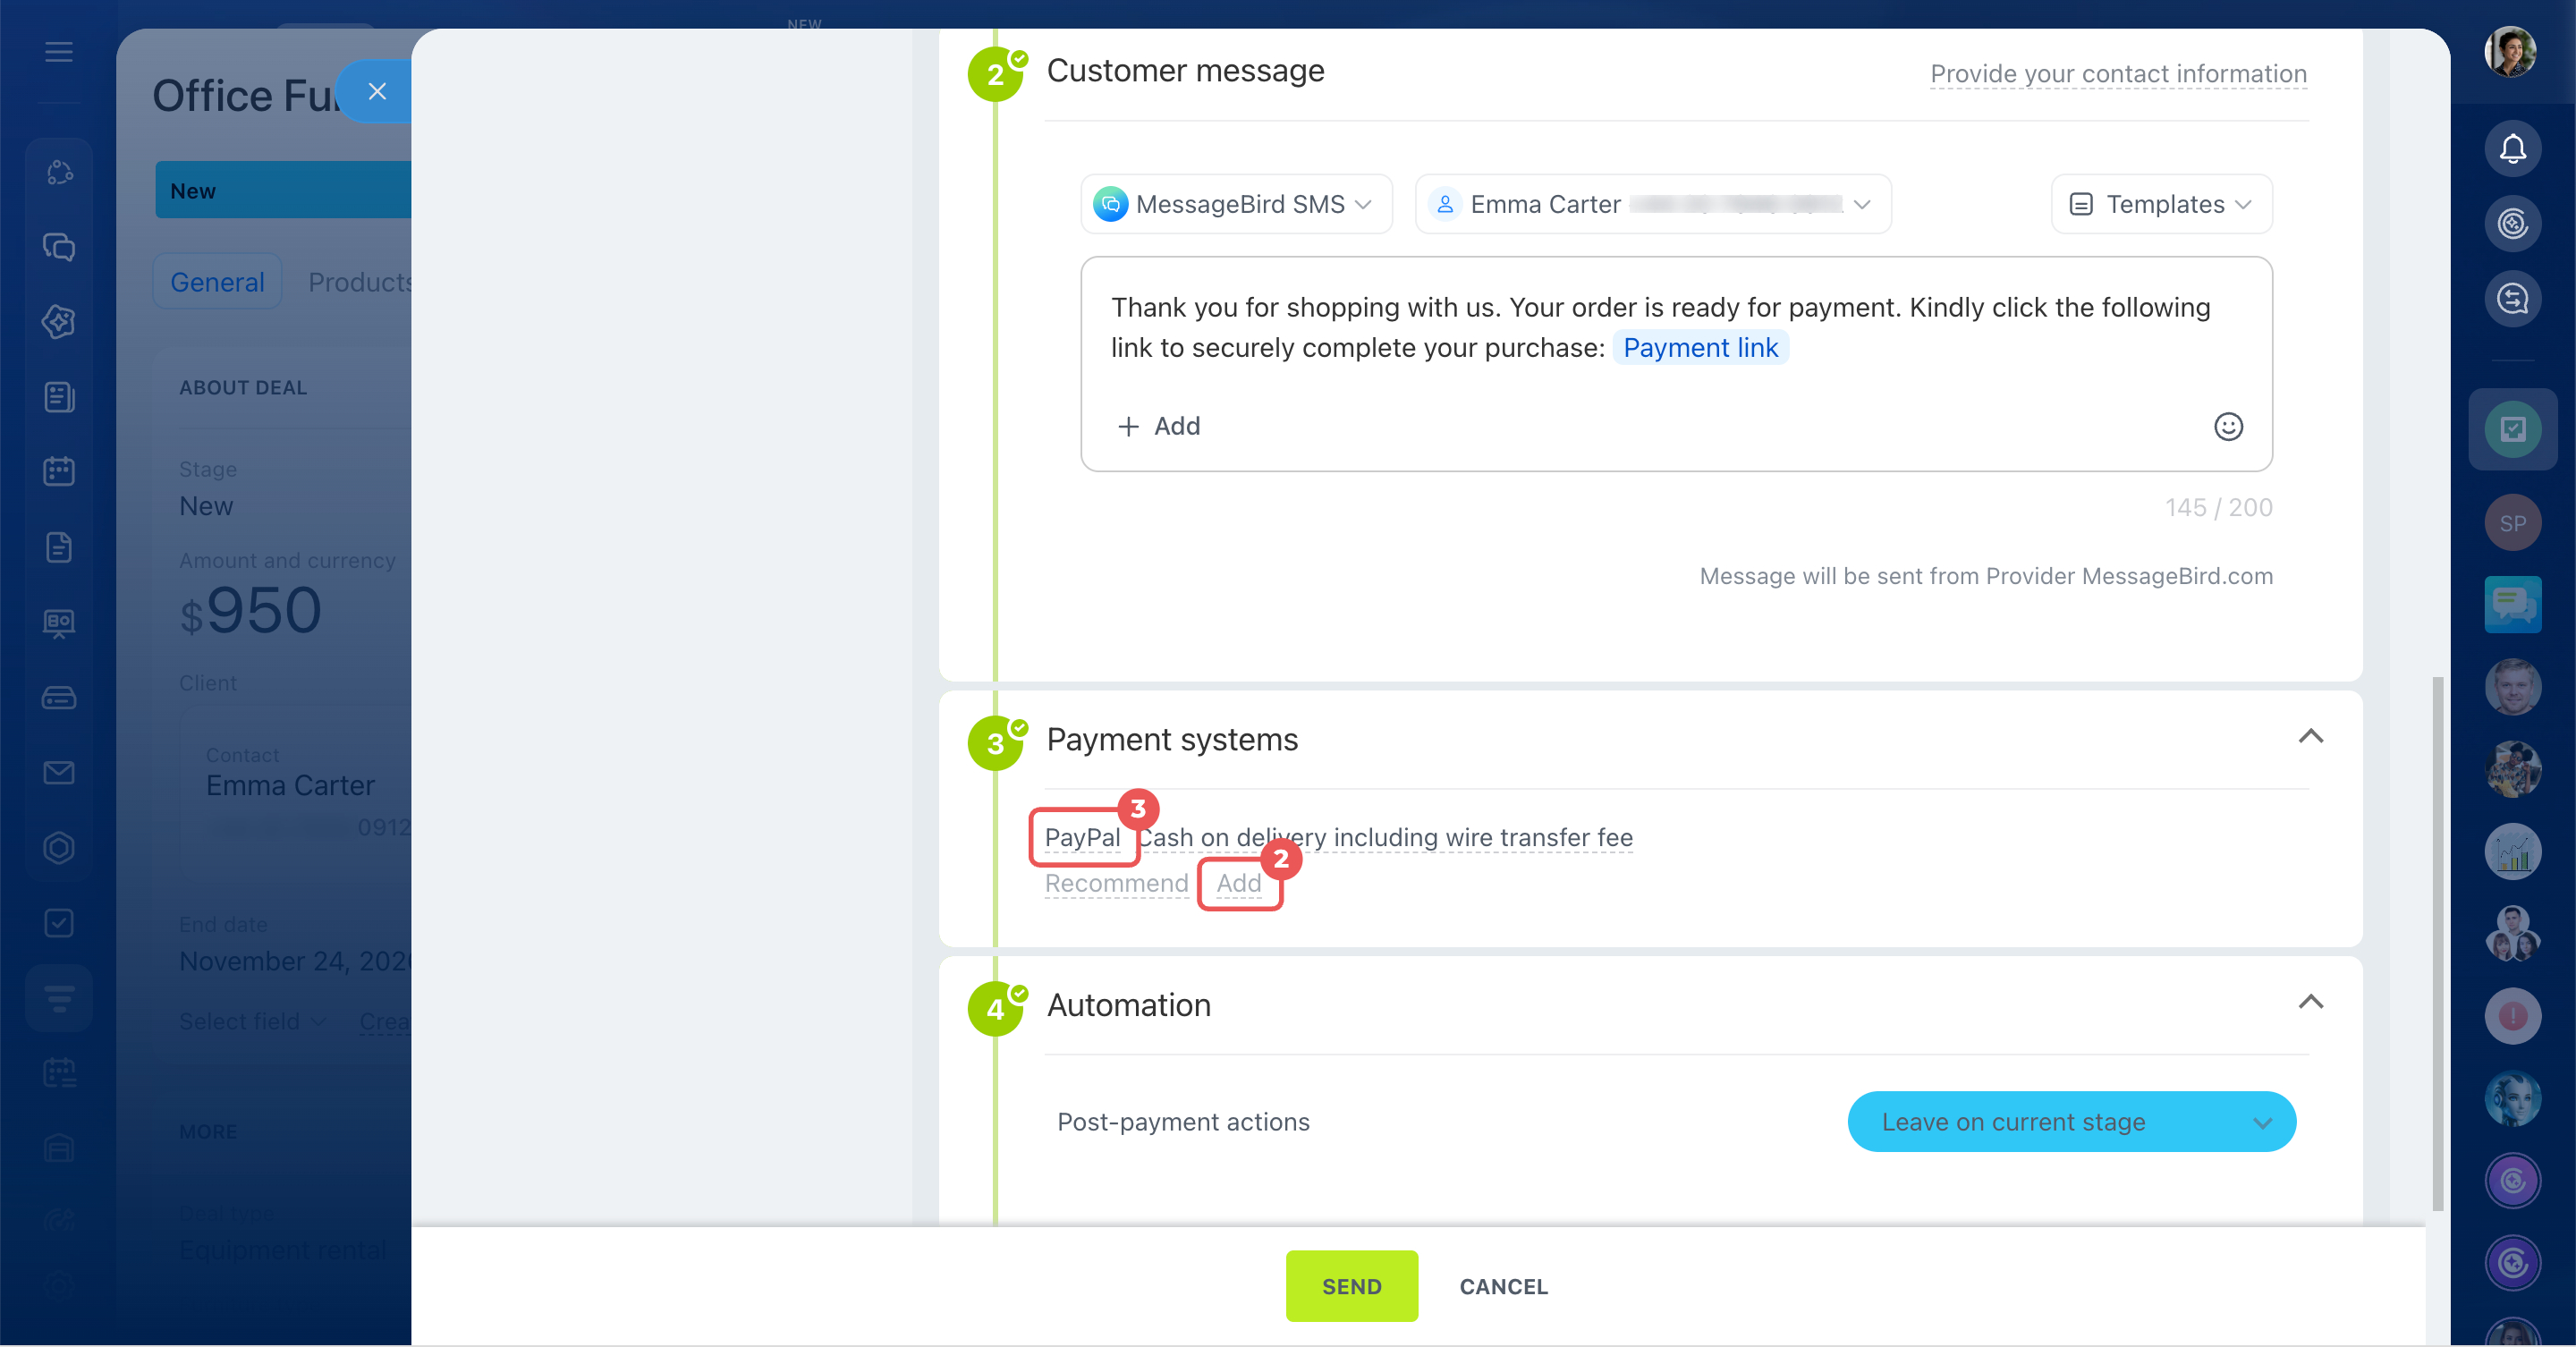
Customer message. Bitrix24 automatically creates a message with a payment link using a template. You can send it through a messaging service or SMS.
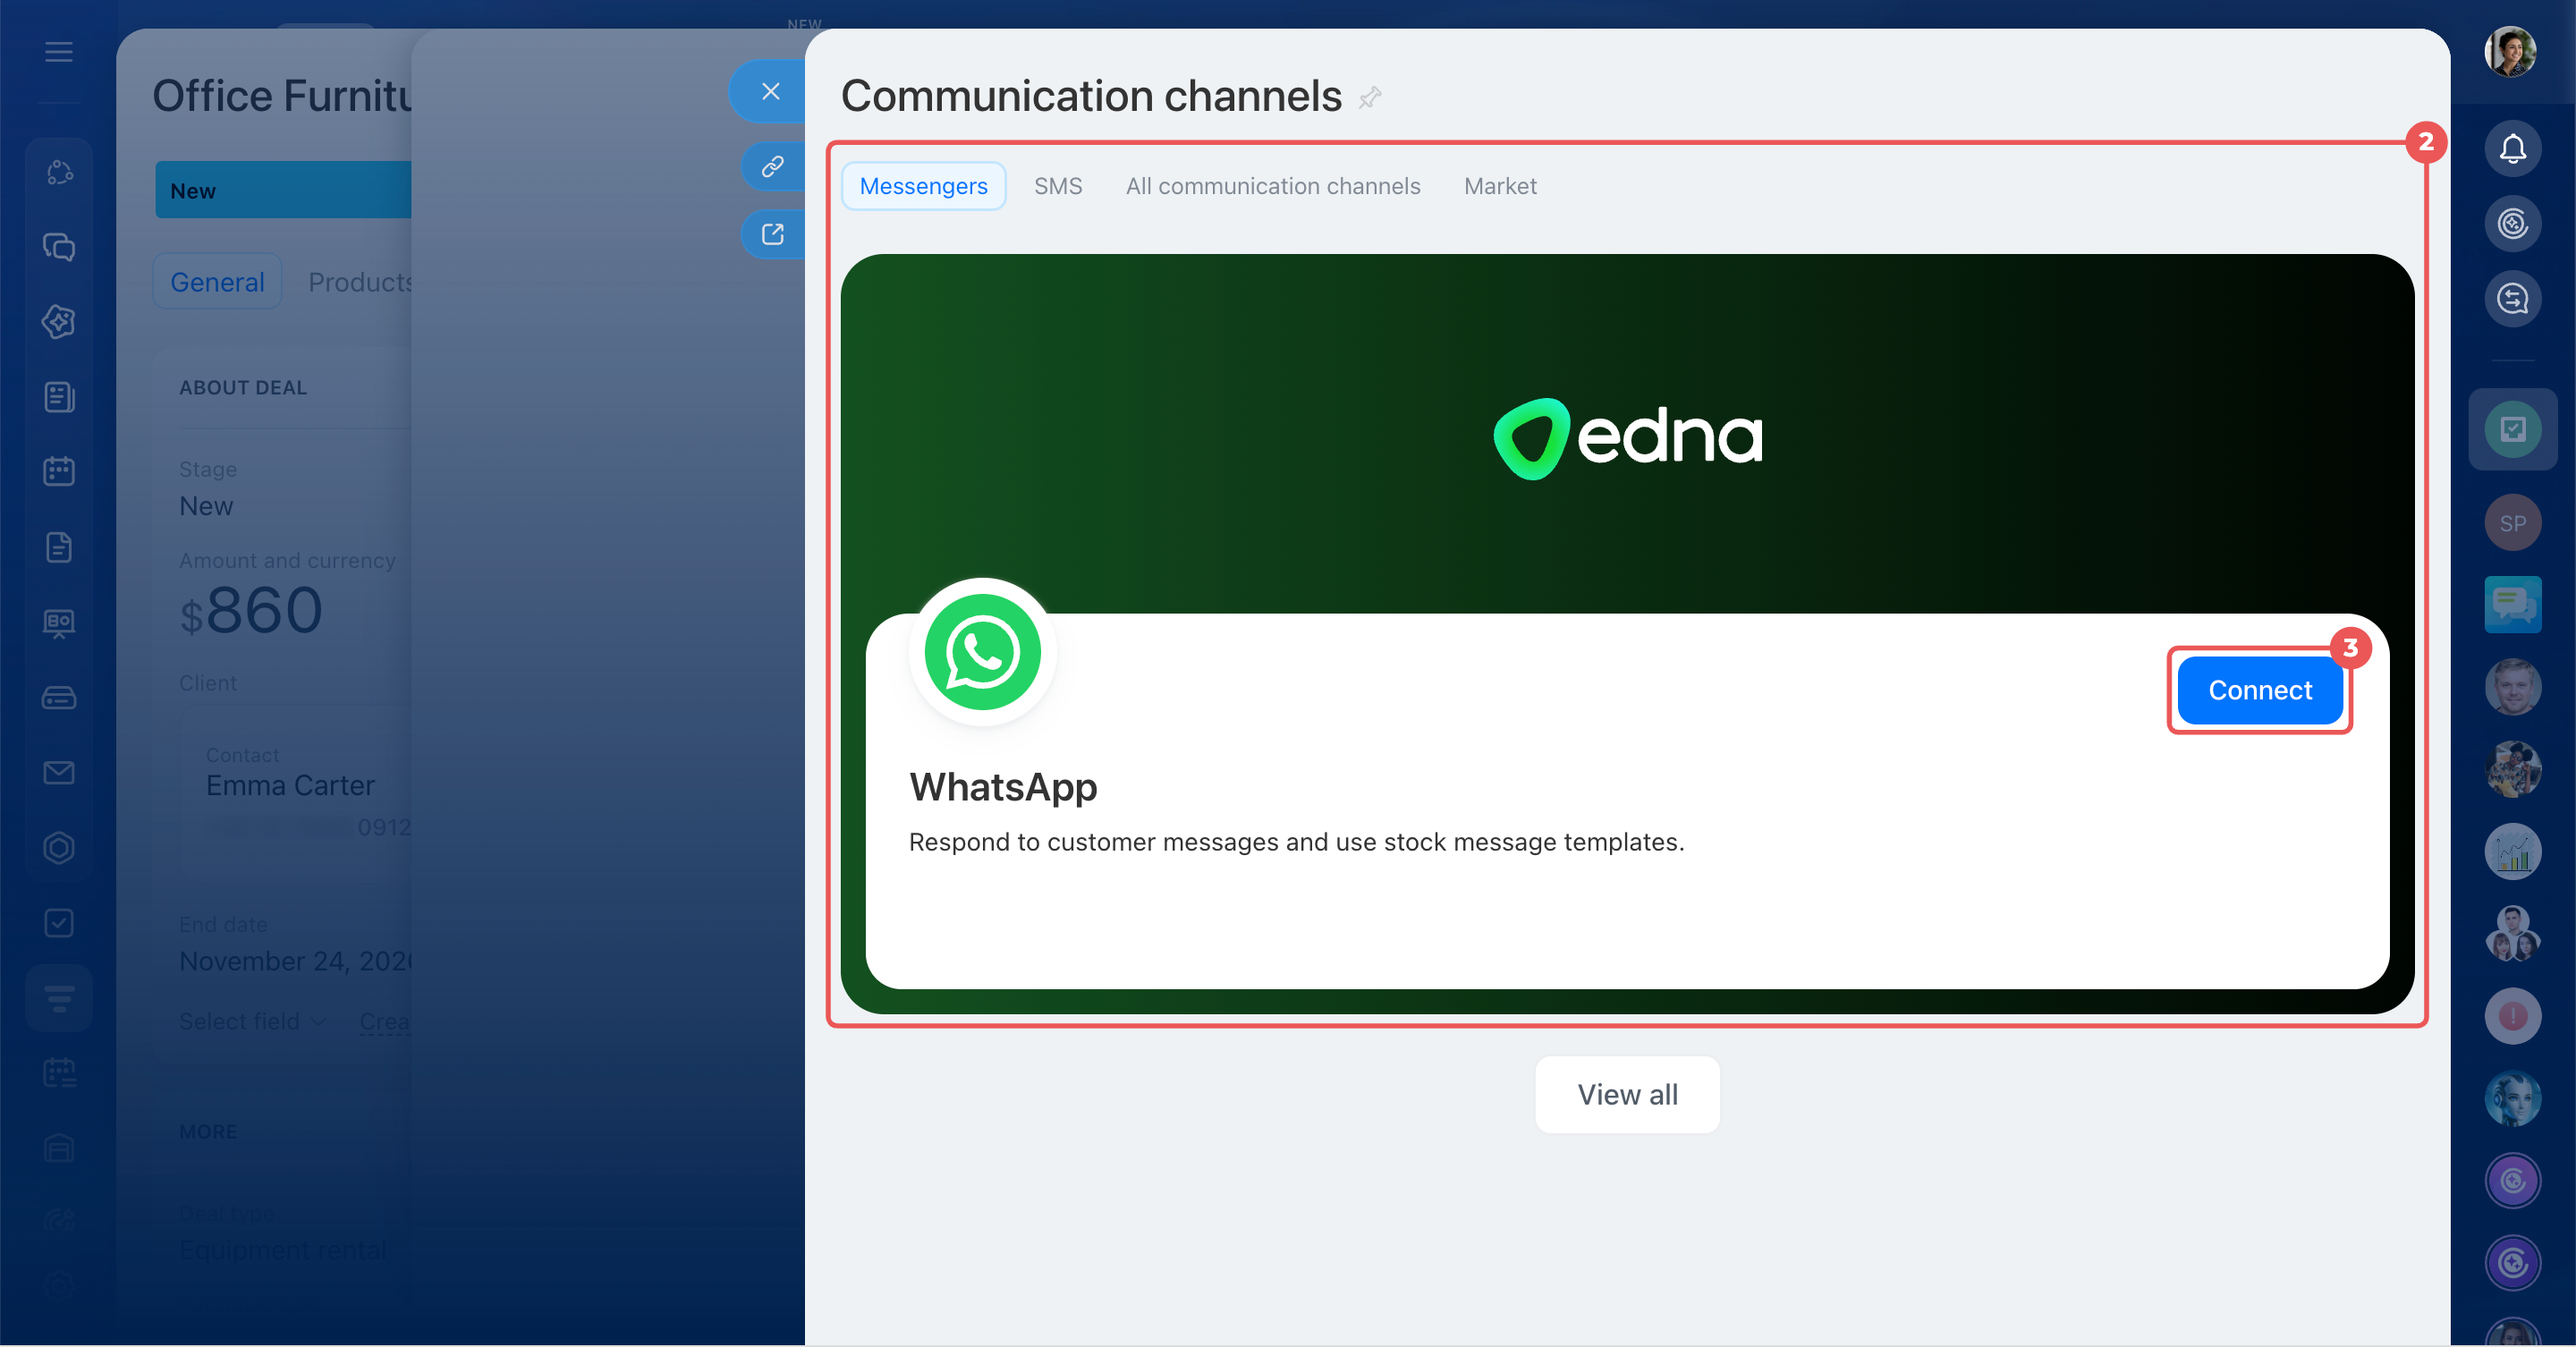
If you haven't connected a communication channel, click Connect. Select a channel or service and follow the steps to connect it.
Set up message delivery.
- Expand the channel list and choose the one you need. Connect a new one if necessary.
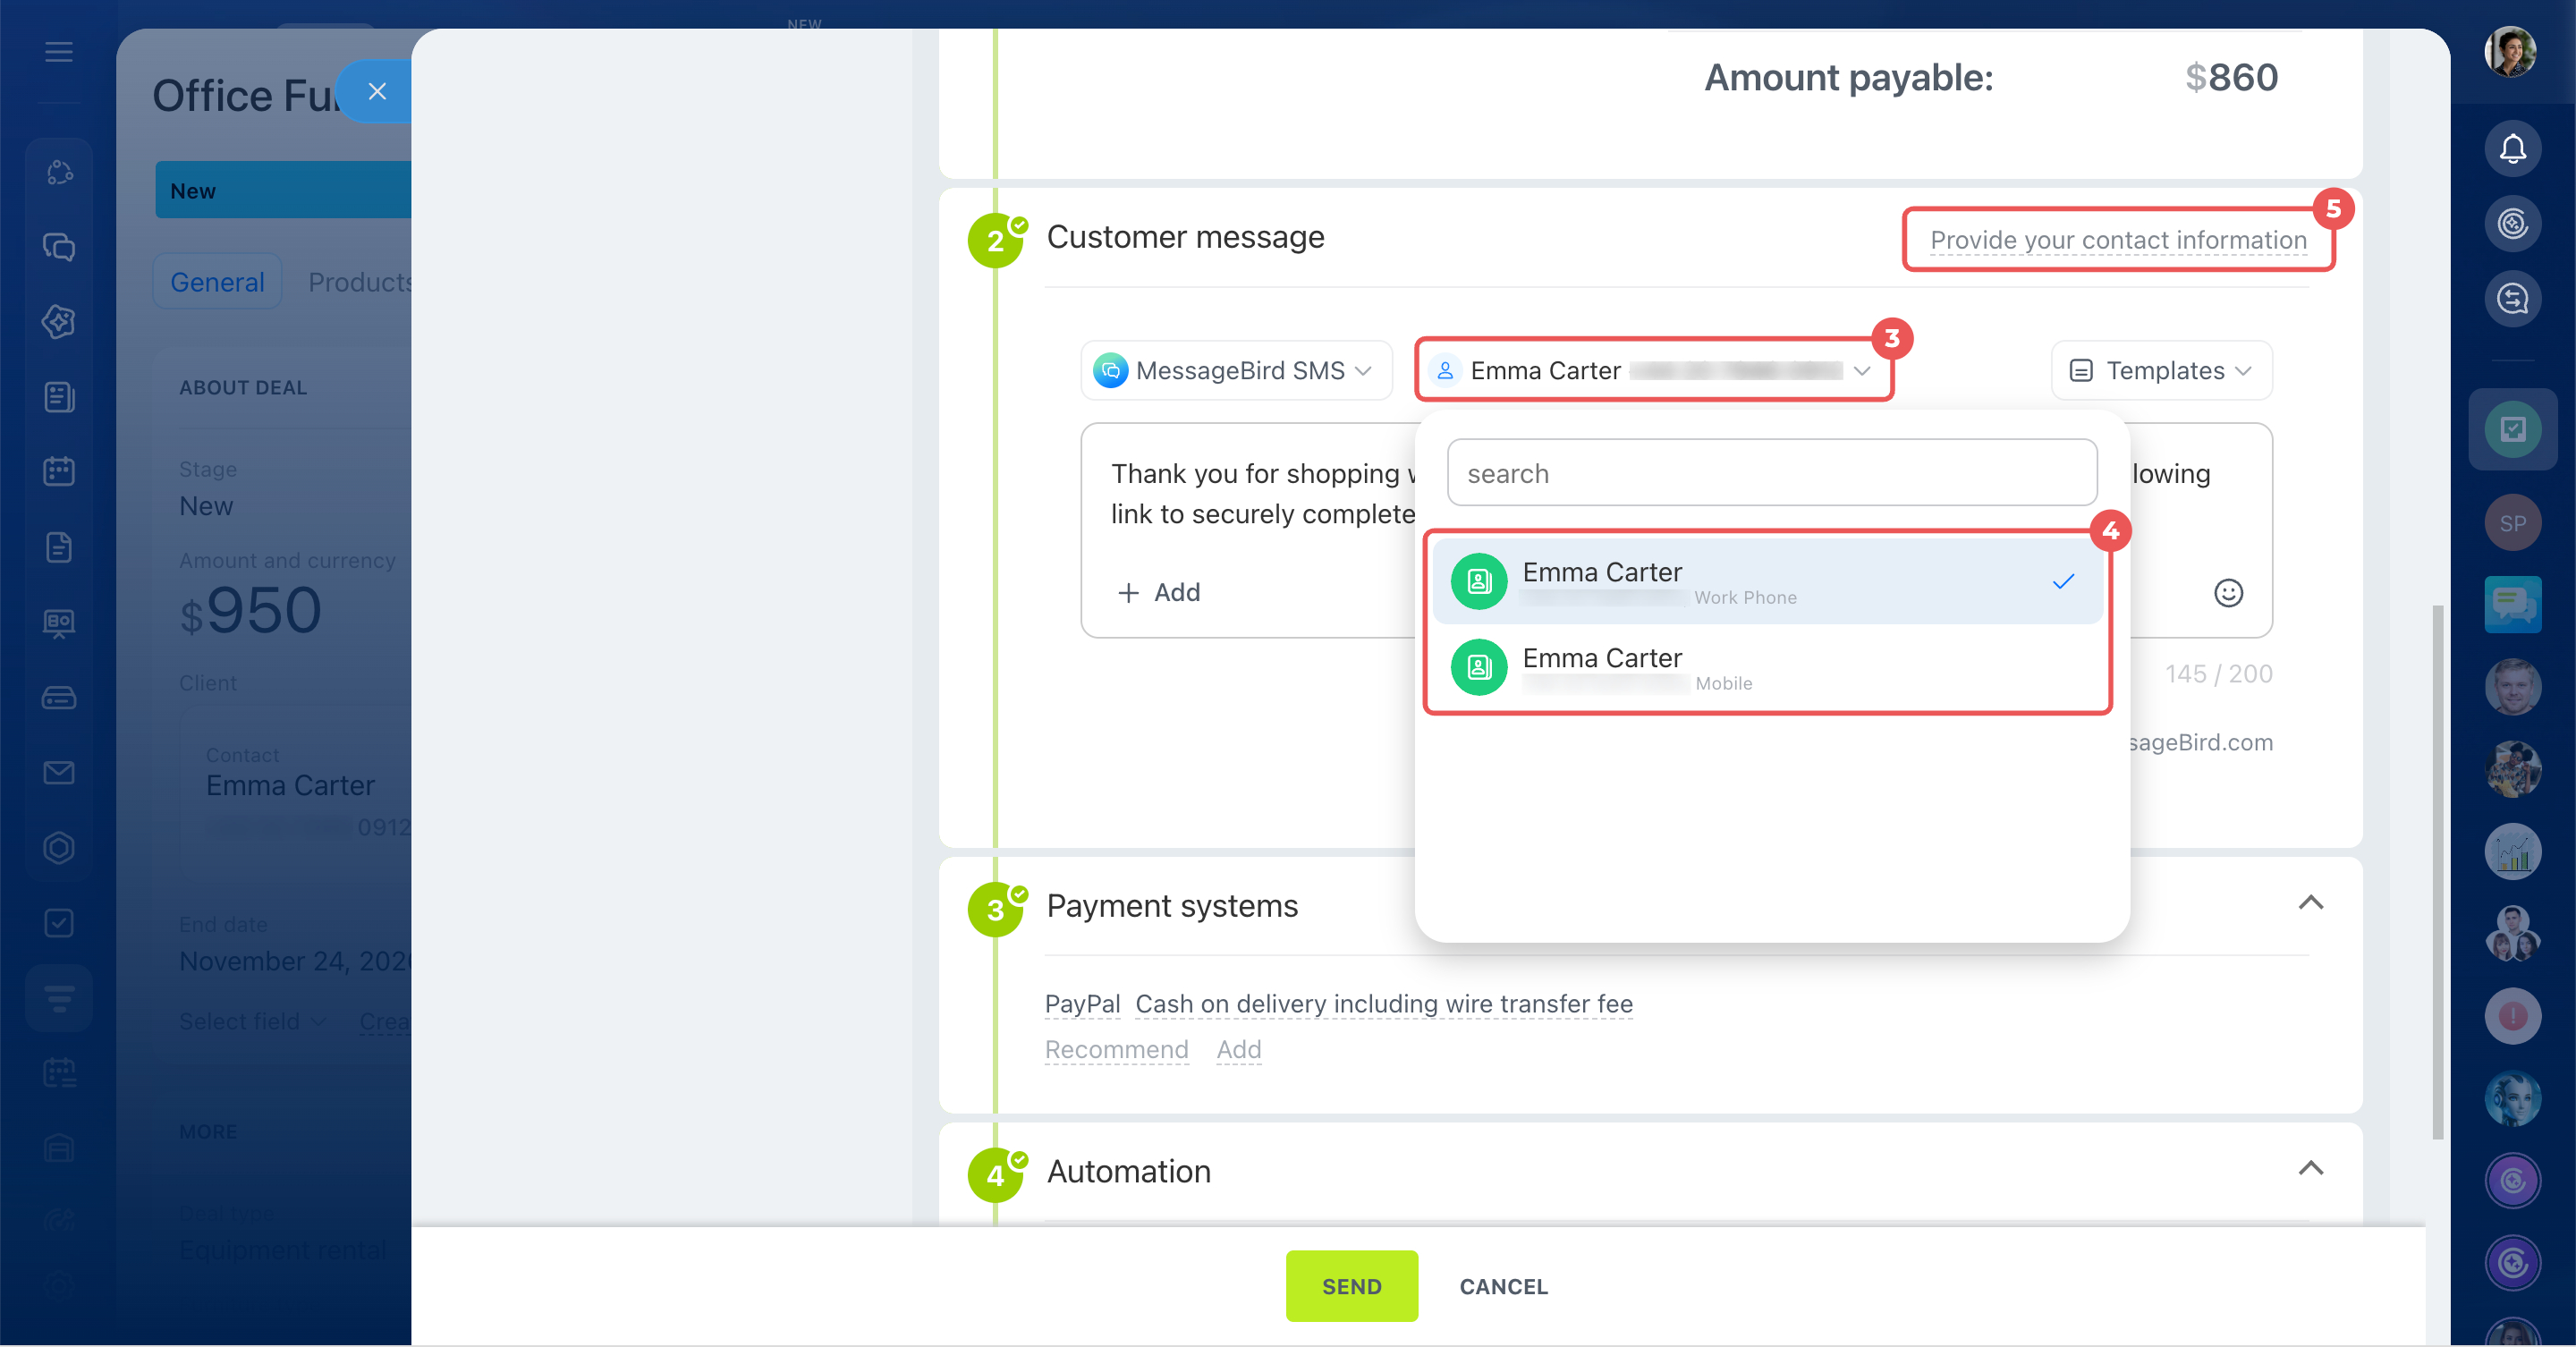
- Bitrix24 automatically fills in the customer's name and the phone number used for the most recent conversation. To use another number, expand the list and select it.
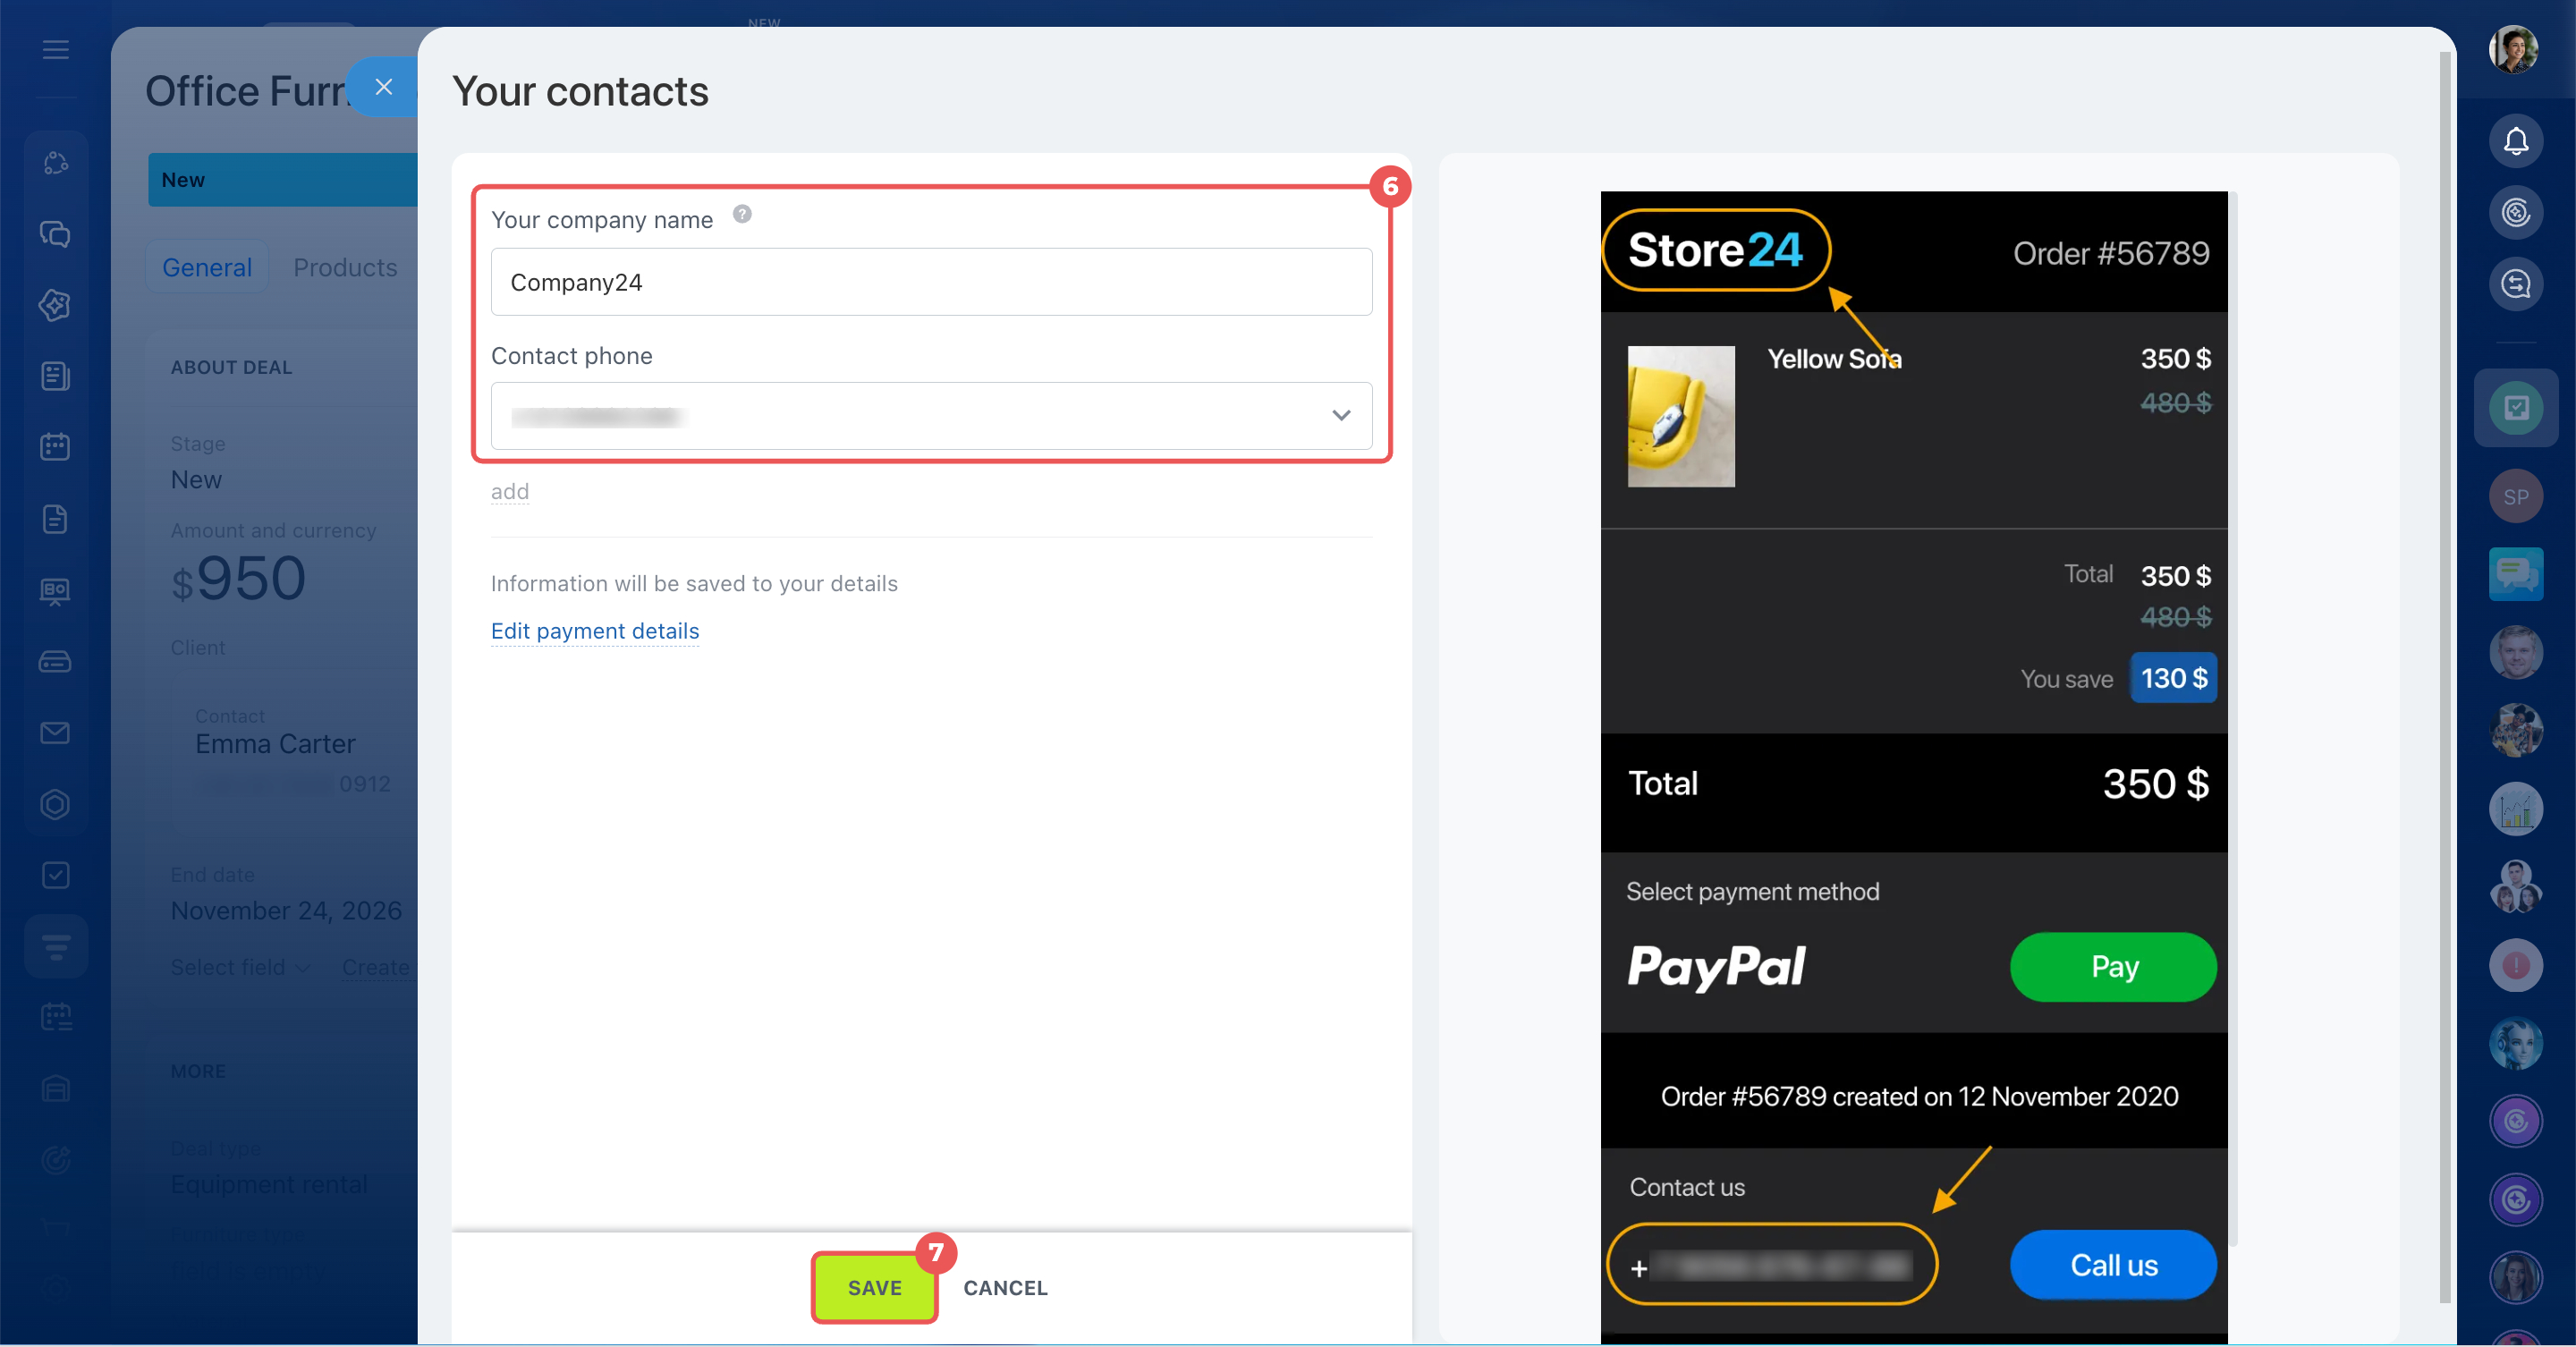
- Click Provide your contact information to choose which company details appear on the payment page. In the side panel, select a phone number and edit the company name if needed. Bitrix24 saves these changes to your company details.
Add company details
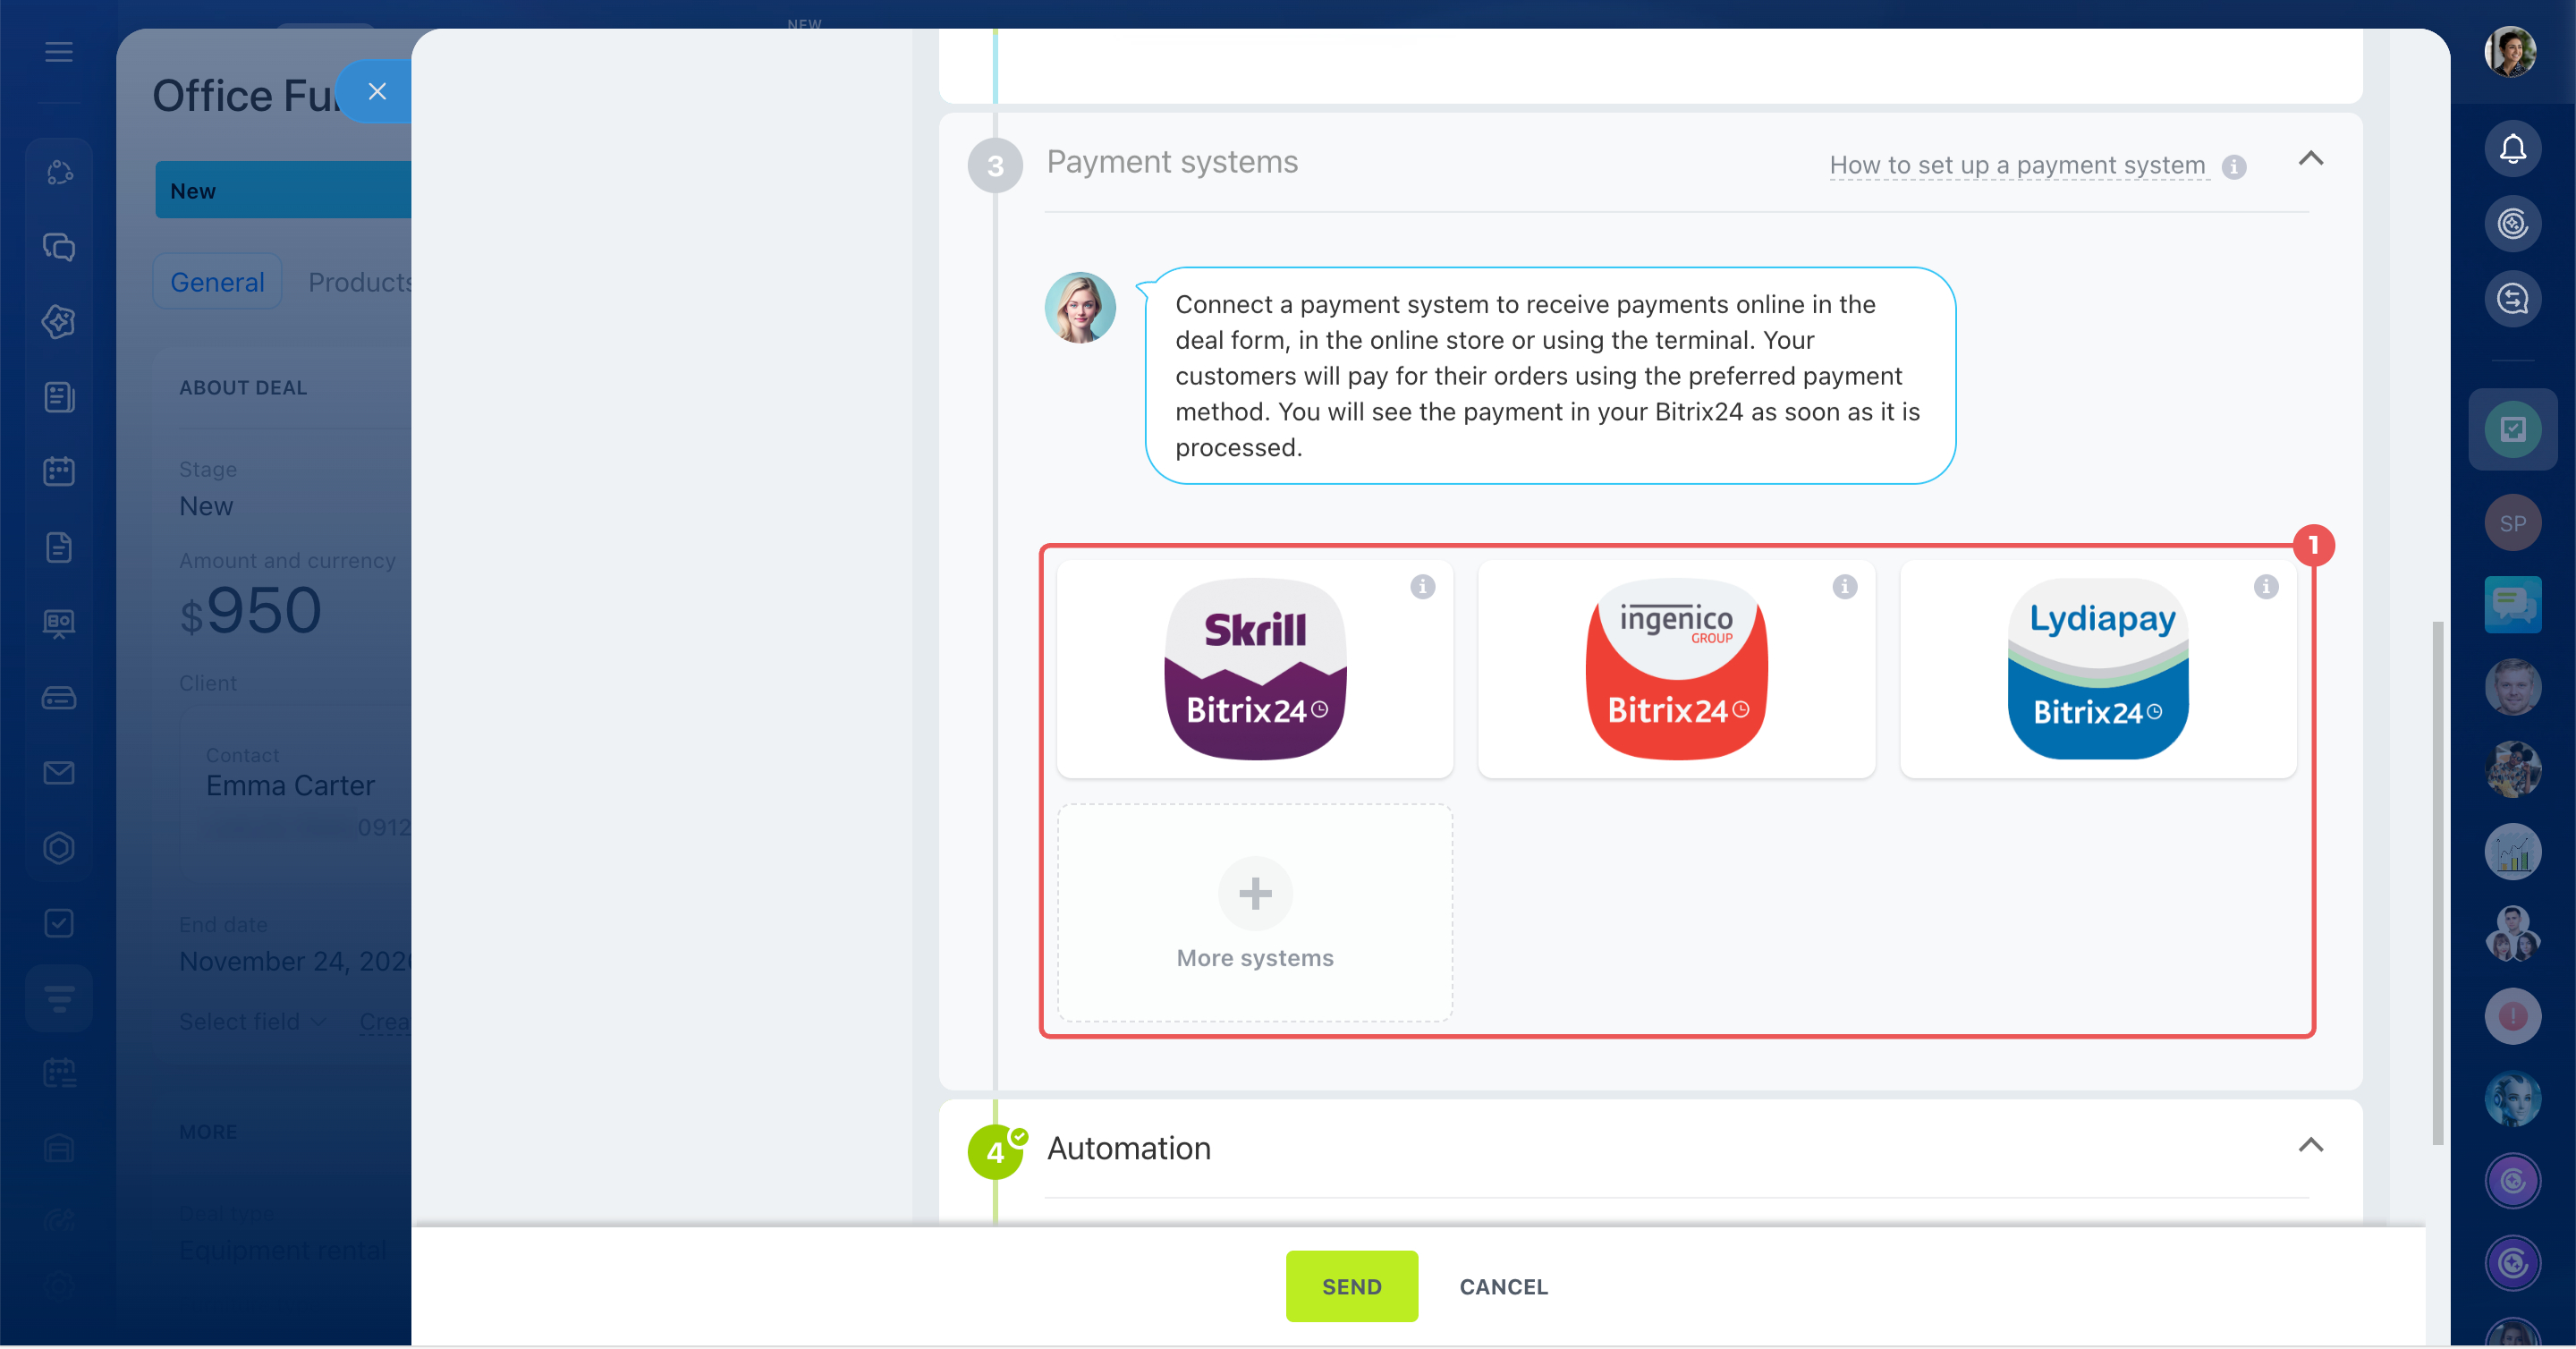
Payment systems. Connect payment systems to accept payments online or through a payment terminal.
- Connect a payment system.
- Click Add to offer another payment method. Customers can then choose how they want to pay.
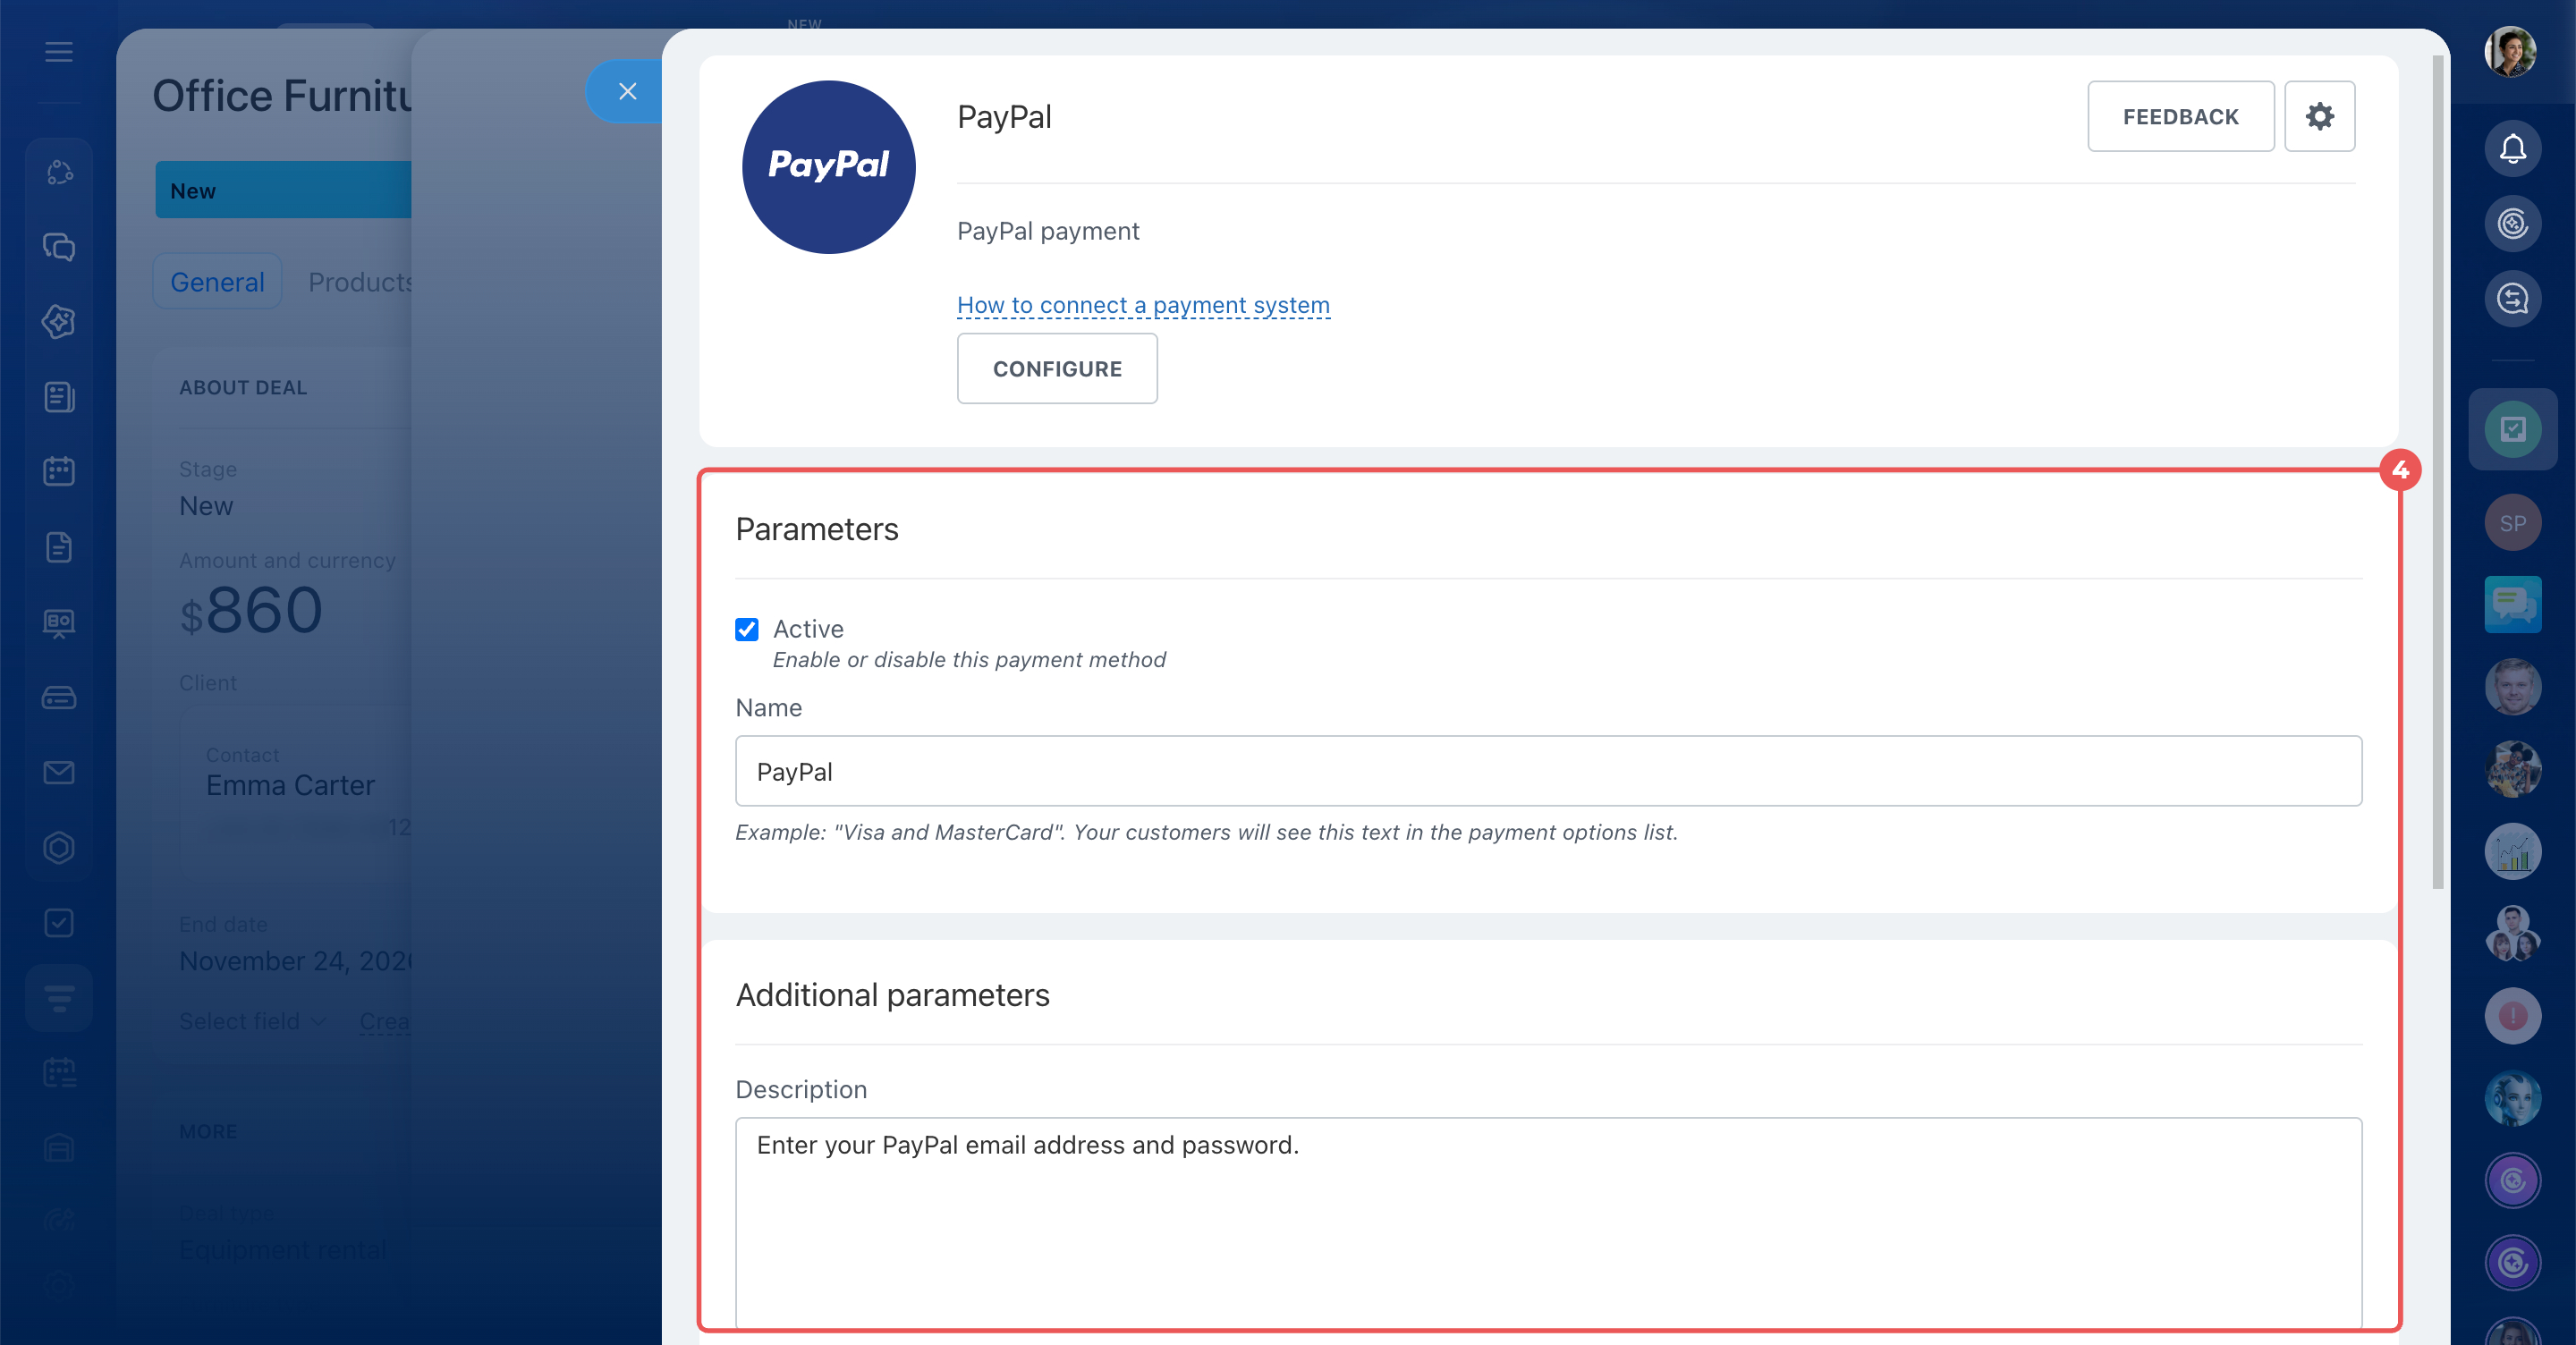
- Click a payment system's name to edit its settings. For example, you can change its logo or display name. Customers will see this name on the payment page.
- Save your changes.
Connect payment systems in Sales Center
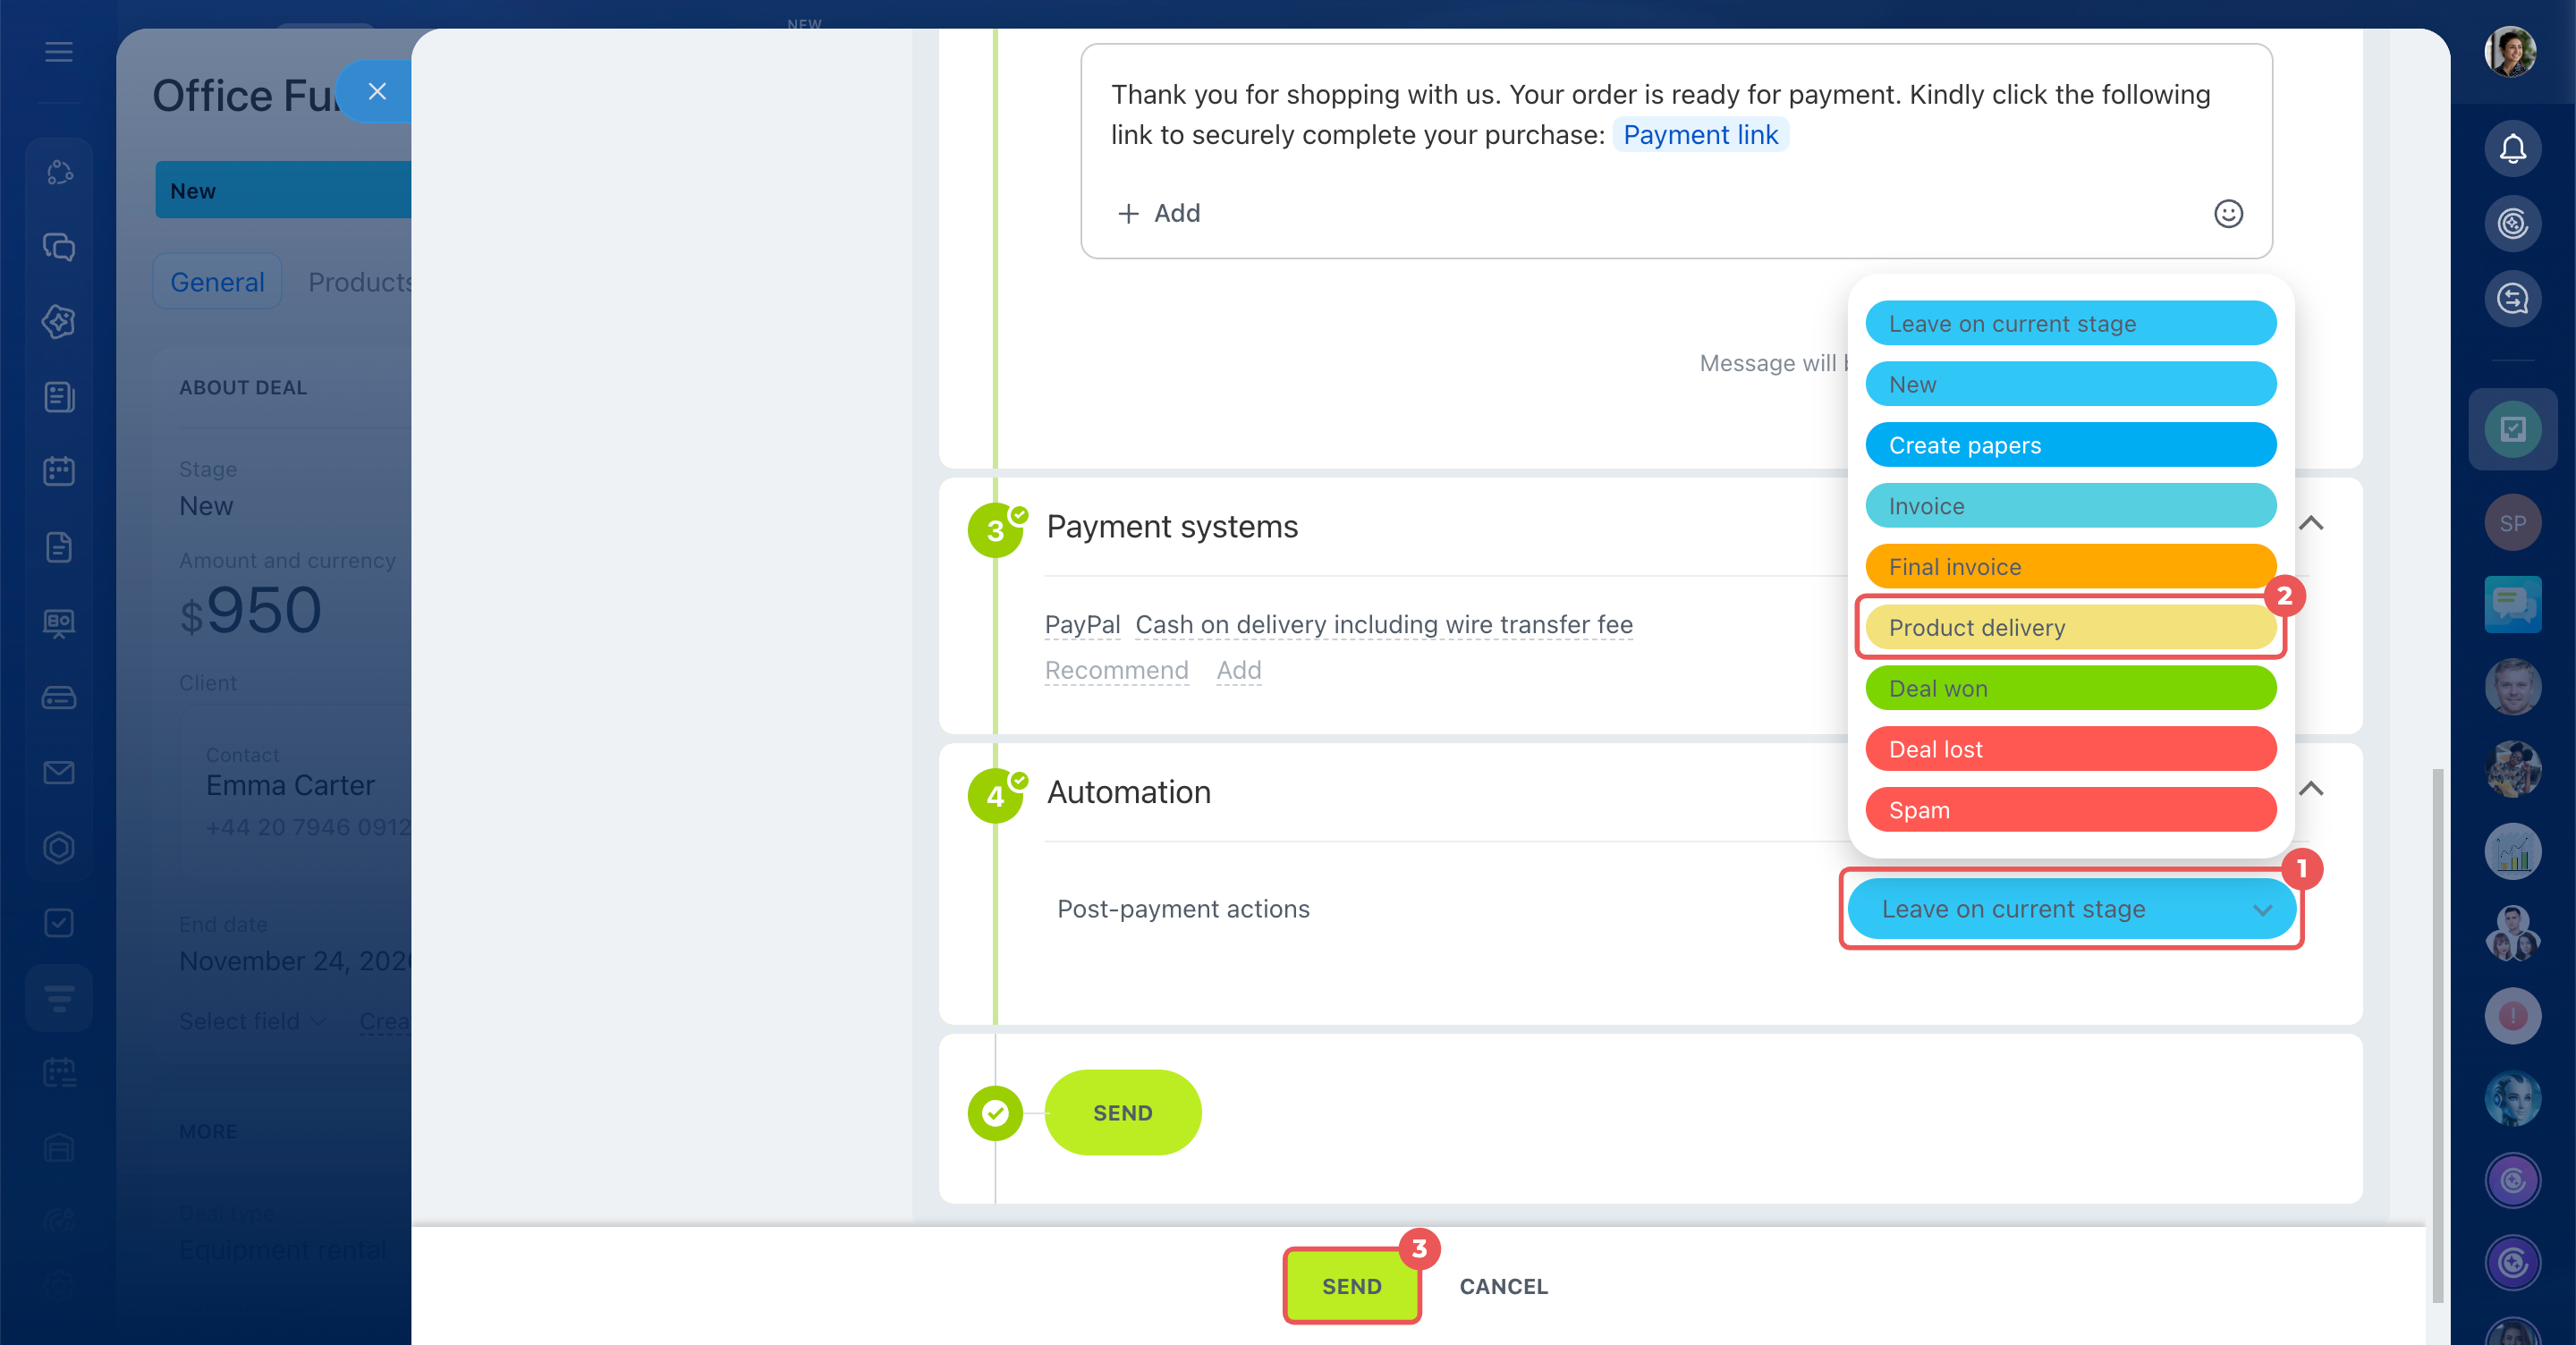
Automation. Choose which stages the deal should move to after payment and delivery are complete. This saves you from having to move the deal manually. By default, the deal stays in its current stage. Click Send.
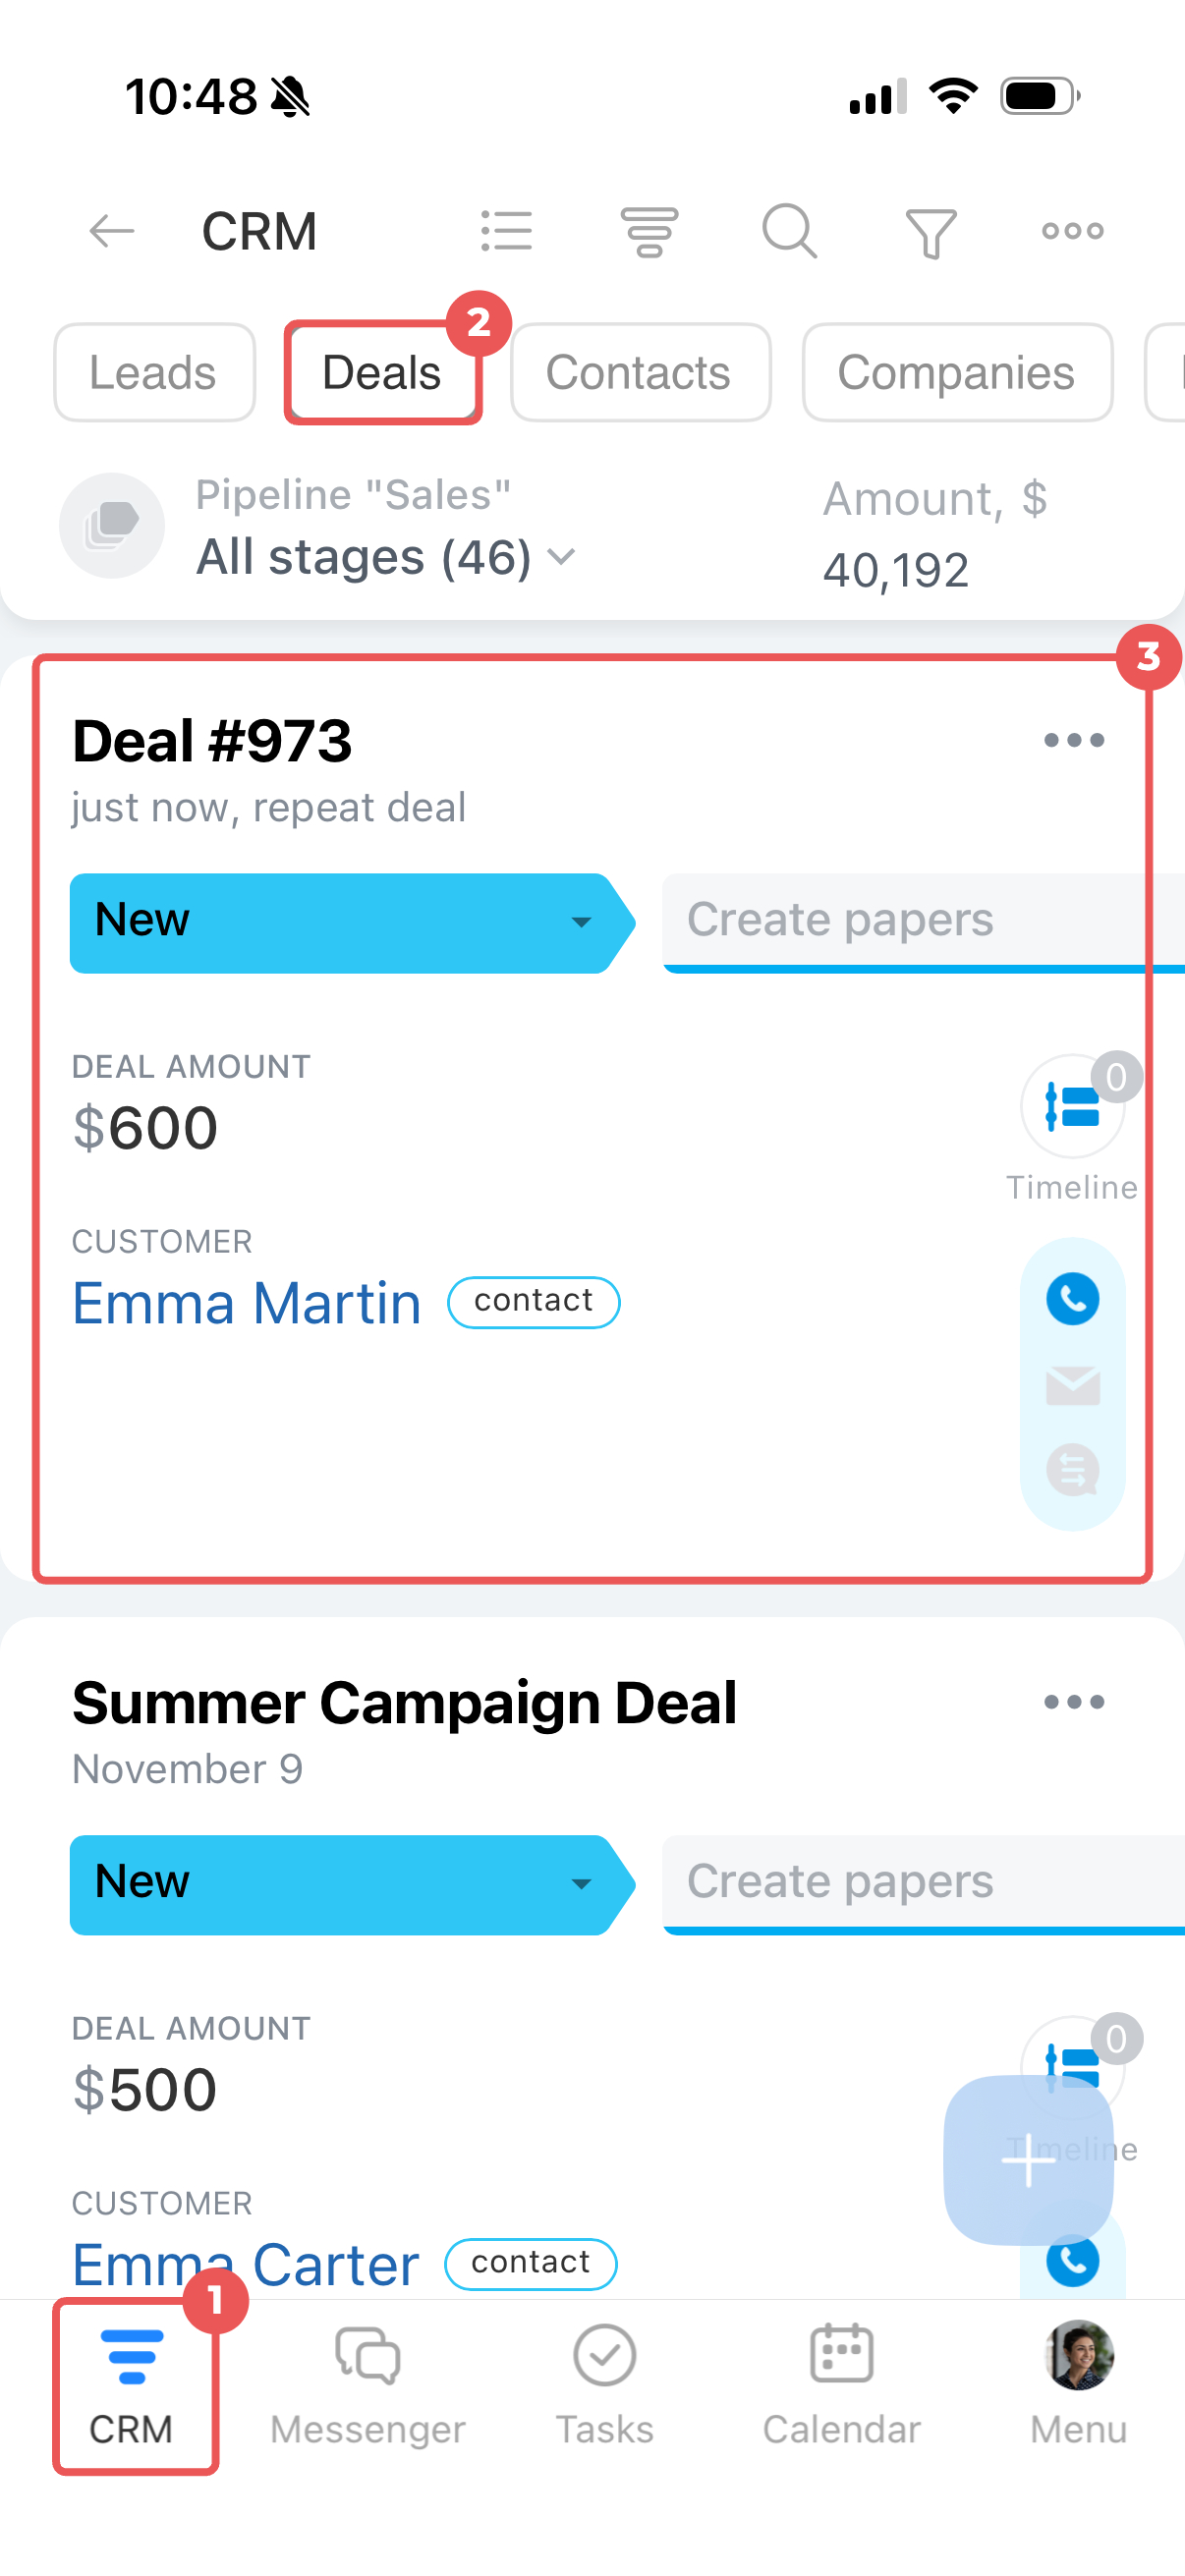
- Go to CRM > Deals and open a deal.
- Tap Receive payment > Pay using link.
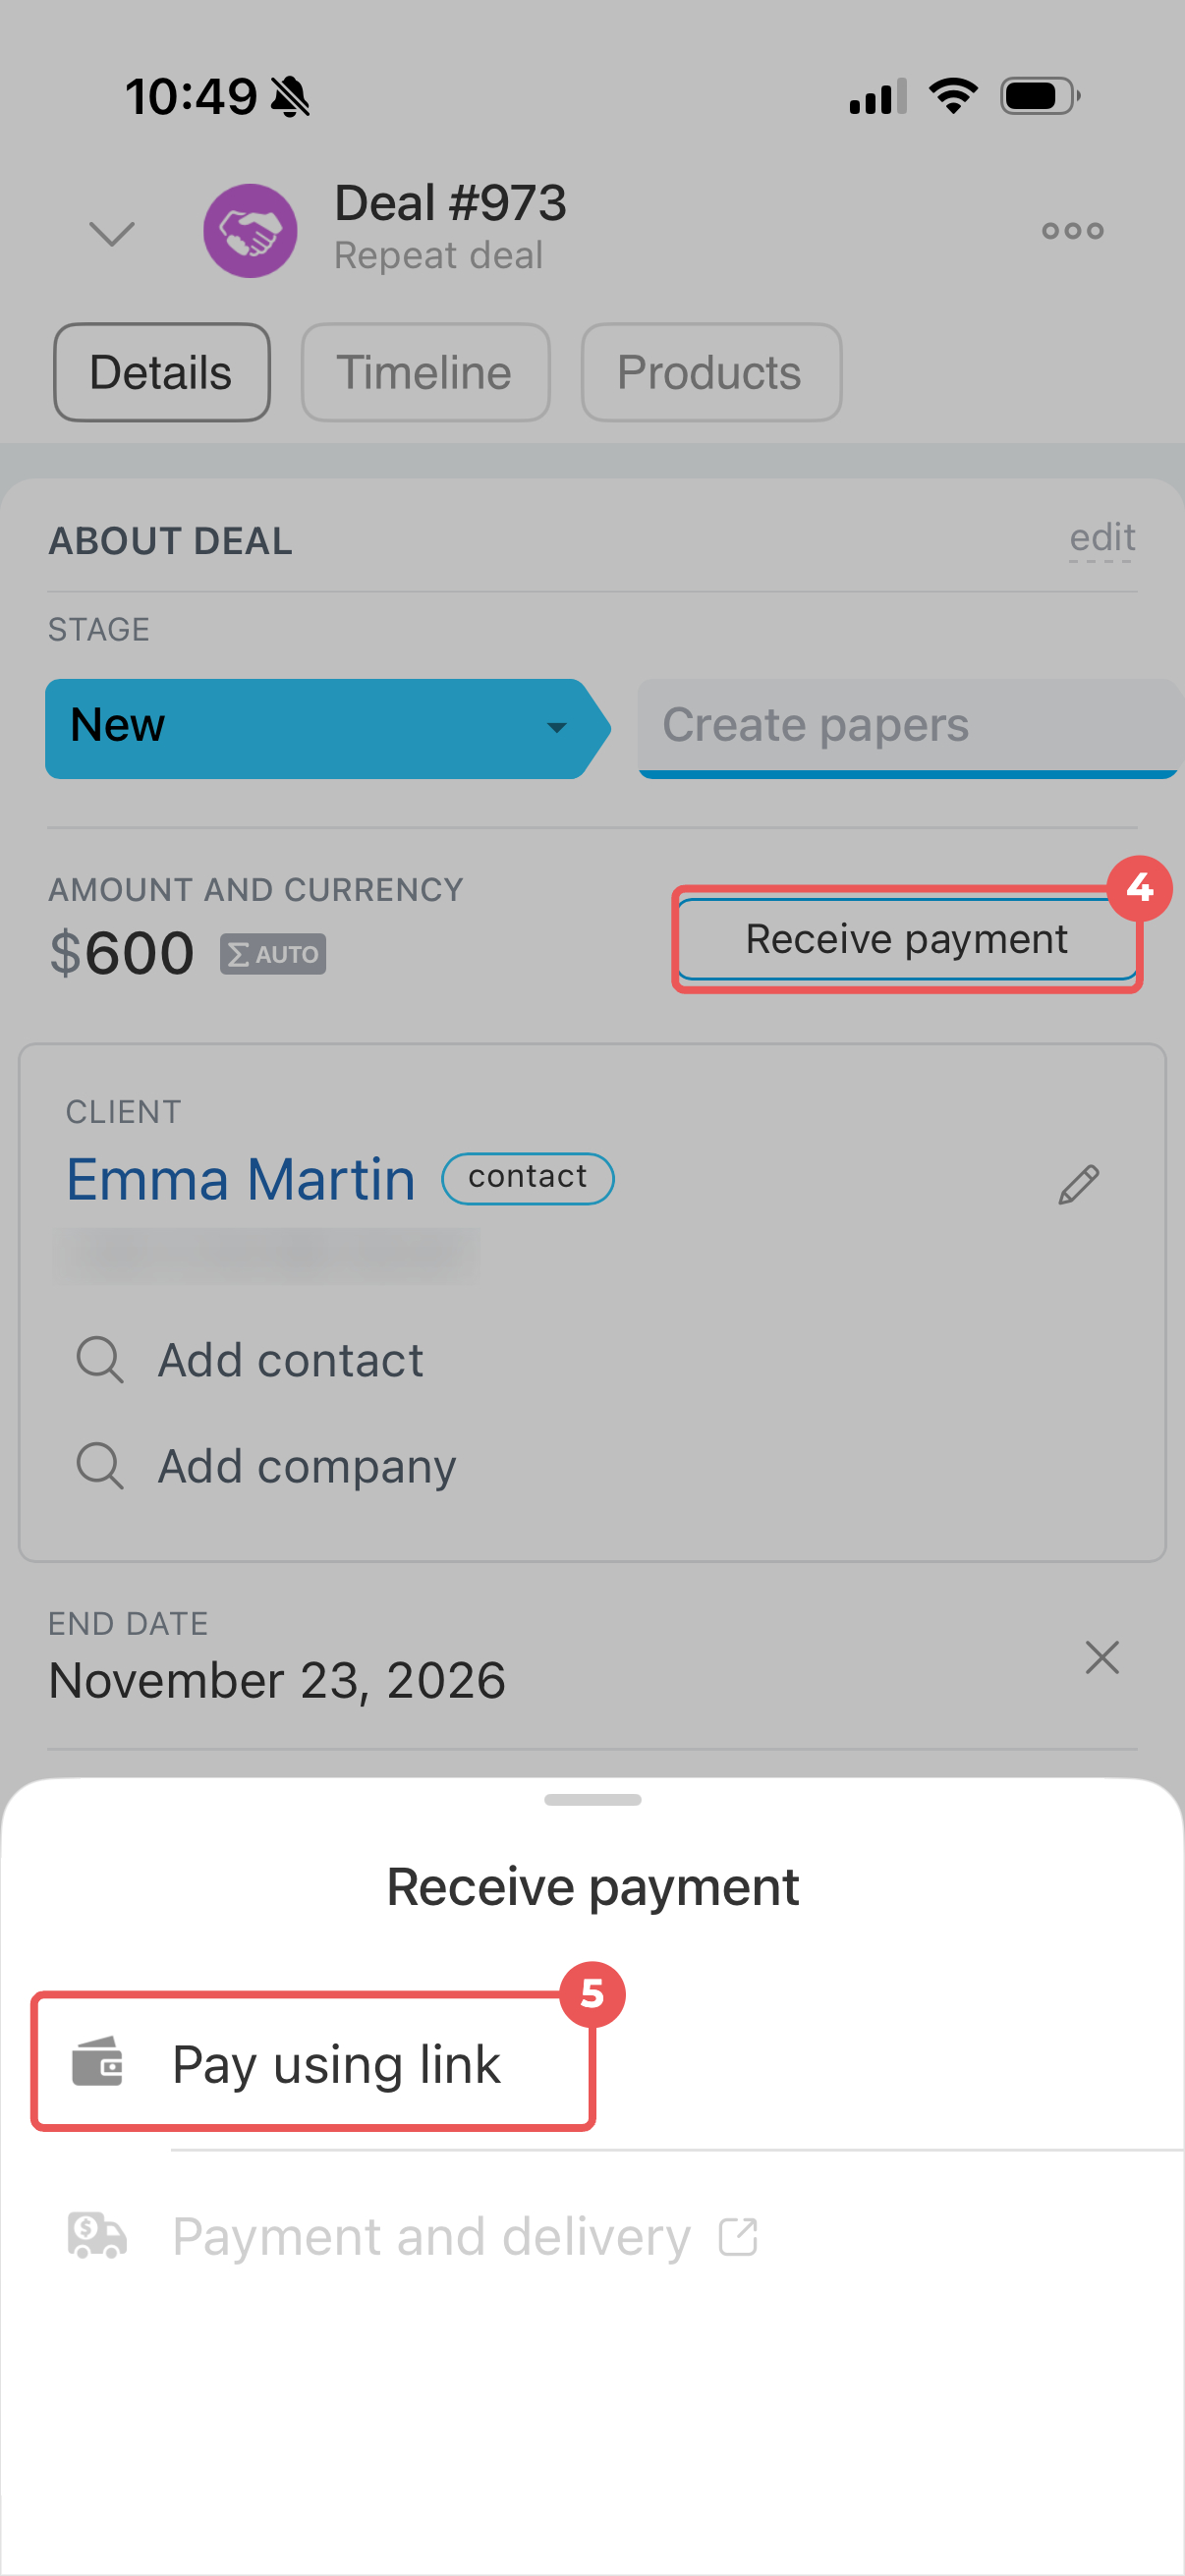
Fill in the payment details.
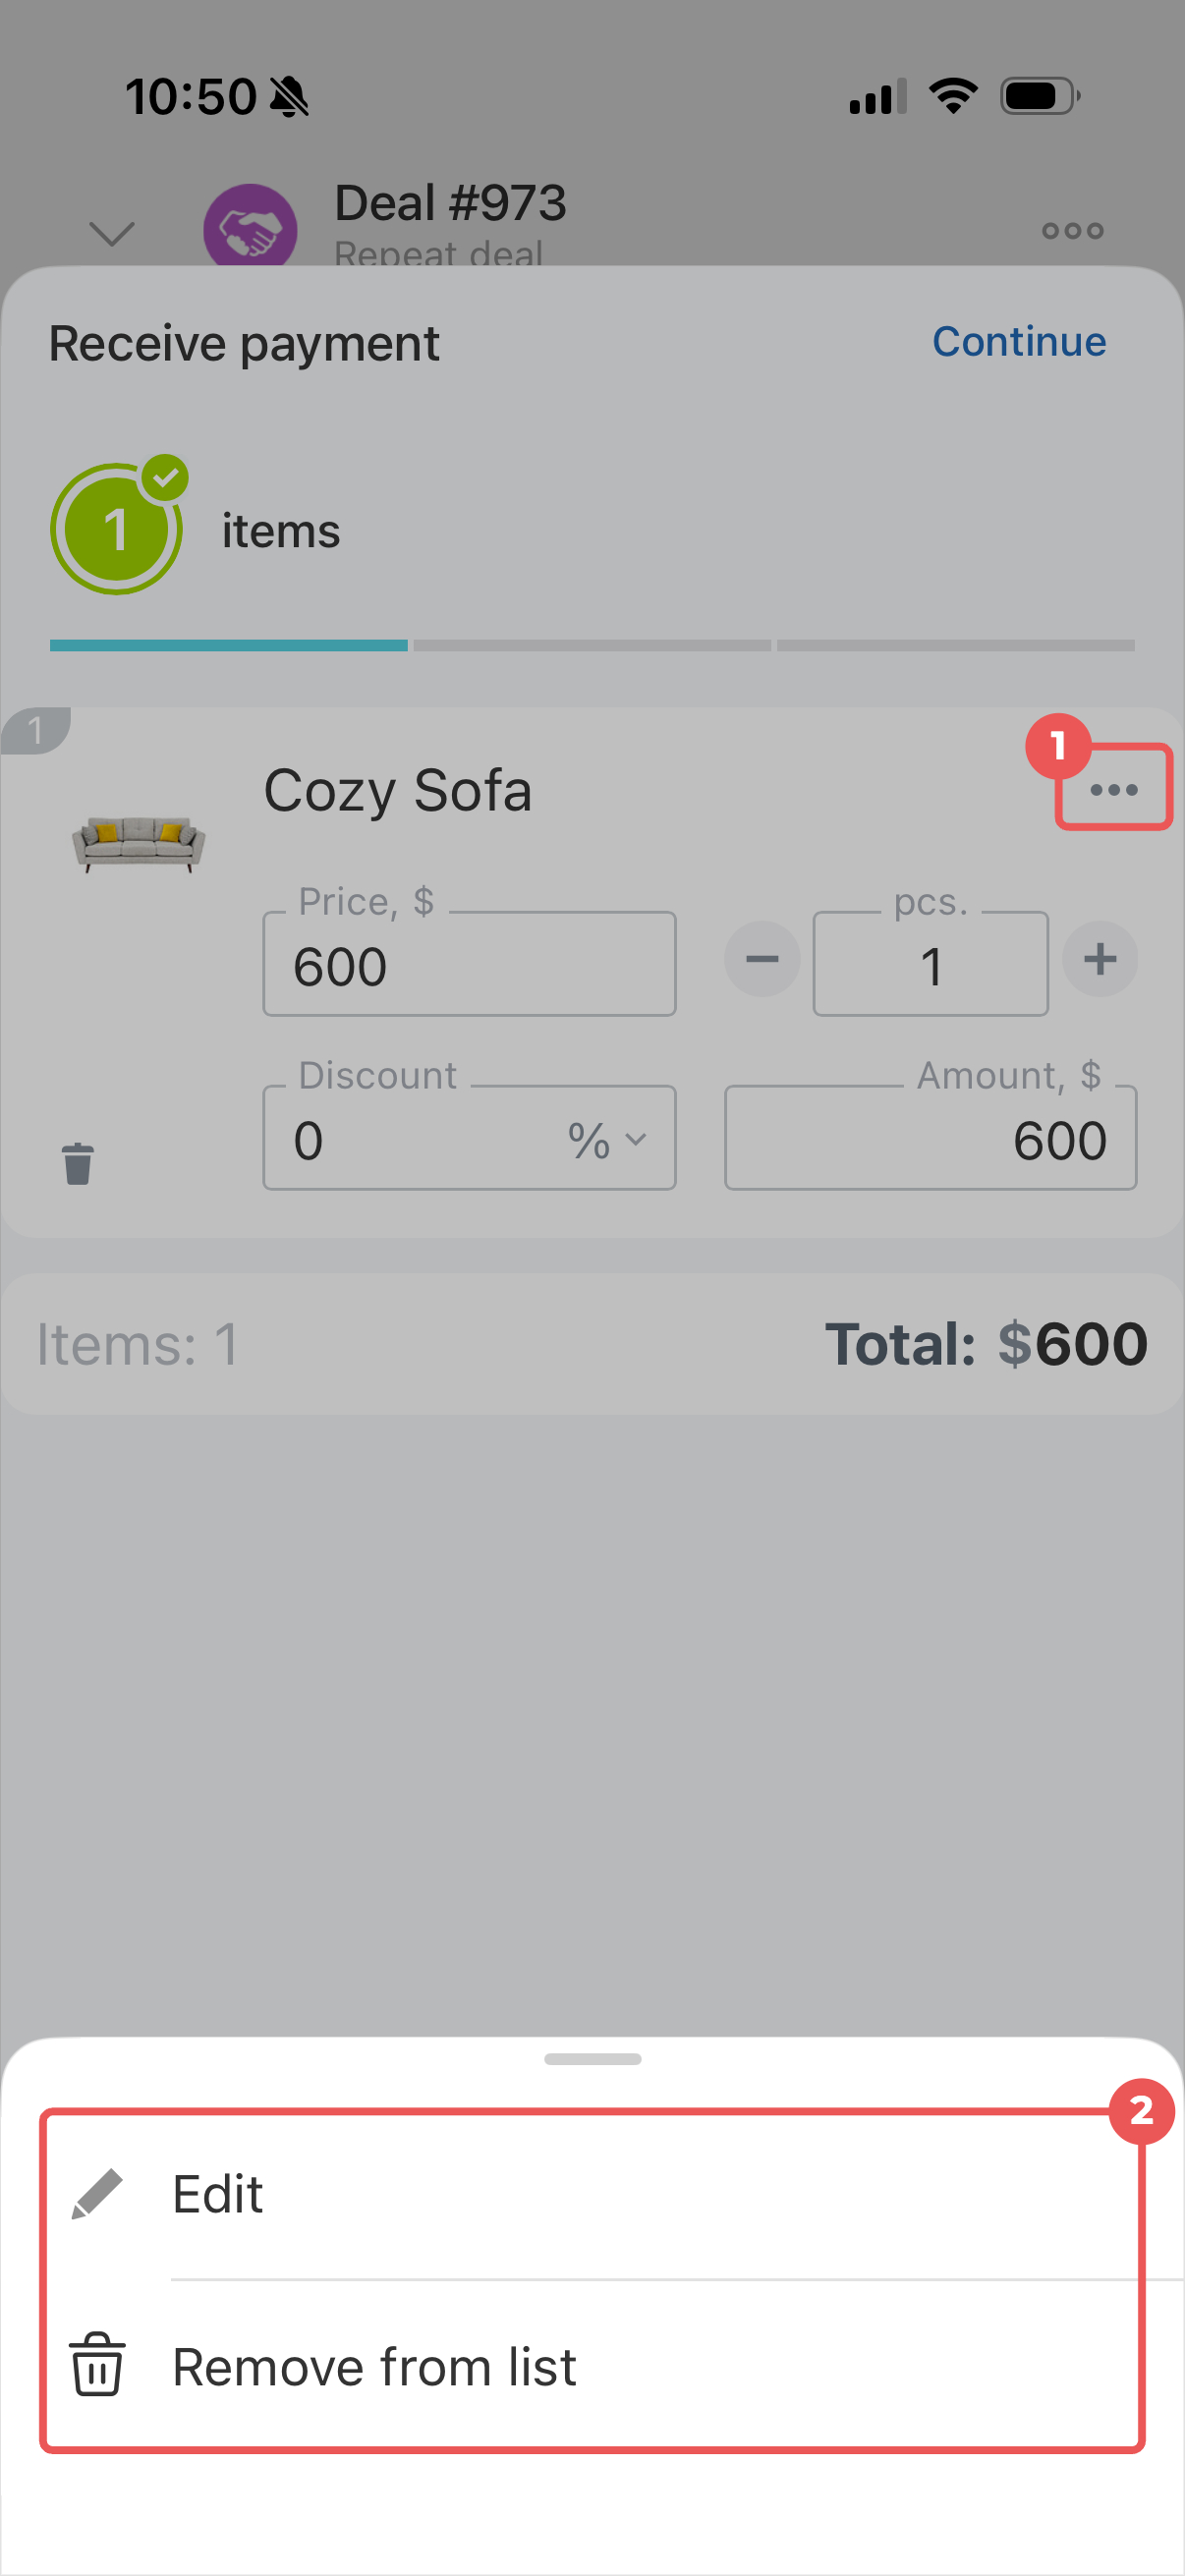
Order items. This block shows the products added to the deal. You can keep the existing list or make changes.
- Tap Three dots (...) next to a product to select a different variant, edit the product, or remove it from the order.
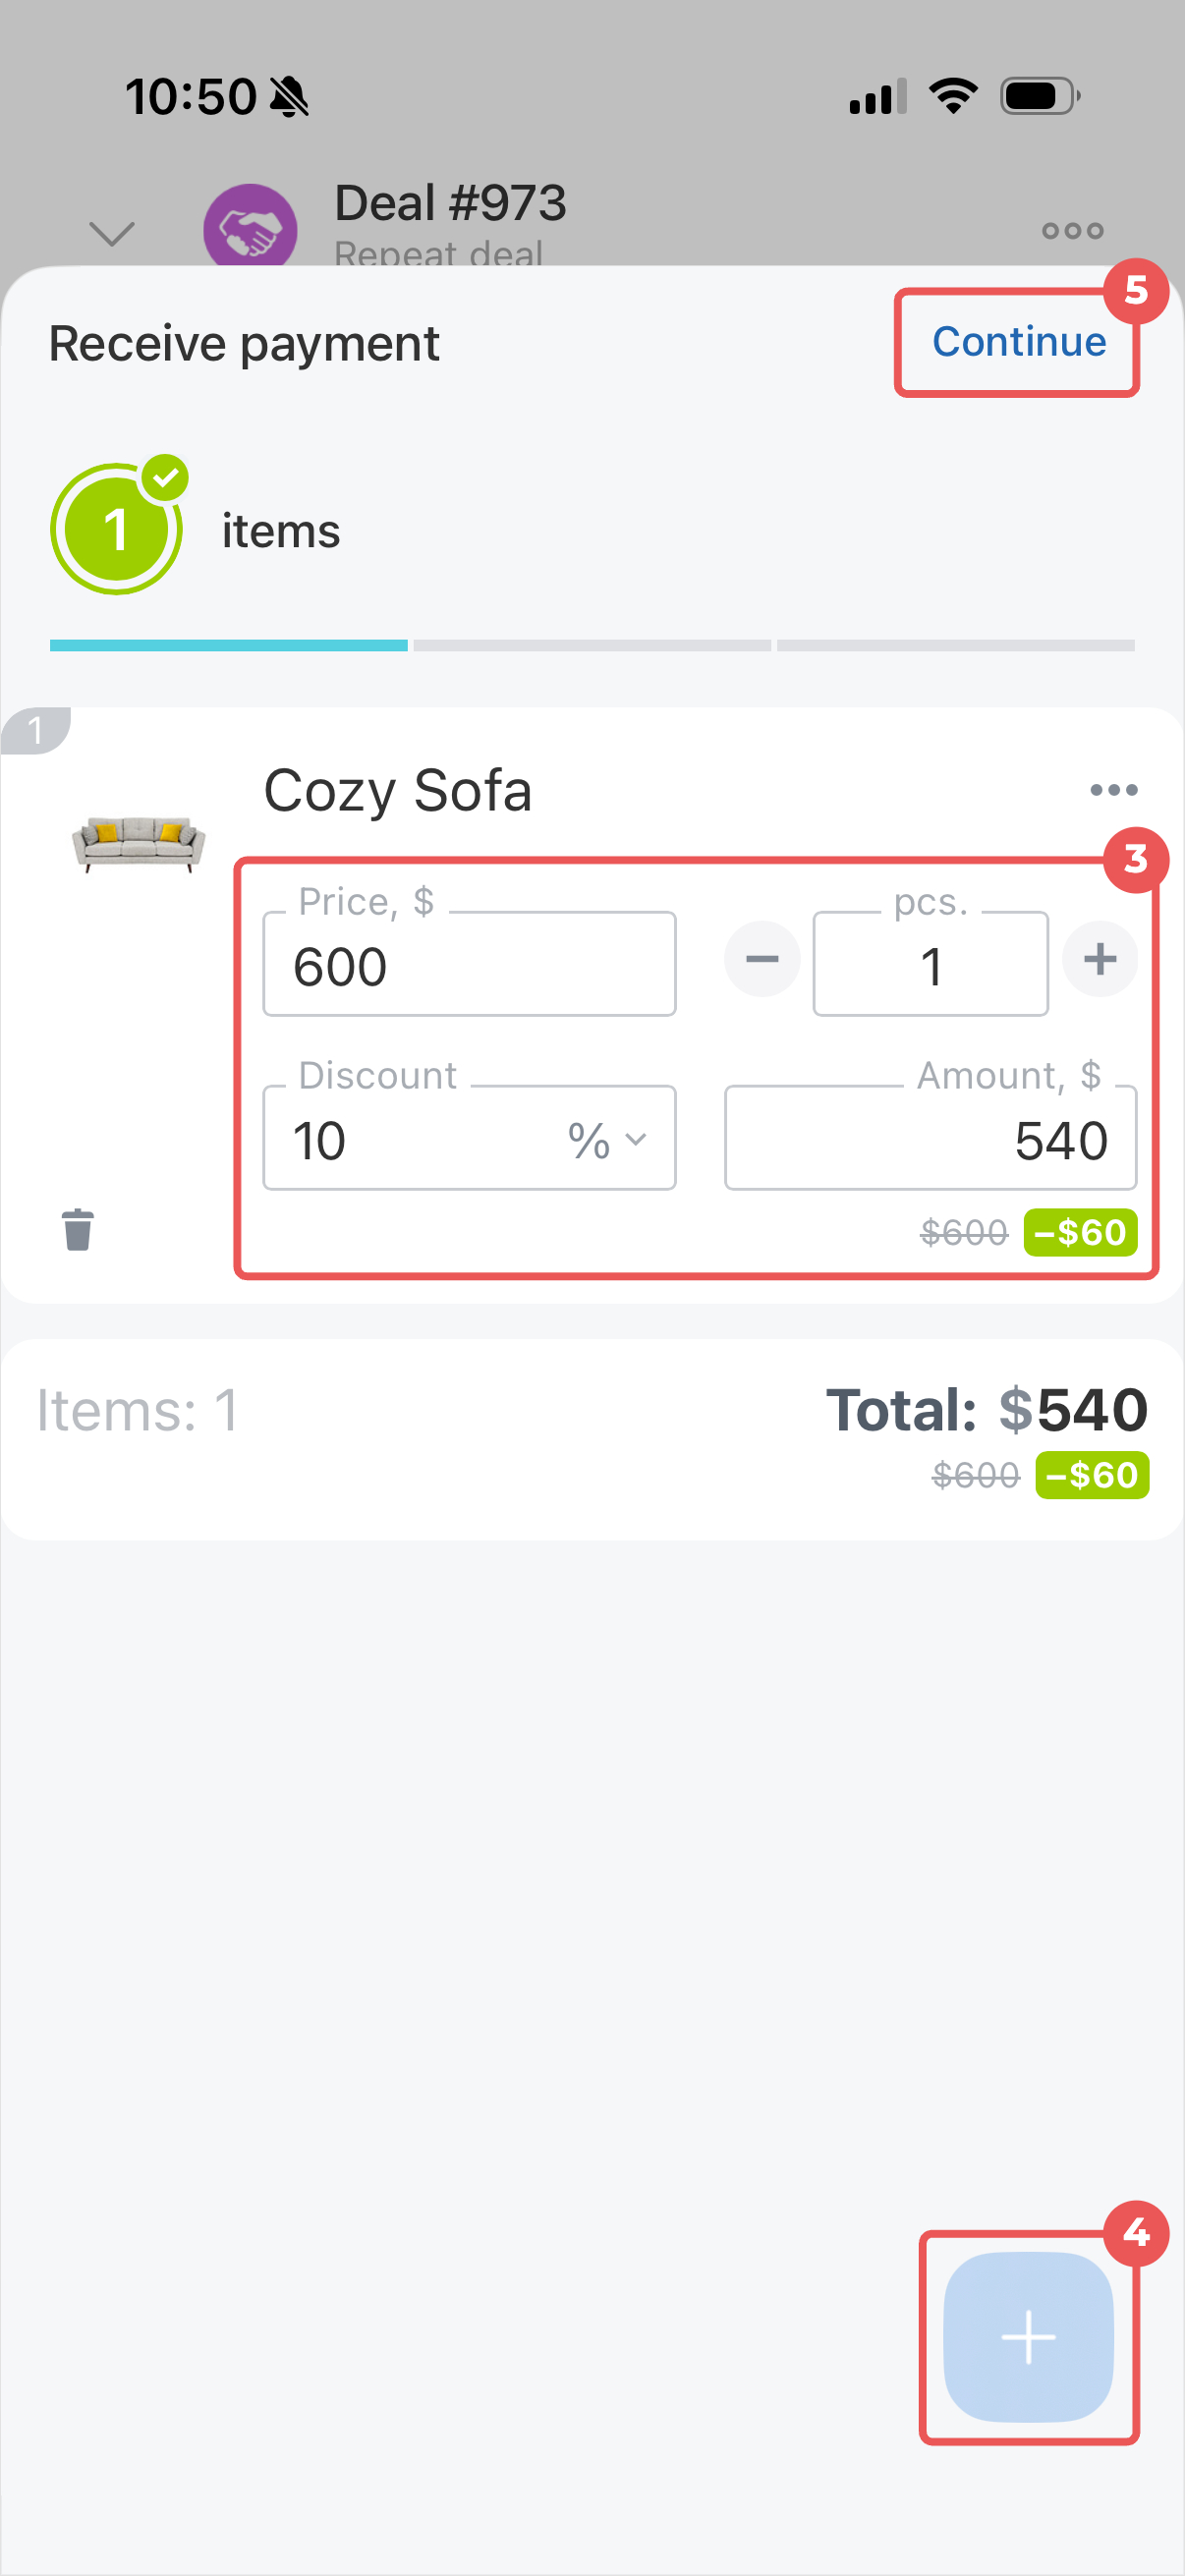
- Change the quantity or price, or apply a percentage or fixed-amount discount. Price changes in the order don't affect the product catalog.
- Tap Plus (+) to add more products to the order.
- Tap Continue.
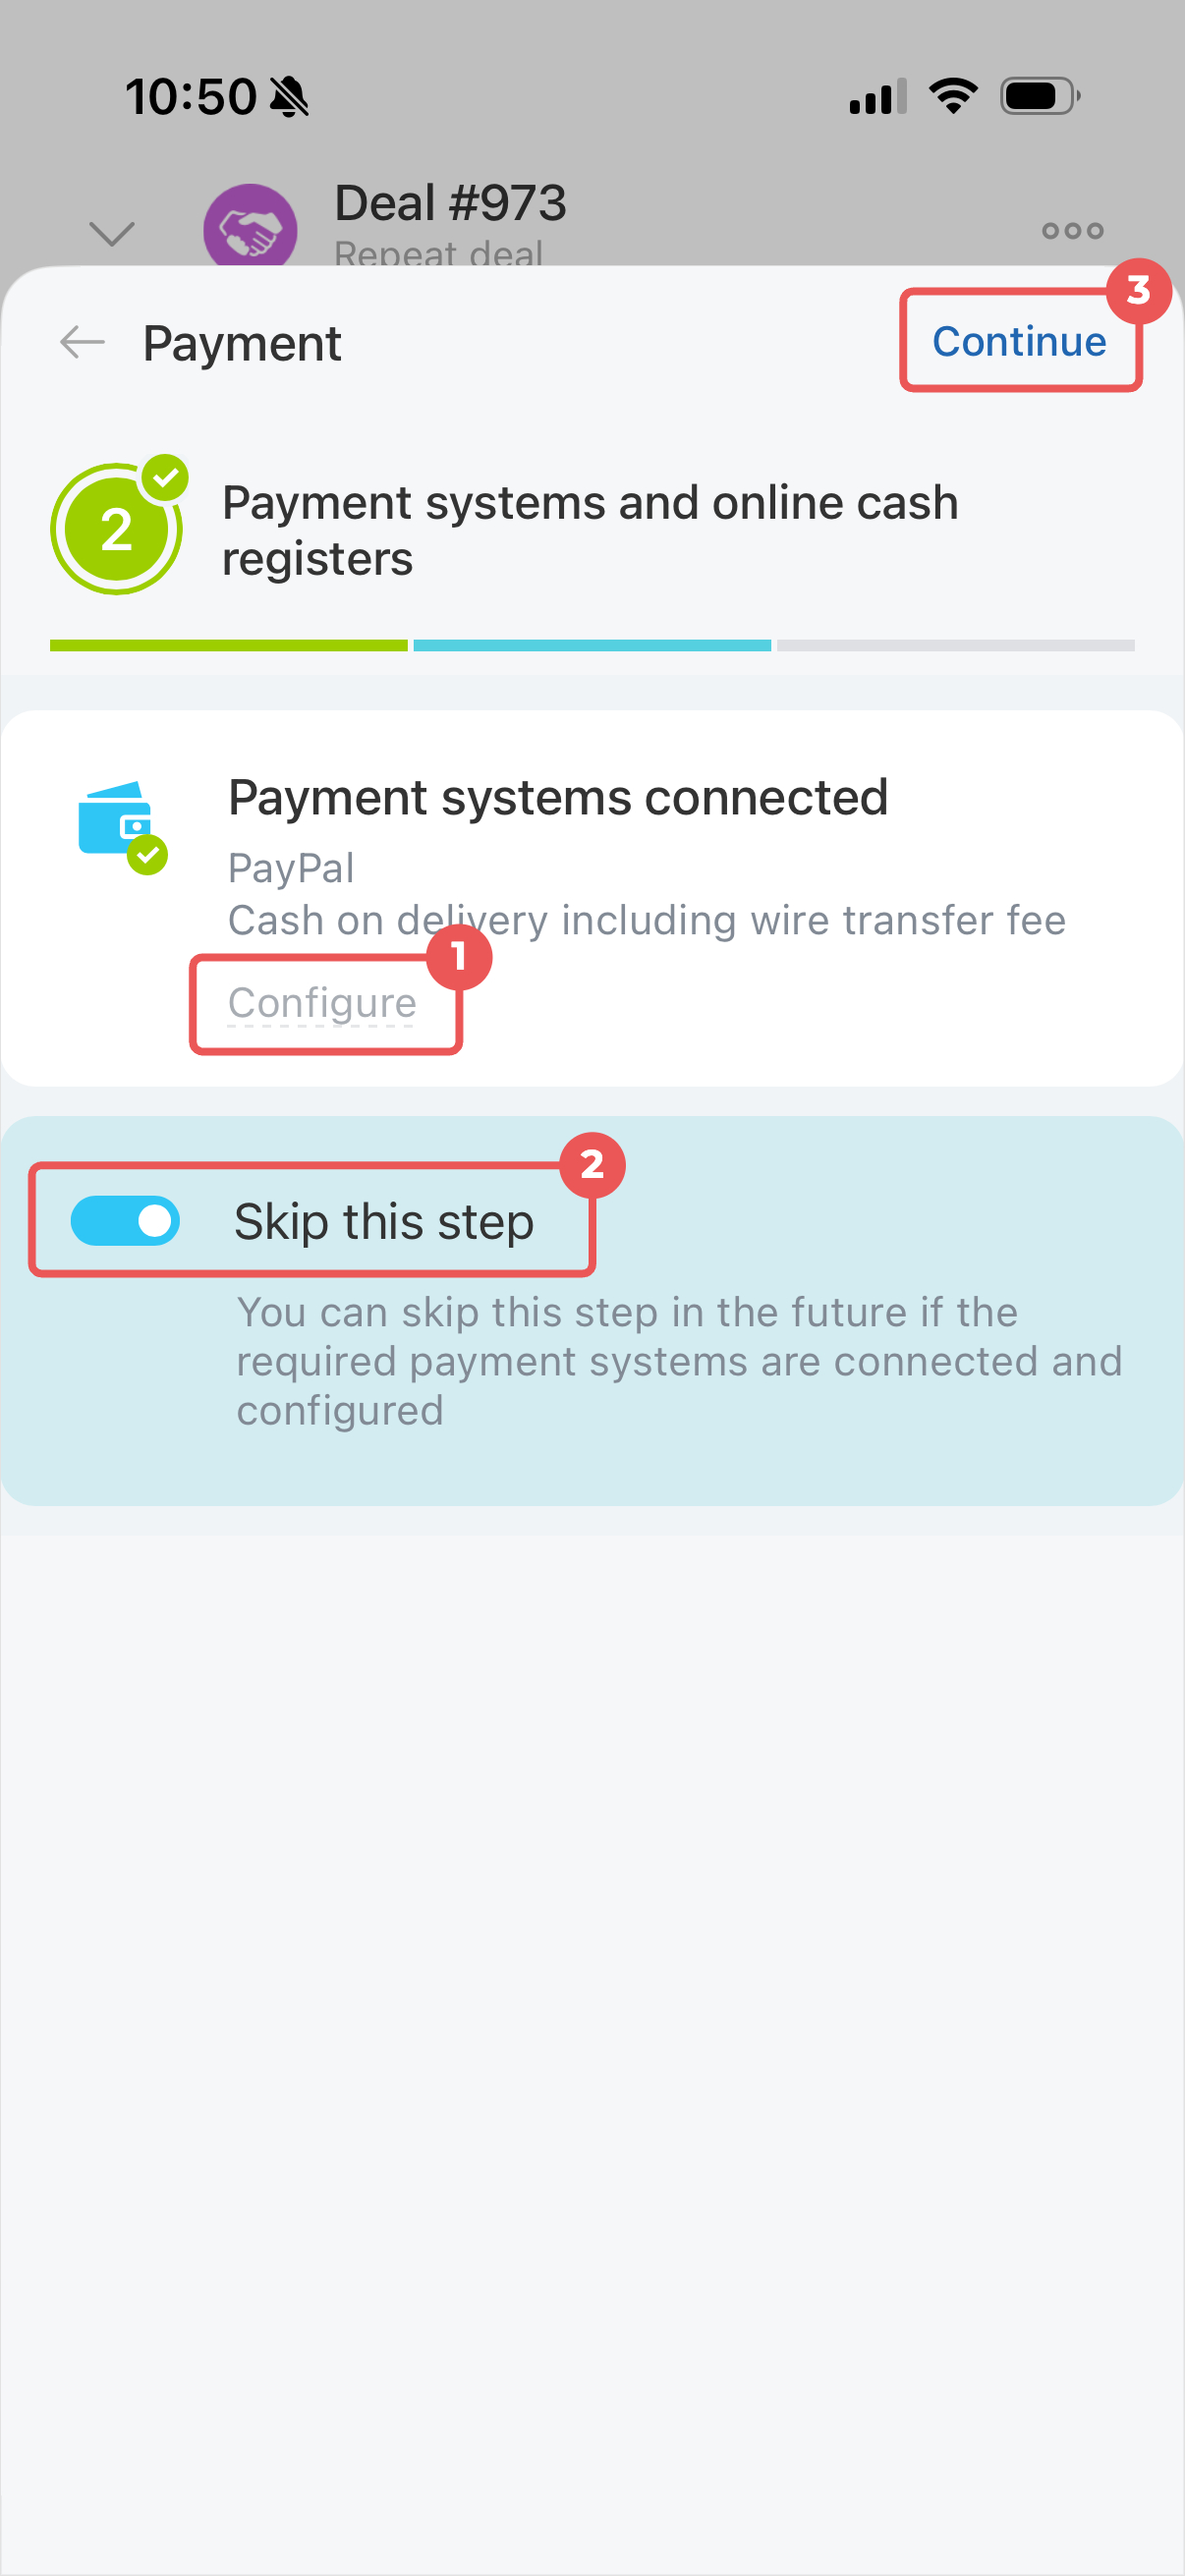
Payment systems. This block shows your connected payment systems. To add another payment option, tap Configure.
If you've already connected the services you need, tap Skip this step. This screen won't appear the next time you accept payment.
Tap Continue.
Receive payment. This block shows the phone number and communication channel Bitrix24 will use to send the payment link. By default, Bitrix24 selects the phone number you last used to contact the customer.
Tap Send.
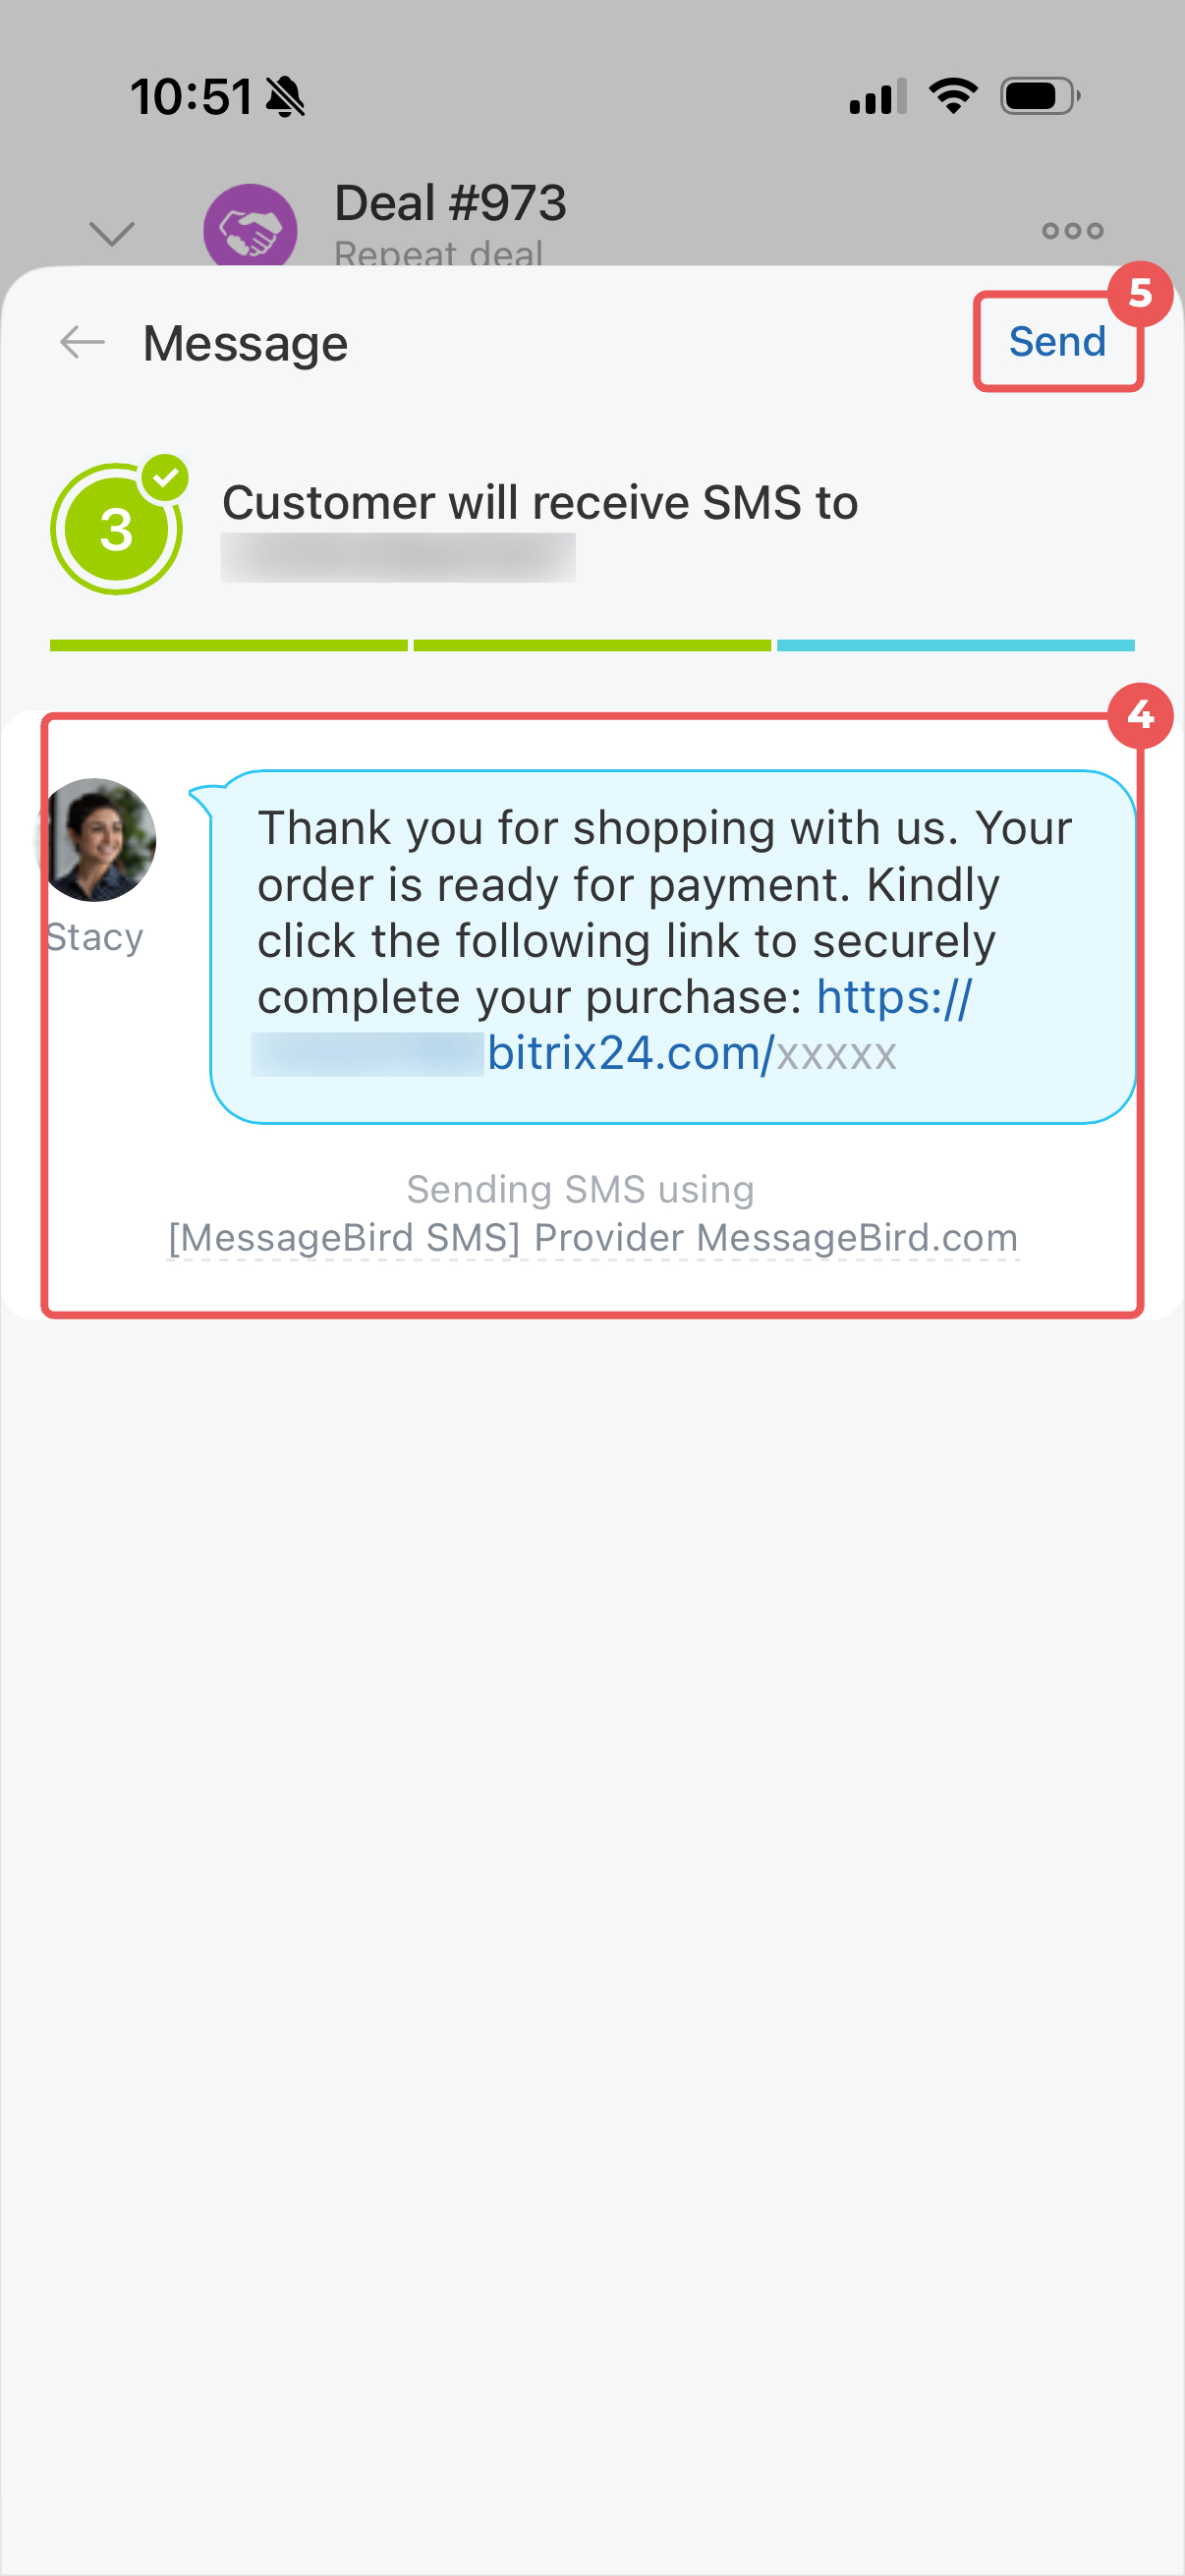
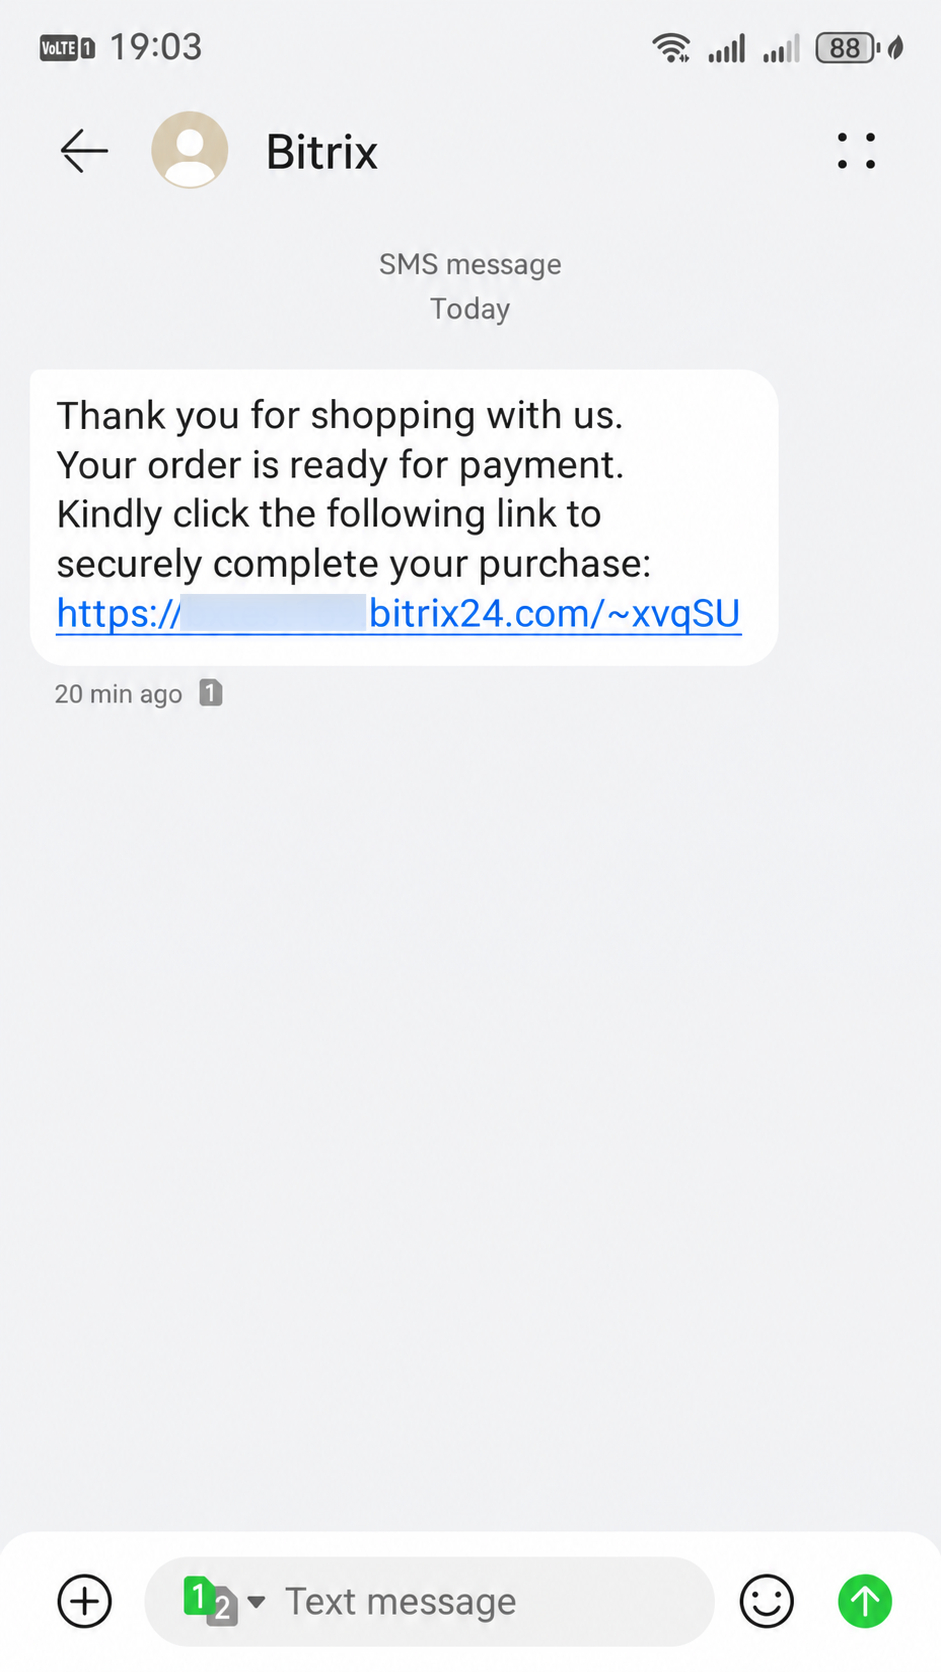
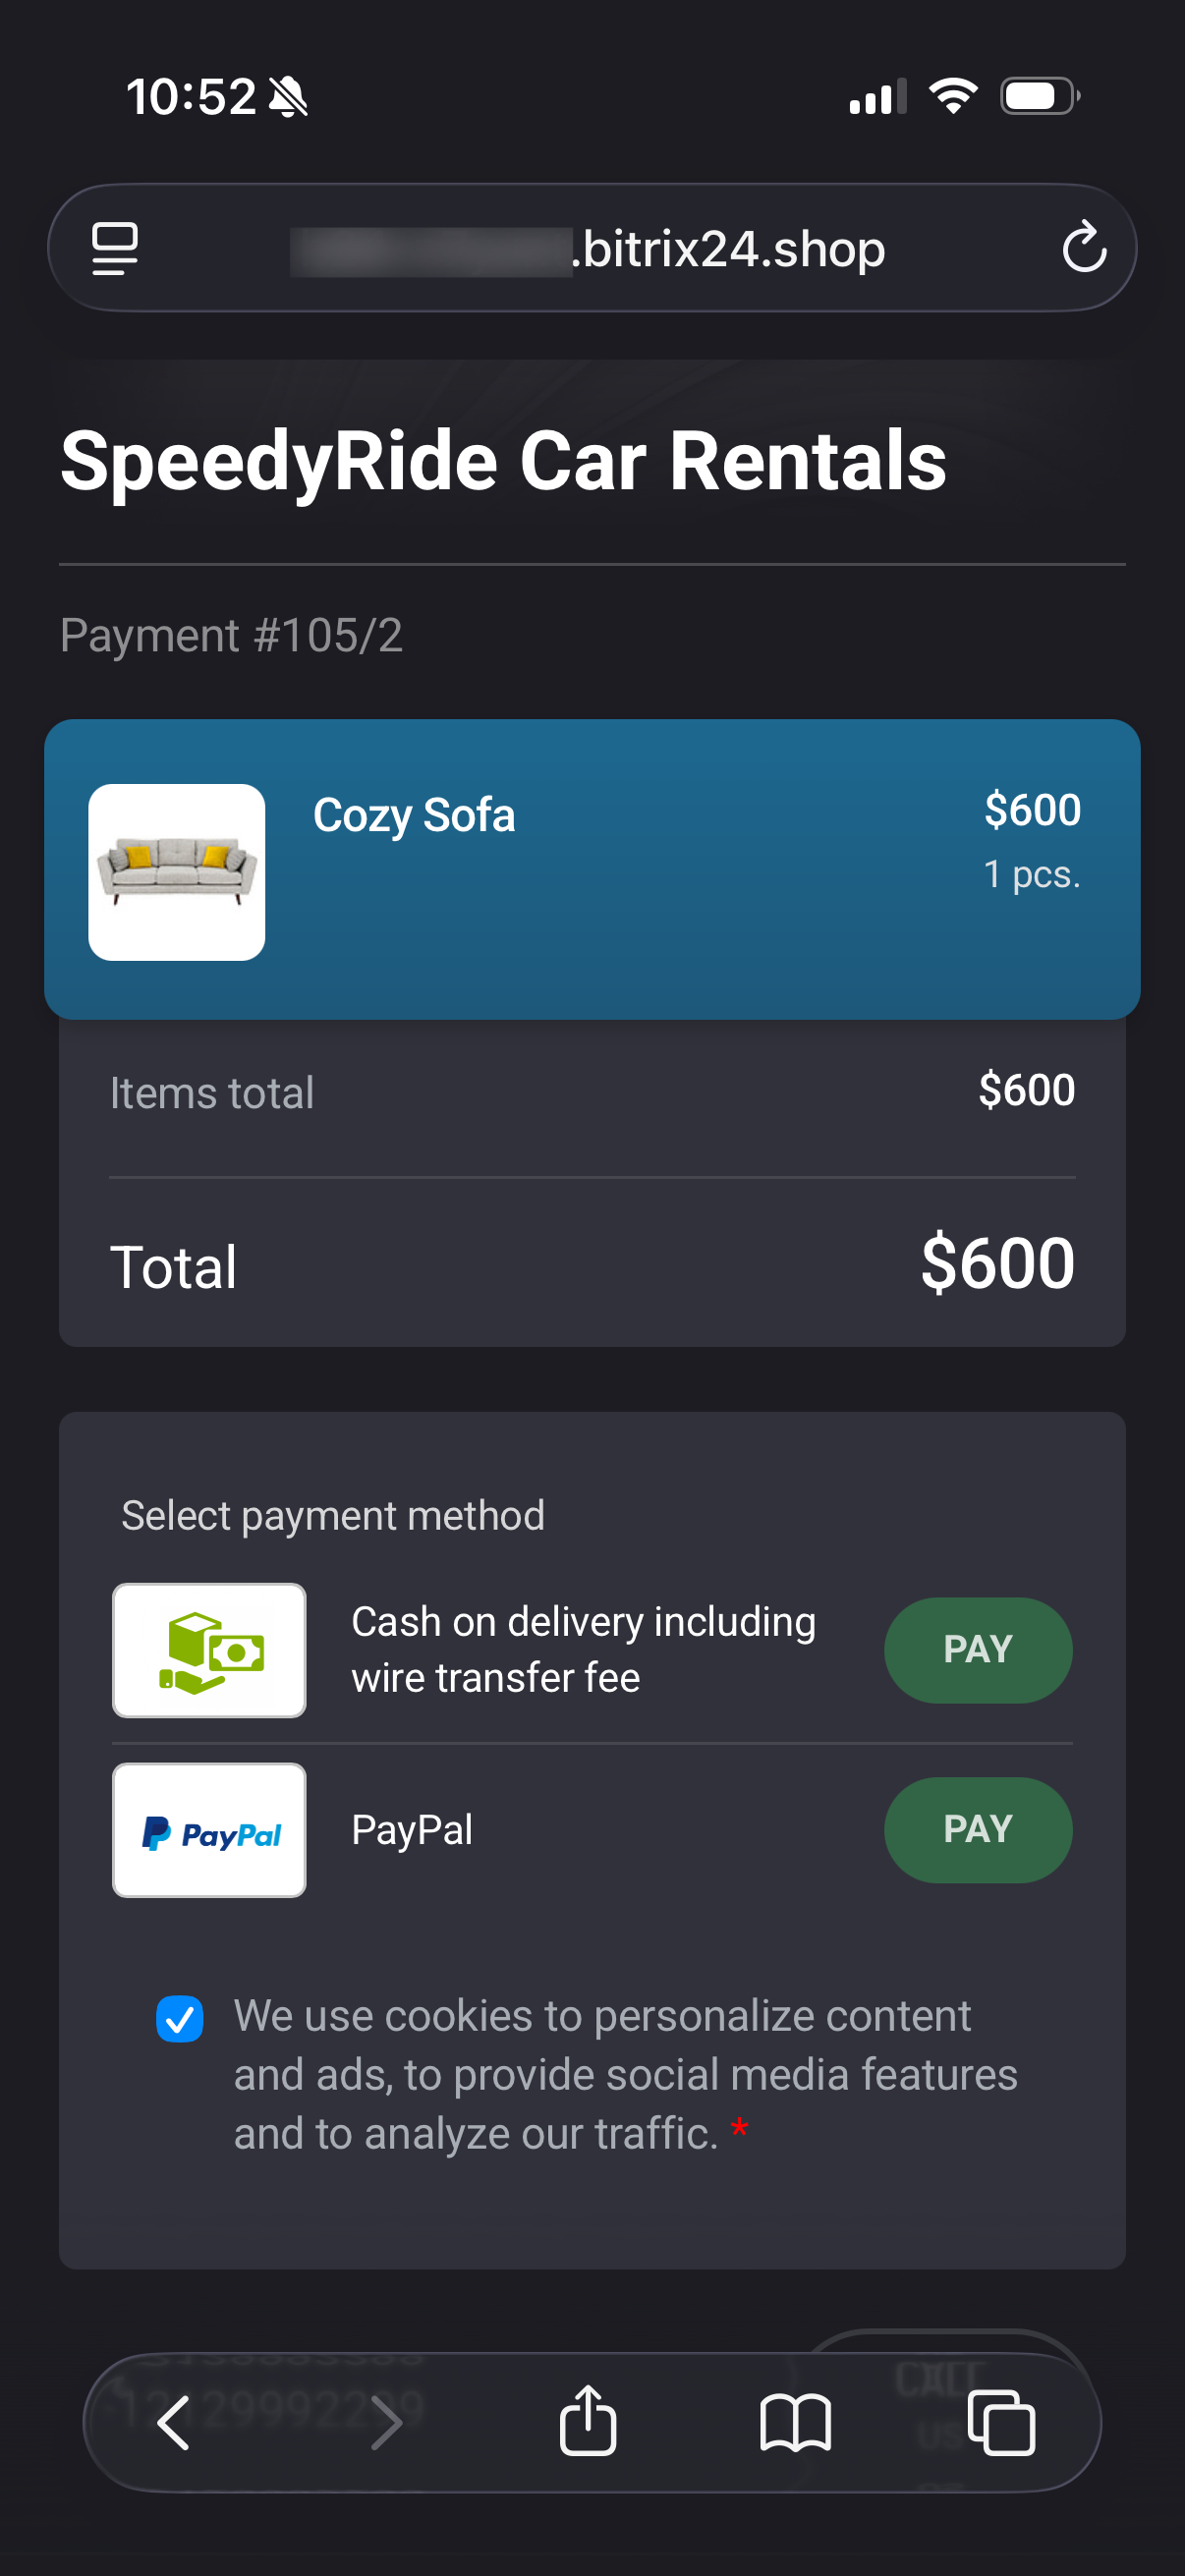
How payment by link works
The customer receives a message with a link to the payment page. They can review the order details and complete the payment using an available payment method.
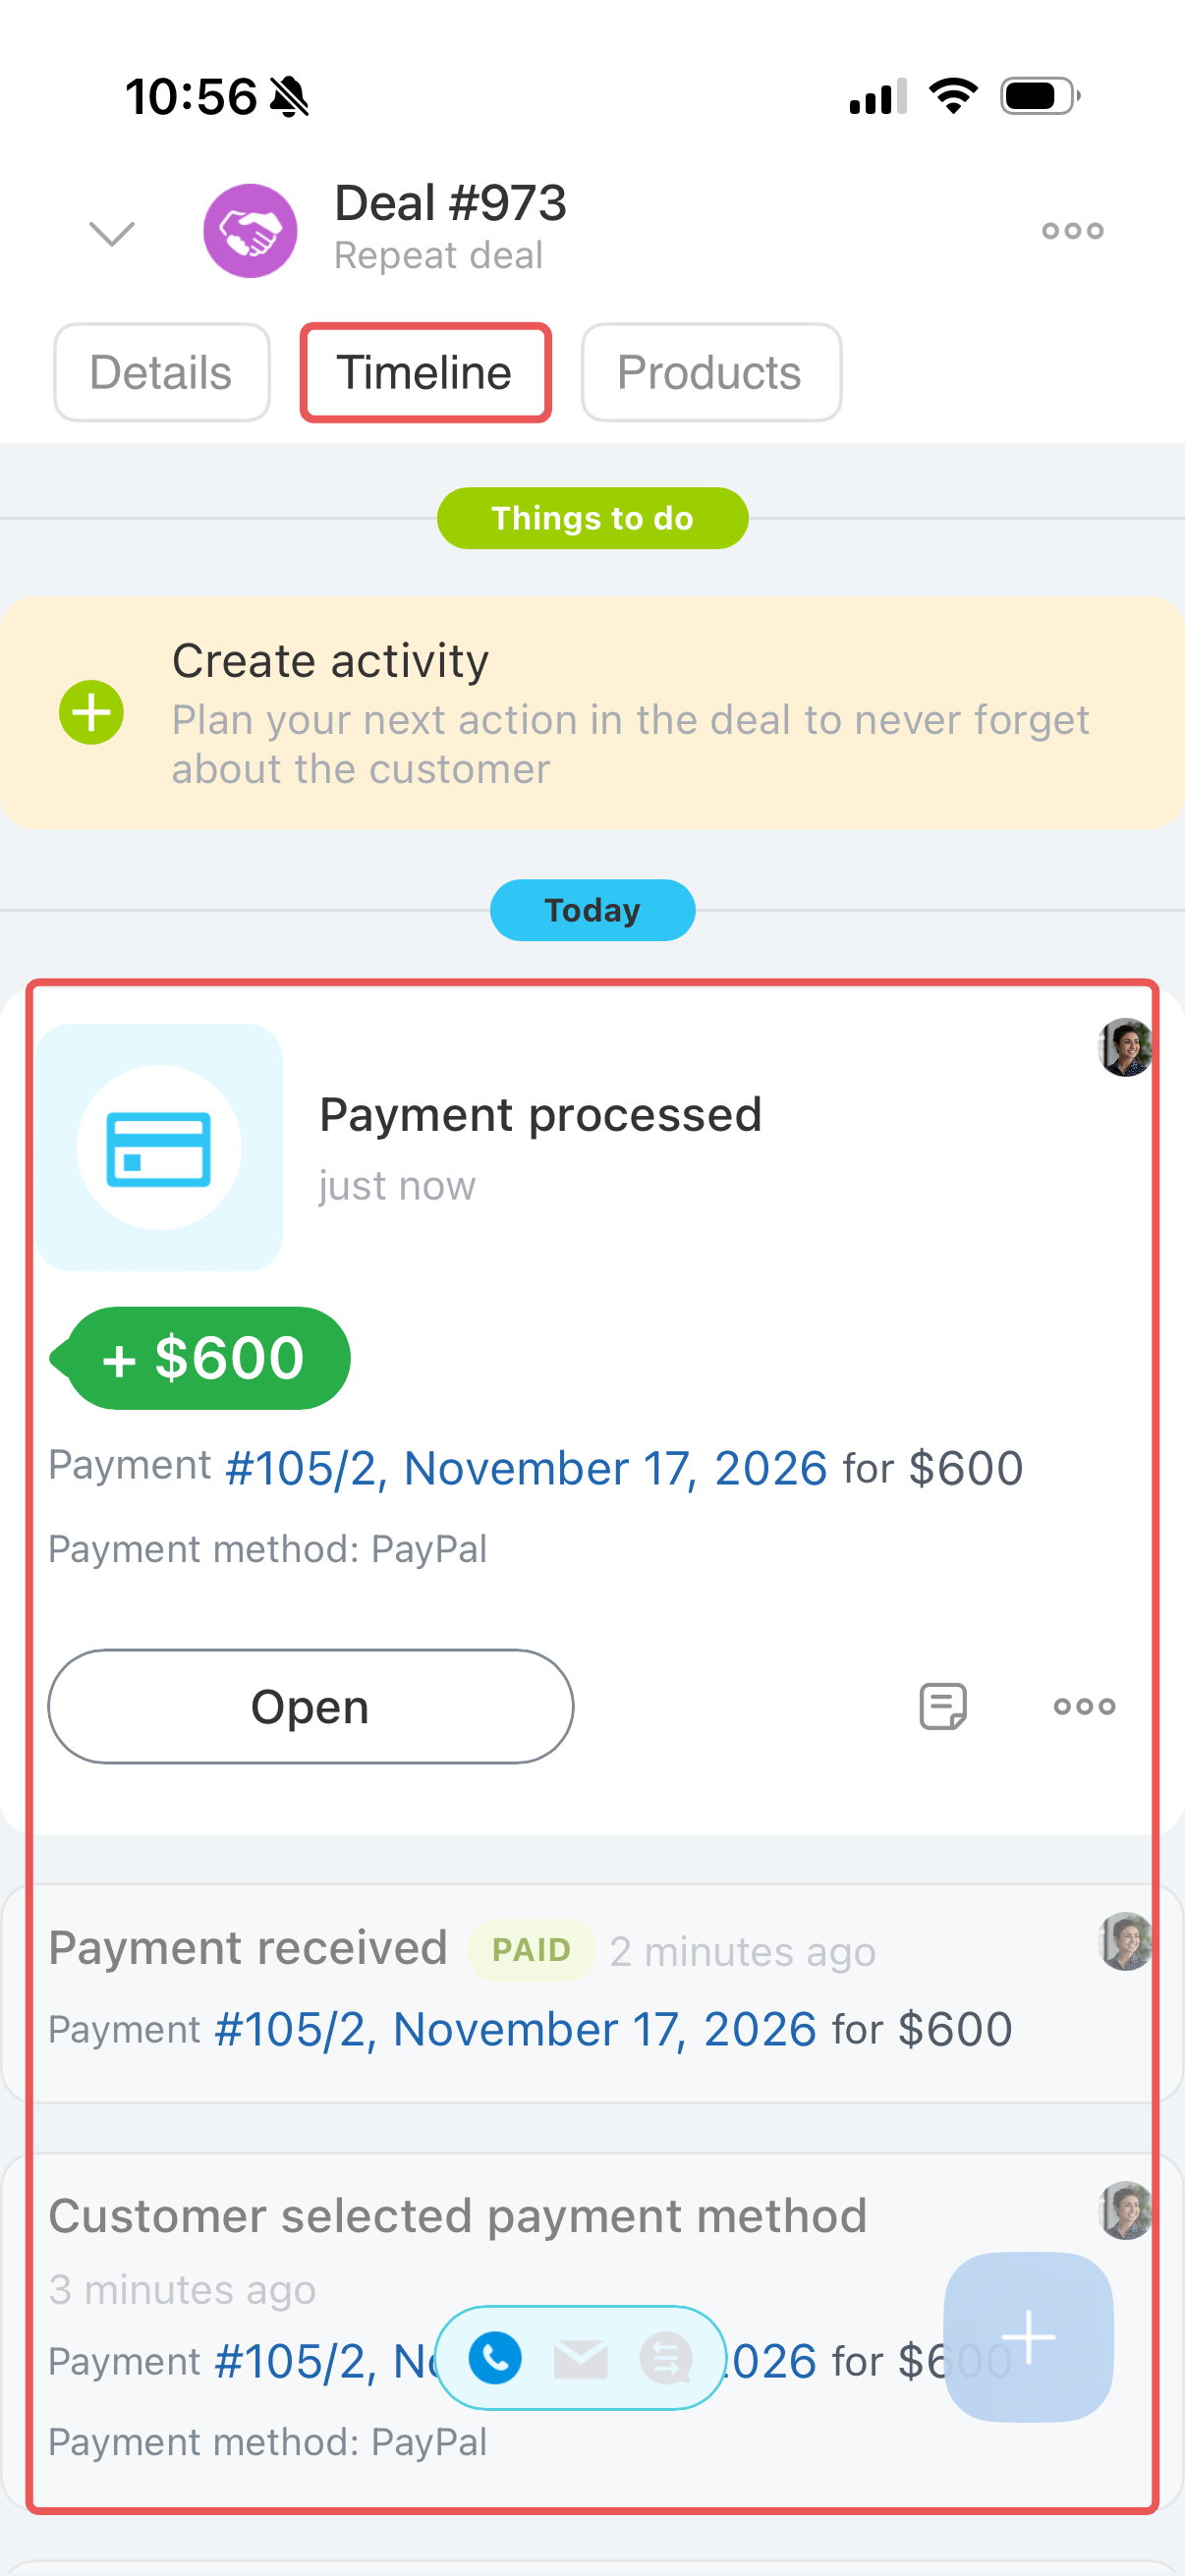
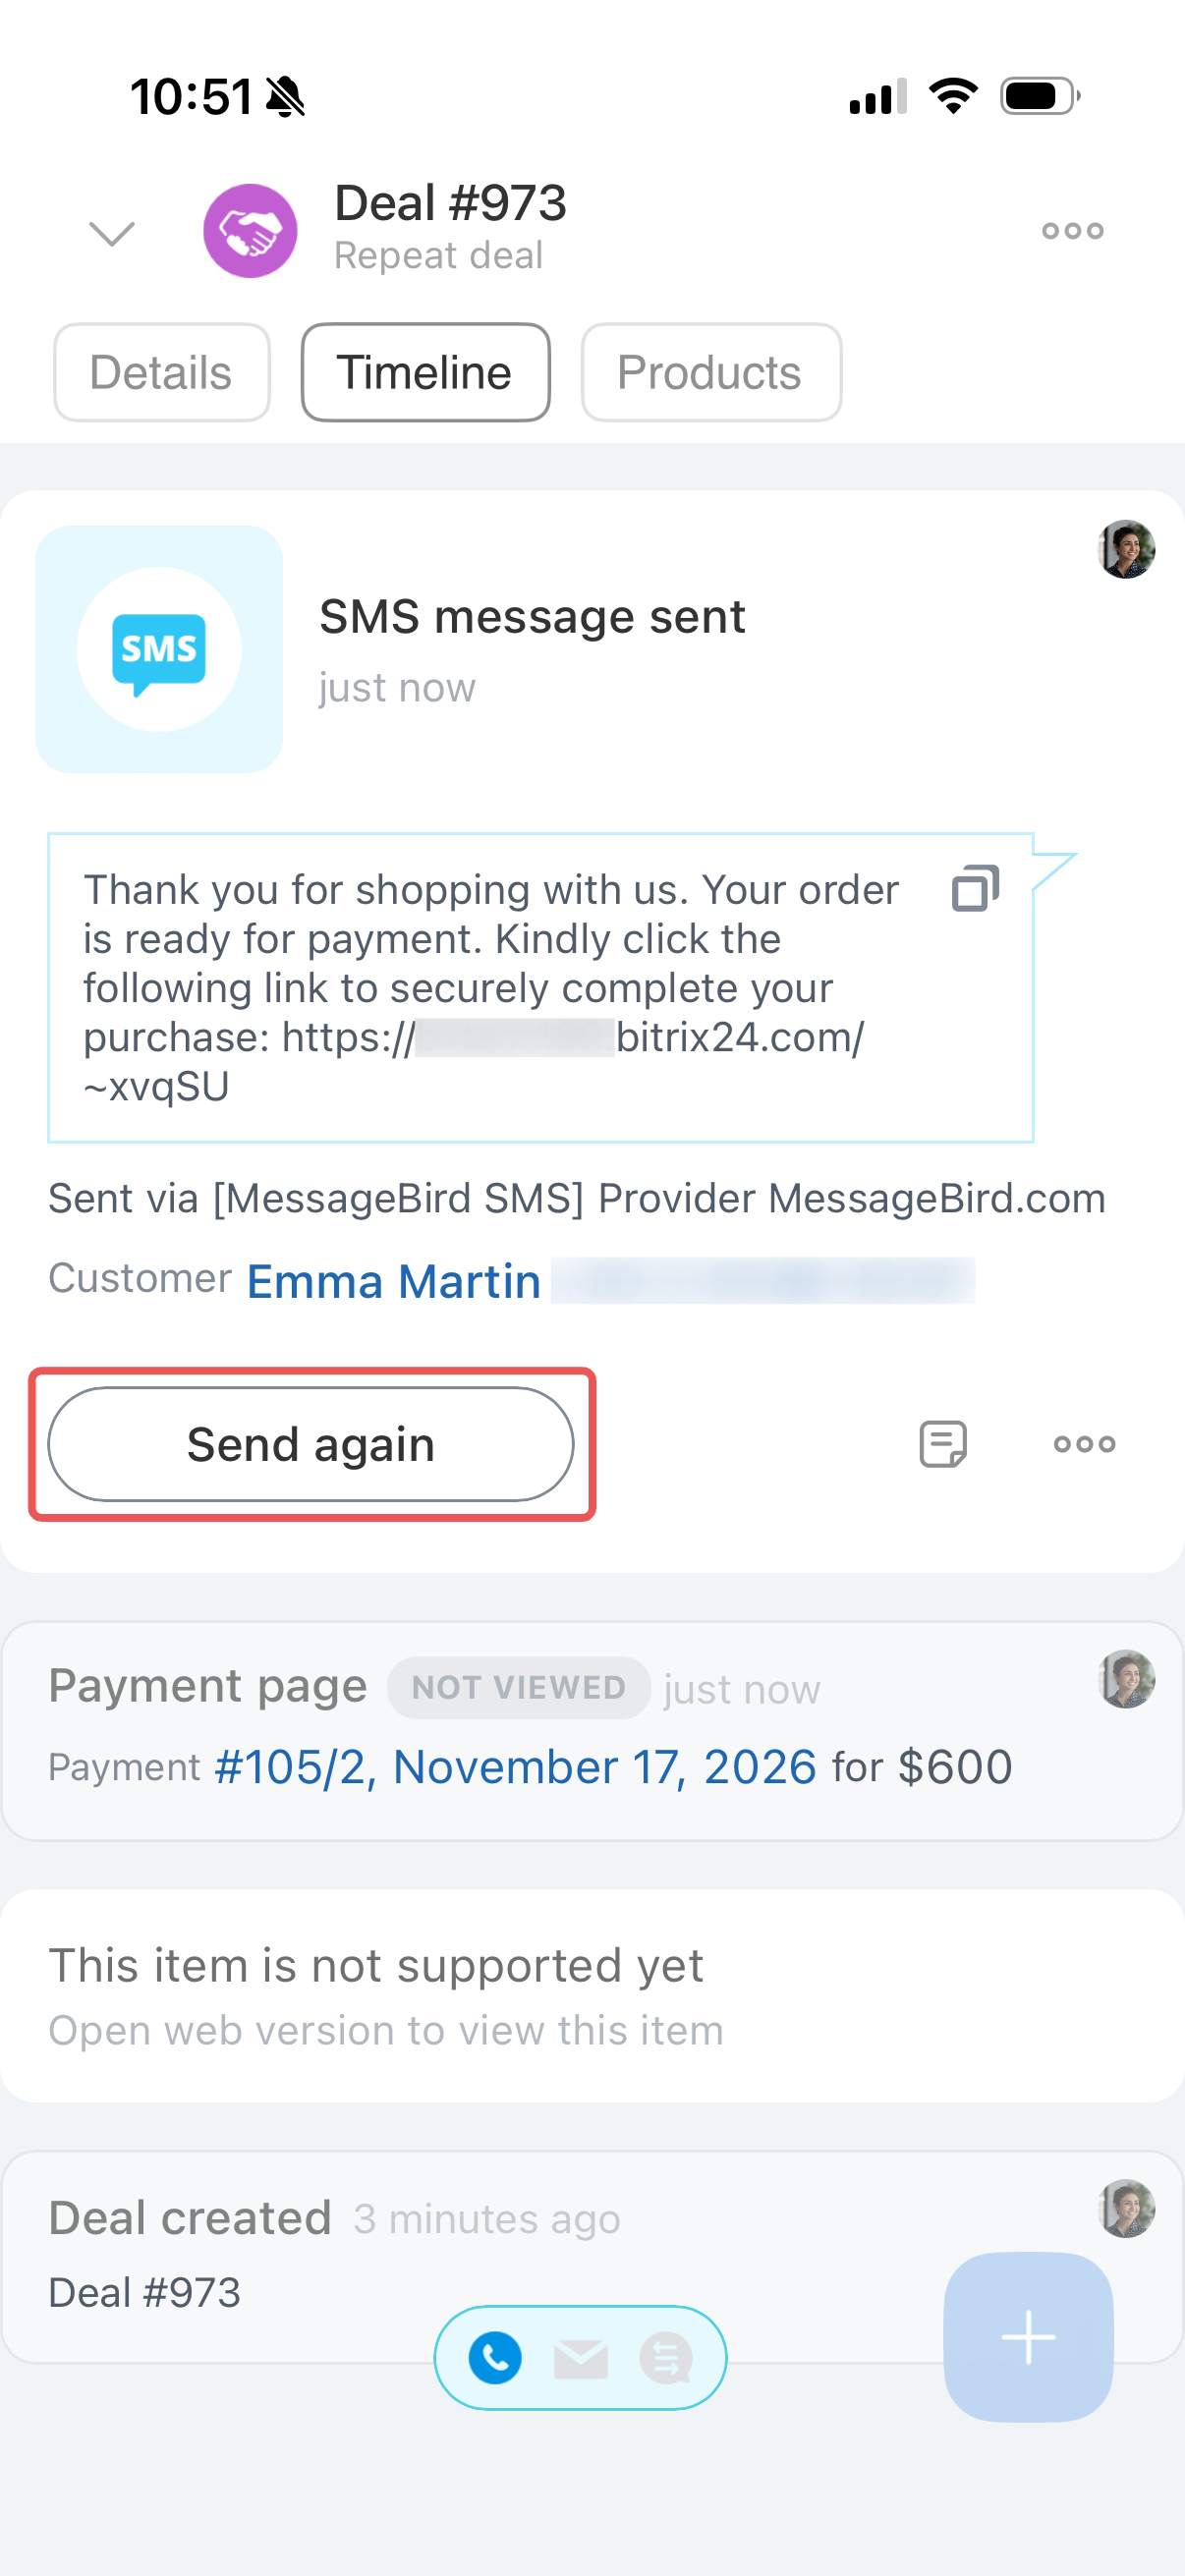
Bitrix24 saves message, payment, and delivery details in the deal timeline. If the customer didn't receive the payment link, find the message activity in the timeline and click Send again.
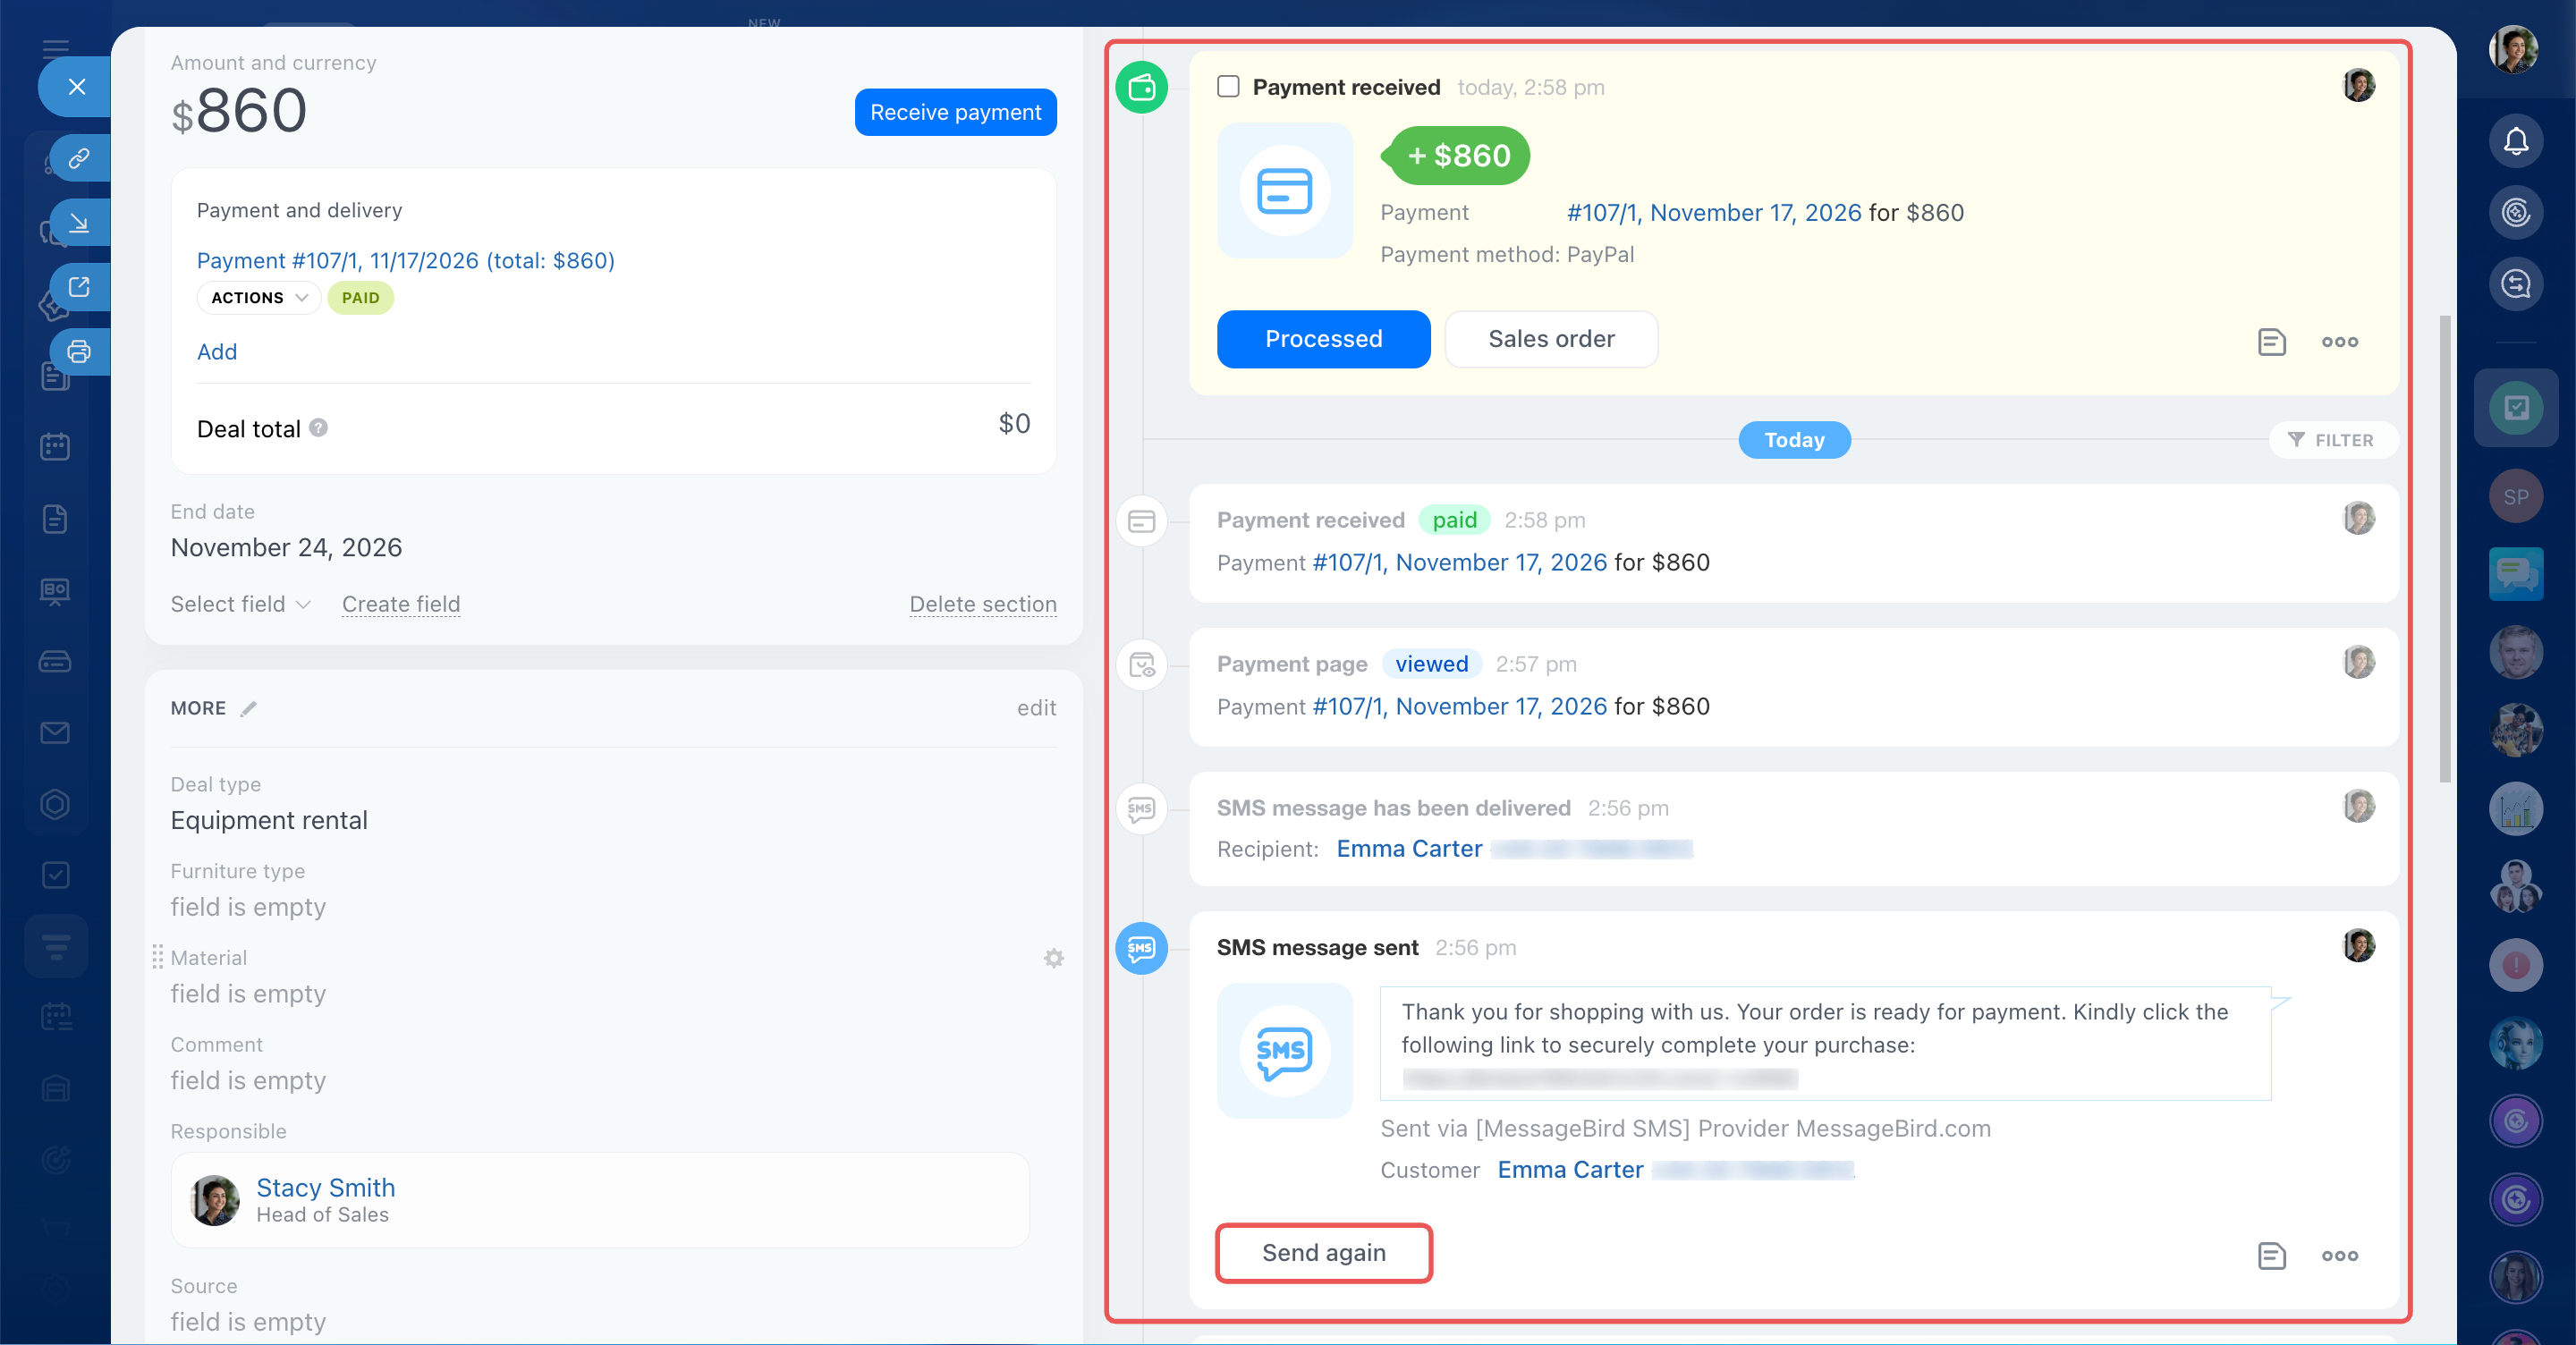
Bitrix24 saves message, payment, and delivery details in the deal timeline. If the customer didn't receive the payment link, find the message activity in the timeline and tap Send again.
In brief
- Accept online payments directly from a deal form, with or without delivery. Bitrix24 automatically calculates the order total and creates a payment link for the customer.
- Send payment links from either the web version or the Bitrix24 mobile app.
- To accept payment, open a deal and click or tap Receive payment. Add products, connect payment and communication services, and configure automation as needed.
- Customers can review their orders and pay using the link. Bitrix24 saves message, payment, and delivery details in the deal timeline.
- If the customer doesn't receive the link, find the message activity in the deal timeline and click or tap Send again.