Mind Map helps you to visualize personal or team objectives. In addition to standard Mind Map app features, you can assign users, create tasks and events – all associated with your Bitrix24 account.
If you are a Mind Map user, make sure to update your app in the Installed subsection within the Market section in your account's left menu.
If you are just considering to try the app, these feature will be available to you by default.
How to install Mind Map app
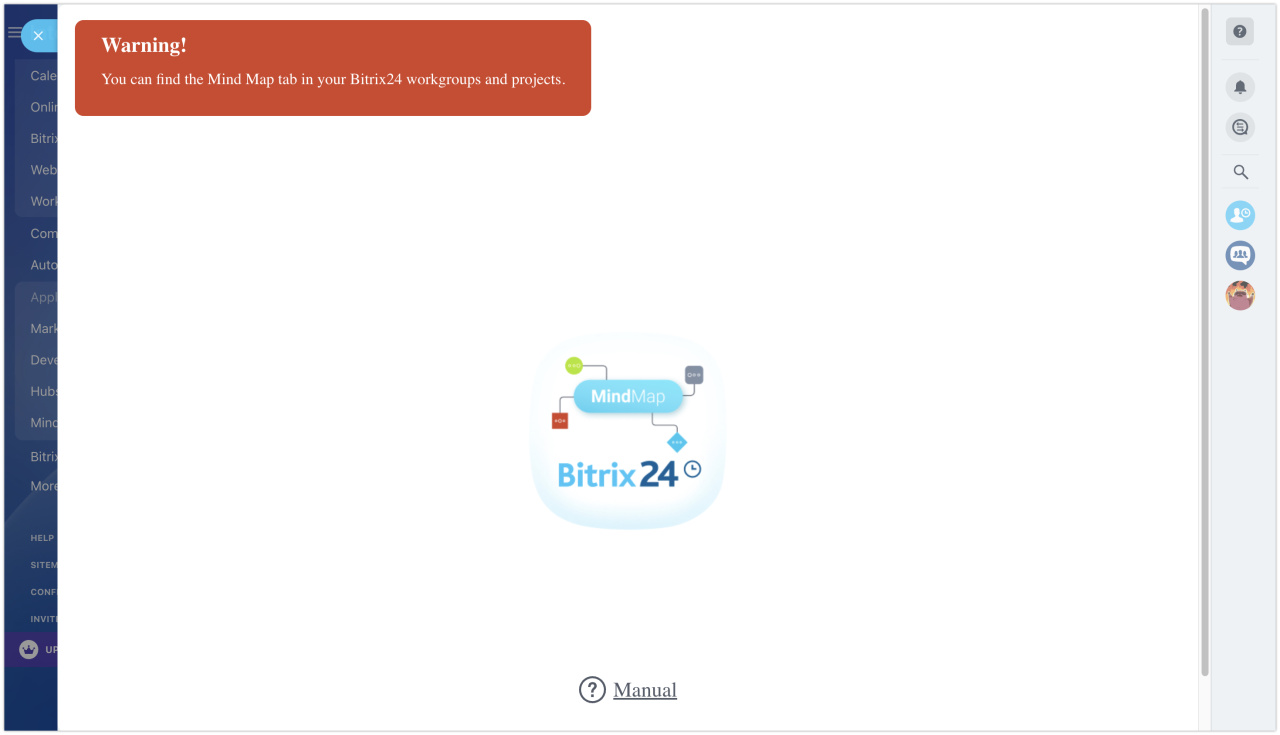
At the end of Mind Map app installation, you will get a warning that the Mind Map app can be used only in workgroups and projects.
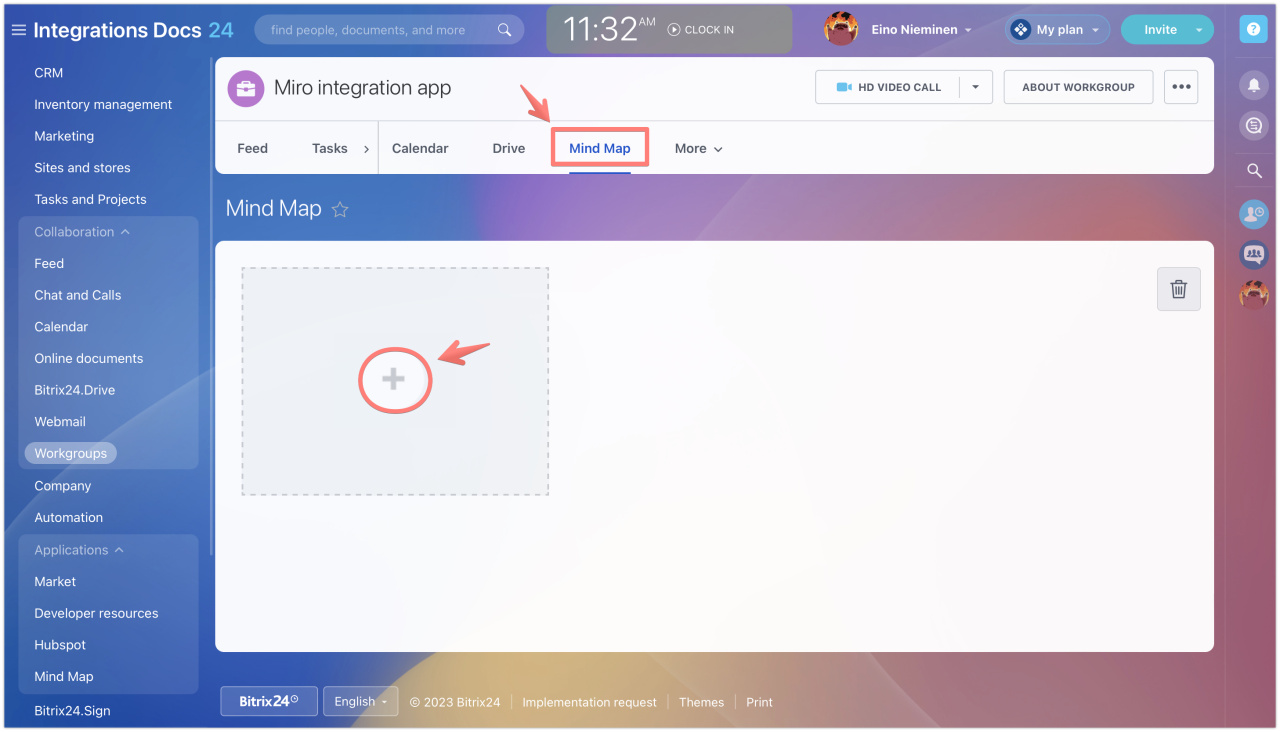
How to create a mind map
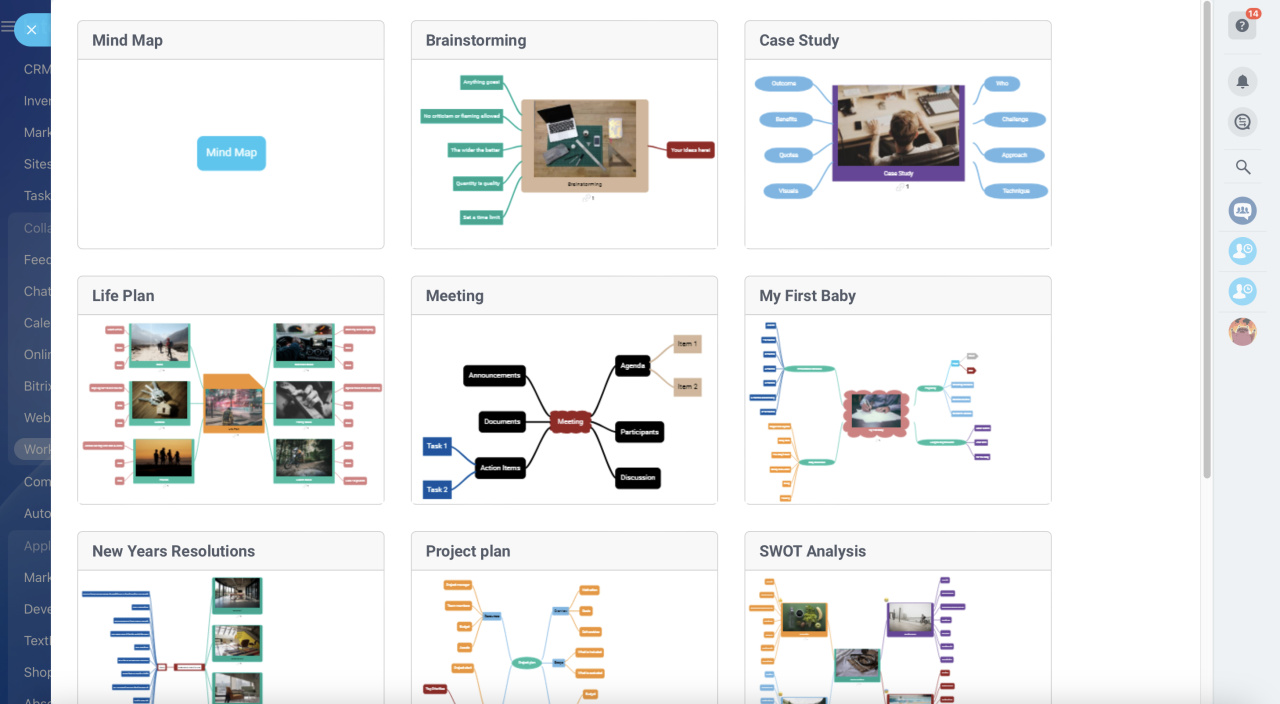
Select the most suitable mind map template. You can reframe it as you like later on.
Read-only mode is enabled for other users by default. However, you can assign editor rights to your colleagues in the Permissions tab.
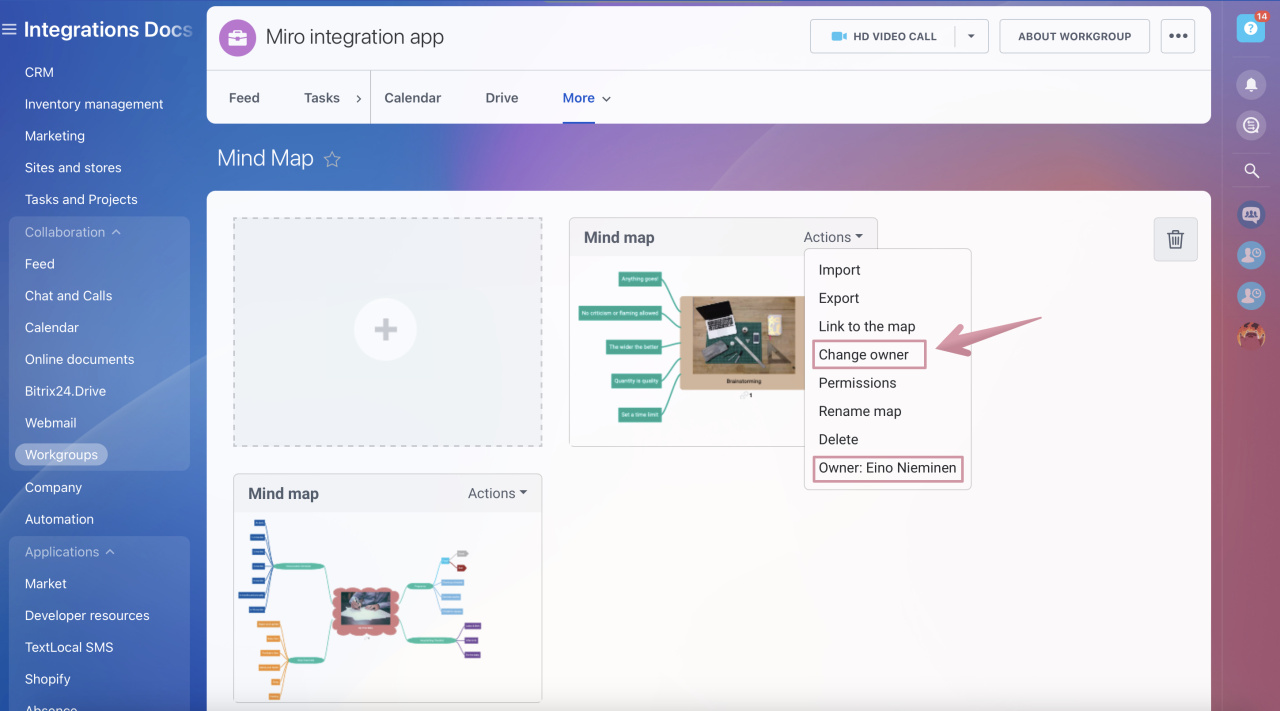
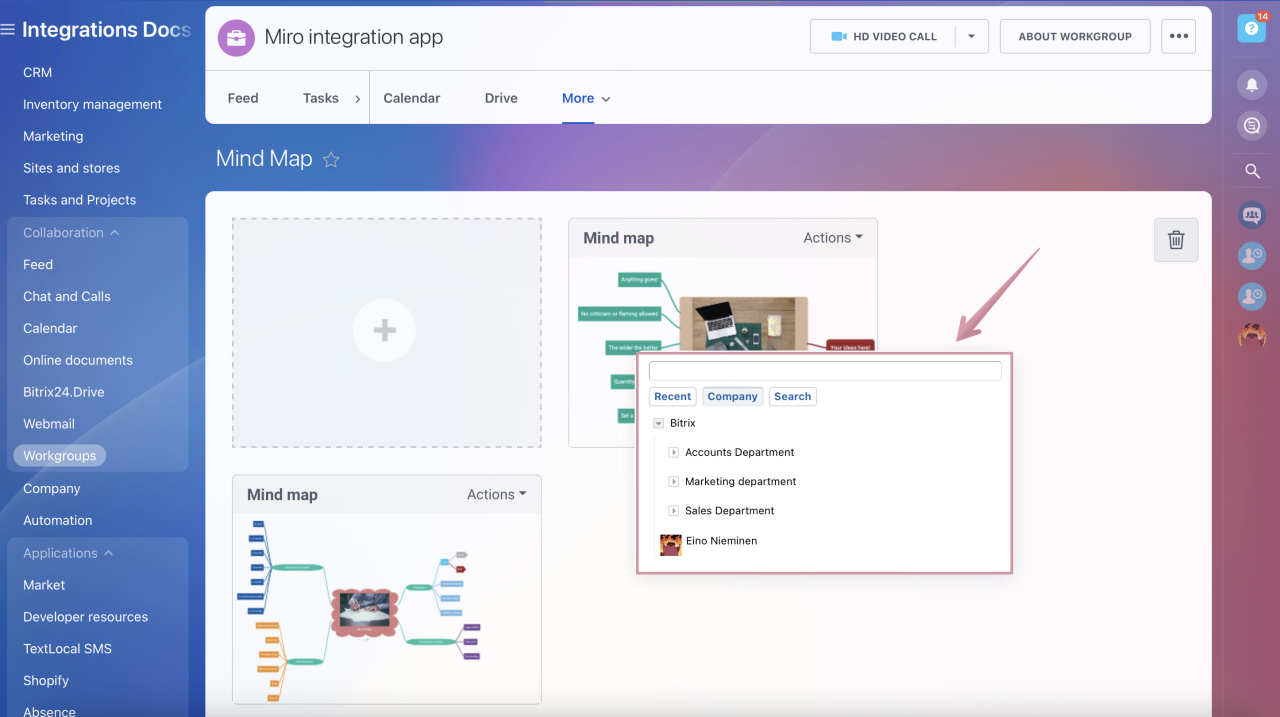
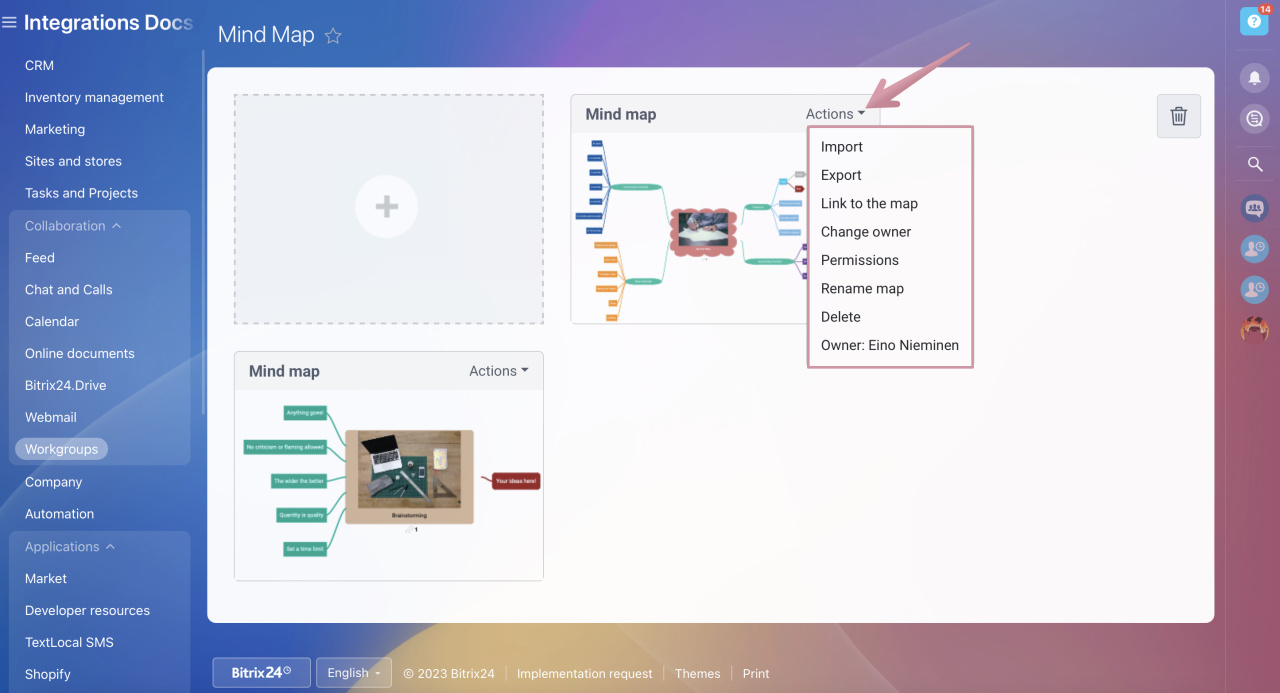
The owner (creator) of the mind map can change ownership by clicking Actions > Change owner. The current owner is also displayed in the context menu, so that you can check ownership structure for specific maps anytime.
How to configure a mind map
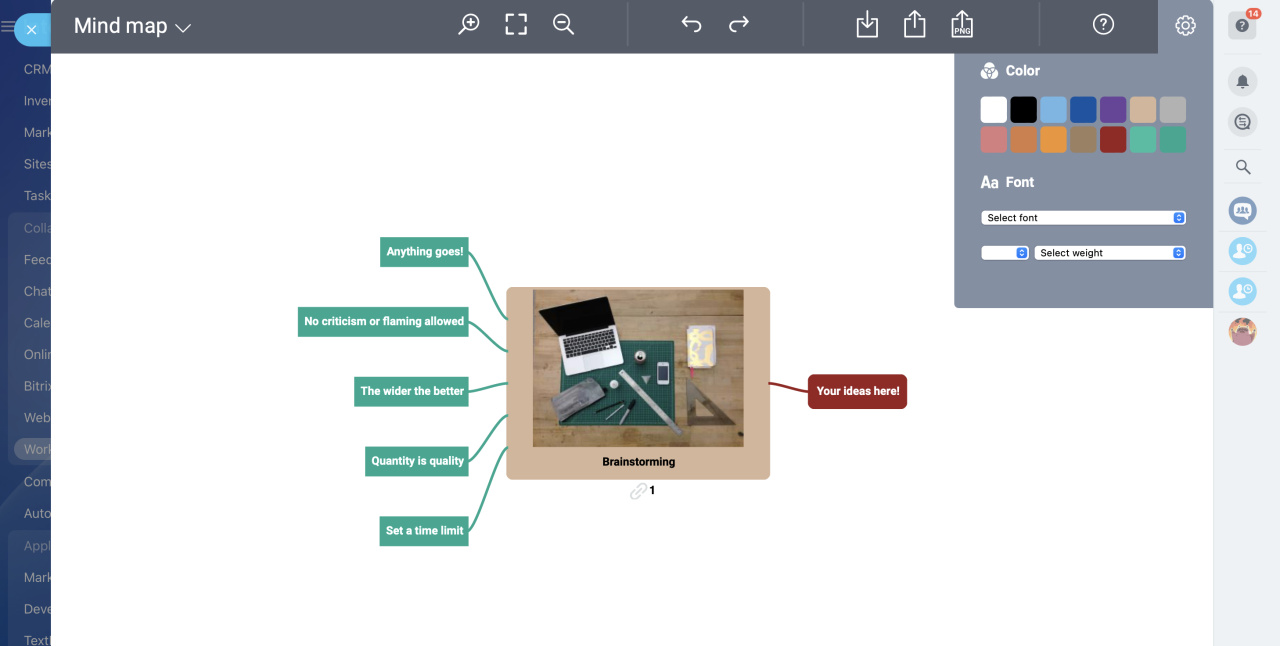
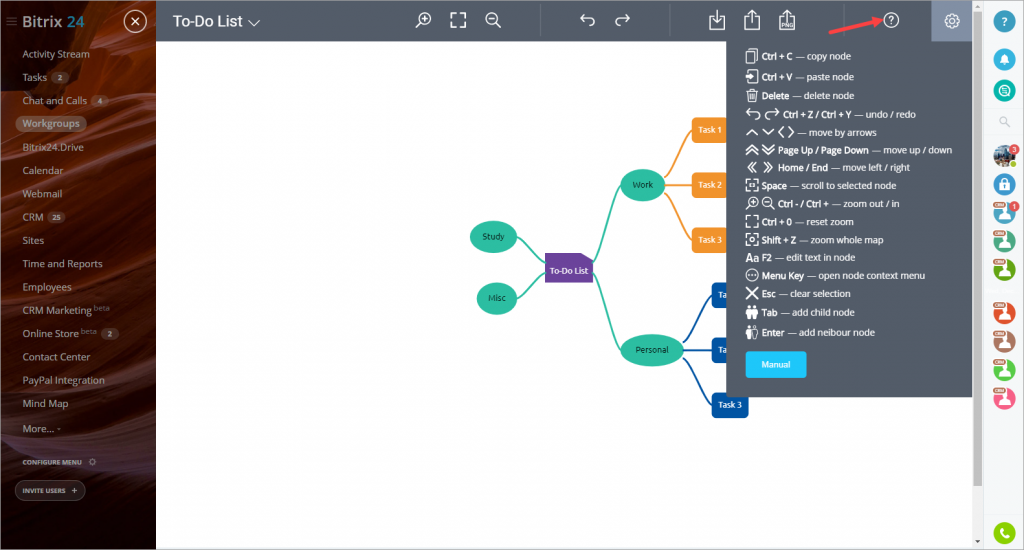
Click the ? button to see the list of available commands.
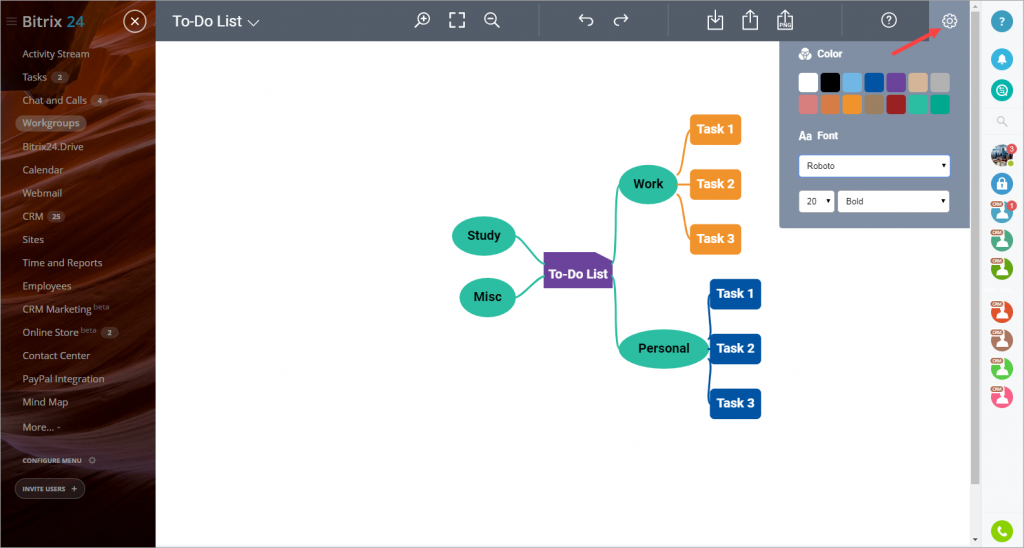
Click the cogwheel button to change the background color and fonts for all nodes.
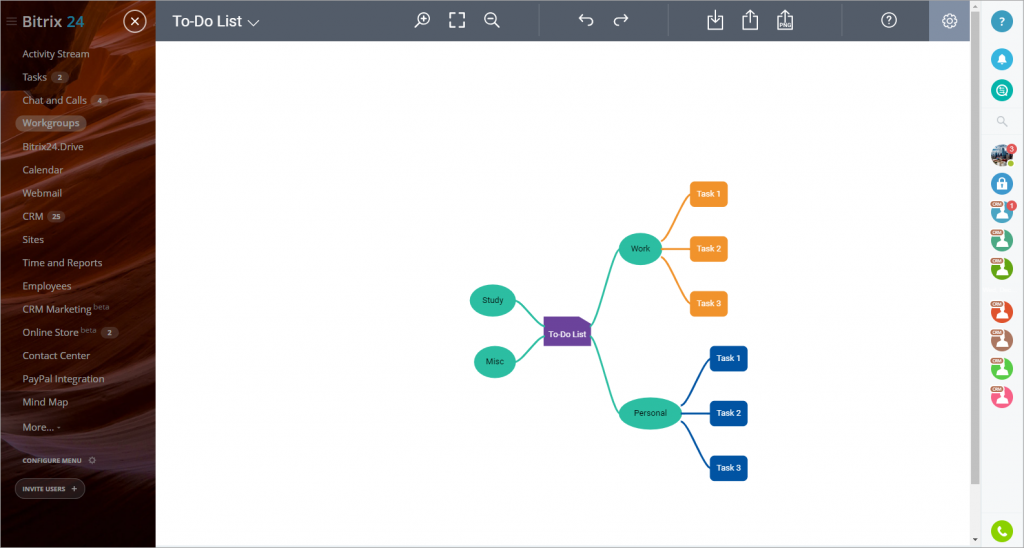
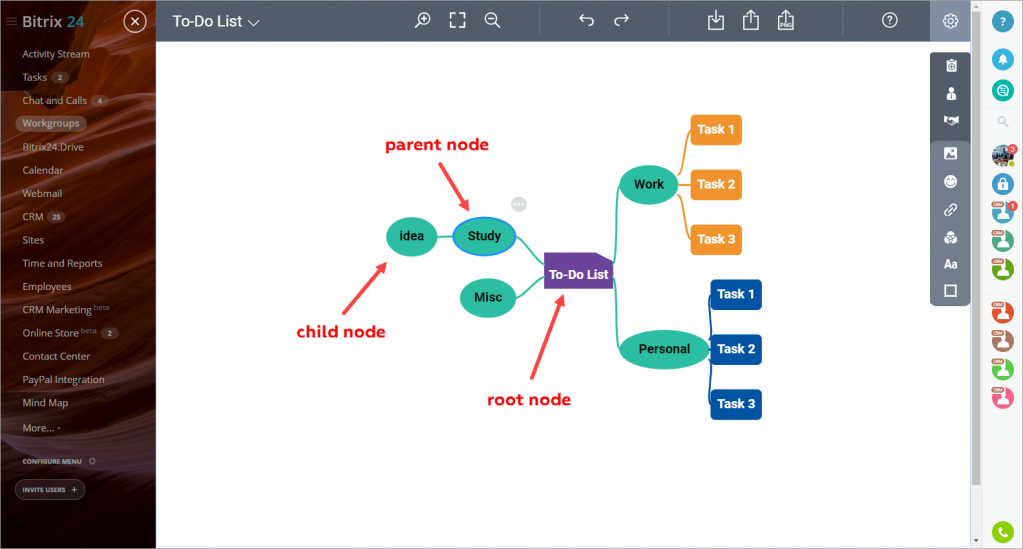
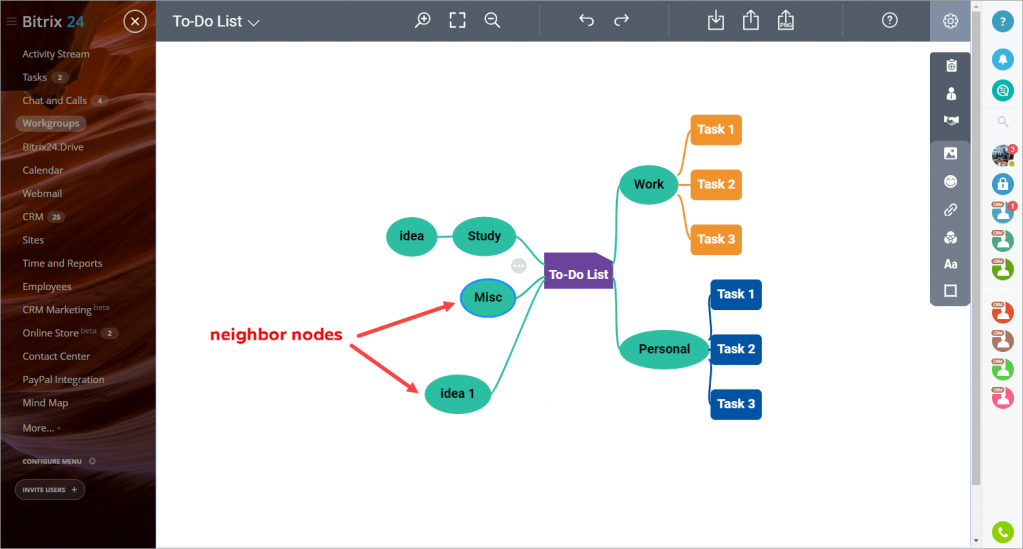
Nodes can be root, child, parent and neighbor. For example, To-Do List is a parent node, Study and Misc nodes are child nodes of To-Do List node. Study and Misc are neighbor nodes.
To add a new child node, select a parent node and press Tab.
To add a new neighbor node, select a node and press Enter.
Select a node and press F2 to edit text in it.
Select a node and press Delete to delete it.
You can copy and paste nodes by selecting a node and pressing Ctrl+C/Ctrl+V.
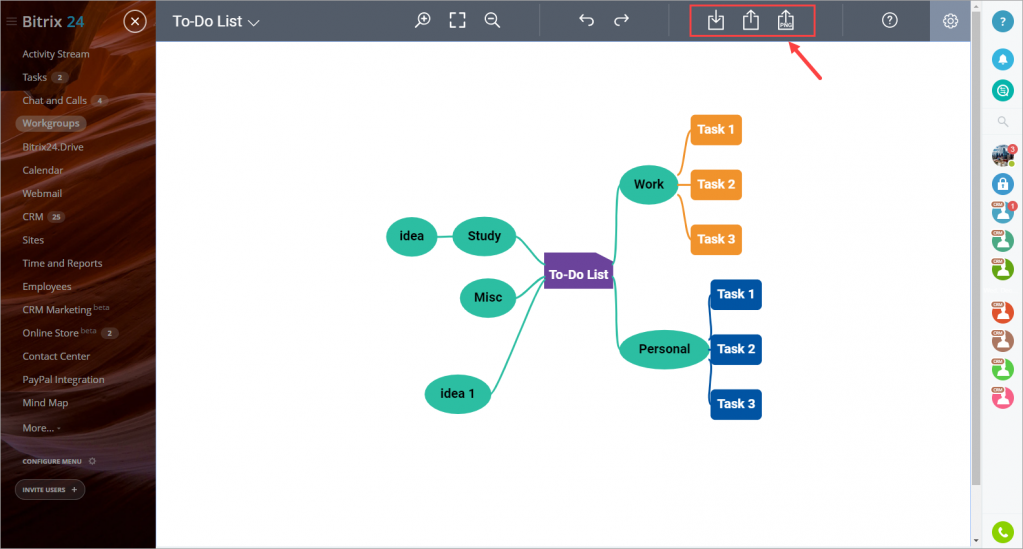
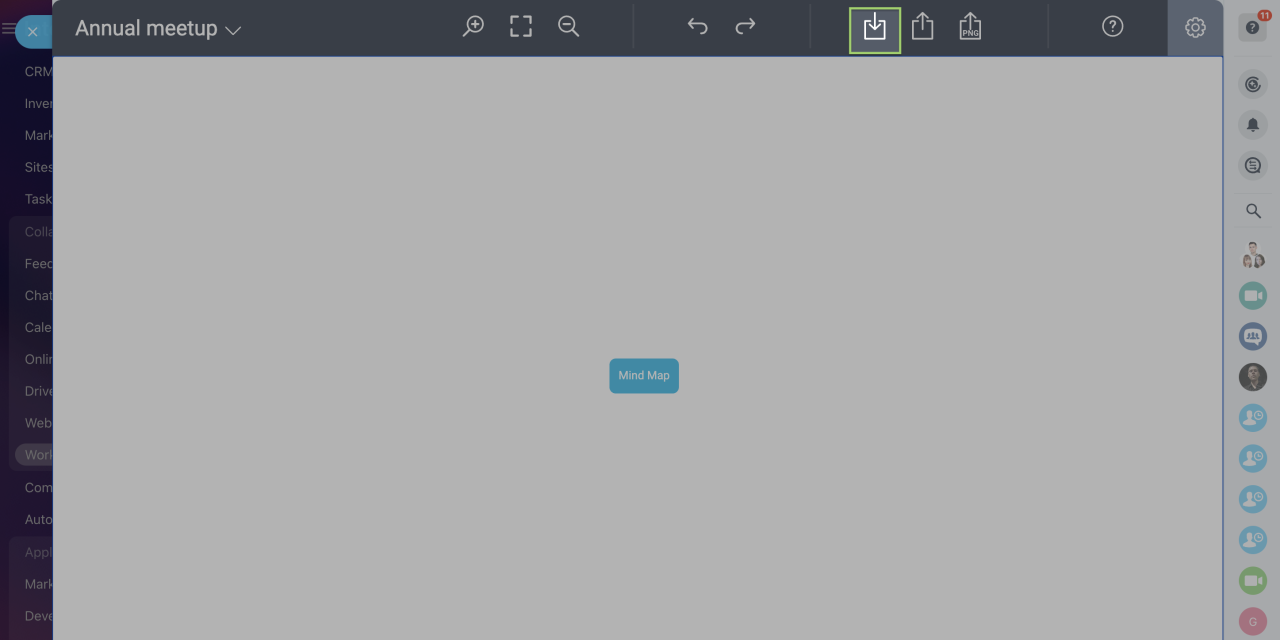
To import a mind map, click the square with a down arrow. To export a mind map, click the square with an up arrow. In this case, the mind map is exported as .json file. If you want to export it as .png file, click the corresponding button.
How to edit a node
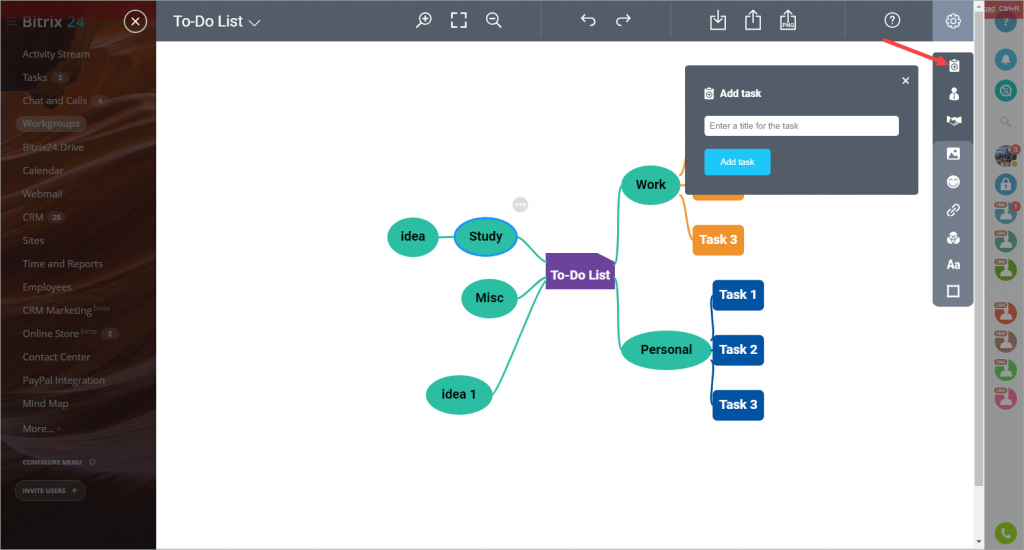
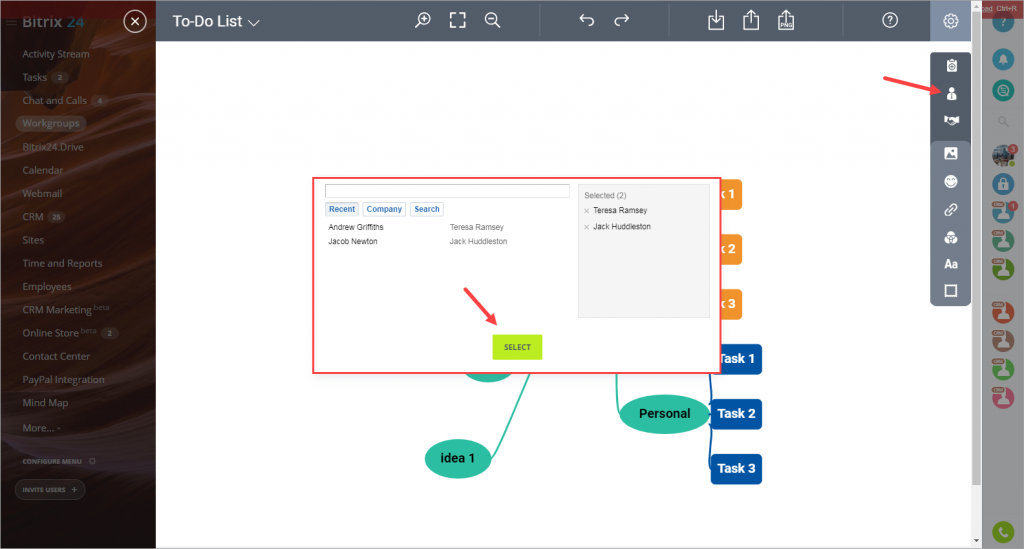
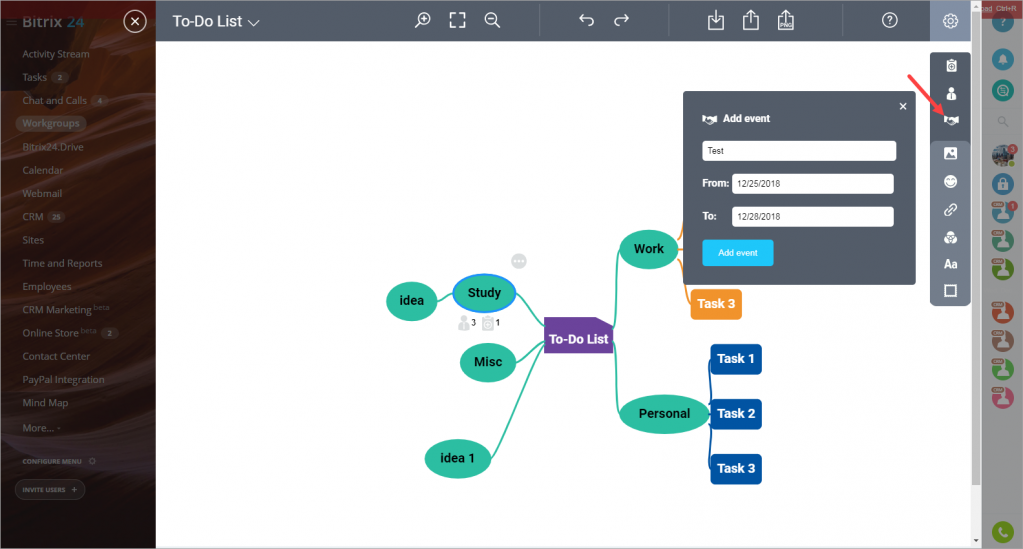
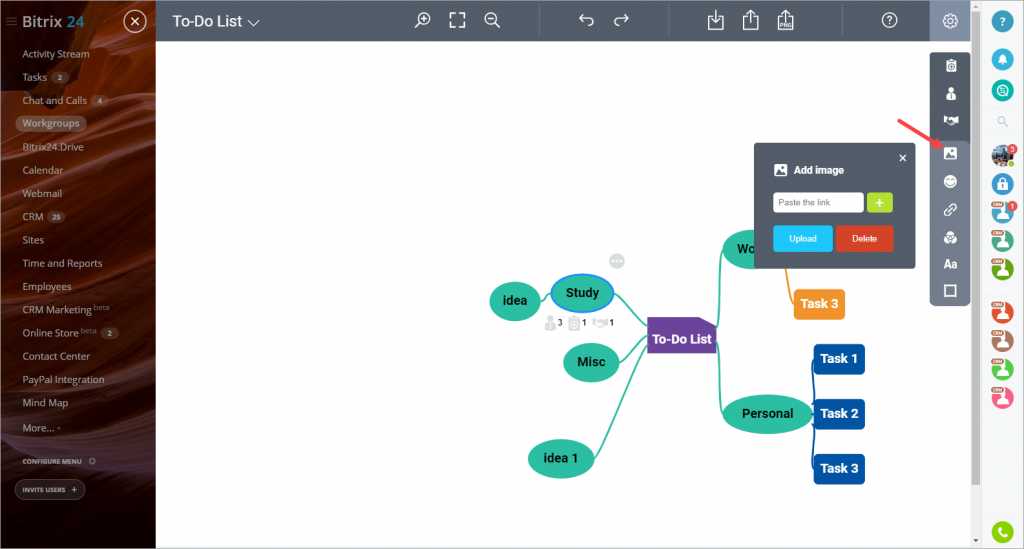
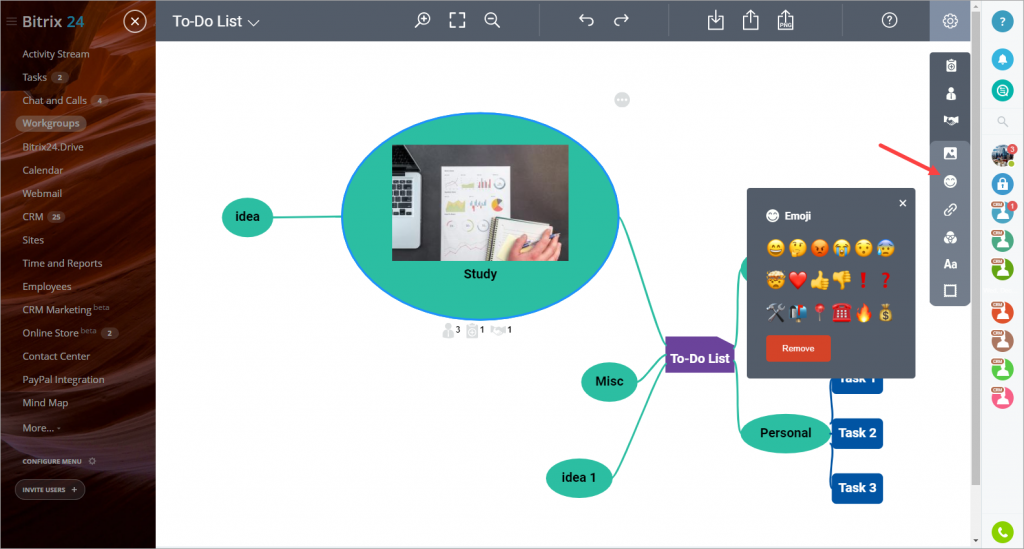
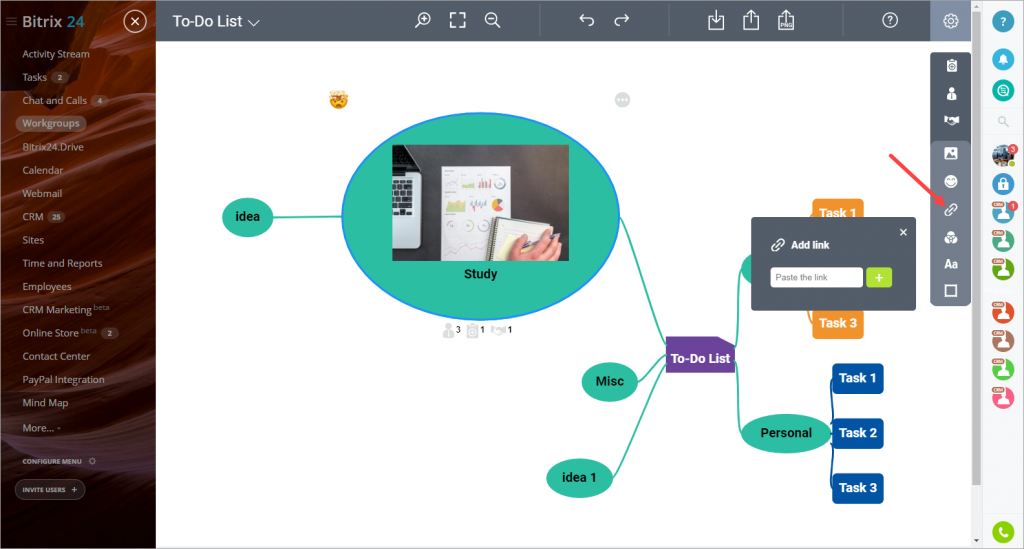
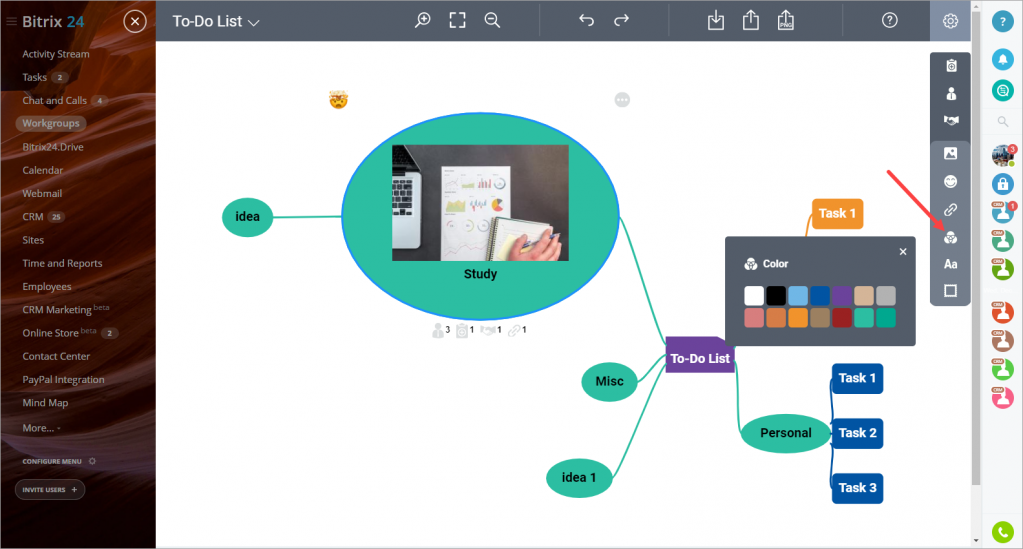
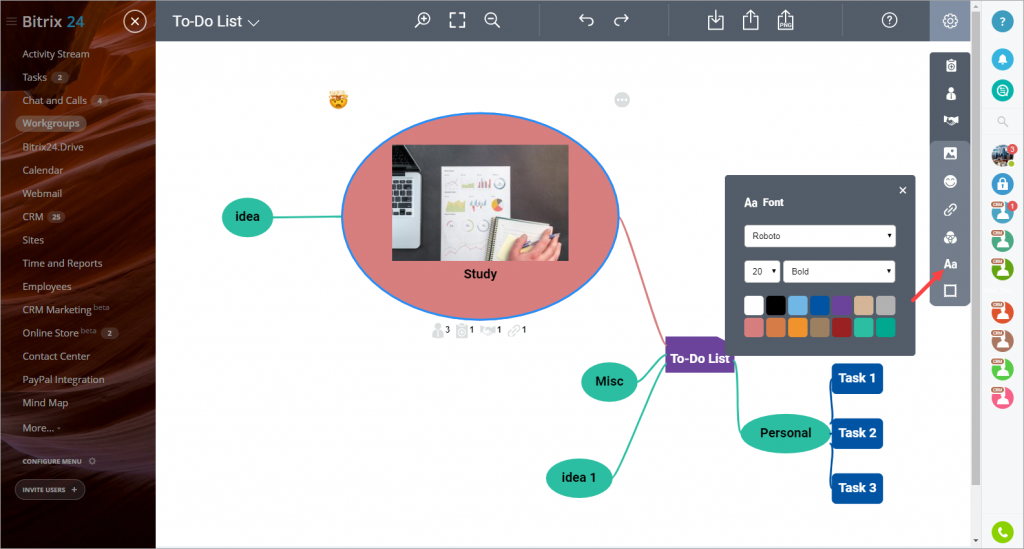
If you select a node, the toolbar appears on the right. Here's a list of actions that you can perform using this toolbar:
- Add a task - click this button to add a new task in your Bitrix24 and attach it to the selected node. You can open your Tasks list in Bitrix24 and edit this task, add a task description, change the responsible person, etc.
- Add a user - click this button to attach users to the selected node.
- Add an event - adds a new event to your Bitrix24 calendar and attaches it to the selected node.
- Add an image - attaches an image to the node. You can select an image on your computer or paste the link.
Mind Map supports .jpg, .png, .gif and .webp formats. File size shouldn't exceed 15Mb.
- Add an emoji - click this button and select an emoji to attach it to the node.
- Add a link - you can paste a link and it'll be attached to the node.
- Change color - change the color of the node.
Node color cannot be the same as the background color.
- Change font - here you can change font, its size and weight. These settings will be applied to text in this node only.
Font color cannot be the same as the node color.
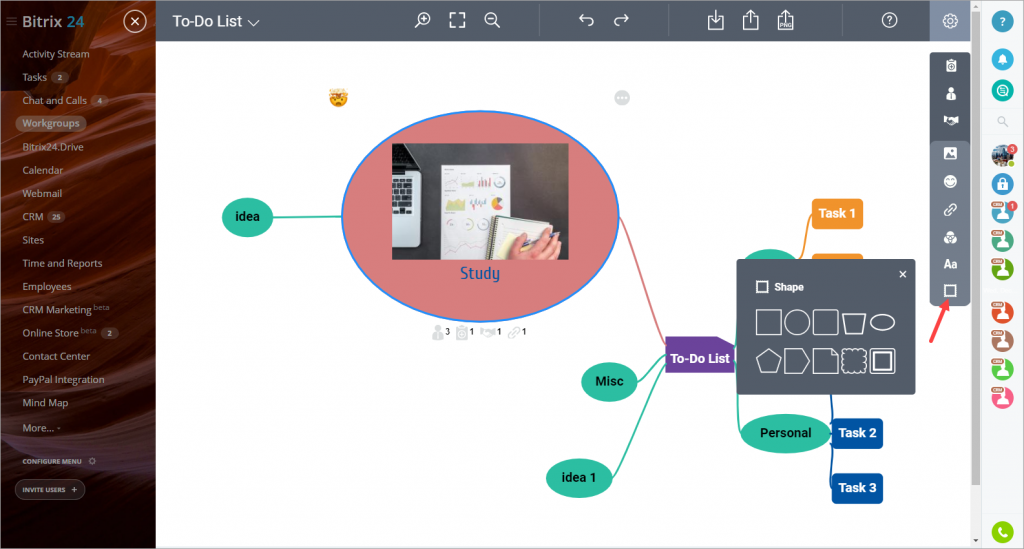
- Change shape - select the node's shape.
How to view and delete attached elements
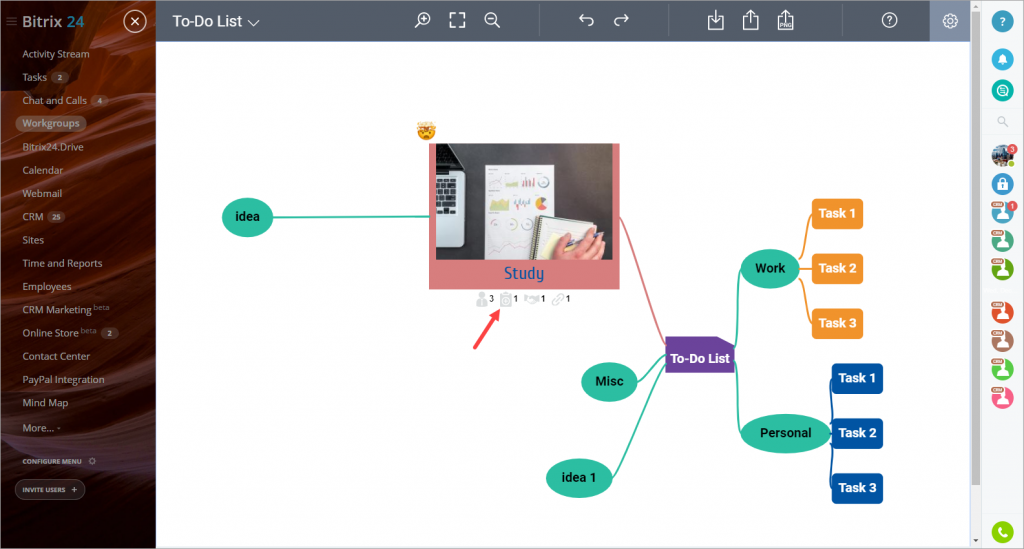
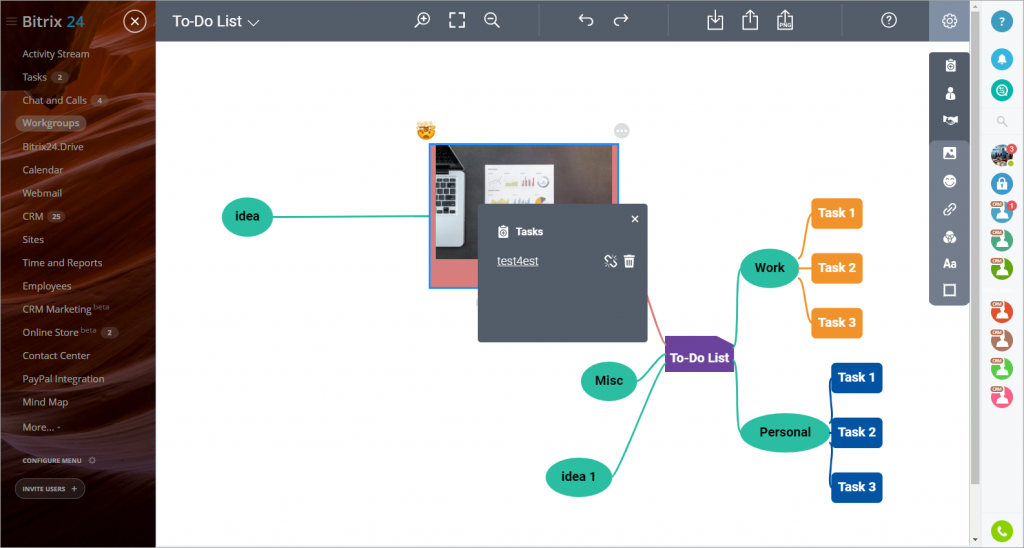
The owner of the mind map can delete or detach elements, attached to the node. "Delete element" means the element (task or event) will be deleted from the selected node and Bitrix24 account. "Detach element" – the element will be detached from the selected node.
Click the element name to open this element in Bitrix24.
How do backups work?
Here are some reasons the functionality might be useful for you:
- One needs to transfer maps between Bitrix24 accounts
- Mind maps include sensitive information, so backups should be stored separately for security reasons
- Mind maps need to be secured prior to upgrading the app's version
Backups will be displayed in the application tabs, which can be found through the left menu.
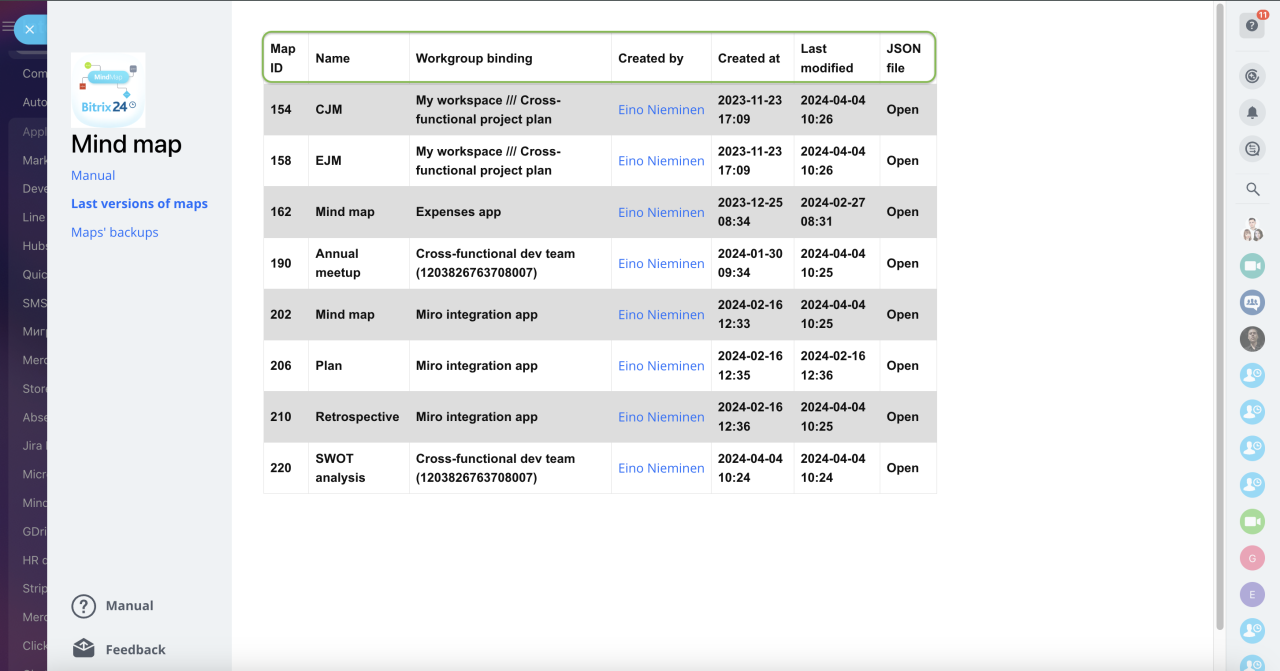
The "Latest versions of maps" tab stores information about the current versions of maps:
- Map ID
- Name
Map's unique name, e.g. "Annual strategic plans" - Workgroup binding
The workgroup to which the map is attached - Created by
Creator's name with hyperlink to their user profile - Created at
Date in YYYY-MM-DD hh:mm format - Last modified
Date in YYYY-MM-DD hh:mm format - JSON file
an option field with Open action button to view the JSON backup
To save a backup, you would need to open the JSON file first.
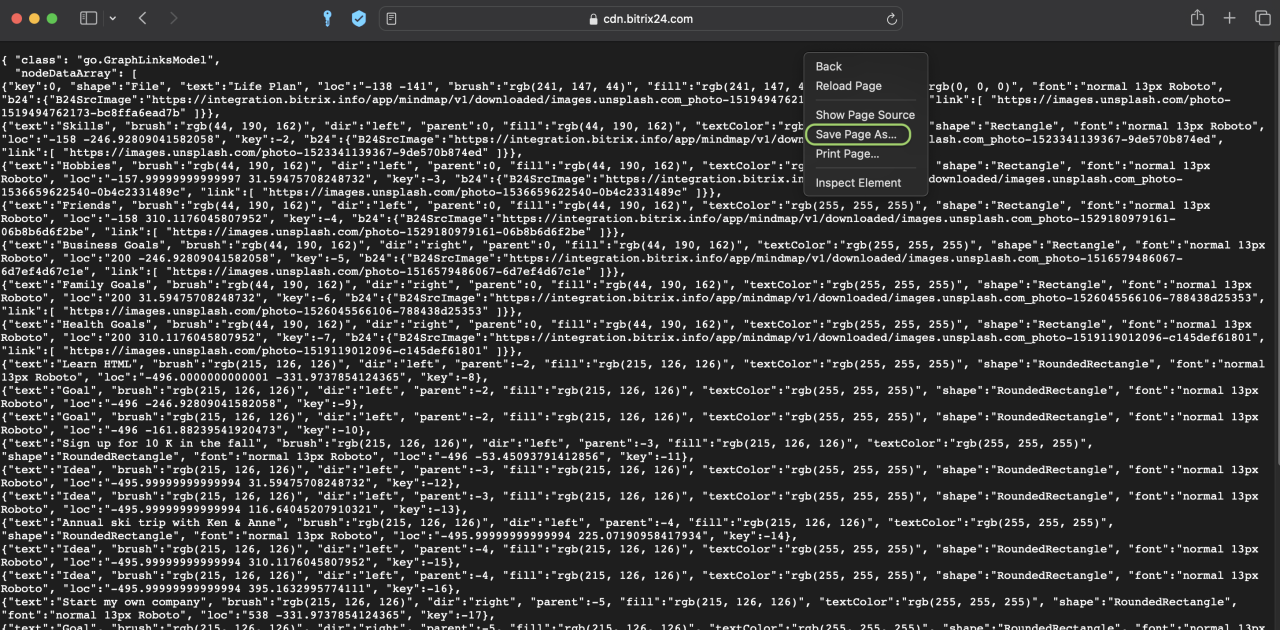
You'll be able to see the JSON file once you open it via the corresponding button. The backup will be opened in a separate browser tab and displayed as text in accordance with CORS policiesCross-origin resource sharing (CORS) is a mechanism that allows restricted resources on a web page to be accessed from another domain outside the domain from which the first resource was served. There are certain limitations to consider in web applications' development aimed at achieving higher levels of security..
To proceed, you'll need to download the JSON file via in-built tools of your browser.
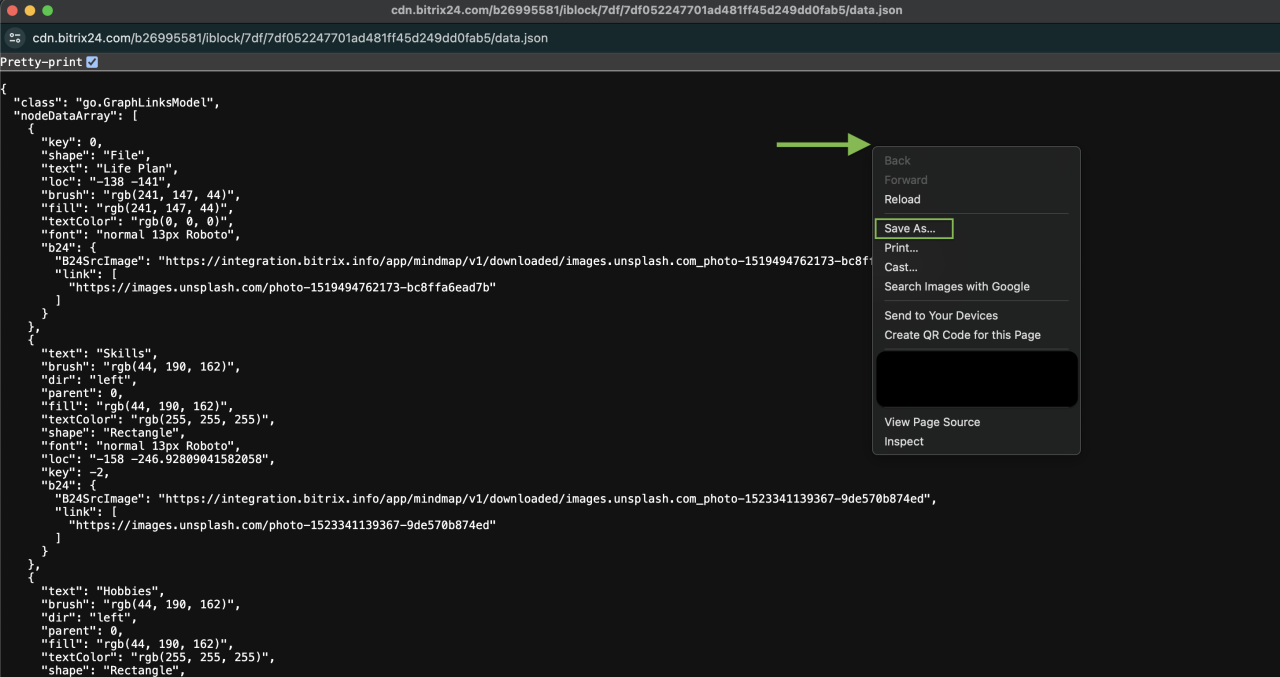
In Chrome: right click on mouse > Save as > set an appropriate name with .json extension (e.g. mymap.json) and a destination
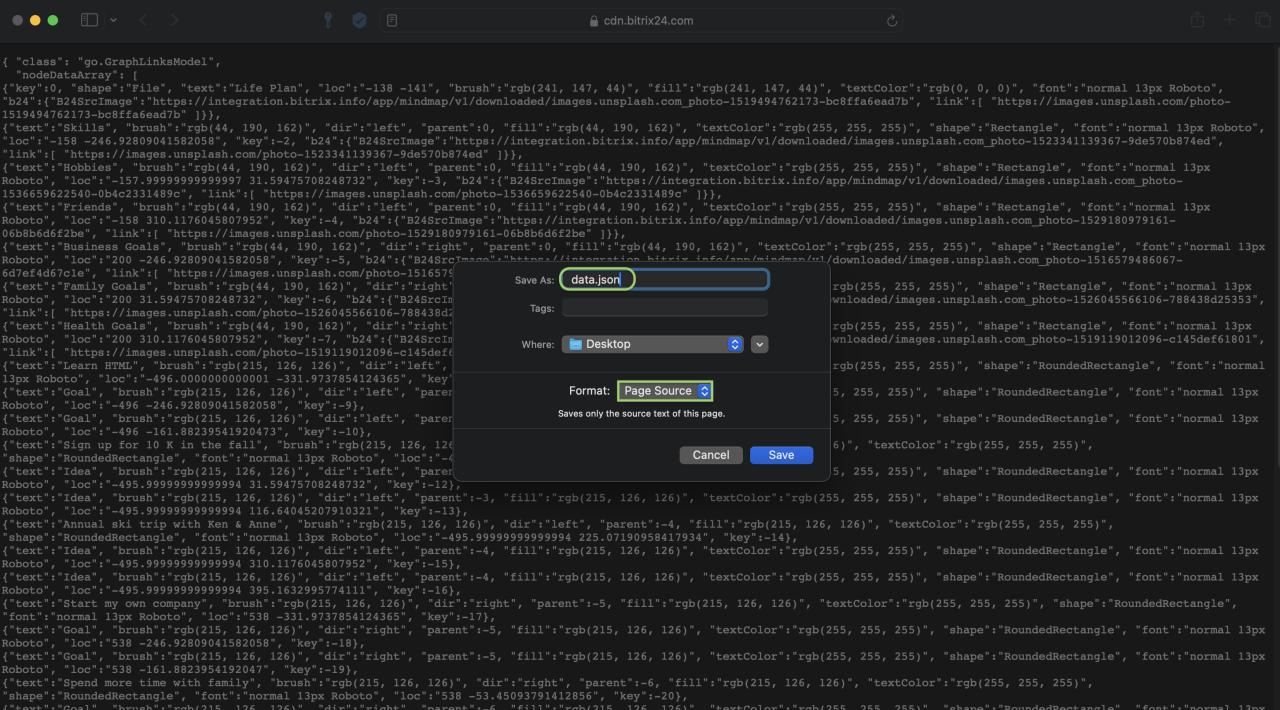
In Safari: right click on mouse > Save Page as > set an appropriate name with .json extension, select Page Source format and a destination.
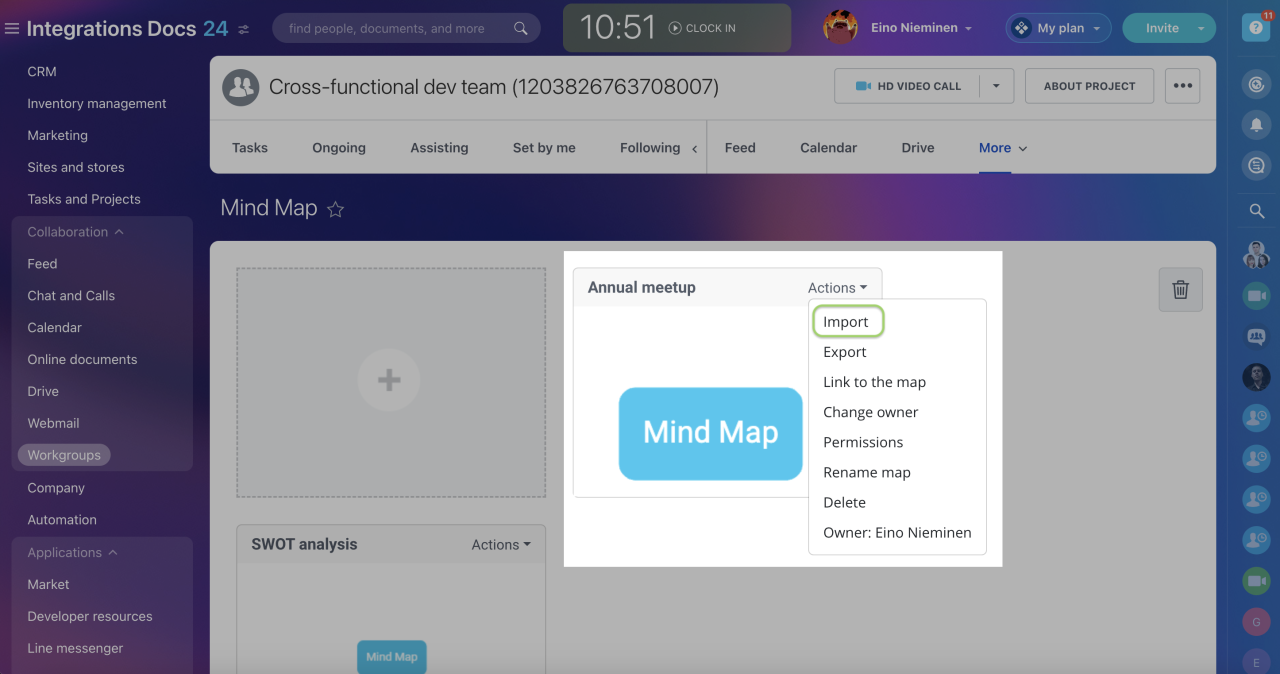
For importing maps, a standard button inside the map template or map list is used. Once you click unto it, you'll be able to select the .json file on your PC's drive downloaded before.
The button is available in map lists as well as within maps.
The backup will overwrite the template elements, meaning a new map created from any template can be used for import.
FAQ
Q: Can I transfer a Mind map from one workgroup or project to another?
A: Yes. If you're the map's owner, export the map to JSON format first and import the file to a new map in another workgroup or project.

