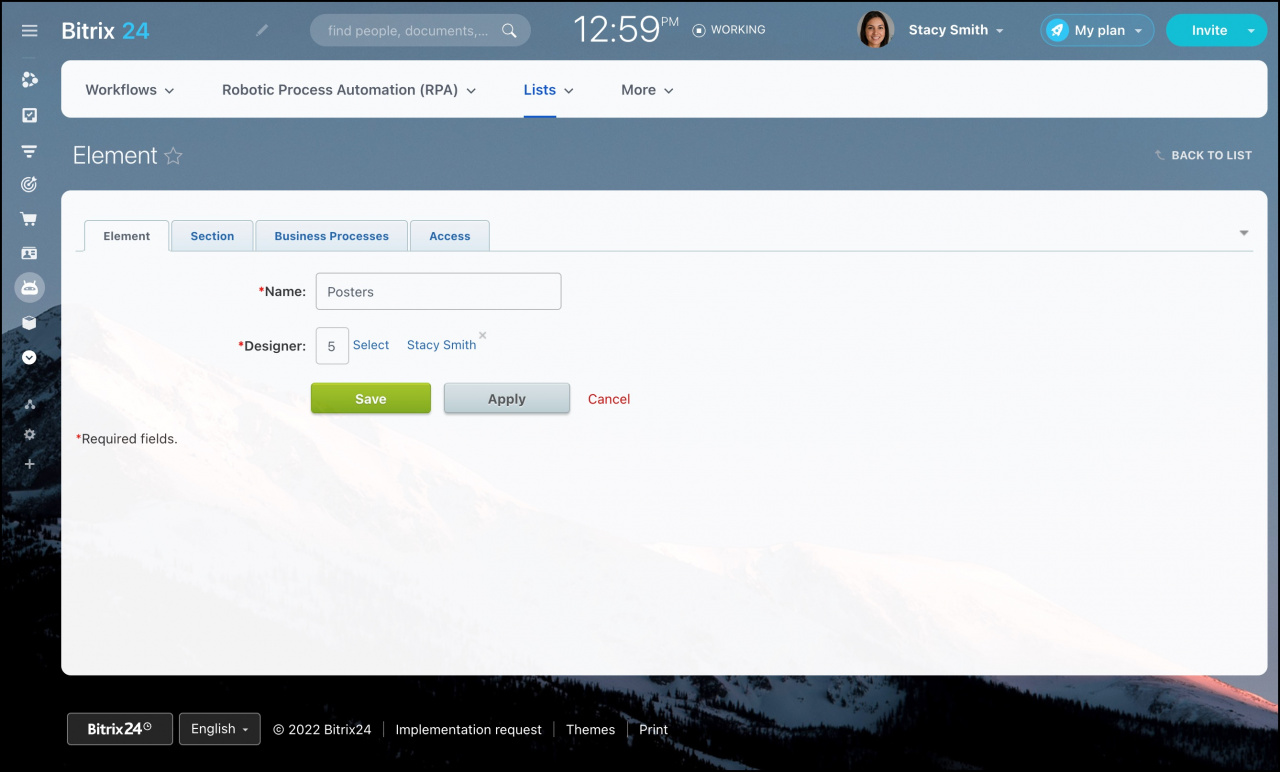
After you create a new list, the next step is to configure its fields.
For example, if you use a list to manage advertising materials, you may want to assign a designer to each item. To do this, add a custom field to the list.
Add custom fields
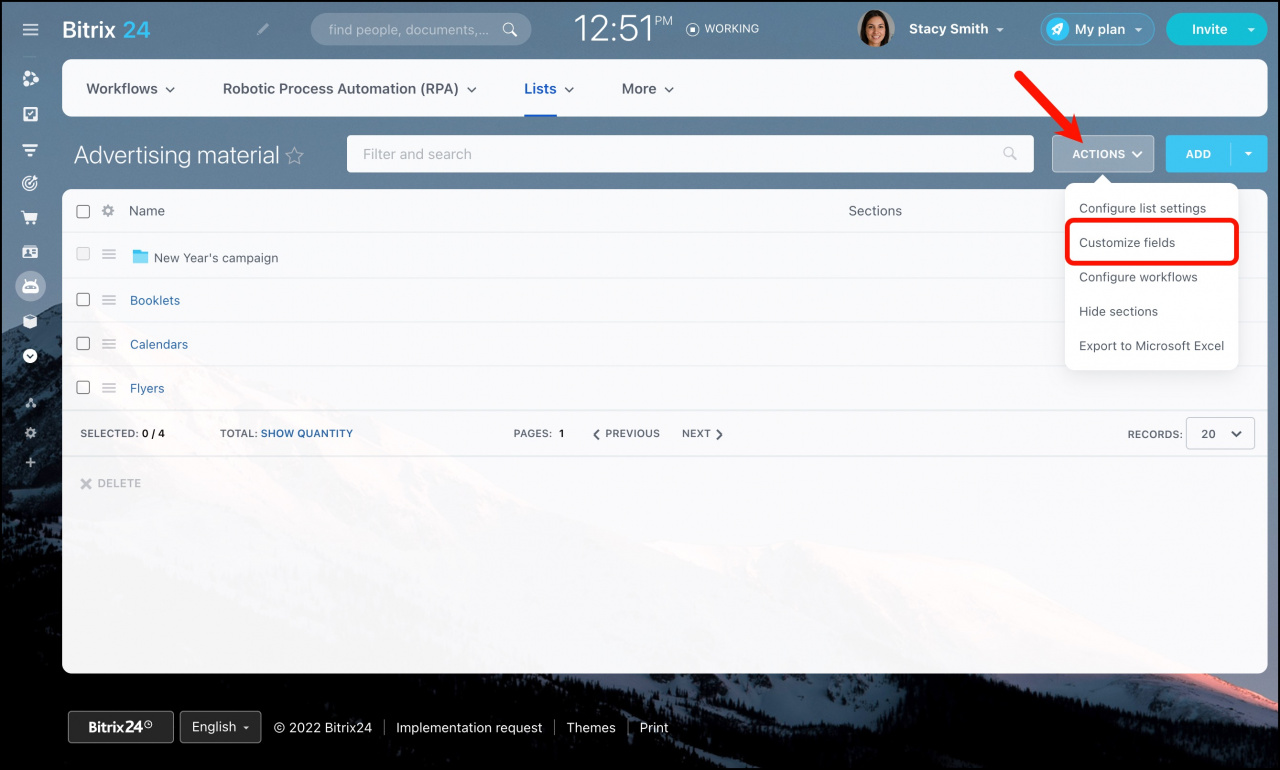
- Open the list.
- Go to Actions > Customize fields.
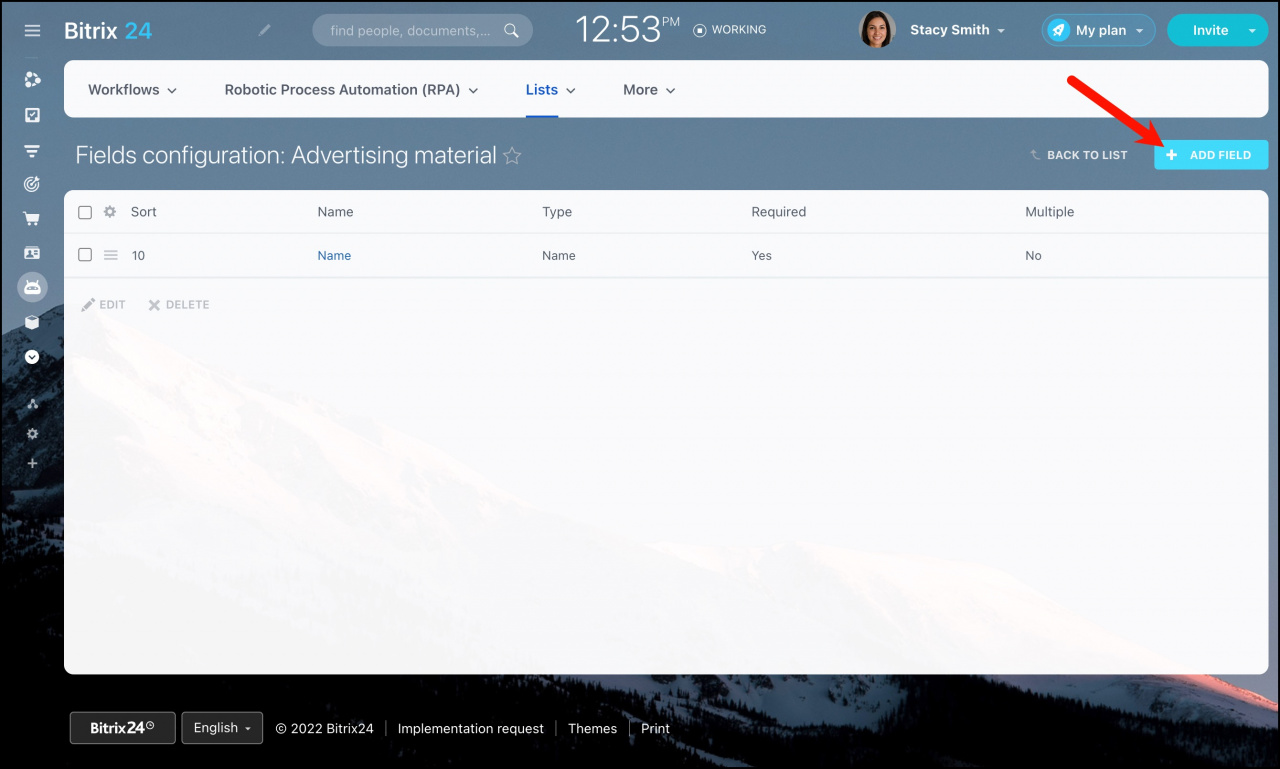
The Fields Configuration page contains one default field: Name. You can edit it if needed.
To create a new field, click Add field.
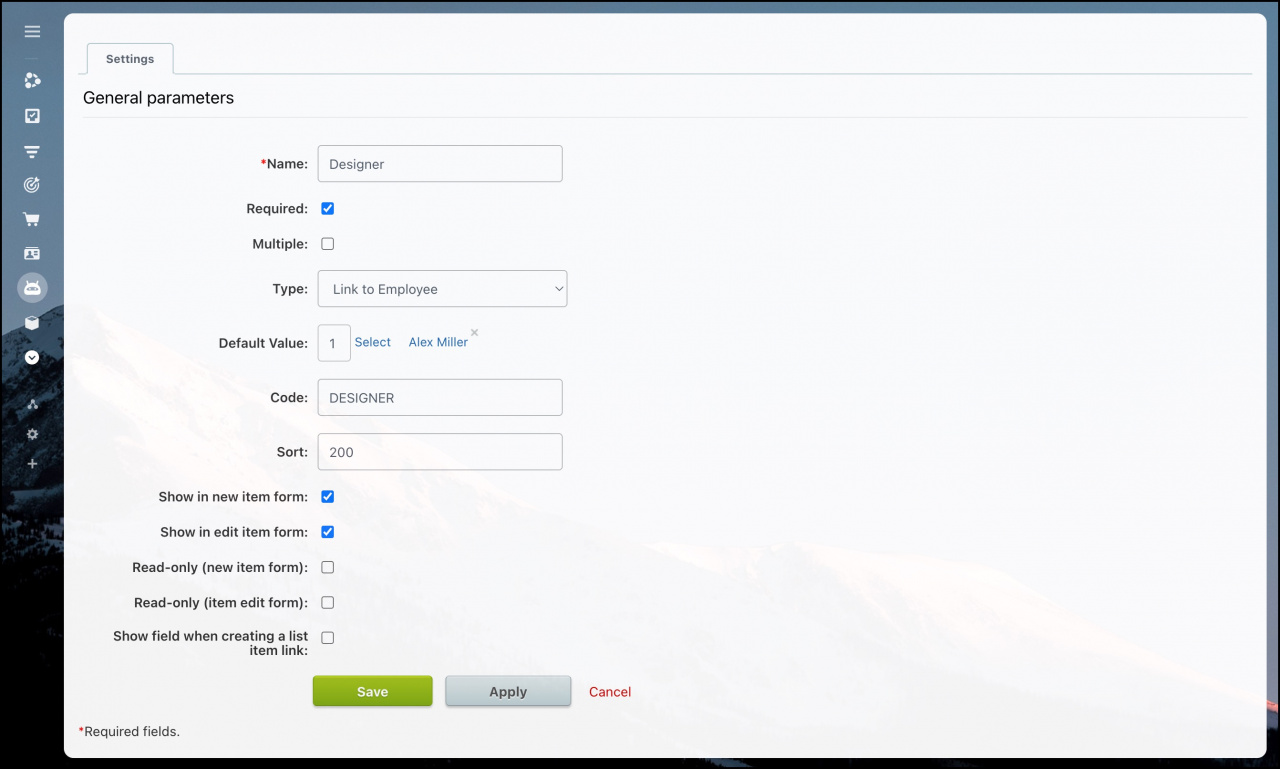
When creating a field, configure these settings:
- Name: Enter the field name.
- Required: Users cannot create a new list item without filling in this field.
- Multiple: Allows users to select or enter multiple values.
- Type: Select the field type, such as list, string, user, or date. Each field type includes additional settings.
- Default Value: Set the value used most often to save users time.
- Sort: Fields with lower values appear higher in the form.
- Show in new item form and Show in edit item form: eDisplay the field when users create or edit items.
- Read-only (new item form) and Read-only (item edit form): Prevent users from editing the field.
- Show field when creating a list item link: Displays the field when users paste a link to a list item in the Feed.
You cannot change the field type after you create the field.
The new field will appear when users create a new list item.