
Lists help you organize record-based data such as supplier directories, product catalogs, expense records, and more. In this example, we’ll use a list to track marketing materials.
Why use lists in Bitrix24
Multiple users can work with the same list at the same time. Depending on their access permissions, users can:
- Edit list items
- View list items
- Have no access to the list
Lists support different field types, including text titles, descriptions, dates, or files. For example, you can attach flyer layouts or scanned documents to list items.
Some fields can be filled in automatically, such as:
- The employee who created the item
- The date the item was updated
Lists also support workflow automation and business processes.
Create a list
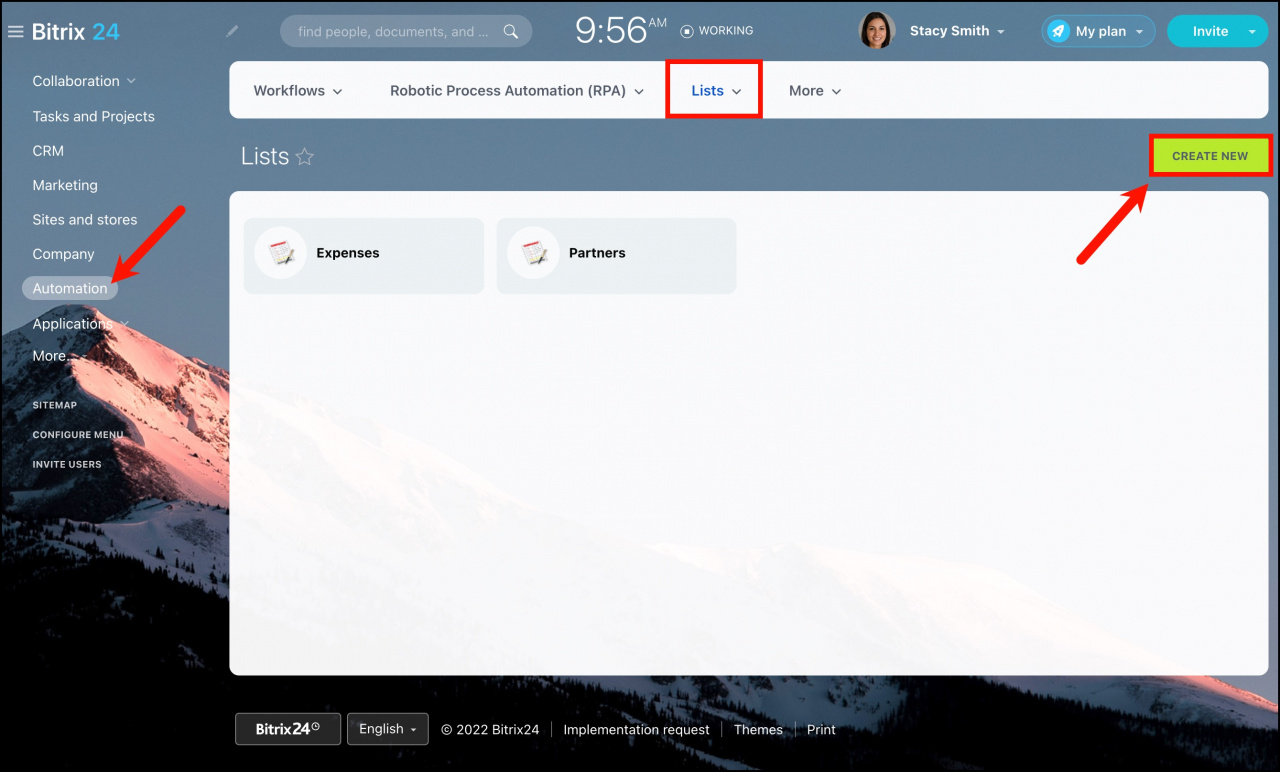
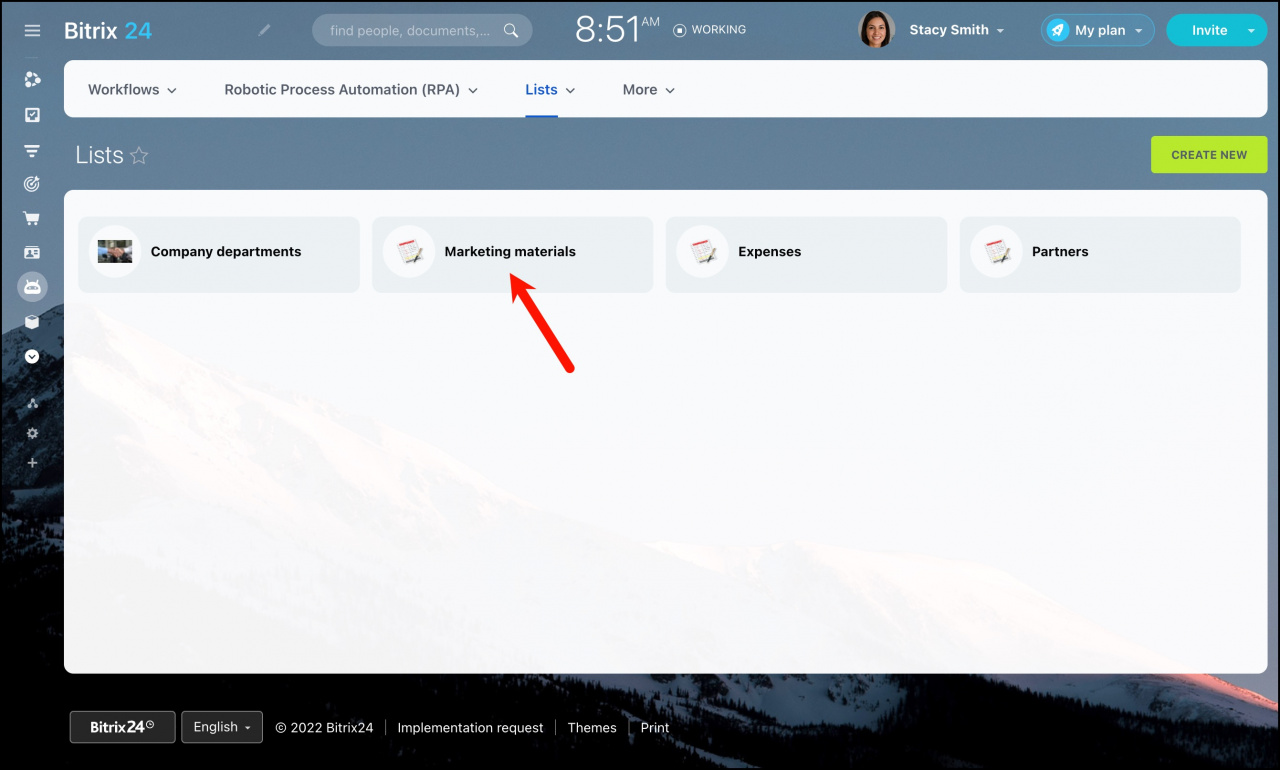
You can create a list in Automation > Lists or in a workgroup. If you create a list inside a workgroup, all workgroup members automatically get access to view it.
- Go to Automation > Lists.
- Click Create New.
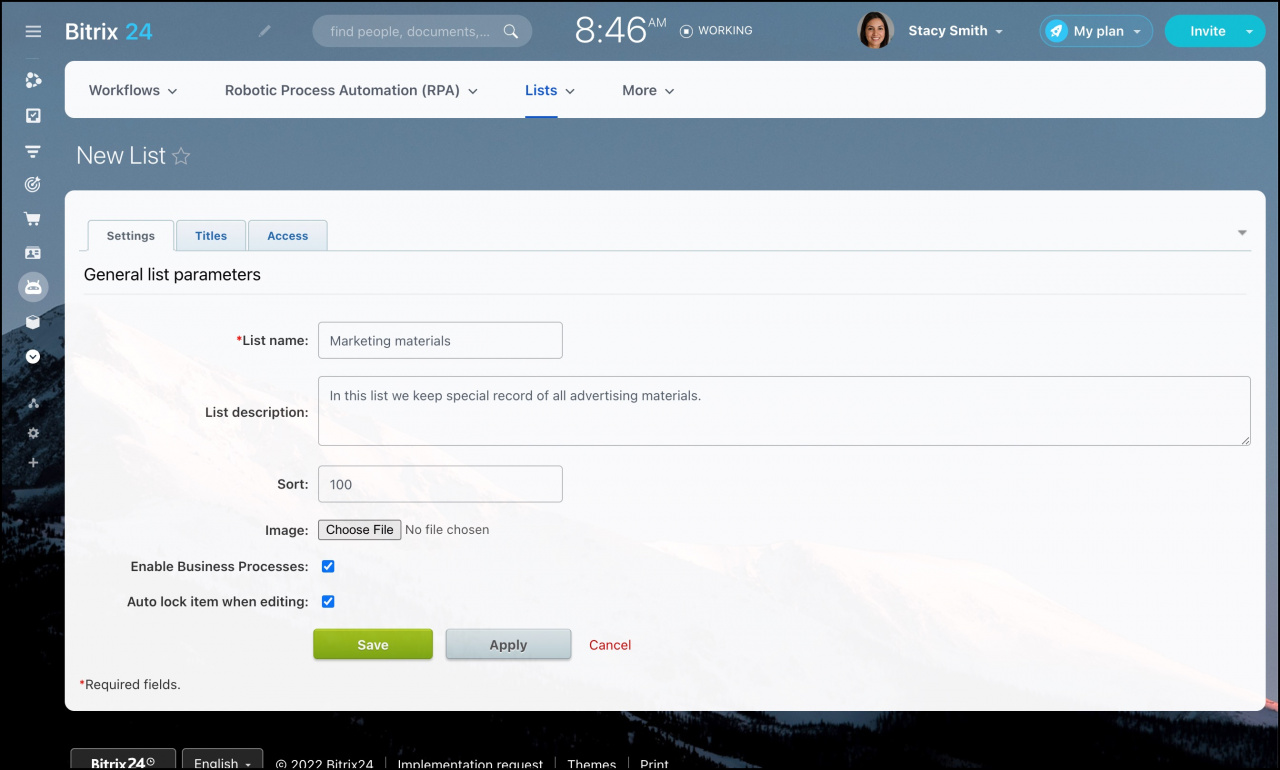
- Enter the list name and description.
- Select Enable Business Processes if you plan to automate workflows.
- Enable Auto lock item when editing to prevent multiple users from editing the same item at the same time.
Customize item names
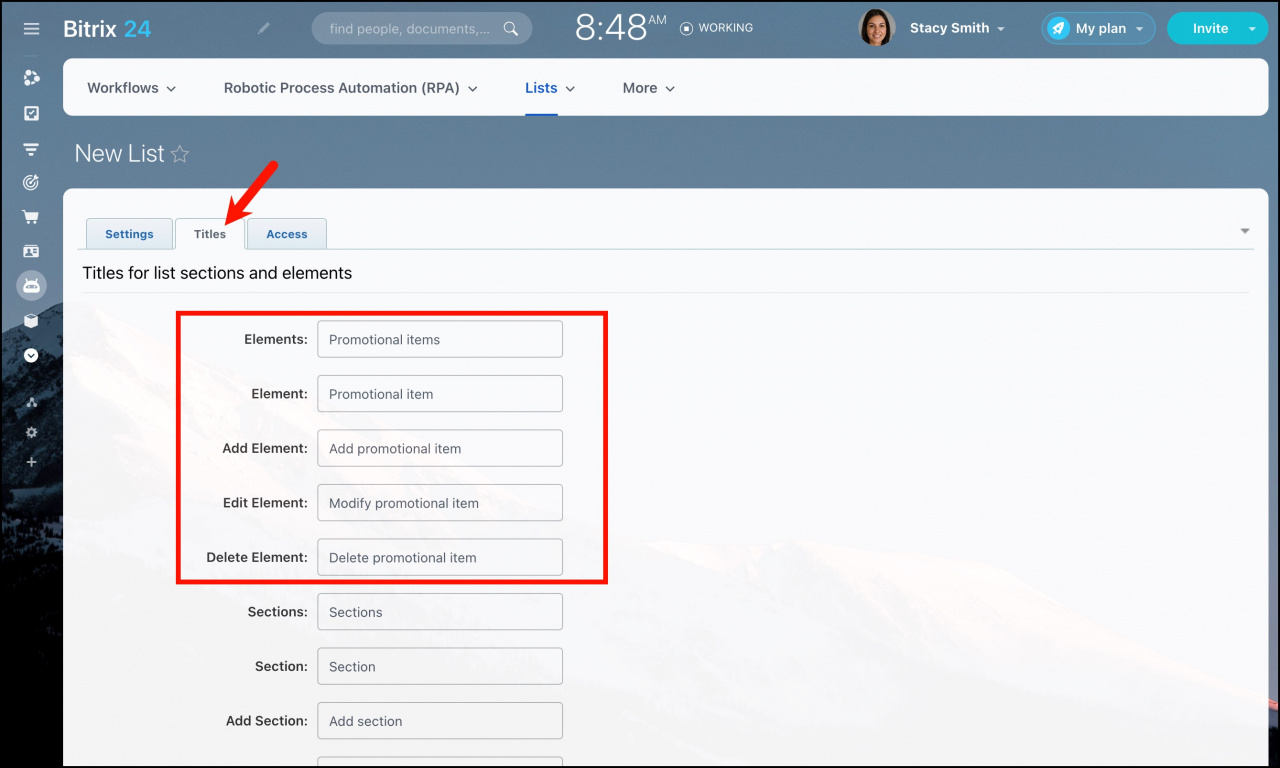
Open the Titles tab to rename default terms such as elements and section. In this example, we replace elements with promotional items.
Configure access permissions
Open the Access tab and grant permissions to the Marketing department employees. Set the access level to Create in Control Panel. Users with this permission can add new items, but they cannot delete them.
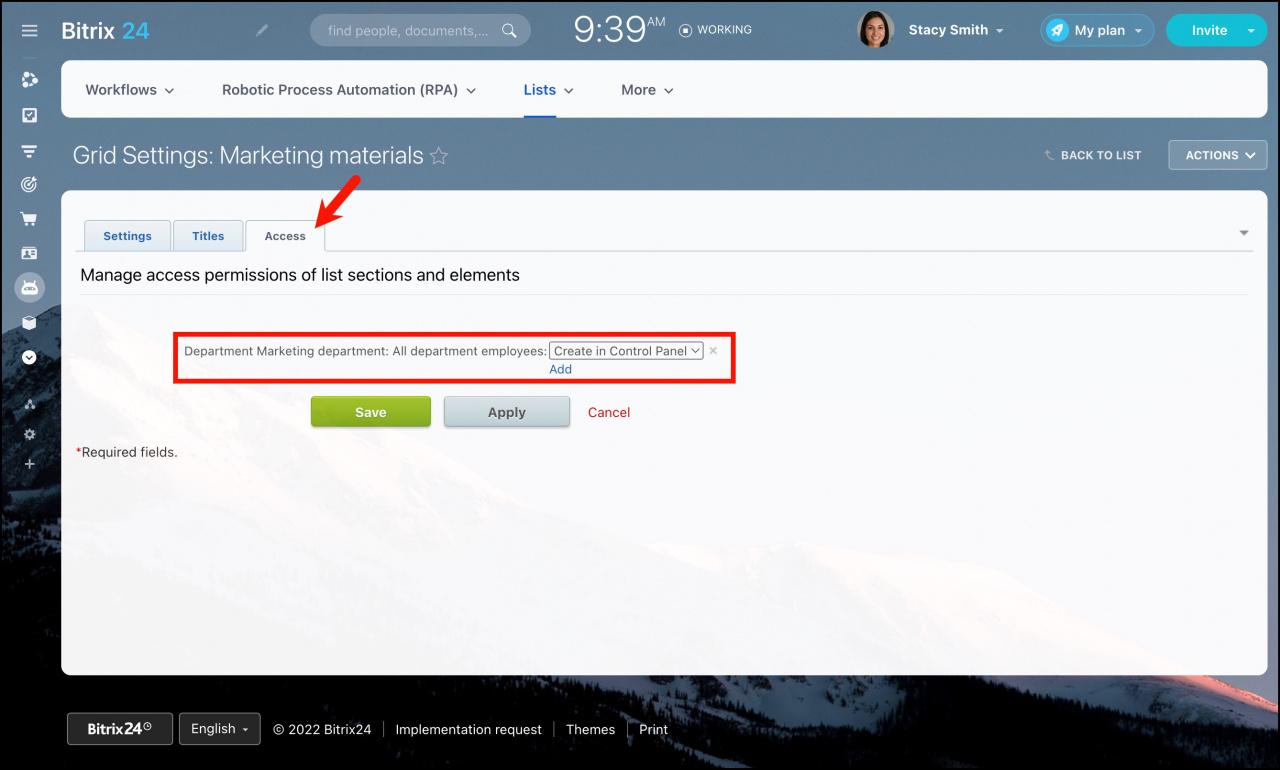
Save the changes. The new list will appear in the Lists section.
Add custom fields
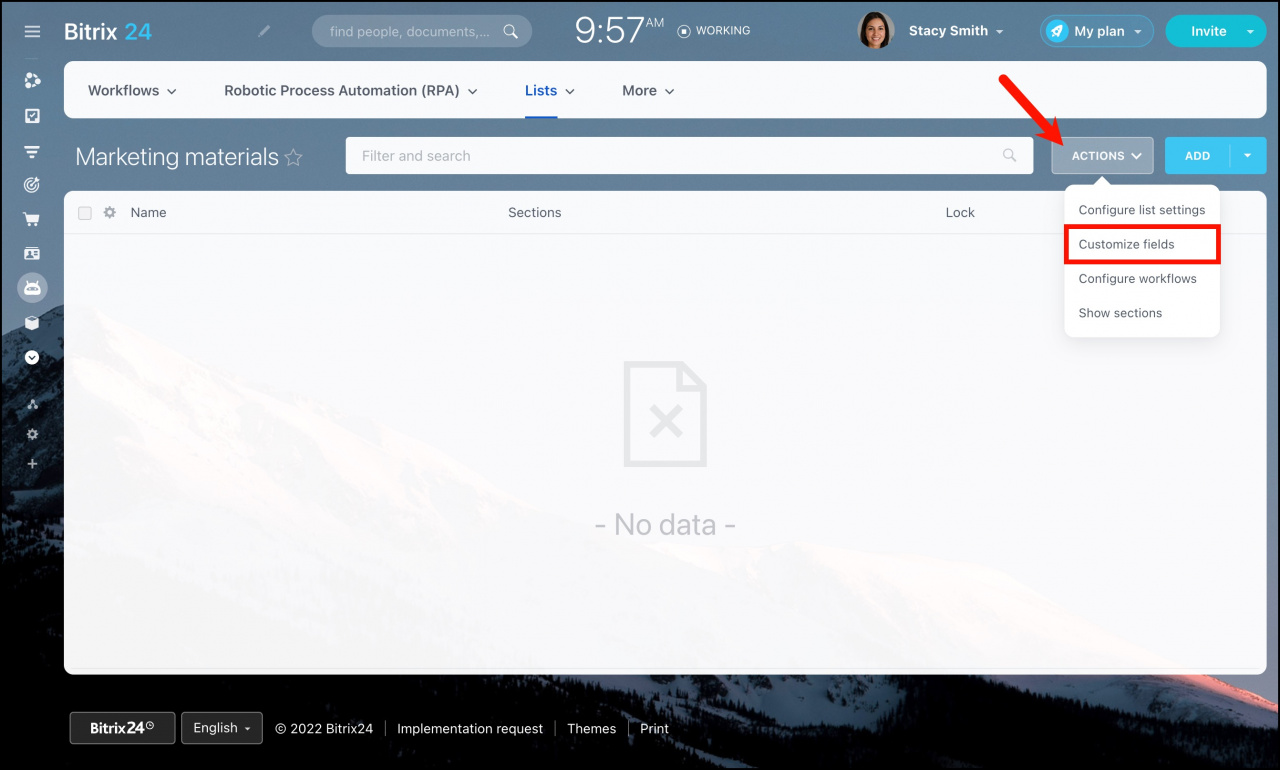
- Open the list.
- Click Customize fields in the actions menu.
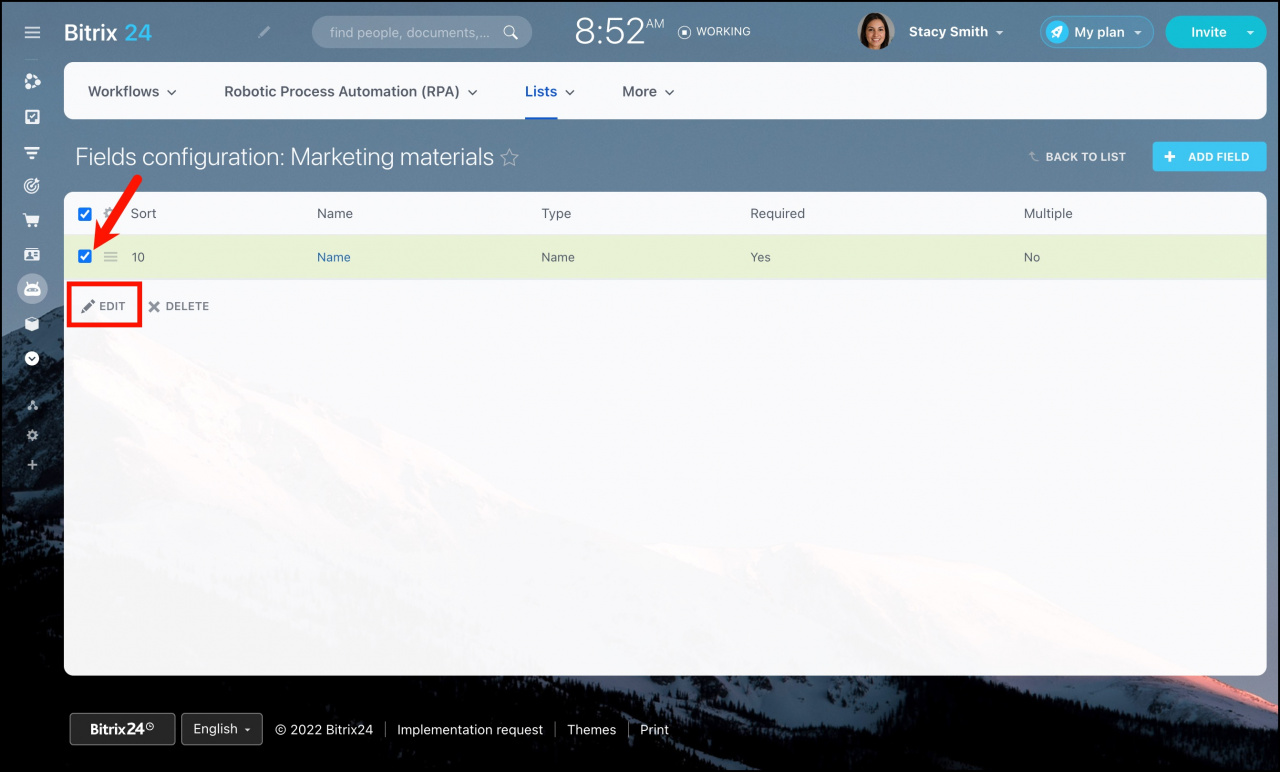
The Fields Configuration page contains one default field: Name .
You can rename it if needed.
- Select the field.
- Click Edit.
In this example, we rename it to Item Name.
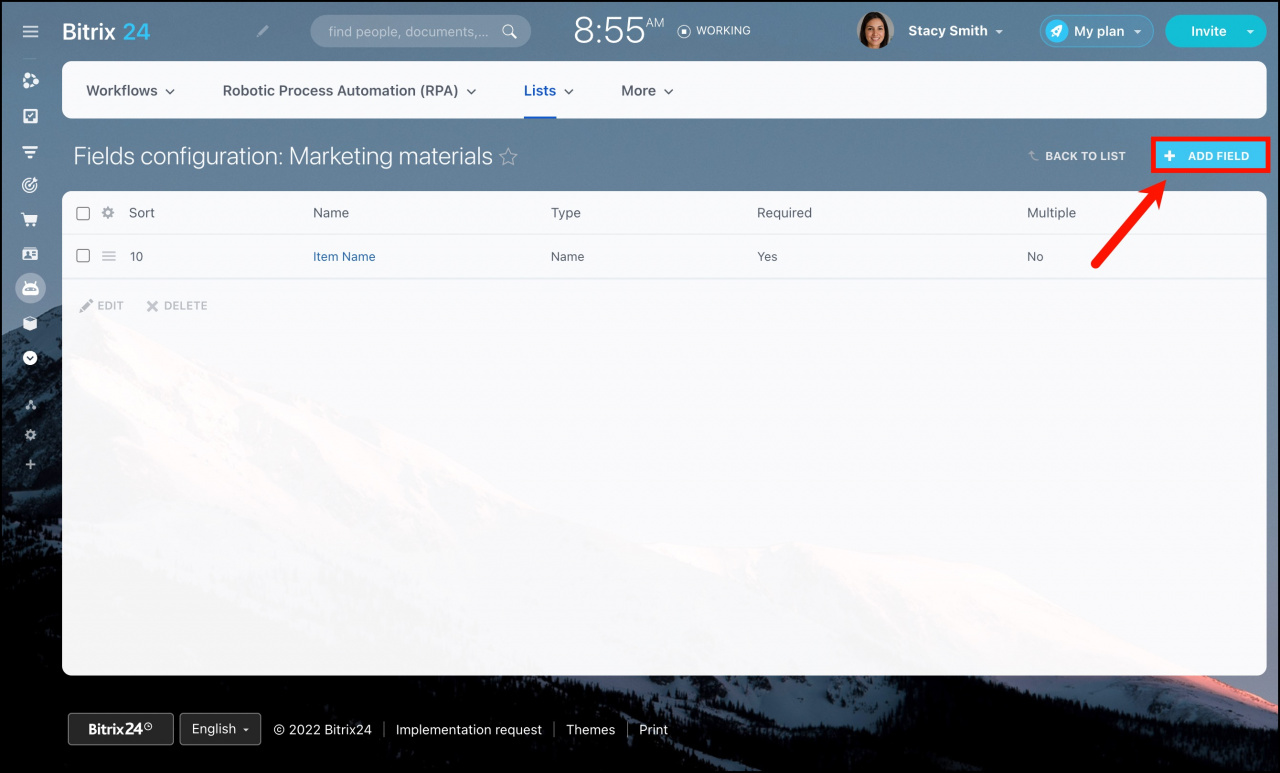
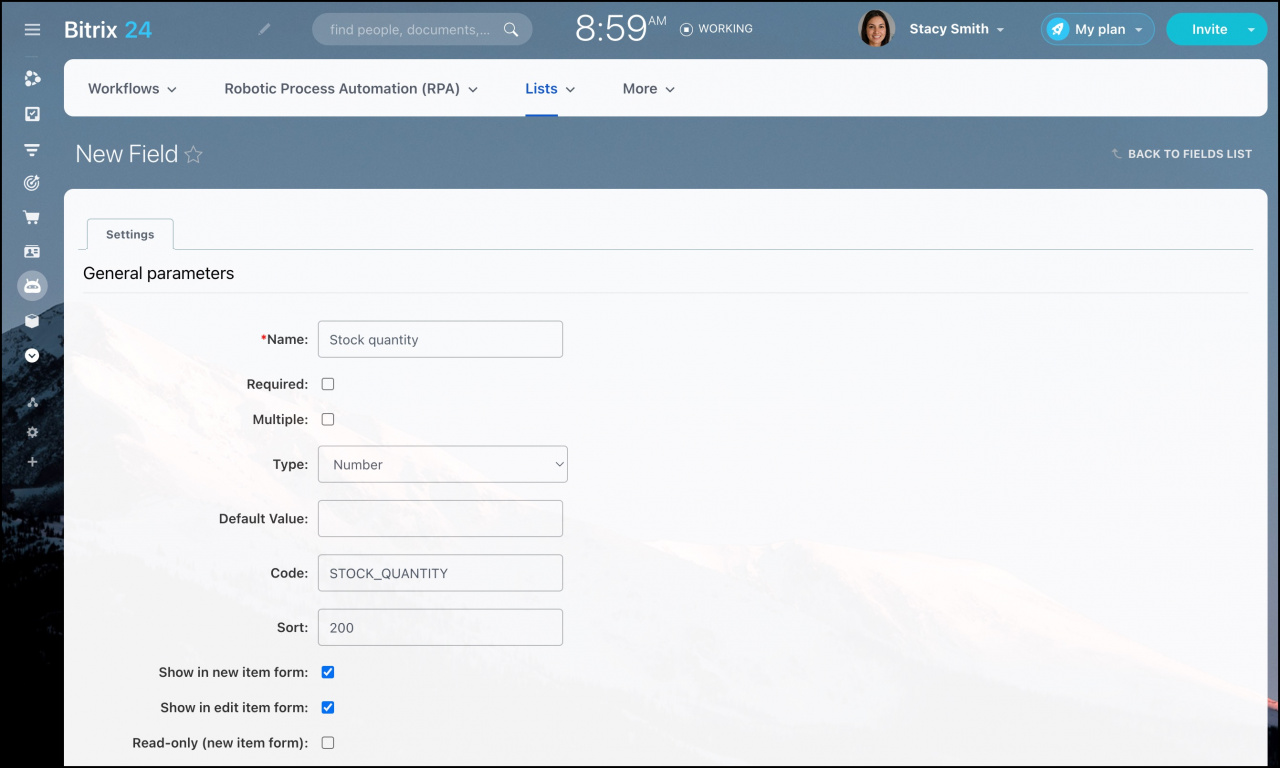
To track the number of promotional items in stock:
- Click Add field.
- Create a field named Stock quantity.
- Select the Number field type.
Enable these options:
- Show in new item form
- Show in edit item form
This allows users to fill in the field when creating or editing items.
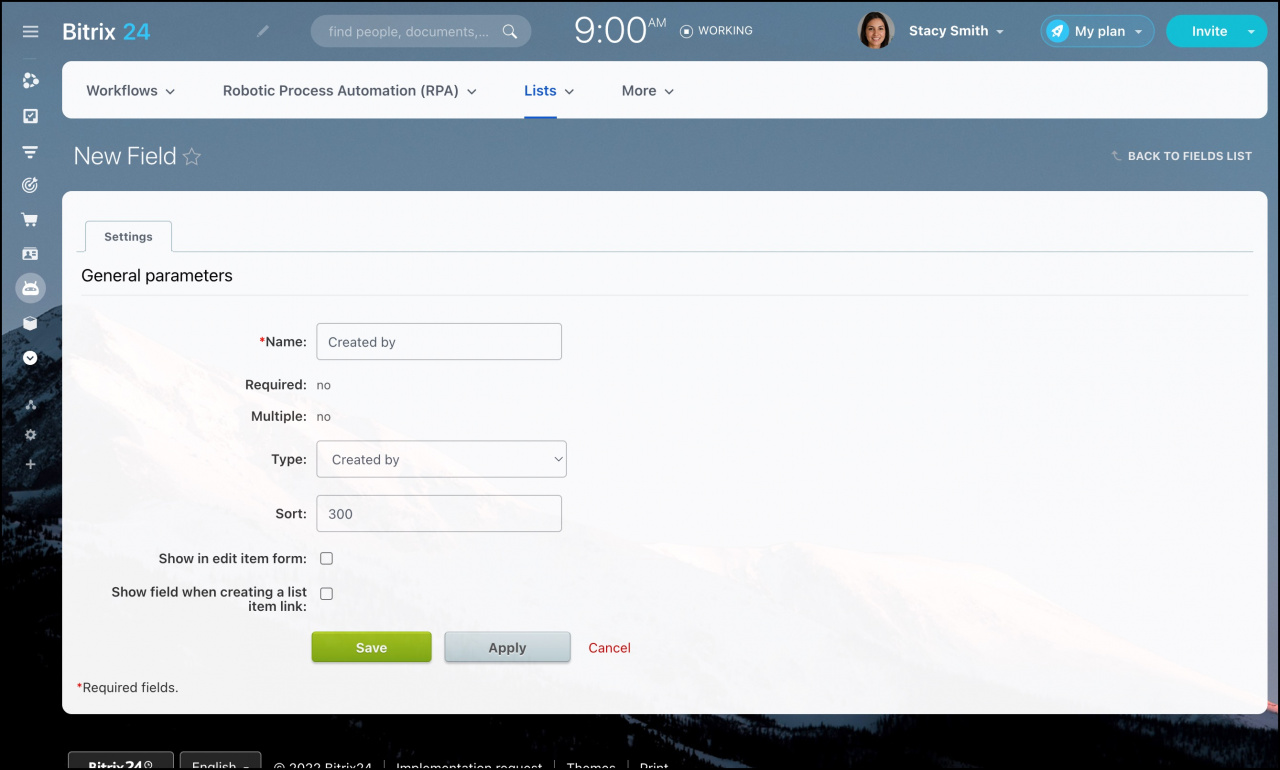
To track who creates or edits items:
- Add a field named Created by.
- Select the appropriate field type.
Do not enable these options:
- Show in new item form
- Show in edit item form
This field is filled in automatically.
Add list items
The basic setup is complete.
- Click Add promotional item.
- Fill in the fields you created.
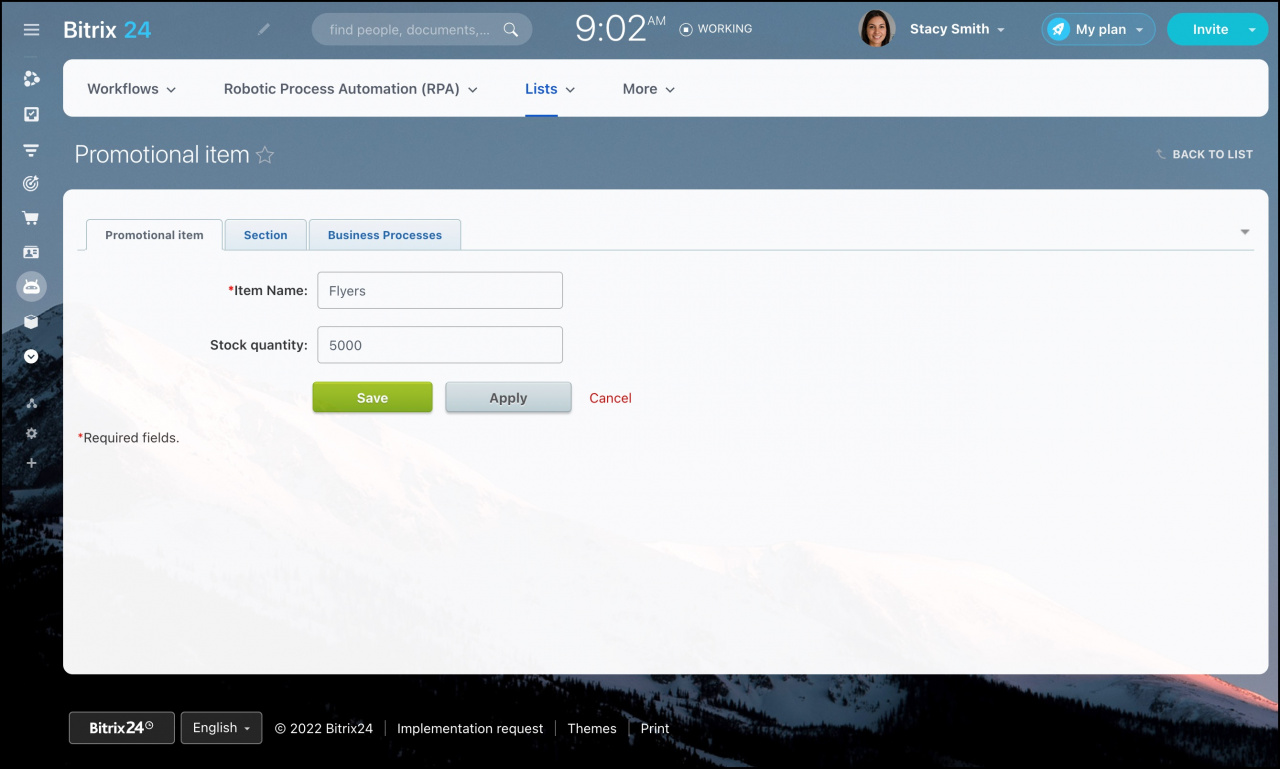
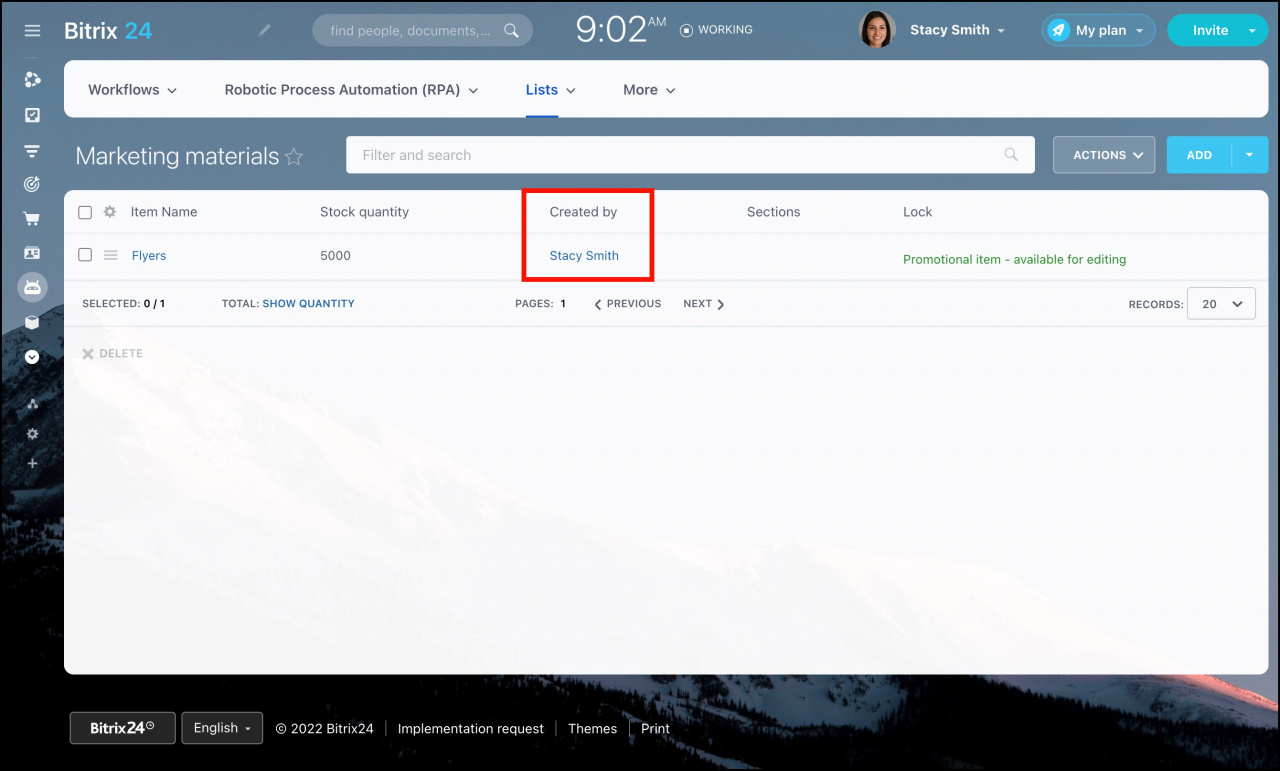
The list will automatically show who added each item.
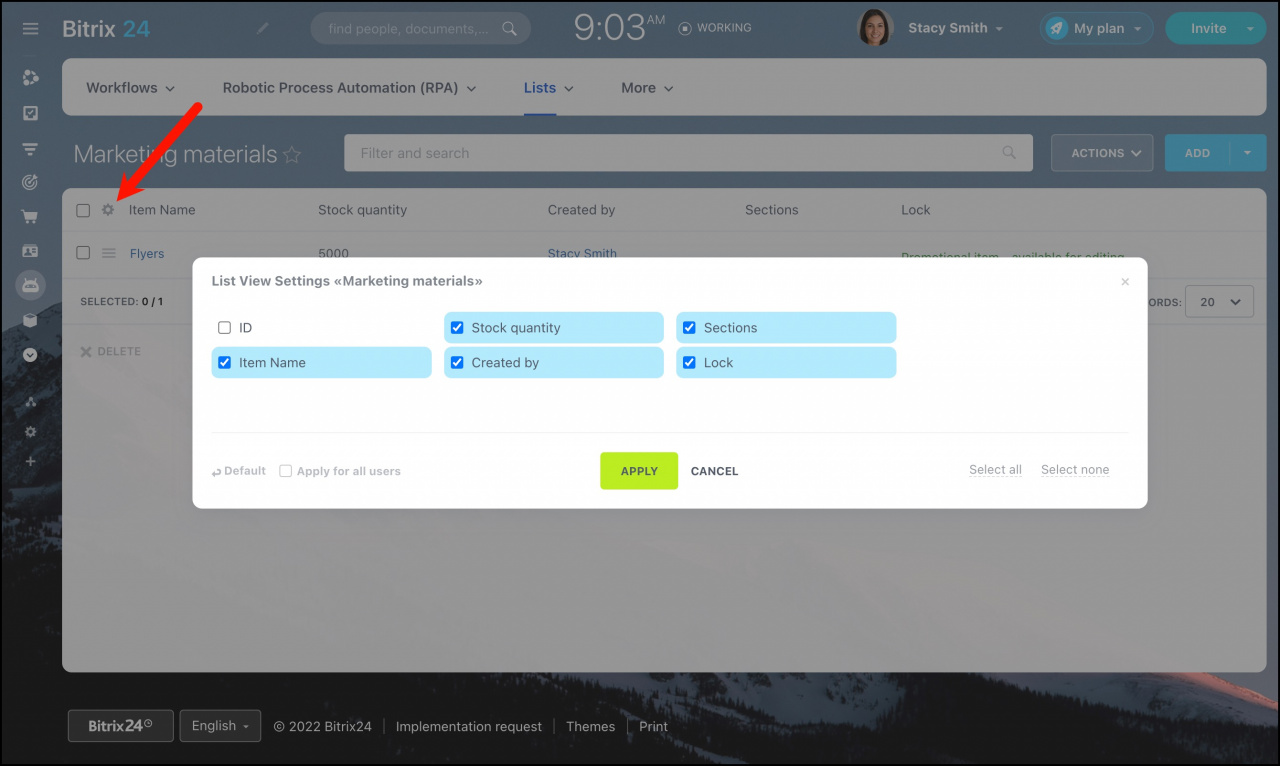
Customize the list view
Users with access to the list can customize which fields appear in the list view.
- Click the Settings icon.
- Select the fields you want to display.
You can continue adding new fields and automate notifications with Business Processes.