With Bitrix24 e-Signature, you can sign contracts and other documents with vendors electronically. This is convenient—no need to print, scan, or exchange papers in person.
Create an electronic document
Employees with the appropriate access permissions can create and send documents for signing.
Configure access permissions for the e‑Signature section
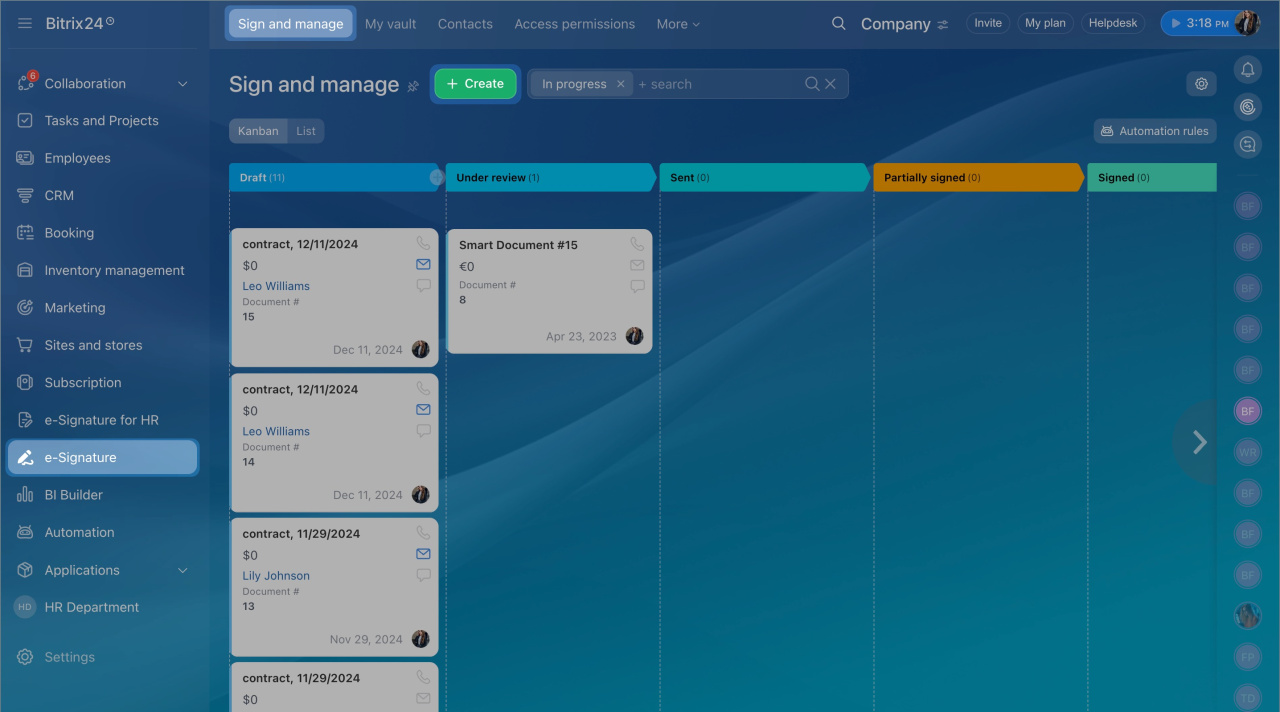
- Go to the e-Signature section > Sign and manage > Create.
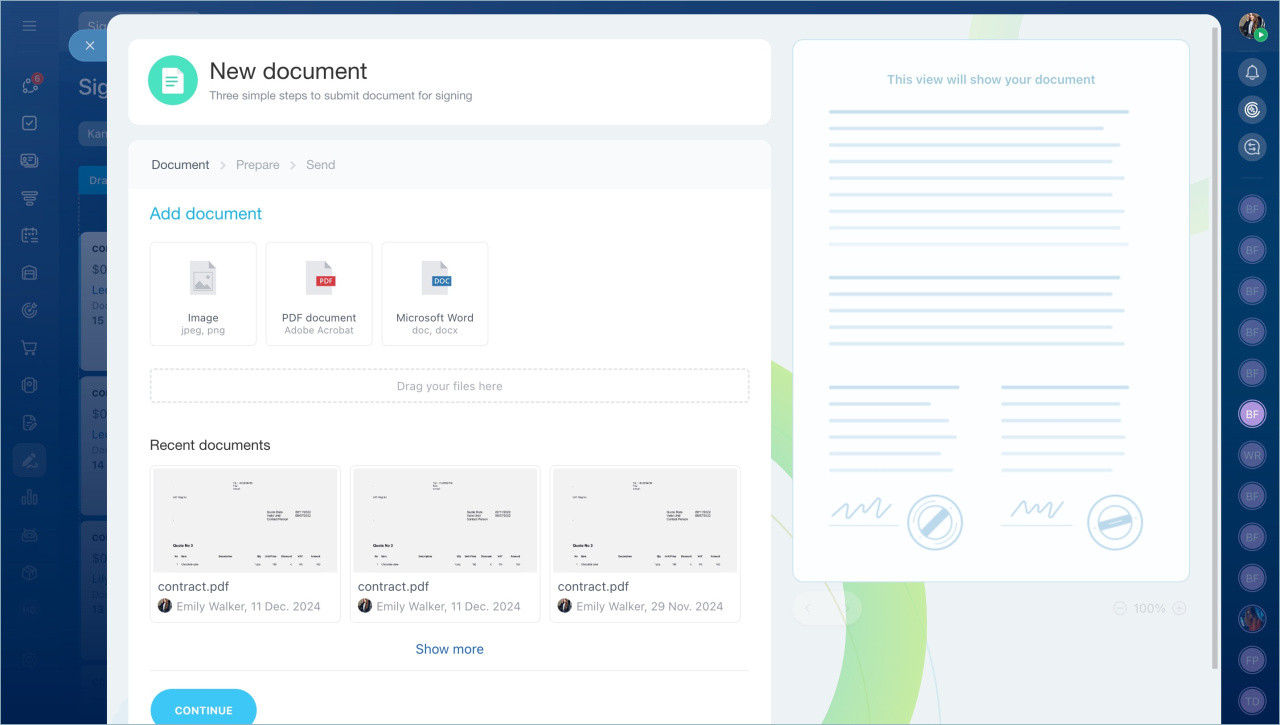
- Upload a new document or select one from recently created files. Click Continue.
Select who will sign the document
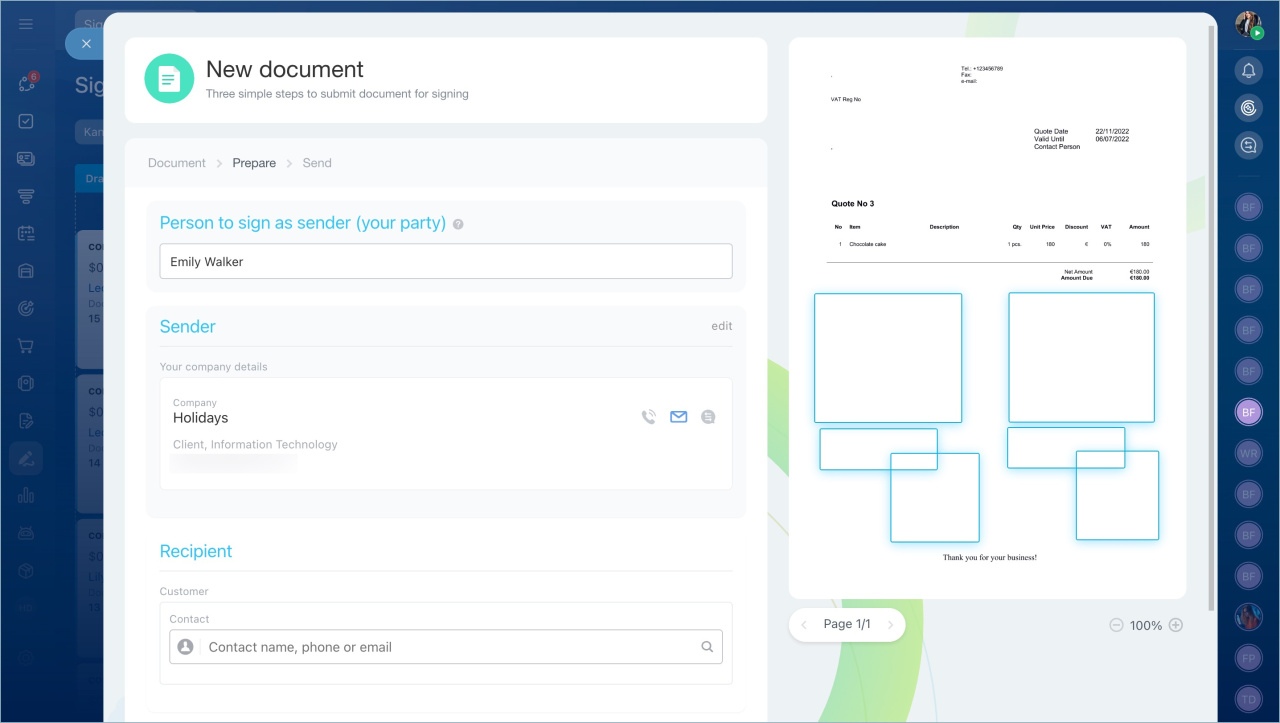
Choose who will sign the document on behalf of your company and the vendor. This could be the director or another employee authorized to sign.
- Enter the name and surname of the employee who will sign the document on your behalf. The name will appear in the document text and the signing certificate.
- Select your company details.
- Click Edit if you need to choose another company.
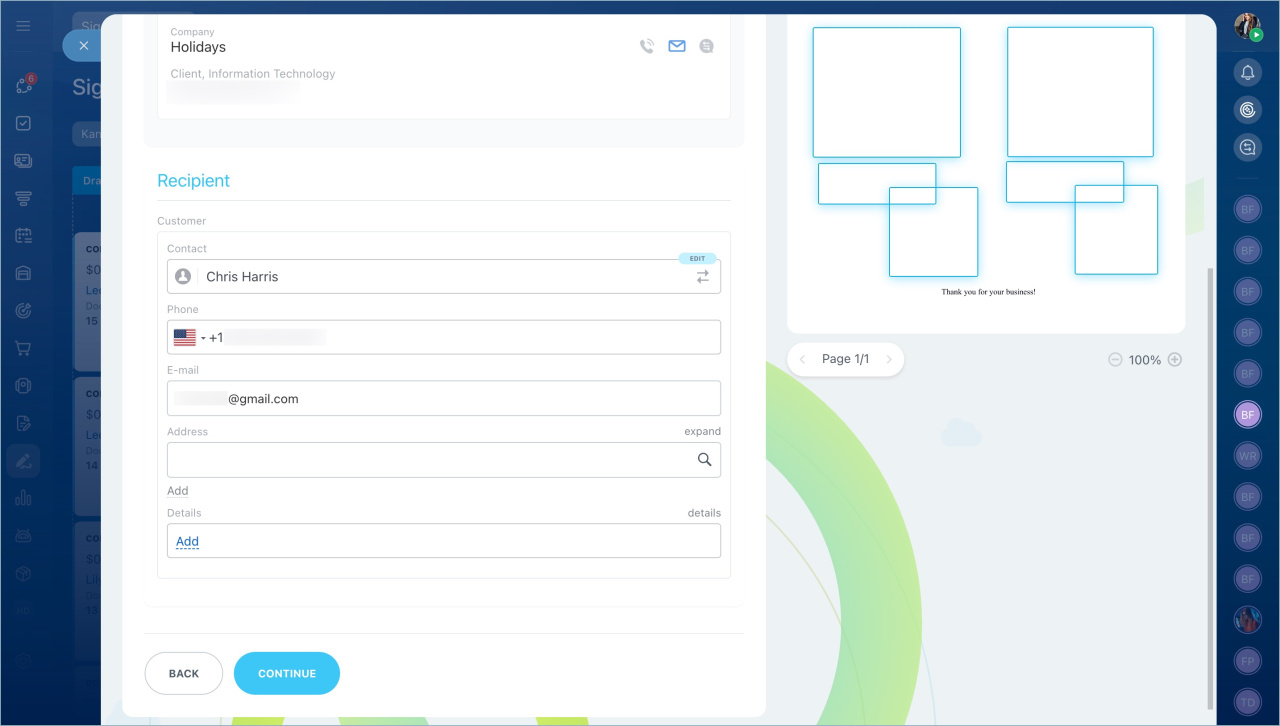
- Select the vendor from the list.
- Click Continue.
Signing parties in Bitrix24 e‑Signature
Edit the document
You can edit the document if needed. For example, update its date or number. Click Edit.
Use the Sender, Recipient, and Common sections to add additional details to the document, like a stamp or signature.
Sender
- Your company details are added automatically. You can fill them in advance or during document creation.
Add company details - Signature and stamp are requested from the employee when signing the document.
- CRM field allows inserting data from a contact, company, or deal form.
Recipient
- Details, signature, and stamp are requested from the recipient when signing the document.
- CRM field allows inserting any information stored in the contact form, like the recipients's surname or position.
Common
- Text. Add any text to the document, like the contract subject or payment terms.
- Date. Specify the contract signing date.
- Number. Enter the document number manually or use an automatic numbering system. Set the starting value and increment in the numbering settings.
Create and configure auto numbering template in CRM
To add an element to the document, like a stamp or signature:
- Click To document next to the required element.
- Adjust the element's position in the text—for example, place the stamp and signature at the bottom near the details.
- Select the color for the signature and stamp. This helps distinguish between your company's and the sender's signatures. The color will be saved in the final document and signing certificate.
- Click Continue.
Choose where to send the signing link
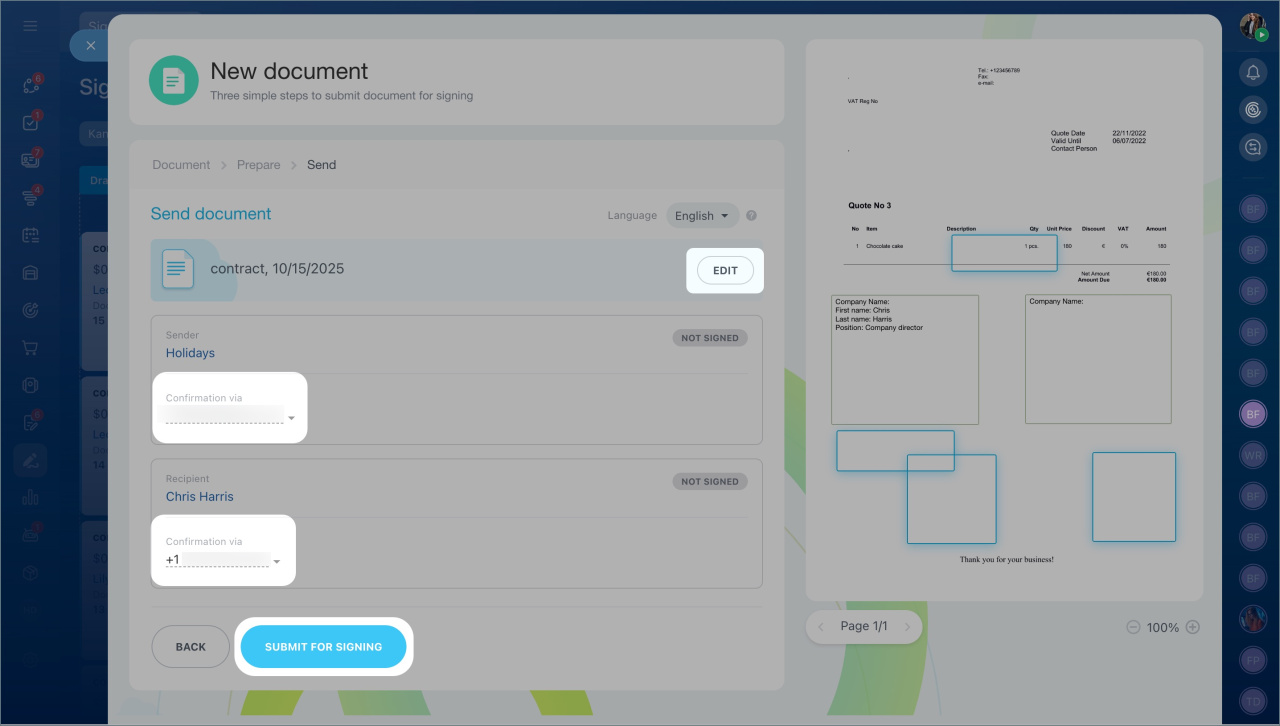
- Click Edit if you need to update the document name. This name will appear in the digital signing certificate.
- Choose how to send the document link—via SMS or email.
- Click Send for signing.
First, the document is sent to your company's representative. After they sign it, the file is automatically sent to the recipient.
Sign a document with Bitrix24 e-Signature
Restrictions for sending documents on trial and free plans
Before sending the third document, the user creating documents in Bitrix24 must verify the phone number. This step is necessary to protect the account: phone number verification ensures that your Bitrix24 is not being used for spam.
When you prepare the third document for sending, a window will appear.
- Enter your phone number and click Get SMS. A code will be sent to this number within 10 minutes.
- Enter the code and click Verify.
- Wait for the verification process to complete and click Finish.
After completing these steps, you will be able to send the document to your counterparty.
In brief
- With Bitrix24 e-Signature, you can sign contracts and other documents with recipients electronically.
- To sign electronic documents with recipietns, agreements must be concluded.
- Employees with the appropriate access permissions can create and send documents for signing.
- To create a document, go to the e-Signature section > Sign and manage > Create.
- You can edit the document if needed, like updating its date or number.
- Documents can be signed by the company director or another authorized employee.
- The signing link can be sent via email or SMS.
- The document is first sent to your company's representative. After they sign it, the file is automatically sent to the recipient.
- On free and trial plans, when preparing the third document, you need to link a phone number to your Bitrix24 account and verify its validity. This step is necessary to protect the account: phone number verification ensures that your Bitrix24 is not being used for spam.

