Live chat allows customers to message you directly from your site. A visitor asks a question in the chat, and the message is immediately sent to Bitrix24, where employees handle it. This is a convenient way to avoid losing inquiries, respond quickly to customers, and keep all correspondence in the CRM.
In this article:
- Connect a live chat to an open channel
- Configure a public page with a chat
- Add a live chat to your site
- View the conversation number in live chat
- Remind the customer about an unread message
Connect a live chat to an open channel
An open channel is a tool that allows you to distribute customer inquiries to managers and configure automated replies.
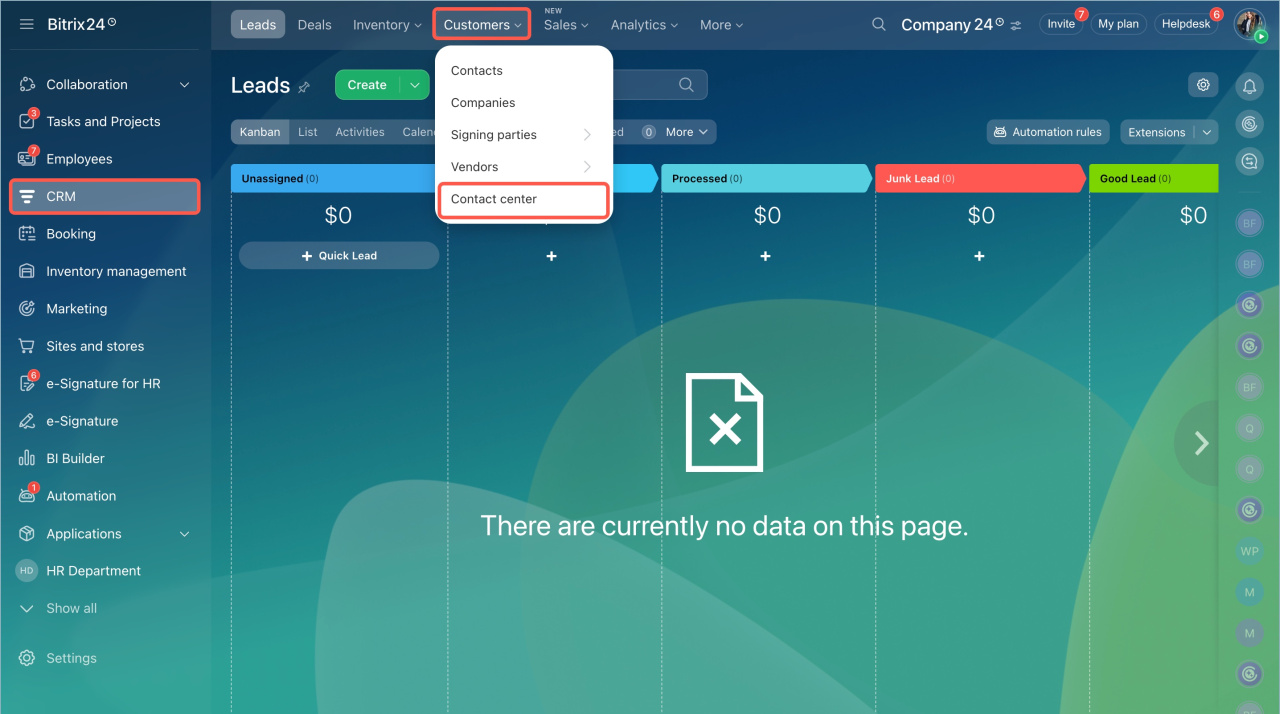
- Go to the CRM section > Customers tab > Contact Center.
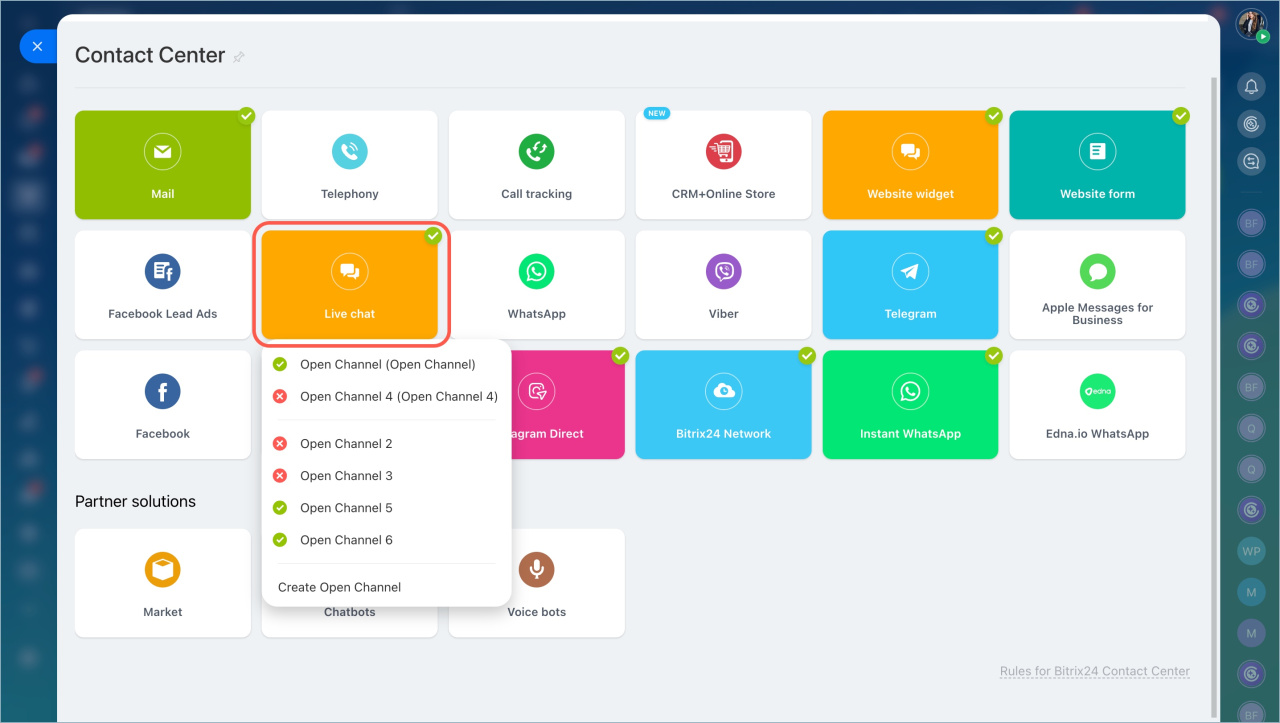
- Click on the Live Chat block, select an open channel from the list or create a new one.
- Click Connect.
Configure a public page with the live chat
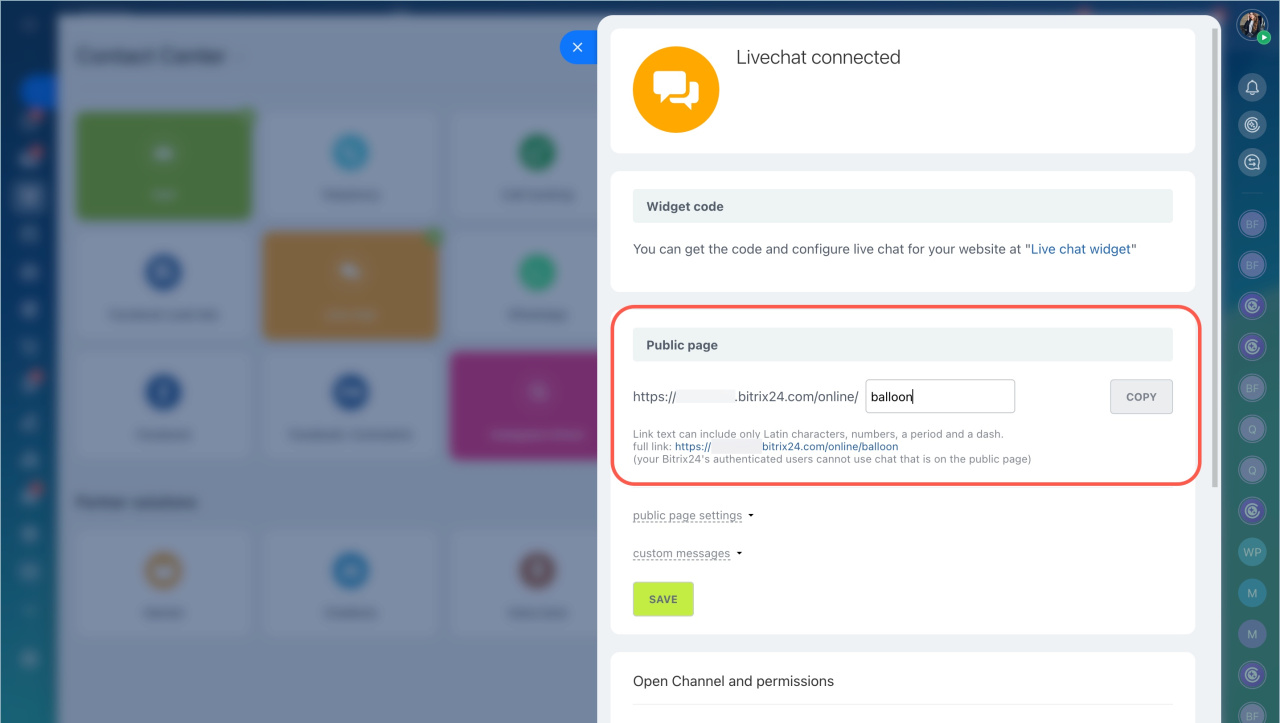
A public page is a separate link that customers can use to access the live chat. This is useful if your site is not ready yet or if you want to provide customers with a direct link to the chat.
Create and specify a short address for the online chat. It will be added to the end of the link.
Public page settings. You can customize:
- Chat design. Upload a background image that will be visible on the chat page.
- Custom CSS. Add a link to a CSS file or insert code into the CSS Text field.
- Signature. Check the box to remove the "Powered by Bitrix24" signature in the chat.
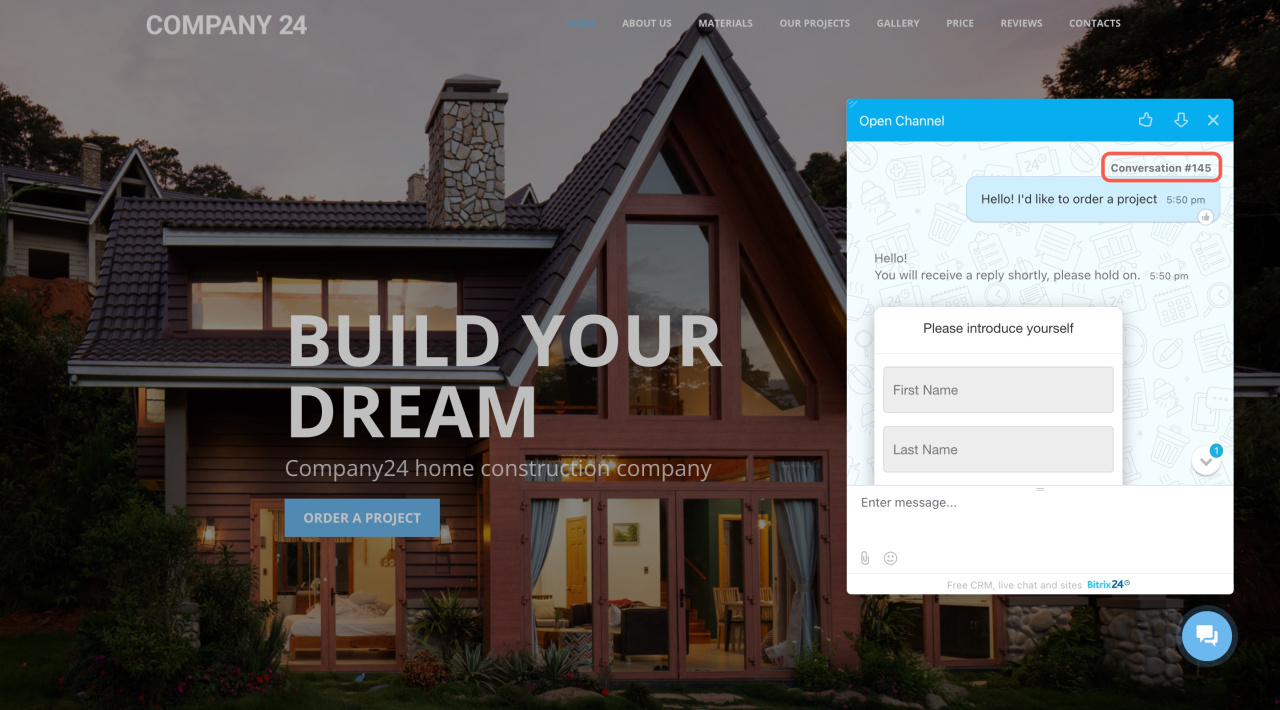
- Conversation #. Enable the show in the widget title option so both the customer and the employee can see the dialog number. This helps reference it for the customer’s next inquiry.
Phrase settings. Customize the text customers see in the online chat. You can configure:
- Welcome message
- Agent unavailable text
- Chat title. It is displayed instead of the open channel name.
After changing the chat title, it may take 10–15 minutes for the updates to apply.
To edit public page settings, click Change.
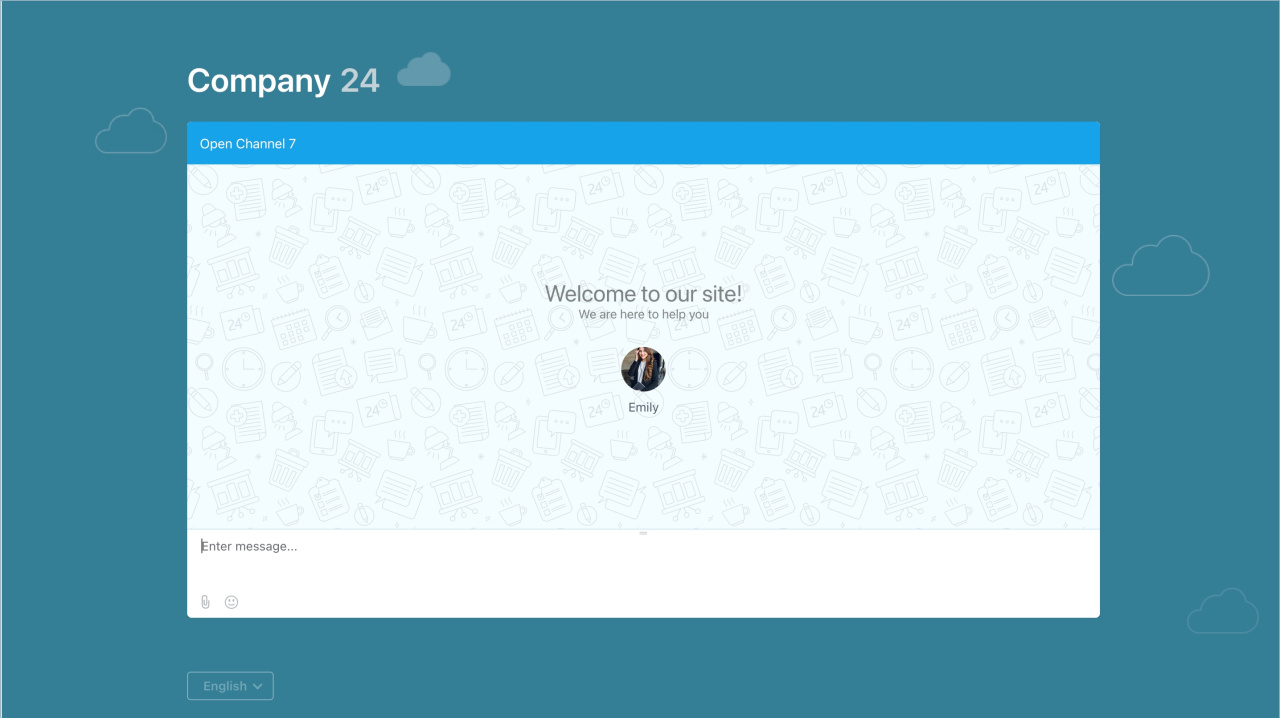
To check how the online chat looks for customers:
- Open the public page with the online chat in the incognito mode in your browser
- Use a browser where you are not logged into your Bitrix24 account
Add a live chat to your site
You can add the online chat to your site using a widget. This can be done on a site created in Bitrix24 or on another platform.
Website widget
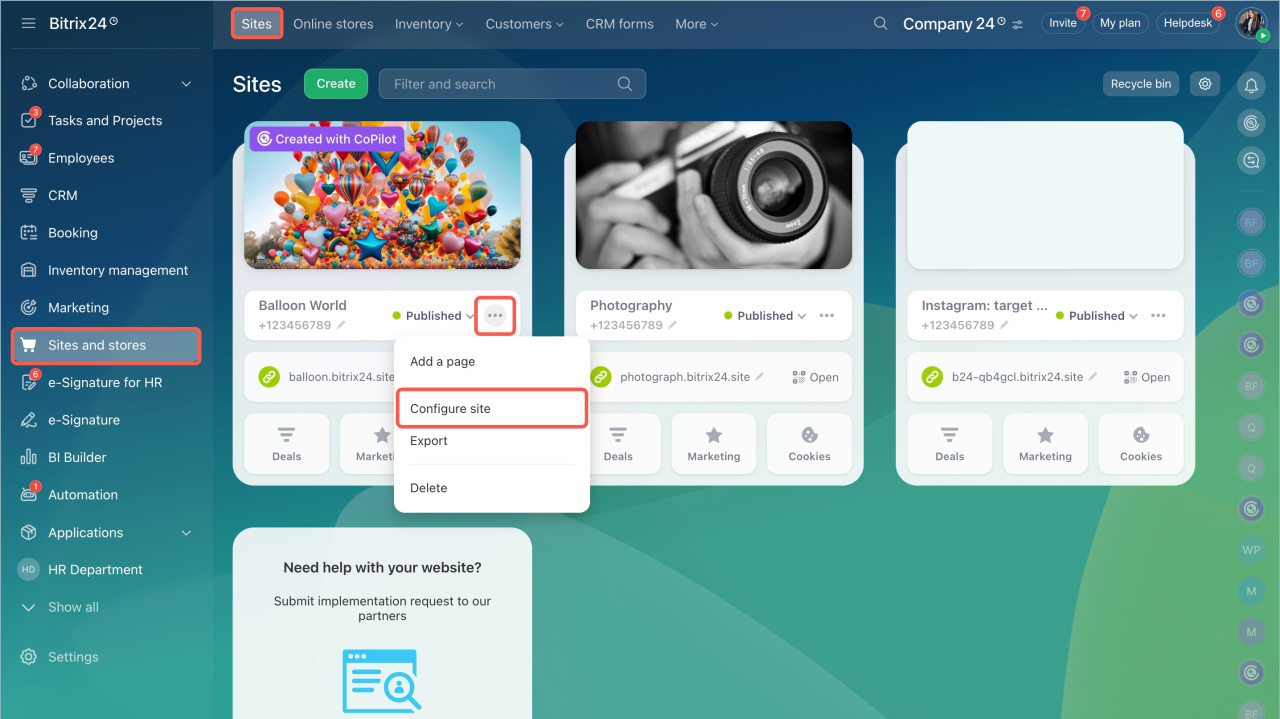
- Go to the Sites and Stores section > Sites.
- Click Three dots (...) > Configure site.
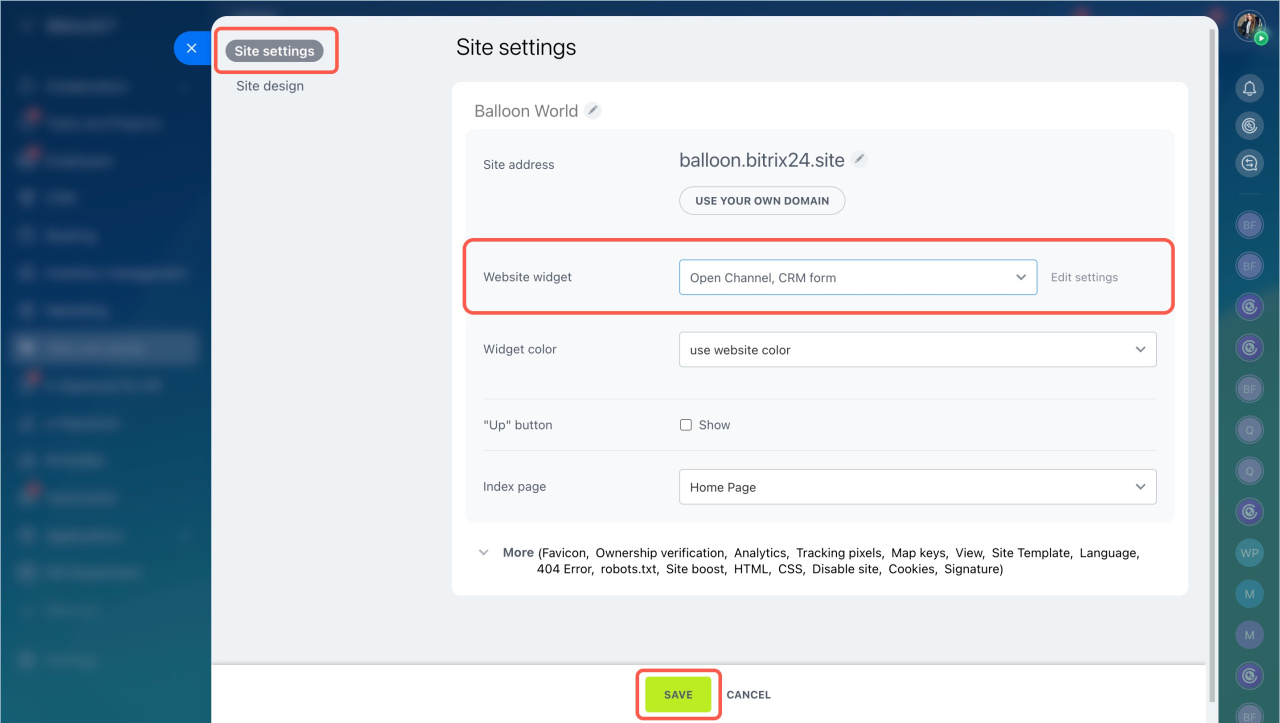
- Open the Site settings tab and select the widget.
- Save the changes.
If the site is on another platform:
- Go to the CRM section > Customers tab > Contact Center.
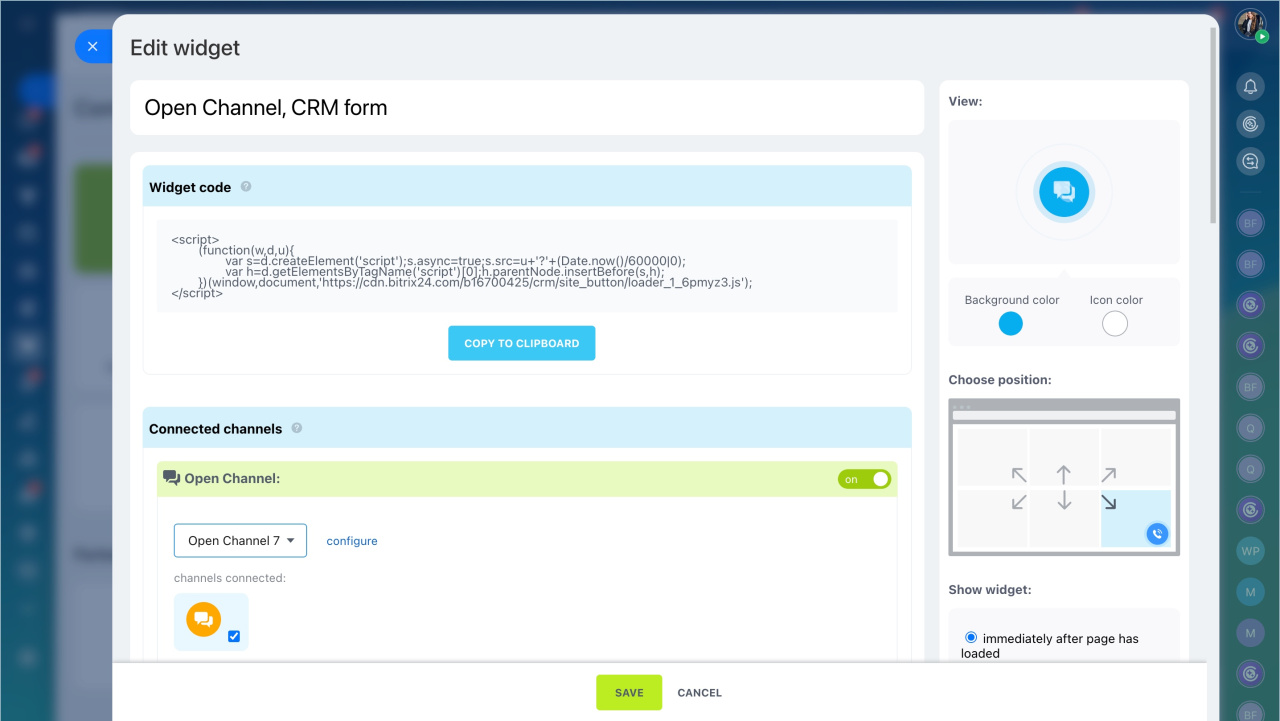
- Click on the Website widget block and select or create a new one.
- Connect the open channel with a live chat to the widget.
- Copy the widget code and paste it into your site template code before the closing
/bodytag.
Use Bitrix24 website widget for WIX
View the conversation number in live chat
The conversation number is displayed in the live chat for both the customer and the agent. Customers can use this number when following up on issues, while agents can use it to quickly find the chat in the Conversations section.
Working with Open Channel chats in the Conversations section
Remind the customer about an unread message
If a customer doesn’t respond in the live chat, Bitrix24 can automatically remind them about the message. One minute after an agent sends a reply that remains unread, or if the customer closes the chat page, Bitrix24 sends an email notification.
The email shows the customer’s question and the agent’s latest reply. The customer can return to the live chat conversation by clicking the link in the email.
For the reminder to work, use a CRM form in the live chat to collect contact details.
Contact information form in live chat
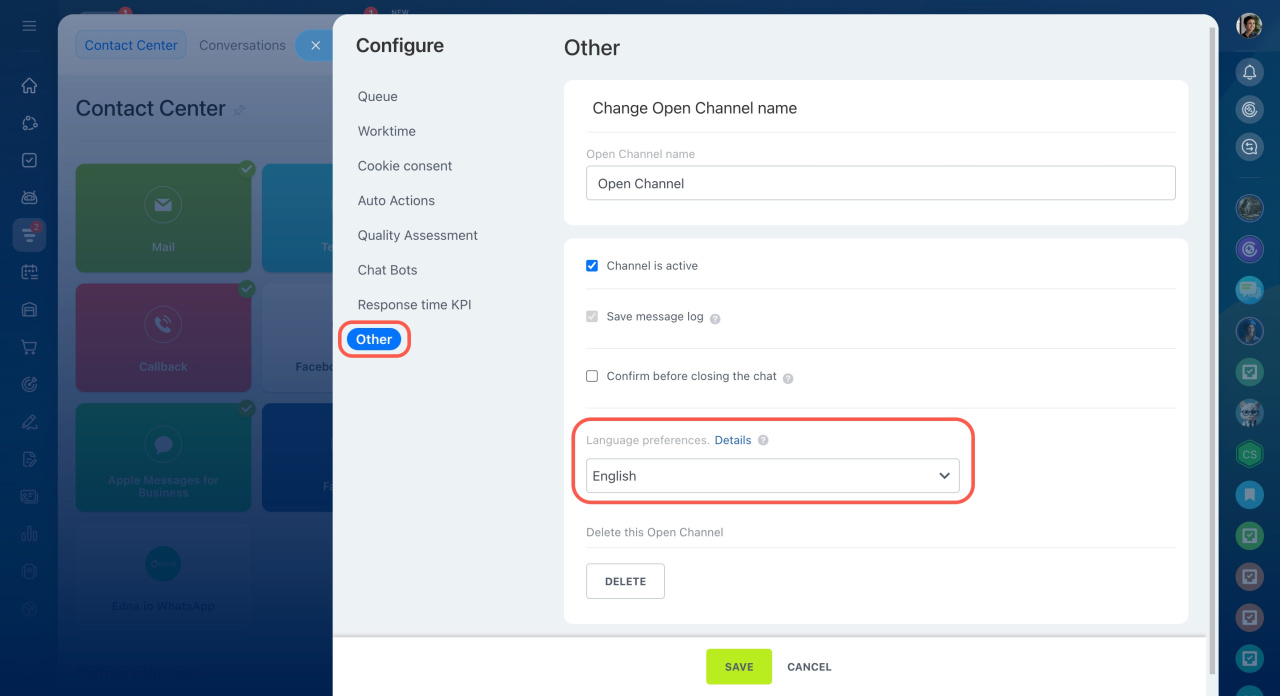
To ensure emails are sent in the correct language:
- In the live chat settings, click Configure.
- Open the Other tab.
- Under Language preferences, select the language you prefer.
This is especially helpful if your Bitrix24 domain zone differs from the language you use to communicate with customers.
In brief
- Live chat helps you communicate with customers directly on your site. A visitor asks a question in the chat, and the message is immediately sent to the Bitrix24 account, where employees respond to it.
- You can place the chat on a separate public page or add it to your site using a widget.
- In the public page settings, you can customize the chat design, welcome text, and enable the dialog number display.
- To check how the live chat looks for customers, open the public page in the incognito mode or in another browser where you are not logged into your Bitrix24 account.
- To place the live chat on a site created in Bitrix24, select the widget in the site settings. If the site is on another platform, copy the widget code and paste it into your site template code before the closing
/bodytag. - In live chat, both the customer and the agent can see the conversation number. This makes it easier to refer to the issue later if needed.
- If the customer provided an email address in the CRM form but closed the chat page or didn’t read the agent’s message within a minute, Bitrix24 automatically sends an email reminder. The email shows the customer’s question and the agent’s latest reply.

