A widget is a tool that allows customers to contact you directly on your website while automatically saving all requests in CRM. You can add these features to your widget:
- Live chat—Talk to website visitors in real time.
- CRM forms—Collect inquiries, bookings, and contact information.
- Social networks and messengers—Let customers contact you through their preferred communication channel.
In this article, you will learn how to:
Create and configure a widget
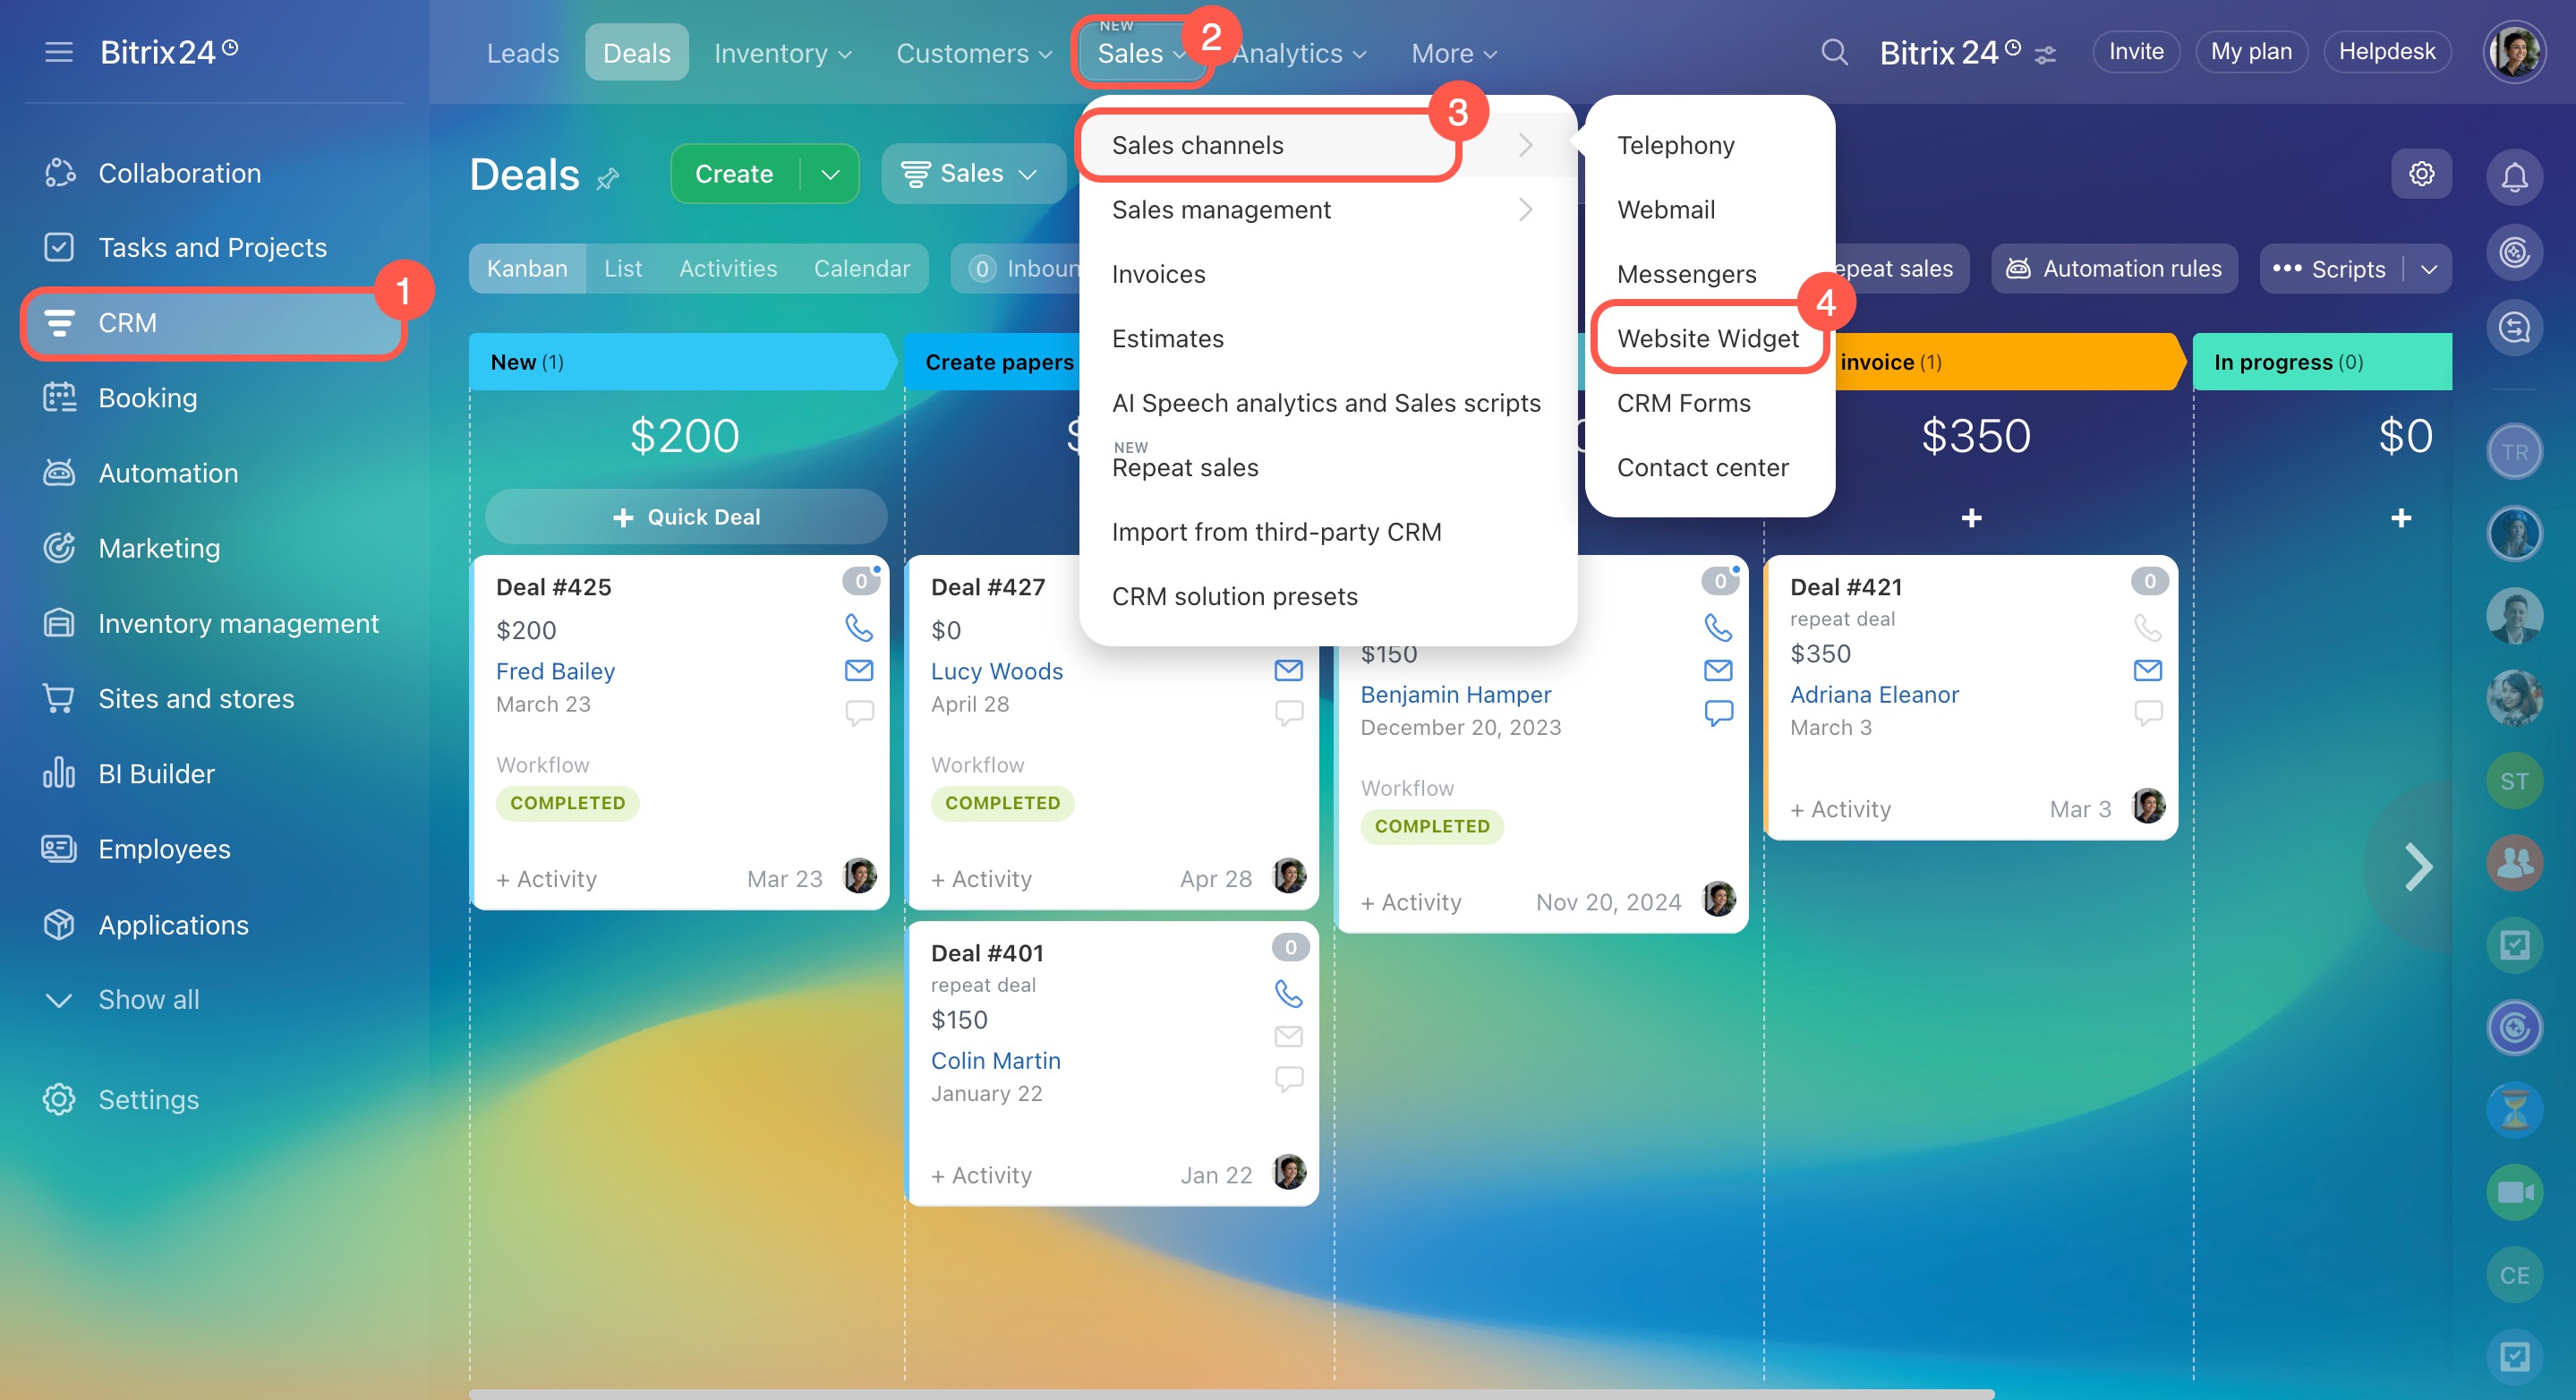
- Go to CRM.
- Expand Sales.
- Select Sales channels.
- Click Website widget to view all your widgets.
- Bitrix24 provides a standard widget that cannot be deleted. You can modify its settings or disable it if needed.
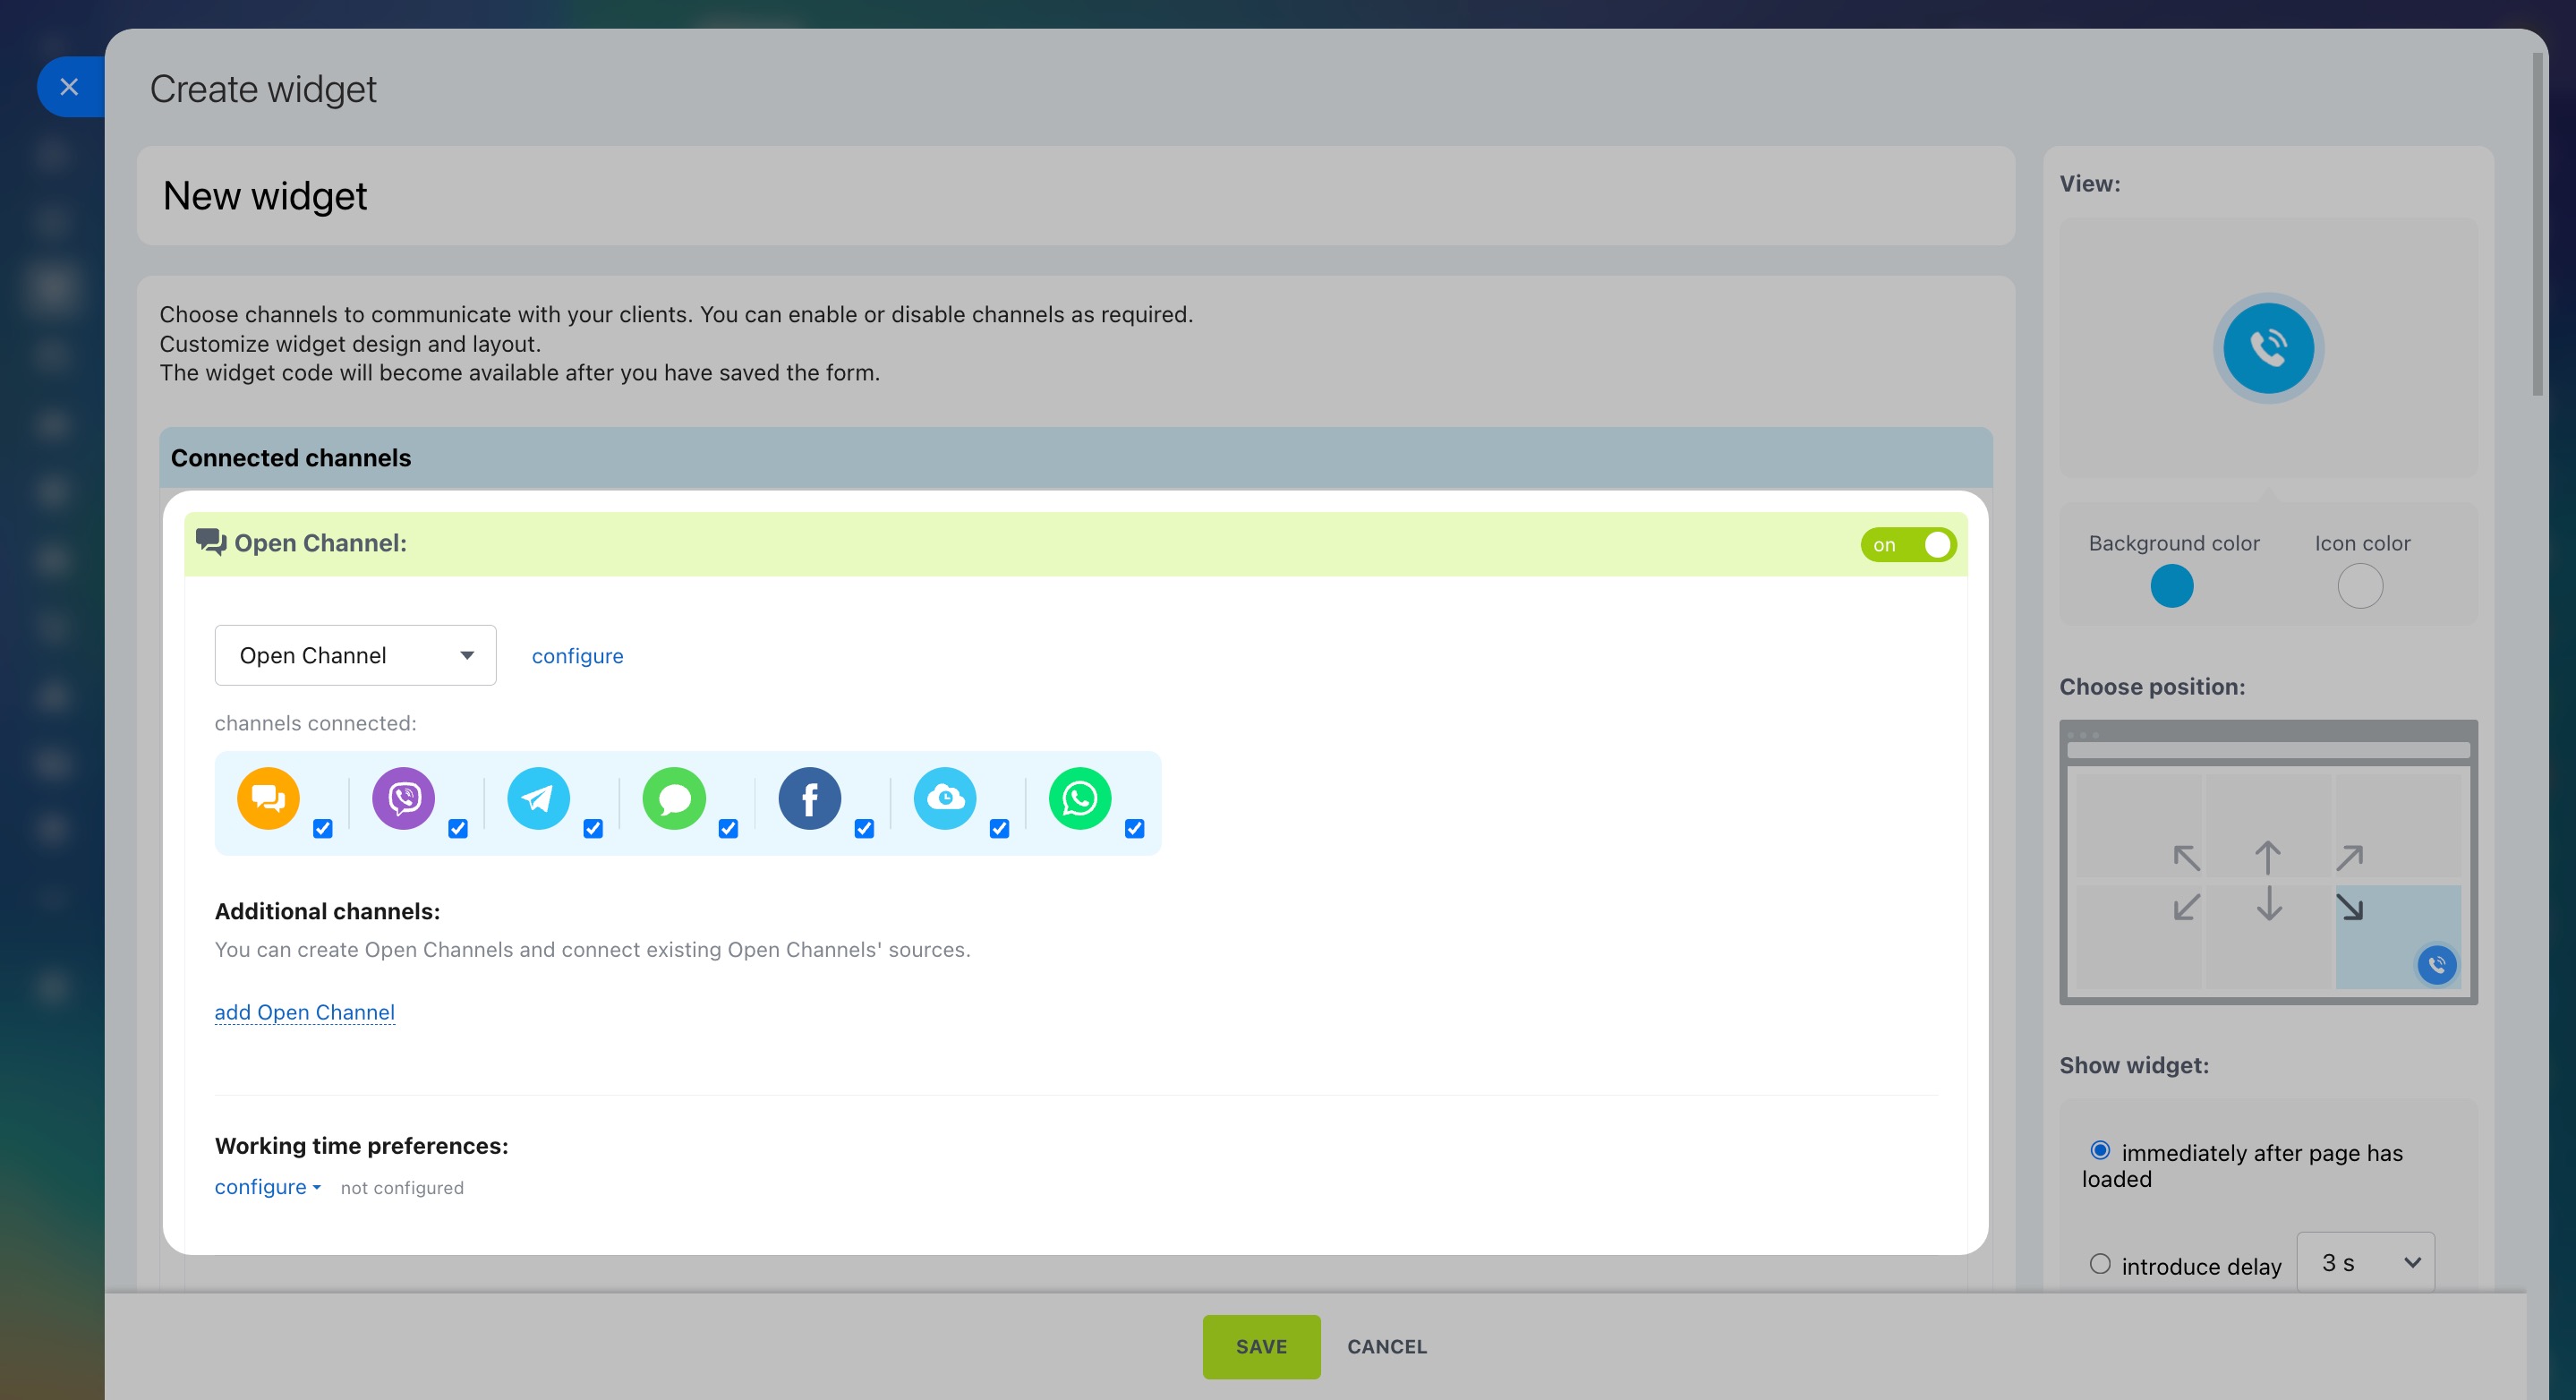
- To create a custom widget instead, click Create widget and enter its name.
Connect channels to the widget
Connect social networks, messengers, a CRM form, and a callback option to the widget. Use the toggle switches to enable the channels you need.
Open Channels. Select an Open Channel and enable the options you need, such as Live chat or WhatsApp. To add another channel, click add Open Channel. This allows you to include social networks and messengers connected to different Open Channels.
To let customers contact you only during business hours, set the working hours for your Open Channel. These settings apply to all the channels linked to it.
Create and configure Open Channels
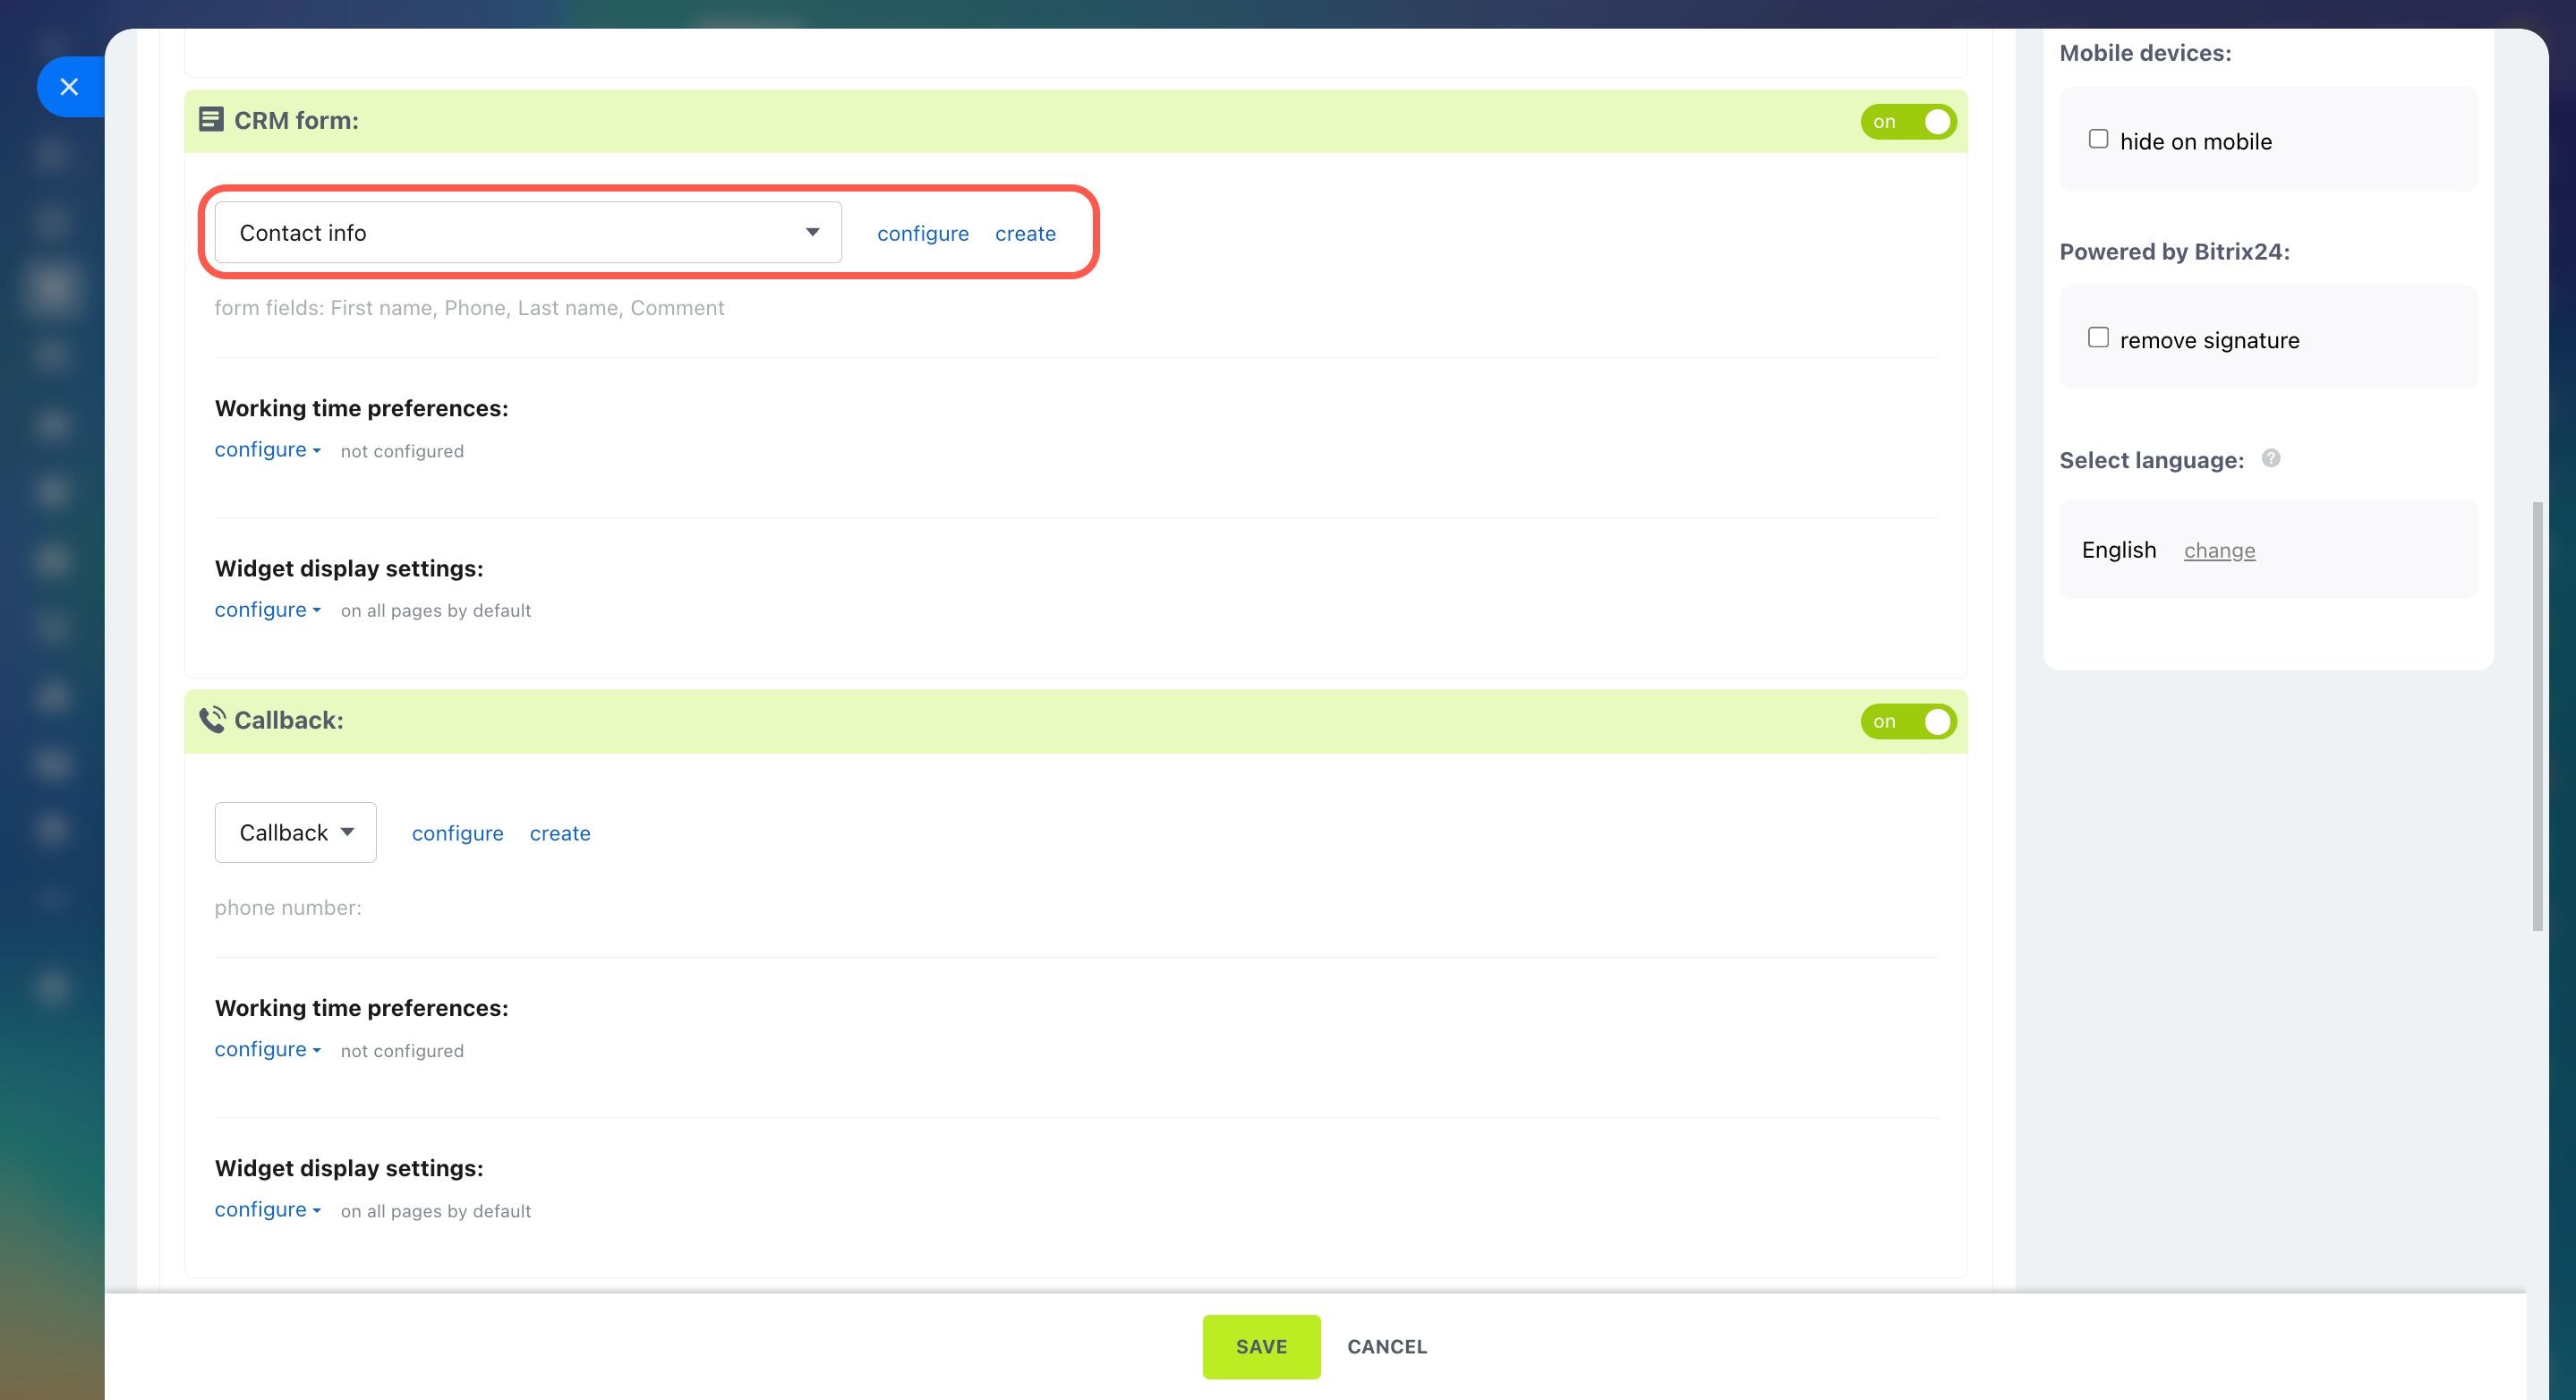
CRM form. Add a form to collect customer data, such as for placing an order or booking a service. Select an existing form or create a new one.
Create and configure CRM forms
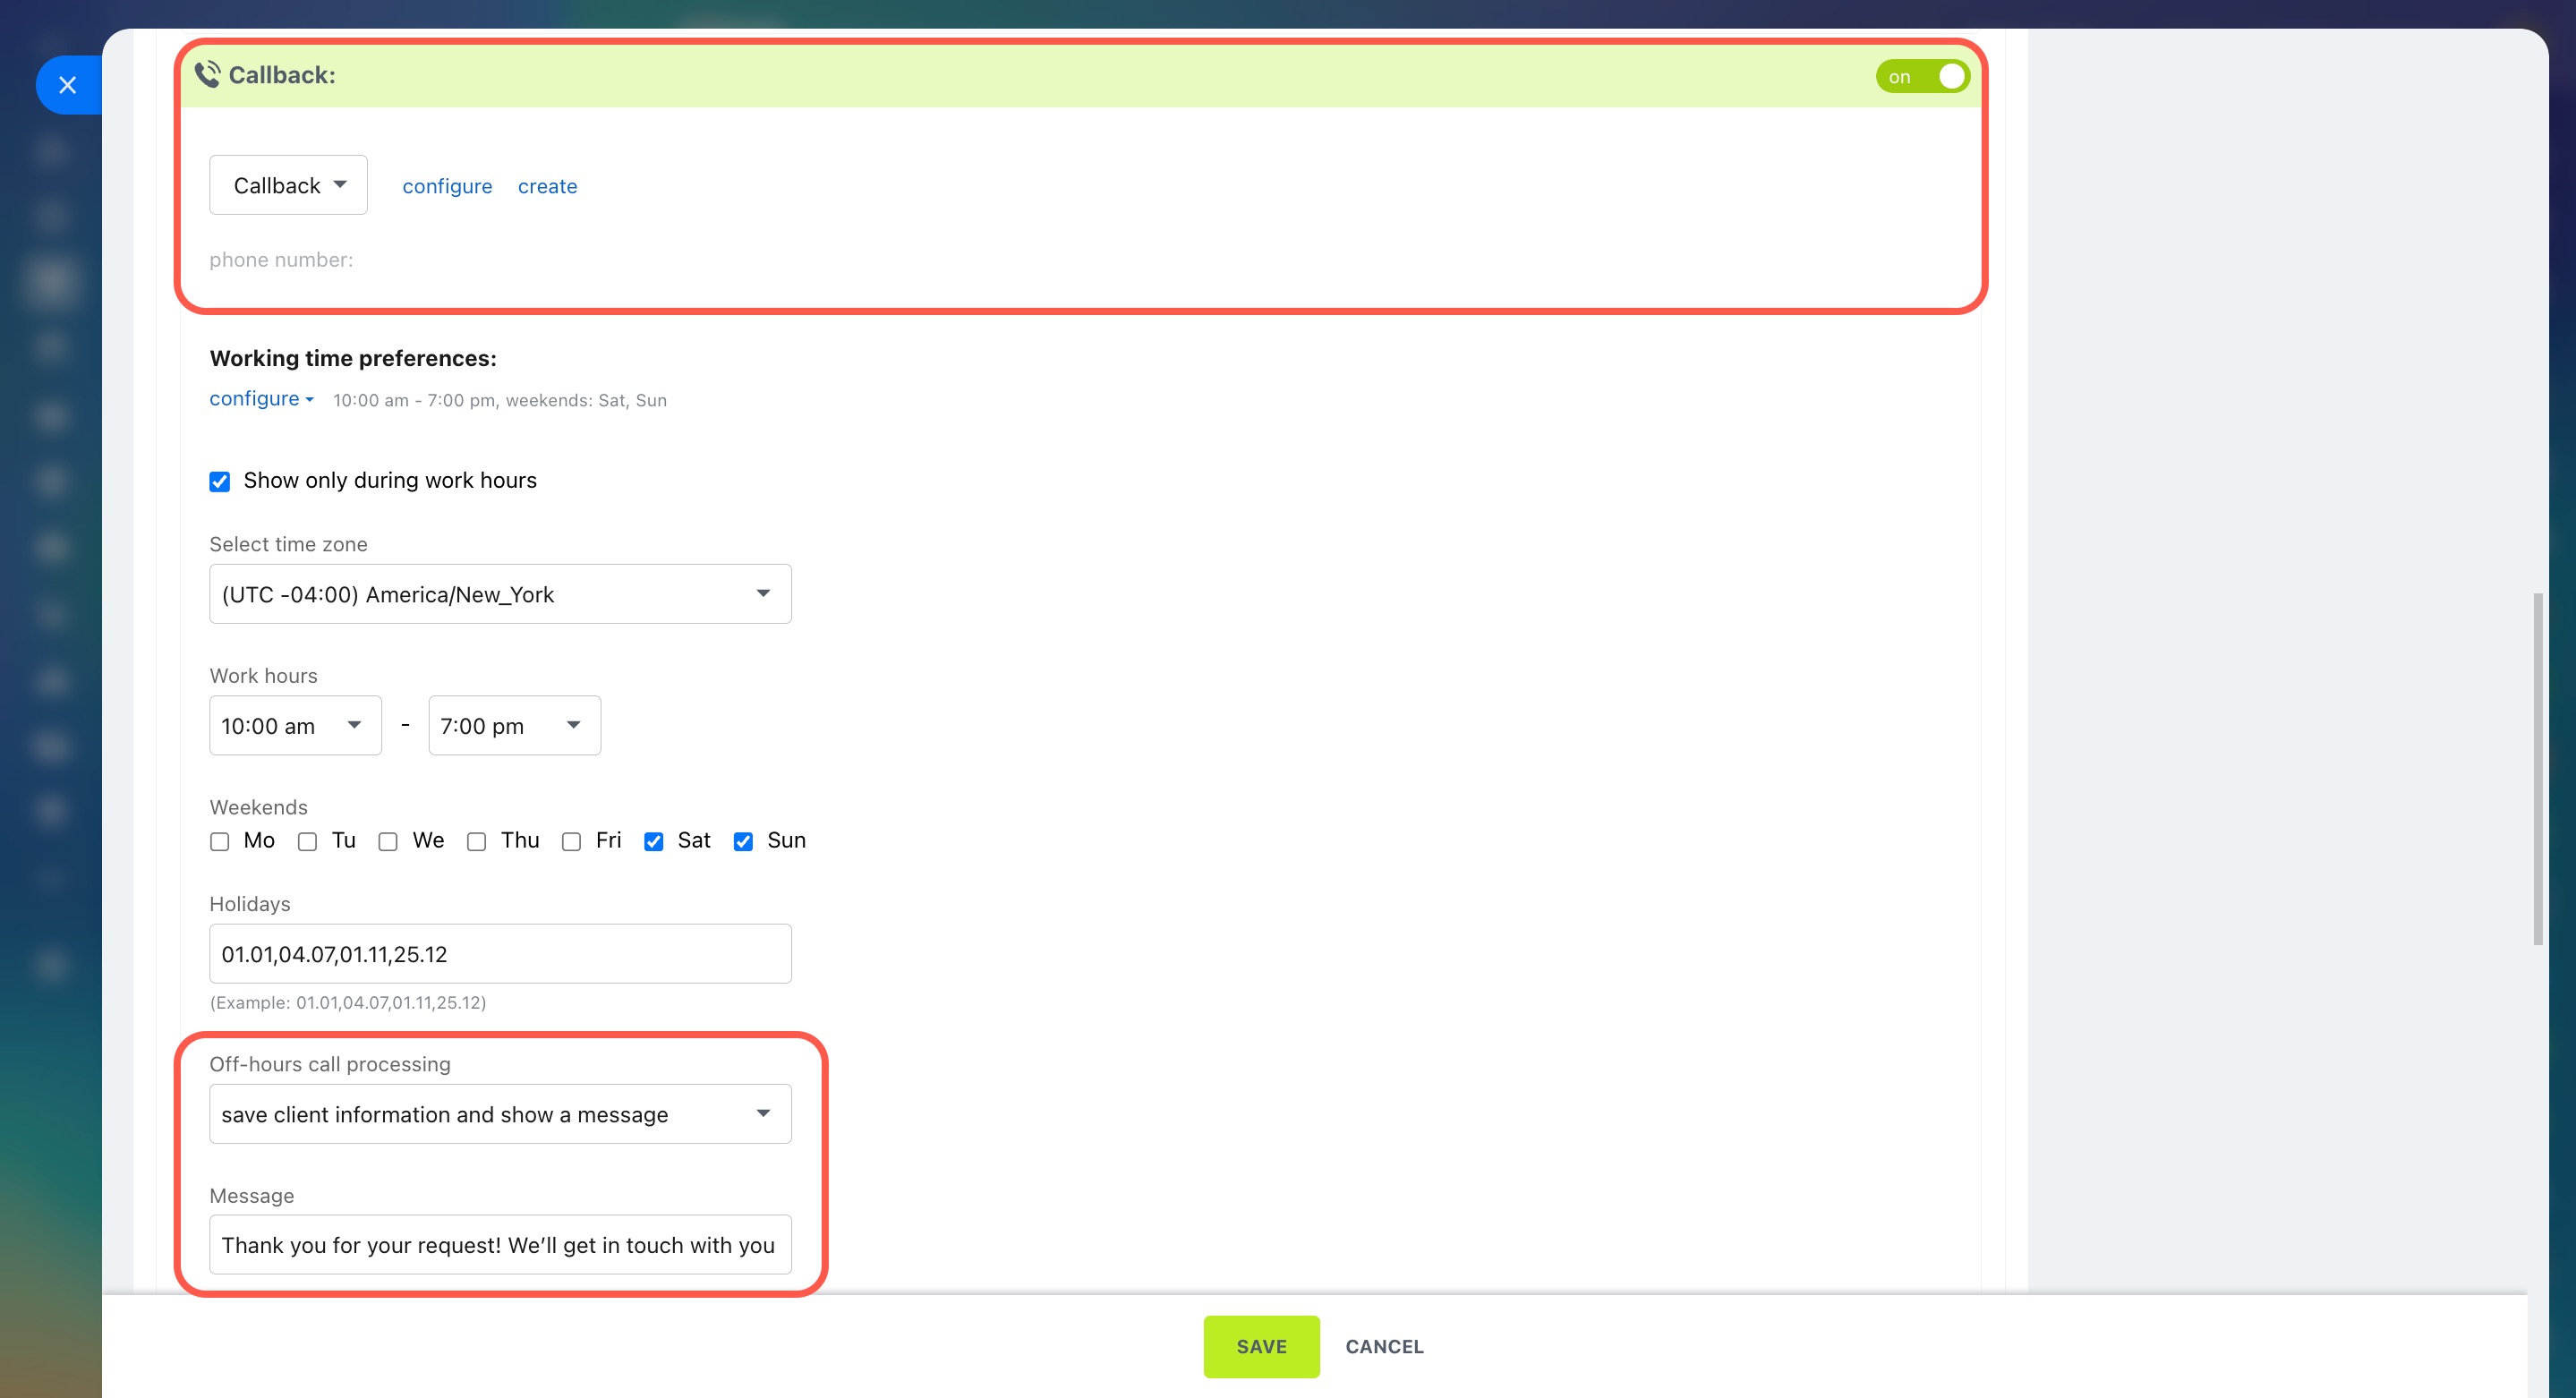
Callback. This is a CRM item form where the customer provides their phone number. If the responsible person for the form can receive incoming calls, they get a call to connect with the customer. If not, they call the customer back from the CRM item form.
Select an existing form or create a new one. Decide what to do with calls outside your business hours:
- Hide the callback button
- Save customer data and show a message
Bitrix24 plans and pricing
Set working hours and channel display
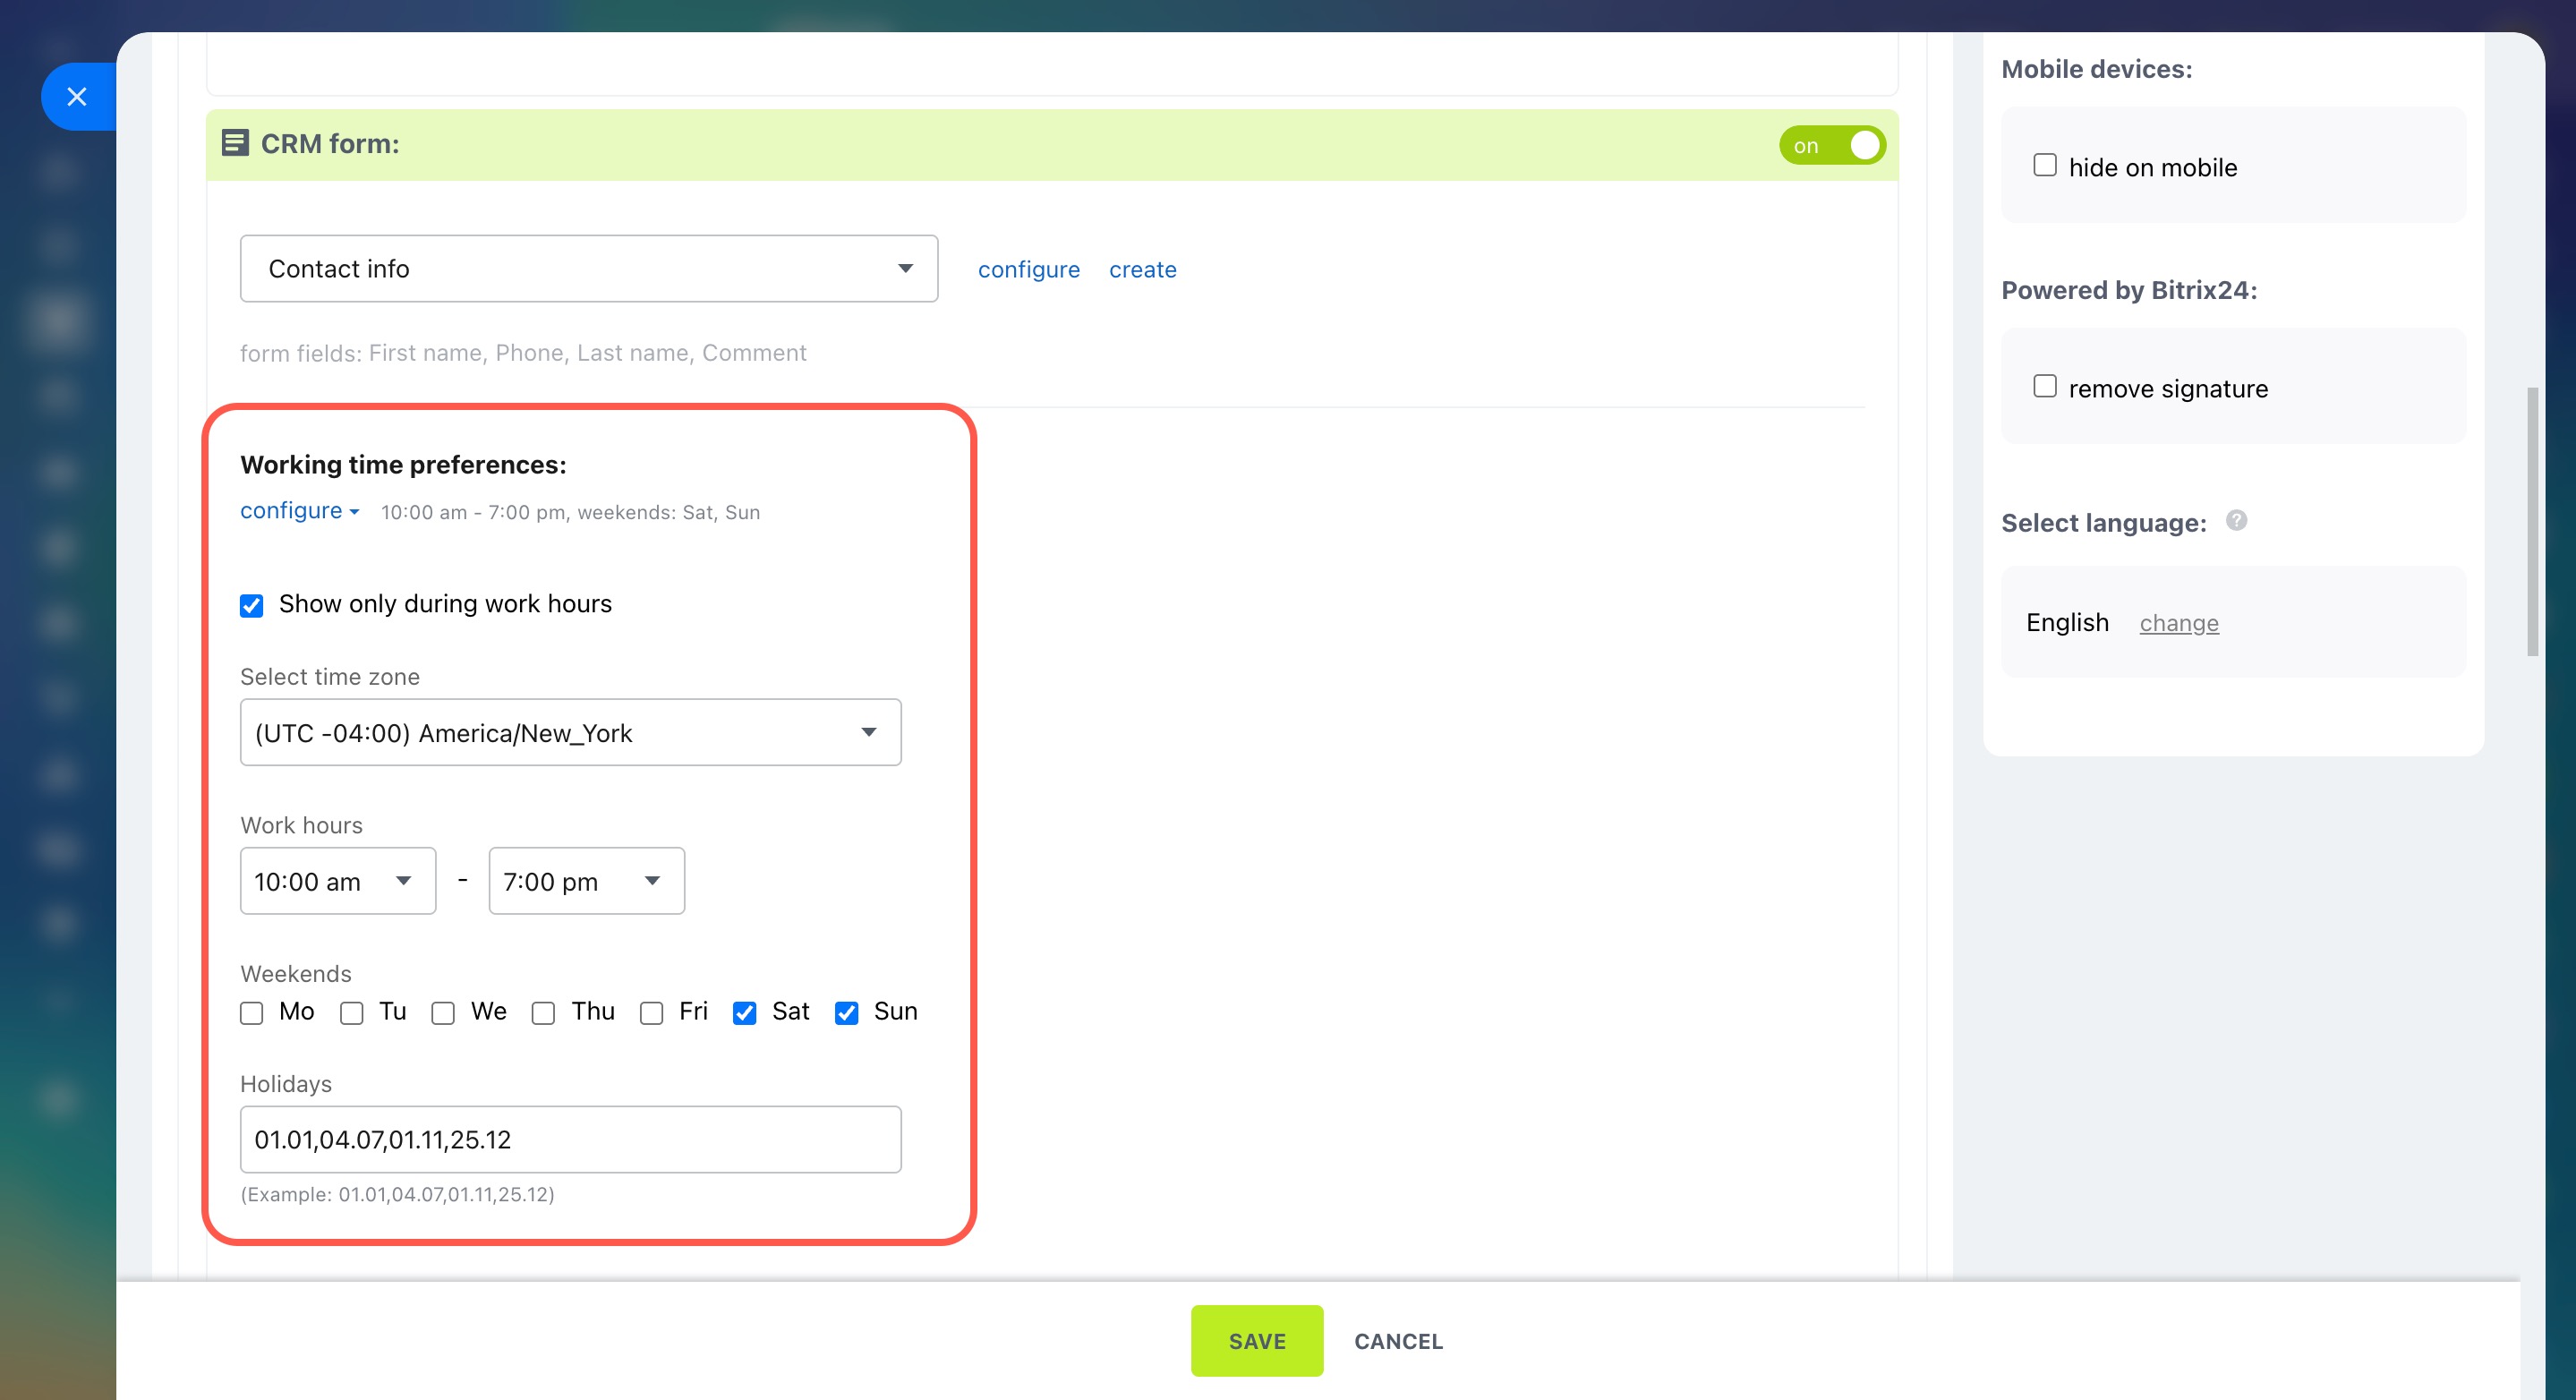
Working time preferences. Set the hours when customers can reach you through each channel (Open Channels, CRM form, and callback).
- Click Configure.
- Check the box next to Show only during work hours.
- Select your time zone.
- Mark your days off by checking the appropriate boxes.
- Add holidays, separated by commas without spaces (e.g., 01.01,04.07).
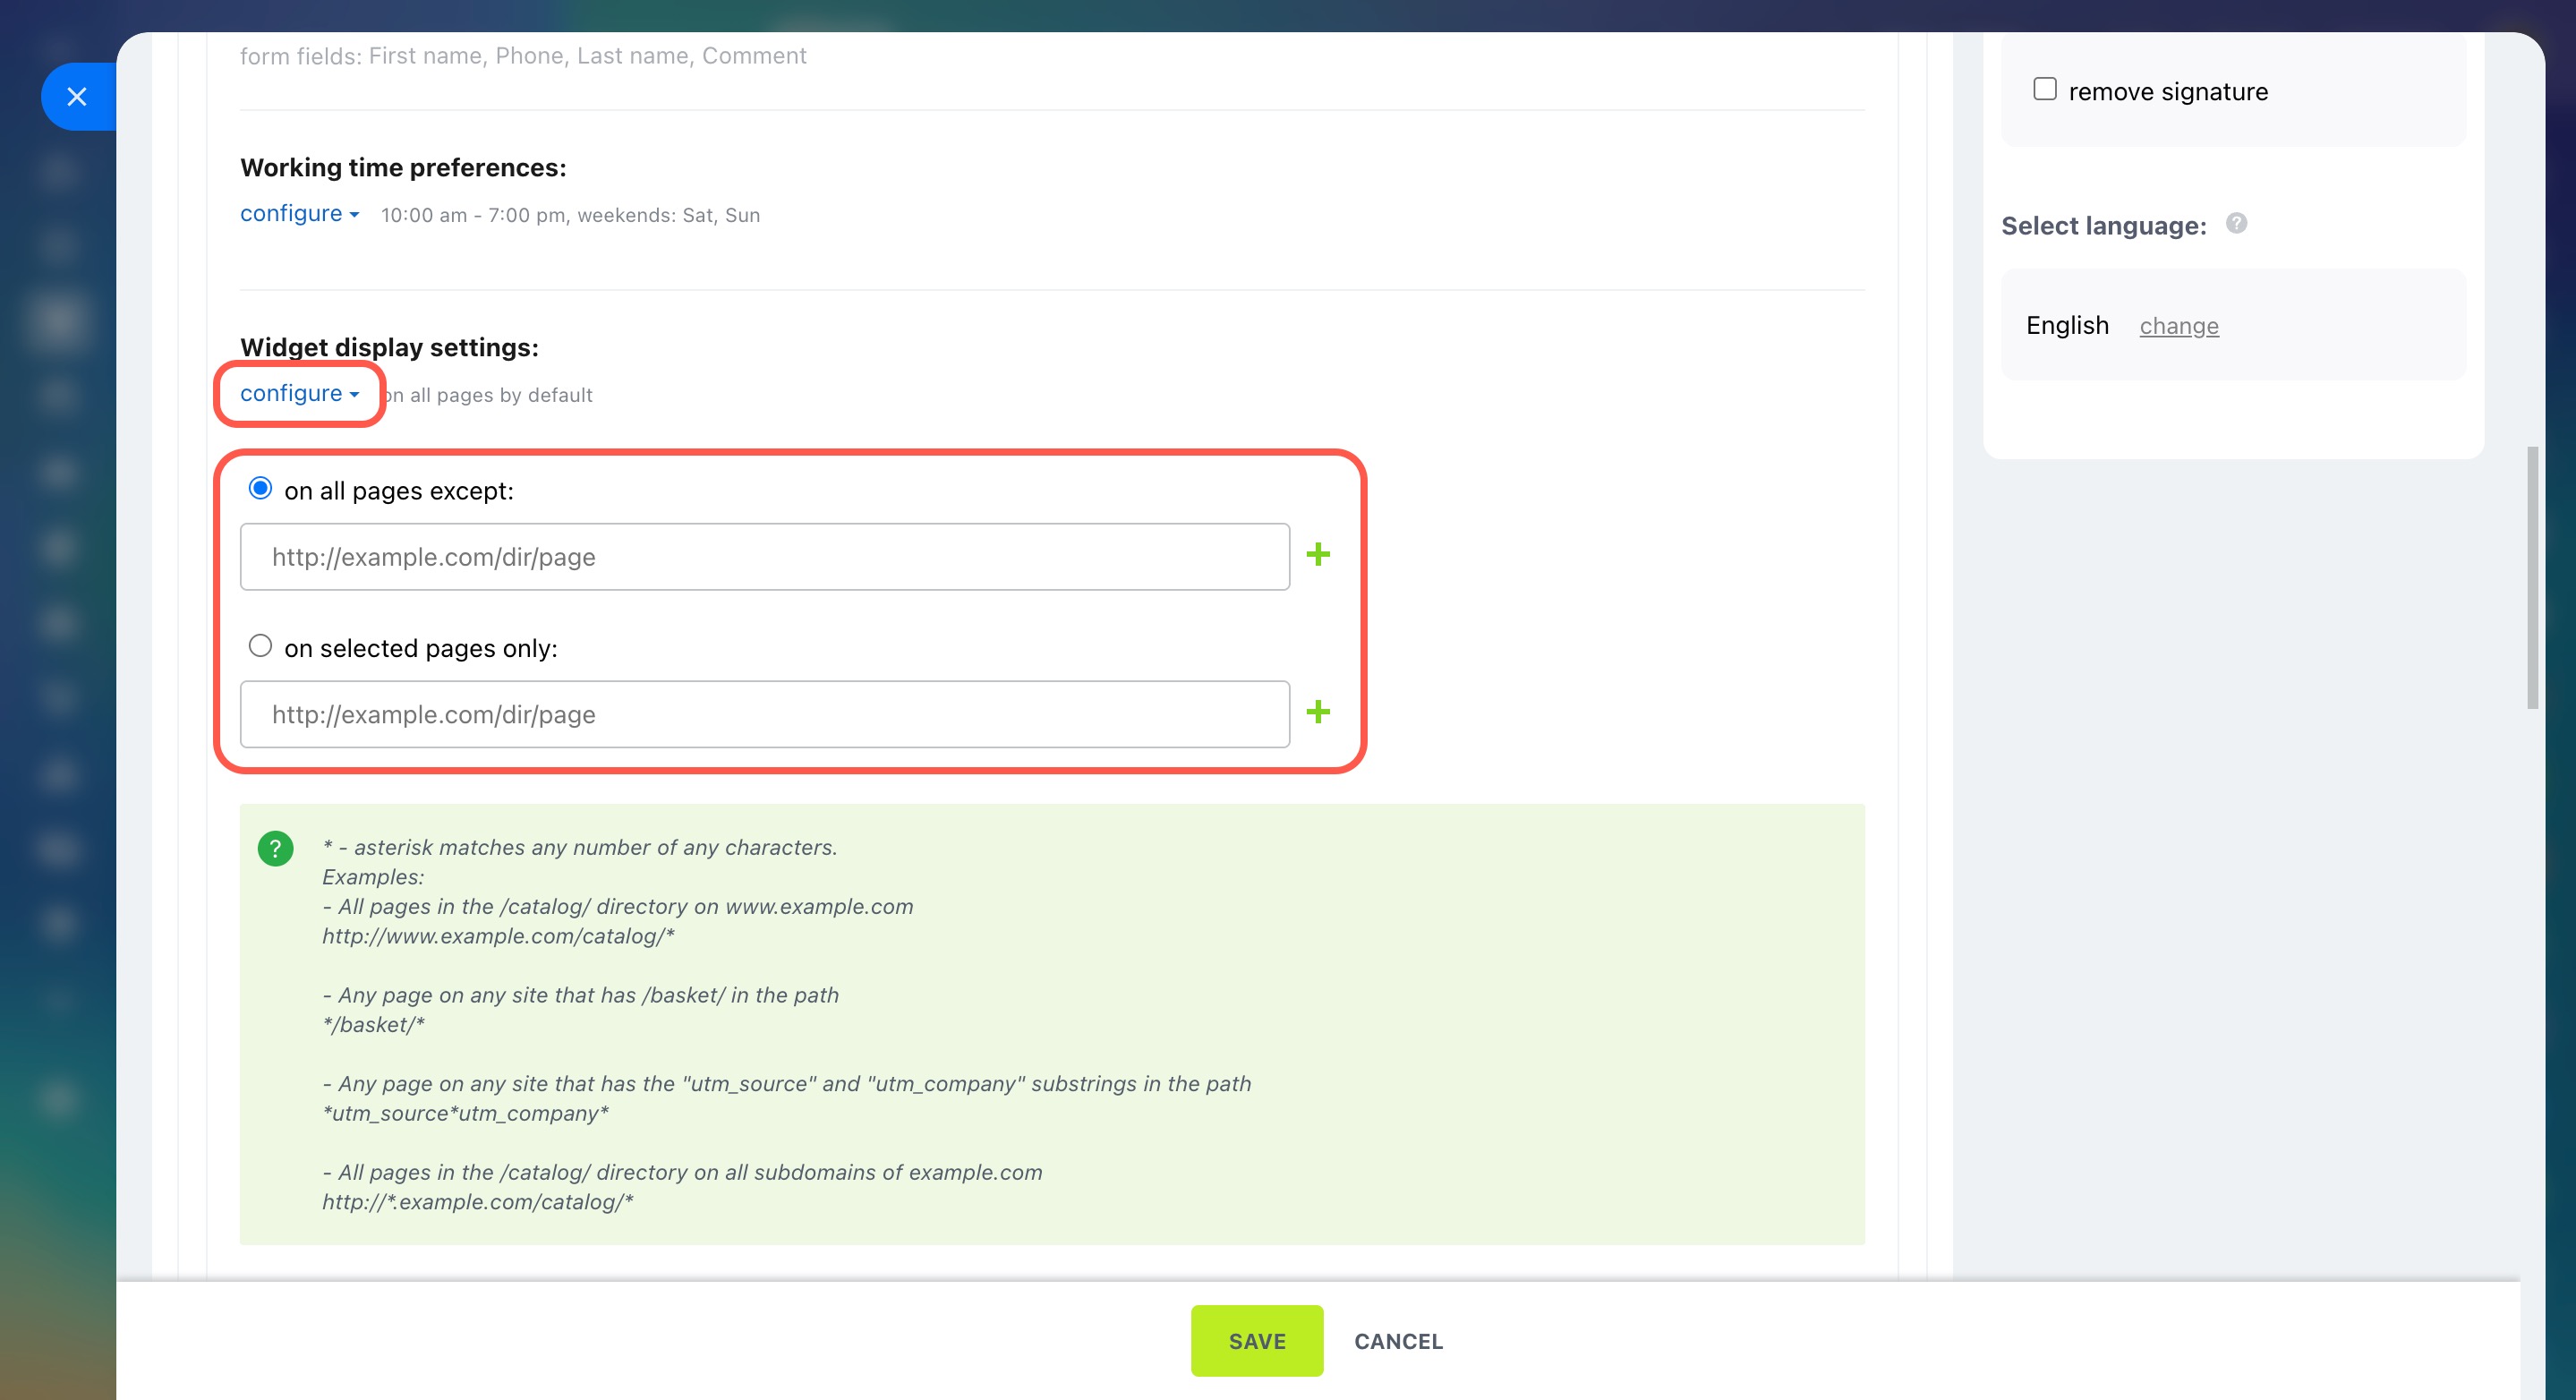
Widget display settings. Choose which pages of your site will display the widget channels. For example, you can set the Live chat to show only on the homepage.
Click Configure and select an option:
- On all pages except: Specify the page addresses where the channel is not needed.
- On selected pages only: Add the page addresses where the channel will appear.
To add more pages, click Plus (+).
Add automatic welcome messages
Create an automatic welcome message to catch your customers' attention. You can customize messages for different pages, like a general one for the homepage and another for product pages.
-
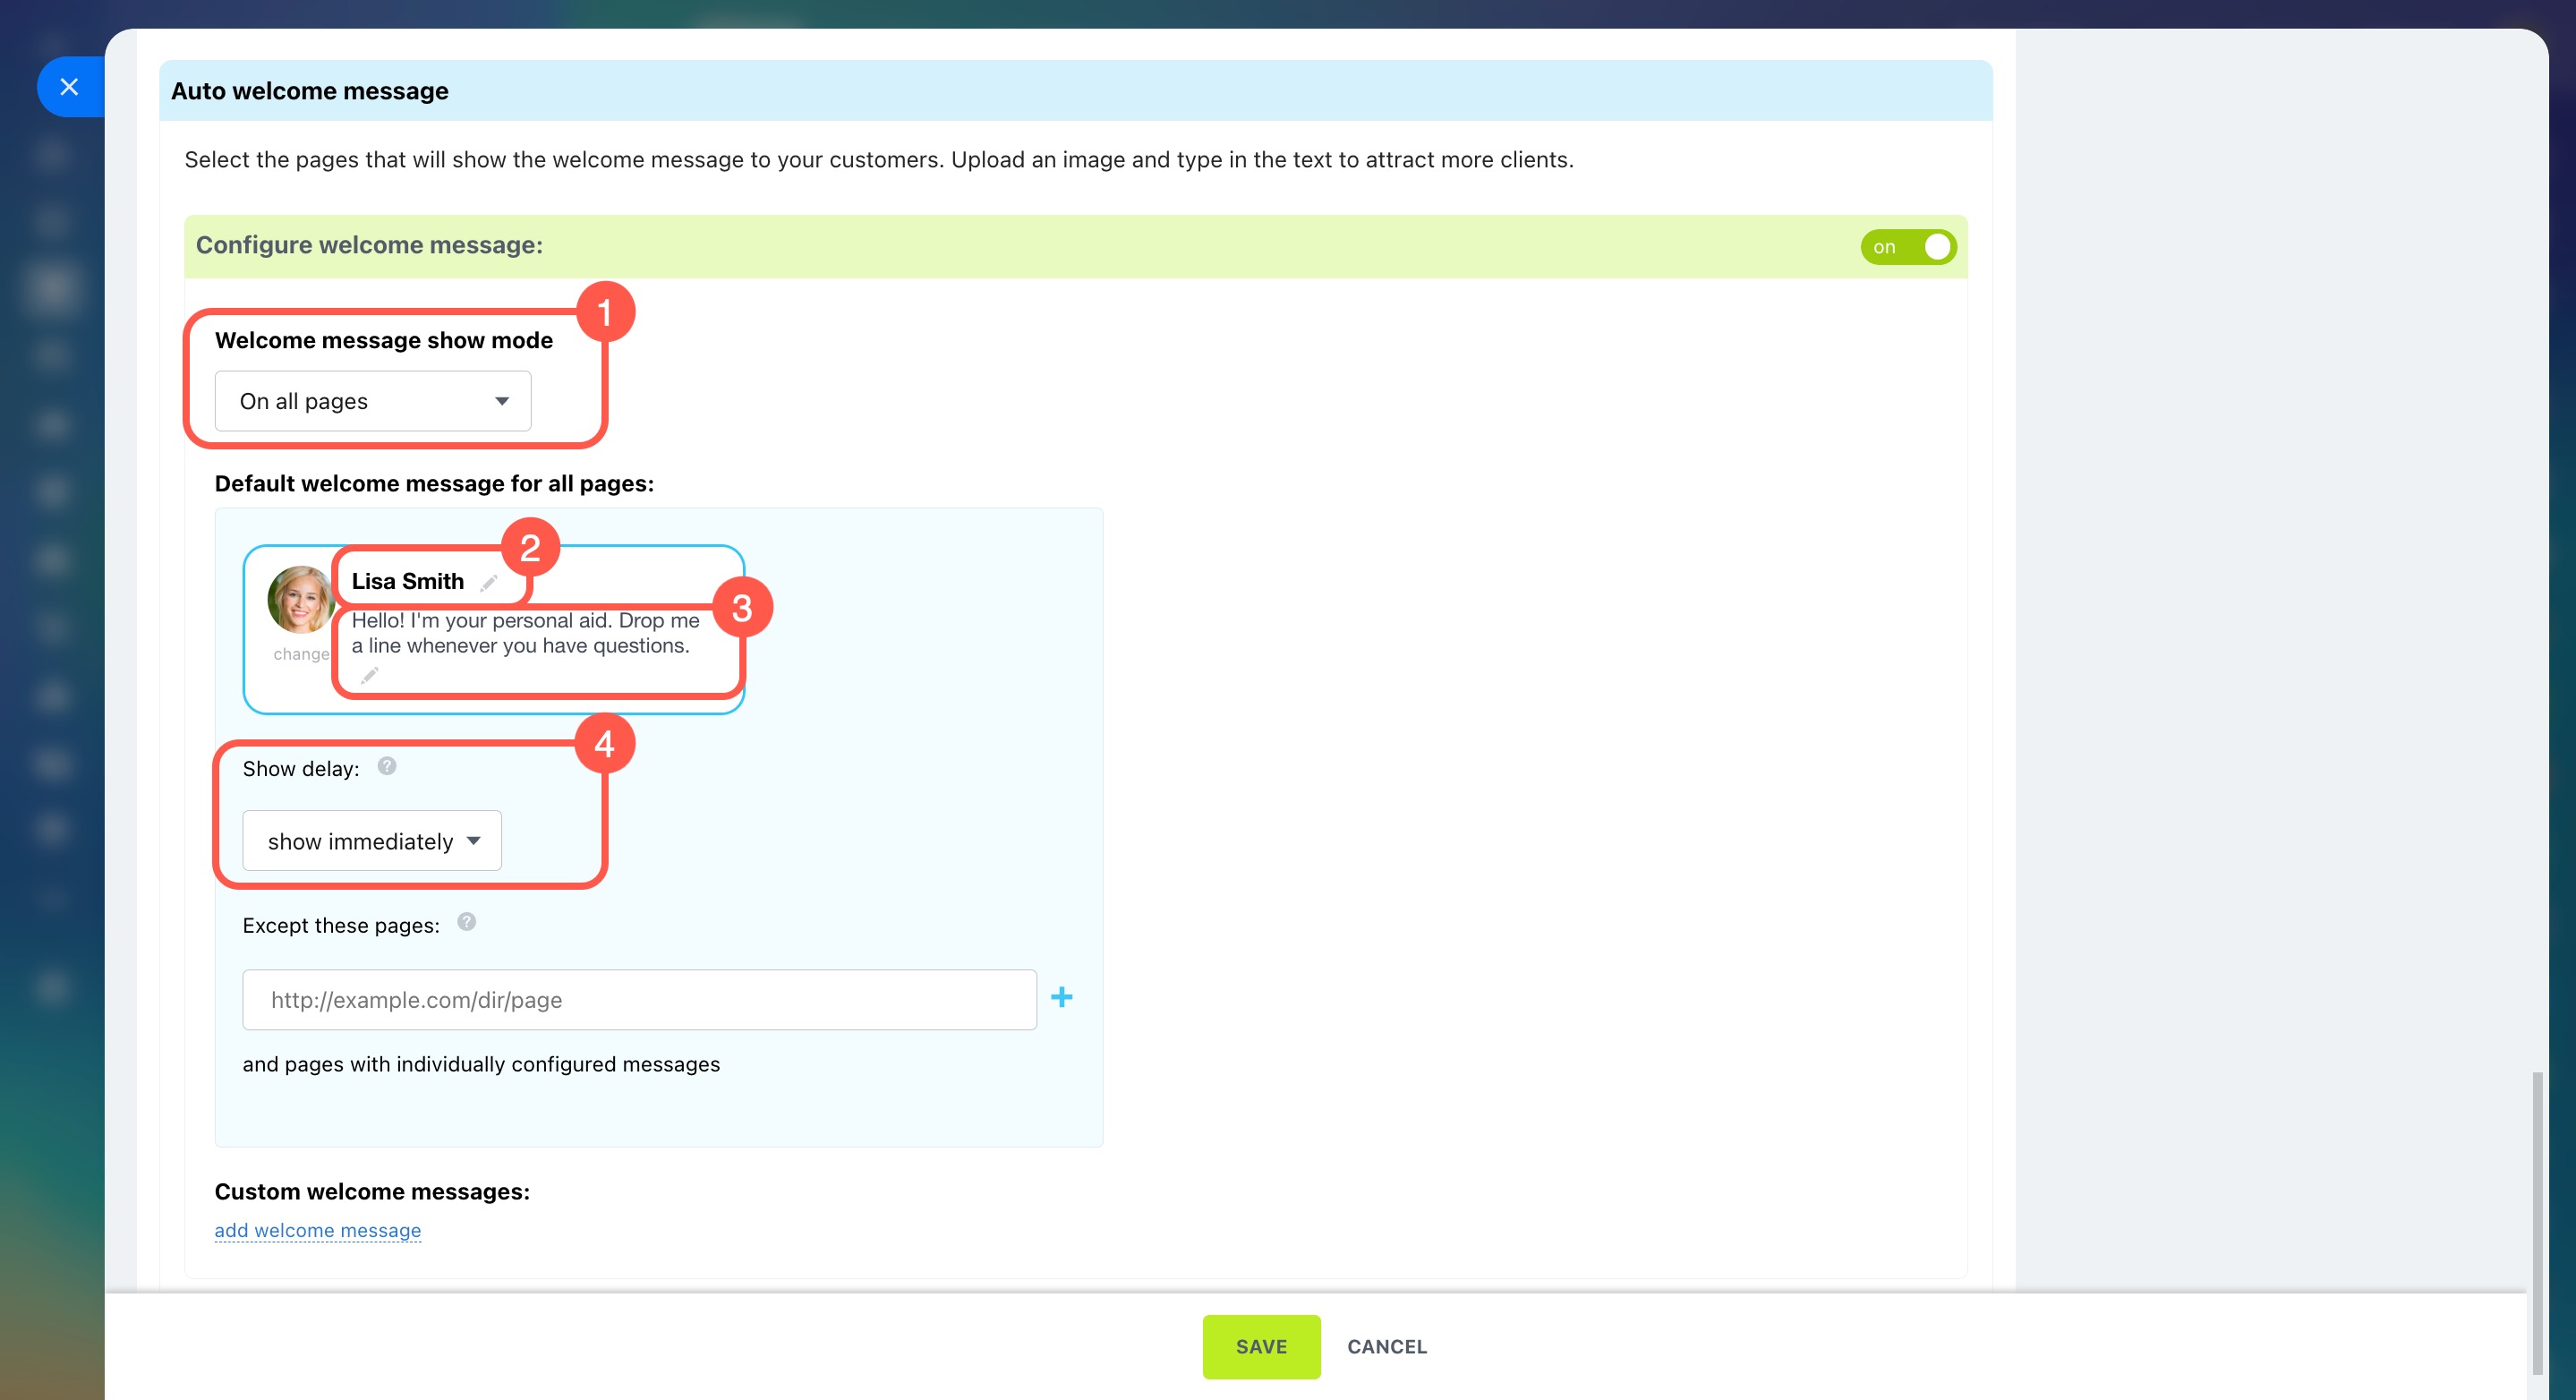
Choose where to display the message:
- On all pages: The same message will appear everywhere, with the option to exclude certain pages.
- Only on selected pages: The message will only appear on the pages you add.
- Add the employee's name and photo, or use a default image.
- Enter your message or leave the default text.
- Decide if the message should appear immediately or after a delay.
Customize widget design
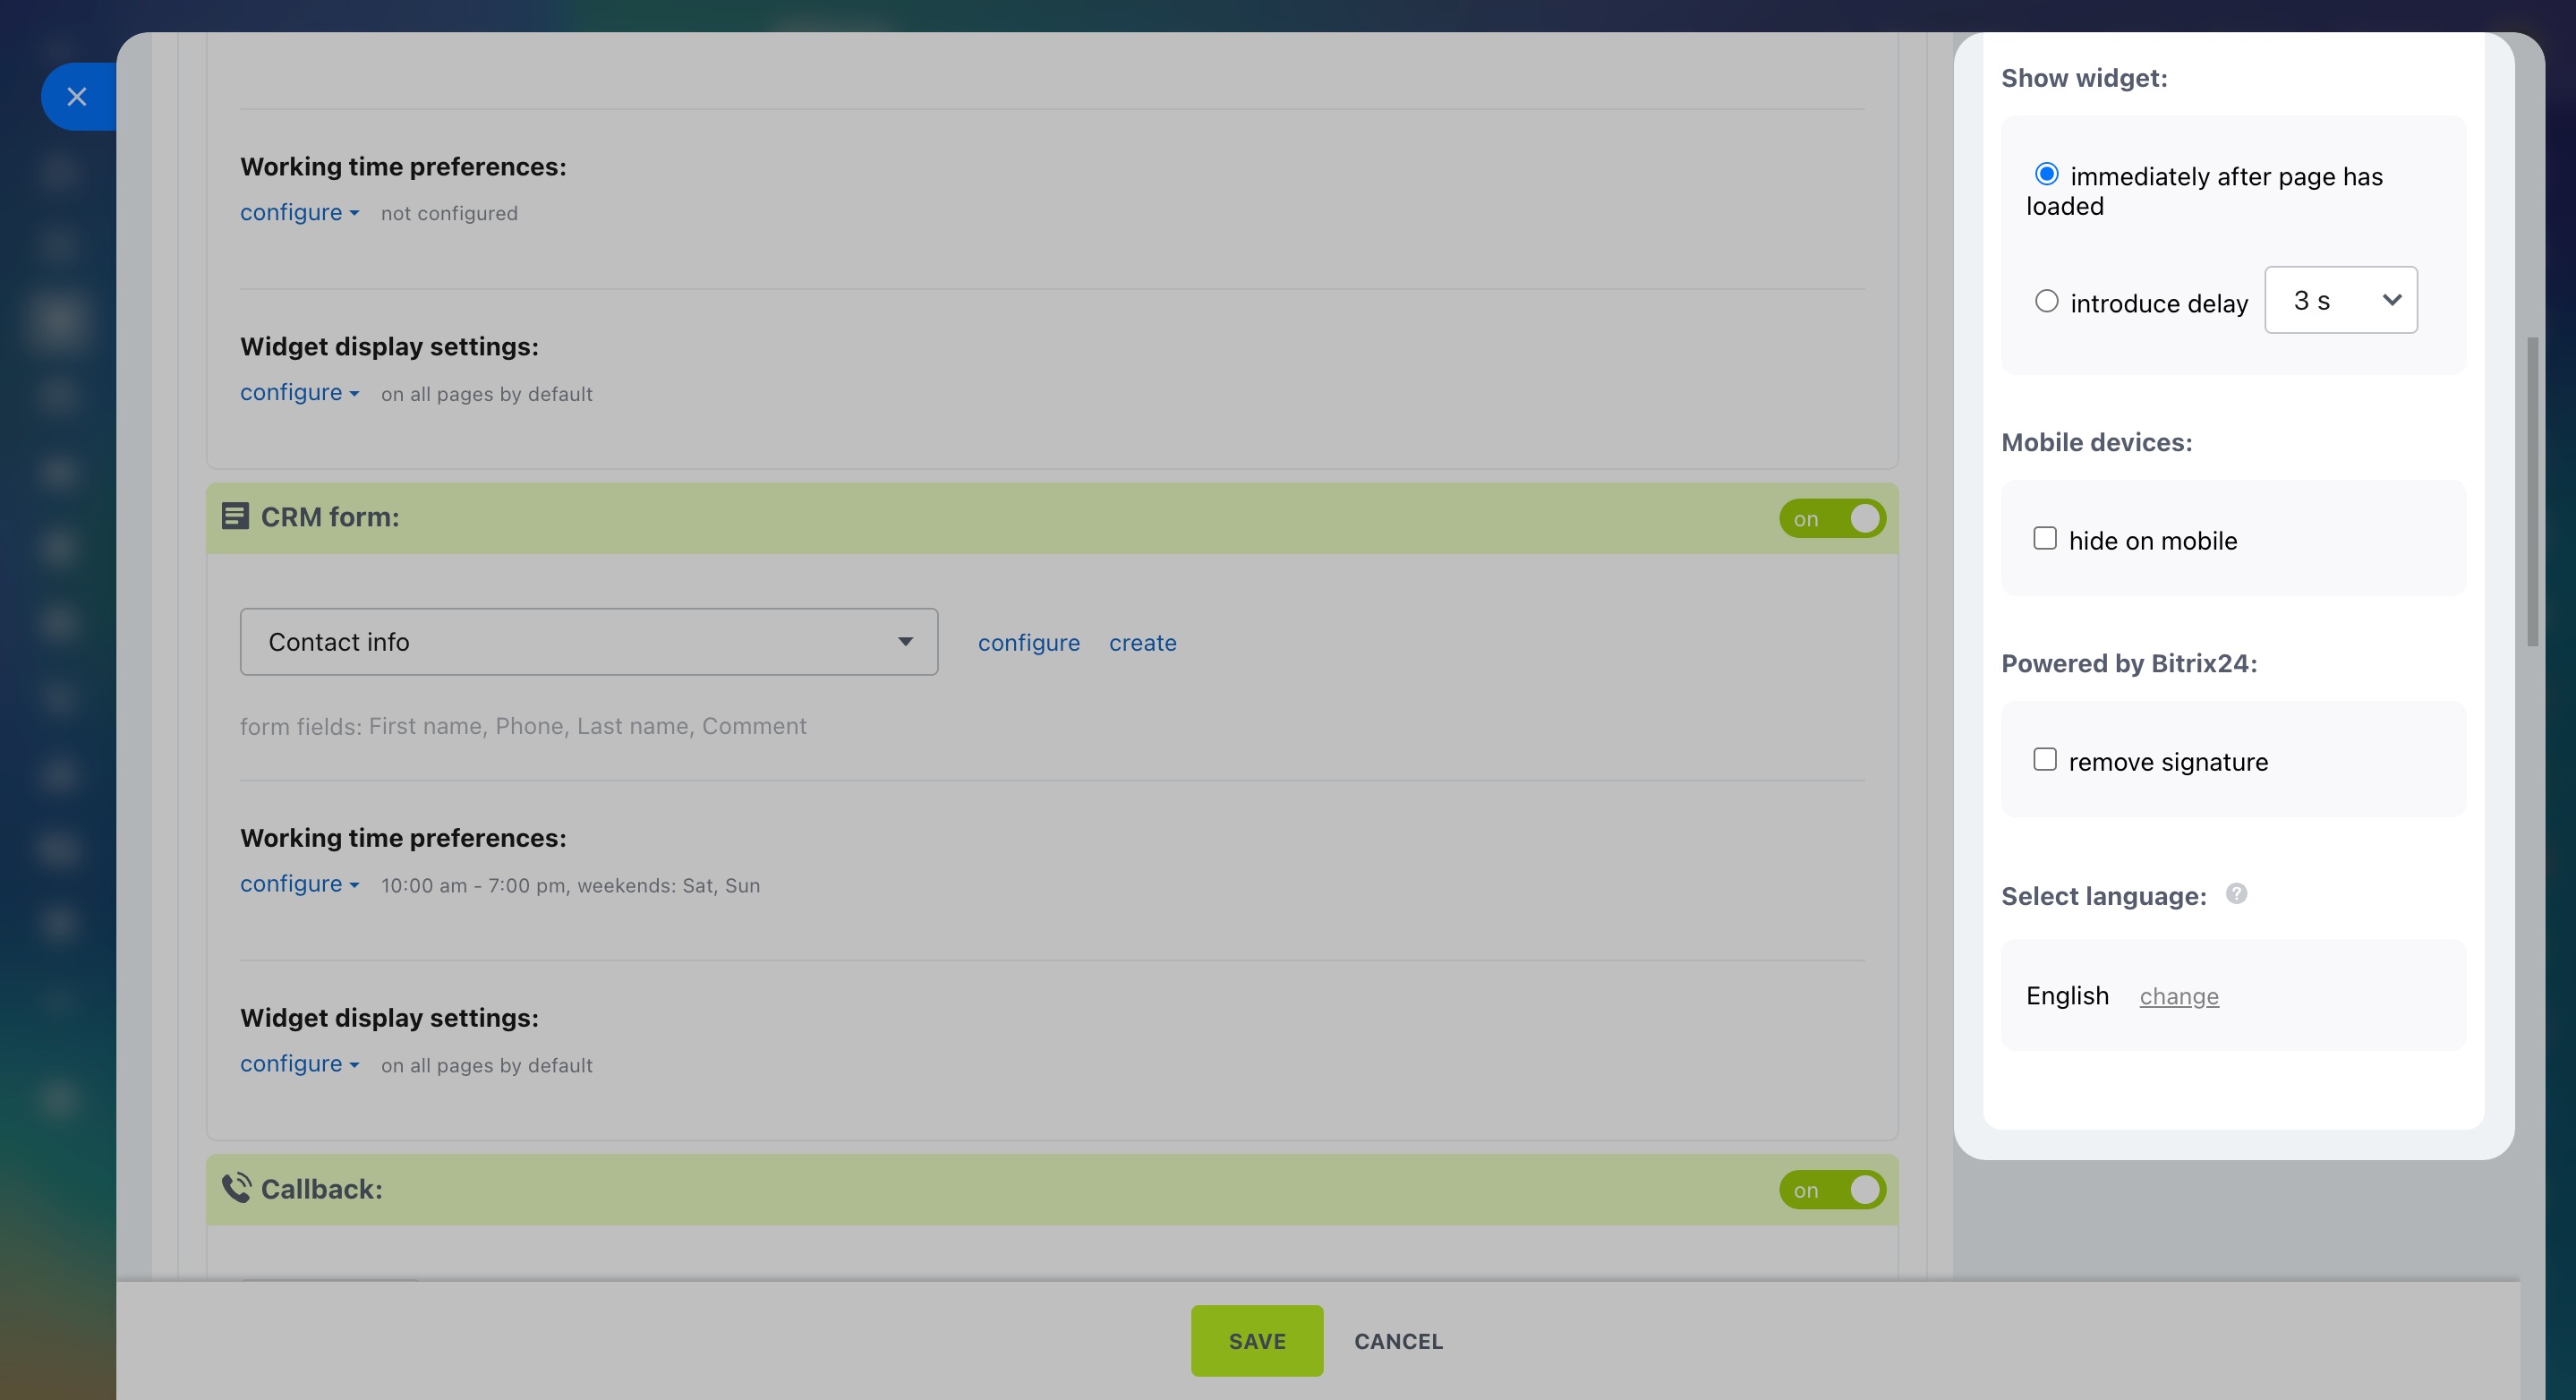
In the right panel, you can customize the following:
- Background and icon colors to match your website design
- Widget position on the page
- Display timing—Show it right after the page loads or with a delay
- Visibility on mobile devices
- Powered by Bitrix24—You can remove this signature
- Widget language—Note that changing the language won't translate manually added text, like automatic welcome messages
Bitrix24 plans and pricing
Add a widget to your site
You can add a widget to a site built with Bitrix24 or any other platform.
If the site is created in Bitrix24.
- Go to Sites and stores.
- Open Sites.
- Click the three dots (...) next to your site.
- Select Configure site.
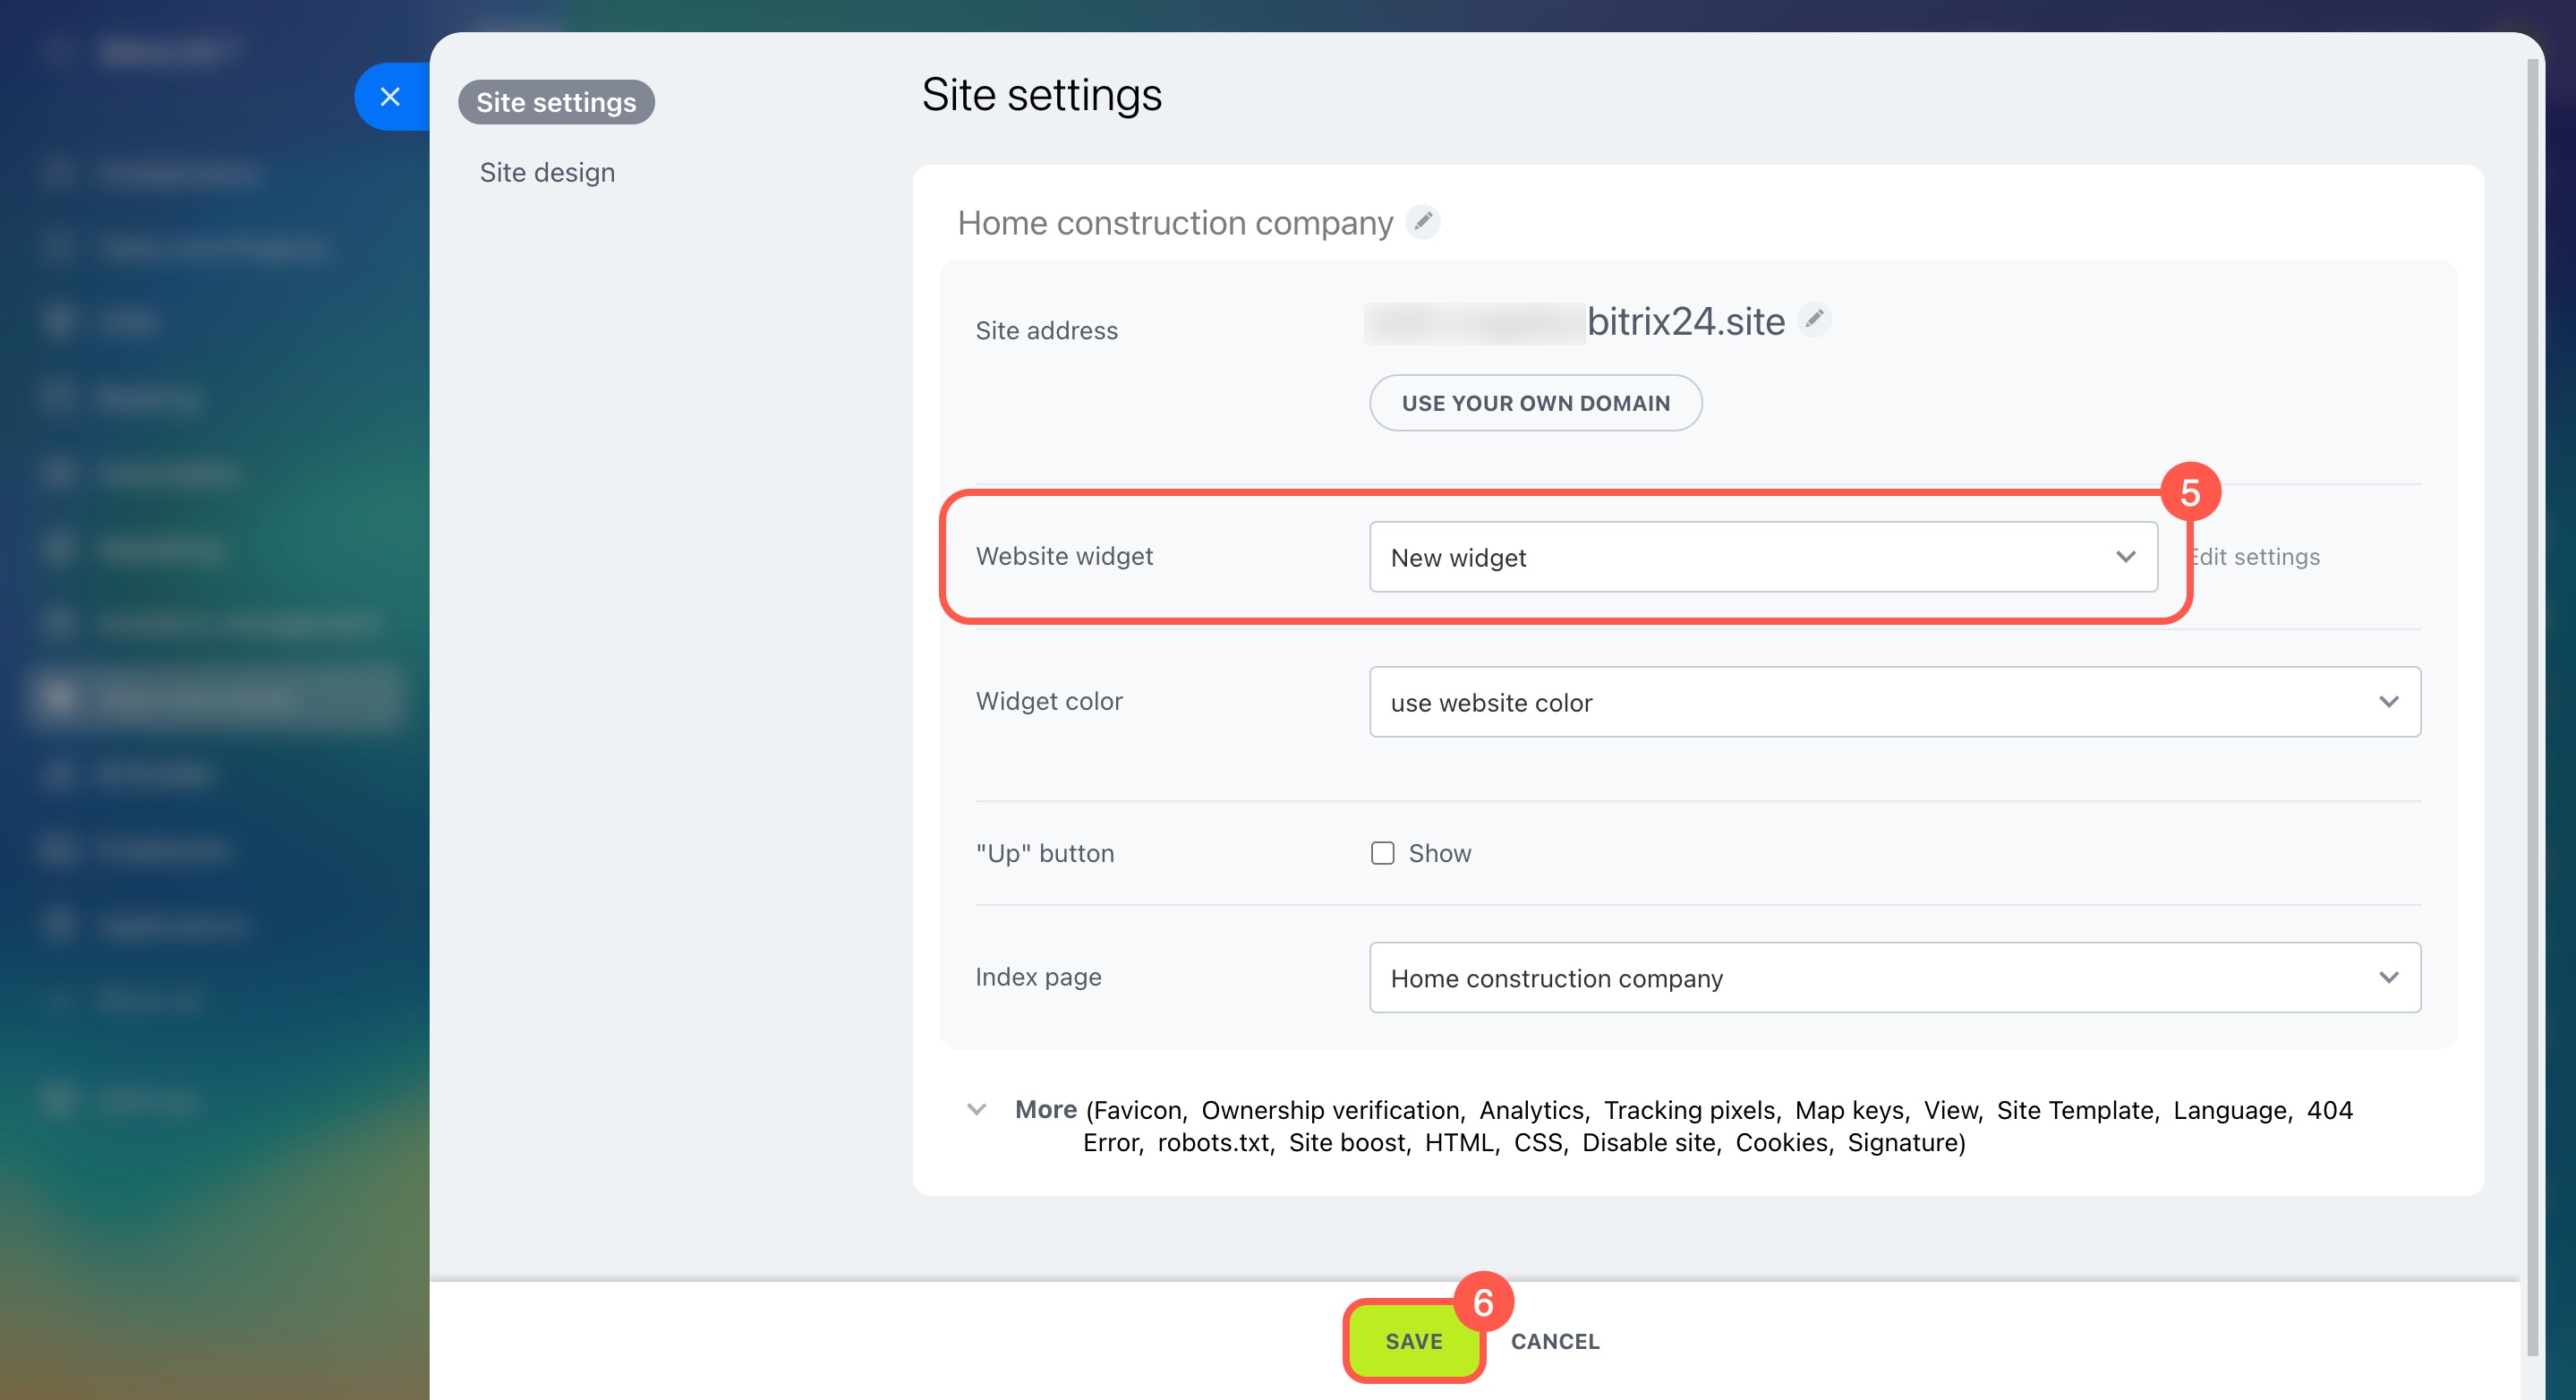
- In the Site settings tab, choose your widget.
- Save the changes.
If the site is on another platform.
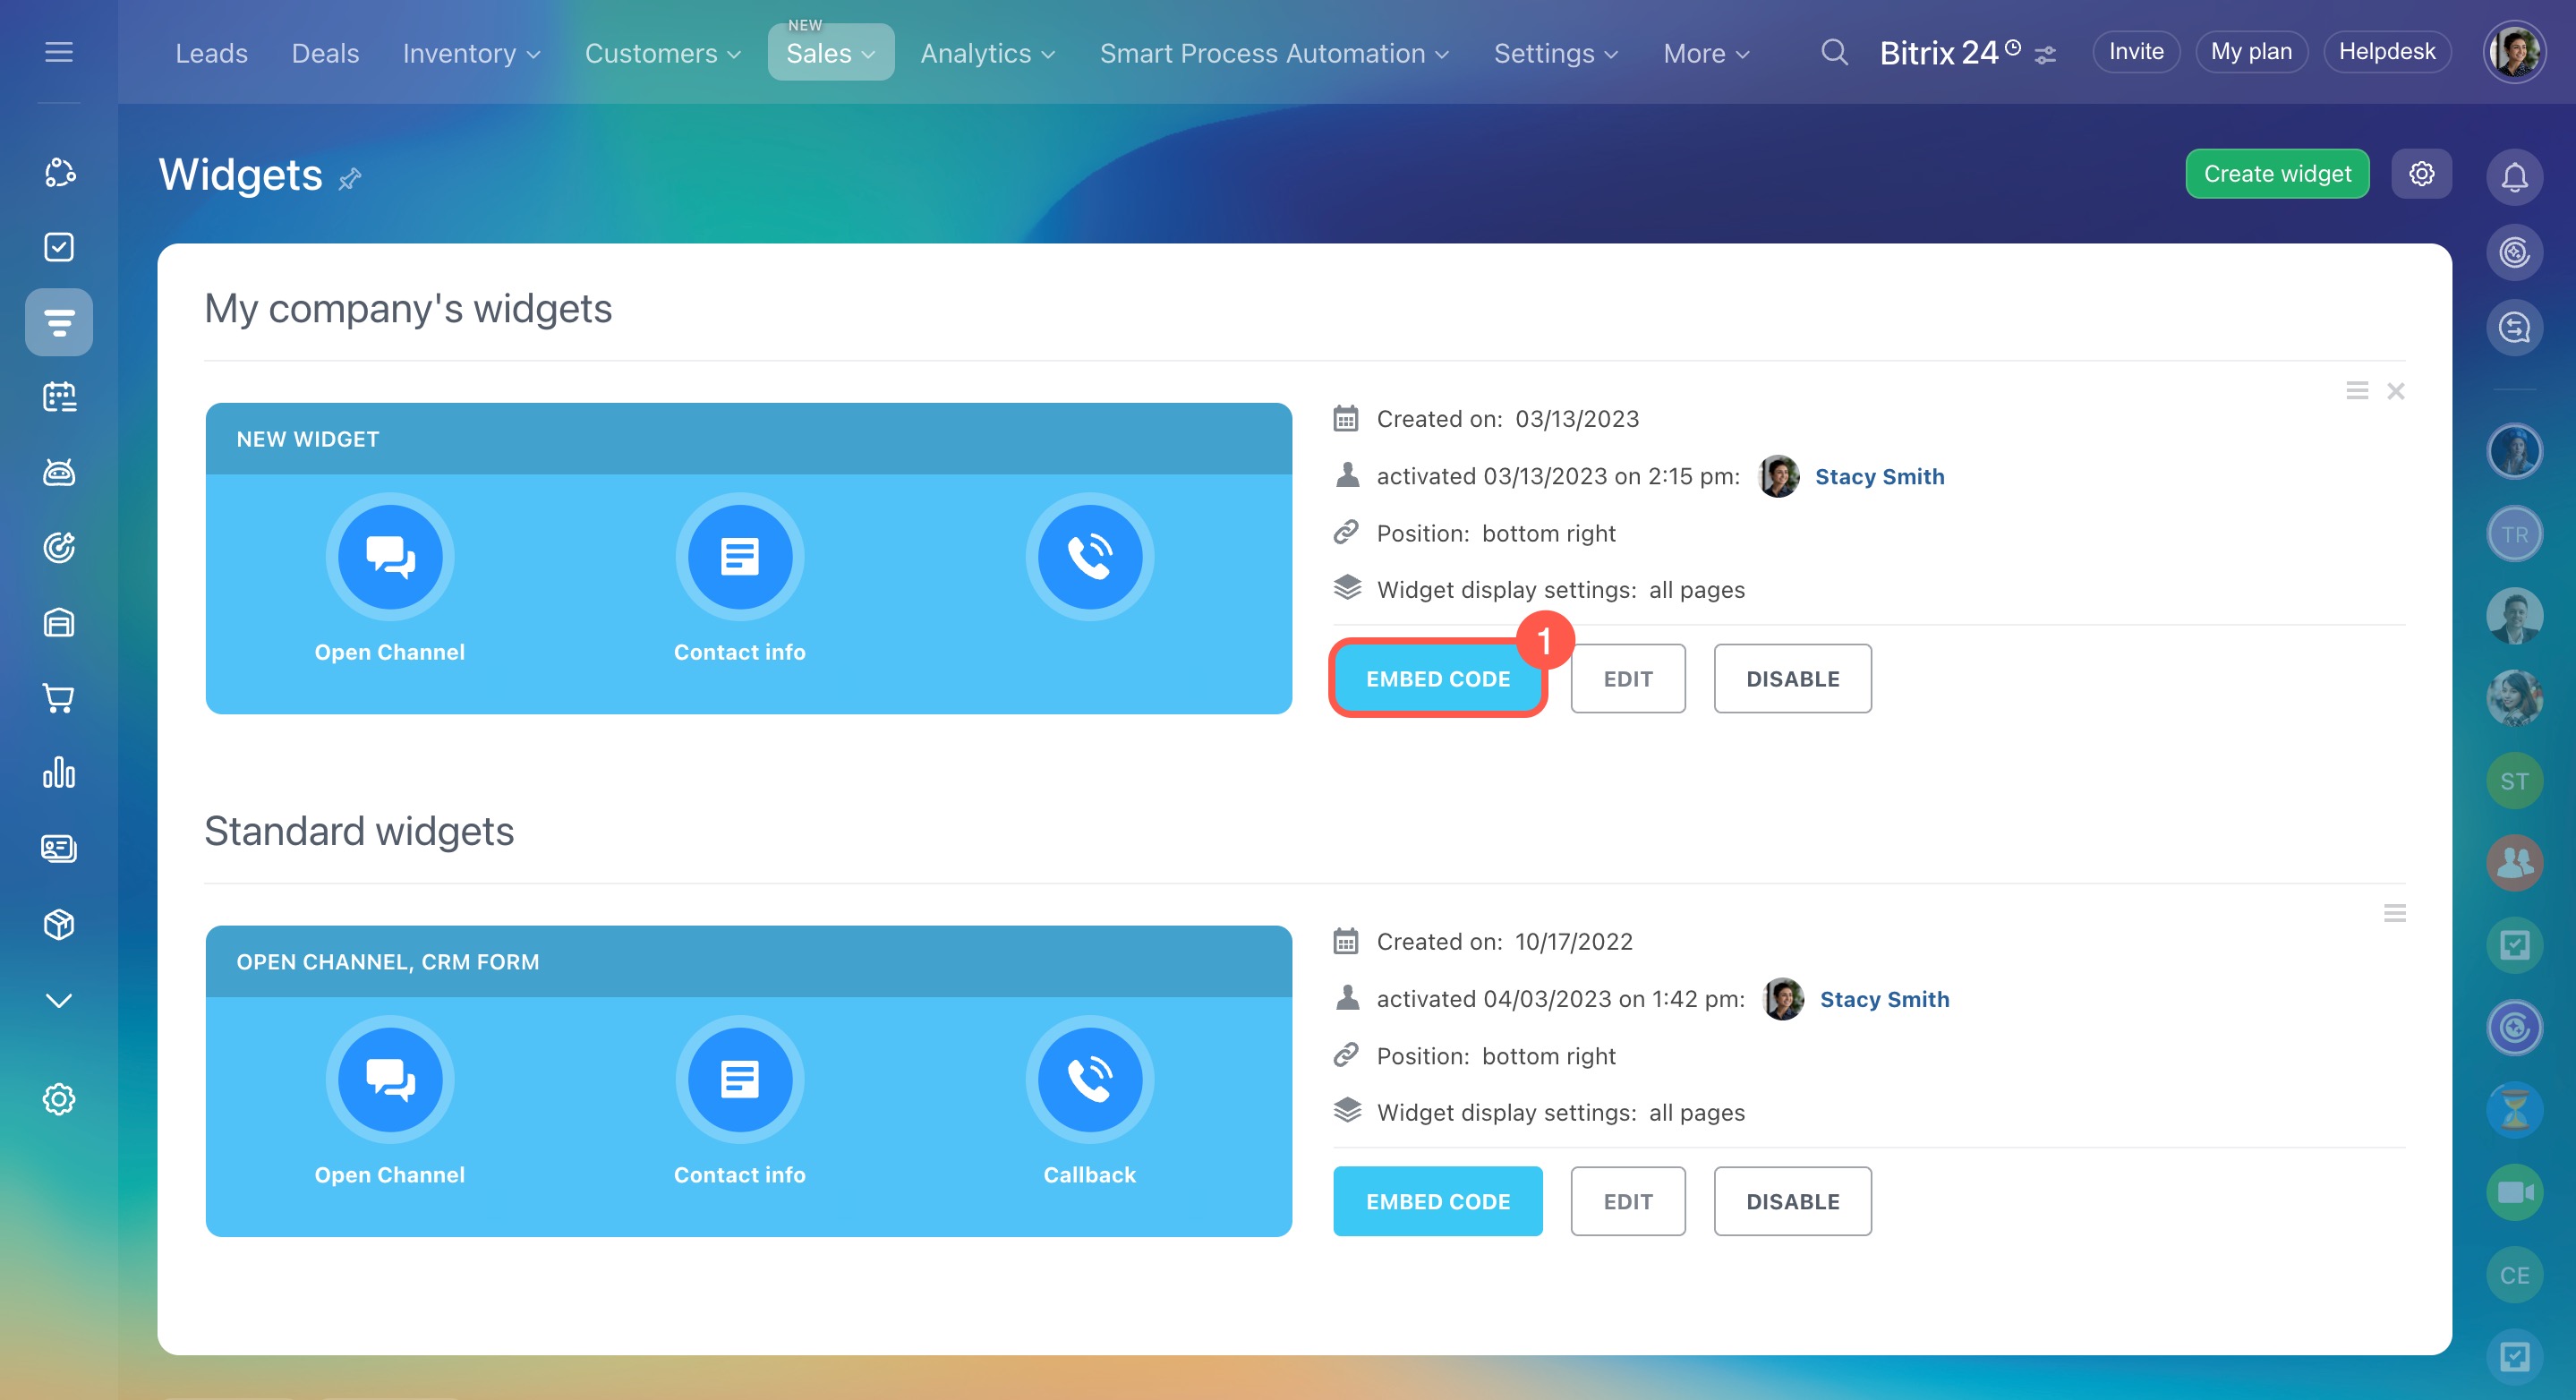
- Open the widget list and click Embed code next to the widget you need.
- Click Copy to clipboard.
- Paste it to the code of your website template before the
/bodyclose tag.
Use Bitrix24 website widget for WIX
To temporarily disable the widget and stop receiving customer messages, remove it from your site or disable it.
Remove website widget
Manage your widgets
Go to CRM > Sales > Sales channels > Website widget to view and manage all your widgets.
- Edit: Update the settings.
- Embed code: Copy the code to add the widget to a third-party site.
- Disable: Temporarily hide the widget from visitors.
- Delete: Remove the widget completely by clicking the cross icon.
In brief
-
A widget is a tool that allows customers to contact you directly on your website while automatically saving all requests in CRM. Configure the standard widget or create a new one.
-
Each widget can include various social networks, messengers, a CRM form, and a callback option.
-
Choose when and where the widget will show up on your site.
-
Create an automatic welcome message to catch your customers' attention. You can customize messages for different pages.
-
Adjust the widget’s design: background and icon colors, position on the page, display timing, mobile visibility, "Powered by Bitrix24" signature, and language.
-
You can add a widget to a site built with Bitrix24 or another platform.
-
Go to CRM > Sales > Sales channels > Website widget to view all your widgets, edit settings, copy the code, disable, or delete them.


