Connect your cloud hosted PBX to Bitrix24 using either REST API or the SIP connector.
For REST API connections, use an app from the Bitrix24 Market. Check the app description or contact the developer for assistance.
Bitrix24 Market
This article focuses on connecting cloud hosted PBX using the SIP connector.
Important points to consider before you start
- Ensure your cloud hosted PBX supports the SIP protocol to connect it to Bitrix24.
- You can receive incoming calls for free via your Bitrix24 SIP PBX, but you will need the SIP connector for outgoing calls or call forwarding.
SIP connector - You have free minutes to make outbound calls and test the SIP connection. Check the number of free minutes and active license term on the Connection page under Balance and Statistics.
- You need to buy only one SIP connector, no matter how many SIP PBXs you need to connect.
- SIP connector needs to be purchased separately and is not related to the Telephony balance.
- We do not recommend using the application and SIP connection from the same provider at the same time. It can cause errors, such as duplicated calls in the Call details section or a missing Answer button in the call form.
Connecting cloud PBX to Bitrix24
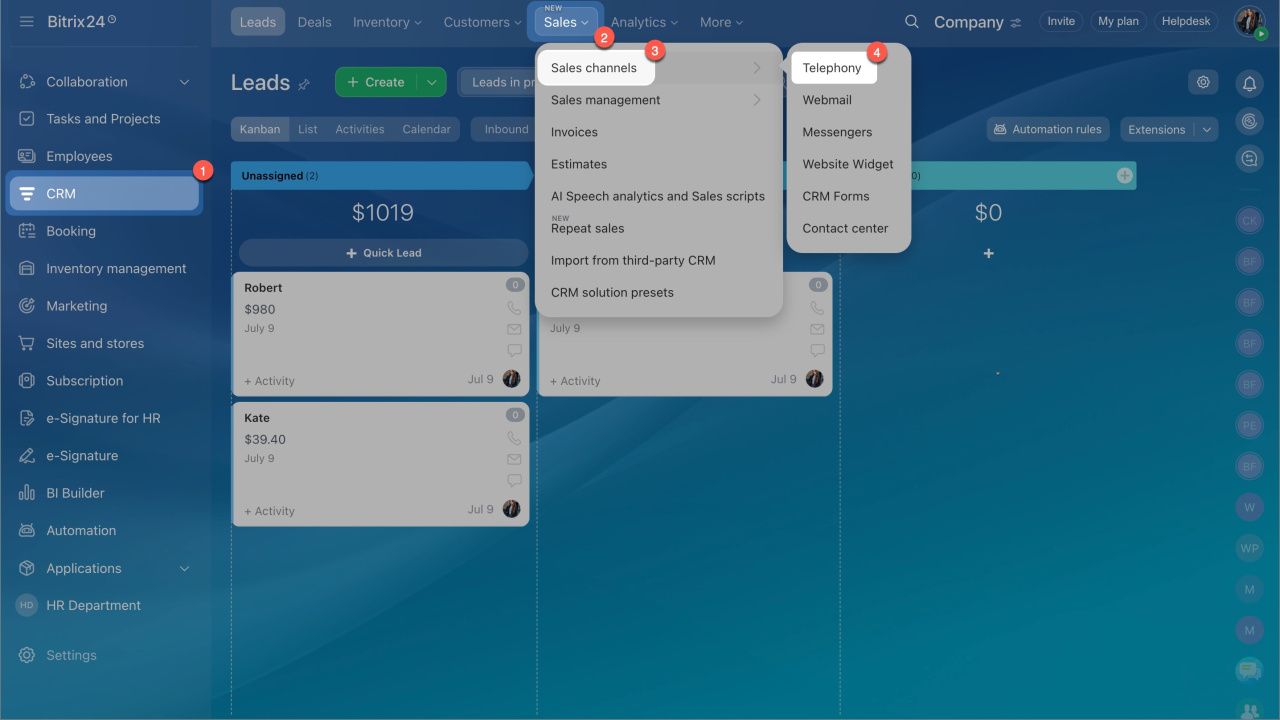
- Go to the CRM section > Sales > Sales channels > Telephony.
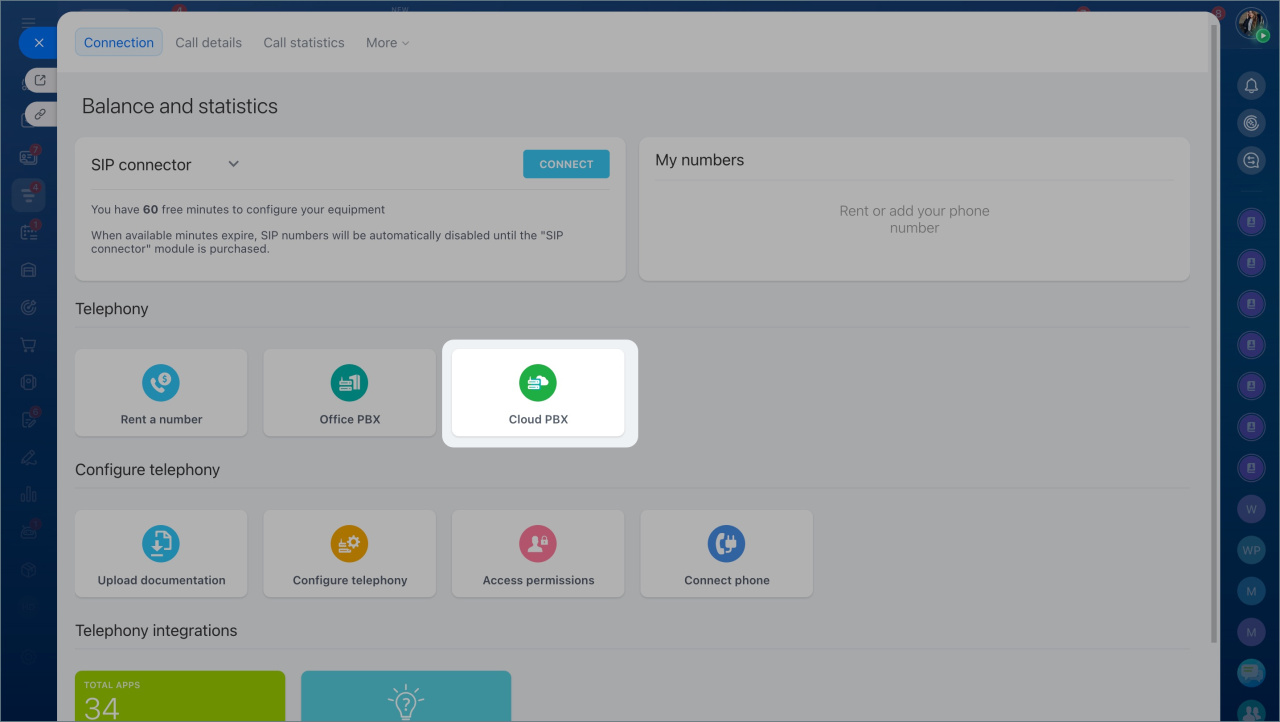
- Click the Cloud PBX block.
- Select Connect cloud PBX.
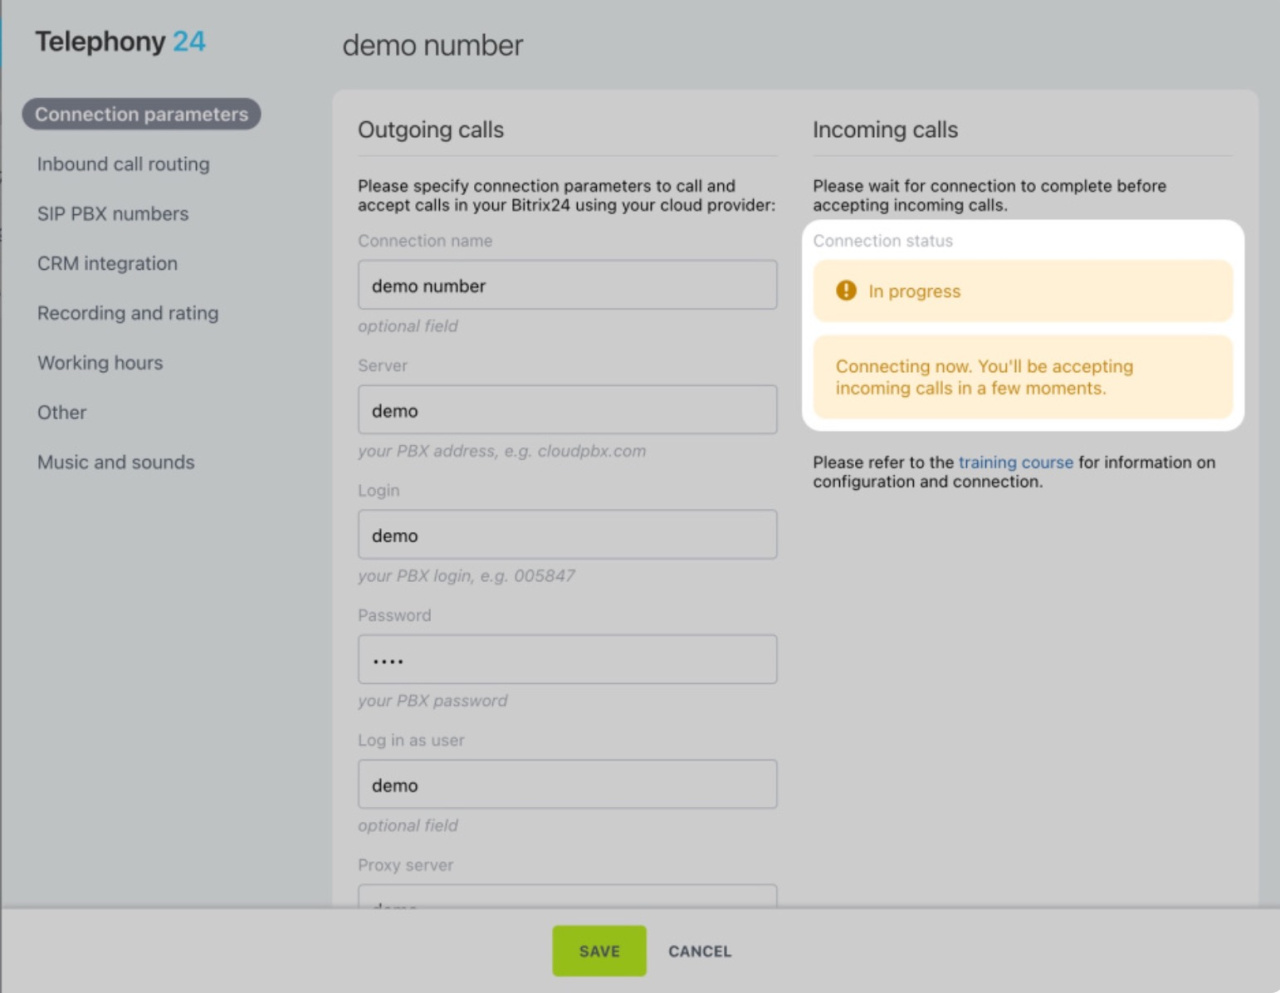
- Fill out the form.
Connection name: Set a connection name (optional).
Server Address: Specify the IP address of your PBX.
Login and Password: Enter your PBX access data.
Some PBXs need the configuration of additional parameters:
Log in as user: Enter the data from auth user field of PBX settings.
Proxy server: Enter the data from sip outbound proxy field of PBX settings.
Click Save, and the page with connection parameters will appear.
PBX connection statuses
Connecting a PBX takes a few steps. Here's what each status means:
- In progress: The connection is being processed. You'll be able to receive inbound calls in a few minutes.
- >Getting data: Information about the current status is being retrieved. Please wait a moment.
- Error: There was an error during the connection. Check that the connection parameters you entered are correct.
- Connected: Once you see this status, you can move on to setting up the number.
Configure numbers
Firewall settings in the local network
By default, these ports are used:
- For browser calls: 443 TCP, 3478 TCP/UDP, 8000-48000 UDP.
- For SIP device calls: 5060 TCP/UDP, 3478 TCP/UDP, 8000-48000 UDP.
Normally, SIP requires that the outbound traffic be permitted (from PBX, for example), and inbound connections will work automatically. RTP is usually used as UDP (so data can still be transmitted, although packets are lost).
The ports themselves can be set up in the PBX properties: the port that is indicated in the properties must also be opened in your firewall.
Bitrix24 Self-hosted administration: Telephony


