Synchronize Bitrix24 Drive files and folders with your computer. Synchronization works both ways. After you edit files on your computer, the changes will be automatically applied to files stored on your Bitrix24 Drive, and vice versa.
How to enable synchronization
To synchronize Bitrix24 Drive with your computer, install the Bitrix24 Messenger app.
Bitrix24 for Windows, Mac and Linux
There are two ways to sync your files:
- Classic sync: Files are stored directly on your computer's hard drive.
- Elastic drive: Files appear as shortcuts and download only when you open them.
If you're using an MSI distribution to set up the app, install the Dokan driver for the elastic drive to work. If you're using a Mac, install macFUSE.
Download the Dokan driver
Download macFUSE
/ \ : * ? " ' | { } % ; & ~ # < > in their names cannot be synchronized. On Windows, don't add spaces at the end of file names, as it can make them difficult to delete.
To set up the sync:
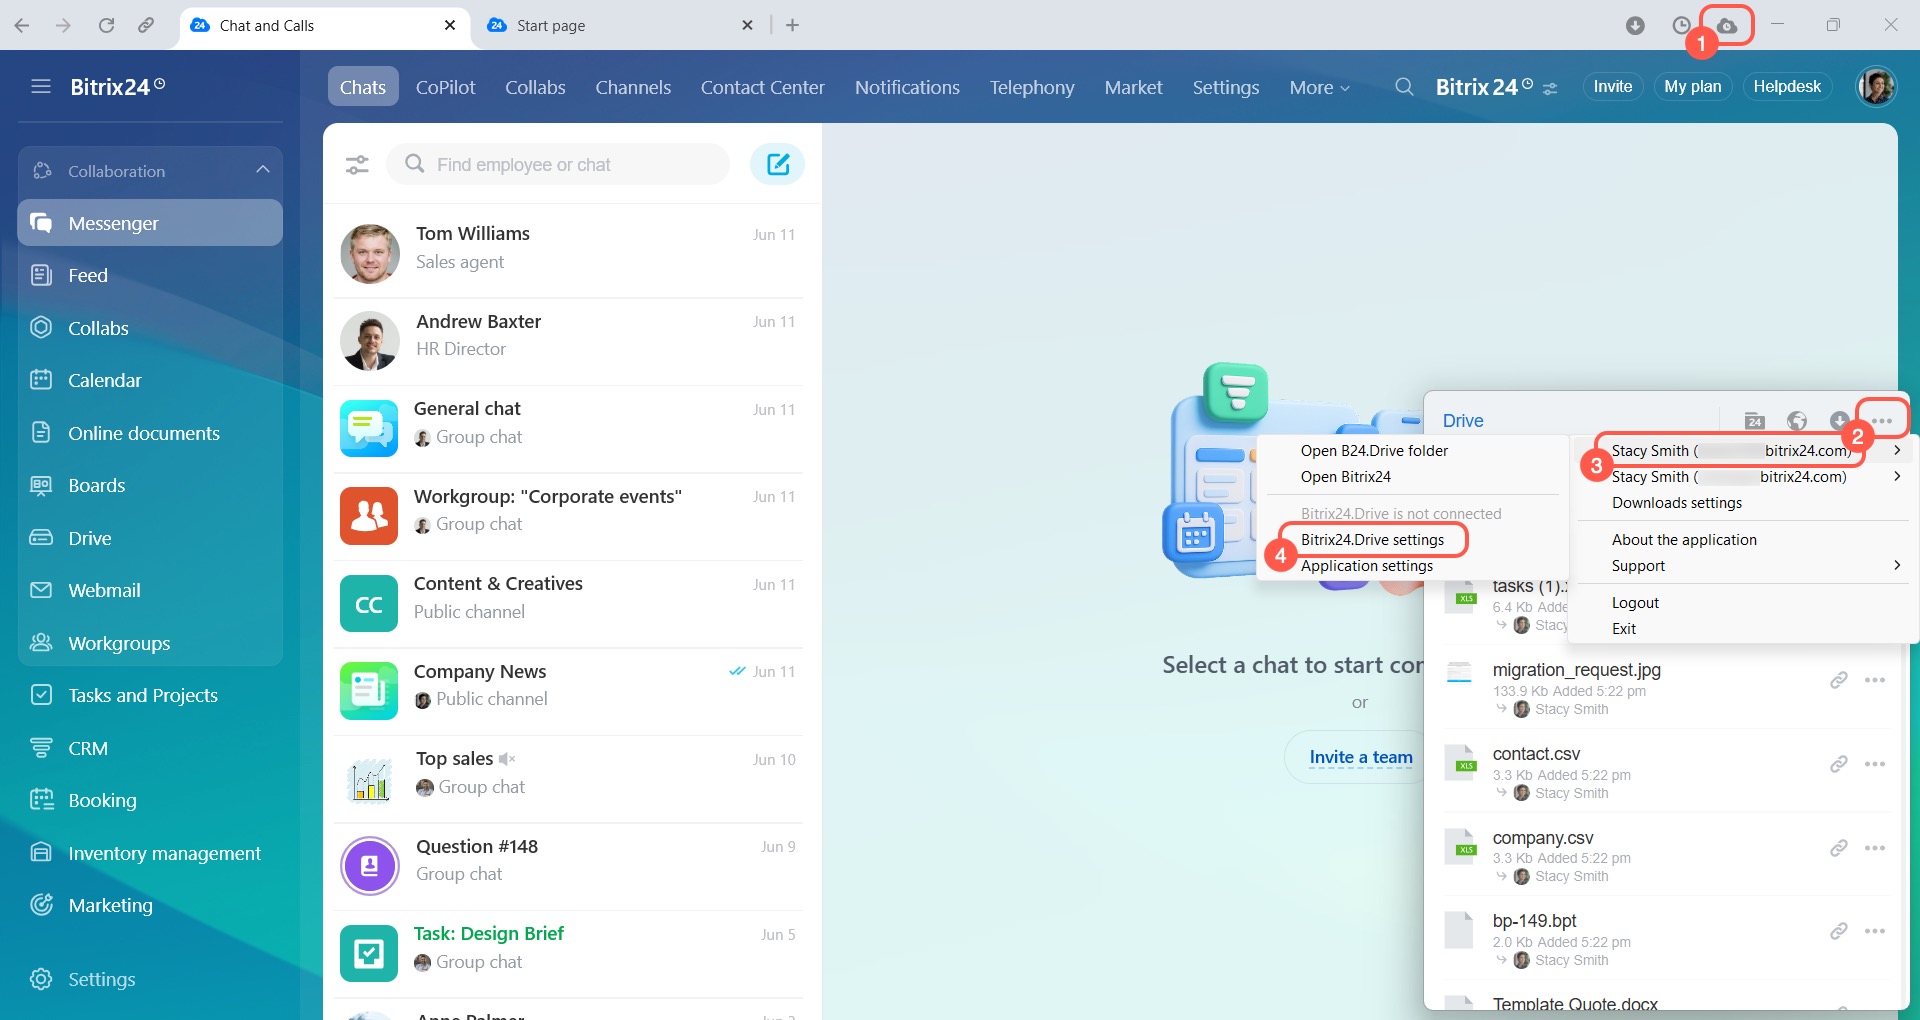
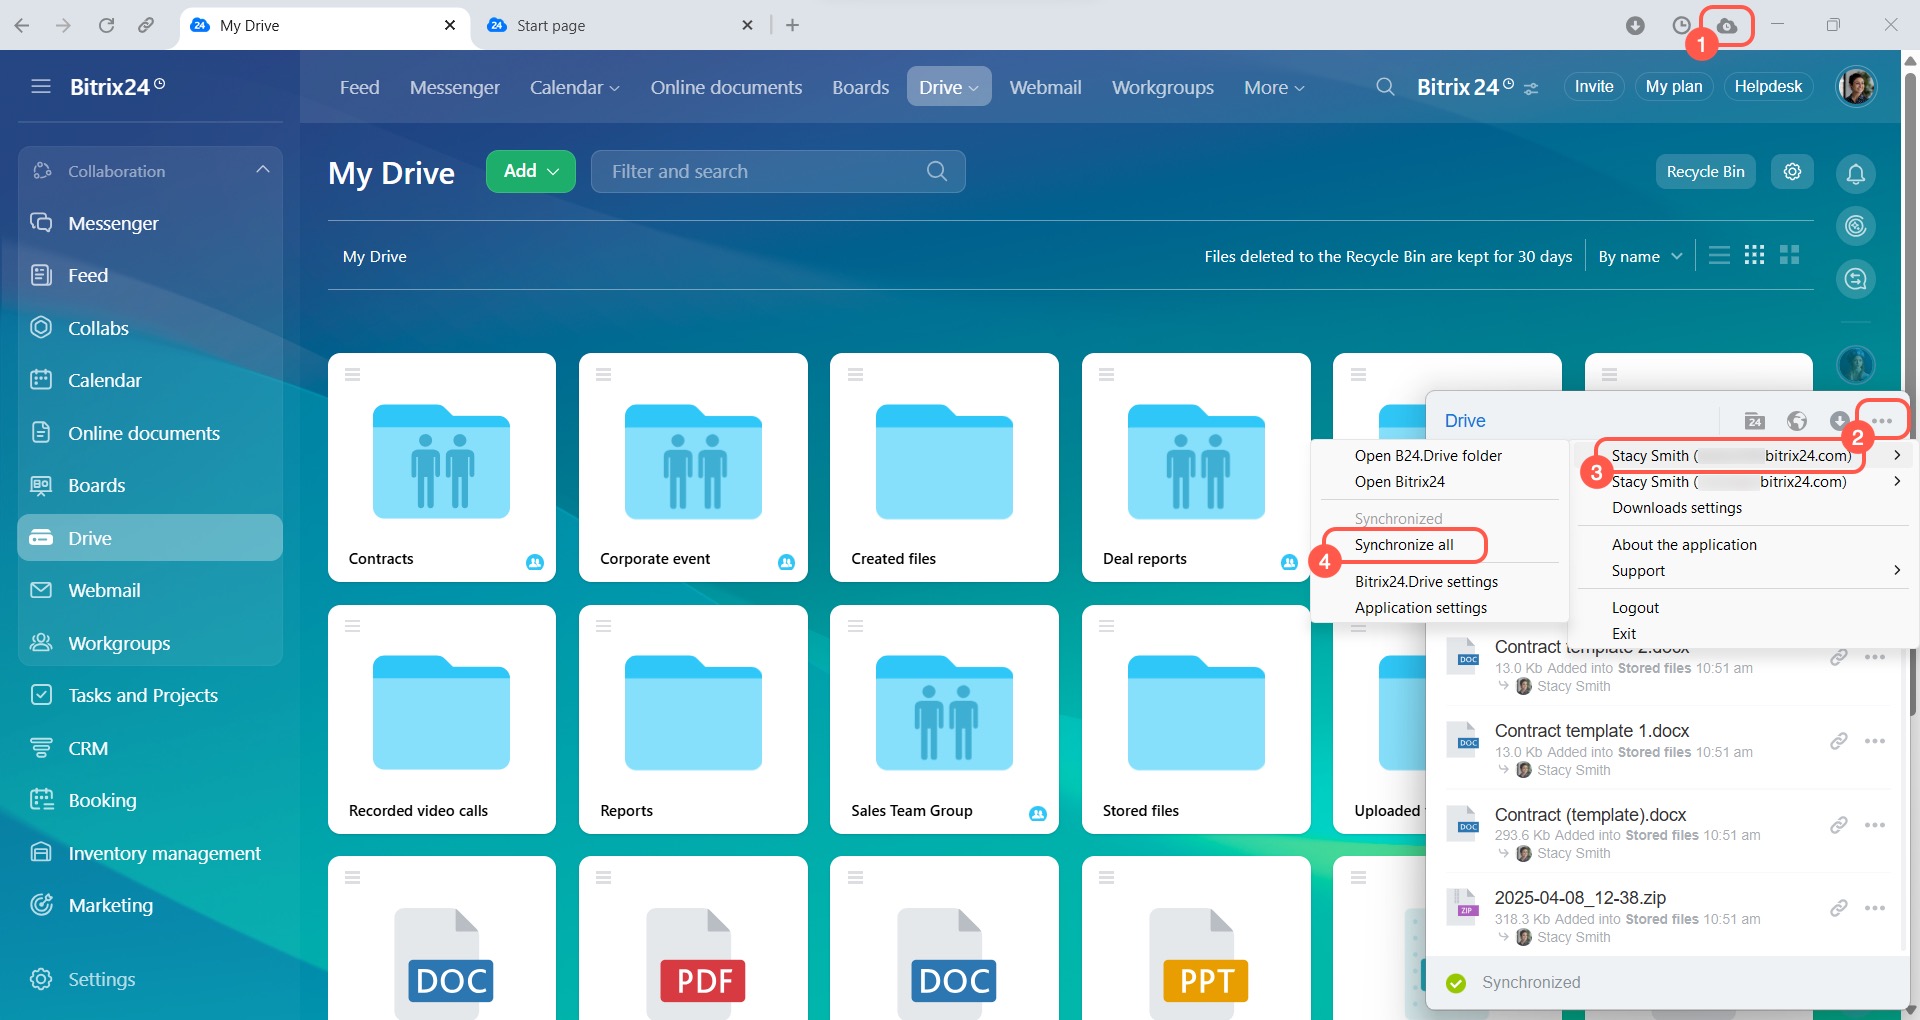
- Open Bitrix24 Messenger and click the cloud icon in the top-right corner.
- In the pop-up window, click the three-dot menu (...).
- Select your profile.
- Click Bitrix24 Drive settings.
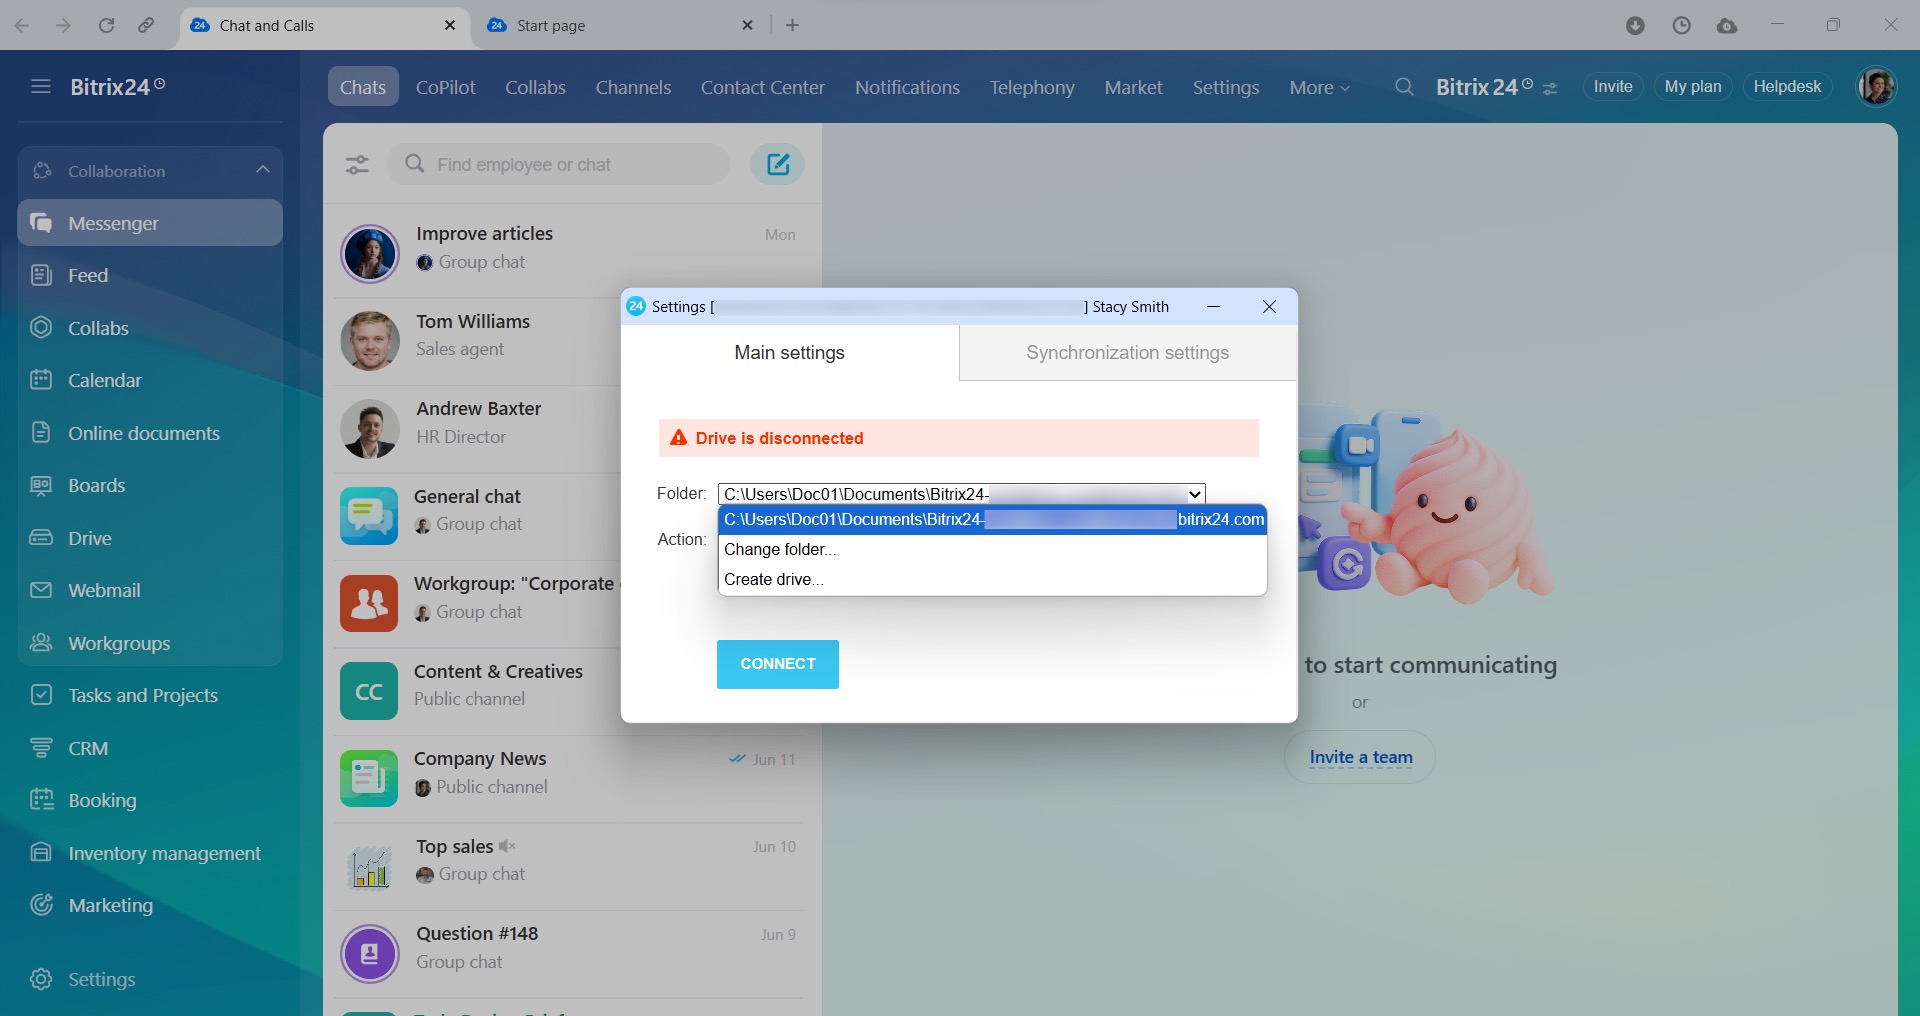
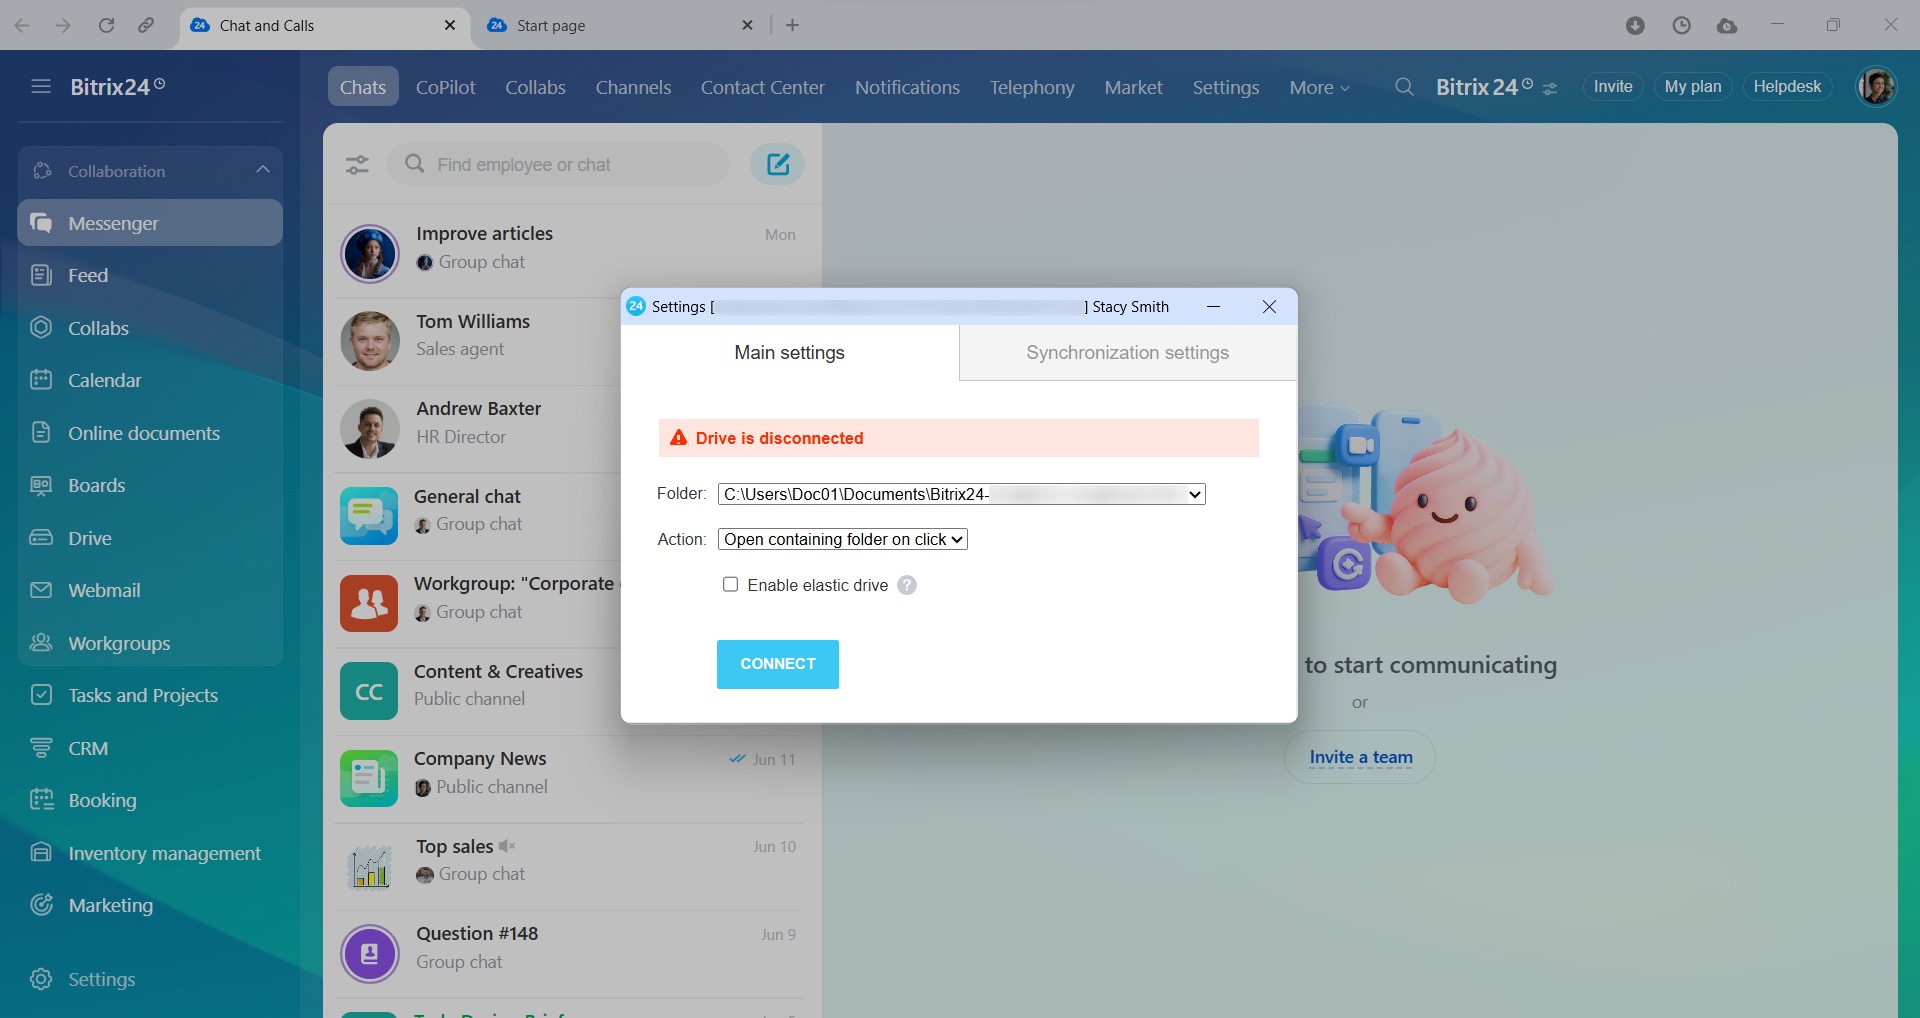
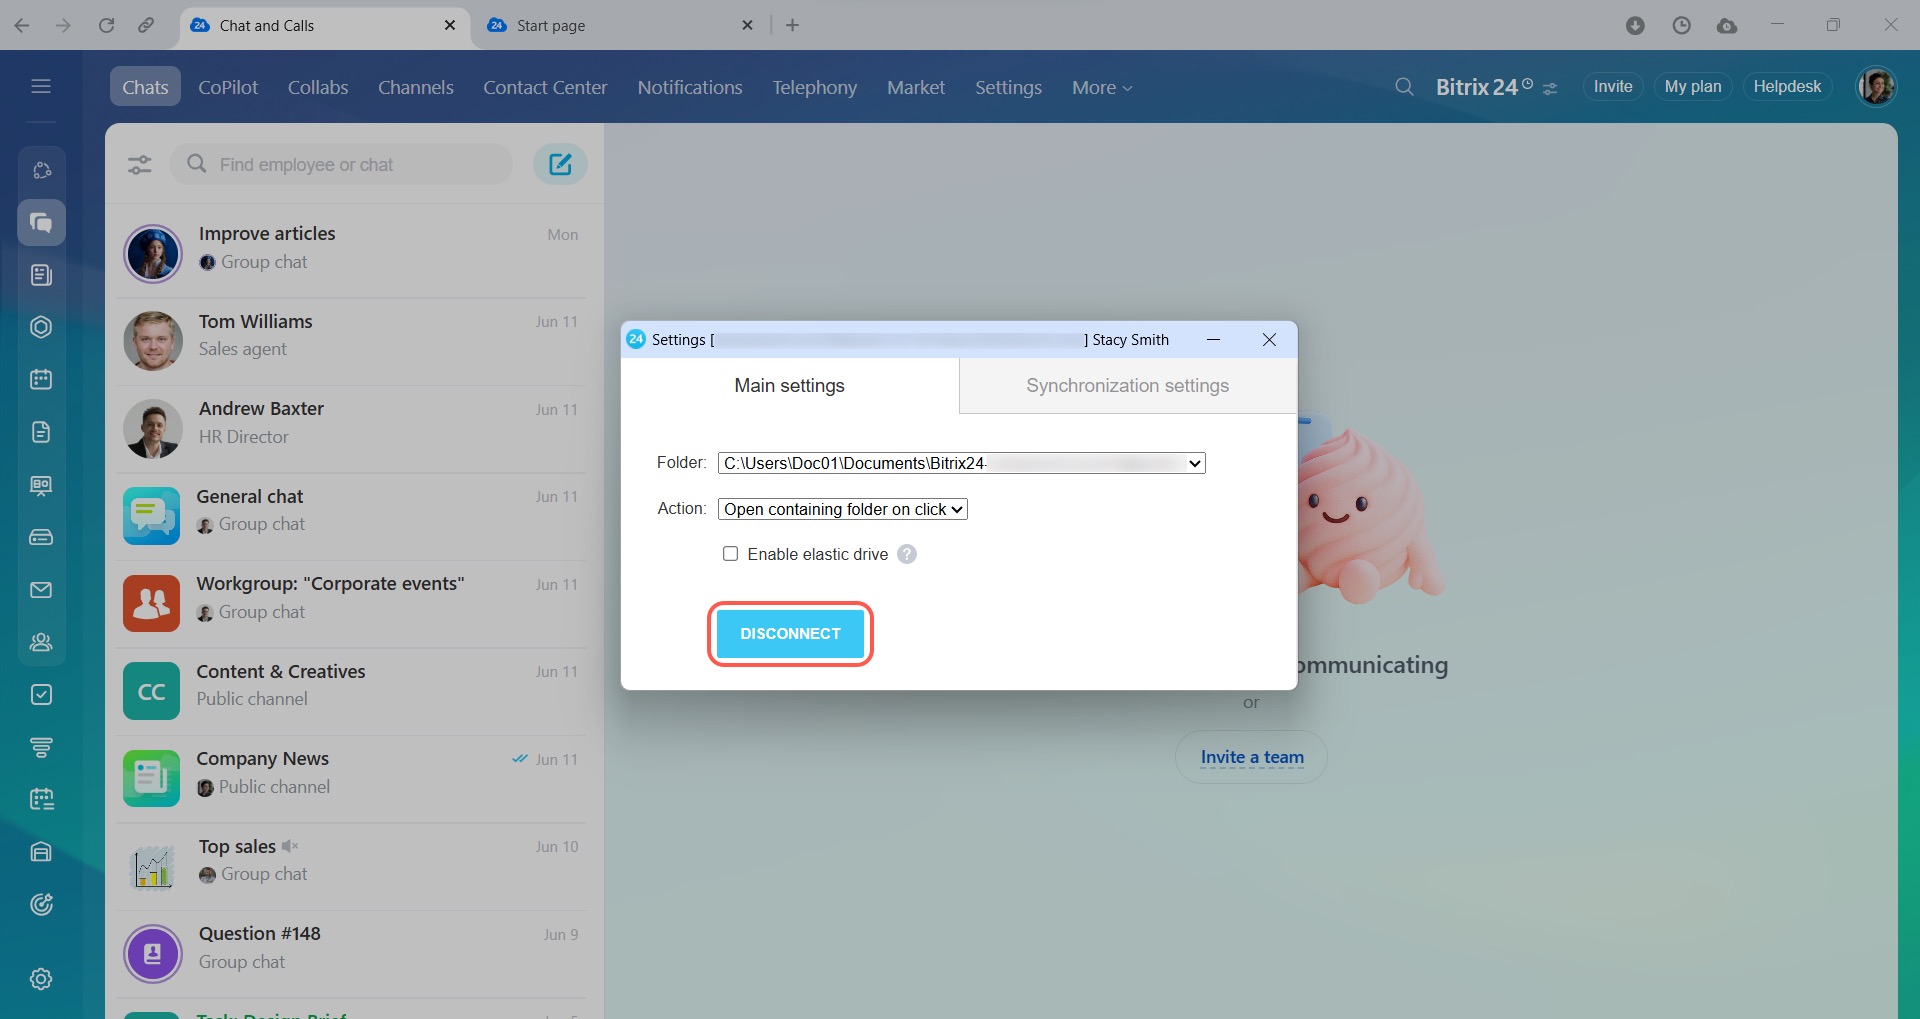
- In the Main settings tab, specify the folder where you want your files to be saved. This must be a local folder, for example, on the C:\ or D:\ drive.
- Select which action to perform after you click on a file. Decide whether to open the file or a folder containing it. Here you can also enable the elastic drive option.
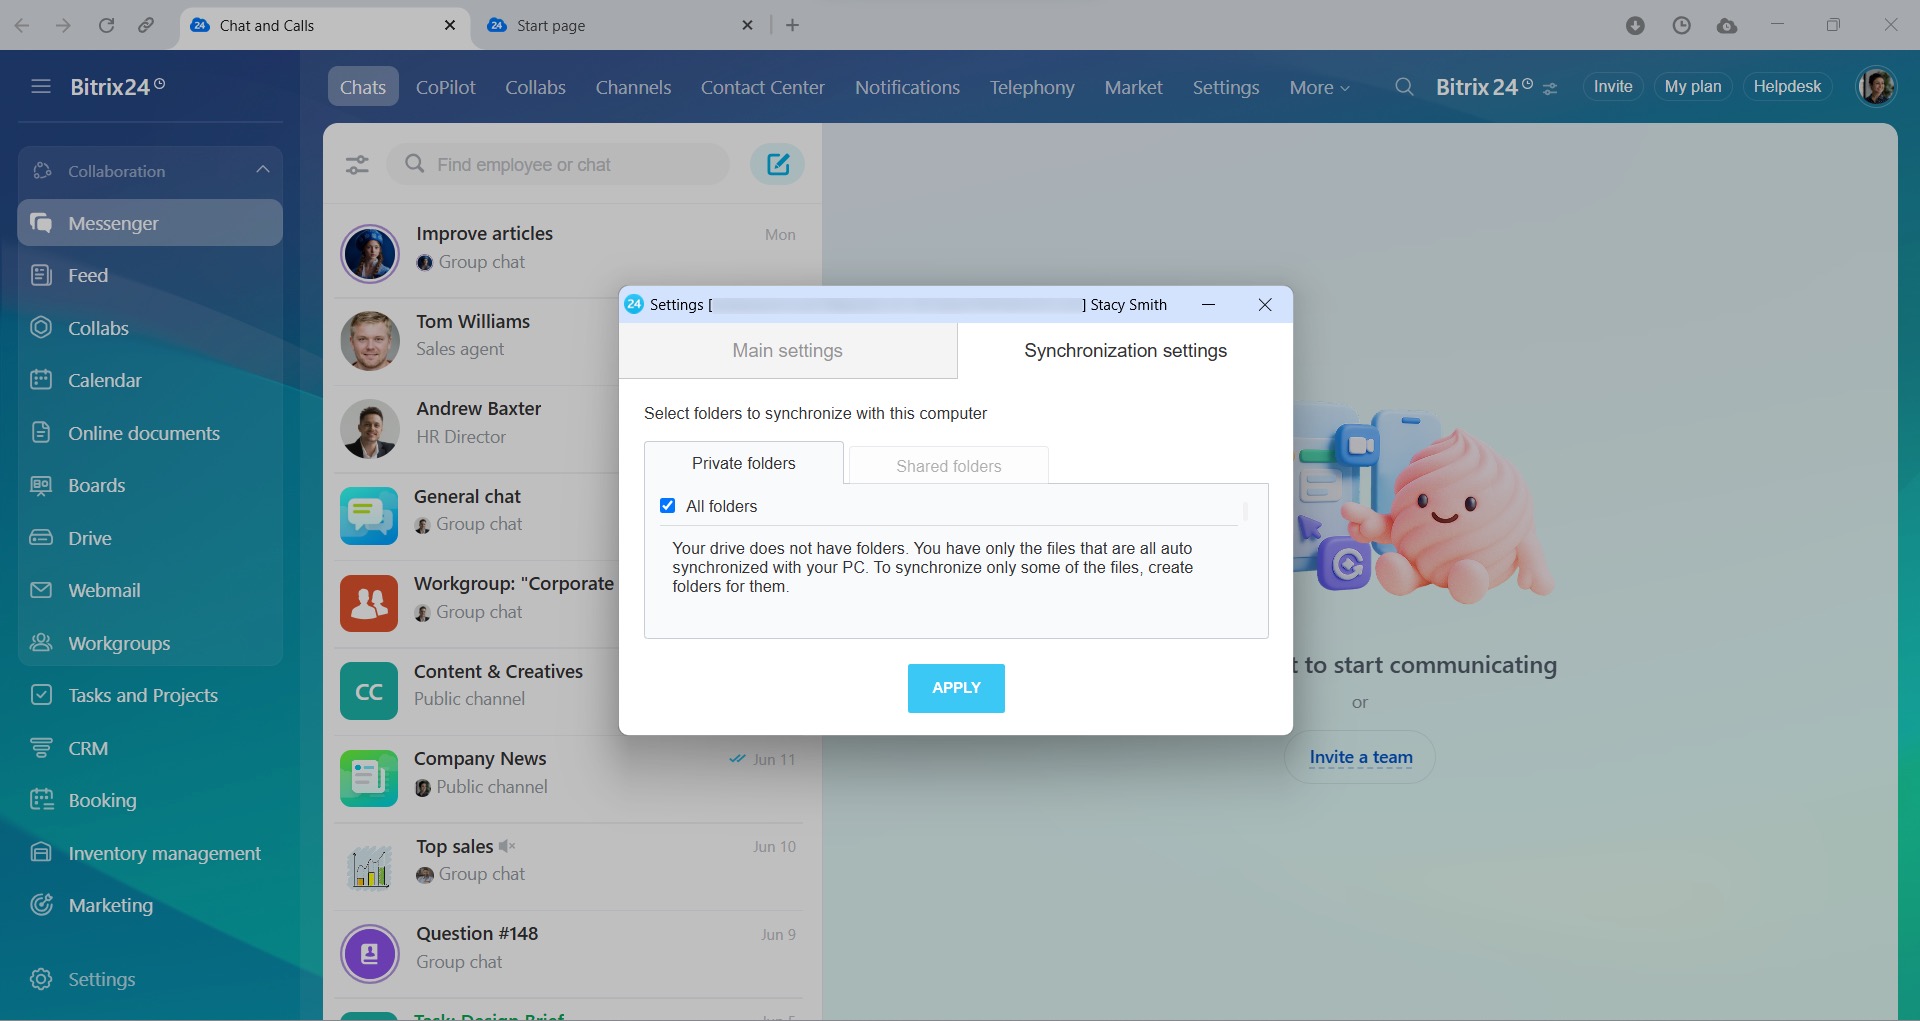
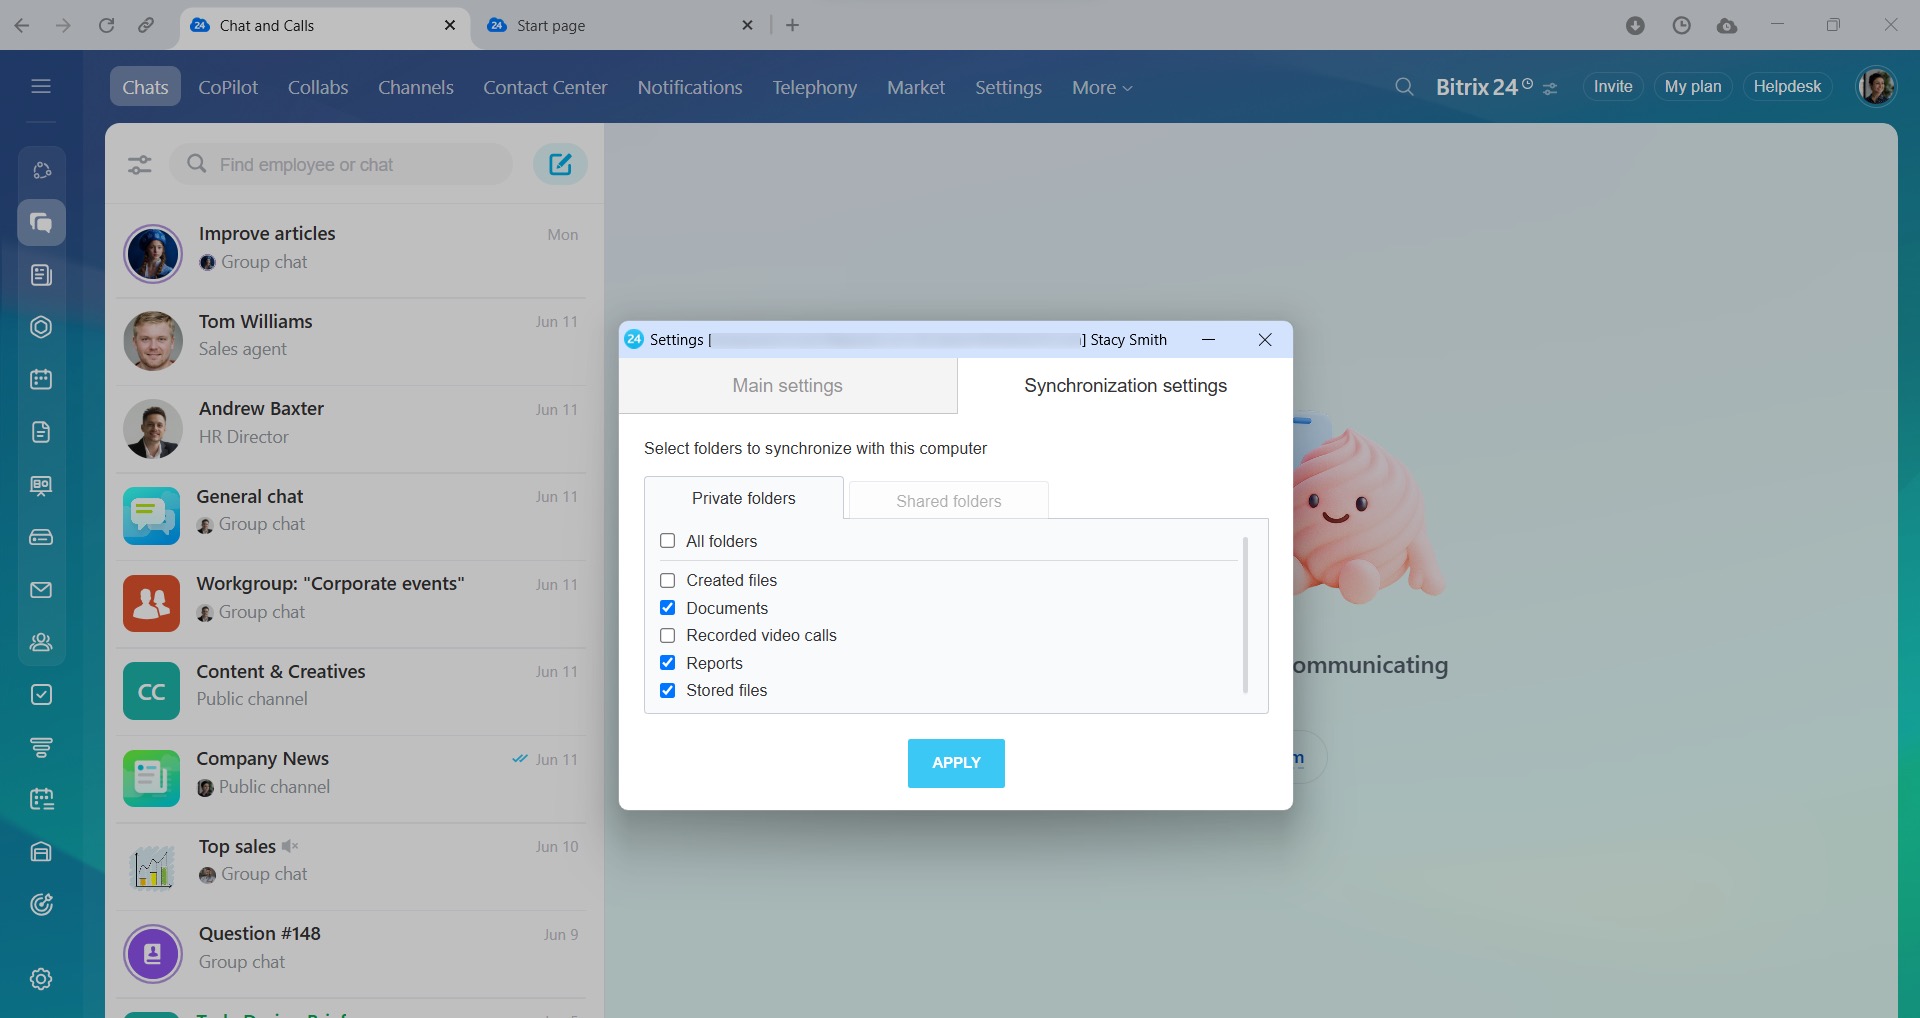
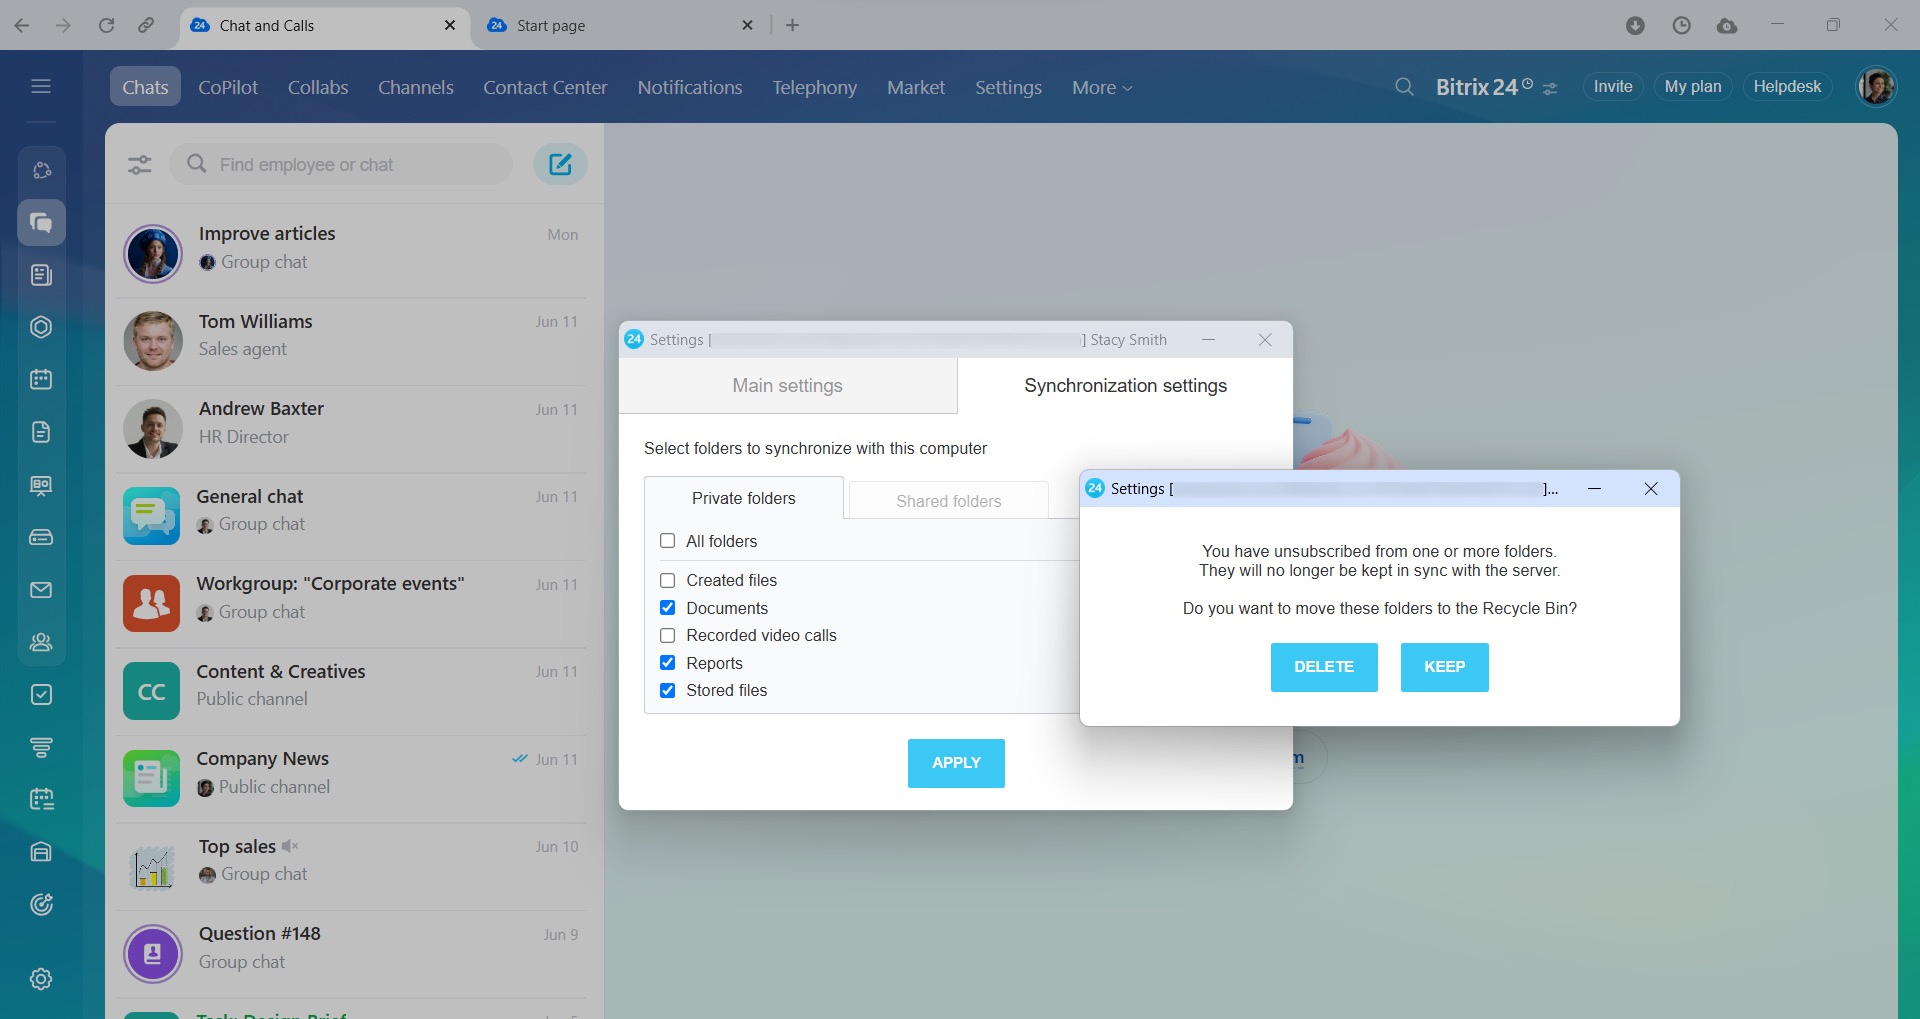
- In the Synchronization settings tab, specify folders that will be synchronized with your computer. You can sync both private and shared folders. The Uploaded files folder is not synced as it contains files uploaded from your computer.
- Click Apply.
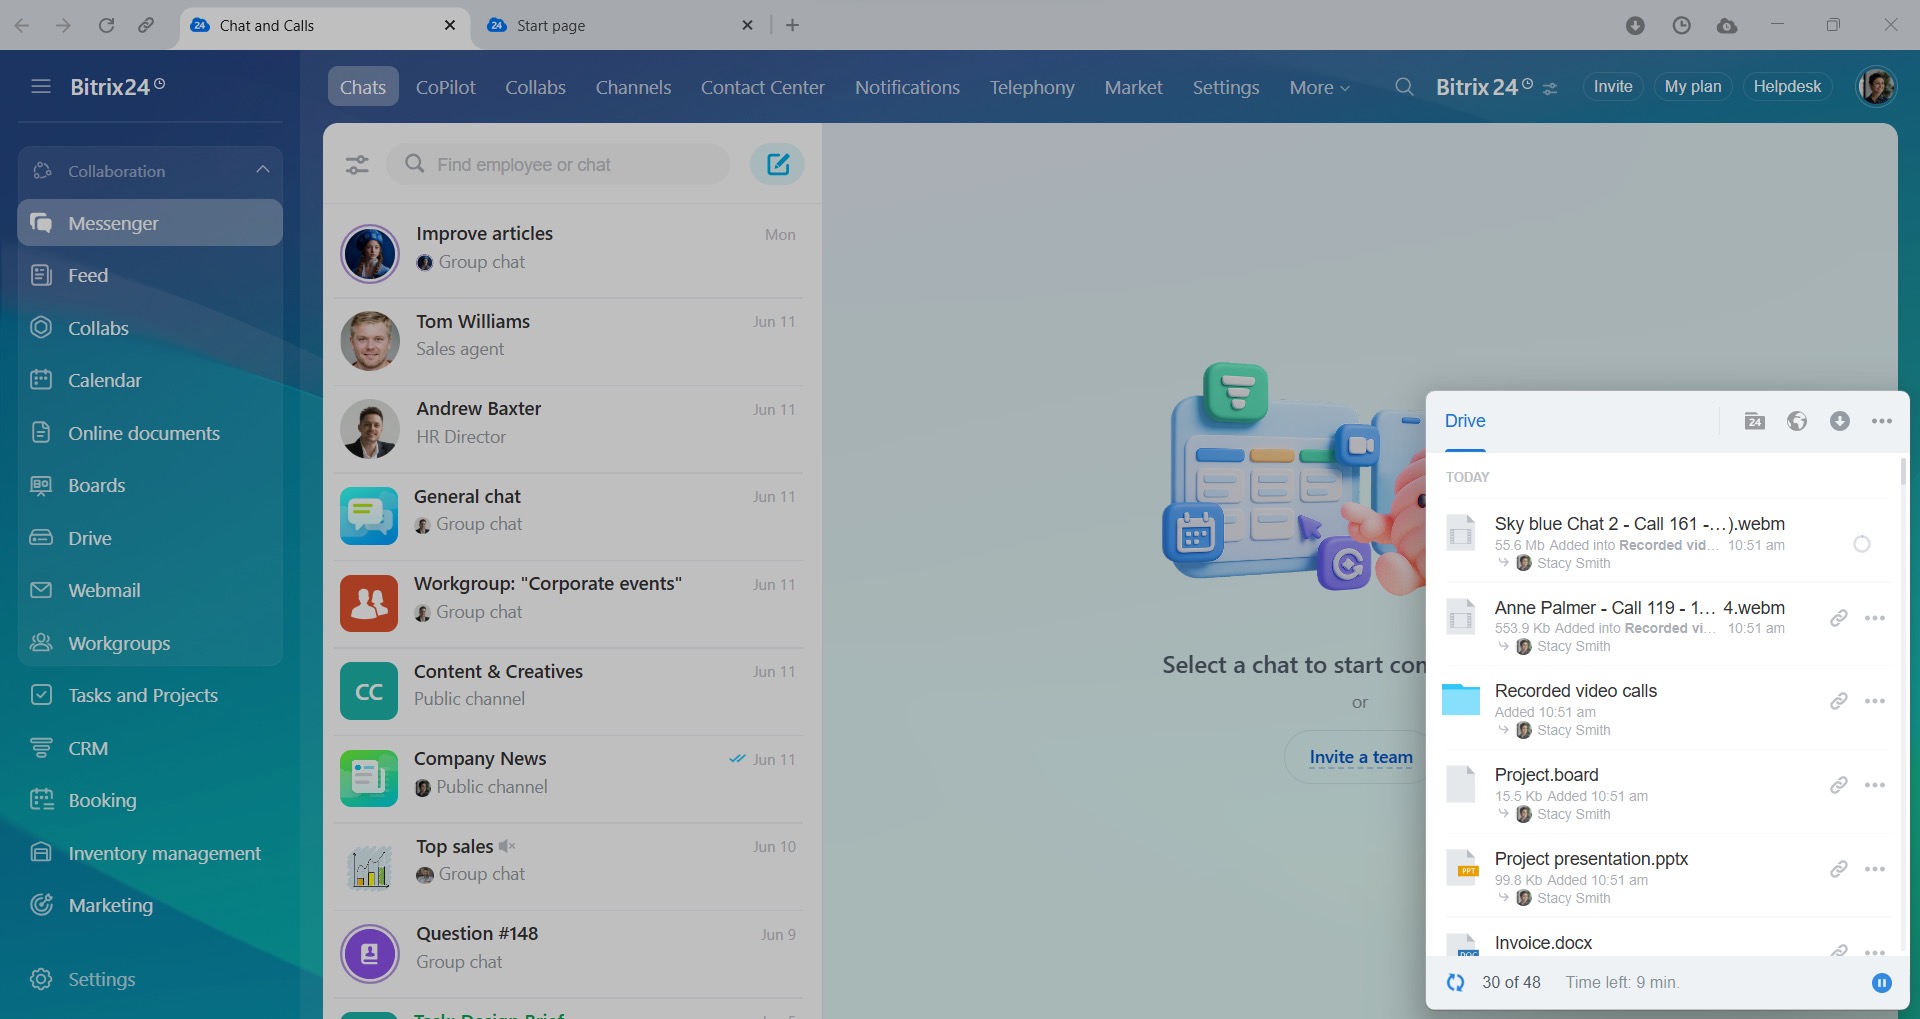
In the sync window, you will see a list of files and the approximate time it will take to sync.
Synchronization features
Deleted file recovery. If you delete a file from your Bitrix24 Drive, it may reappear there. For example, user A deleted a file. At the same time or shortly thereafter, user B starts full synchronization. The Synchronize all option starts the full reconciliation of the local sync folder with Bitrix24 Drive. Thus, the deleted file will be restored in Bitrix24 Drive.
File version conflict. Conflict happens when two users simultaneously edit the same file with Drive synchronization enabled. The app syncs the latest version of the file. Another version will be kept locally on another user's computer. Such a local copy includes the user name in the file name, for example, Contract (Stacy Smith).
To delete a local file copy and get the latest version:
-
Delete all local copies of conflicting files. If needed, move them to another folder that is not synchronized with your Bitrix24 Drive.
-
Disable synchronization.
-
Delete the files from your Bitrix24 Drive.
-
Re-enable synchronization.
How to disable synchronization
- Open Bitrix24 Messenger and click the cloud icon in the top-right corner.
- In the pop-up window, click the three-dot menu (...).
- Select your profile.
- Click Bitrix24 Drive settings.
- Click Disconnect. The files will remain on your computer even after you disable synchronization.
To disconnect a specific folder:
- Switch to the Synchronization settings tab.
- Uncheck the box next to the folder name.
- Click Apply.
- Specify whether you want to delete the folder from your computer or not.
If you disable synchronization for some time and then re-enable it:
-
The files you deleted from Bitrix24 Drive will be uploaded to Bitrix24 again.
-
The files you deleted from your computer will be restored in the same folder.
-
The files you deleted from both Bitrix24 Drive and your computer will be deleted forever.
In brief
-
Synchronize Bitrix24 Drive files and folders with your computer.
-
Synchronization works both ways. After you edit files on your computer, the changes will be automatically applied to files stored on your Bitrix24 Drive, and vice versa.
-
To synchronize Bitrix24 Drive with your computer, install the Bitrix24 Messenger app.
-
To enable synchronization, open Bitrix24 Messenger and click on the cloud icon in the top-right corner. In the pop-up window, click the three-dot menu (...), select your profile, and click Bitrix24 Drive settings.
-
The app does not support .lnk, .tmp, .ini, .pl. file formats. Also, files or folders containing symbols
/ \ : * ? " ' | { } % ; & ~ # < >in their names cannot be synchronized. -
To disable synchronization, click the three-dot menu (...), select your profile, and click Bitrix24 Drive settings > Disconnect.

