Lists in Bitrix24 are designed to help you store and manage data, such as contract registries, equipment catalogs, or office supply inventories. They are fully customizable, allowing you to add fields, organize sections, and integrate them with other Bitrix24 tools. For example, when you add a new contract to a list, you can set up a workflow to automatically create a task for the manager and notify the responsible person.
Bitrix24 plans and pricing
In this article:
Create a list
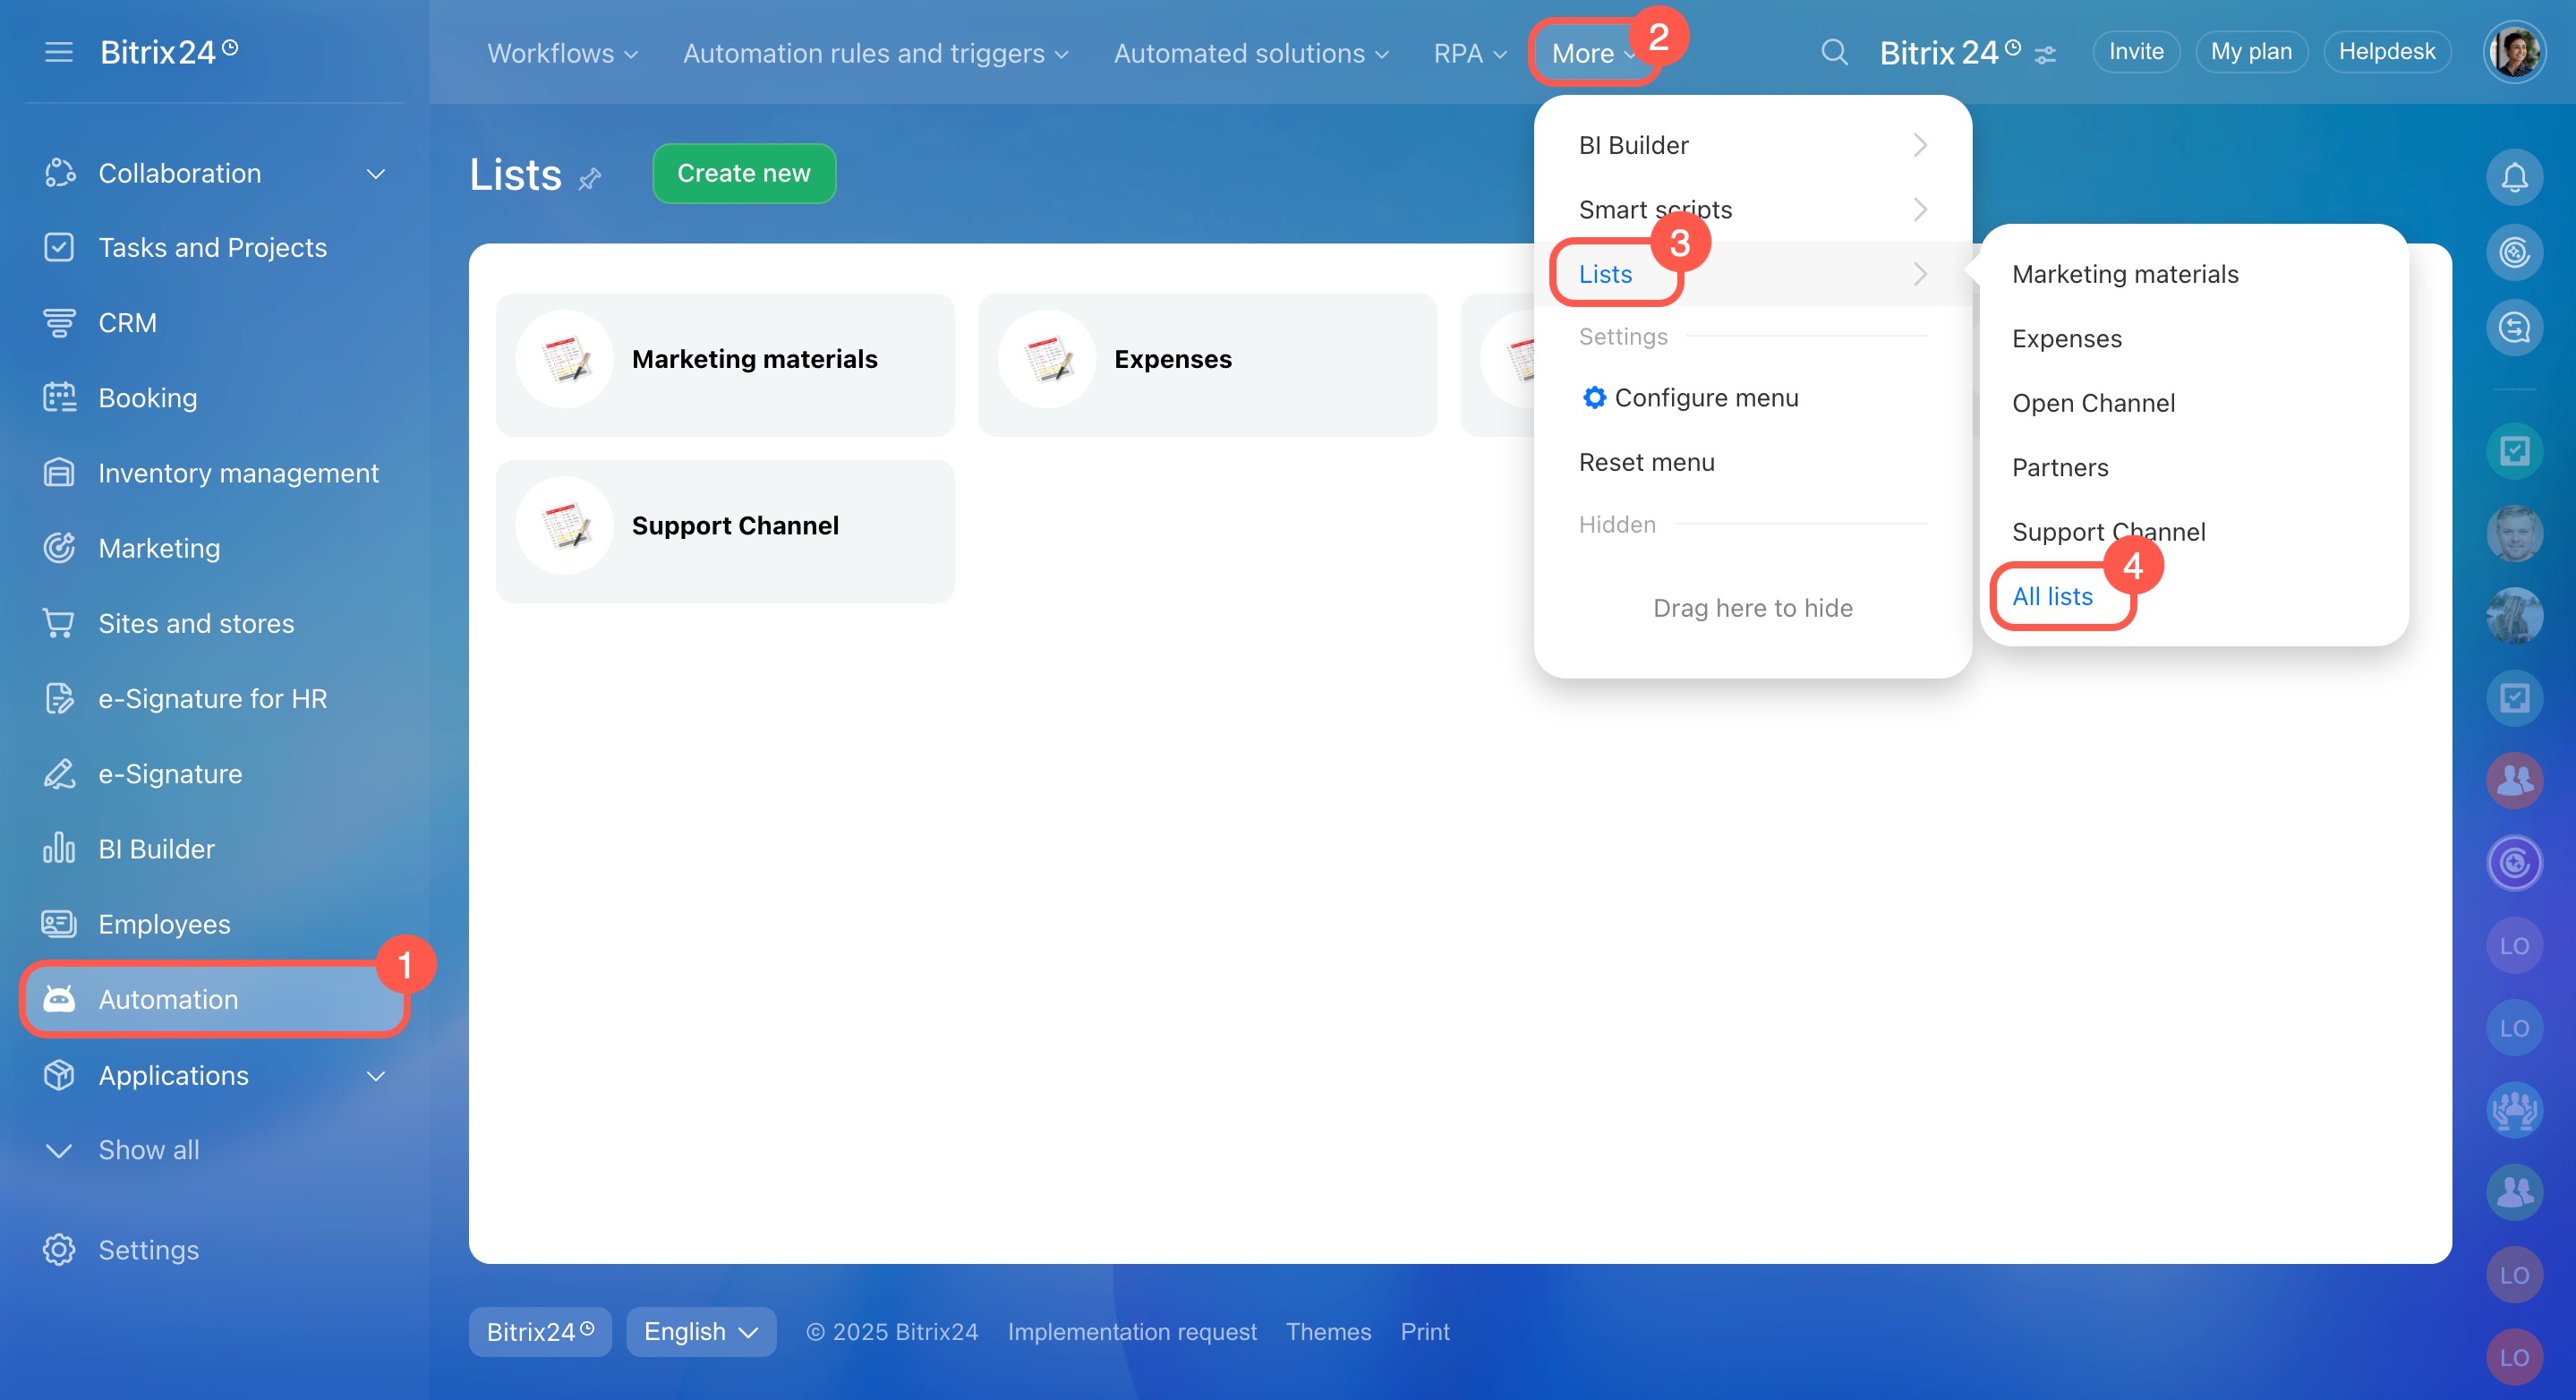
- Go to Automation.
- Click More.
- Expand Lists.
- Select All lists.
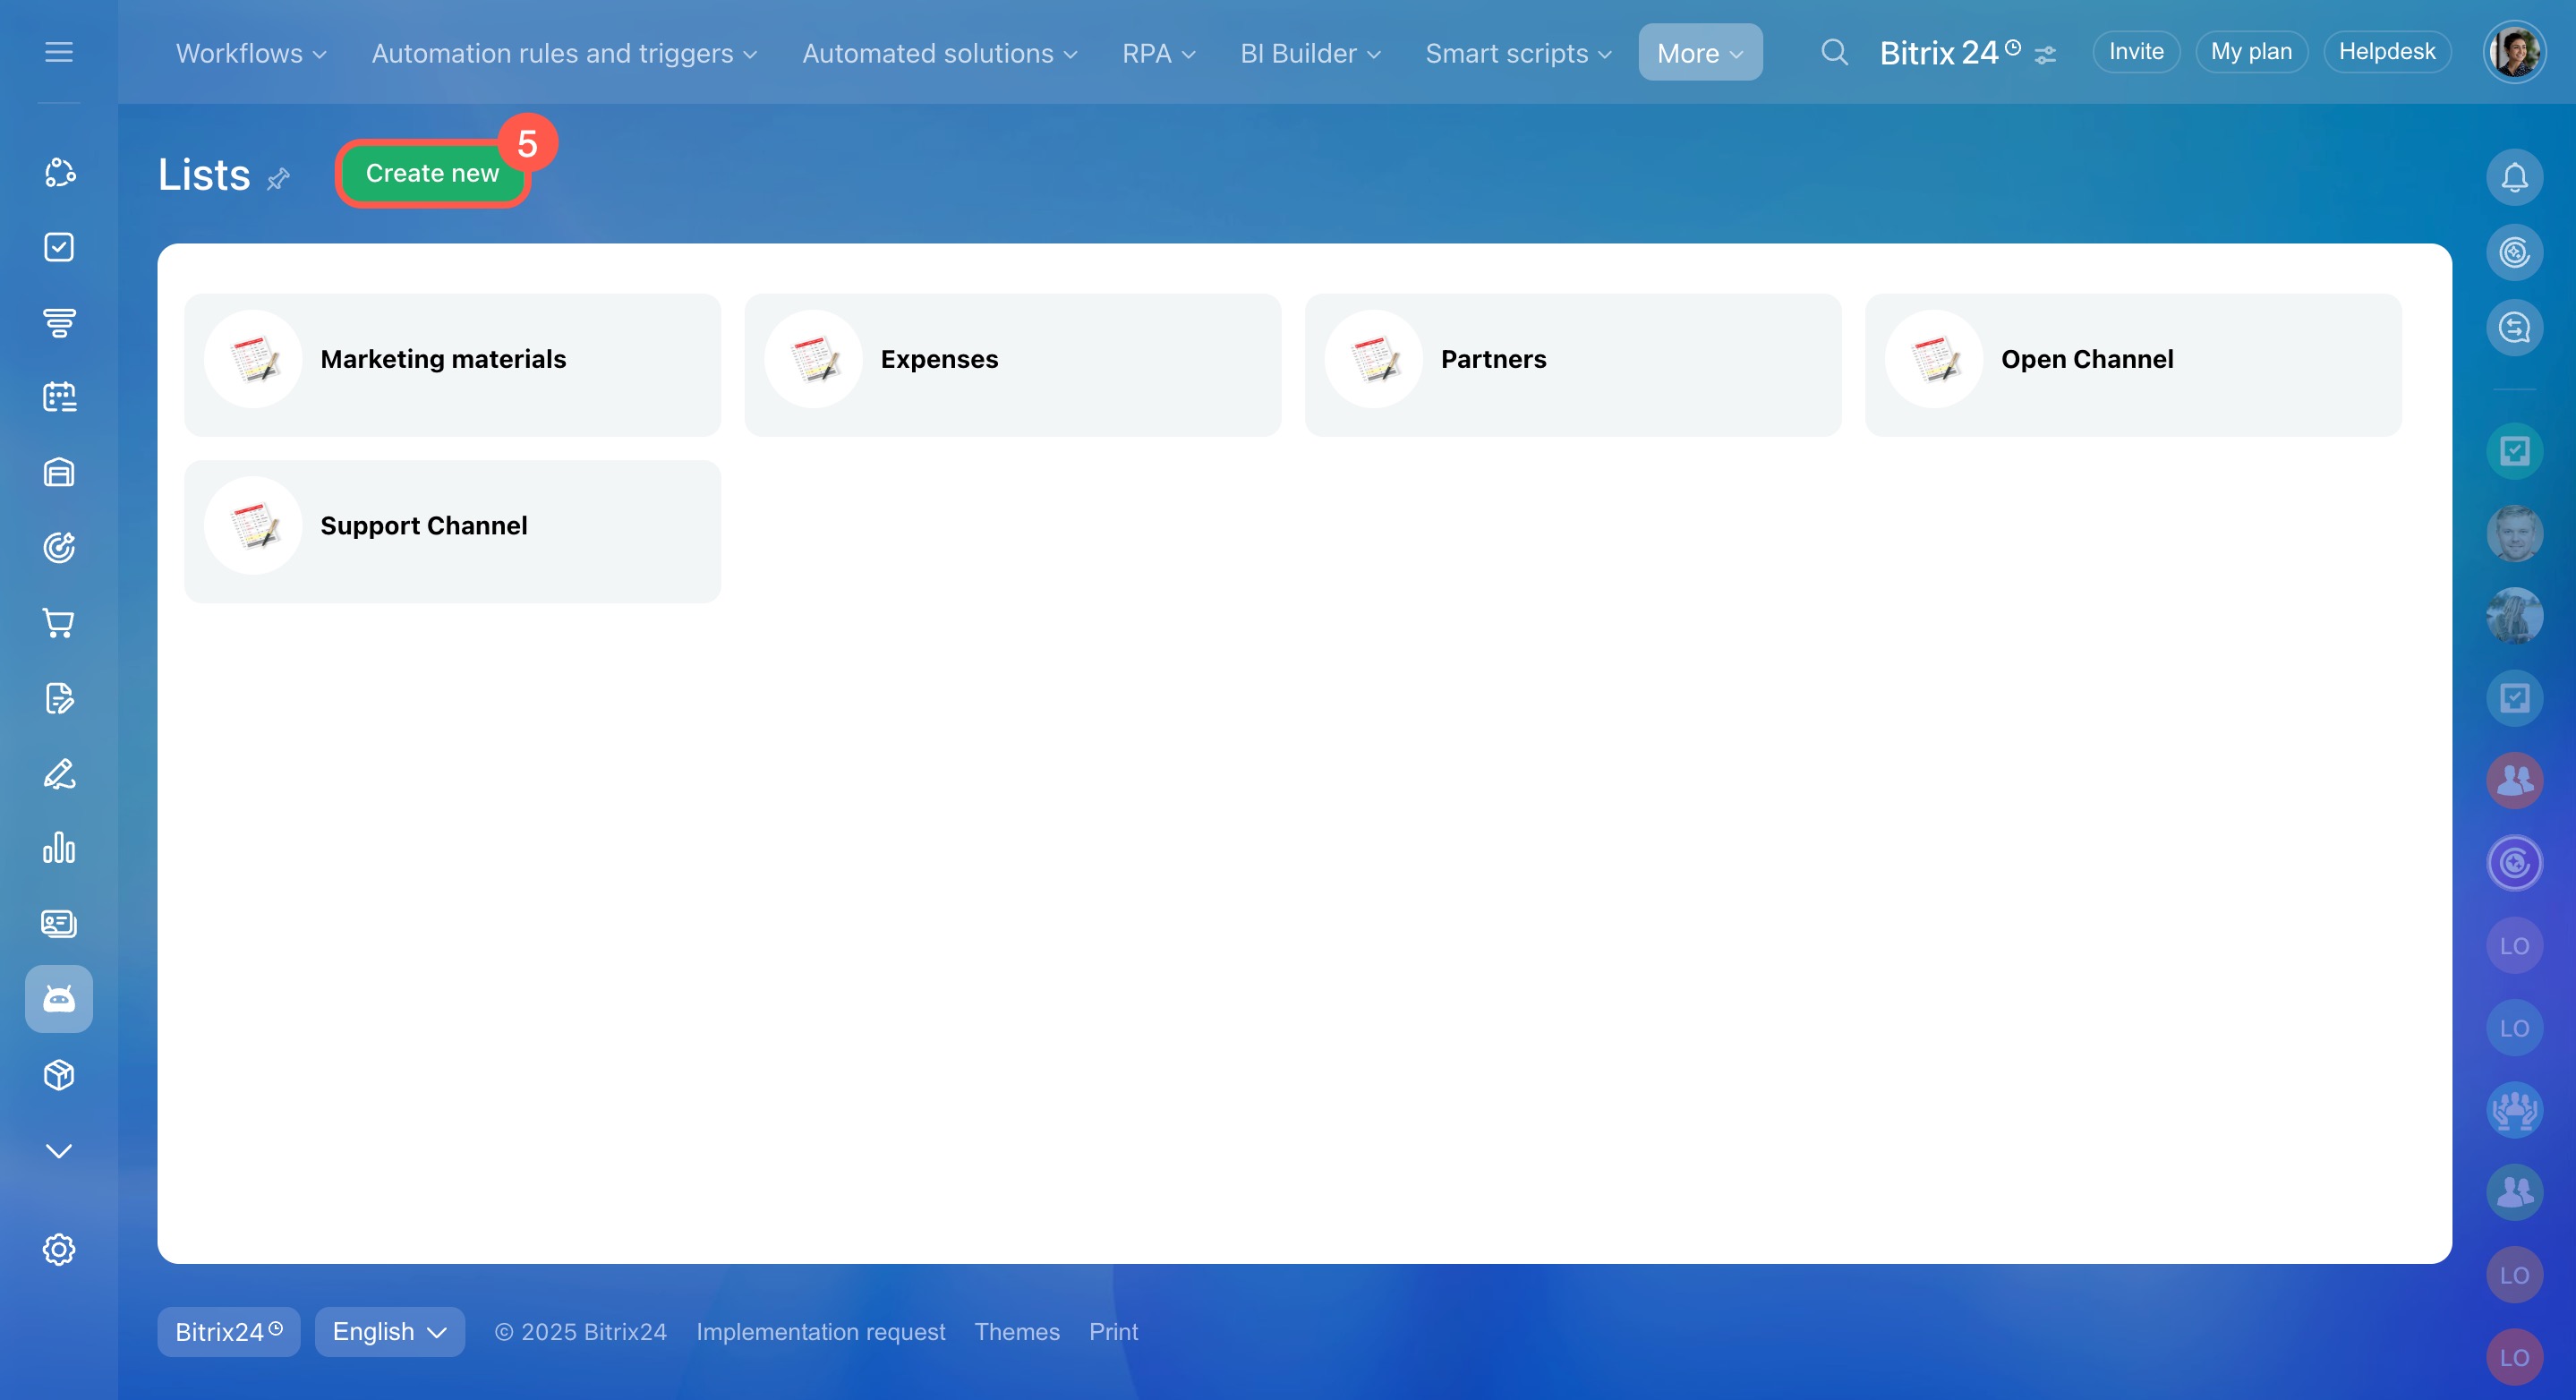
- Click Create new.
Provide general information. On the Settings tab, fill in the following fields:
- List name: This will appear on the lists page.
- List description: Specify a purpose to help employees choose the right one.
- Sort: Sets the list's position on the page (smaller numbers appear higher).
- Image: Upload an image to make the list easier to find.
- Enable Business Processes: Turn this on to set up workflows for the list. Configure workflows in Feed
- Auto lock items when editing: Prevents others from editing a list item while you're working on it.
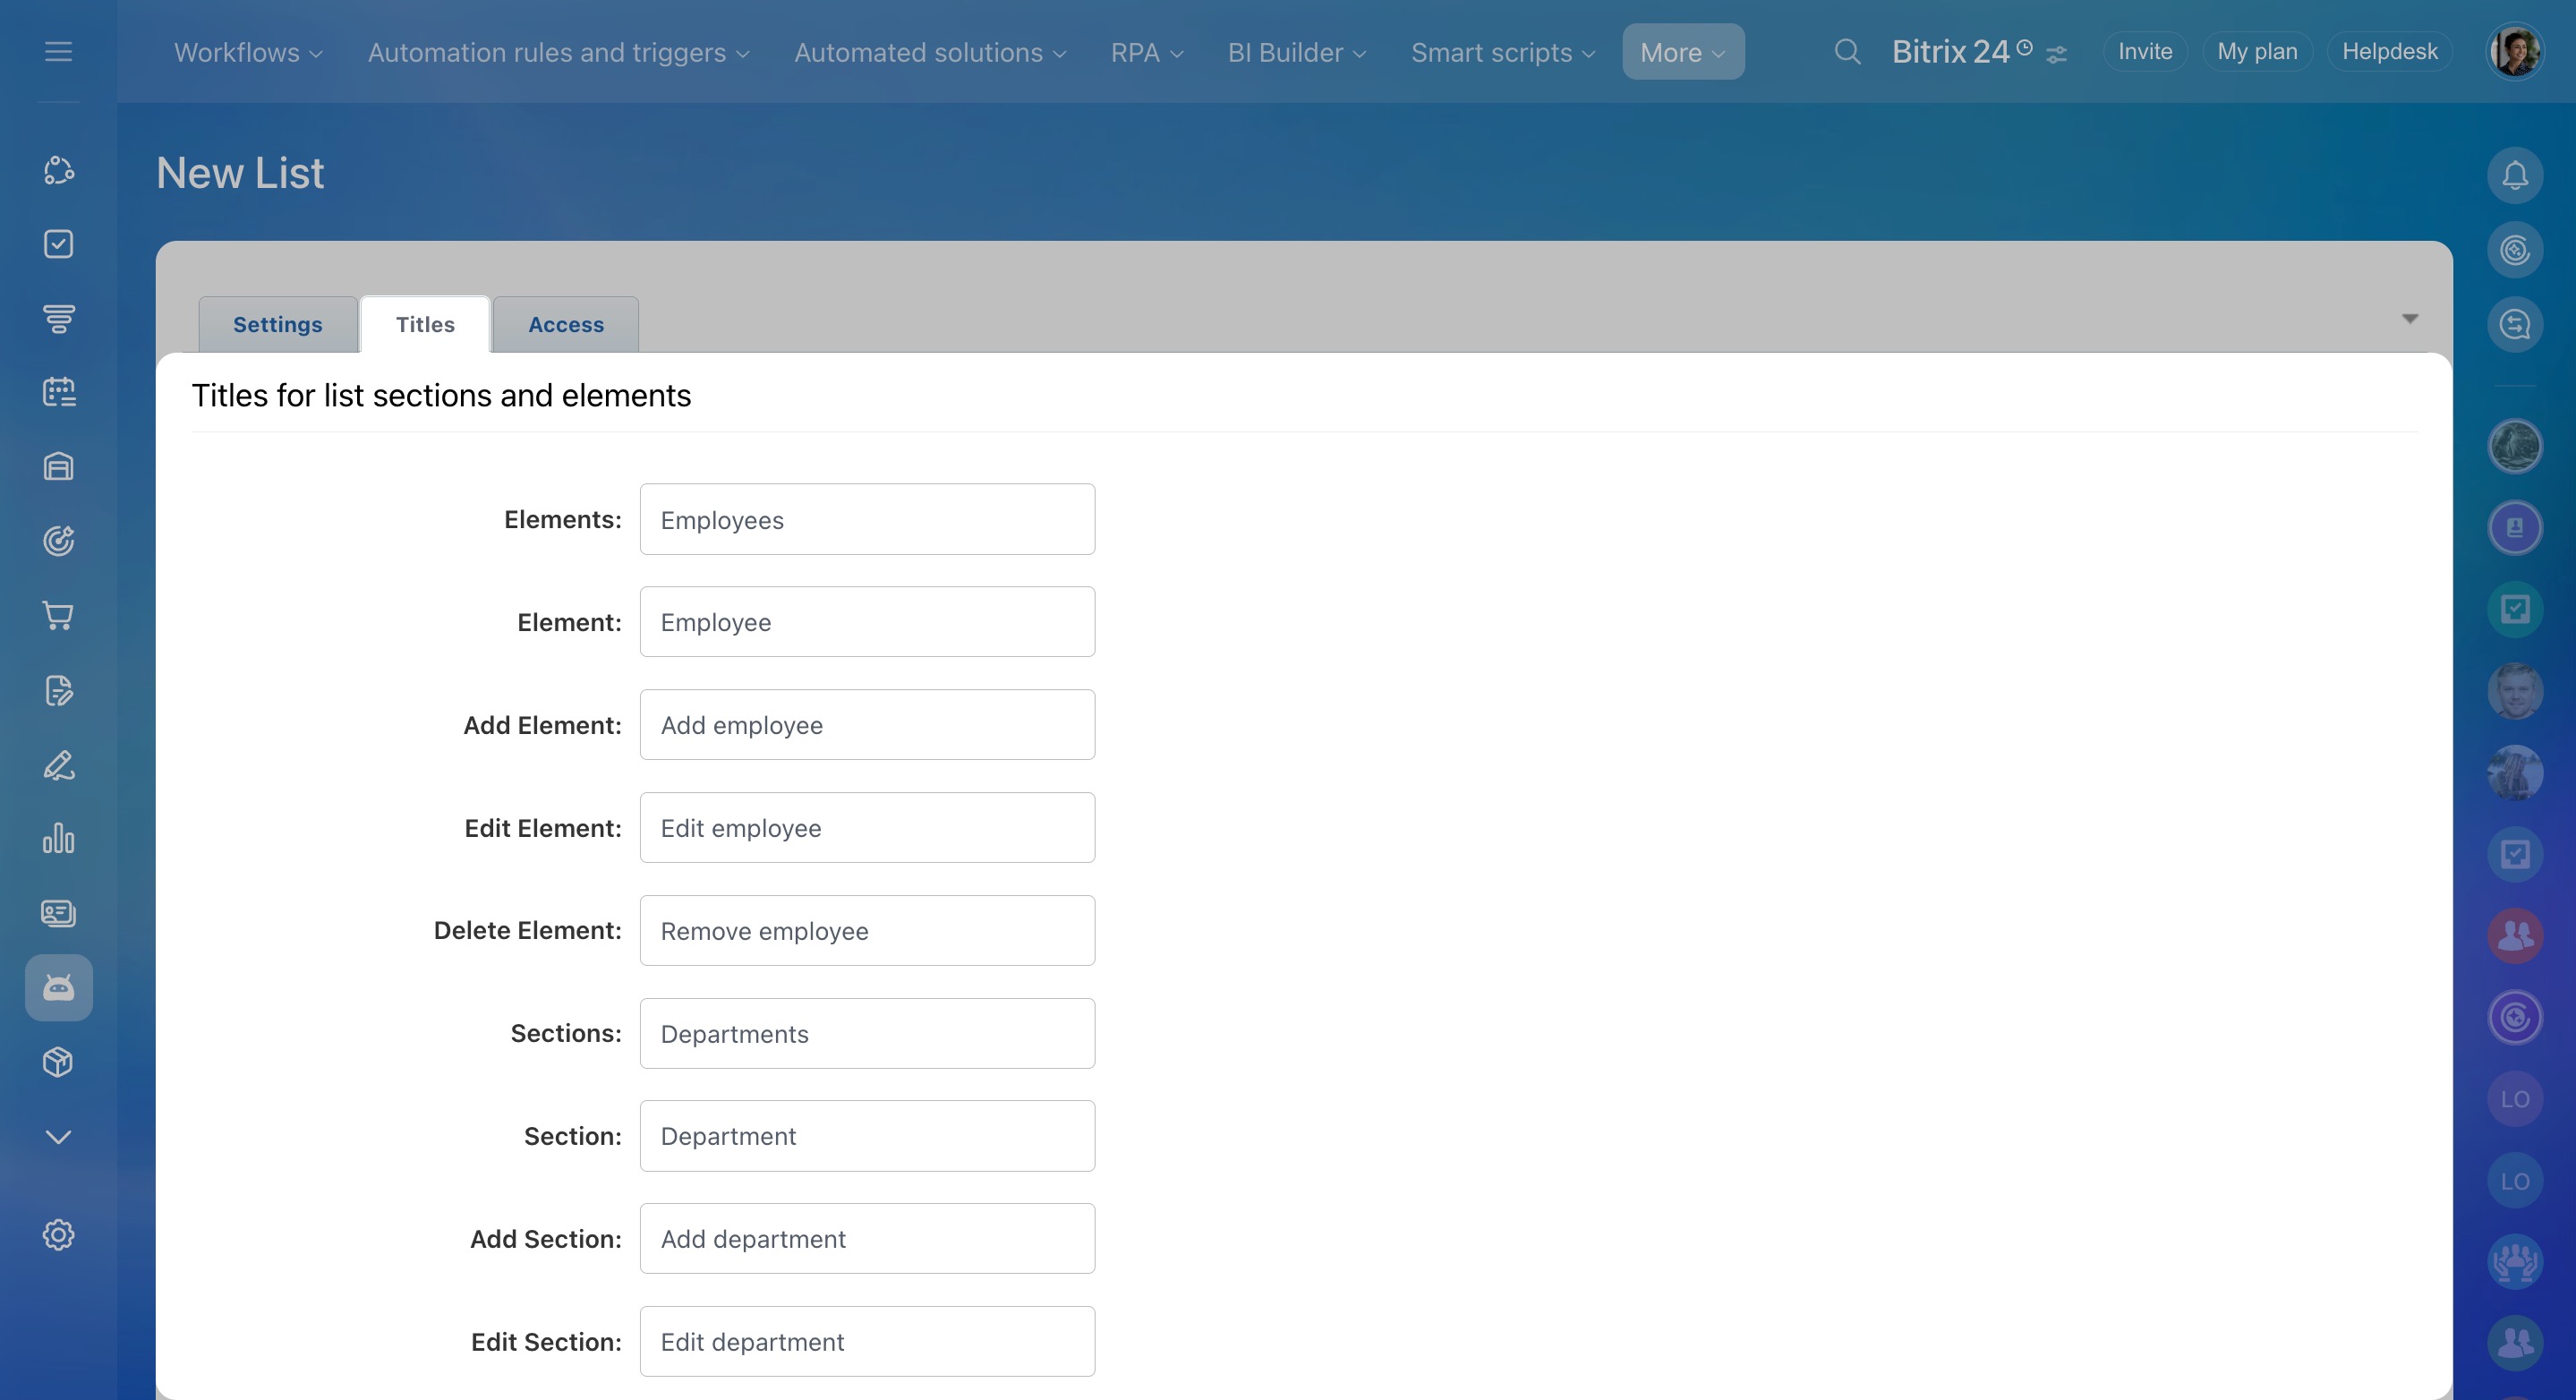
Rename elements and sections. On the Titles tab, you can rename the default field names to suit your needs. For example, if you are creating a company departments list, change Element to Employee and Section to Department.
Set access permissions. On the Access tab, follow these steps:
- Click Add.
- Select employees or departments you want to configure permissions for.
- Click Select.
- Specify access permissions for each employee or department.
- Click Save.
Types of permissions:
- No access: Users can't see the list.
- Read: Users can view the list.
- View in Control Panel: Users can view the list and its elements. This type is only relevant for the Bitrix24 On-premise version.
- Add: Users can add elements to the list.
- Add in Control Panel: Users can add and view list elements. This type is only relevant for the Bitrix24 On-premise version.
- Limited edit: Users can't add and delete sections.
- Edit: Users can add, delete, and edit sections and elements.
- Full access: All actions are allowed. This includes creating, editing, configuring the list and fields, and running workflows with list elements.
Add fields to describe list elements
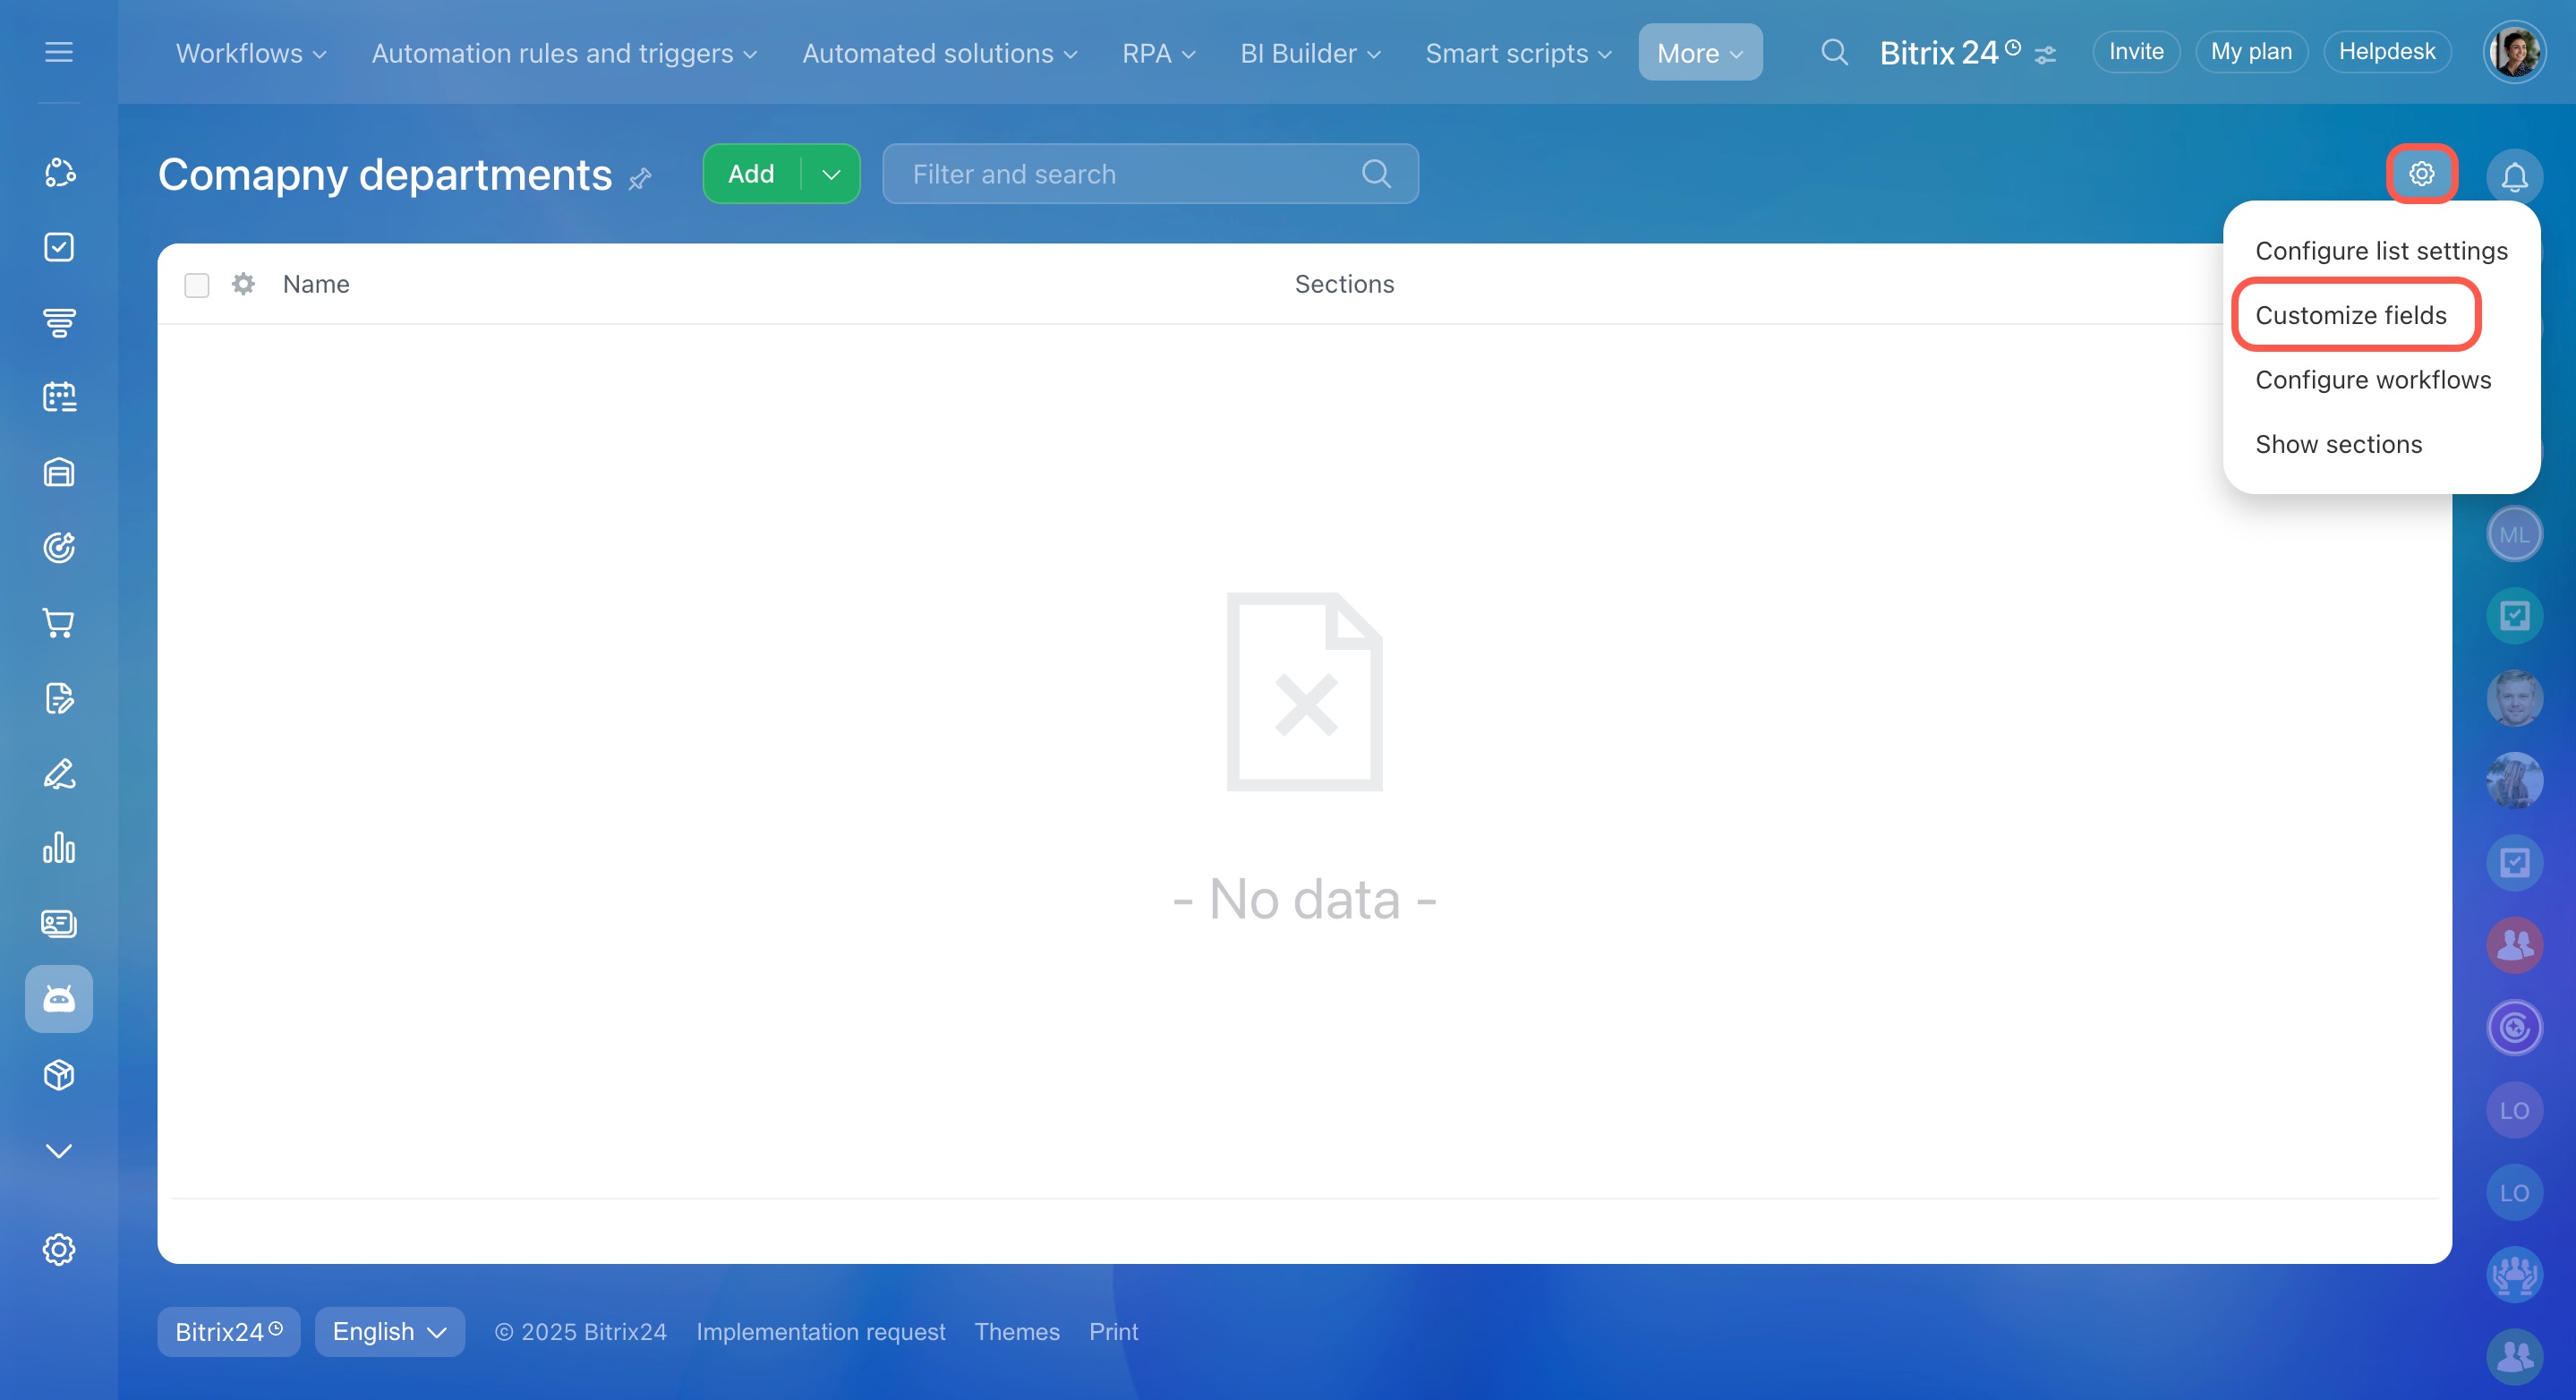
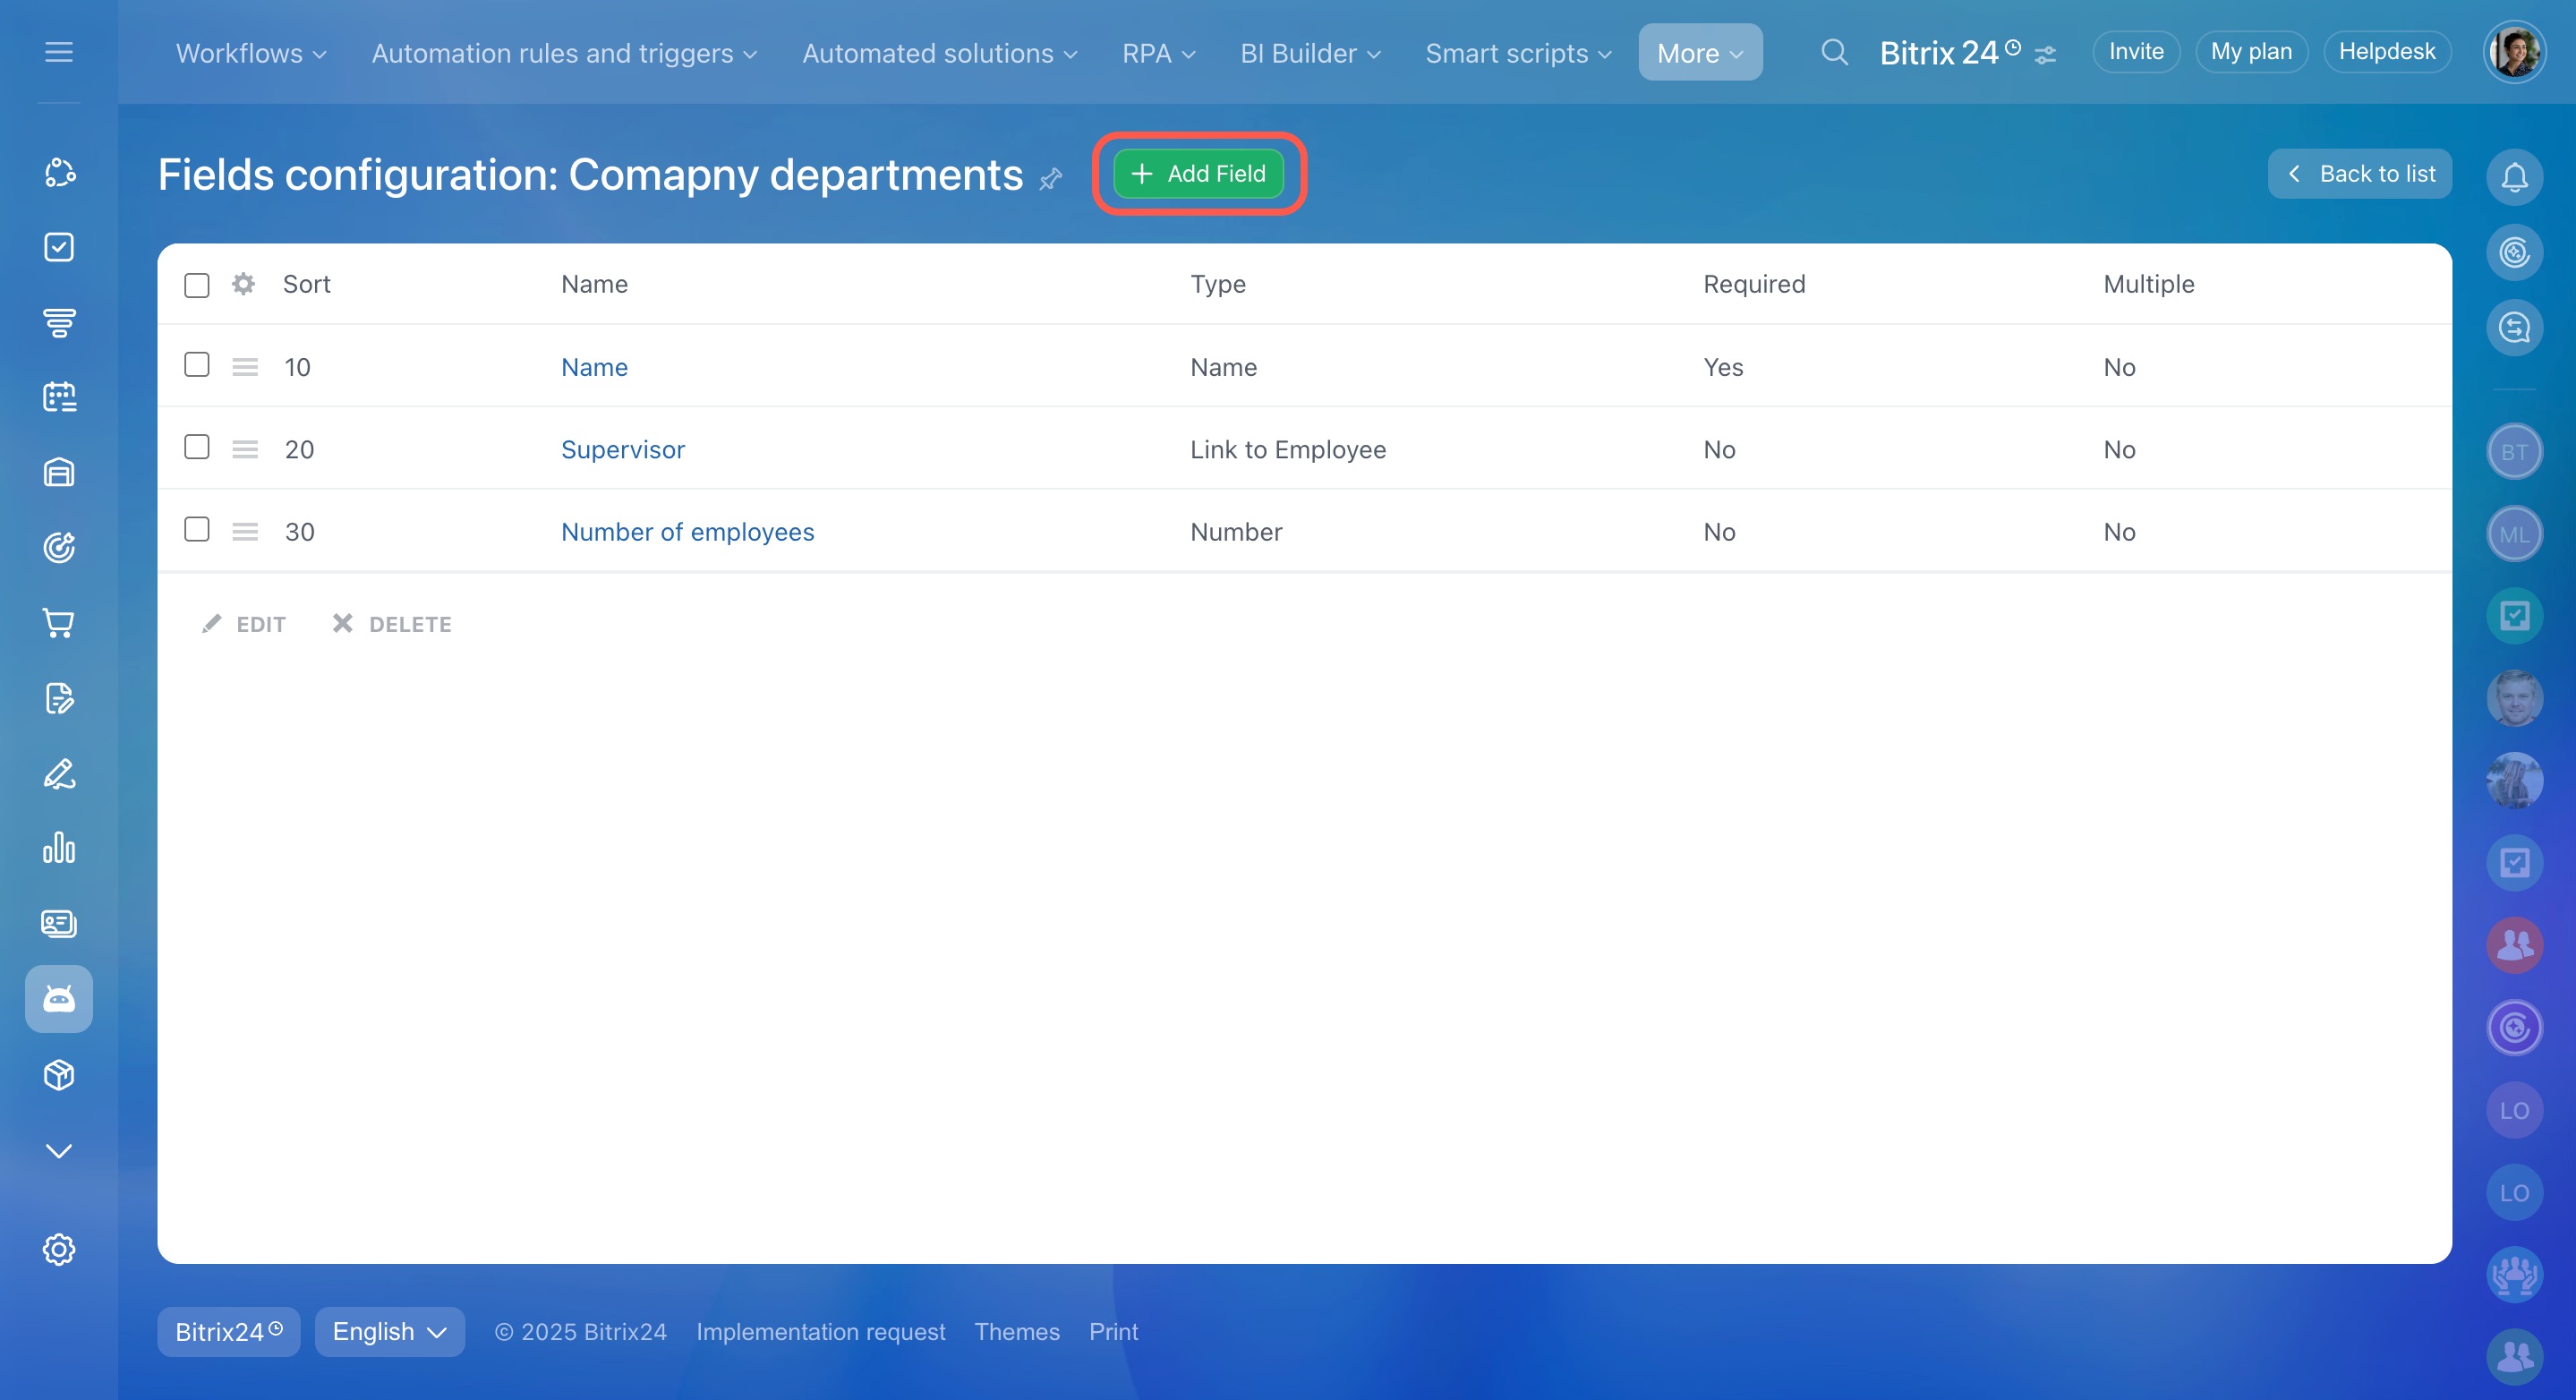
By default, each list element has one field called Name. To include more details, create additional fields. For example, in a departments list, you can add fields for the supervisor and the number of employees.
To add a field, go to the list and click Settings (⚙️) > Customize fields > Add field.
Customize list fields
Add sections and elements to the list
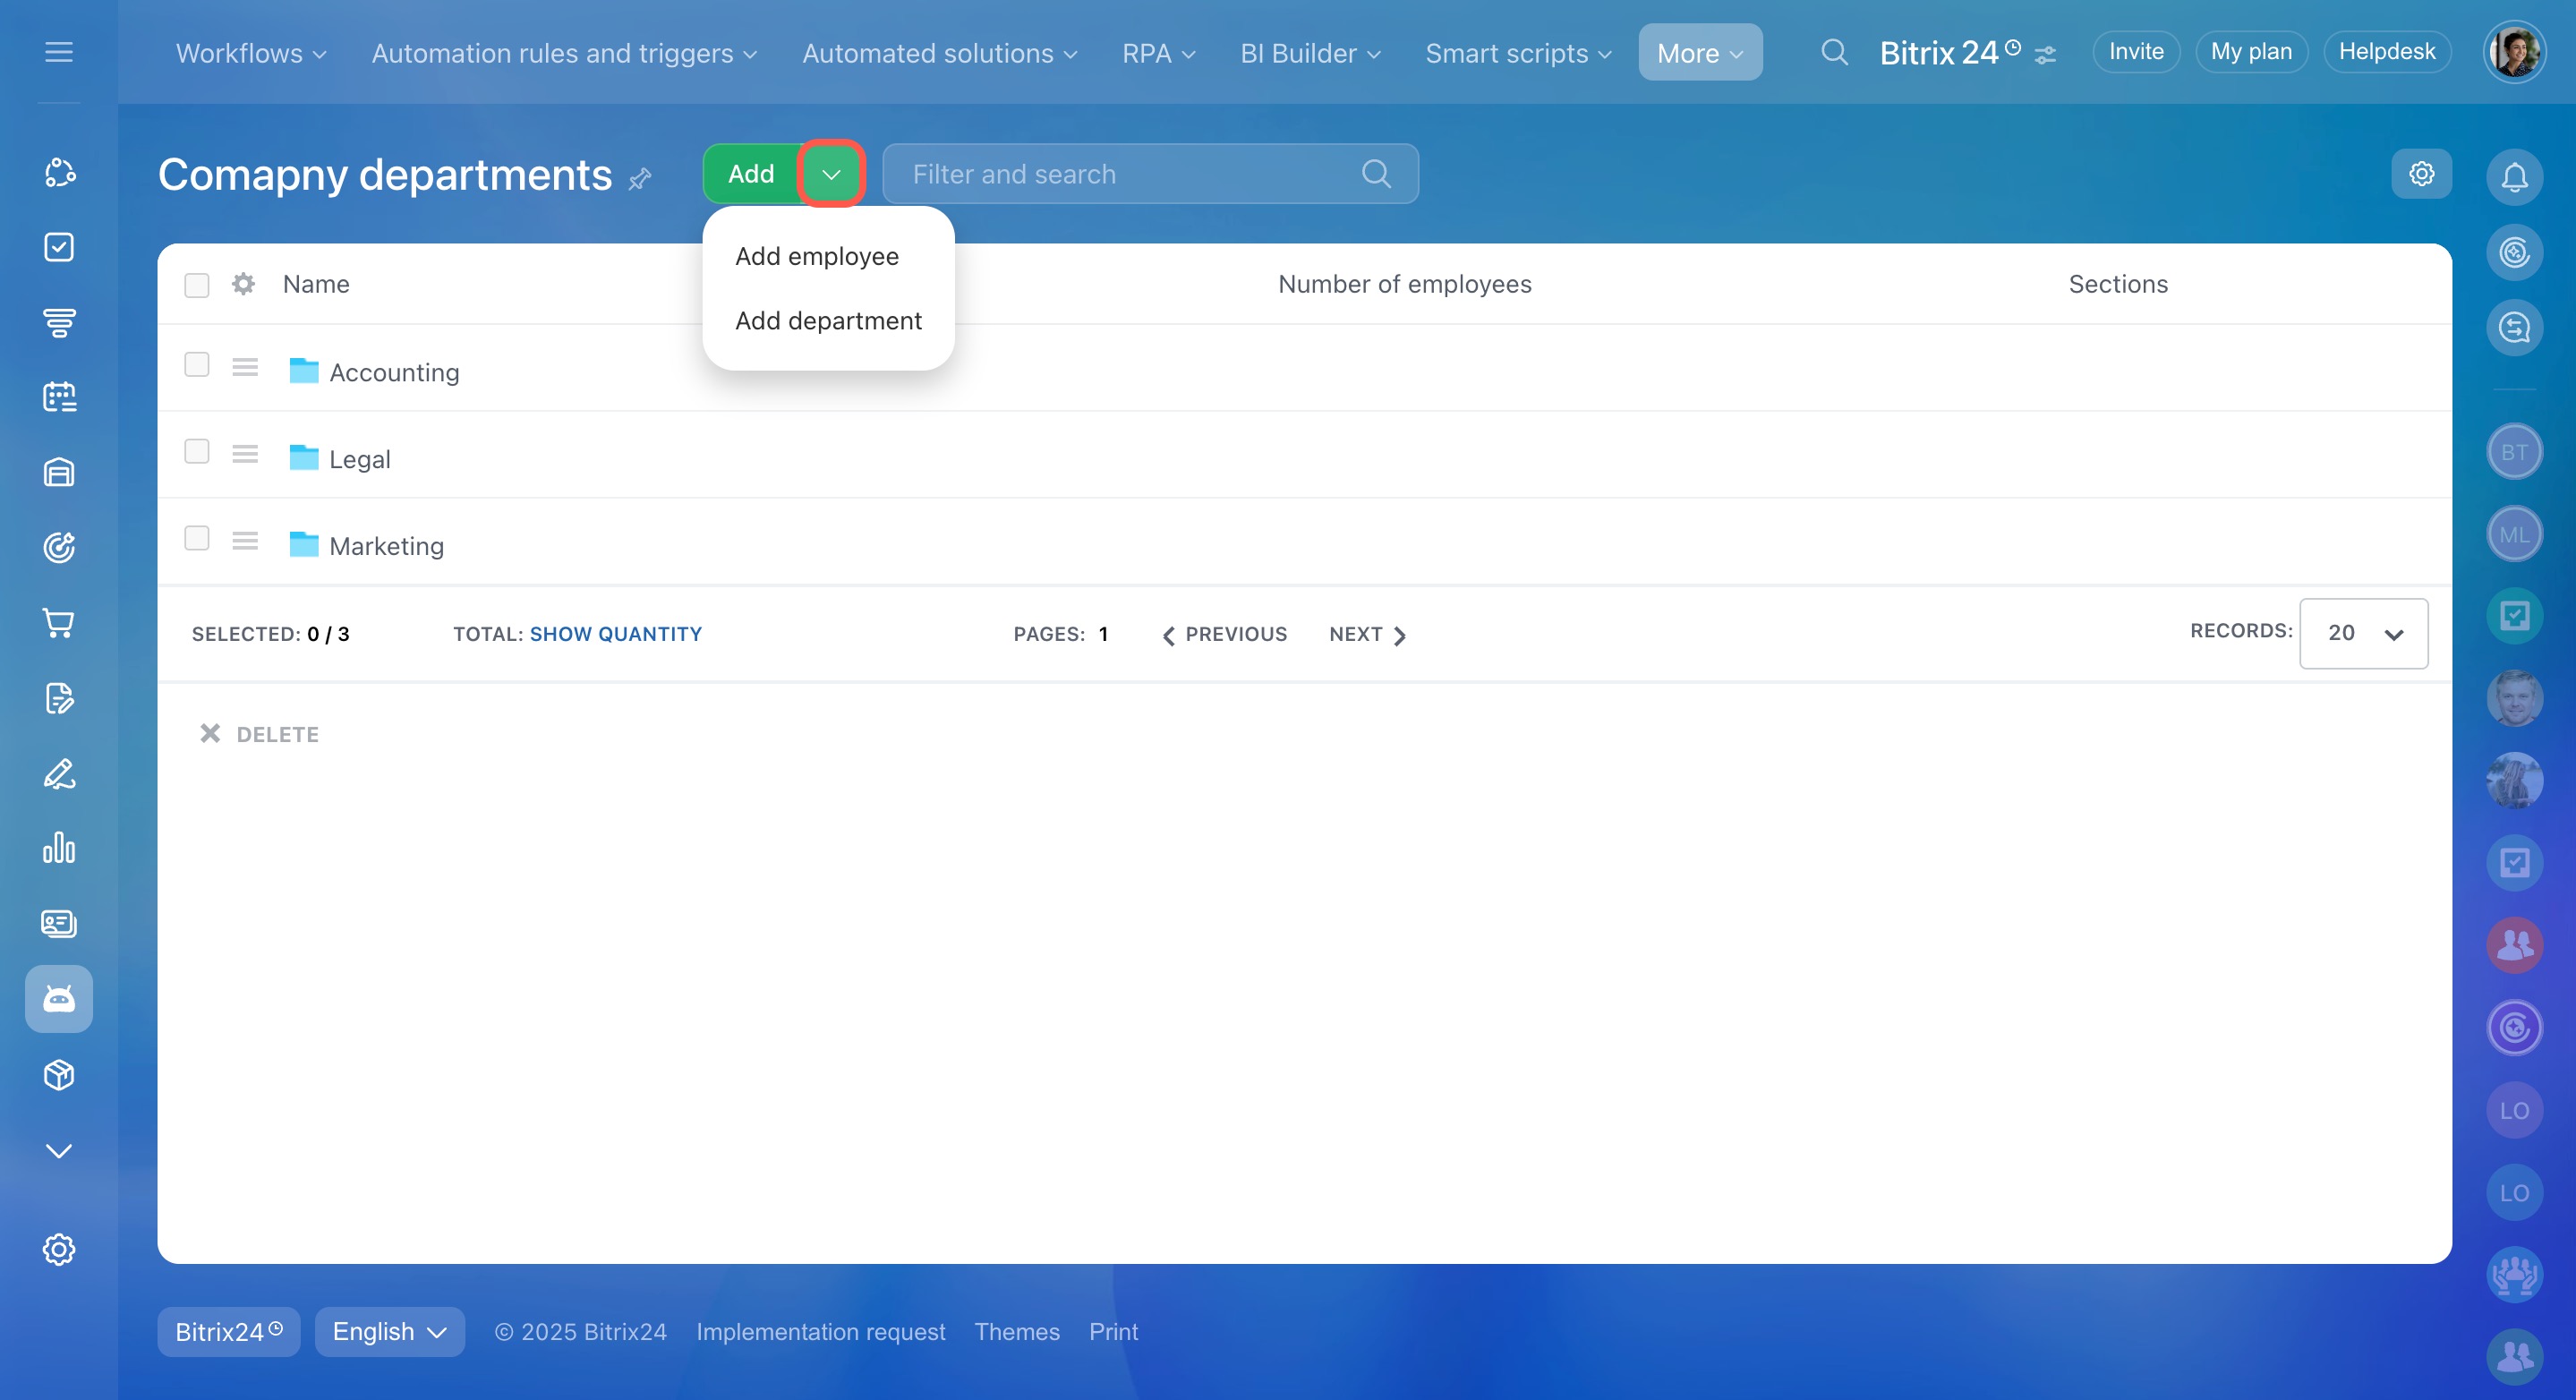
To start using the list, you need to add information to it. Go to the list, click the arrow next to the Add button, and choose whether to add a section or an element.
Add new list elements
In brief
-
Lists in Bitrix24 are designed to help you organize and manage data like contract registries, equipment catalogs, and more.
-
Use lists independently or integrate them with other Bitrix24 tools to automate workflows and improve efficiency.
-
Only Bitrix24 administrators can create new lists.
-
To create a list, go to Automation > More > Lists > All lists and click Create new. You can then add details, rename elements and sections, and set access permissions.
-
Customize fields to describe list elements, and add sections and elements to populate your list as needed.

