Bitrix24 Boards is a space for collaboration. A team can gather ideas, discuss layouts, plan presentations, and visualize processes on a single board without switching to third-party services.
All changes are saved automatically: participants see updates in real time and can leave comments directly on the board. No need to download and send files. The latest version of the board is always at your fingertips.
Find a board
Configure access to the board
To collaborate on a board, team members need access to it. The board owner and employees with full access can configure this on a computer.
Click Access Permissions and select a configuration option:
- Get public link — for external users.
- Share with users — for colleagues.
Configure access to Bitrix24 Boards
Manage the board
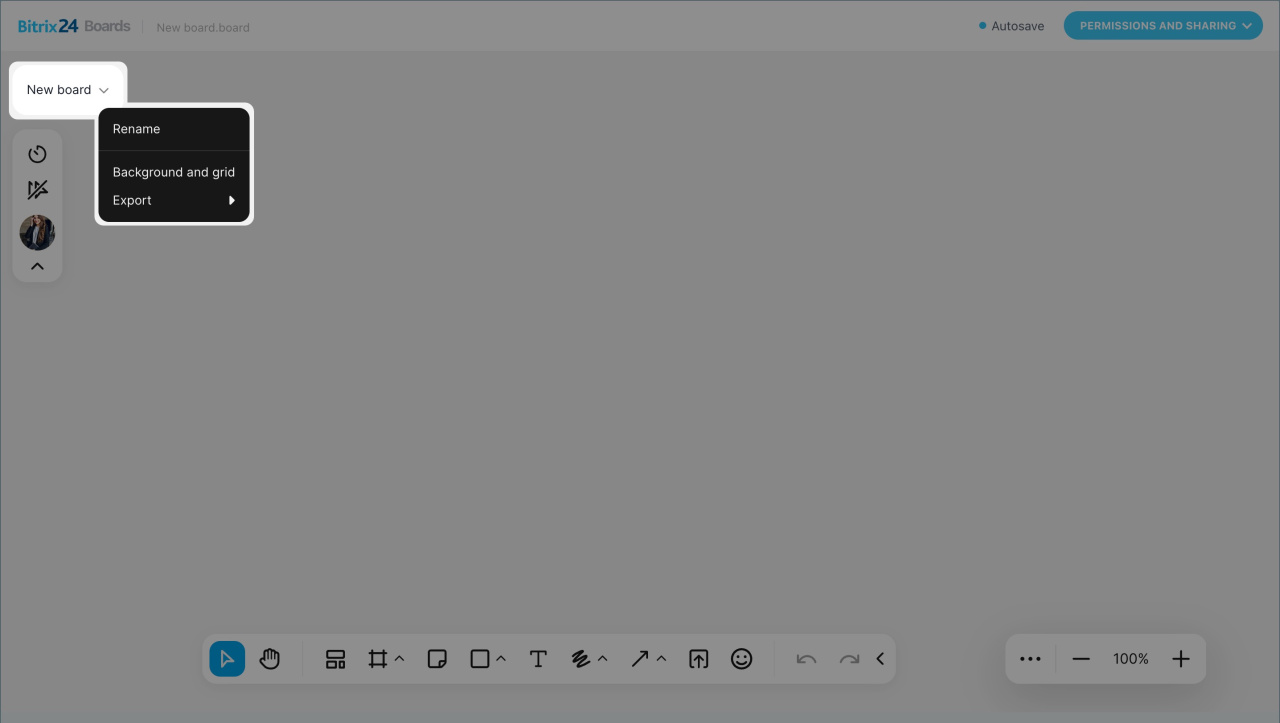
The tools for managing the board are located on the left. With their help, you can change the name and design, download the board, start the timer, and see the actions of other participants.
Top bar. Click on the menu icon and select an action:
- Rename — the name of the board will be updated for everyone working with it.
- Background and grid — customize the board's design. Select the background color and grid type: dots, grid, or remove the grid.
- Export — download the board to your computer. Select the background and area of the board to export, as well as the file format and resolution.
Search helps find the required objects on the board using keywords and item types.
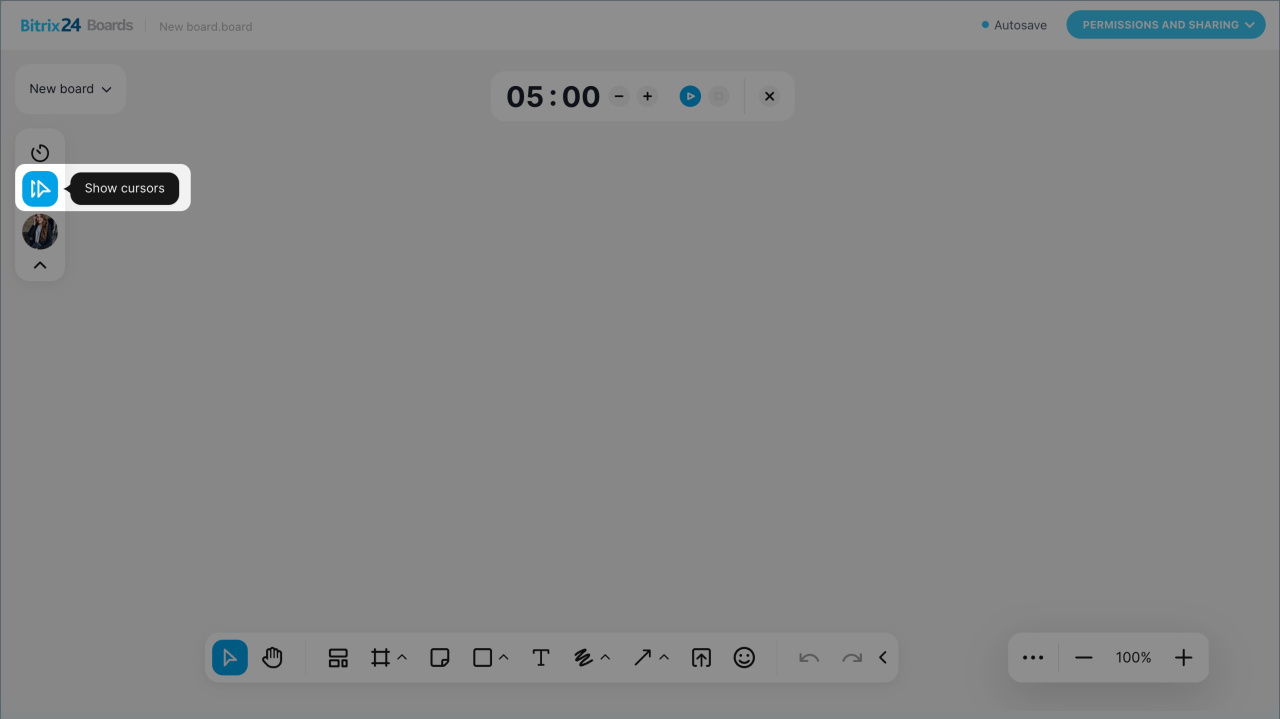
Timer helps the team stick to the schedule and stay focused on the board content, for example, during a project presentation or discussion of ideas. The running timer is visible to everyone currently working on the board.
To start the timer, click on the special icon. A panel will appear at the top of the screen. Here you can:
- See how much time is left
- Add one or five minutes
- Pause or turn off the timer
- Hide the timer from your screen
Hide or show cursors. Configure the display of other participants' cursors on your screen. For example:
- Turn it on during discussions to see which elements your colleagues are pointing to.
- Turn it off during presentations so that other people's cursor movements do not distract you from the main point.
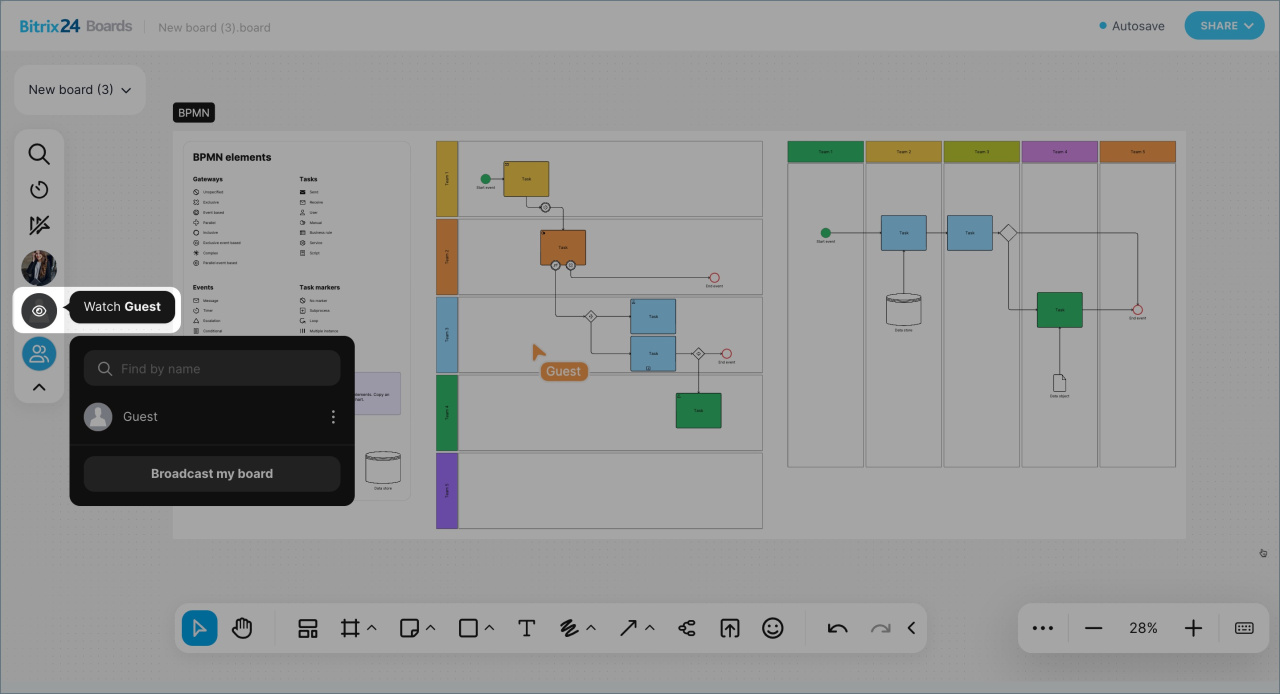
Icons of users working on the board at the same time as you. Hover over the icon to see the name.
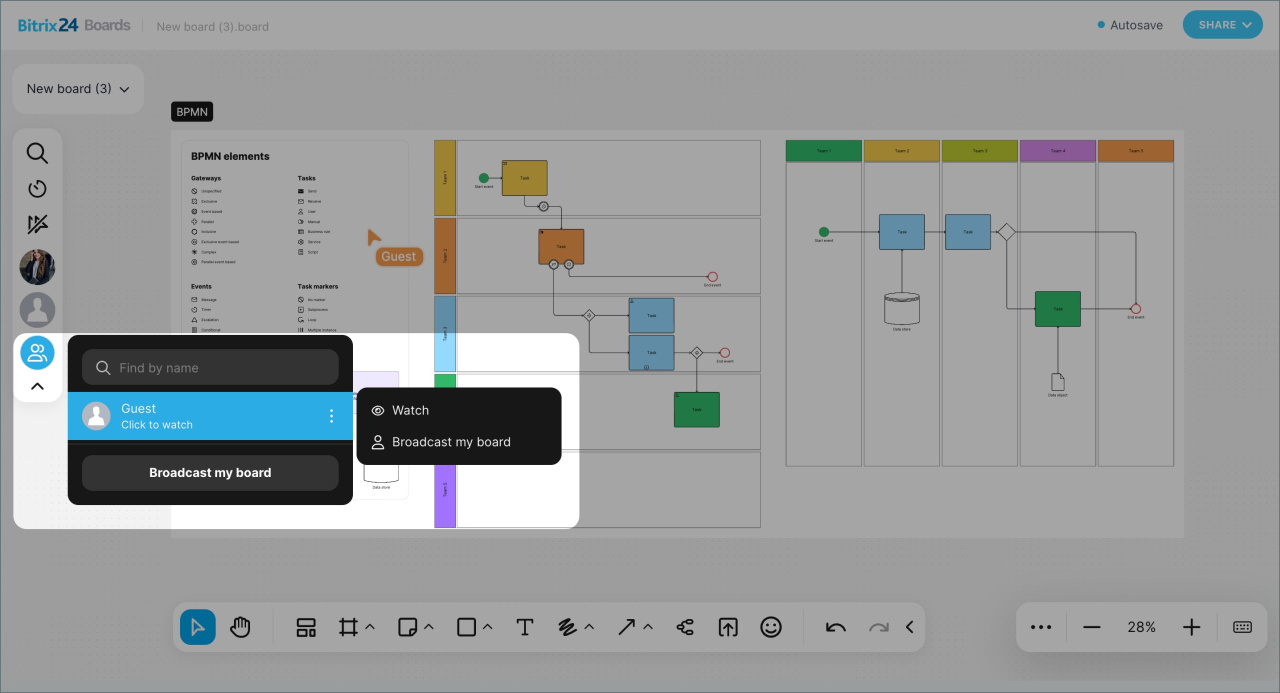
Click on an icon to see the list of participants and choose an action:
- Watch — automatically moves the board on your screen to the section the user is working on and adjusts the zoom.
- Broadcast my board — automatically moves the board on other participants' screens to your section and adjusts the zoom.
Hover over an icon to view the guest's name and enable or disable observing option.
Collapse icon — hide the panel to free up space on the screen.
Use the toolbar
The panel at the bottom of the screen contains tools for working on the board. You can use them to create block diagrams, draw, add text, align elements, mark important details, and so on.
Select — choose objects on the board. Move elements and highlight them for editing.
Hand tool — move around the board and find the desired section. This is convenient if there are many elements on the board and you need to view another part of the diagram or image.
Templates — add ready-made sets of elements for plans, diagrams, analytics, and so on.
Frame — combine several objects into a single block. Everything inside can be moved and scaled together, and elements can be aligned relative to each other. For convenience, frames can be named — this makes it easier to navigate the board.
For example, an image, text, and button can be combined into a single "Banner" frame so that you can quickly find and move the entire block rather than individual elements.
Sticker — suitable for feedback directly on the board. Attach the sticker next to the item you want to discuss and write a comment — other team members will see the note on a bright background and can take it into account.
Choose a color and a method for adding:
- Single sticker — convenient when moving around the board and leaving comments in different places.
- Sticker set — ideal for adding many notes in one area of the board.
- Sticker pack — allows you to fill them out first and then attach them to the desired spots.
Rectangle — helps you build flowcharts. For example, to describe the stages of a project or the steps in instructions. Select a shape, add it to the board, and enter your text.
Text — add a text block to the board: caption, comment, title. Use this if you need to describe an idea, leave a comment on the layout, number the steps in a screenshot, and so on.
Within a single block, you can combine different format styles. For example, make the heading bold and underline key ideas.
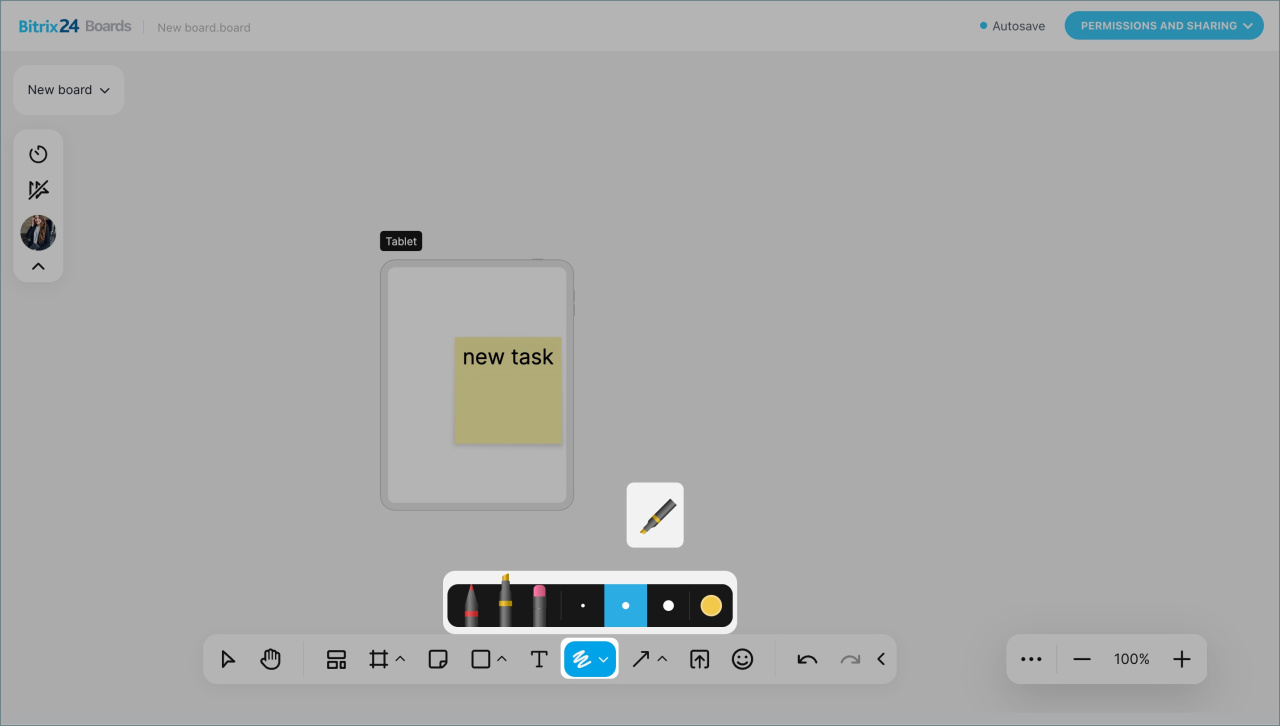
Draw freehand and erase sketches. This is useful when you need to quickly highlight something important. For example, circle an element or underline part of the text to draw your colleagues' attention to it. In the drawing tools, you can select a marker, highlighter, or eraser, as well as set the color and thickness of the line.
Arrow — connect objects on the board. You can use different types of arrows to show connections between elements or visualize a sequence of steps.
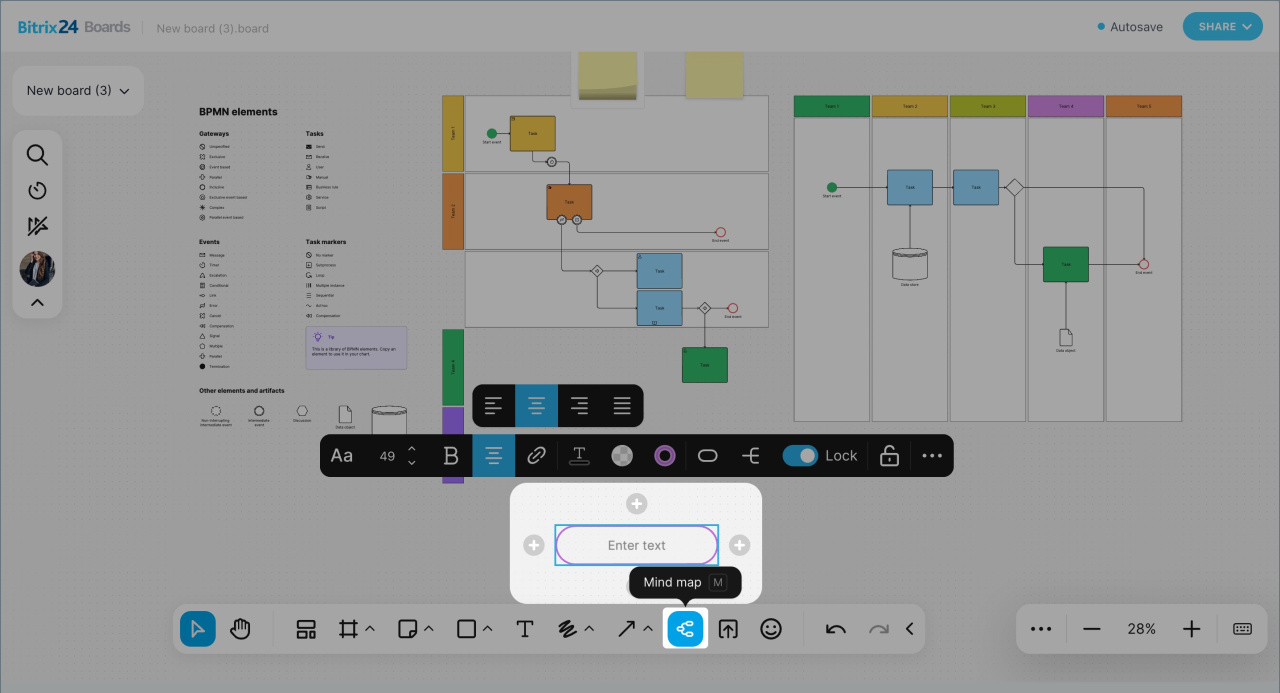
Mind map — quickly create multi-level diagrams where individual branches can be collapsed and expanded.
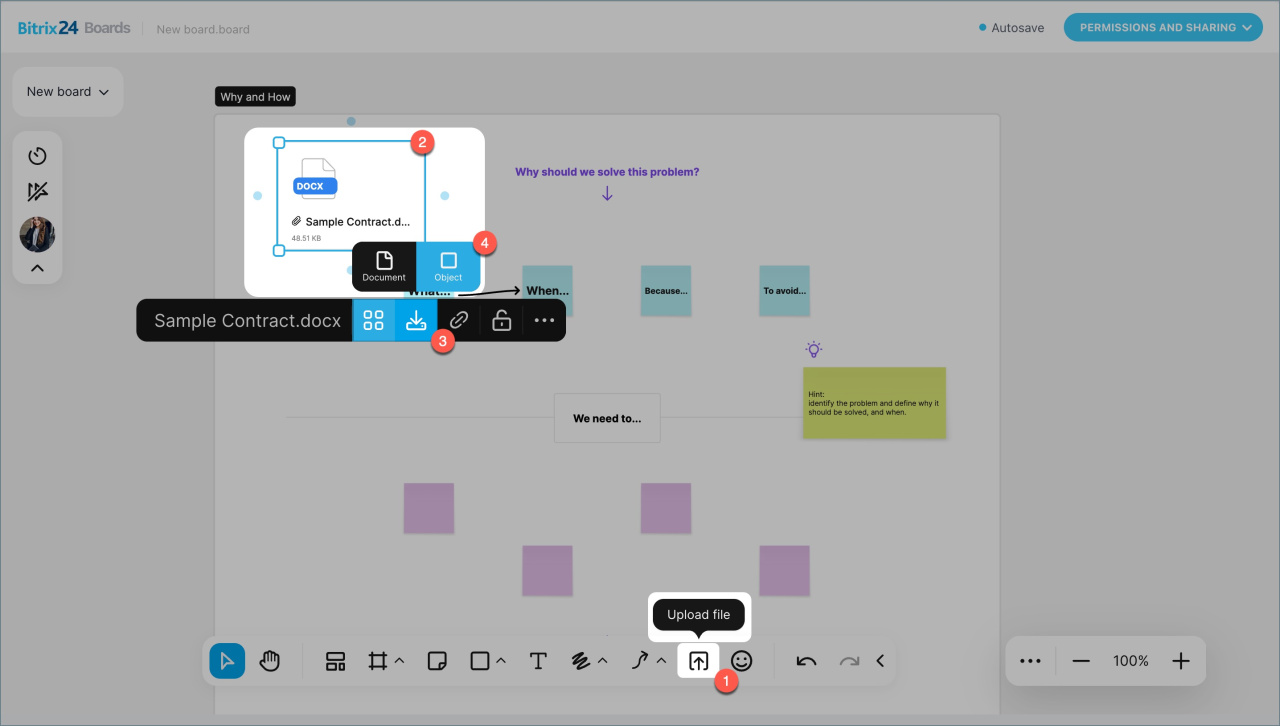
Upload file — add files in the following formats to the board:
— jpeg png — on your computer and in the mobile app up to 20 MB in size
— pdf, ppt(x), doc(x), xls(x) up to 35 MB in size and no more than 50 pages — only on your computer.
Emoji — add emojis to the board. This is a quick way to show your reaction without long comments. For example, like a good decision or express surprise at sudden edits.
Undo and redo — undo the last action or redo it.
Hide toolbar — collapse the toolbar to free up space on the screen.
The scale can be changed using the ➕ and ➖ buttons. To select the board display mode, click on the three dots (...) and select the appropriate option: 100%, Fit to screen, or Fullscreen.
Keyboard shortcuts make working with the board more convenient. Click on the three dots (...) to view all combinations.
In the mobile app, you can work on the board just like on a computer: create block diagrams, add text, emojis, stickers, and so on. The toolbar is at the bottom of the screen — tap ➕ to expand it.
The controls are adapted for touch devices. Select the Hand tool to use gestures to:
- Move across the board and find the desired section.
- Move an element: tap on it and drag it with your finger.
- Select multiple elements: press and hold an empty area of the board and drag to create a selection area.
- Zoom in and out.
If you want to enable the board to fit the screen width, tap on arrows.
Work with board elements
You can edit elements and their position relative to each other, and configure connections between them.
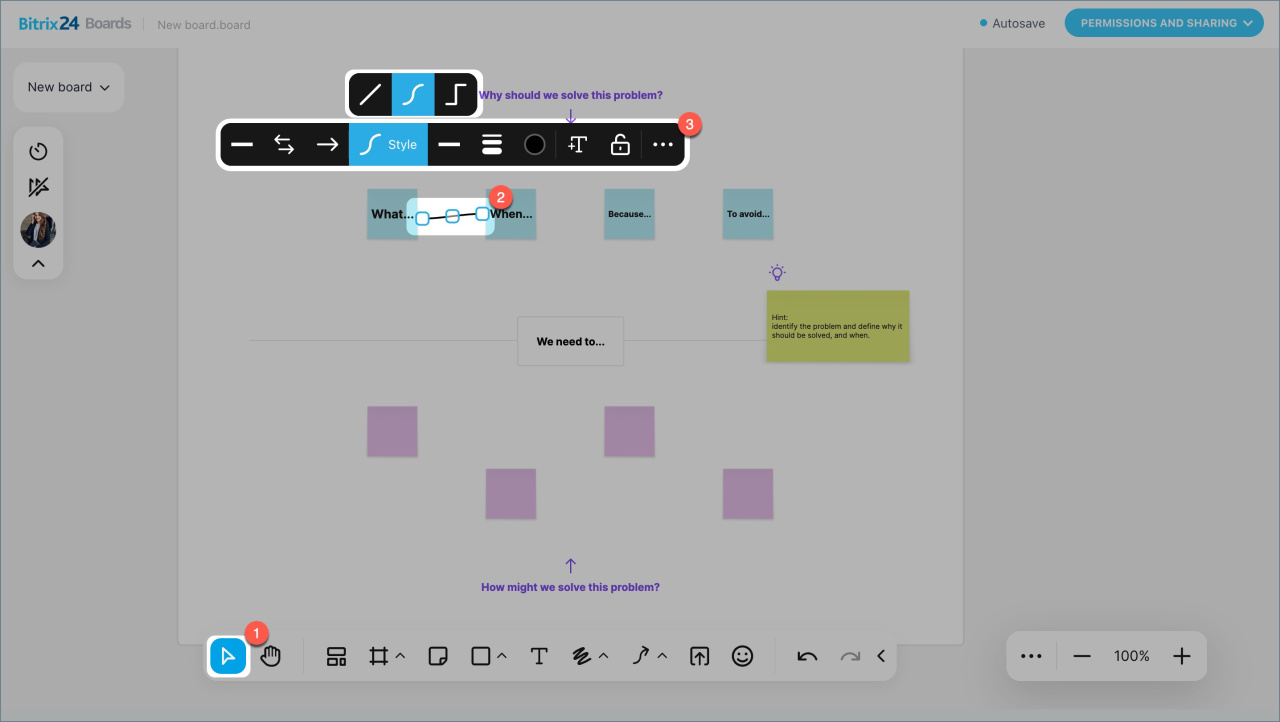
Click the Select tool and left-click on the element to open the editing panel. The list of available actions depends on the type of object.
Frame. You can:
- Change the color and transparency of the background.
- Hide or show the frame's contents.
- Lock or unlock the frame — prohibit or allow moving the frame and changing the objects located on it.
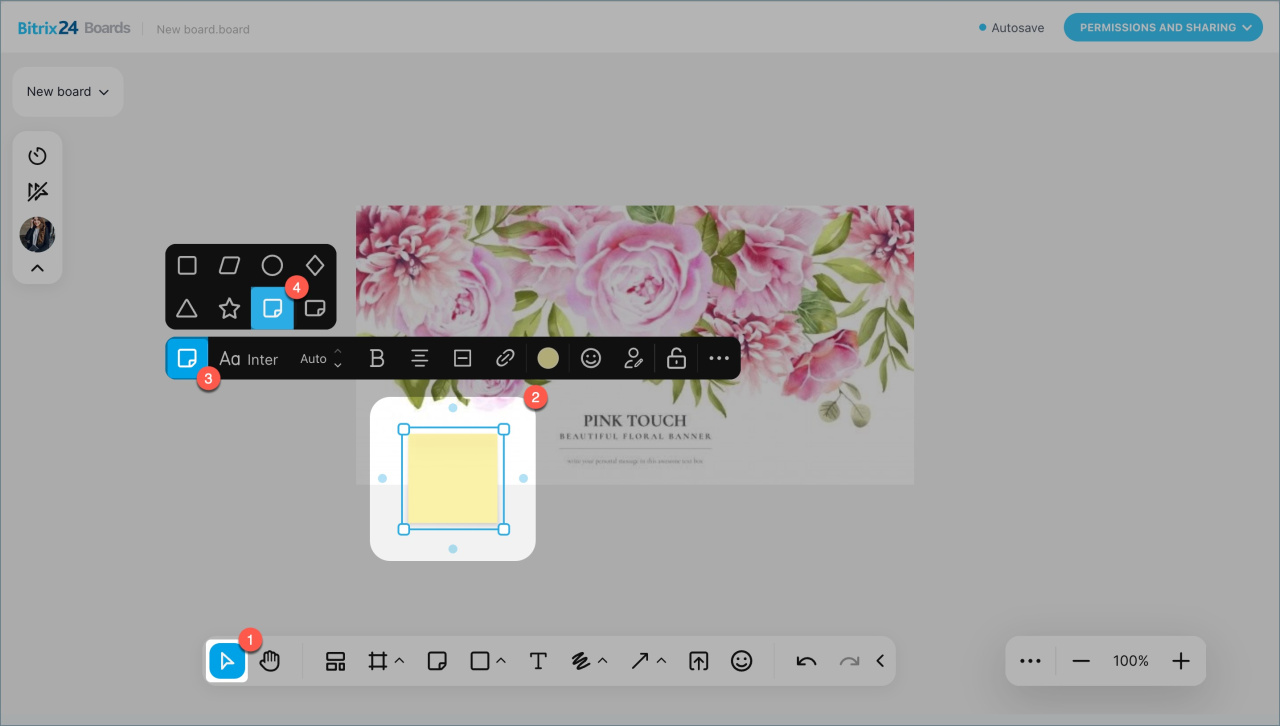
Sticker. You can:
- Change the element — select a different sticker shape or replace it with a shape.
- Edit the text: font type, size, and style, align horizontally and vertically, add emojis and a link.
- Select the background color.
- Lock or unlock the element.
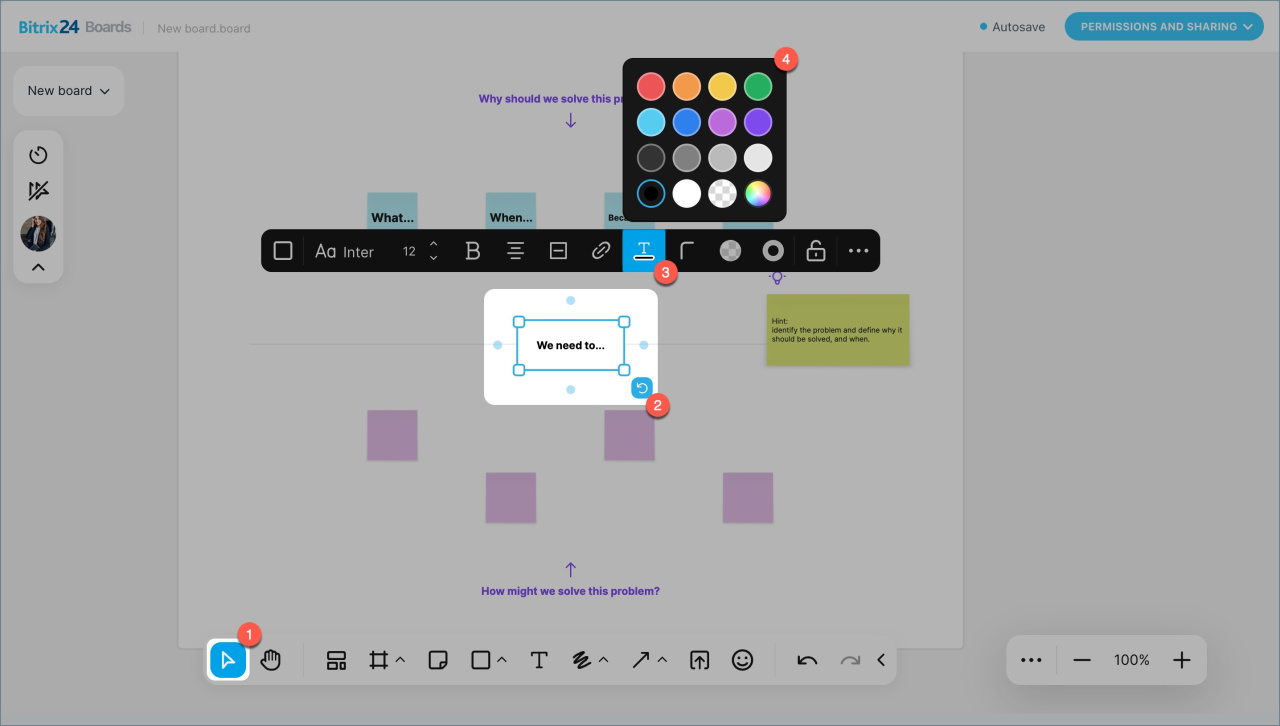
Rectangle — editing is available as with stickers, and you can also:
- Change the text color.
- Adjust corner rounding.
- Select the background transparency level.
- Customize borders: style, color, and transparency.
Draw. For lines and shapes drawn by hand, you can change the thickness, color, and accessibility: lock or unlock these elements.
Arrows connect to elements only through the points in the center of their sides. To redirect an arrow, drag its end and drop it on the center of the other side.
You can edit an arrow:
- Change its start and end appearance: add or remove a pointer.
- Change its direction, shape, and type: straight or dashed line.
- Select the line thickness and color.
- Lock or unlock it.
Emoji can be locked and unlocked.
File. To resize it on the board, drag any side — the aspect ratio will remain unchanged. Additionally, you can:
- Change the name, color, style, and border thickness.
- Download it to your computer.
- Crop the image.
- Add a link.
For files with multiple pages, you can choose the display mode:
- Document — allows you to view pages directly on the board without downloading the file.
- Object — includes the file name, format, and size.
In Document mode, you can:
- Flip through pages.
- Extract all pages or specific ranges — the selected pages will be added to the board as separate files.
- Enable presentation mode — expand the document to full screen, view slides, and use a pointer.
Mind map. Choose the diagram's appearance and configure how branches will move. If the Auto option is disabled, elements can be moved manually while maintaining their connections.
Additional actions are available for all elements, regardless of their type. To open the list, click on Three dots (...) in the editing panel or right-click on the element.
- Save as PNG — exports the frame as a PNG image. This is useful if you need to share a specific part of the board, such as discussing a particular section of a layout in a group chat.
- Copy
- Cut
- Clone — creates a copy of the selected element next to it.
- Paste
- Move forward — moves the element above others in the layering order. For example, if a frame covers part of a sticker with a comment, bring the sticker forward.
- Move backward — moves the element below others in the layering order. For example, if a shape overlaps text, send it backward.
- Group — combines several selected elements into one block to move and edit them together. For instance, group arrows and elements so they stay connected when moved.
- Ungroup — separates a previously created block into individual elements.
- Lock — fixes the element in place. It cannot be moved or edited until unlocked.
- Unlock — removes the lock from the element, allowing it to be moved and edited again.
- Copy the link to an object.
- Add a link to an object — connects one object on the board to another and allows quick navigation between them.
- Delete
In brief
- Bitrix24 Boards are collaborative spaces. A team can use a single board to gather ideas, discuss layouts, plan presentations, and visualize processes without switching to external services.
- All changes are saved automatically: participants see updates in real time and can leave comments directly on the board.
- Team members must have access to the board. The board owner and employees with full access can configure this, but only in Bitrix24 on a computer.
- The Bitrix24 mobile app allows you to work with the board just like on a computer.
- Tools for managing the board are located on the left. You can rename, download, or customize the board.
- To organize collaboration, use the timer and the option to display colleagues' cursors, watch guests and broadcast the board.
- The tools for working on the board are located at the bottom of the screen. They allow you to create flowcharts, draw, add text, align elements, highlight important details, and more.


