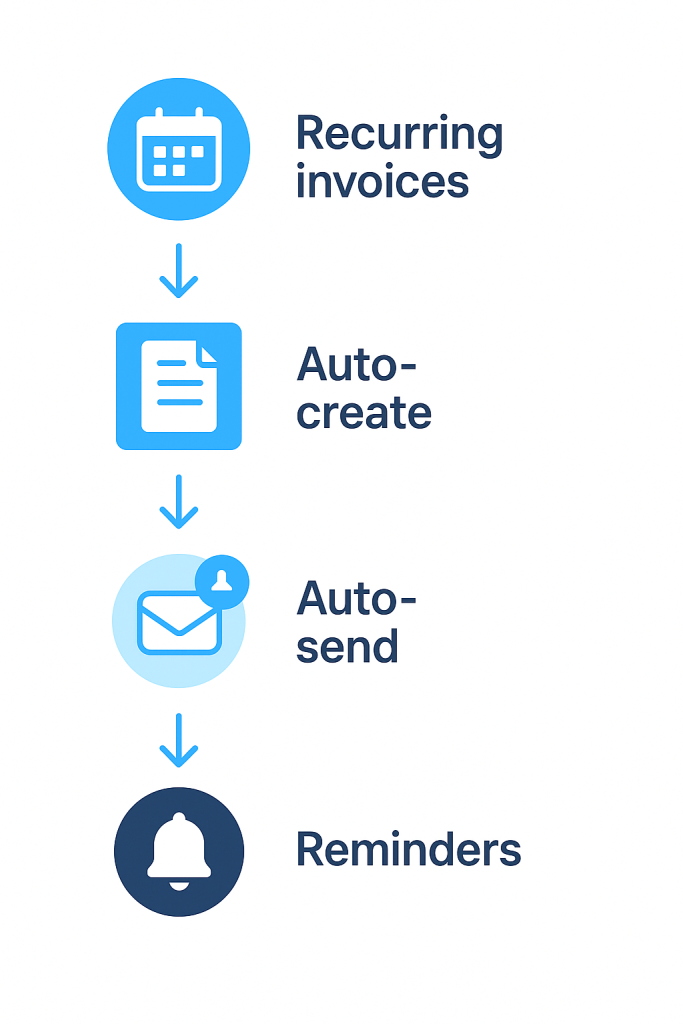
Recurring invoices help you keep track of clients' regular payments, such as rent, services, or subscriptions. CRM creates and sends these invoices automatically based on the schedule you set. Clients receive timely payment reminders, and you save time on routine tasks.
In this article:
Bitrix24 plans and pricing
Only a Bitrix24 administrator or an employee with permission to edit and add invoices can configure recurring invoices.
Access Permissions in CRM
Create a recurring invoice
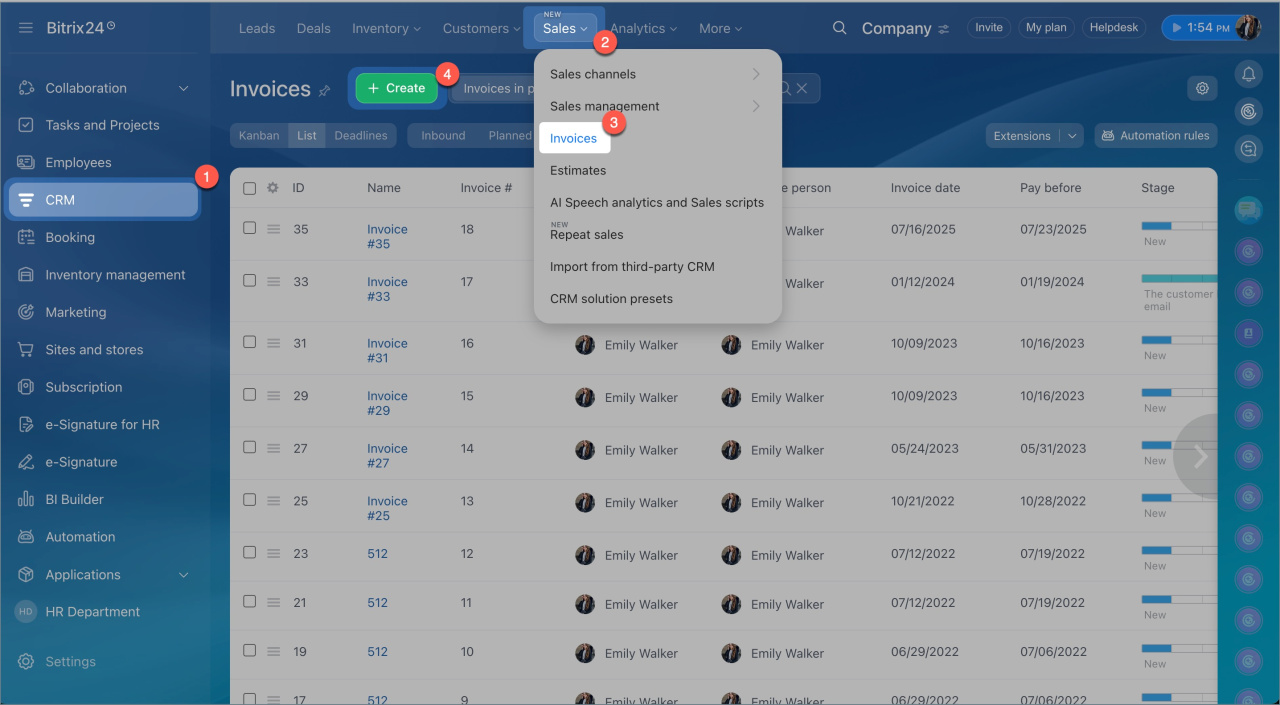
- Go to the CRM section > Sales > Invoices.
- Click Create.
- In the invoice form, Fill out the fields in the Recurring invoice section.
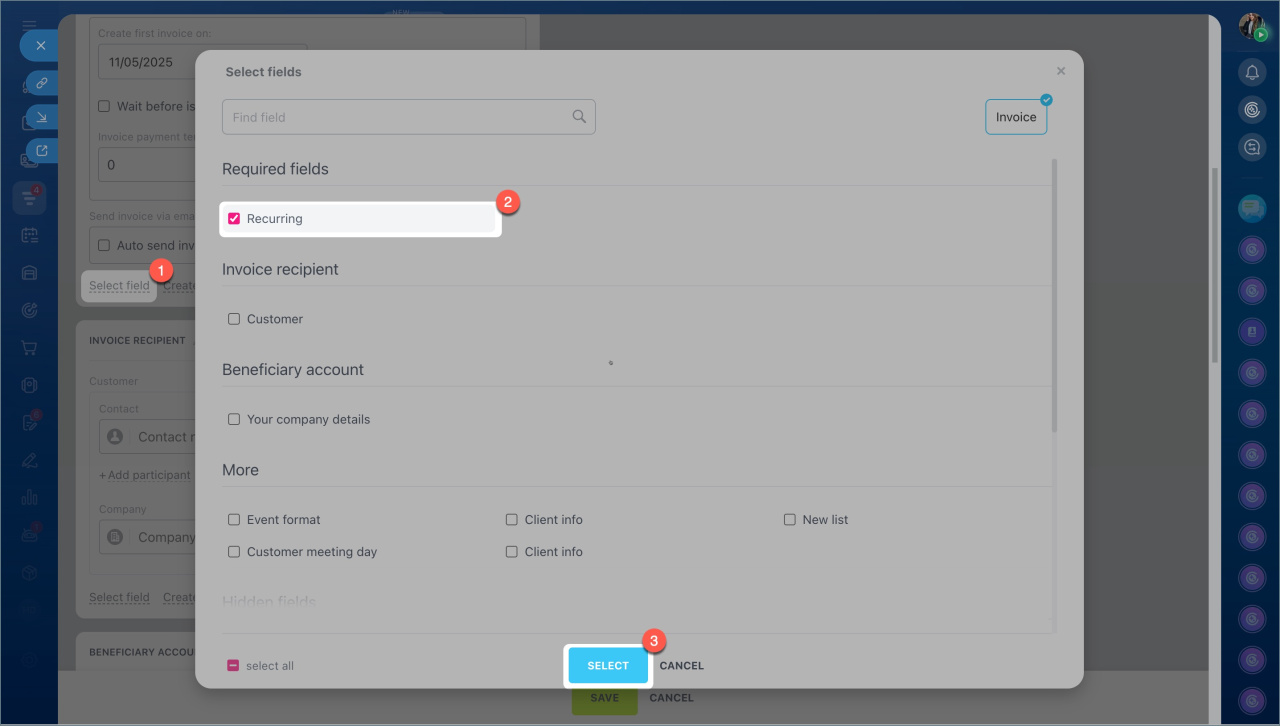
- To add the Recurring invoice section to the form, click Select field > Repeat > Save.
Create invoice again: — how often the invoice will be created:
- Specify interval — CRM will automatically create invoices on a schedule, such as weekly or monthly.
- Create invoice again: — the invoice will be created only once on the specified date.
Repeat interval — daily, weekly, monthly, yearly, or a custom option, such as every three days.
Stop recurring invoice:
- Never — invoices will be created indefinitely.
- Specify date — the last invoice will be created on the specified date.
- Specify iteration count — CRM will stop creating invoices after the specified number of repetitions.
Create first invoice on — specify when the first invoice should be created. Select the Issue invoice after creation date option to delay invoice issuance. This is useful for preparing documents in advance and sending them a few days before payment is due. For example, if the first invoice creation date is November 3 and a 2-day delay is set, the invoice will be created on November 3, and the Issue date field will show November 5.
Invoice payment term (this will set the due date): — specify the time frame within which the client must pay the invoice. This information will appear in the invoice form under the Payment due date field.
Save your changes.
Send an invoice to a client
Mailbox settings
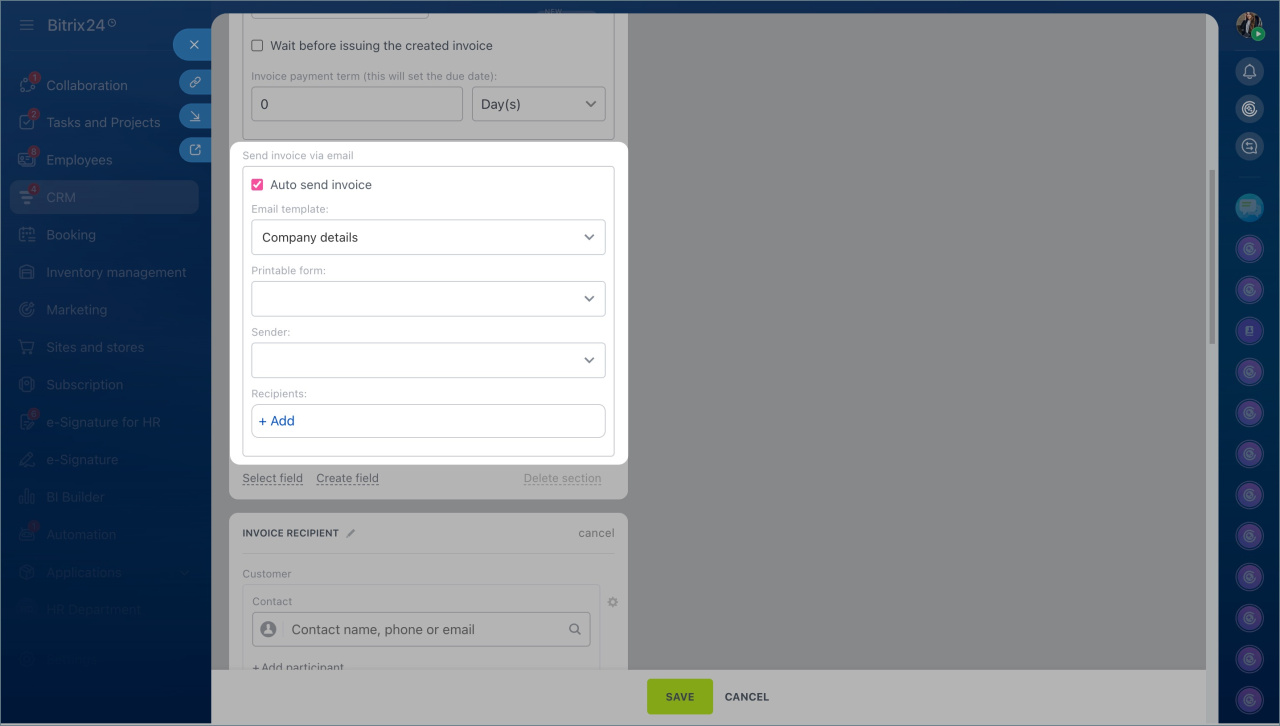
To automatically send recurring invoices to clients, enable the Send invoice automatically option and fill out the fields:
Email template — the email template used to send the invoice to the client.
Email templates in CRM
Printable form — the template CRM will use to create the invoice for the client.
Document templates in CRM
Sender — the email address CRM will use to send the invoice to the client.
Recipients — select the email address to send the invoice to. If the selected contact in the invoice has no email, the list will be empty. You can add an address or choose another contact from CRM by clicking Add recipient. Once selected, the recipient will automatically appear in the Client field in the invoice form.
View the list of recurring invoices
After creating a recurring invoice, CRM saves it as a template. All such templates are collected in a separate list, where you can see which invoices are set up, who is responsible for them, and when new documents are created.
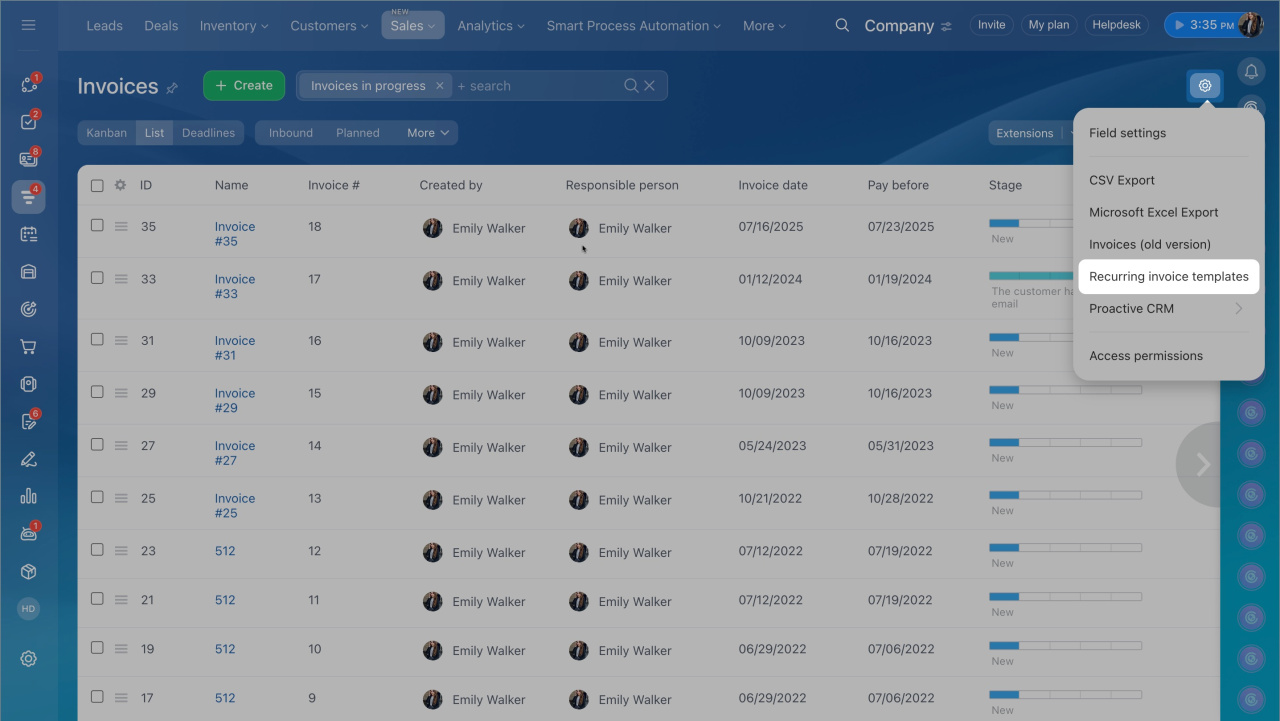
- Go to the Settings ⚙️ > Recurring invoice templates.
- If the required columns are not displayed, go to the Settings ⚙️ in the upper-right corner of the table and select the necessary fields. For example, check the Invoices created field to see the total number of invoices created for each template.
- Save your changes.
In brief
- Recurring invoices help you keep track of clients' regular payments, such as rent, services, or subscriptions. Clients receive timely payment reminders, and you save time on routine tasks.
- Only a Bitrix24 administrator or an employee with permission to edit and add invoices can configure recurring invoices.
- To set up a recurring invoice, go to the CRM section > Sales Invoices and click Create. In the invoice form, specify the frequency of its creation in the Recurring section.
- To automatically send recurring invoices to clients via email, enable the Send invoice automatically option.
- After creating a recurring invoice, CRM saves it as a template. To view all recurring invoices, go to Settings ⚙️ > Recurring invoice templates.

