Add CRM event
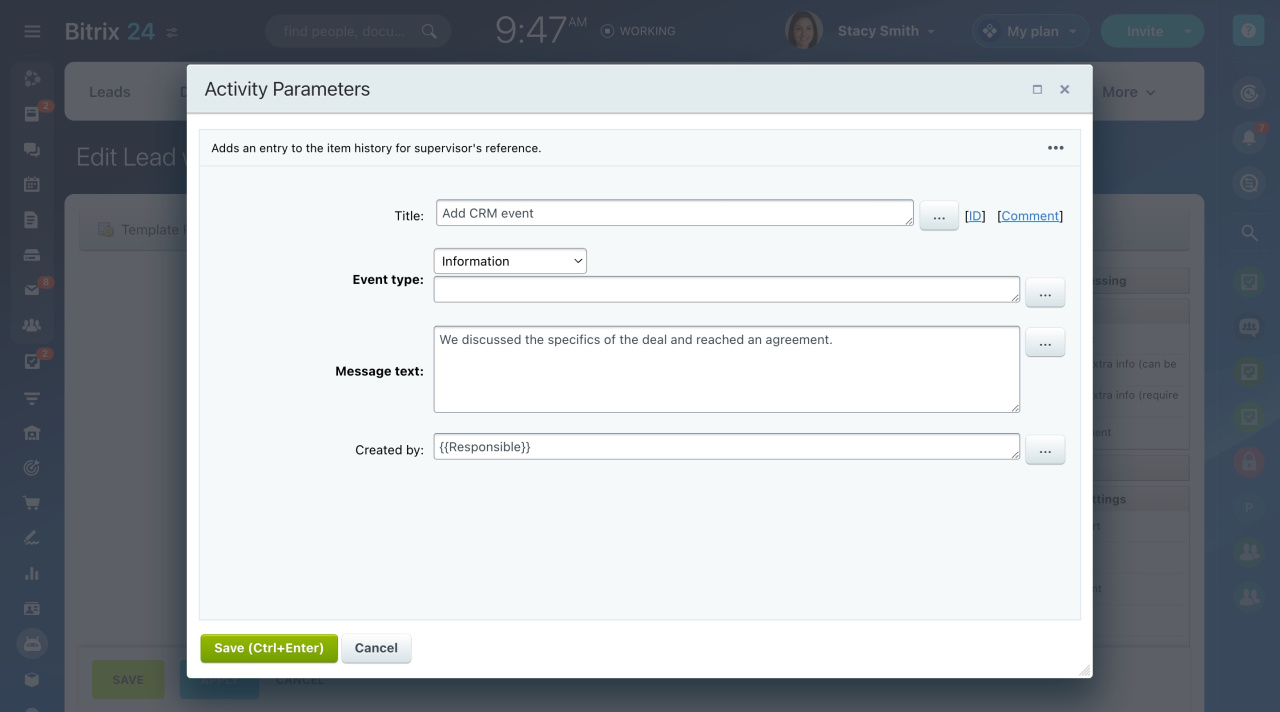
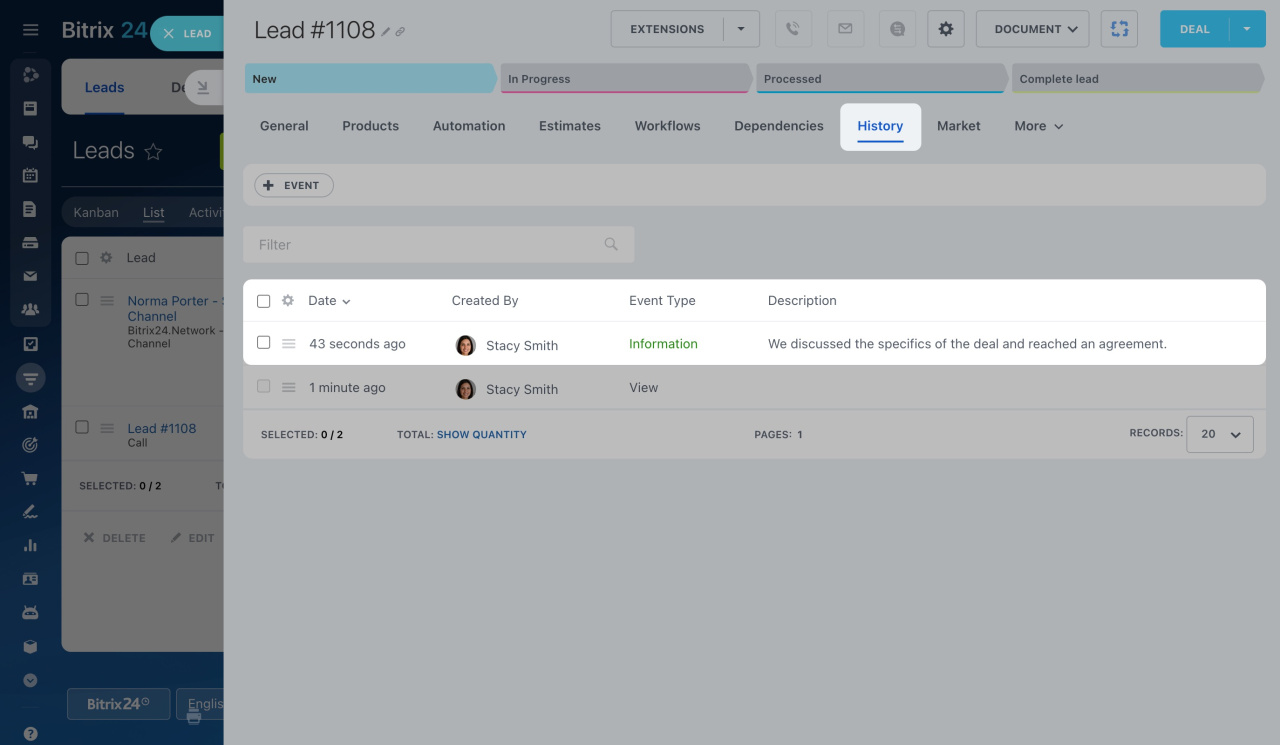
The activity adds an event to the History tab of the CRM entity form.
CRM entity form
-
Event type: Select the event type from the list: Information, Phone call, or Email has been sent.
-
Message text: Specify the text that will be added to the Description field in the History tab.
-
Created by: Select the user on whose behalf the event will be created.
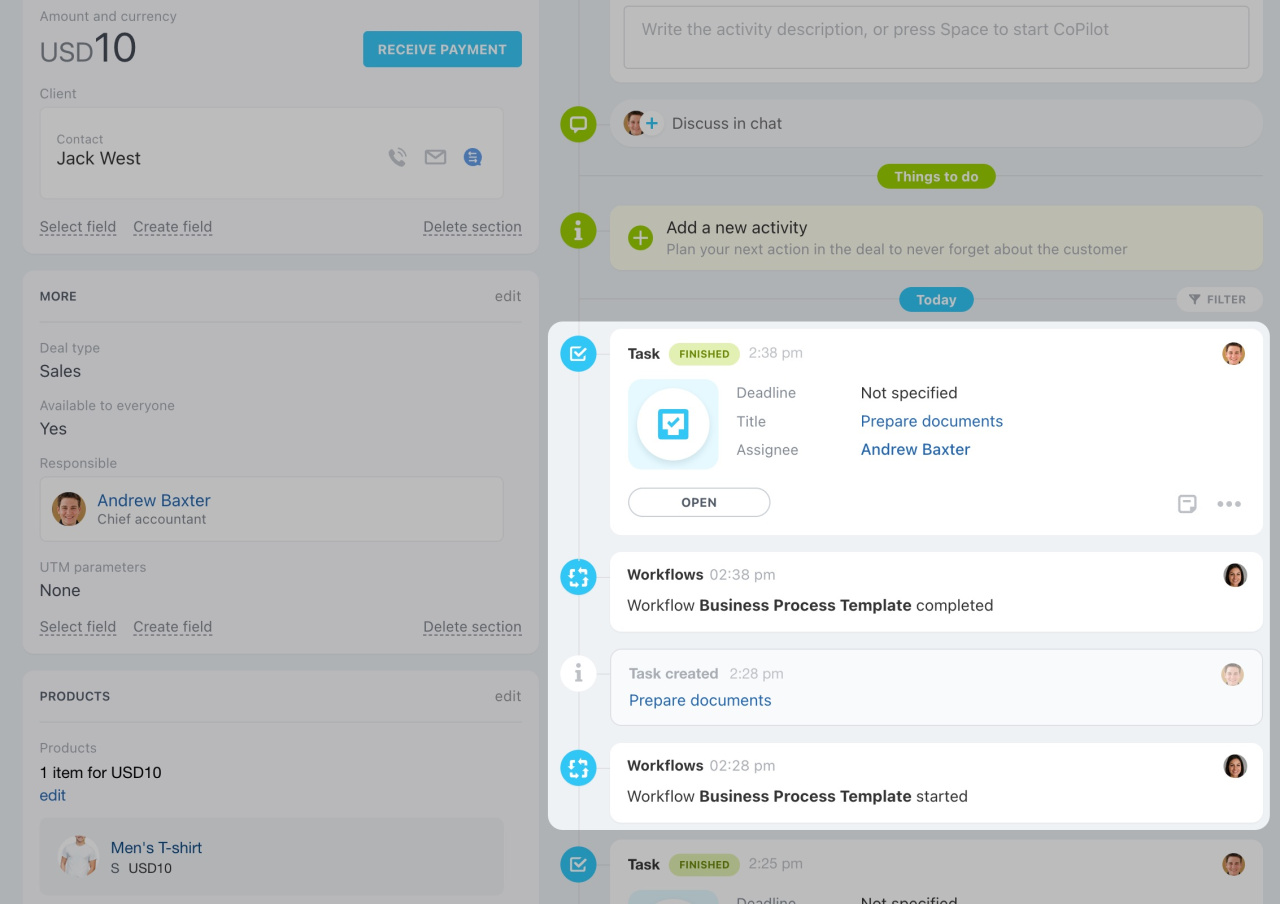
After you launch the workflow, this activity will create an event in the History tab of the CRM entity form.
Add comment to item
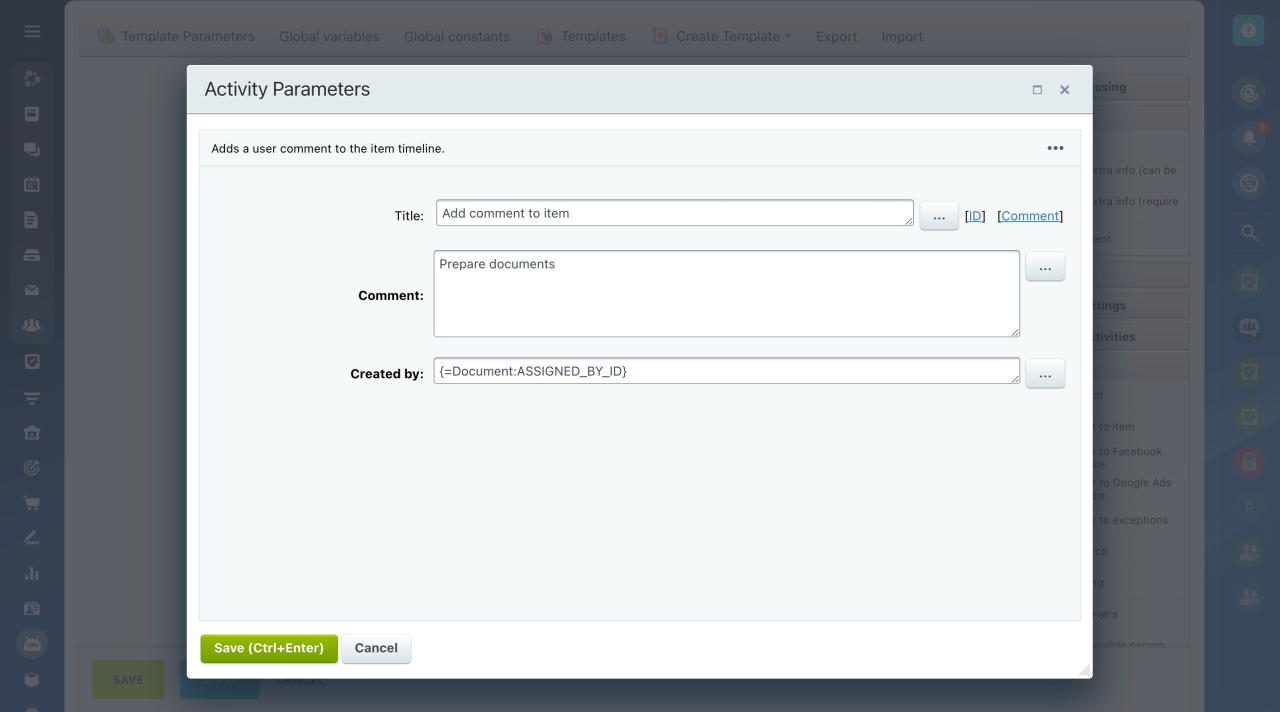
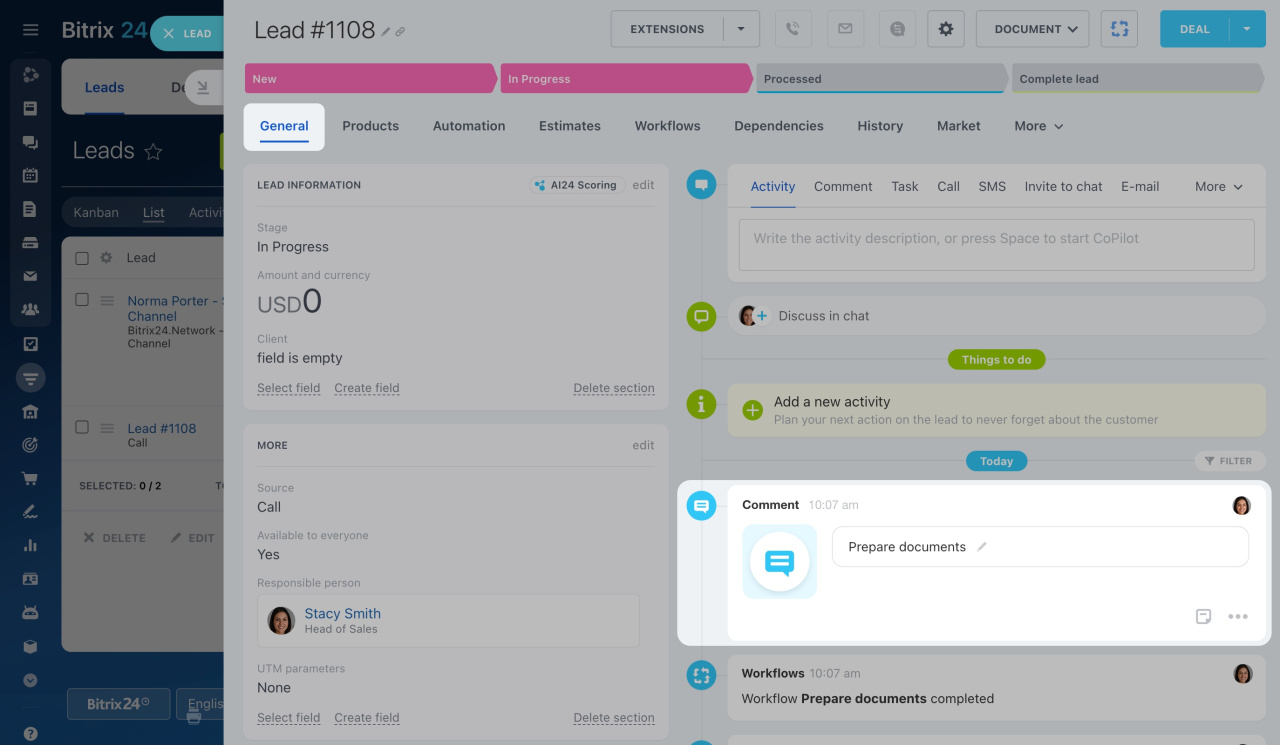
The activity adds a comment to the CRM entity timeline.
-
Comment: Specify the text of the comment. You can also use these BBCode tags:
[b],[i],[s],[u], and[url].
How to use BBCode tags -
Created by: Select the user on whose behalf the comment will be added.
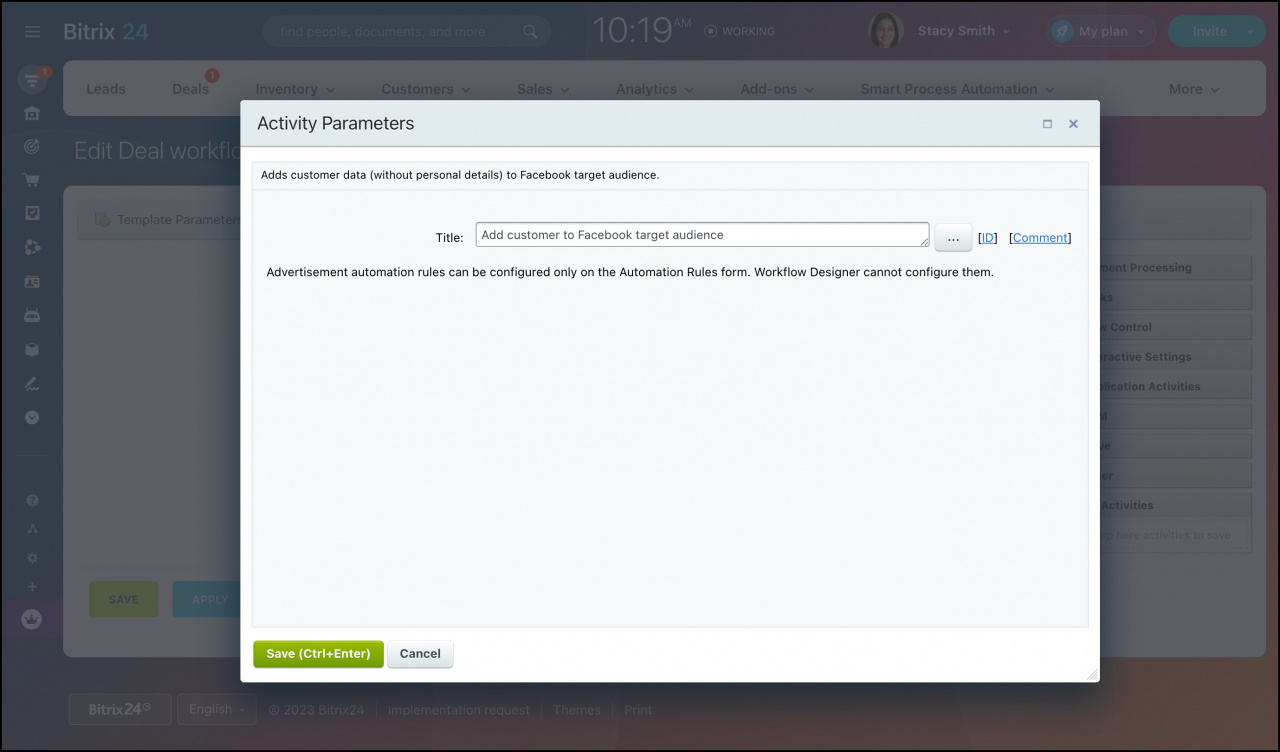
Add customer to Facebook target audience
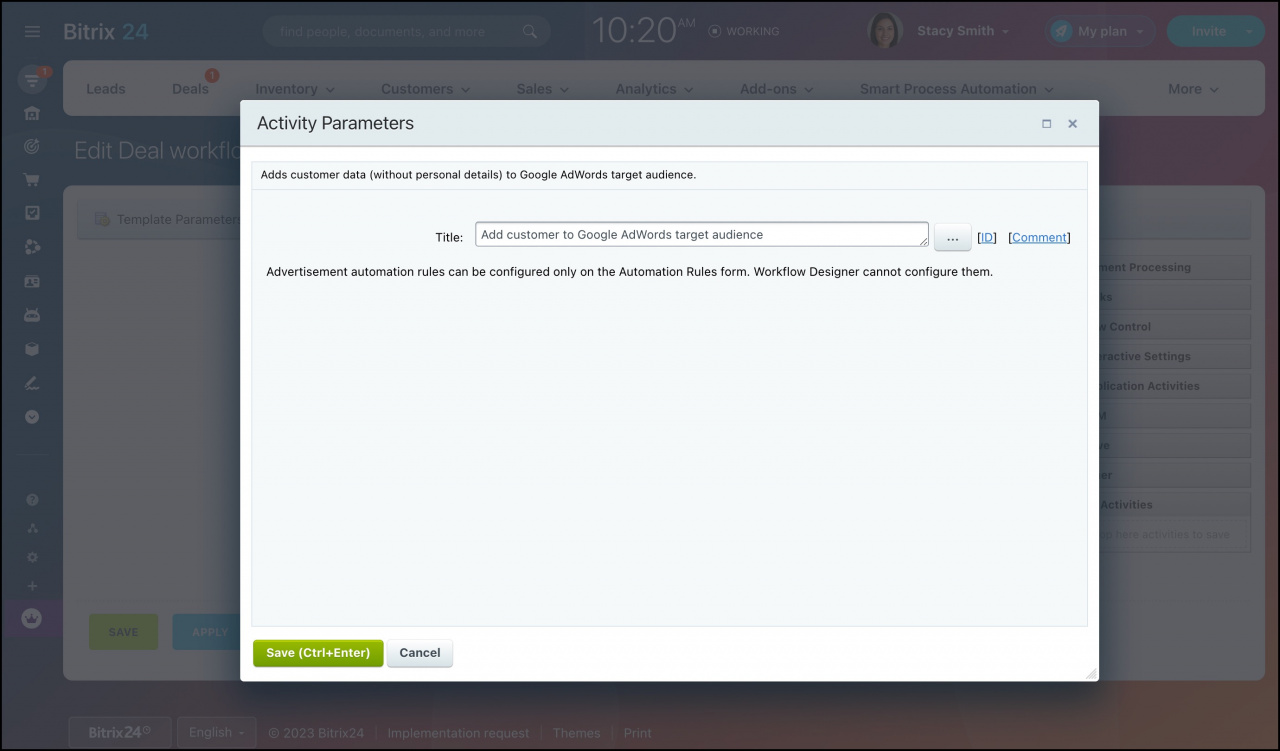
Add customer to Google AdWords target audience
Add to exceptions
The activity adds an entity to the list of exceptions.
Exceptions
Add product
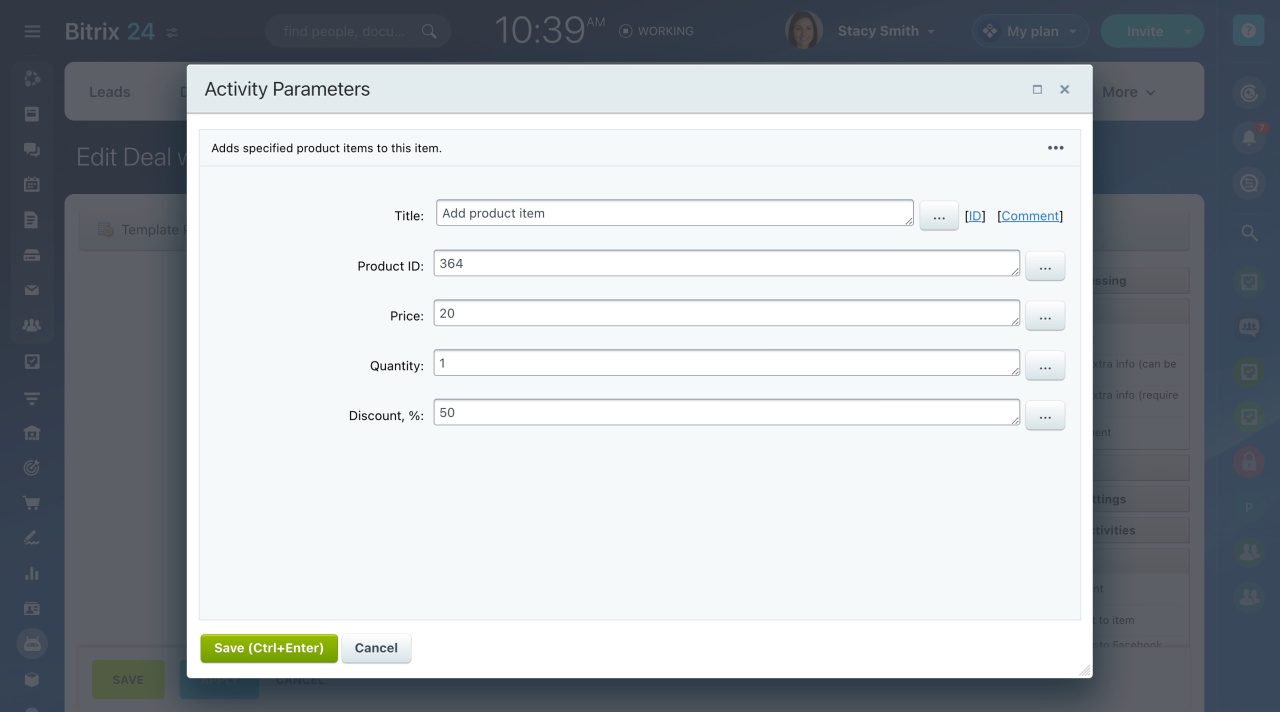
This activity adds a product to the CRM entity.
-
Product ID: Select the needed product or specify its ID.
-
Price: Enter the product price.
-
Quantity: Specify the product quantity.
-
Discount, %: Provide a discount on the product if needed.
For example, you can add a product to a deal using this activity.
Book a resource
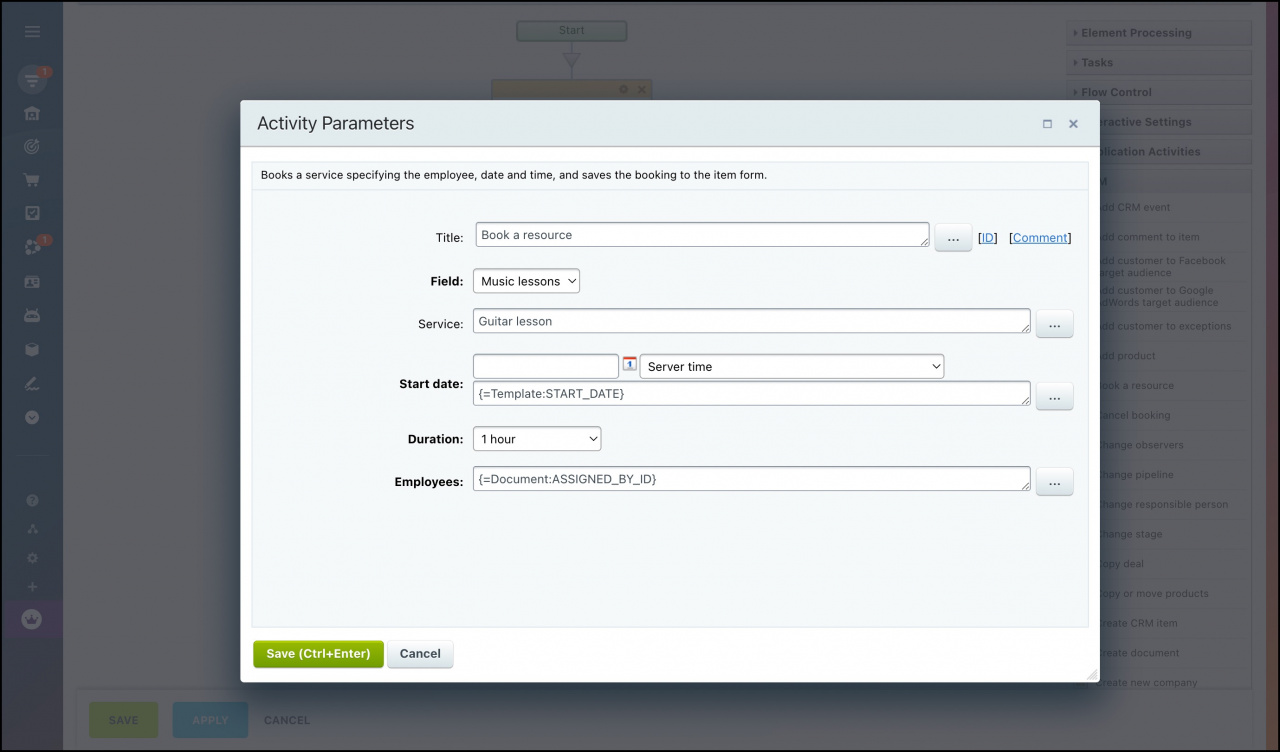
The activity reserves a resource. You need to create the Book a Resource field in a lead or deal form first.
Resource booking: how to manage bookings in CRM
-
Field: Select a field from the existing fields of the Book a Resource type.
-
Service: Specify the services that you need to book.
-
Start date: Set the booking date and time. You can add it through the Insert Value form or choose a specific date in a pop-up calendar.
-
Duration: Specify the service duration.
-
Employees: Select the users responsible for the service.
Cancel booking
This activity cancels any booking in the selected field of a deal or lead form.
Resource booking: how to manage bookings in CRM
Field: Select a field from the existing fields of the Book a Resource type.
Change observers
You can use the activity to change observers in the deal or lead form.
Observers in leads and deals
-
Apply action to observers: Select which action to take: add, change, or delete an observer.
-
Observers: Specify a user or a group of users to be affected by the action.
Change pipeline
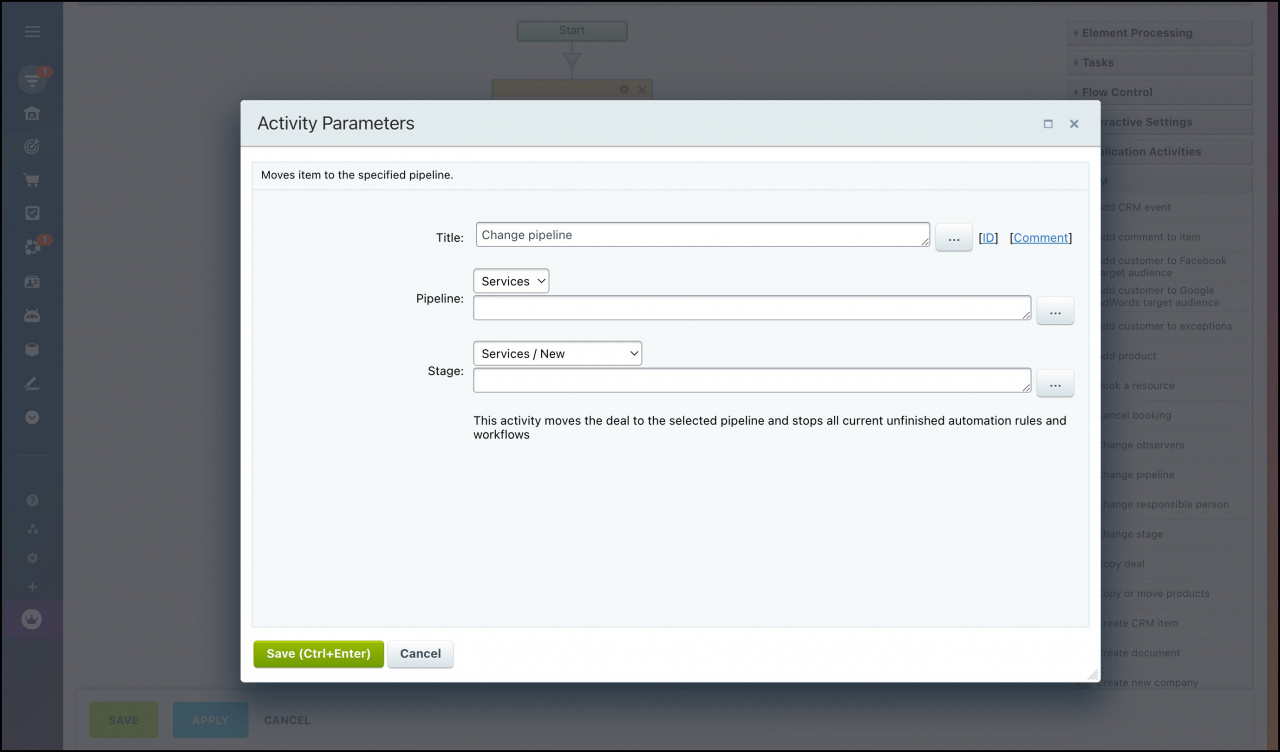
This activity moves an entity to the specified pipeline.
Sales pipelines
Pipeline: Select a pipeline from the list or specify it through the Insert Value form.
Stage: Specify a pipeline stage to move the deal.
Change responsible person
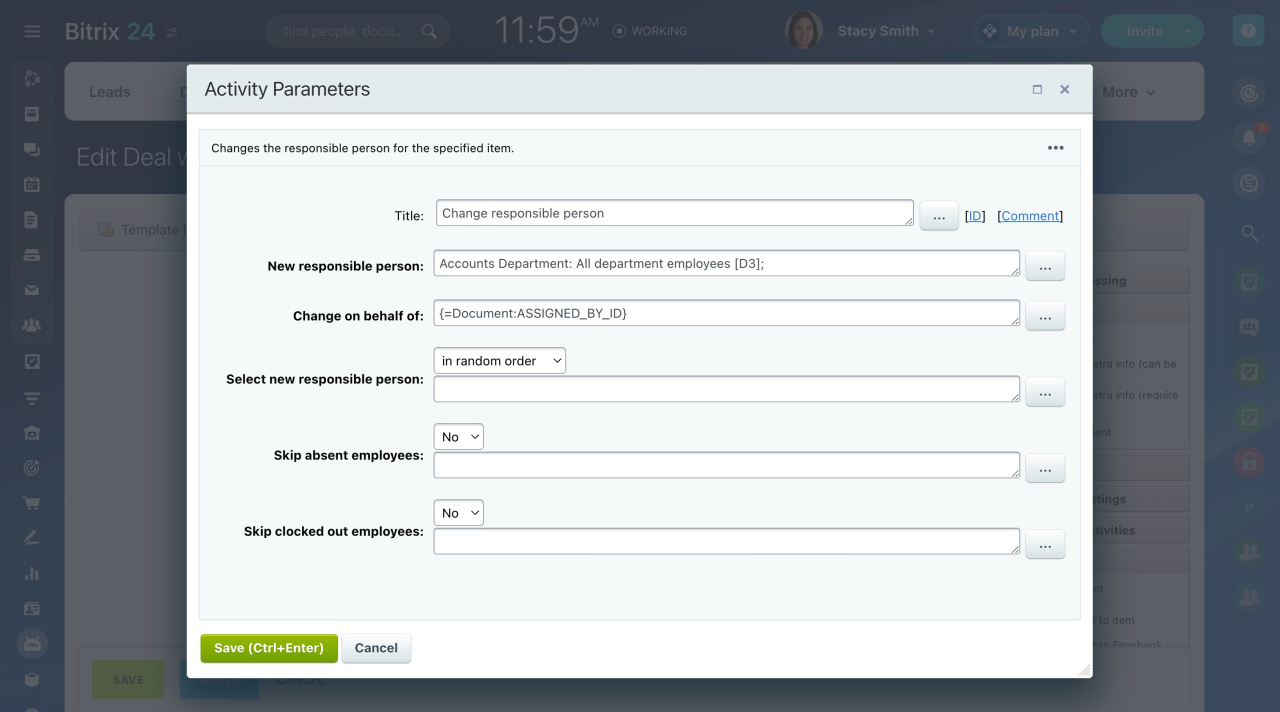
The activity changes the person responsible for the CRM entity.
New responsible person: Specify a new responsible person for the entity.
Change on behalf of: Specify on whose behalf the new responsible person will be assigned.
Select new responsible person:
-
In random order: A random employee is selected from the queue, except the one who is already responsible for the entity.
-
First available: The next employee in the queue will be responsible.
-
In specified order: The specified employee or the first from the list will be responsible.
Skip absent persons:
-
Yes: No leads or deals will be assigned to employees who have an absence in the chart. The next or a random employee from the queue will be selected depending on the value in the Select new responsible person option.
-
No: An absence in the chart will not affect the assignment of an employee to be responsible.
Change stage
The activity allows you to change the lead or deal stage.
New stage: Set the stage to move the entity.
Copy deal
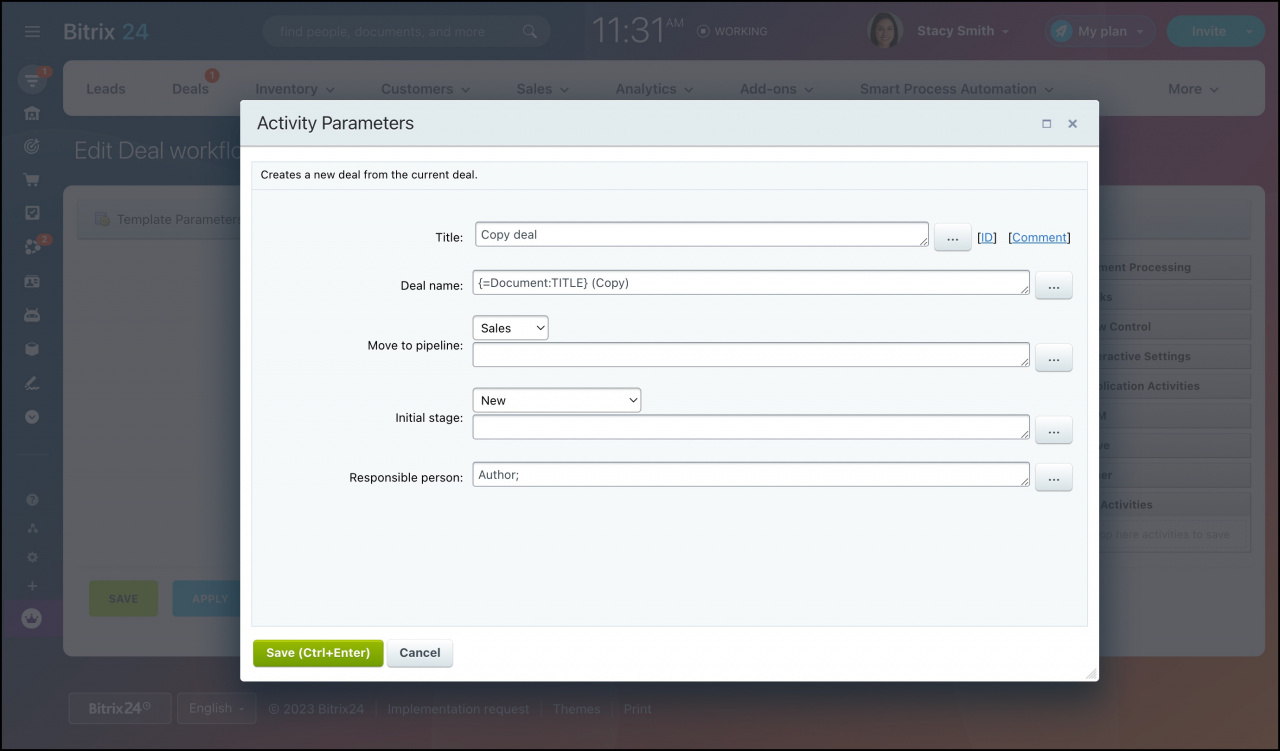
The activity creates a new deal from the current deal.
-
Deal name: Specify the name of the new deal. By default, the name of the current deal is used
=Document:TITLEand(Copy)is added in the end. -
Move to pipeline: Select a pipeline from the list or specify it through the Insert Value form.
-
Initial stage: Specify the stage to create a deal.
-
Responsible person: Select a user responsible for the new deal.
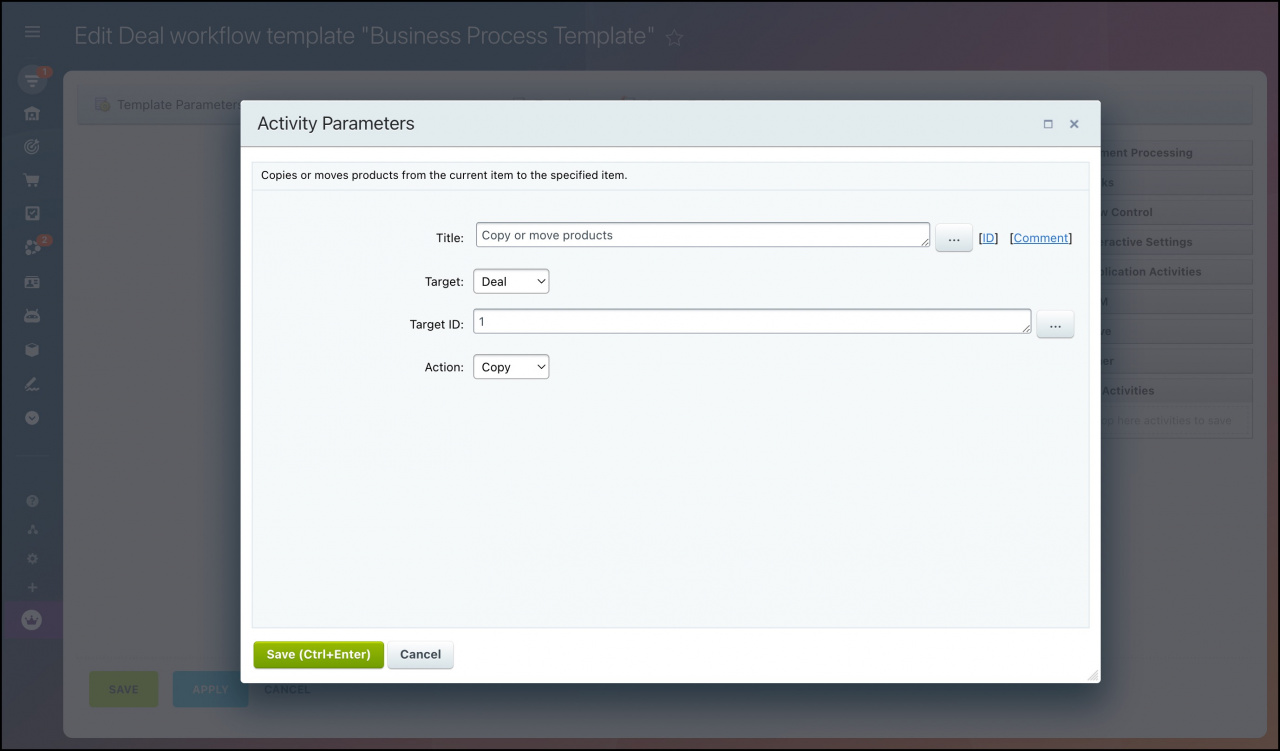
Copy or move products
Create CRM item
The activity creates a CRM entity and fills out specified fields in it.
Create SPA
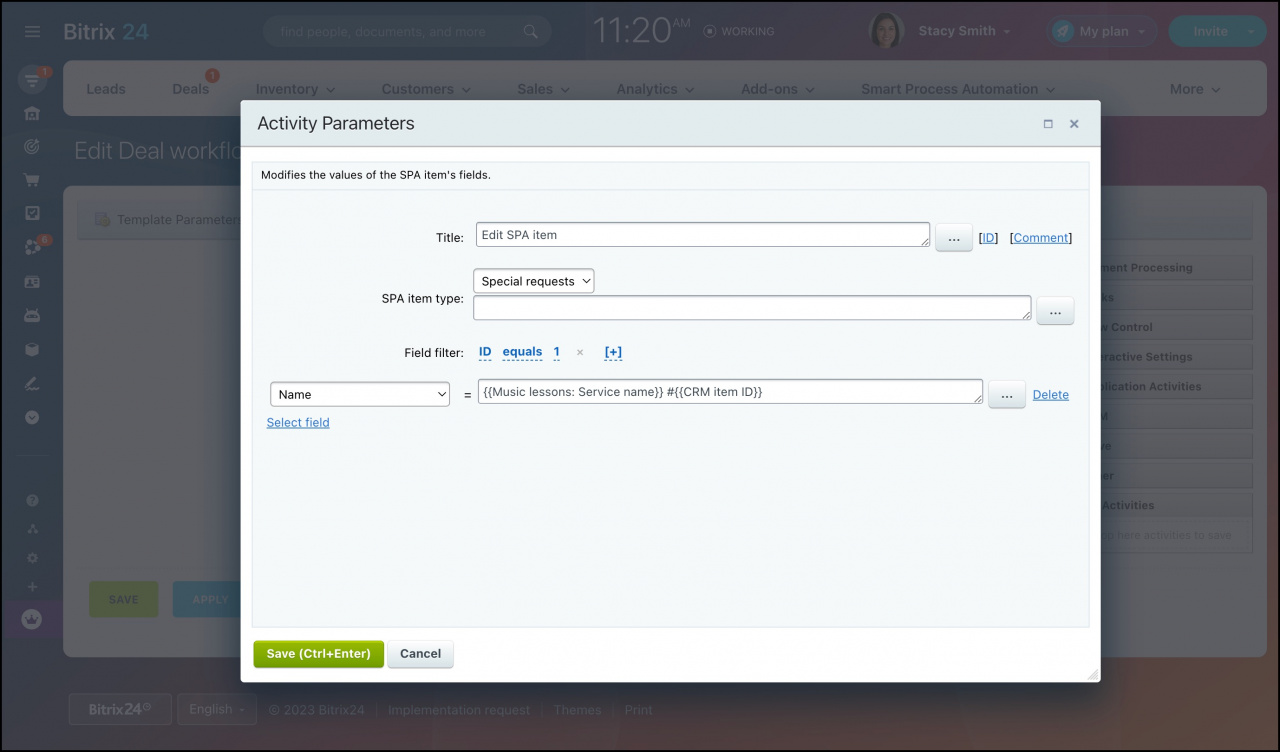
The activity creates a new SPA item and fills out specified fields in it.
Create contact for lead
The activity creates a contact and marks the lead as the repeat lead.
Repeat leads
Responsible person: Assign a user to be responsible for the contact being created.
Create document
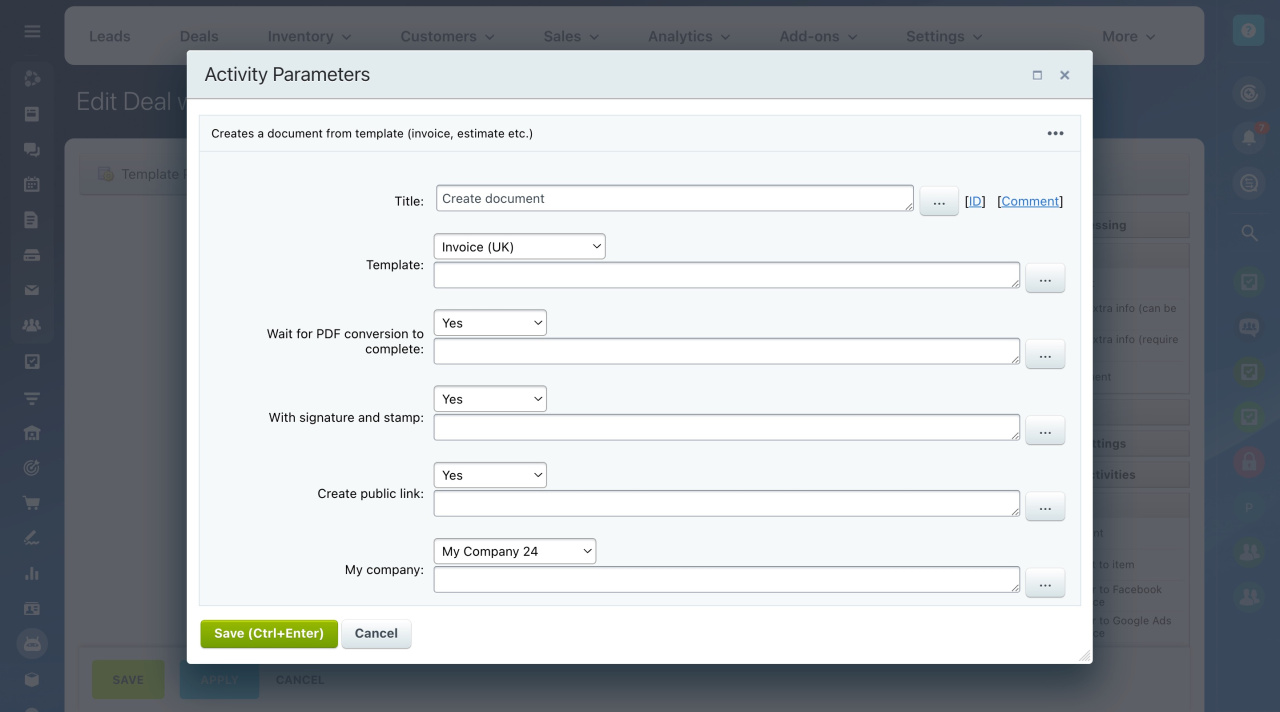
The activity automatically creates a document within a CRM item. Choose a template, and the workflow will fill in all the necessary details. To add a variable value, click the three dots (...) and select it.
Documents in CRM: Create and send to customers
-
Template: Specify the template by which the document will be created.
-
Wait for PDF conversion to complete: If Yes is selected, the activity will not be completed until the document is converted to PDF.
-
With signature and stamp: Add signature and stamp to the document. Remember, you need to add them to your company details first.
-
Create public link: A public link will be created, and the document will be available to download via this link.
-
My company: Specify your company.
-
My company details: Specify your company details.
-
My company bank details: Specify the bank details of your company.
Under Document Fields, click Add Field to add custom fields for the document.
Create new company
The activity creates a new company.
Add a new company to CRM
Create new contact
The activity creates a new contact.
Add new contacts
Create new deal
The activity creates a new deal.
Add a new deal
Create new lead
The activity creates a new lead.
Create a lead
Create payment link
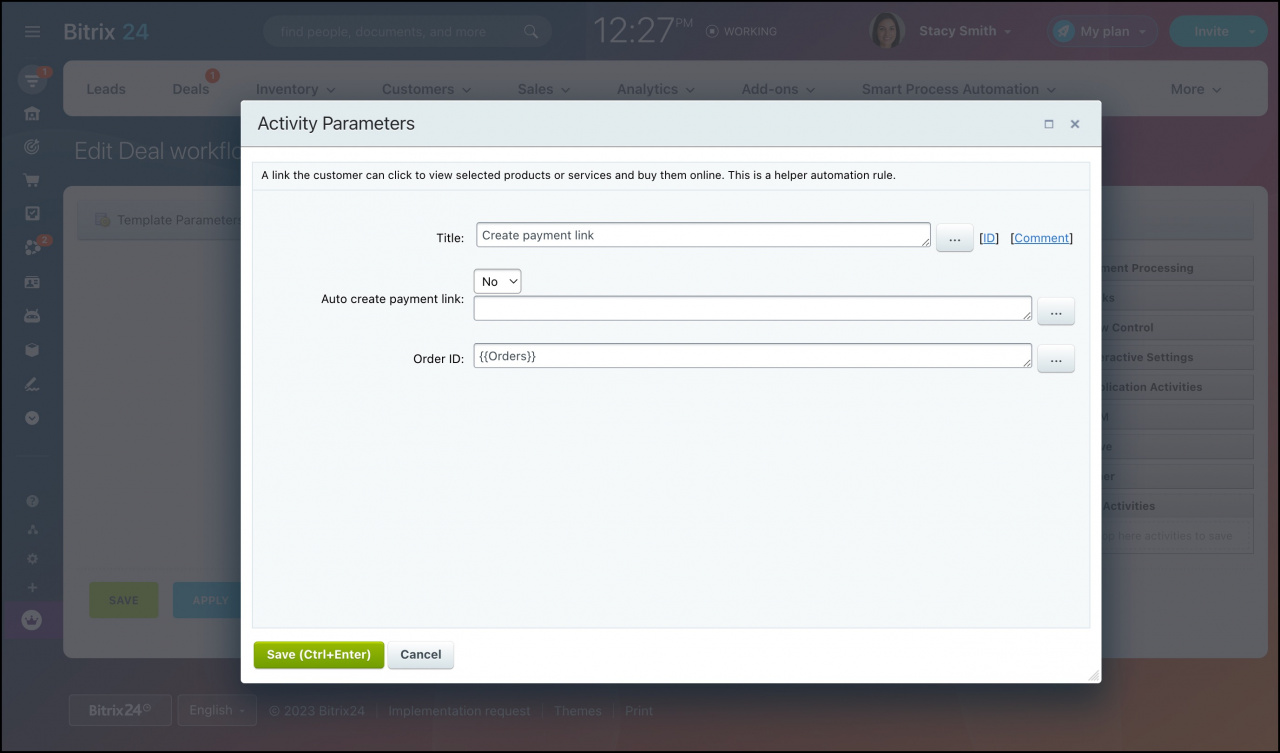
The activity creates a link to pay for an order online.
Order ID: Identify the order.
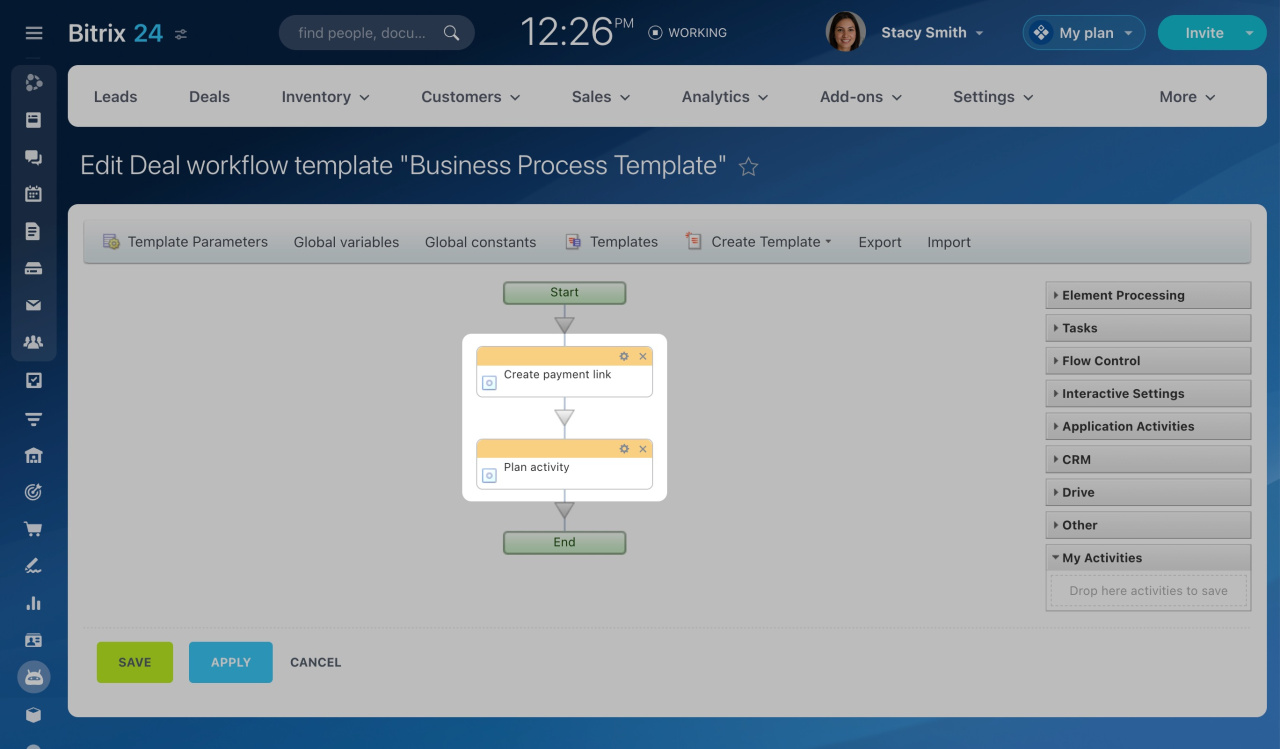
Consider the following example to see how it works:
Enter {{Orders}} parameter in the Create payment link action.
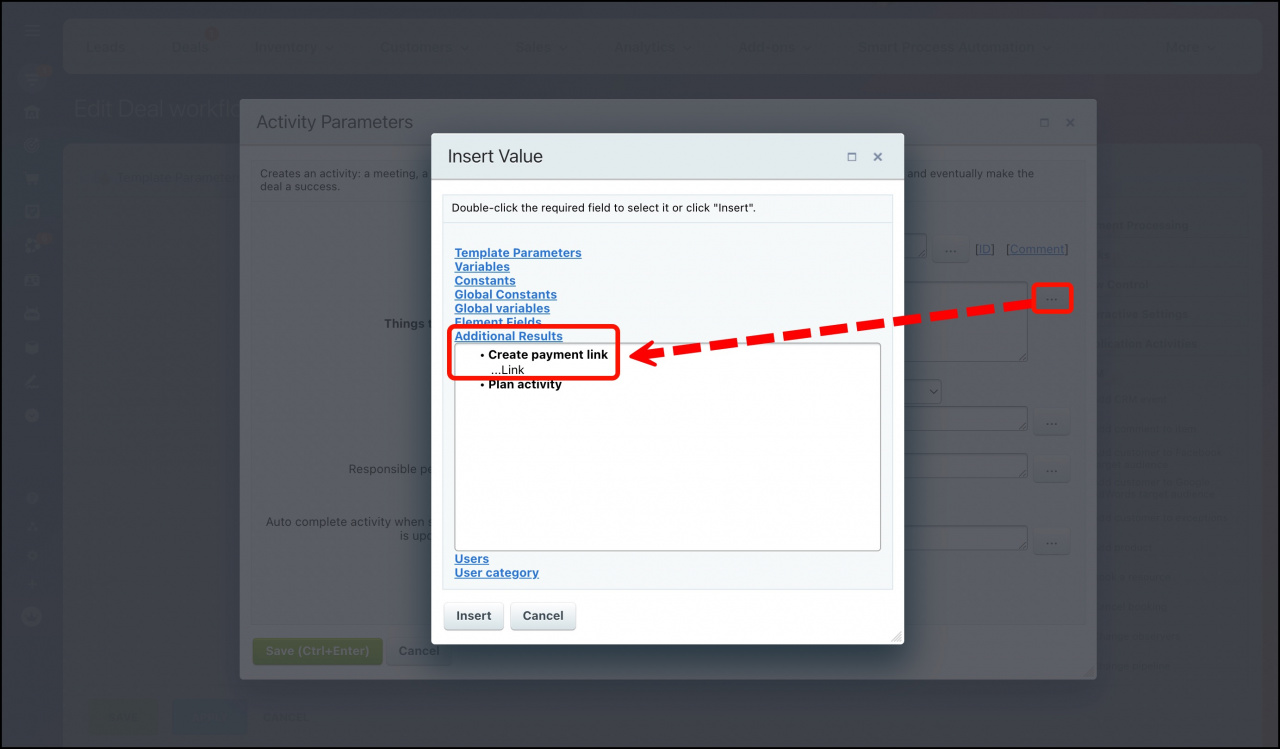
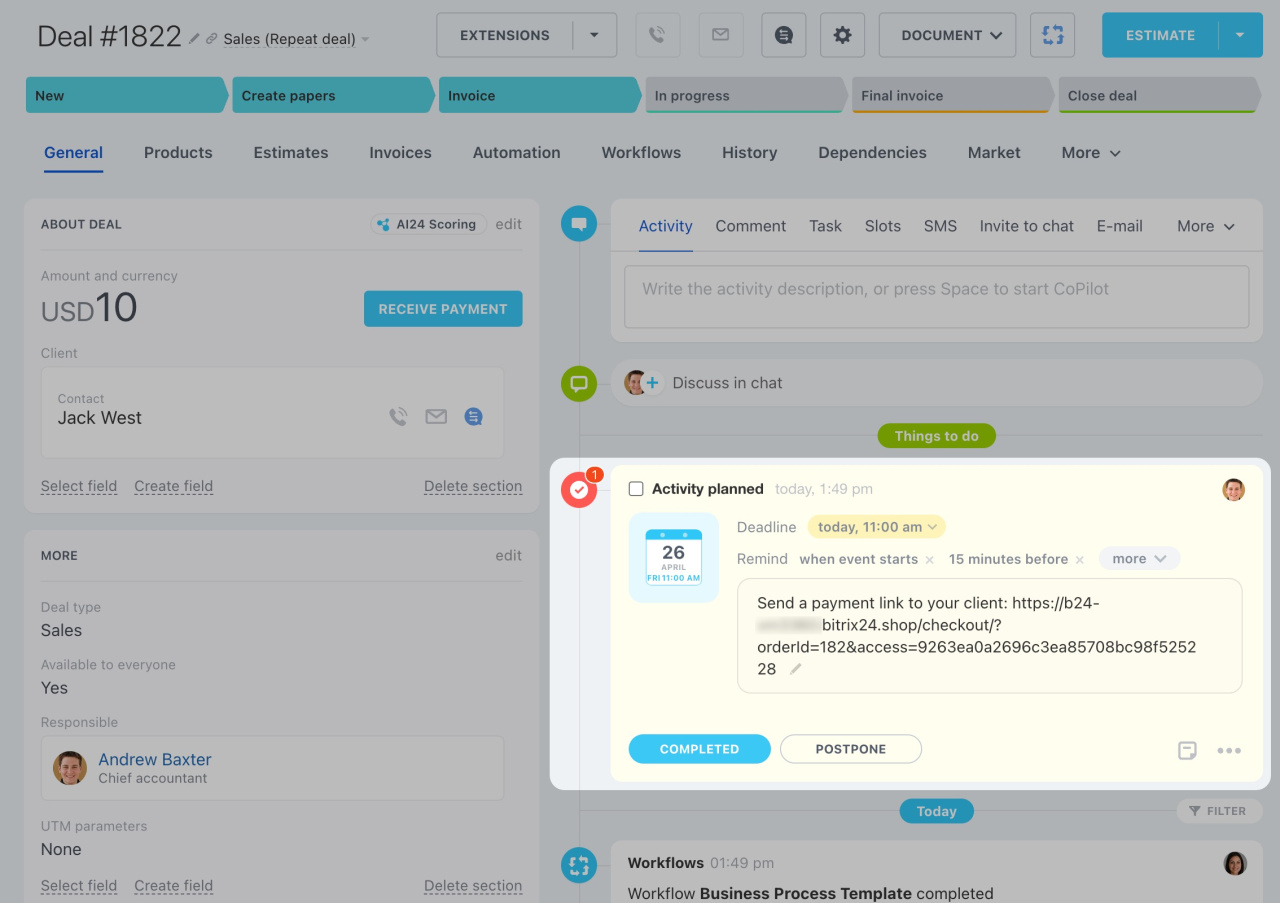
Then add the generated link to the Plan activity activity using the Insert Value form.
After you launch the workflow, it will create a CRM activity with a payment link in the deal form.
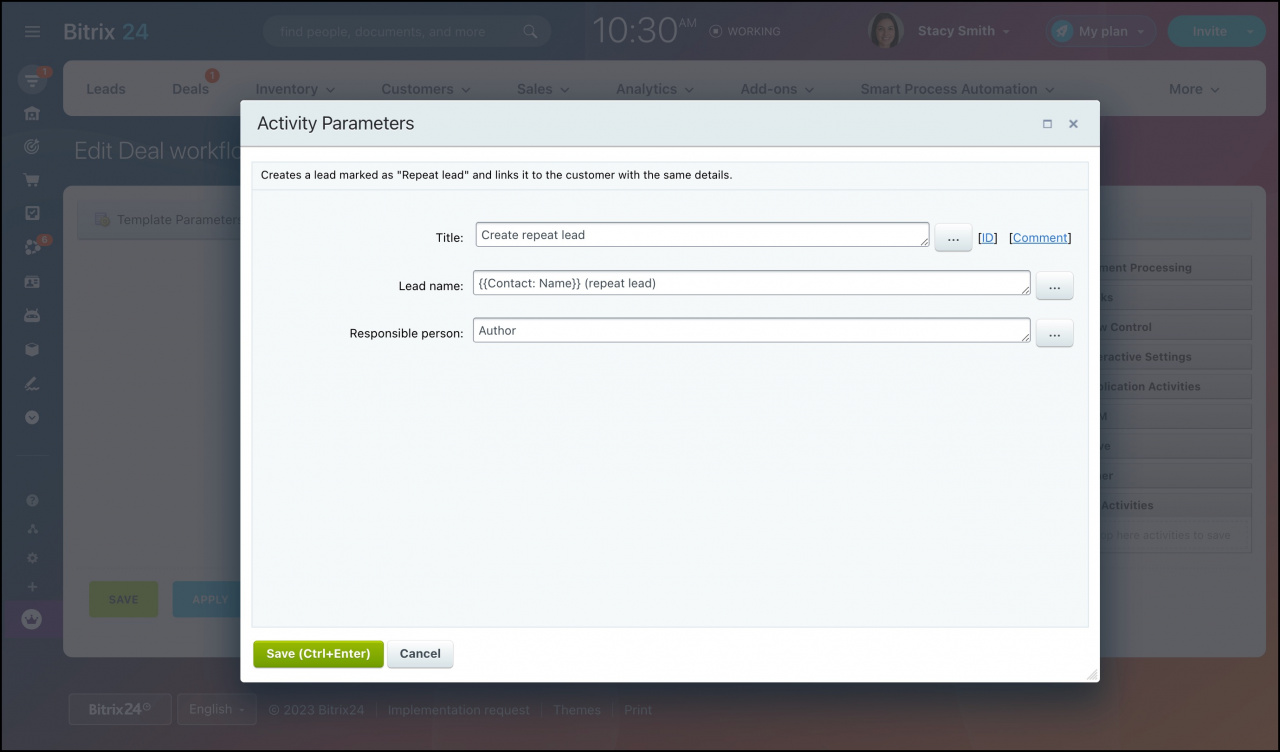
Create repeat lead
The activity creates a lead based on the element's details and marks it as the repeat lead. It is available for the deal workflow templates only.
Repeat leads
Lead name: Specify the name of the new lead.
Responsible person: Select a user responsible for the new lead.
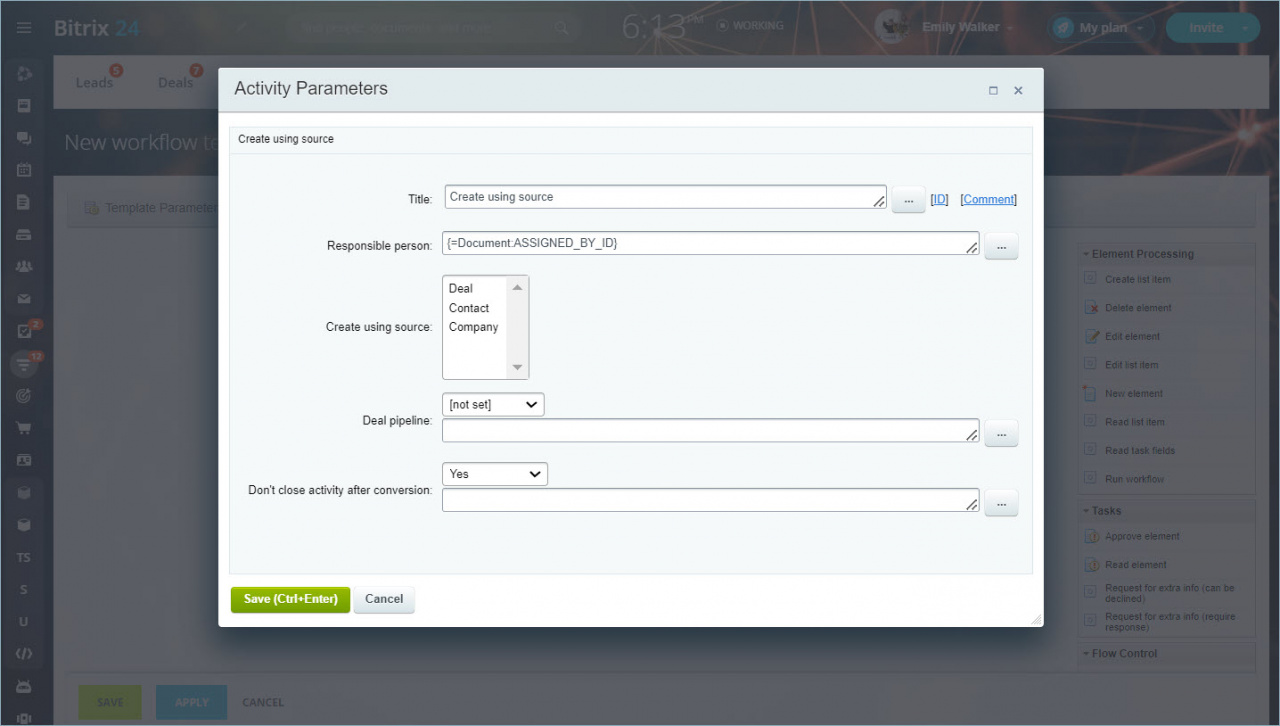
Create using source
For lead workflow templates:
The activity creates a new entity (deal, contact, and/or company) using the lead as a source. It is similar to the lead conversion process.
Convert a lead
-
Responsible person: Specify who is responsible for the new entity.
-
Create using source: Select the type of the new entity.
-
Deal pipeline: Select a deal pipeline if you've selected the deal type of the new entity.
-
Don't close activity after conversion: If the option is enabled, related activities (tasks, meetings, etc.) won't be closed after a new entity has been created.
For deal workflow templates:
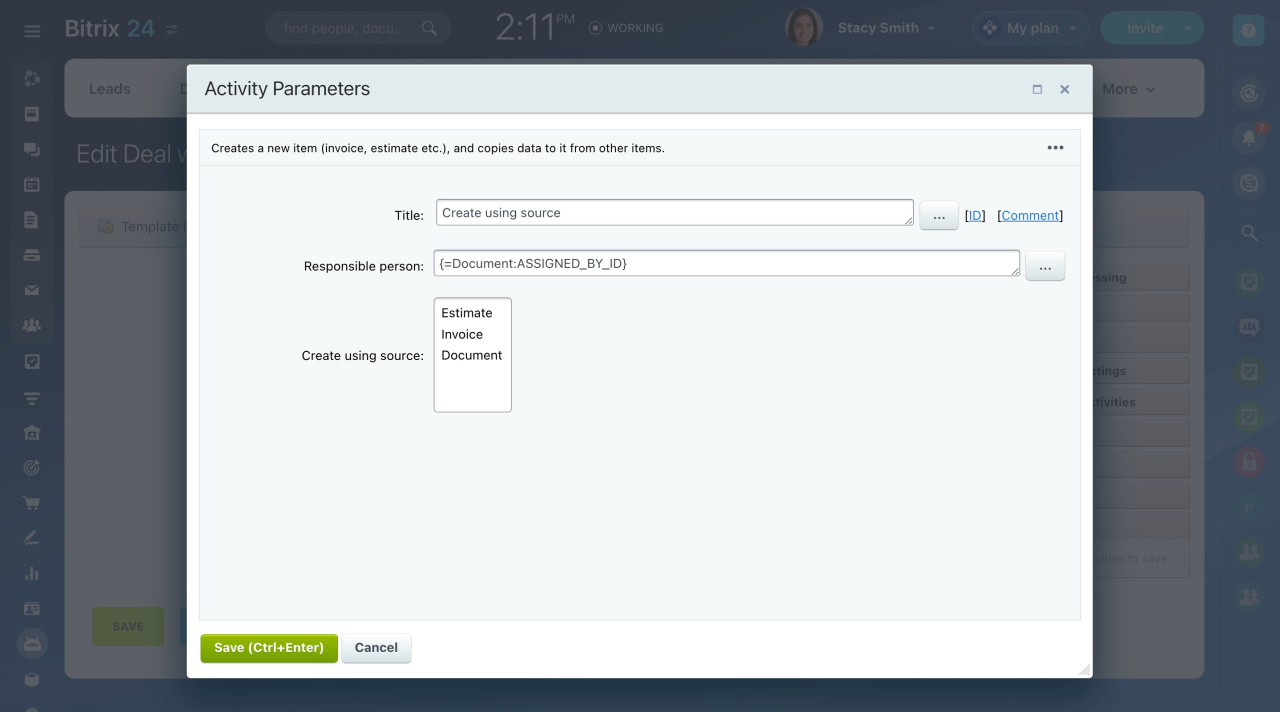
The activity creates a new item (invoice and/or estimate) and copies data from other items to it.
-
Responsible person: Specify who is responsible for the new entity.
-
Create using source: Select the new entity type.
Delete CRM item
The activity removes the selected item.
Delete SPA
The activity deletes an SPA item when it is no longer needed.
Delete product items
The activity deletes all products in the entity.
Edit SPA item
End task
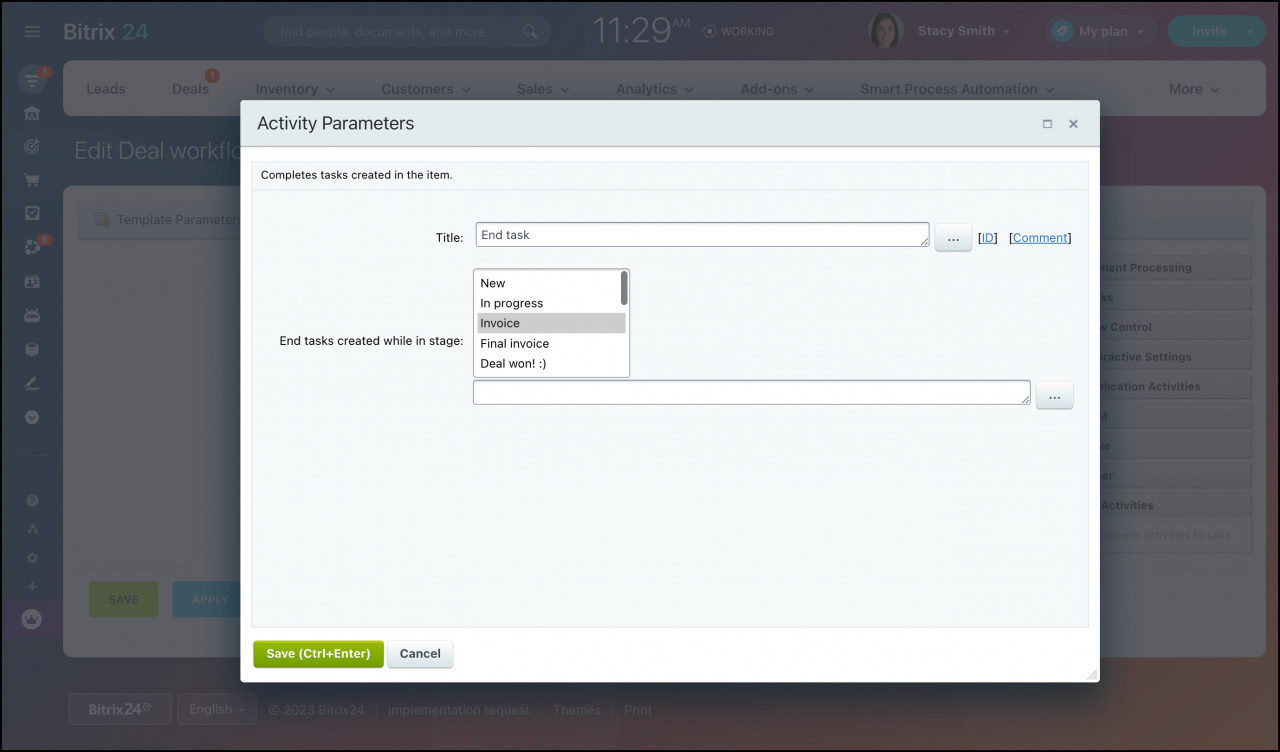
The activity completes the tasks created while in a specific stage of the current deal pipeline.
End tasks created while in stage: Select the required stages.
After the launch of the workflow, this activity will complete the tasks created while in the selected stages.
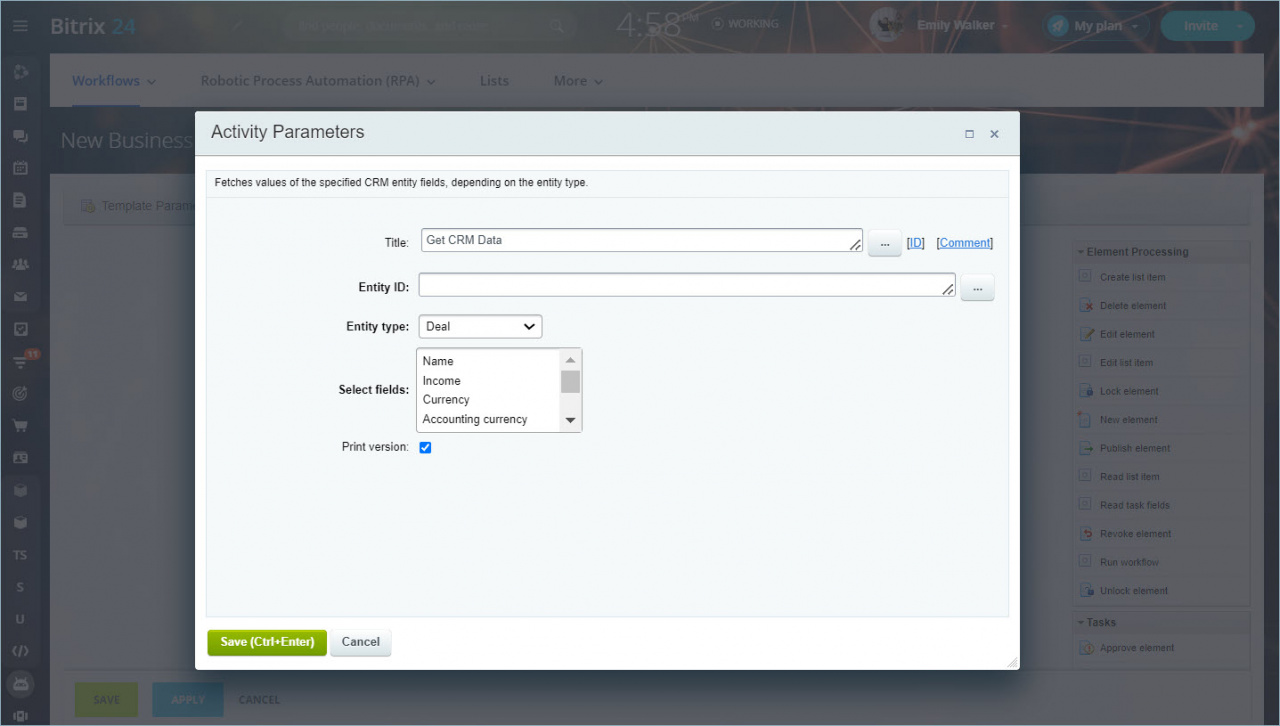
Get CRM Data
The activity fetches the values of the specified CRM entity fields, depending on the entity type.
-
Entity ID: Specify the identifier of the entity for which you want to get the field values.
-
Entity type: Select the type of CRM entities you want to extract fields for: contacts, leads, deals, or companies.
-
Select fields: Specify the required fields. The list of available fields depends on the selected entity type.
-
Print version: Enable this option if you want to get the field values in the printed form.
As a result of the activity, the field values of the selected entity will be available in the Additional Results section of the Insert Value form. You can use them in other workflows' activities.
Insert Value form
Get CRM item information
The activity gathers and sends information about a specified CRM entity to other automation rules.
CRM item type: Select the entity type from the list.
Field filter: Choose the fields and their values to find a specific item and get the data you need. Add conditions in the filter and use the insert value form. If multiple items match the filter, you will only get data for the first item (sorted by ID).
For example, limit results by ID and set it equal to the selected entity type.
To get data for multiple items, use an iterator if they are in a multiple variable or field. Specify the ID in the filter as equal to the iterator value (from Additional Results).
Learn more about using iterator
Select fields: Select the CRM item fields whose values you want to get. The available fields depend on the entity type.
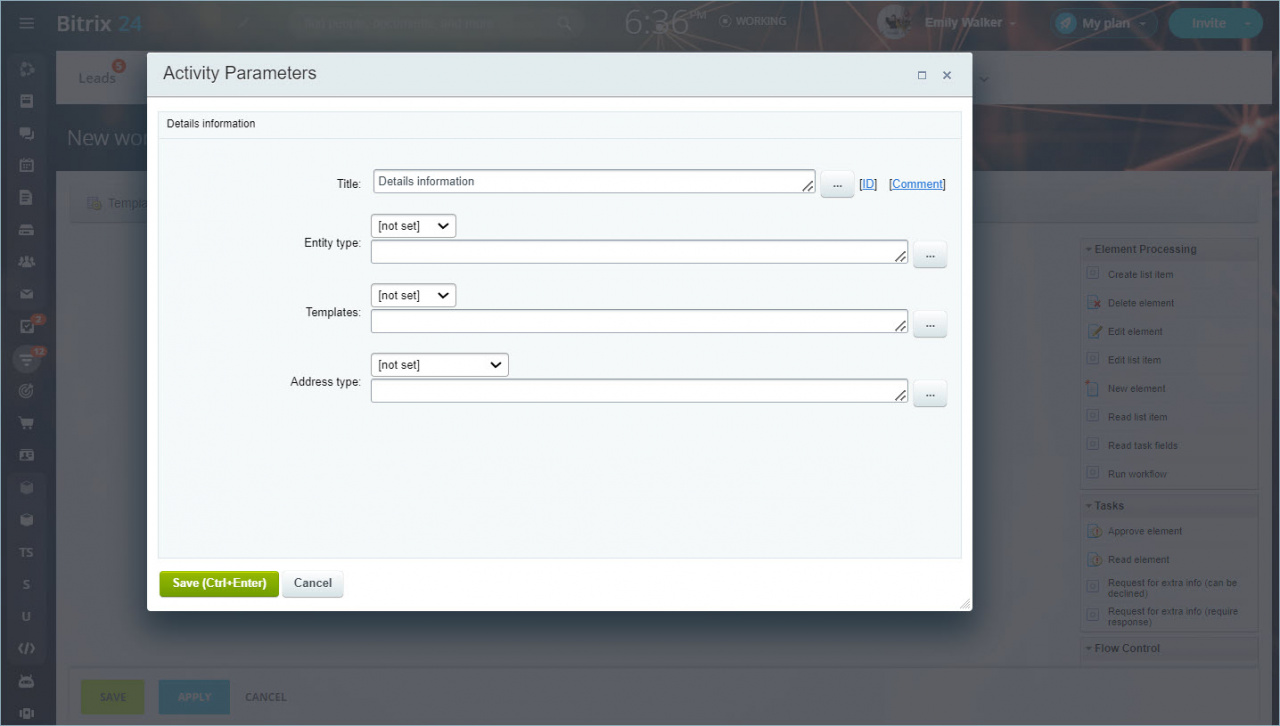
Get details values
The activity gets information about the details of the contact or company.
If it is a contact or company workflow, the activity will get details of the entity in which the workflow is launched.
If it is a deal or lead workflow, it will get the details of the linked contact or company.
-
Entity Type: Select the type of entity (contact or company) for which you want to get information about the details. This option is not displayed if the activity is used in the contact or company workflow.
-
Templates: Specify the details template.
-
Address type: Specify the address type from the details.
Get payment information
The activity sends payment status information to other automation rules.
Order ID: Identify the order.
Order processing in CRM
You can also use this activity to get the payment ID in the order.
Get product item information
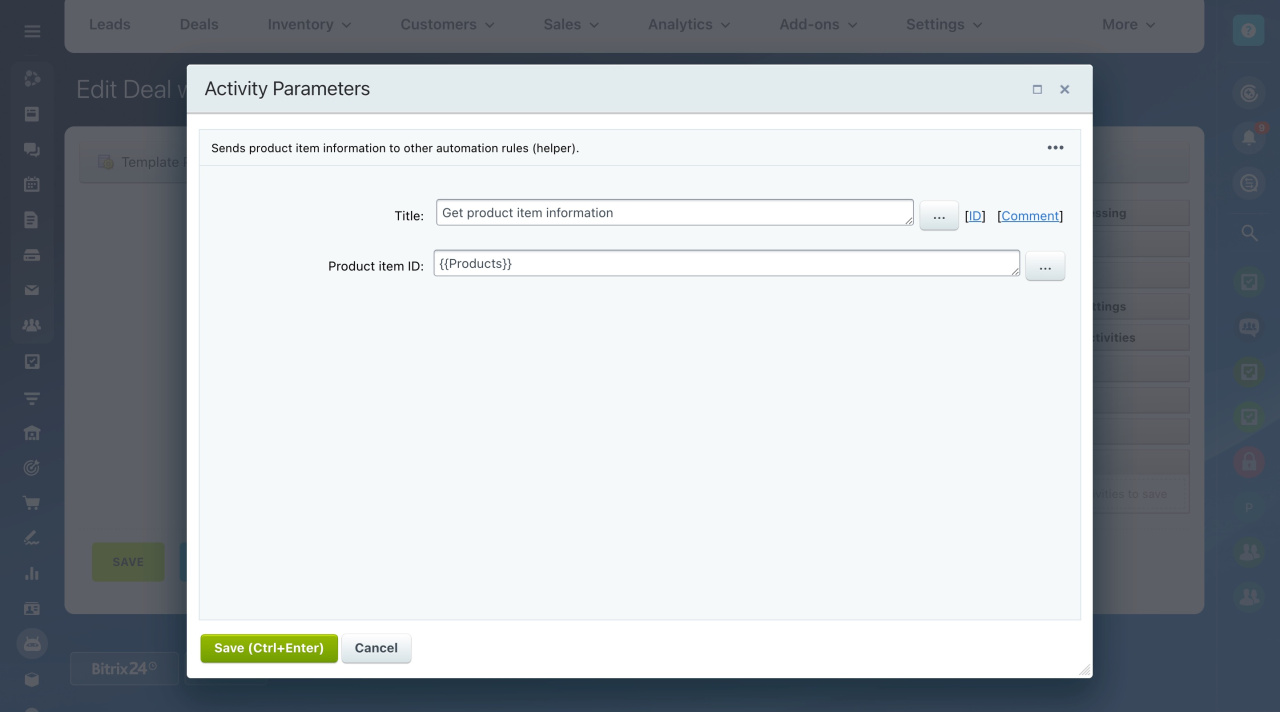
The activity sends product information to other automation rules.
Product item ID: Identify the product.
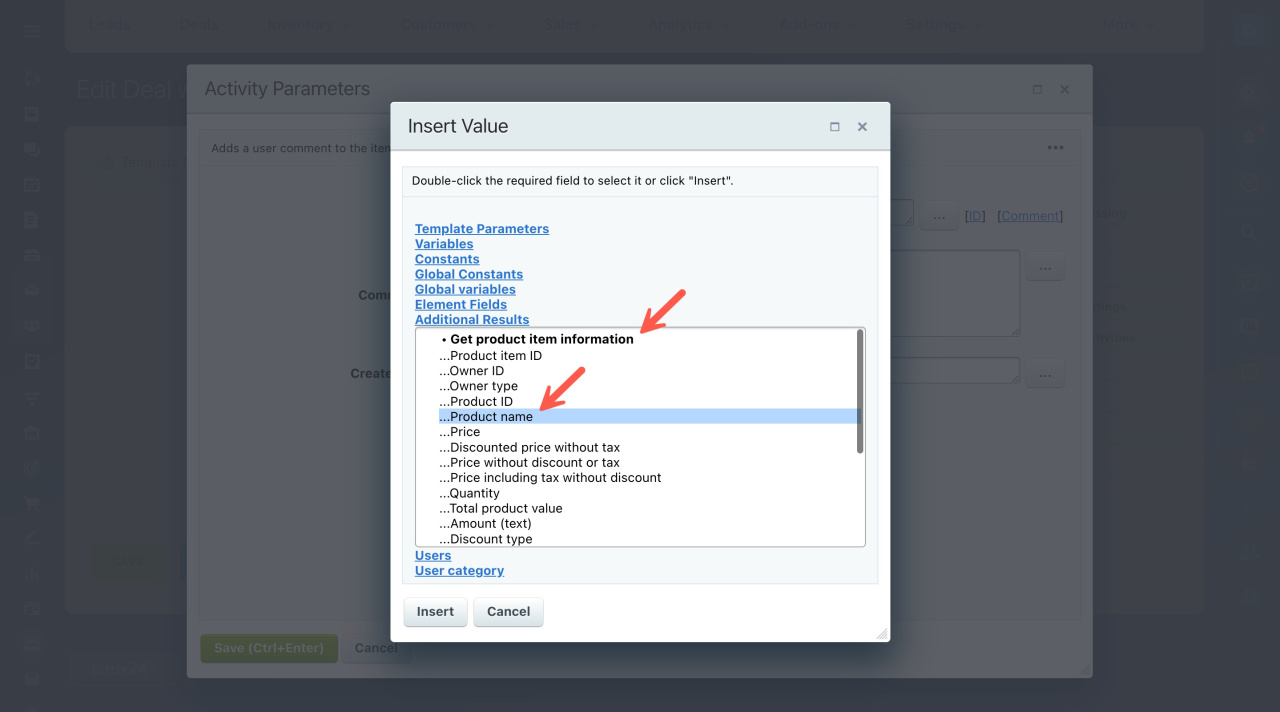
Consider the following example to see how it works:
Enter {{Products}} parameter in the Get product item information activity.
Then add the needed values to the Add comment to item activity using the Insert Value form.
After you launch the workflow, it will add a comment with the required information about the product.
Invite customer to messenger
Use this activity to invite a customer to Telegram and continue the conversation. They will receive a Telegram link to the conversation. All communication history will be saved to the CRM entity timeline.
Invite a customer to Telegram chat
Modify company
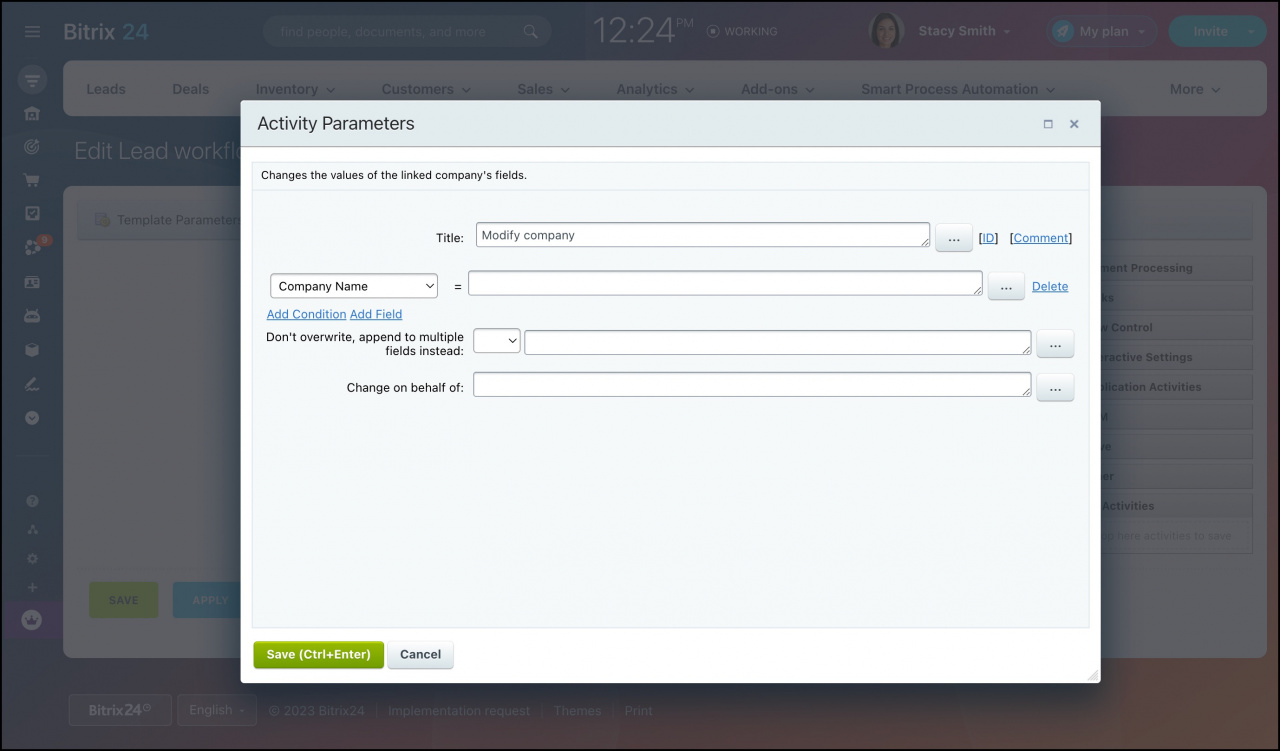
You can use this activity to change the values of the linked company's fields.
-
Add condition: When you click, a new line is added, in which you have to select an existing field from the list and specify its new value.
-
Add field: It opens the form for adding a new field. After creating the field, specify its value.
-
Don't overwrite, append to multiple fields instead: If the field is multiple, select Yes to add a new value to the list of options. Otherwise, the old value will be overwritten.
-
Change on behalf of: Specify on whose behalf the change will be made.
Modify contact
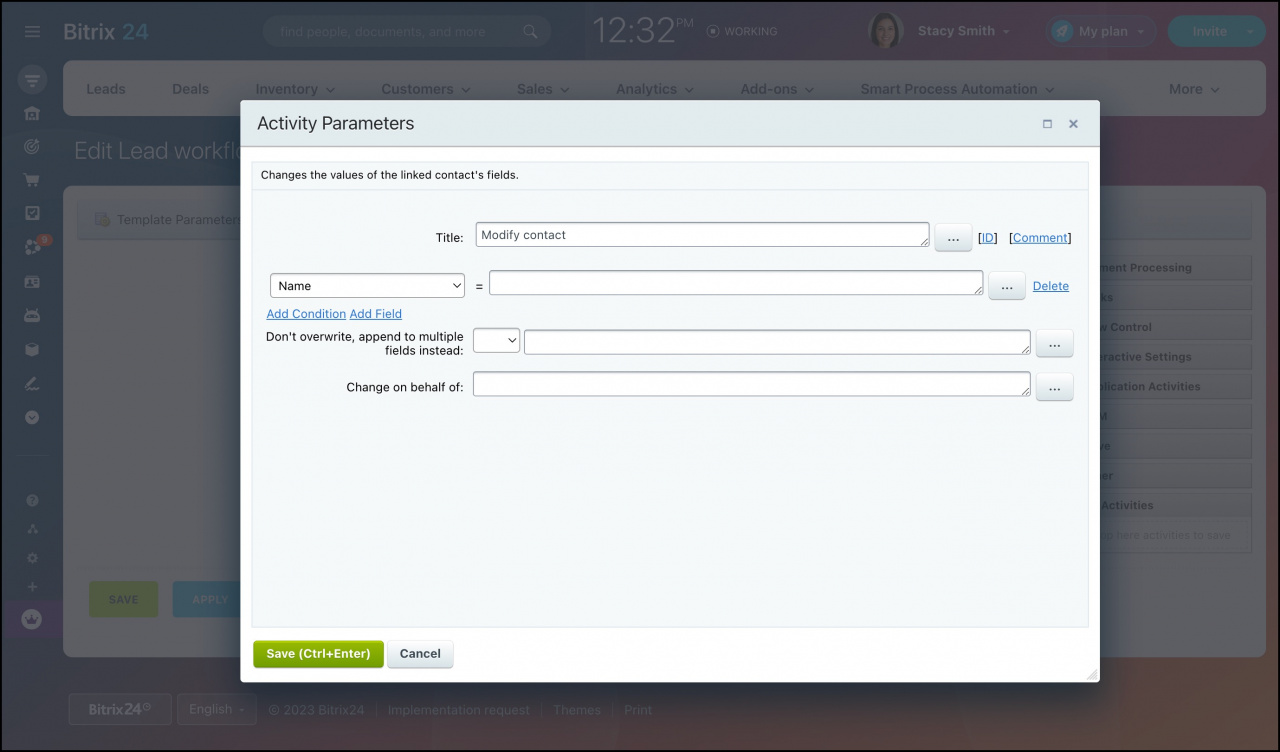
You can use this activity to change the data of a linked contact.
-
Add condition: When you click, a new line is added, in which you have to select an existing contact field from the list and specify its new value. In this way, you can change all necessary fields in one action.
-
Add field: It opens a form for adding a new field. After creating the field, specify its value.
-
Don't overwrite, append to multiple fields instead: If the field is multiple, select Yes to add a new value to the list of options. Otherwise, the old value will be overwritten.
-
Change on behalf of: Specify on whose behalf the change will be made.
Modify details
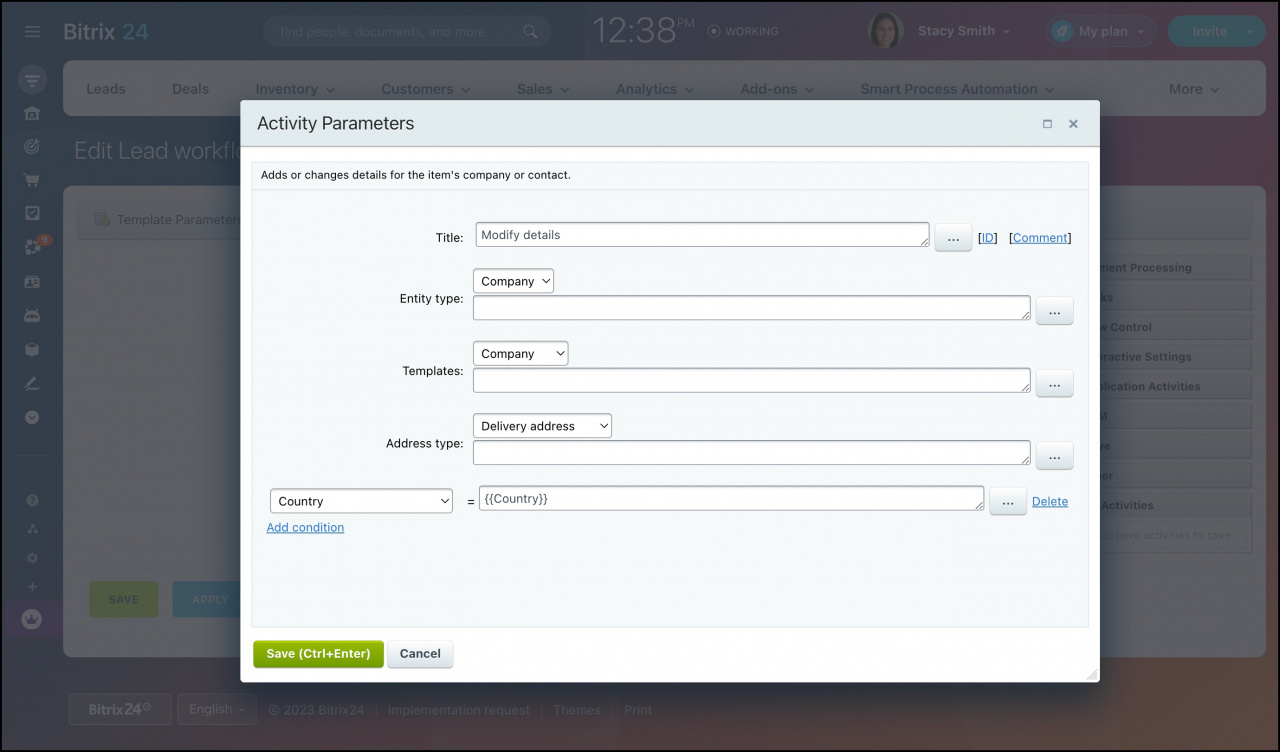
The activity changes the details of a contact or company.
-
Entity type: Select an entity type from the list: contact or company.
-
Templates: Specify a template of details.
-
Address type: Specify the address type from the details.
Pause
The activity suspends the item for the specified number of days or until customer comes back.
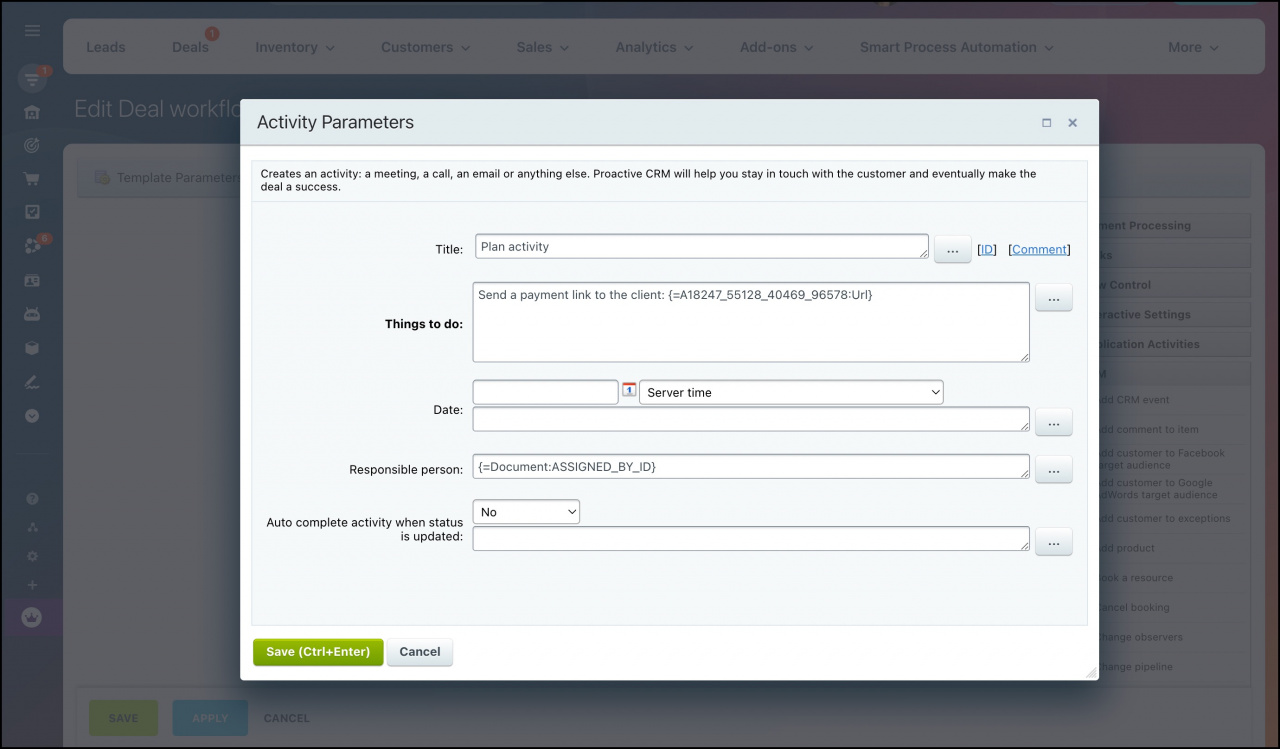
Plan activity
The activity creates and assigns a new activity to the person responsible for the CRM entity.
-
Title: Specify the title of the activity.
-
Things to do: Instruct the employee to perform the required actions.
-
Date: Specify the activity deadline.
-
Responsible person: Specify who is responsible for the activity.
-
Auto complete activity when status is updated: If the option is enabled, the activity will be considered completed after the lead or deal moves to another stage.
Process automatic payment
The activity debits funds from the customer's payment card according to the customer's preferences. It is used with recurring payments.
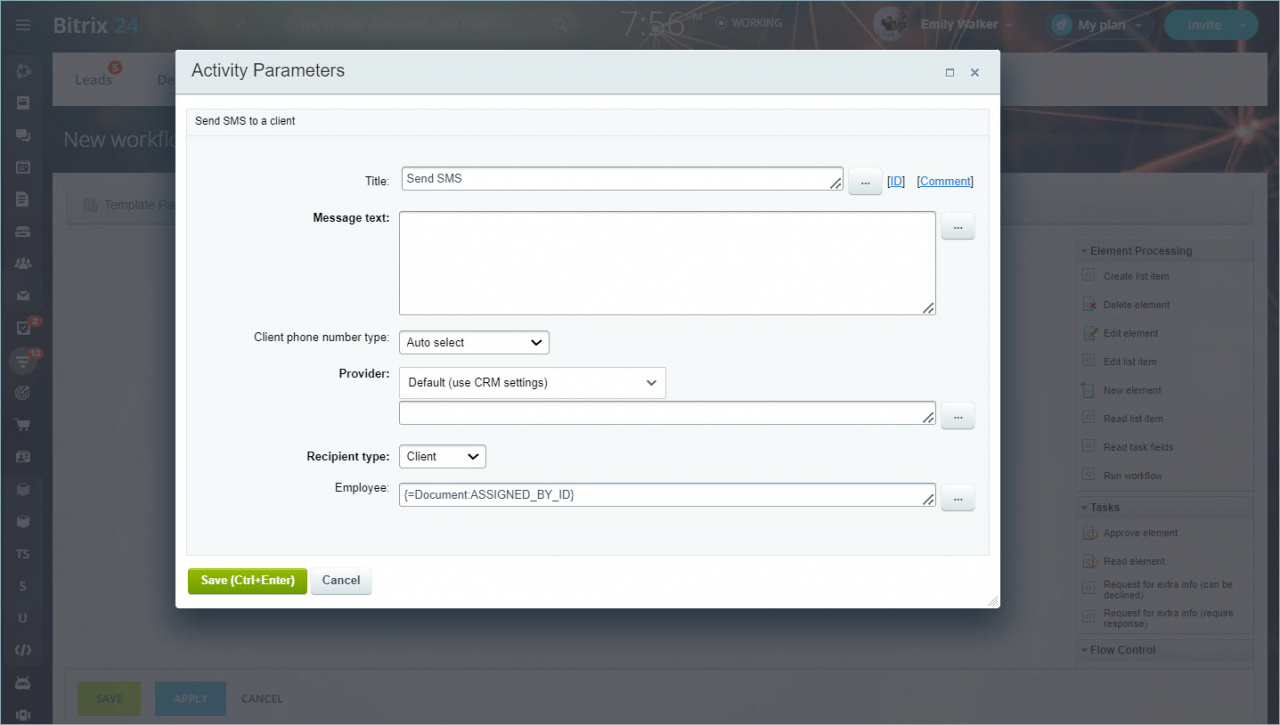
Send SMS
Schedule a call
The activity adds a call to the CRM entity form and the responsible person's calendar.
Schedule a meeting
The activity adds a meeting to the CRM entity form and the responsible person's calendar.
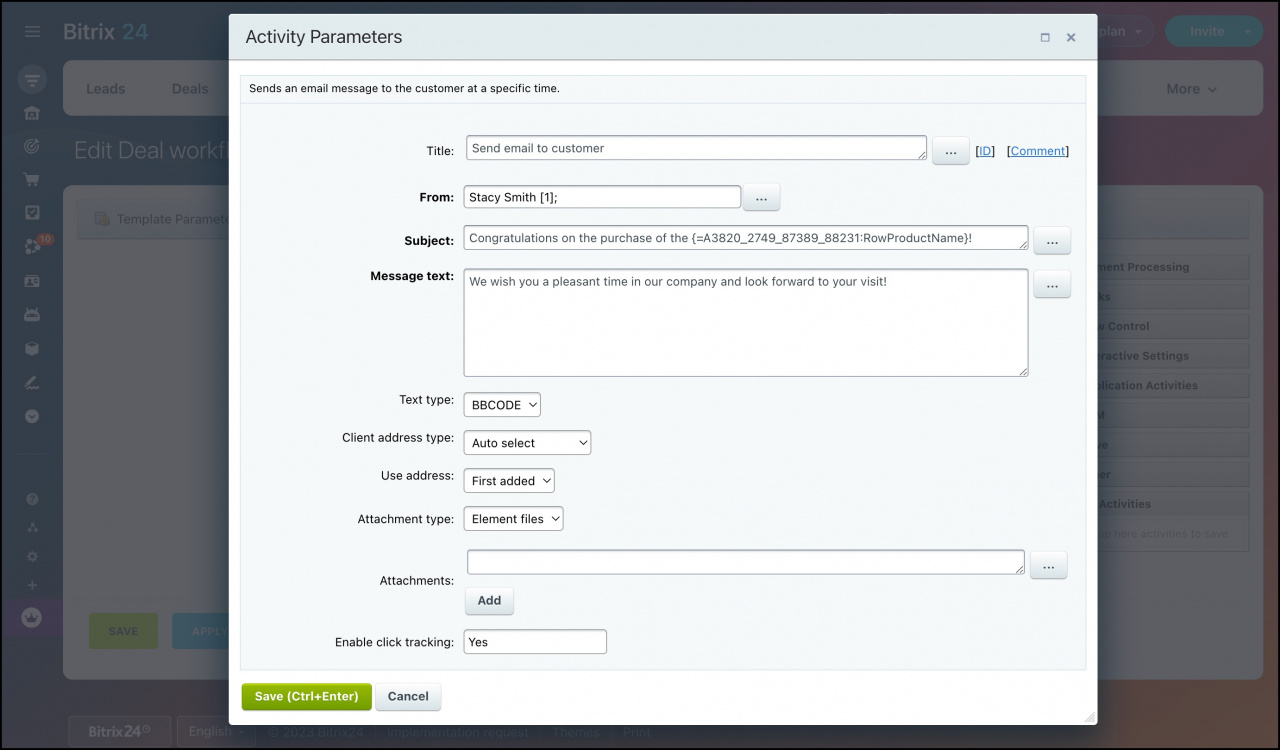
Send email to customer
The activity sends an email to a client.
Manage emails with CRM
-
From: Select an email address that an email will be sent from. Auto select option means that the sender's email address is selected from the list of the connected mailboxes (the first one). Also, you can add a new sender (connect a new email address).
-
Subject: Specify the subject of the email.
-
Message text: Specify the text of the message.
-
Text type: Select the text type (BBCode or HTML).
-
Client address type: Select the client address type. For example, if a client has several email addresses, you can select the one that the email will be sent to.
-
Attachment type: Select the attachment type. You can select Document files and select the field that will be attached to an email (if you want to attach a file, you may need to create a custom File field), or you can select Drive and attach files stored on Bitrix24 Drive.
-
Enable click tracking: Enable this option if you have a link in your email and want to track clicks from this link.
Submit document for signing
The activity creates a document and sends it for signing to all involved parties in the correct order.
Bitrix24.Sign in CRM
Waiting for deal stage
The activity pauses the workflow until a deal gets to a certain stage.
-
Deal ID: Deal identifier. You can use the Insert Value form for convenience.
-
Stage: Select one or more stages to wait on. The workflow will wait until the lead has moved to the selected or final stage.
Waiting for lead stage
The activity pauses the workflow until a lead gets to a certain stage.
-
Lead ID: Lead identifier.
-
Status: Select one or more stages to wait on. The workflow will wait until the lead has moved to the selected or final stage.

