Jotform integration app allows you to connect Jotform web forms as data sources to Bitrix24 CRM. With the app, you'll be able to generate leads, deals or contacts in your CRM as well as custom fields to make sure no data gets lost in the process.
Connect JotForm to Bitrix24
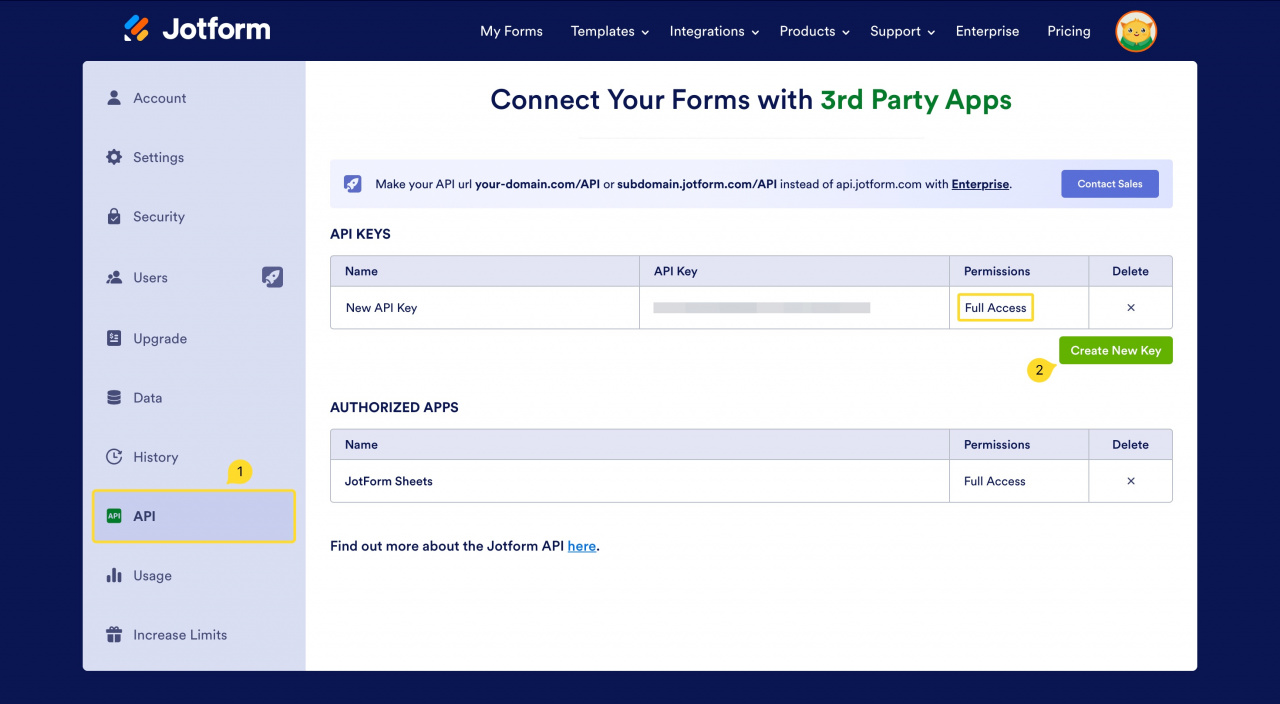
To connect JotForm web forms to Bitrix24, you'll need to generate an API key for your Jotform account.
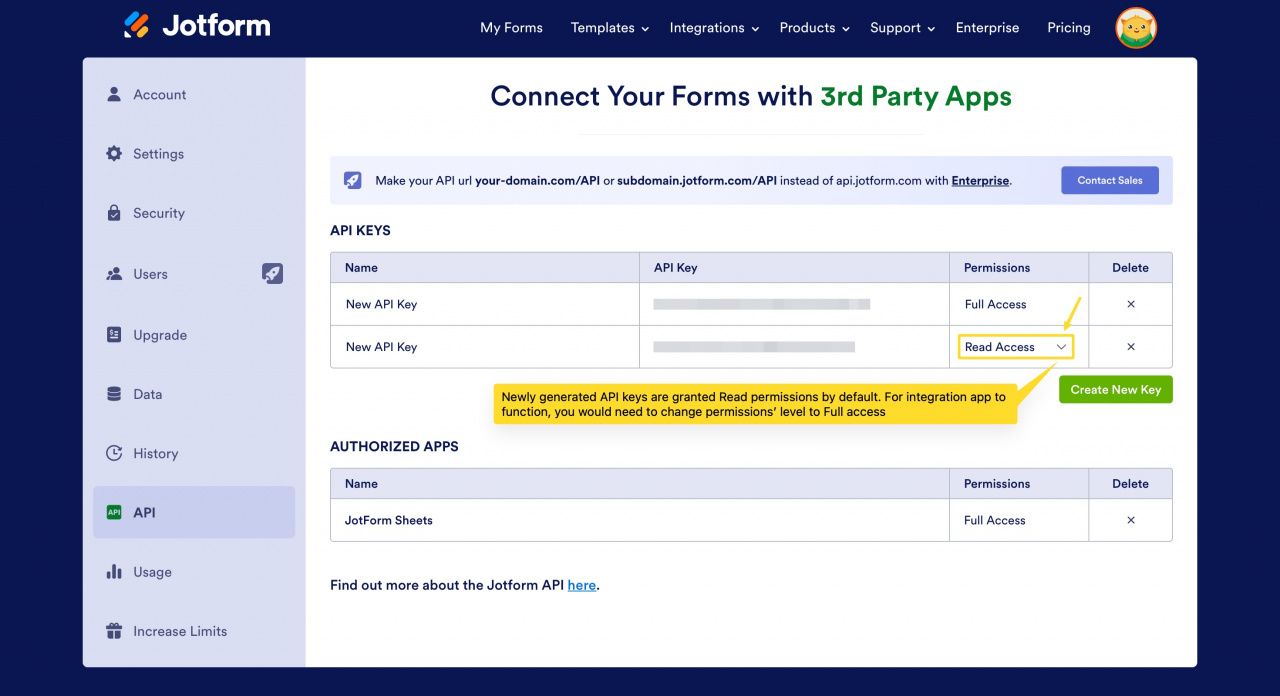
Go to Account settings => API section and create a new key with Full Access permissions. A new key is granted Read permissions by default, however you may change its permissions level anytime by selecting the required option from the dropdown list.
How to create API keys in Jotform
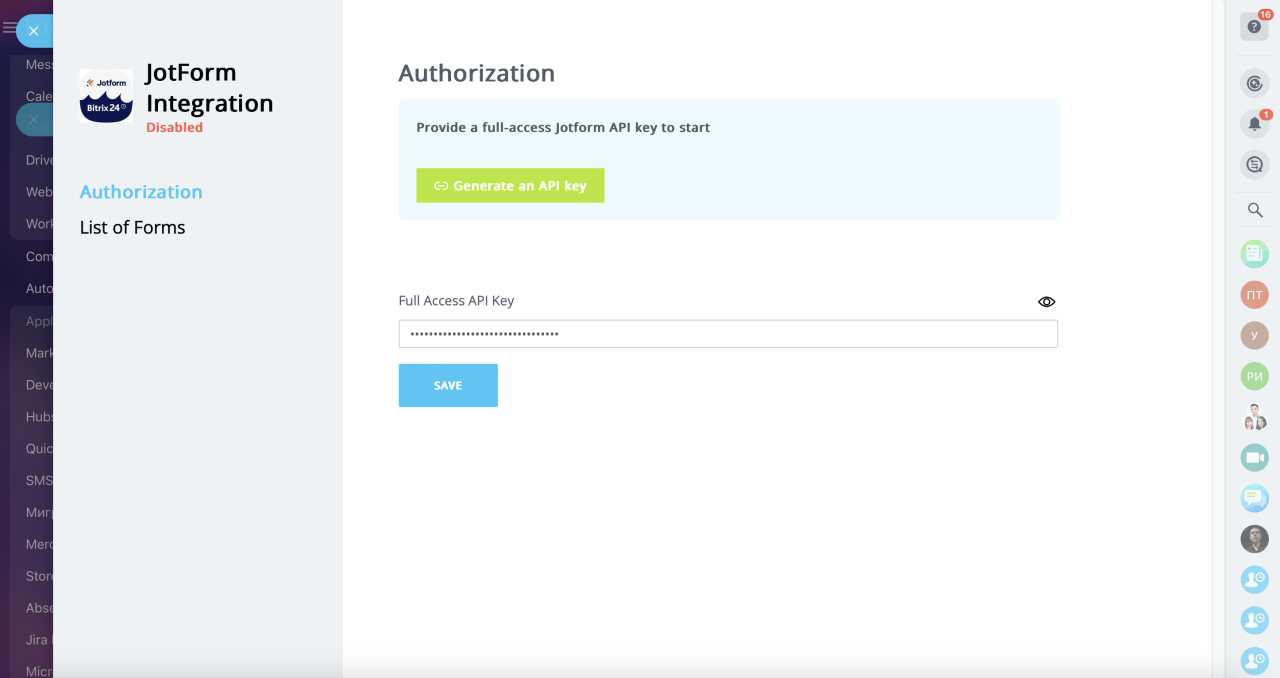
Once you have the key, copy and paste it on the Jotform settings page and hit save in your Bitrix24 to apply changes and to load forms linked to your account.
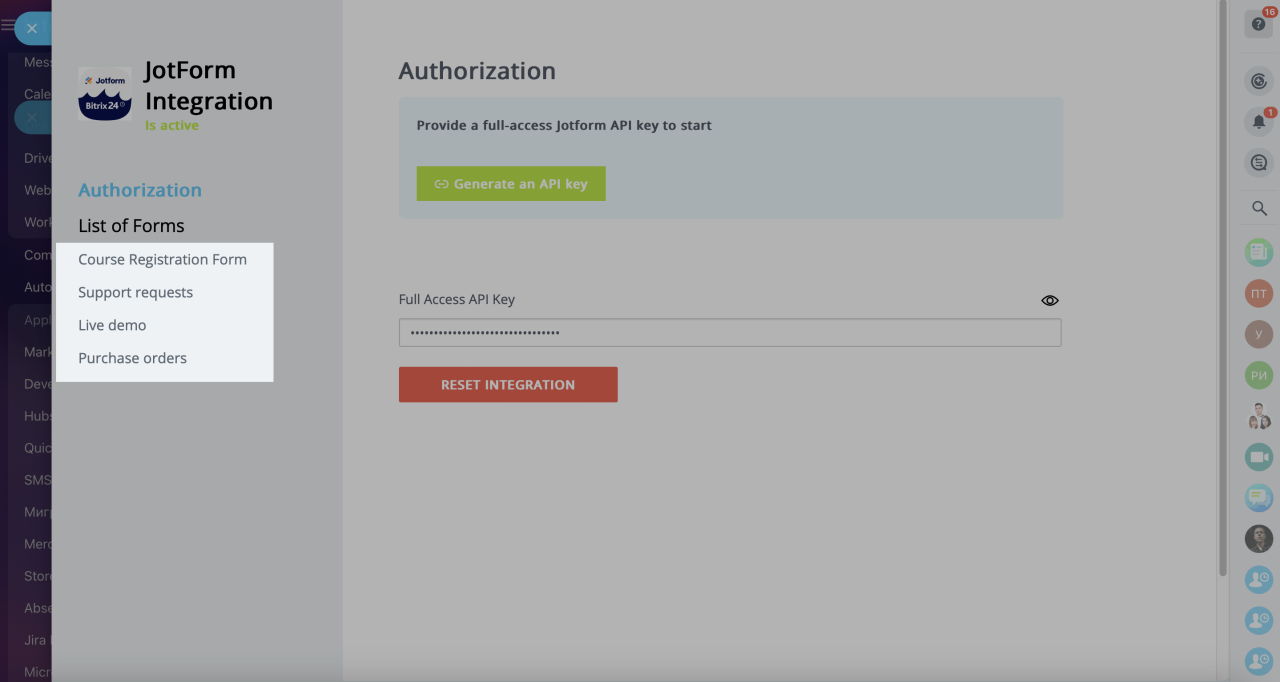
Once you provide the full access API key and save the changes, the list of forms will be displayed in the left panel of the main application page.
These forms are inactive for now. To proceed, you'll need to set up field mapping and enable sync for the forms you would like to monitor.
How to set up forms' sync
When connected, you will see all of the available web forms on the setting page in Bitrix24.
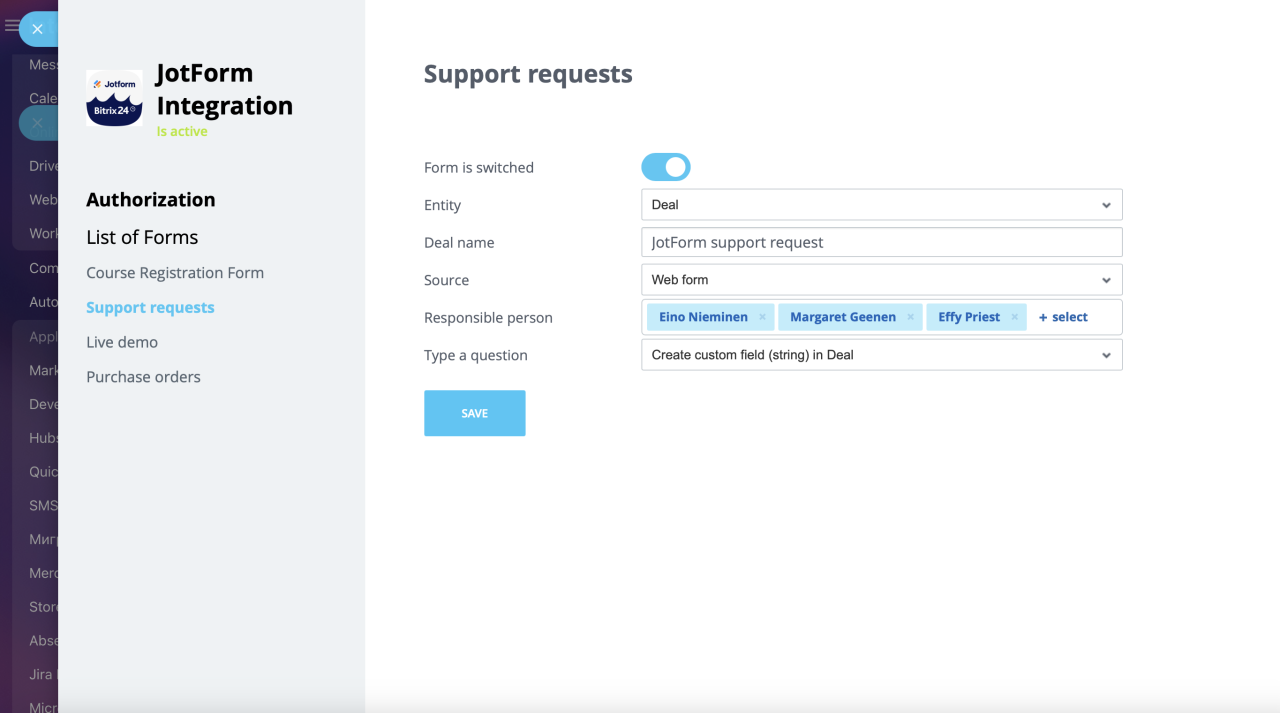
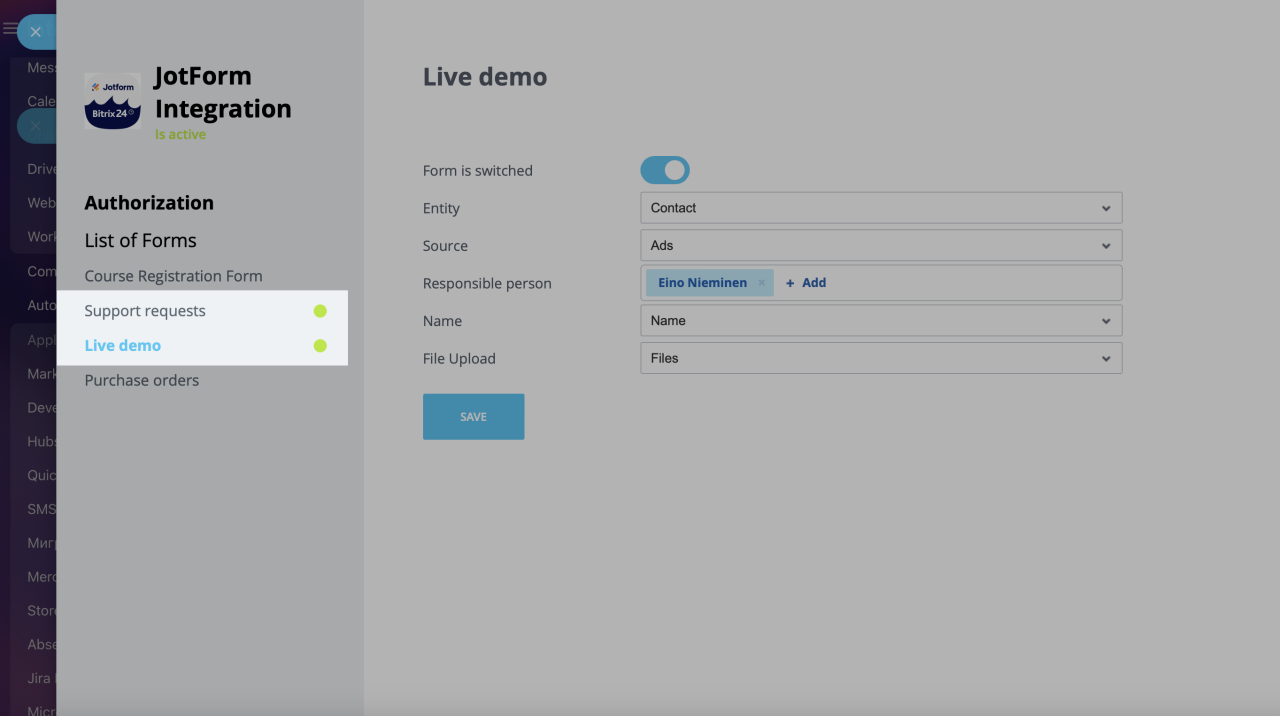
Switch to the form you need by clicking unto its name and set field mapping preferences:
There are several available field options to select from:
| Matching field | Description |
|---|---|
Name, Phone, Email
|
System fields to store basic customer contact info |
[CRM item] name
|
Set a default name to be assigned to new leads, deals or contacts (depending on the item you choose to be created) |
Source
|
Select CRM source for new leads / deals / contacts |
Responsible person
|
A list of Bitrix24 users to be set as responsible for incoming leads / deals / contacts (randomized queue) |
Products
|
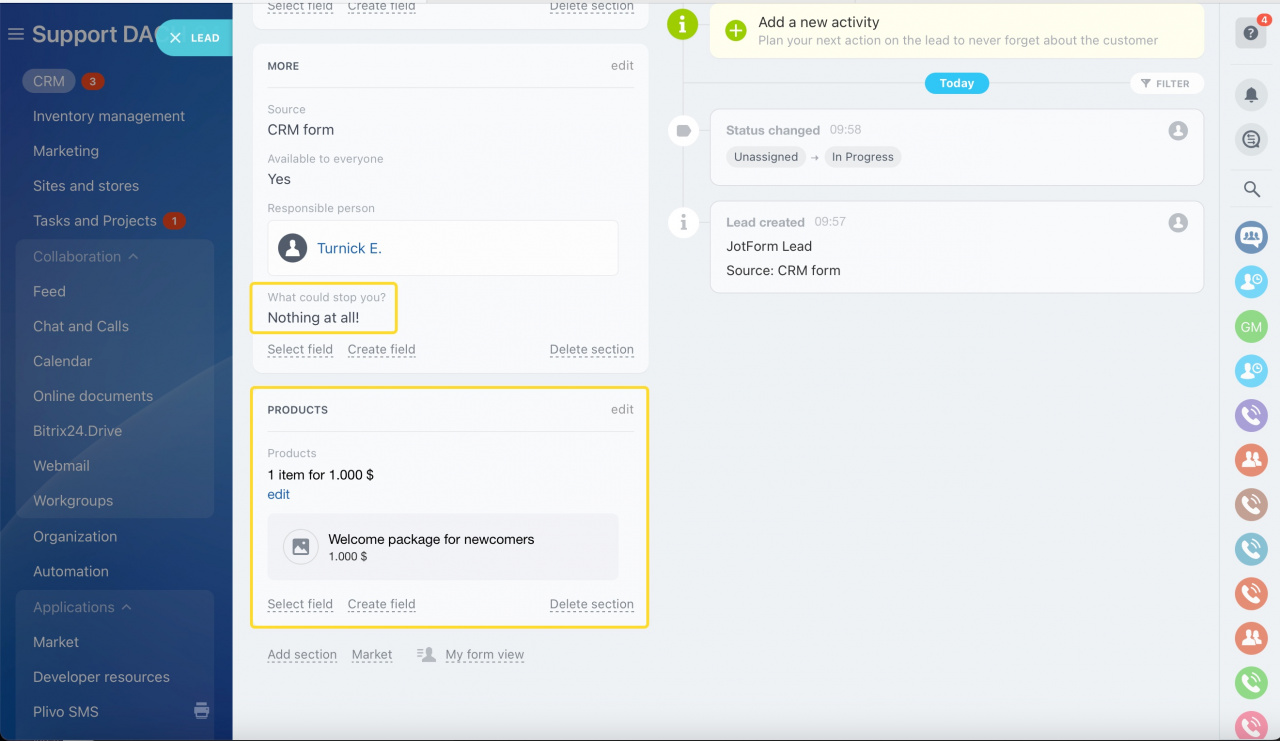
If specified a form will create a set of products based on customer's form submission and will add it as list to the Products tab of the CRM item |
Custom fields in [CRM item]:[custom field's name]
|
This option allows for selecting an existing custom fields in Leads / Deals / Contacts that will be used to store data |
Create custom field (string) in [CRM item]
|
The option can be used to create new custom fields for storing form submissions' data. Note that the fields have the String type and may not be applicable in certain scenarios |
Files
|
Specific option for file uploads. If enabled for a certain form field, it will create the Upload File custom field in leads / deals / contacts. Files will be listed as direct links |
None
|
If you select None, that field's value will not be passed to Bitrix24 from Jotform |
Save the form settings to start receiving submissions' data in Bitrix24 CRM. Active forms with enabled sync will be highlighted with a green bubble in the forms' list.
Processing form submissions
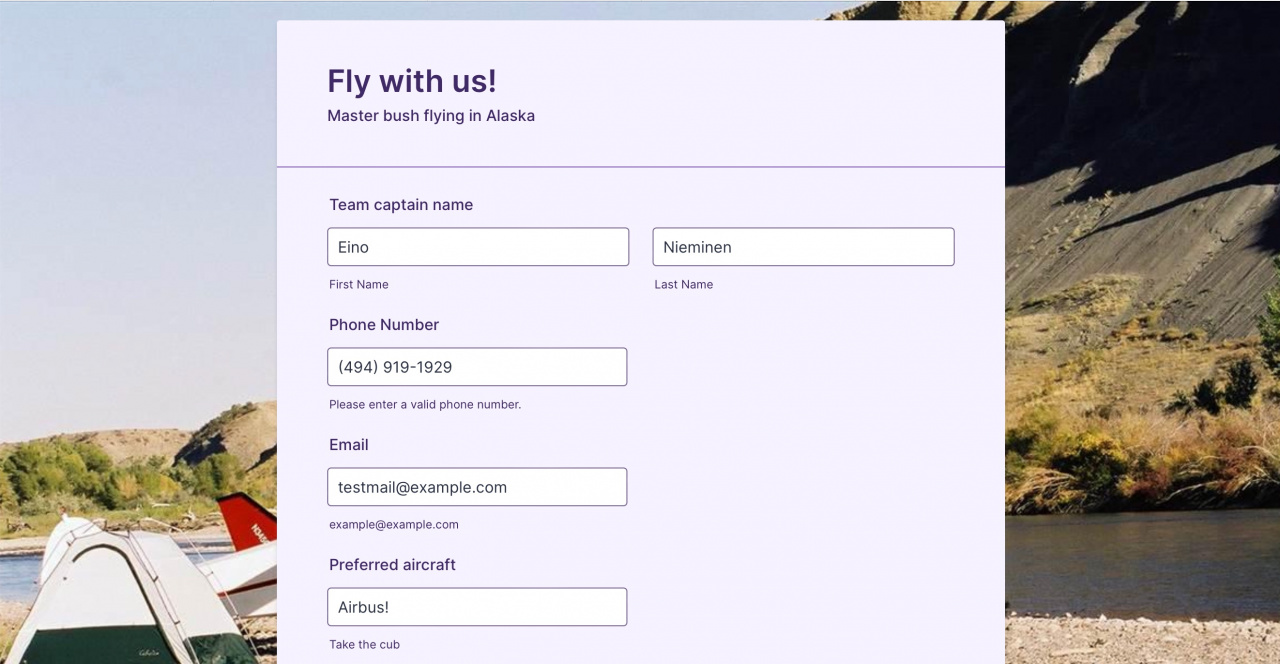
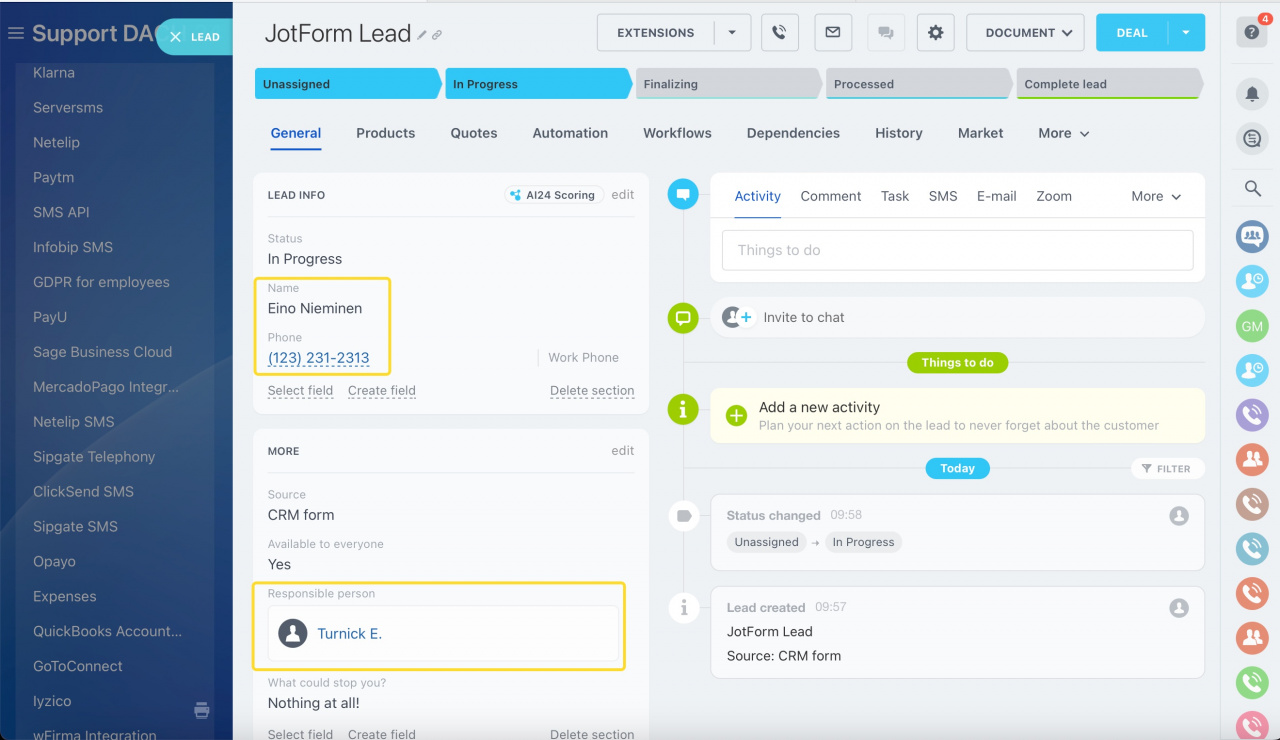
Process leads in Bitrix24 CRM taking advantage of the entire CRM toolset, automation, and communication tools. When a client submits a JotForm, it automatically generates a lead or a contact in the CRM per preferences:
Simple as that!
See also:

