It is important not only to get new leads, but also to assign them to the right person in your team. One option is to create a queue of employees for lead processing for each connected source.
Distribution of employees responsible for leads
Explore alternative criteria for assigning leads rather than sources. Create a workflow for all new leads and apply custom lead distribution conditions.
Bitrix24 pricing page
To add a new workflow template for leads,
-
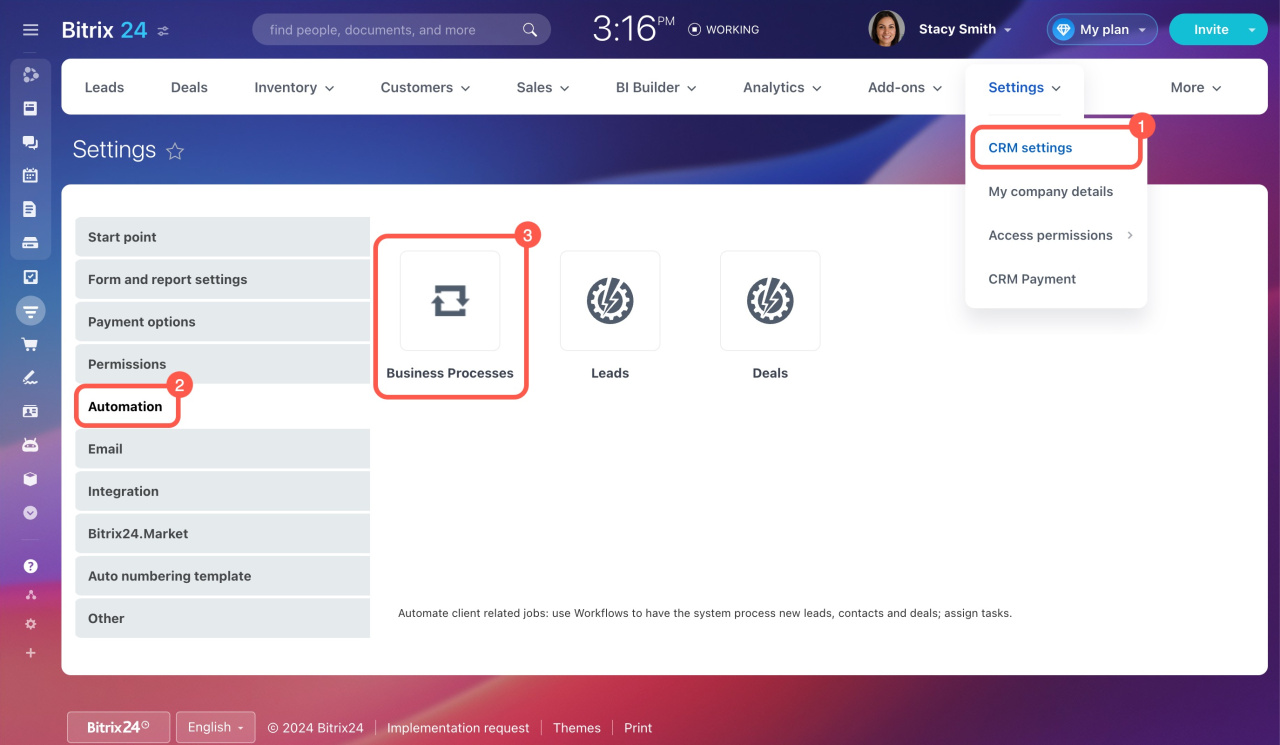
Go to CRM > Settings > CRM settings.
-
Open the Automation tab and select the Business Processes block.
-
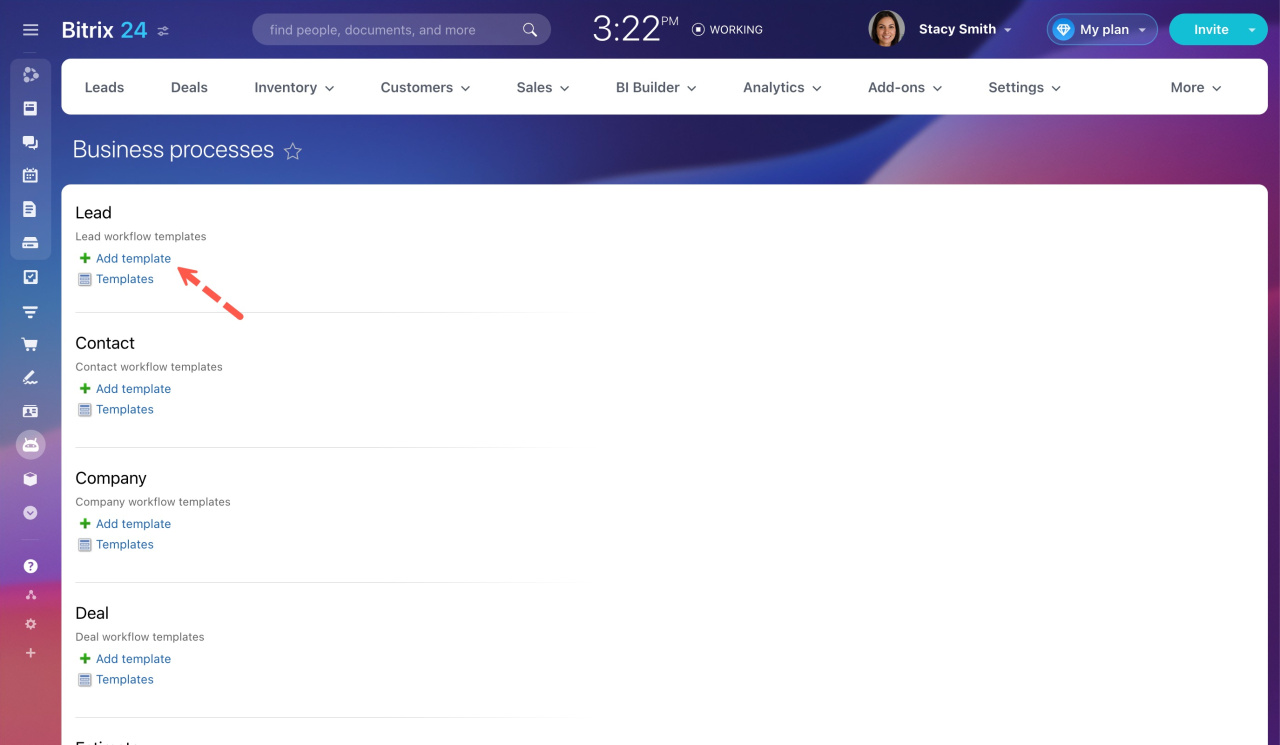
Click Add template under Lead.
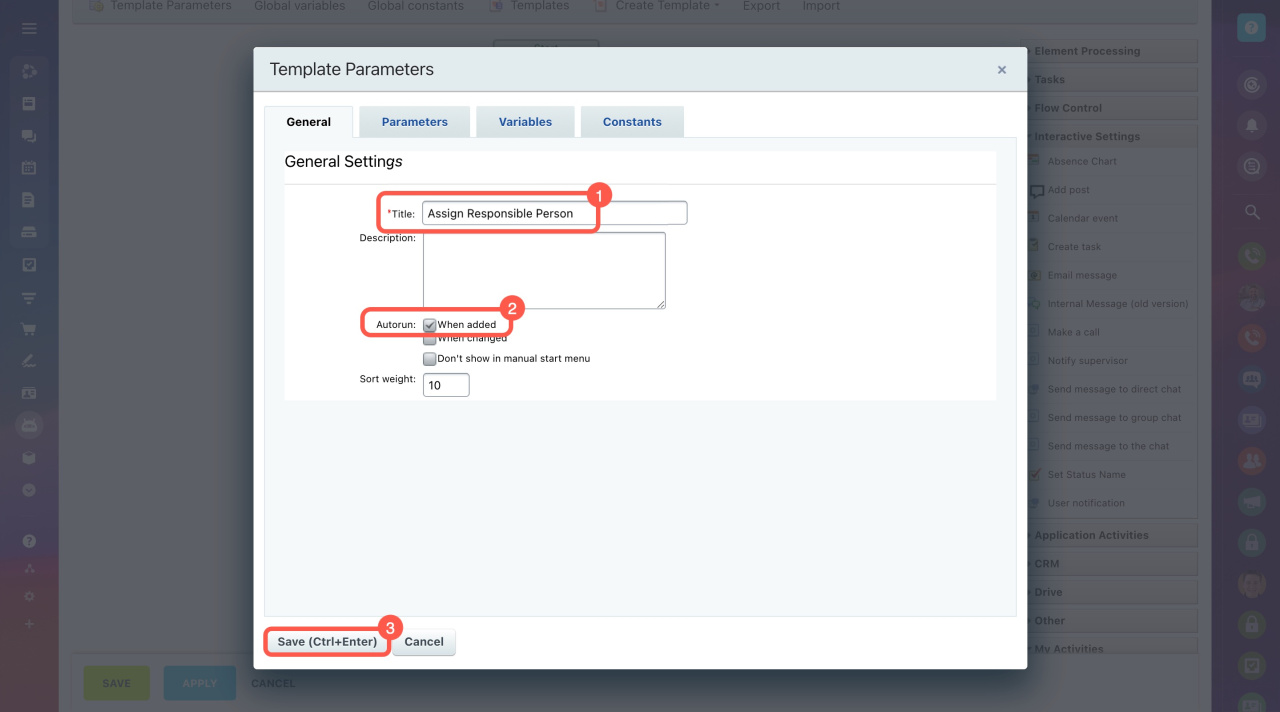
The workflow designer opens, and the pop-up window with template parameters appears. Specify the template name, keep the option to run it when added, and click Save.
"Autorun: when added" option in workflow templates
Now, you can create a flowchart and configure it according to your needs.
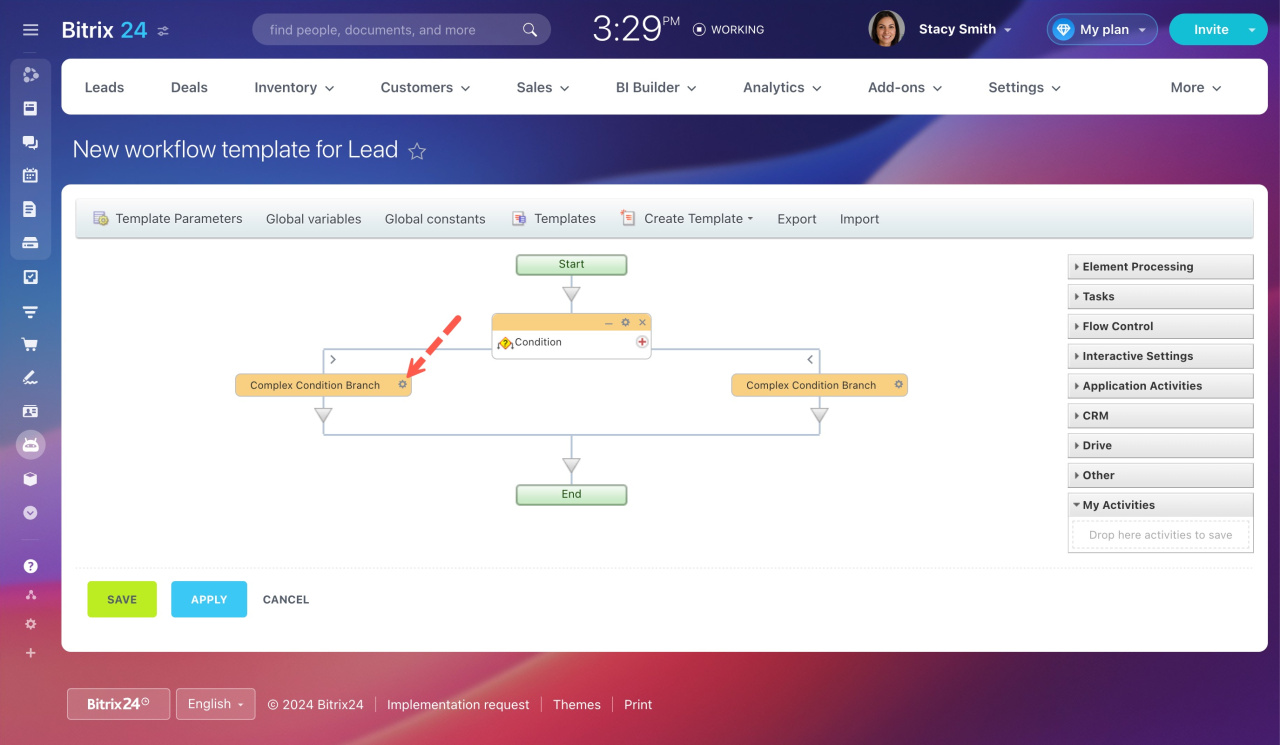
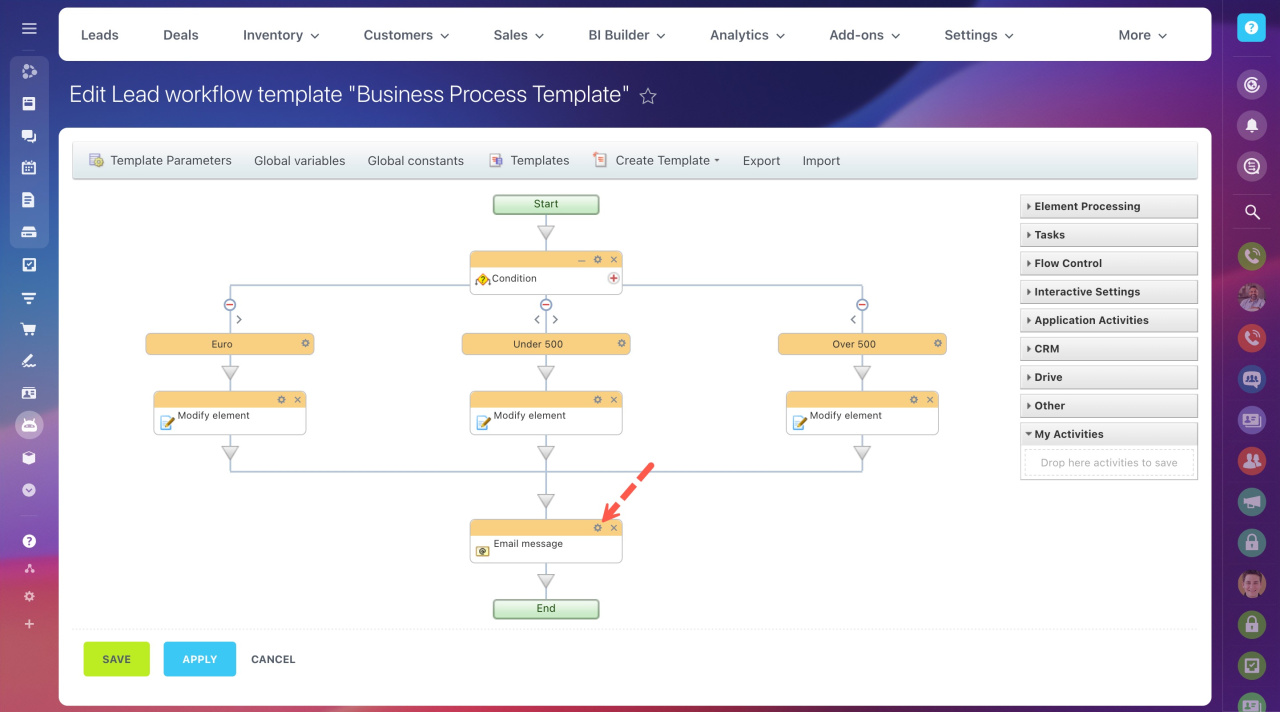
First, add the Condition activity to your workflow. In our example, we'll sort leads according to these criteria:
- leads are to be paid in euro
- lead amount is less than 500 USD
- lead amount is more than 500 USD
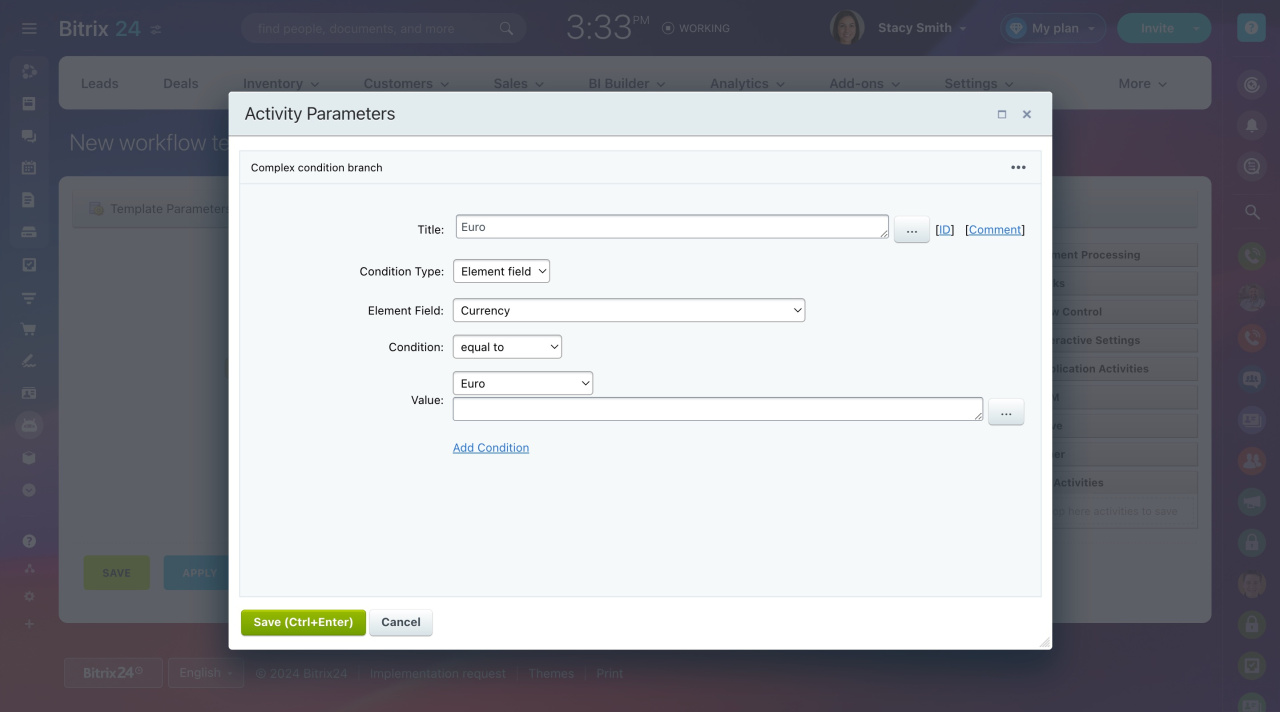
To set up a condition, click the gear on the right of the Complex Condition Branch block.
A pop-up window appears, and you can adjust the activity parameters.
-
Title: Rename the activity if needed.
-
Condition Type: Select Element field to use lead fields further.
-
Element Field: Choose a lead field whose value you need to know.
-
Condition: Select an appropriate condition from the drop-down list. To specify the exact value, we use equal to.
-
Value: Enter the value required for comparison.
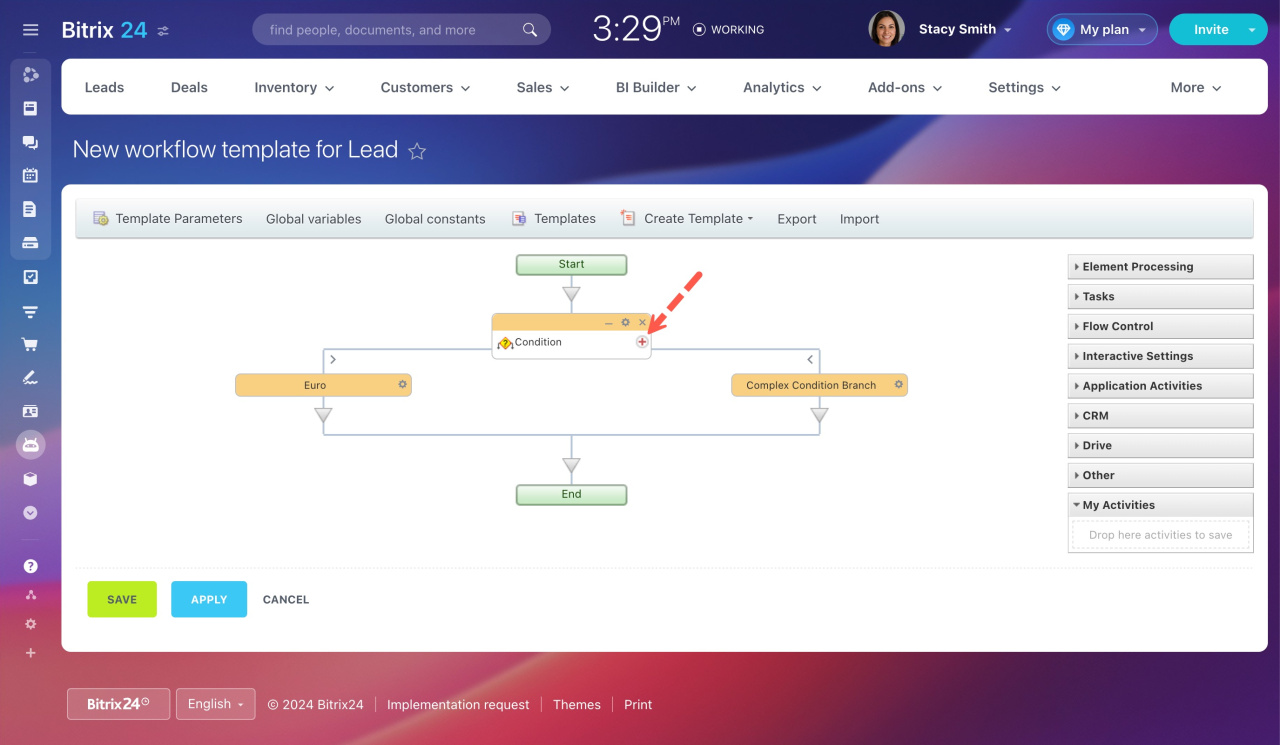
To add another condition branch, click + on the Condition block.
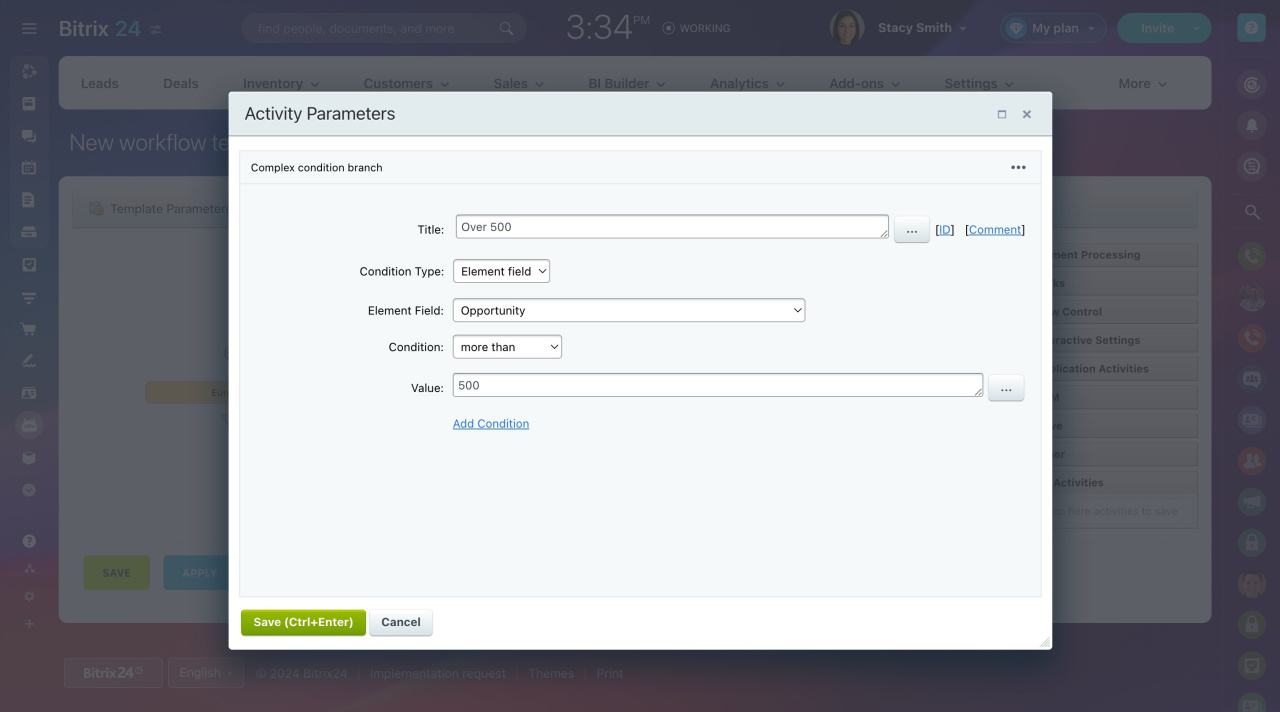
In the same way, configure two more conditions according to whether the amount is more or less than 500 USD.
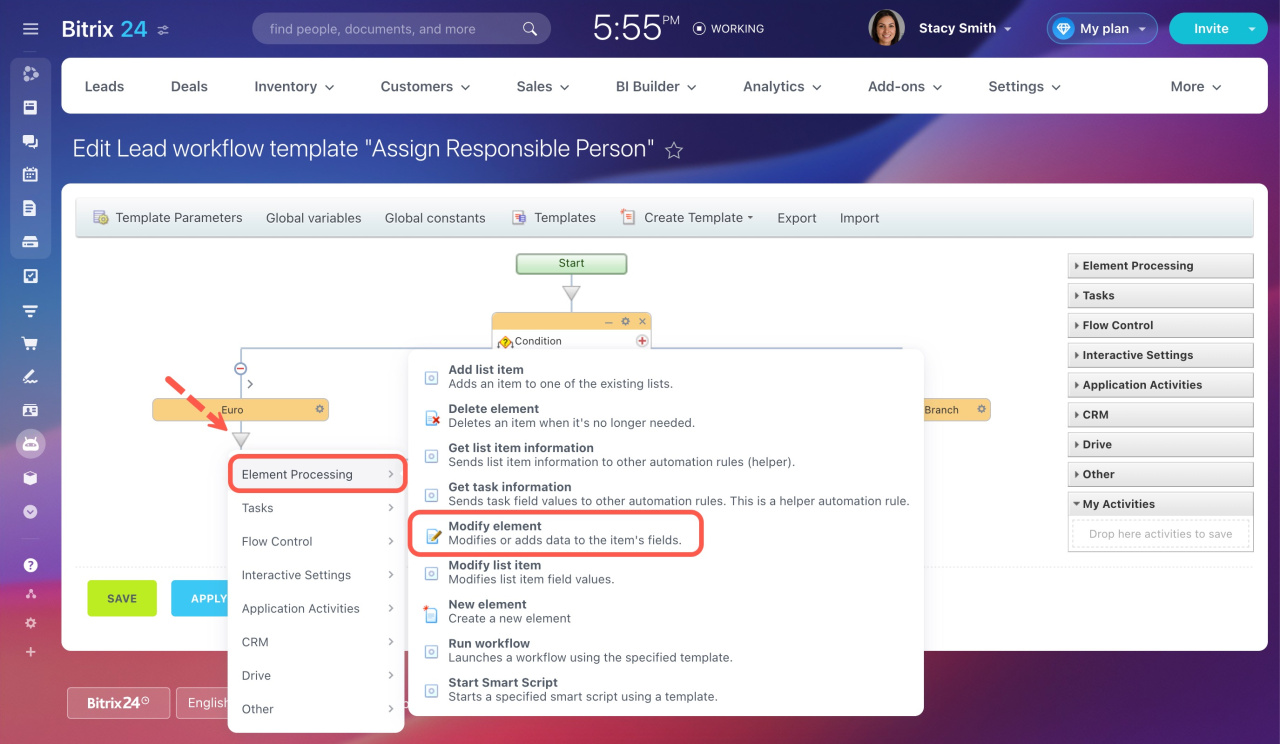
Under each condition branch, add the Modify element activity.
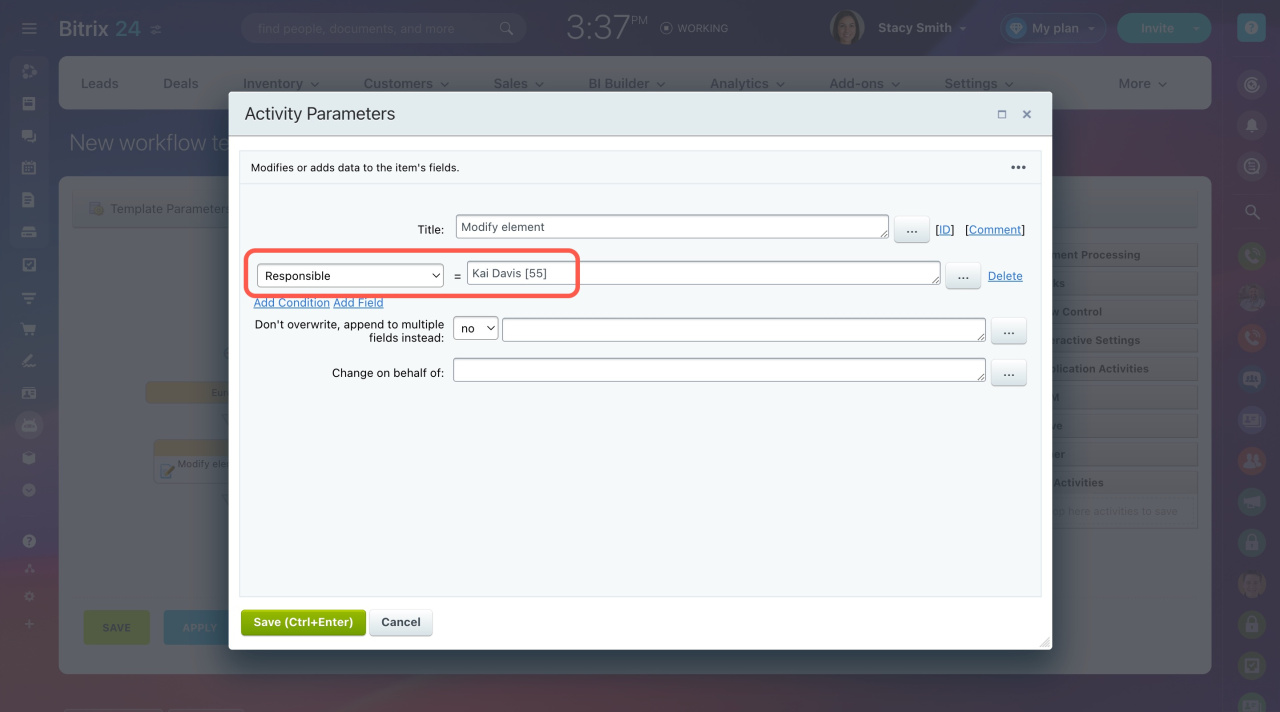
Configure each Modify element activity to set the Responsible field to the person who should be working on that type of lead.
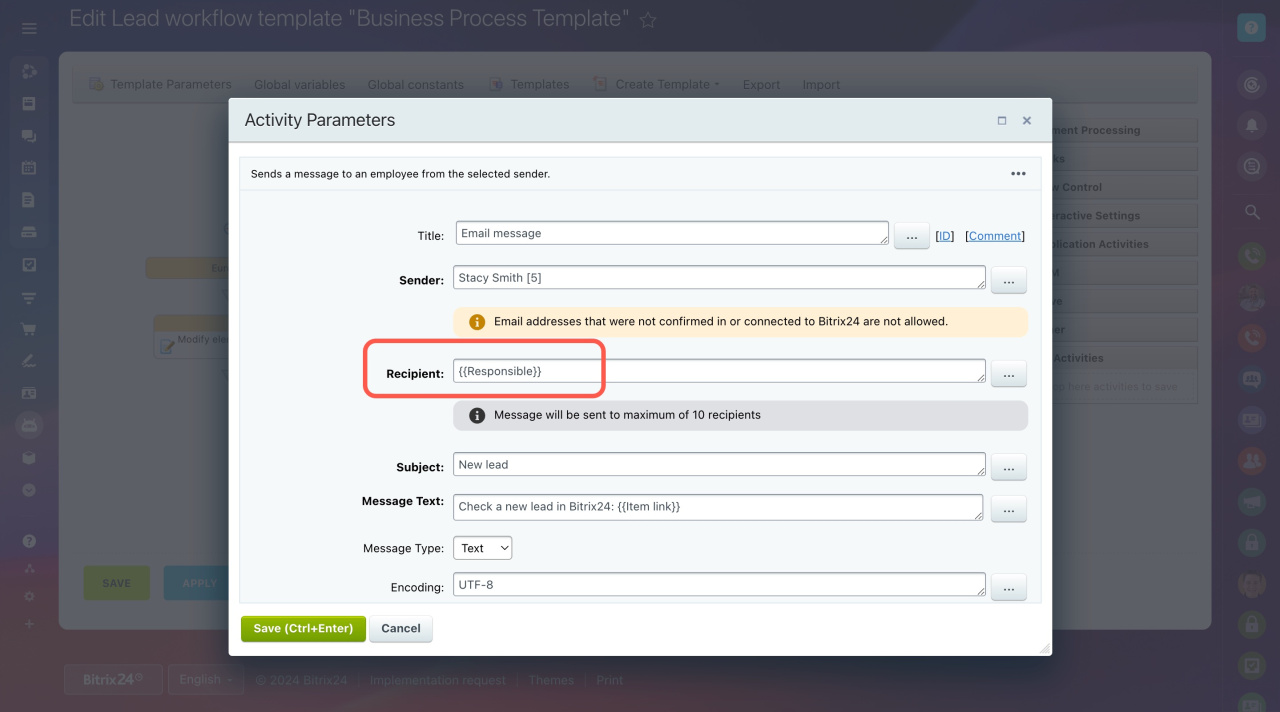
Once it's done with conditions, let's add the Email message activity that sends an email to the newly assigned responsible person.
Open its settings and specify {{Responsible}} in the Recipient field.
Save your workflow template. When a new lead appears in CRM, it will automatically be assigned to the proper person. Also, the system will email them about a new lead.

