In the BI analytics section, you can connect your analytics system and transfer data from Bitrix24. Then you can create a report in Microsoft Power BI, post it in your account, and share it with your colleagues.
Connect the Microsoft Power BI analytics system with step-by-step instructions.
Step 1. Install the app
First, you need to install the free Microsoft Power BI Desktop app.
Step 2. Get your connection data
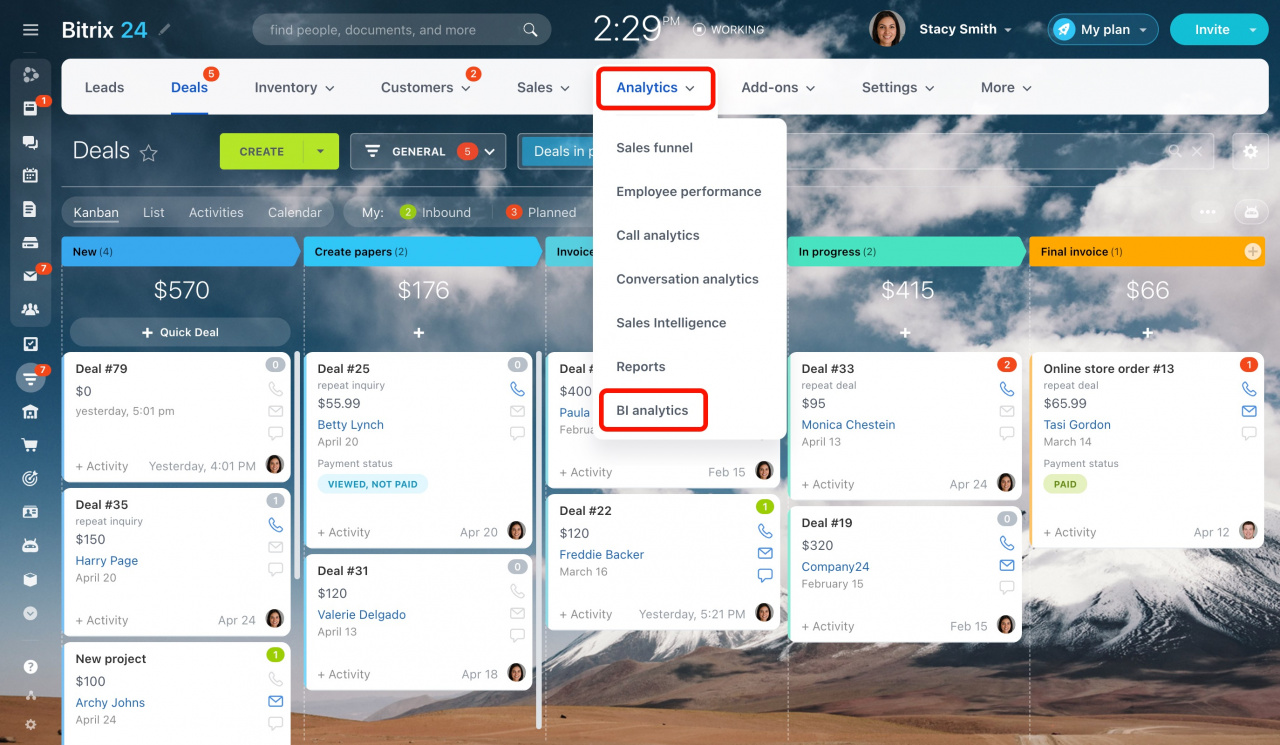
Open your Bitrix24 and navigate to CRM > Analytics > BI analytics.
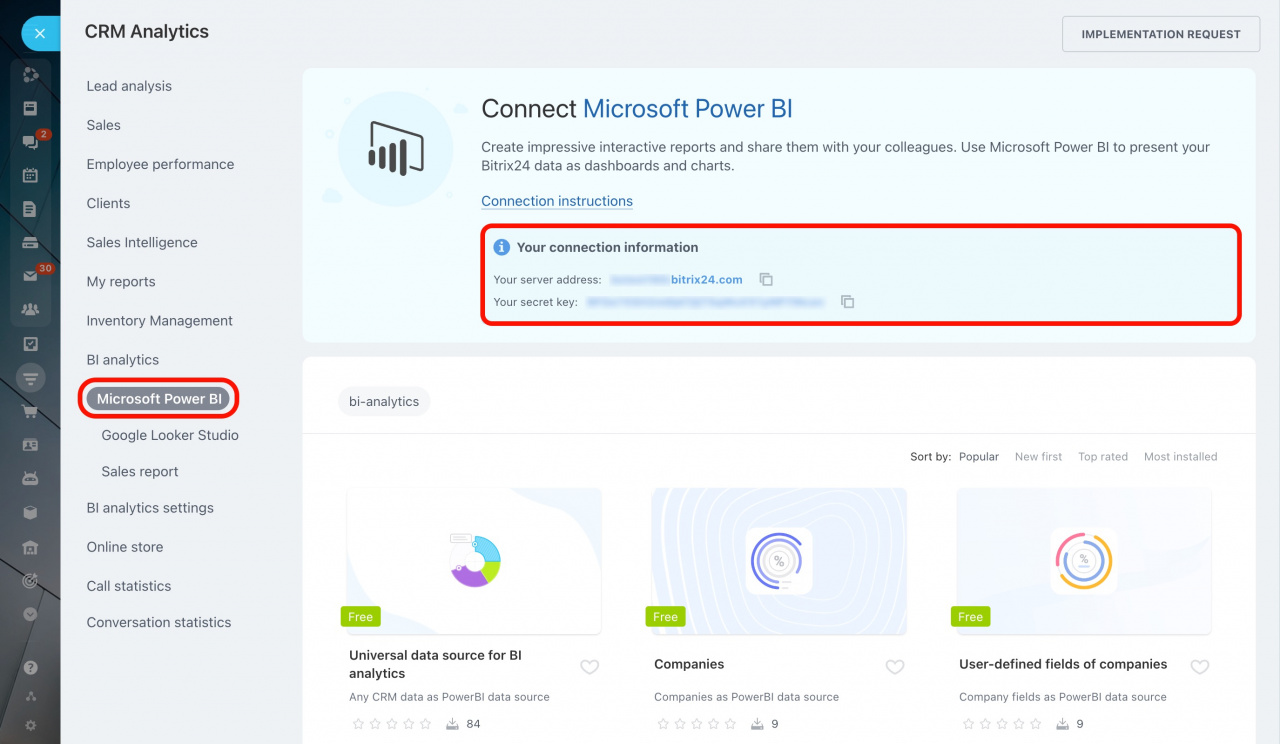
Open the Microsoft Power BI tab and copy your connection information.
Step 3. Install a template
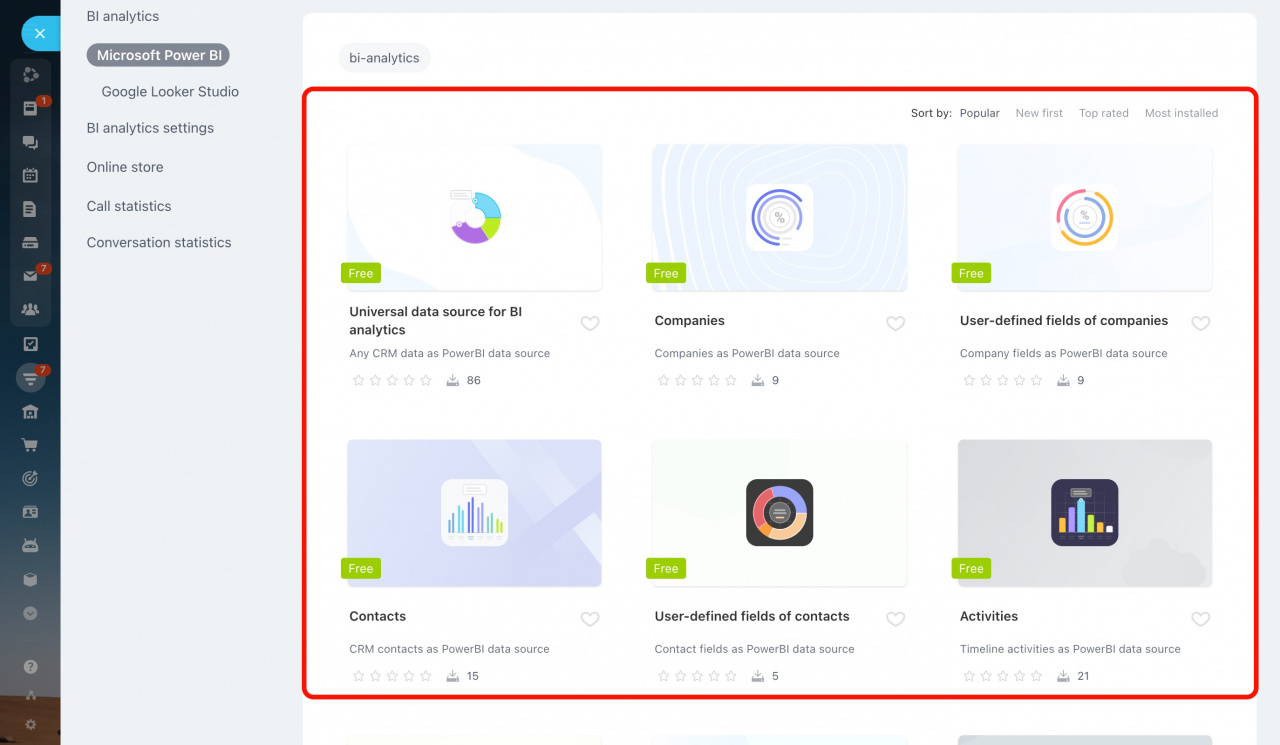
Scroll down and select the appropriate template for your report.
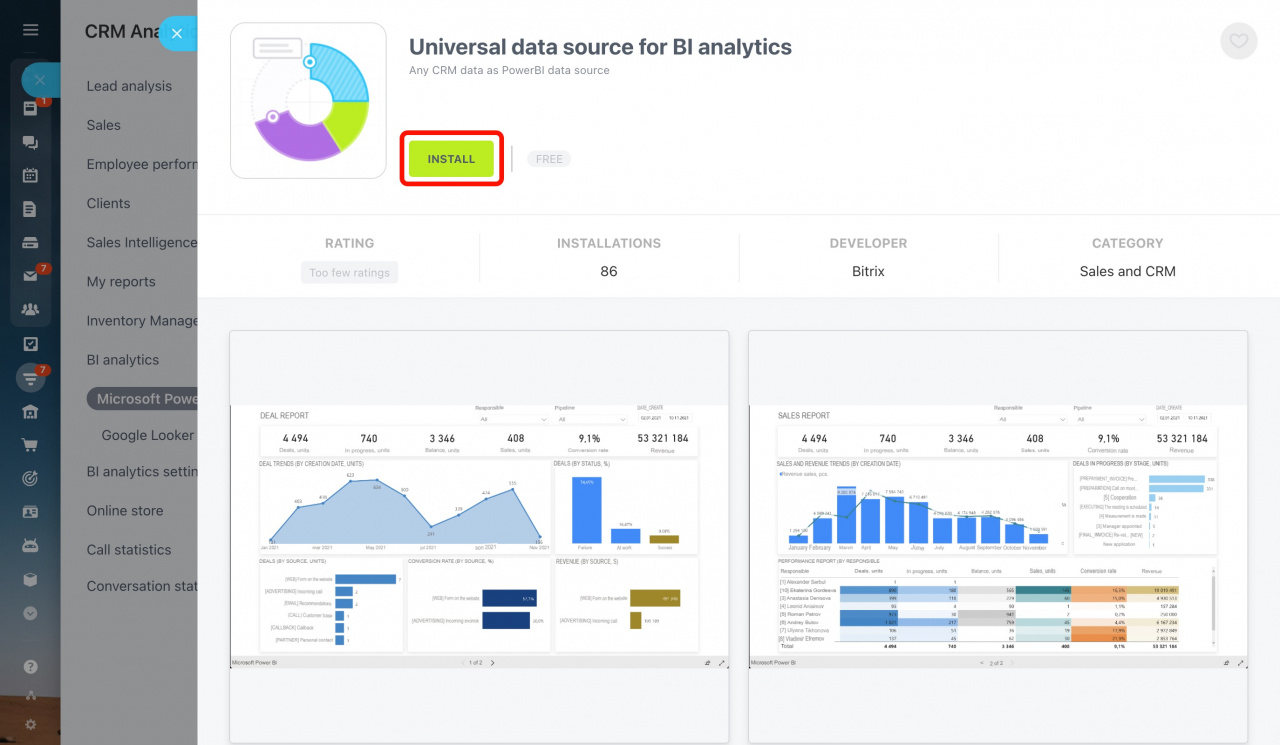
For example, you can install Universal data source for BI analytics that contains the bi-connector's fields with information from leads, deals, smart processes, etc.
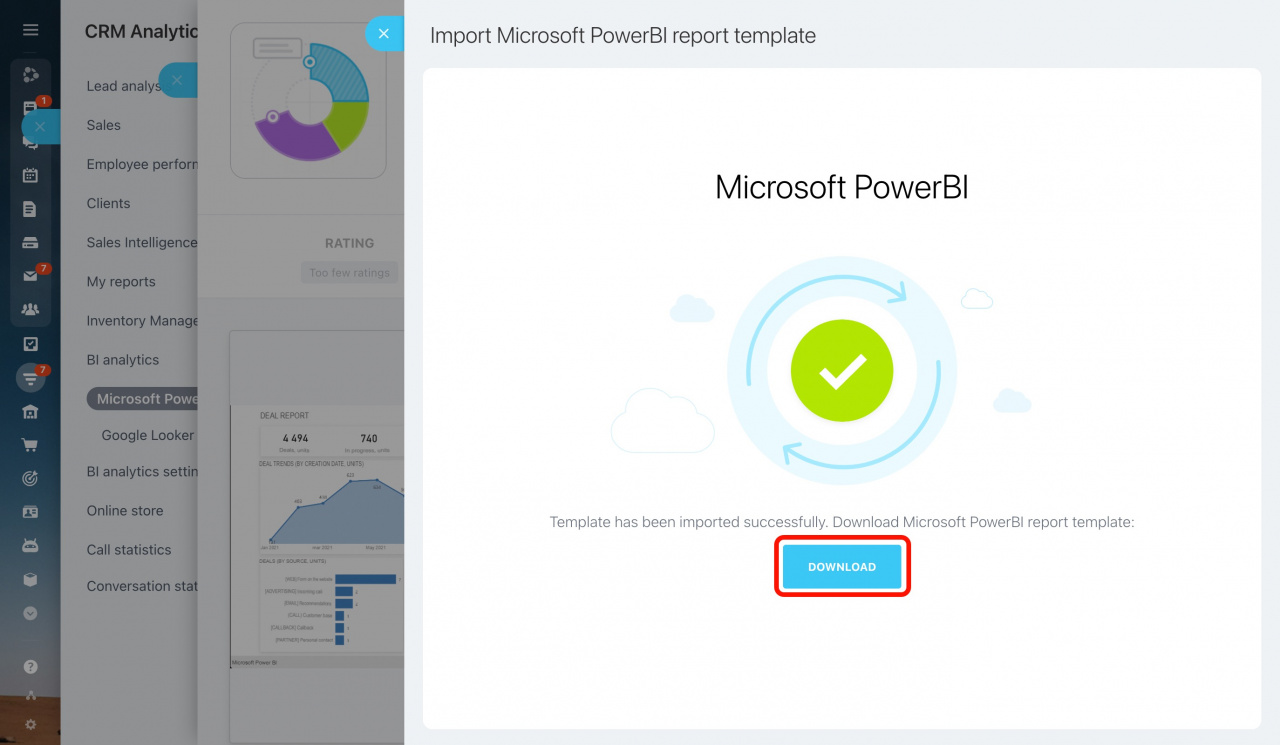
When the import finishes, click Download.
Step 4. Connect Microsoft Power BI
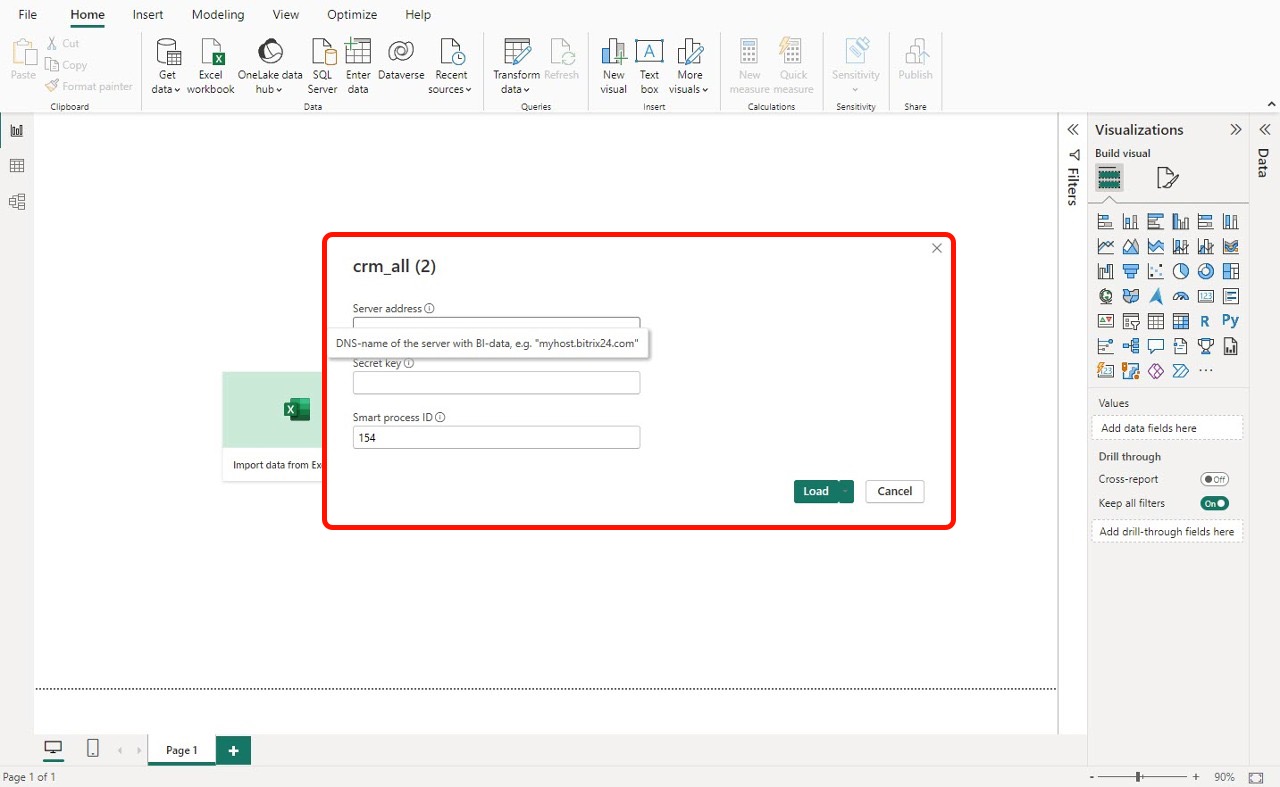
Open the Power BI Desktop file. Enter the server address and secret key from the connection information section, and then click Load. The Universal data source provides for uploading SPA data, so you need to specify a smart process ID in the corresponding field.
Where to find the SPA ID
The templates serve as examples. Edit them before using to avoid exceeding the limit in the BI connector. Change the time range in the templates as needed before uploading the data.
How to reduce the number of rows uploaded by Microsoft Power BI
Enter the account address and secret key from the connection information section and click Load > Edit.
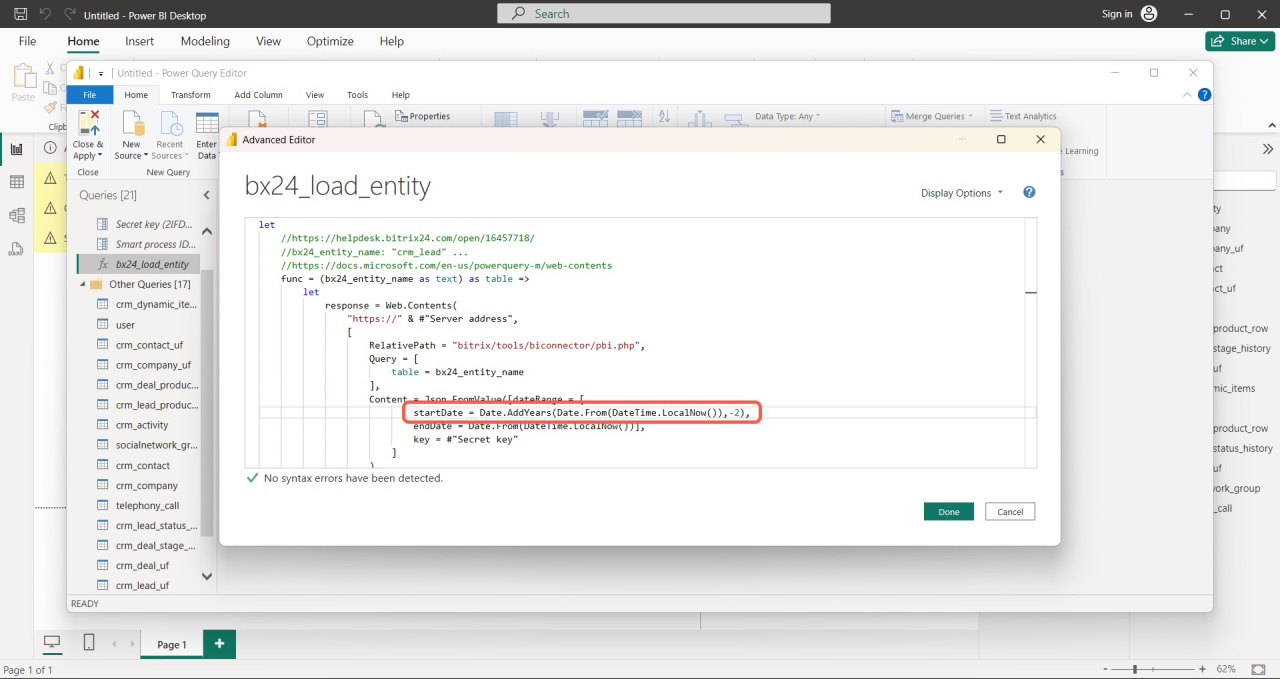
Right-click on bx24_load_entity and select Advanced Editor.
In the pop-up window, adjust the time range of the data requested from Bitrix24. For example, to get data for the last two years from the current date, enter -2 in the Advanced Editor window.
To publish the report to the cloud, click Publish.
Then log in to the Power BI cloud service.
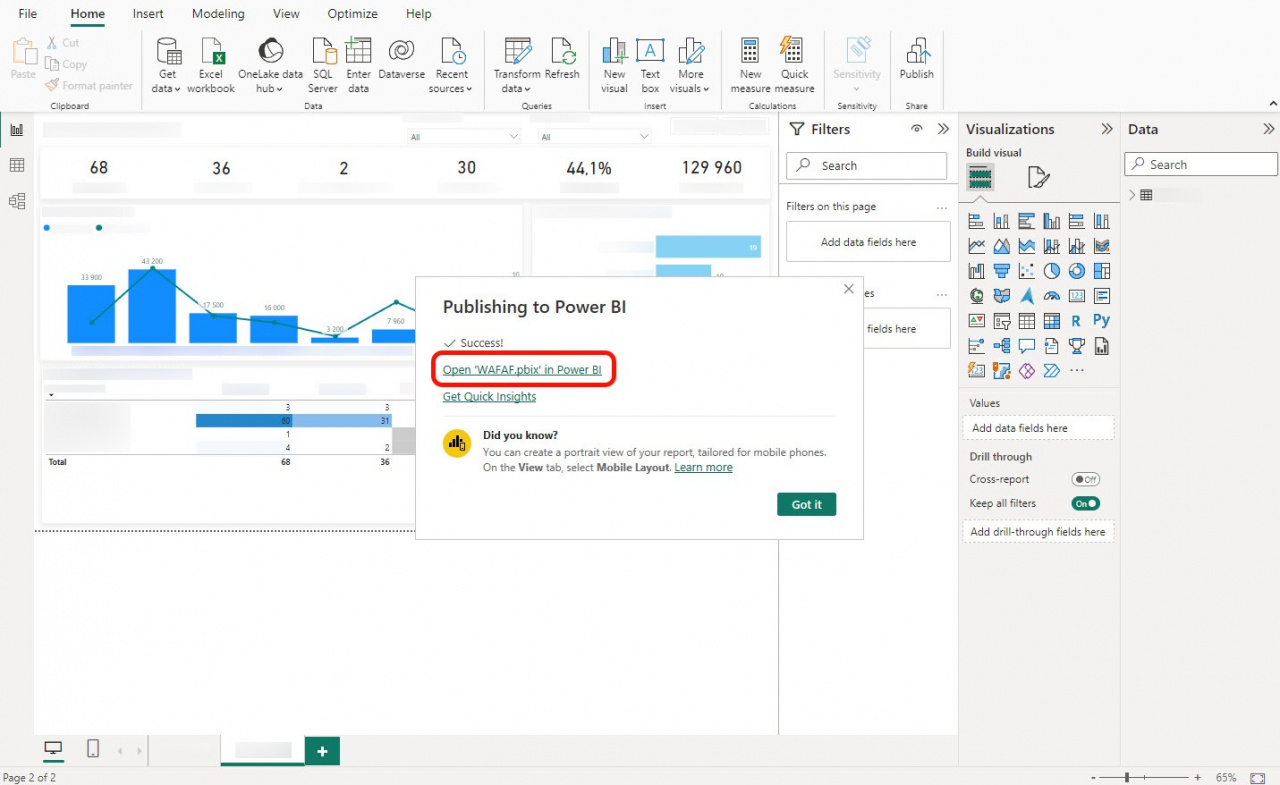
Wait for the report to finish publishing to the cloud and select Open report in Power BI. You will be redirected to the Power BI (Microsoft) cloud service.
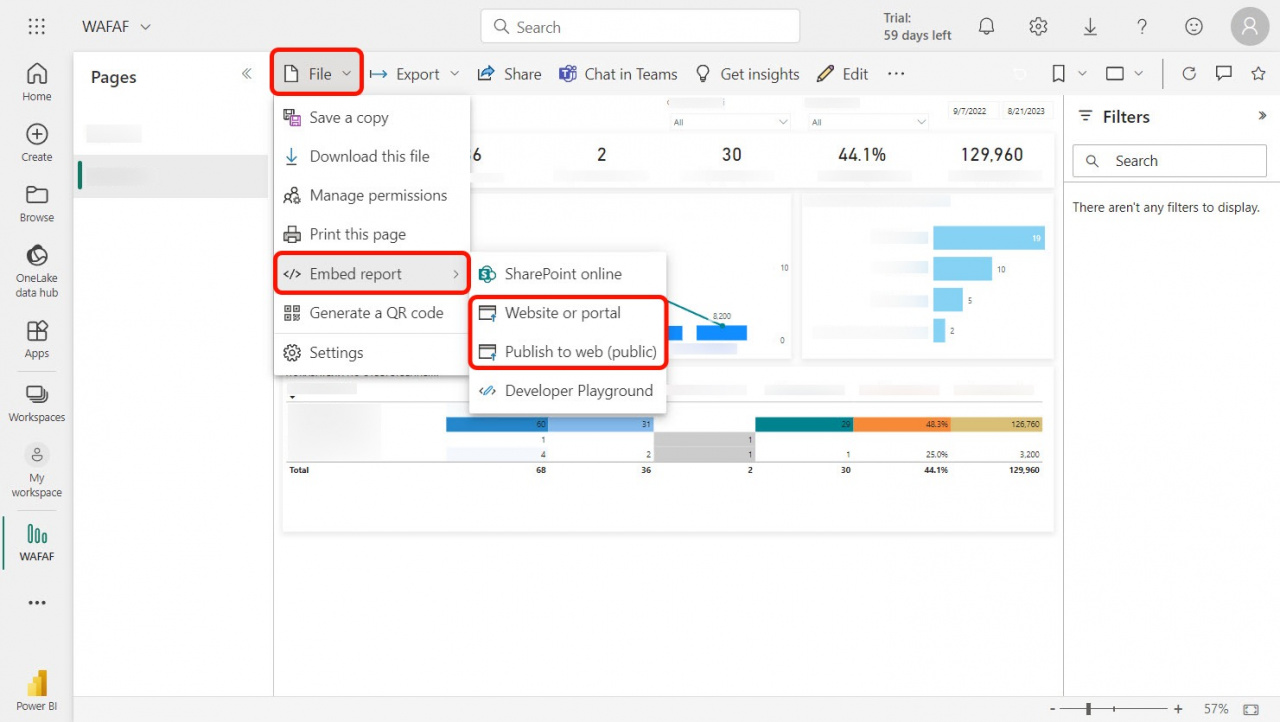
In Power BI (Microsoft) cloud service, open the File menu, select Embed report - Publish to web (public).
You can also publish a report to Website or portal.
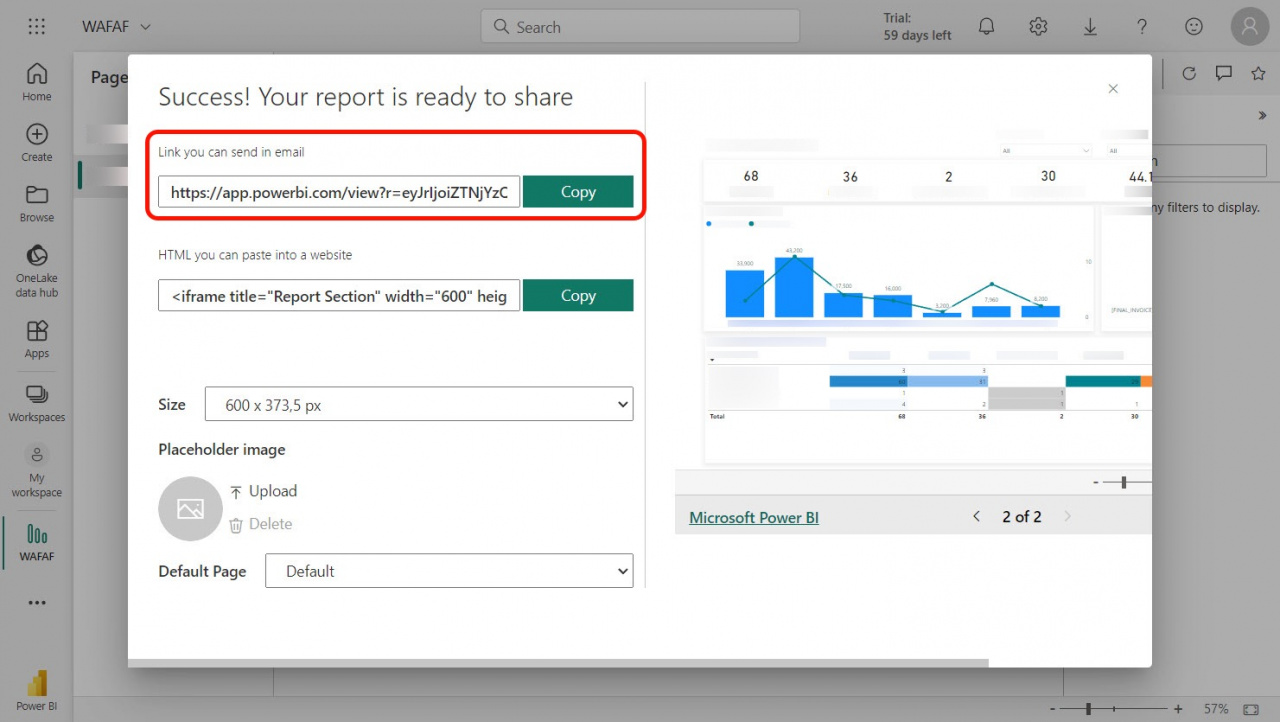
Then copy the link from the field.
Step 5. Add your report to Bitrix24
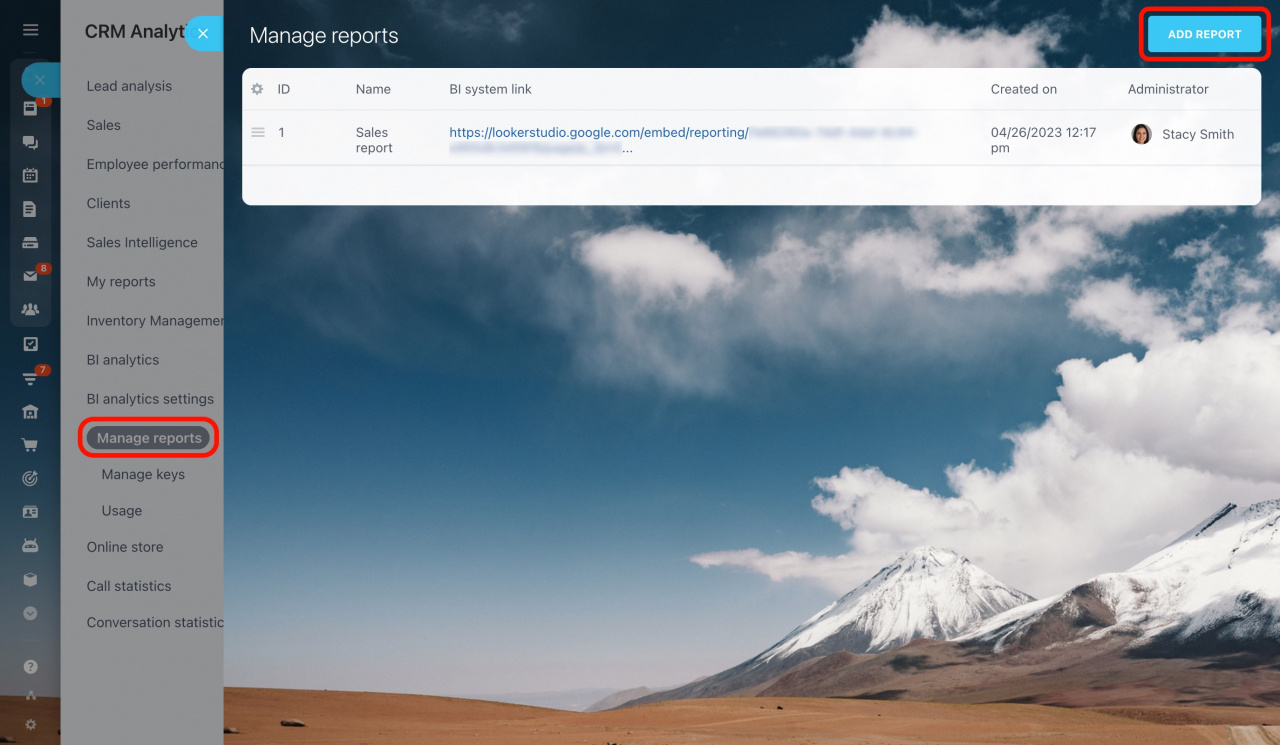
In Bitrix24, in the BI analytics section, open the Manage reports tab and click Add report.
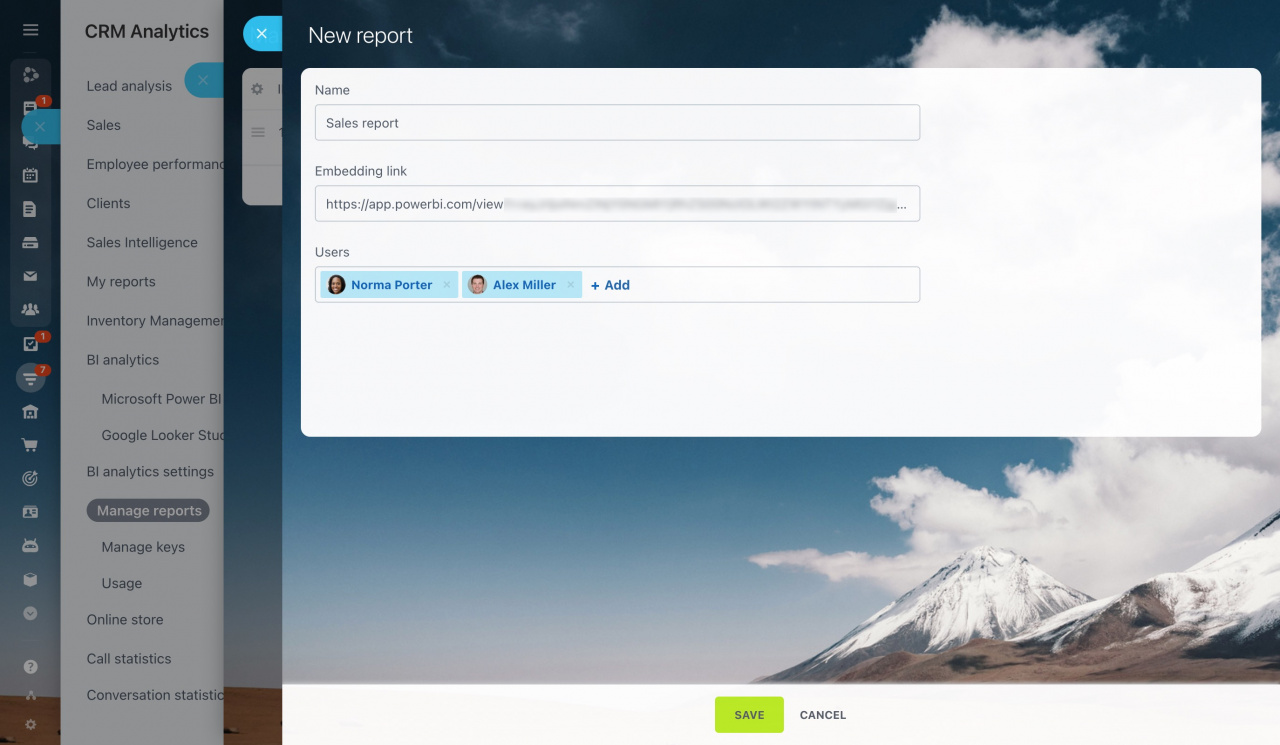
Type in a title, add a link, and specify the users who will see the report.
The report will appear in the list and be available for viewing in your Bitrix24. It will also appear as a new left menu item for users who have access.
FAQ
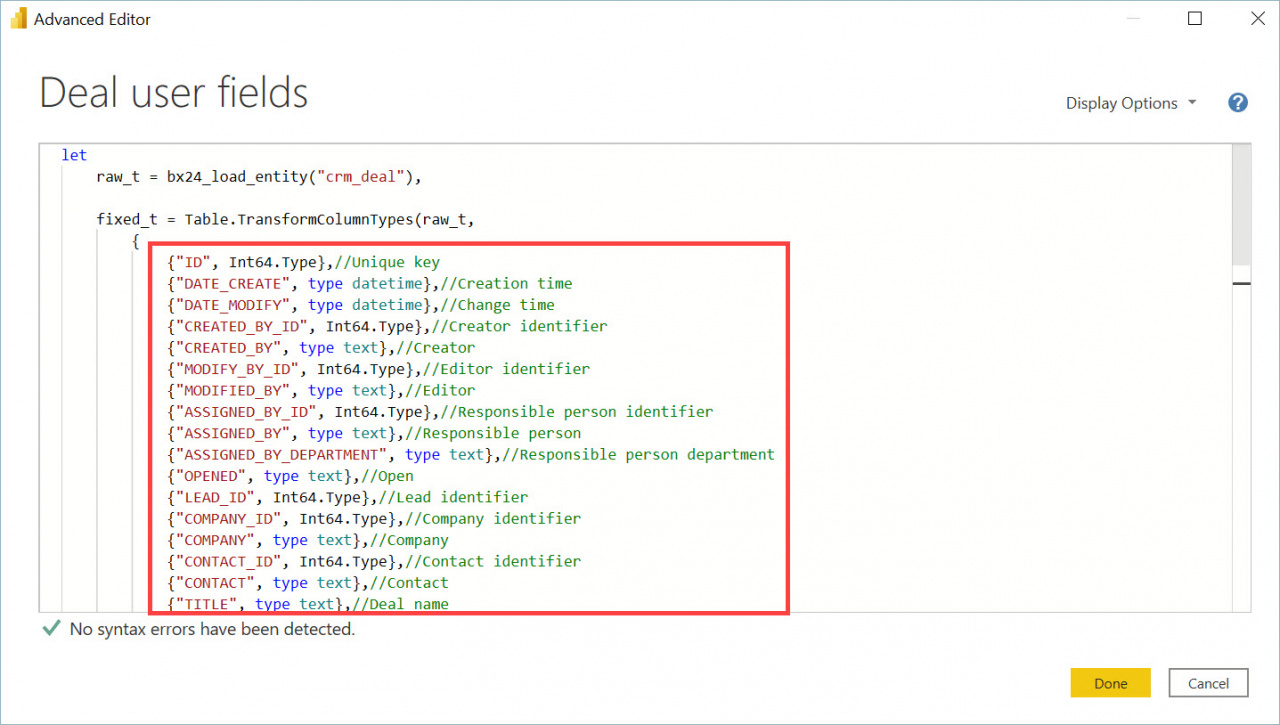
How to specify data types for columns in Microsoft Power BI
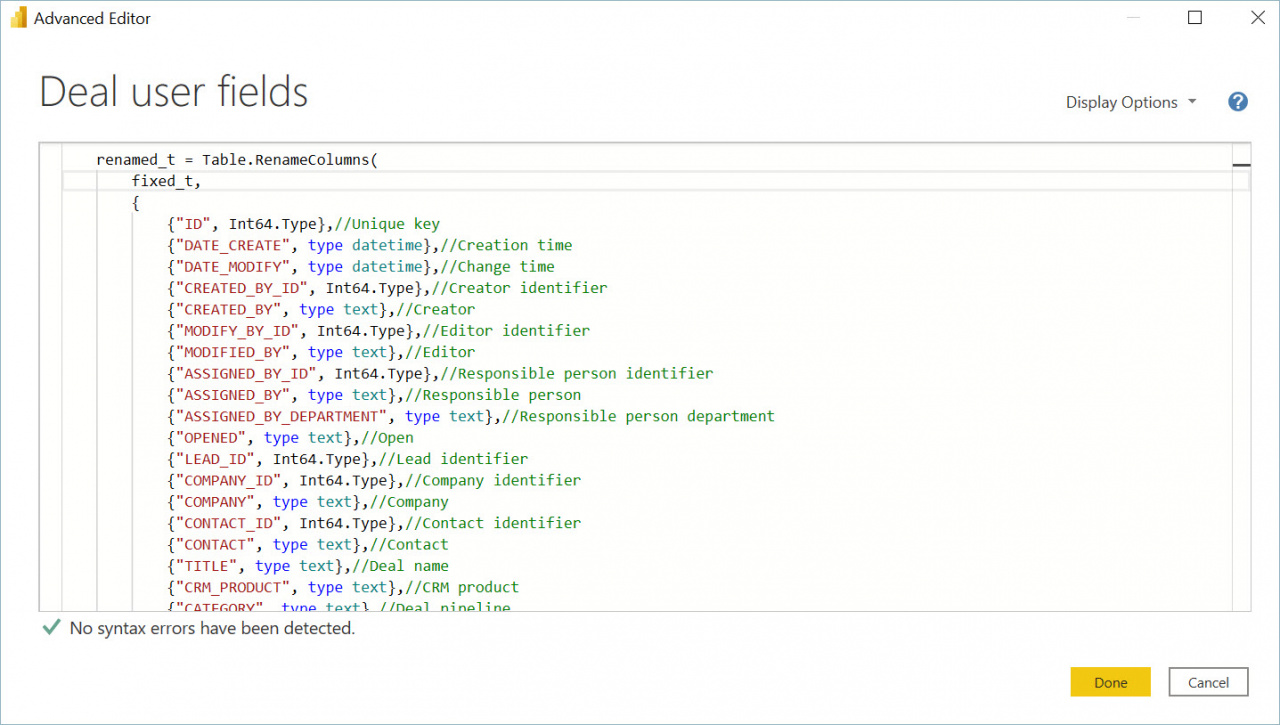
When you install a report template for Microsoft Power BI, the Transform Data section already has a set of data types for the columns. You can delete unnecessary types in the Advanced Editor window, or copy them and use them for other entities.
You can also change the column names for your report in this window.
How to update report data in Microsoft Power BI
To update the data in the built-in report, open the Microsoft Power BI cloud service.
Go to My Workspace - All.
Then select the data from your report and click the Schedule Update button.
Turn on the Maintain up-to-date data option and set the appropriate settings so that the data is updated automatically.
You can also manually update the data using the corresponding button.

