Implementing a comprehensive ticketing system is the initial stage in creating an exceptional customer experience.
This system serves as a centralized platform for managing customer inquiries, requests, and issues. Most importantly, it provides a holistic view of each customer, enabling you to deliver tailored support.
With Zendesk integration app you'll be able to track, prioritize and solve customer support tickets in Bitrix24. That means, you'll be able to integrate ticketing into wider working environment: CRM, collaboration tools, tasks and more.
If you already work with Zendesk tickets and you need to keep an eye on them while working in Bitrix24, this app might be the perfect fit you.
The app allows you to view and create Zendesk tickets right from Leads, Contacts, and Companies in your Bitrix24 account without switching between the tabs.
Zendesk integration app is available in Bitrix24.Market free of charge in all of the commercial plans and in the trial period.
How to configure the app
First of all, make sure to install the integration app from Bitrix24.Market — from the web catalog or right from within Market in your Bitrix24 account. We have a separate article dedicated to the process to help you master this scenario.
Once you've installed the app, you'll be offered to provide data required to connect to your Zendesk account.
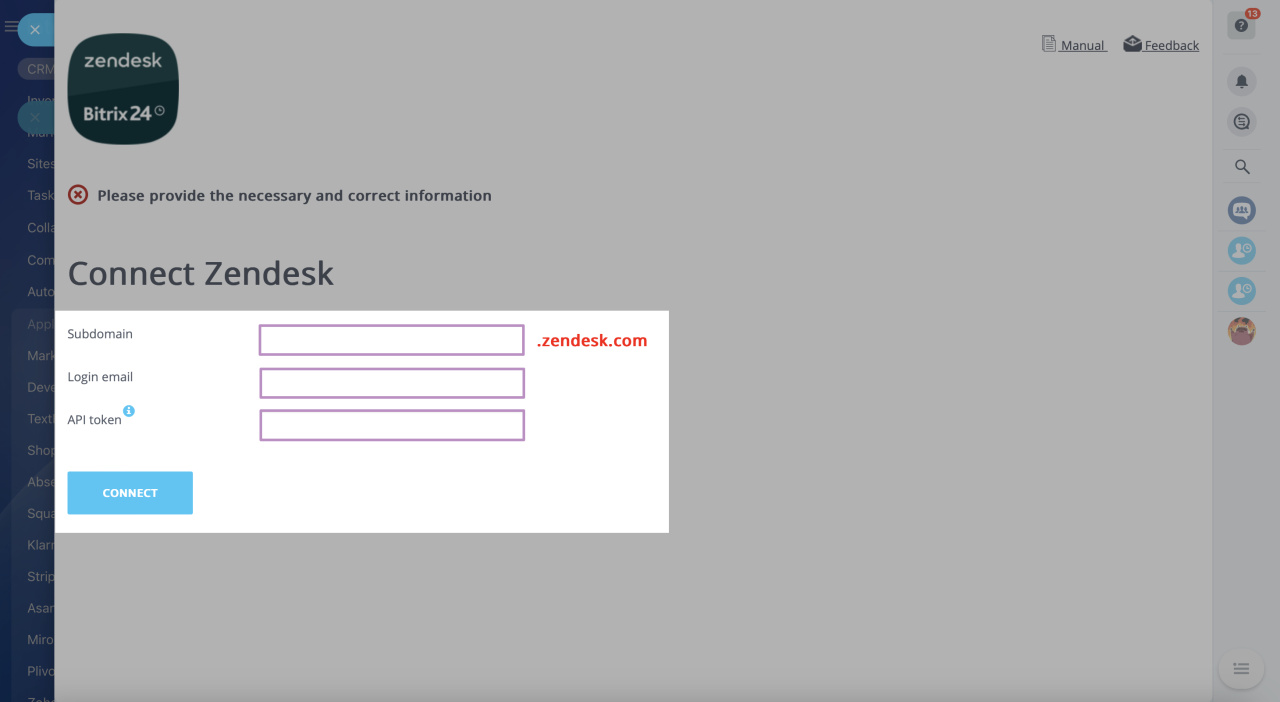
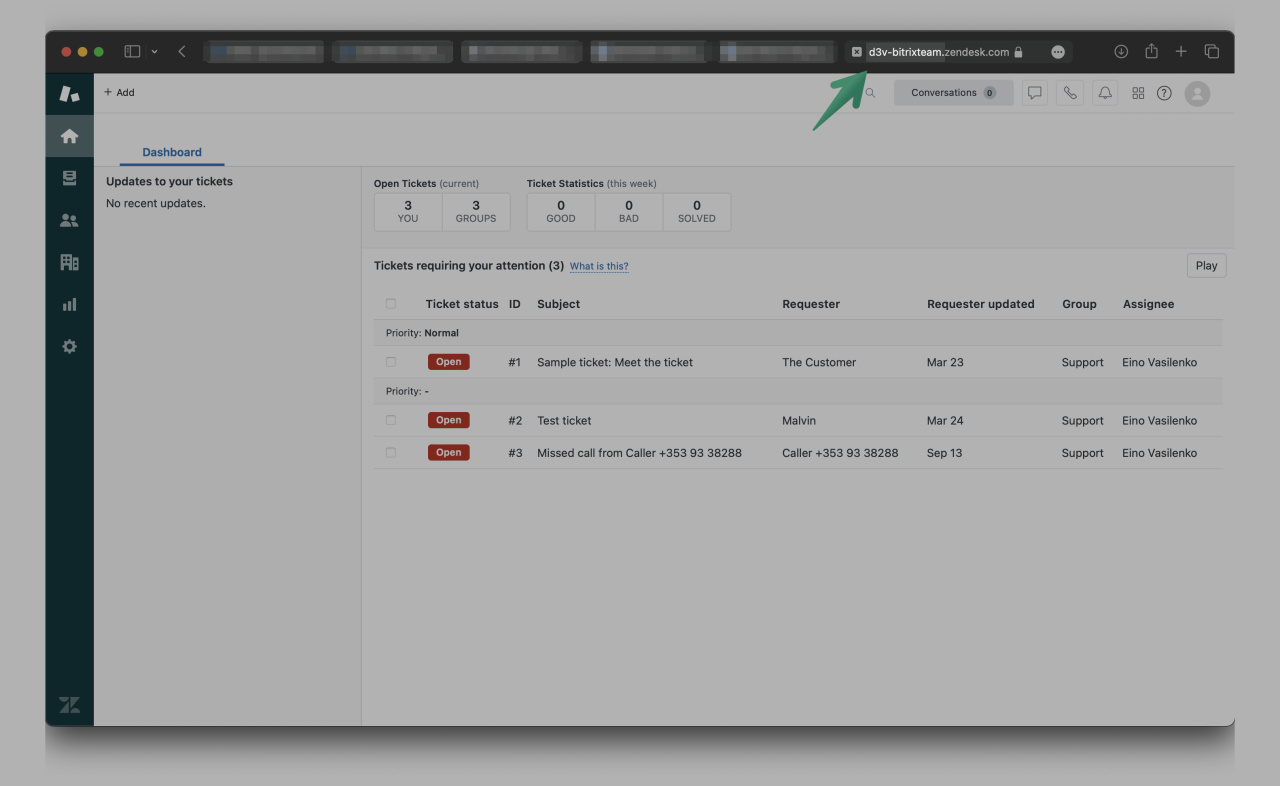
Subdomain can easily be obtained from the address bar once you are in your Zendesk account, like that:
For User Name (e-mail) specify the email address you normally use for logging in into the Zendesk account in question.
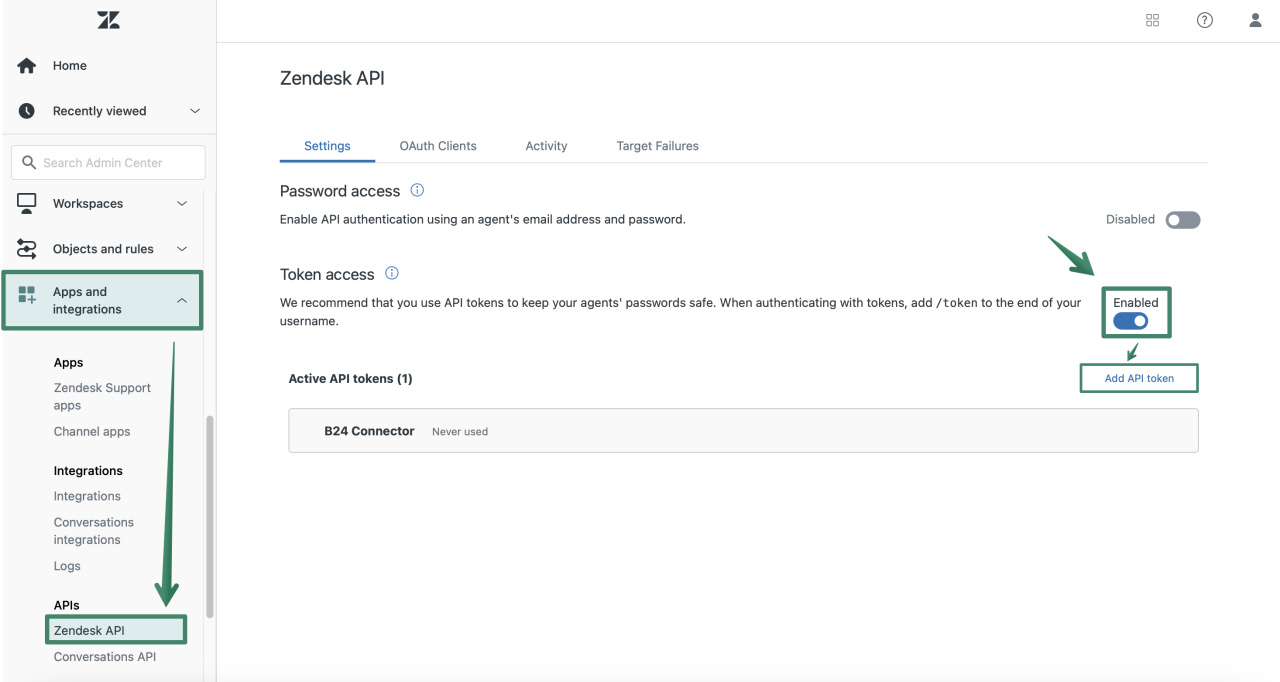
To obtain an API token, follow these steps:
- Go to Admin Center
- Open Apps and integrations section and go to APIs — Zendesk API
- Navigate to the Settings tab and make sure Token access option is enabled
- Click unto Add API token button to generate a key.
- Copy and save your token.
Then navigate back to the app settings page and insert token along with other auth parameters. Connect when ready.
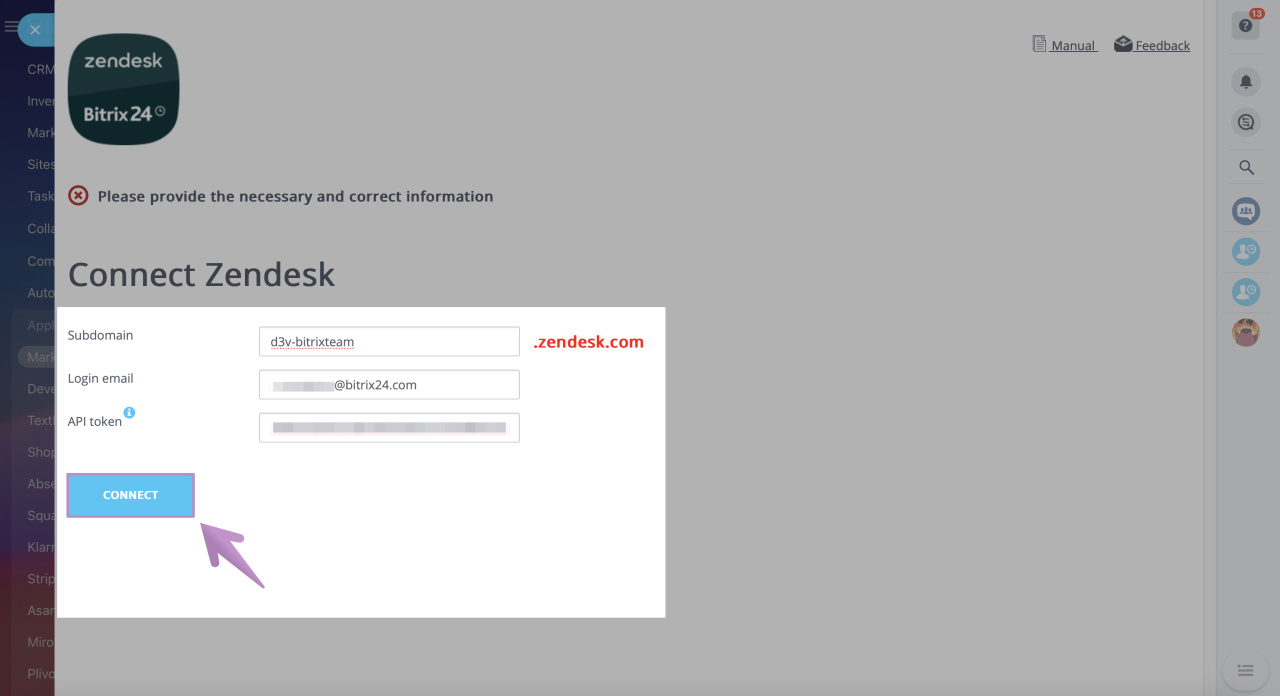
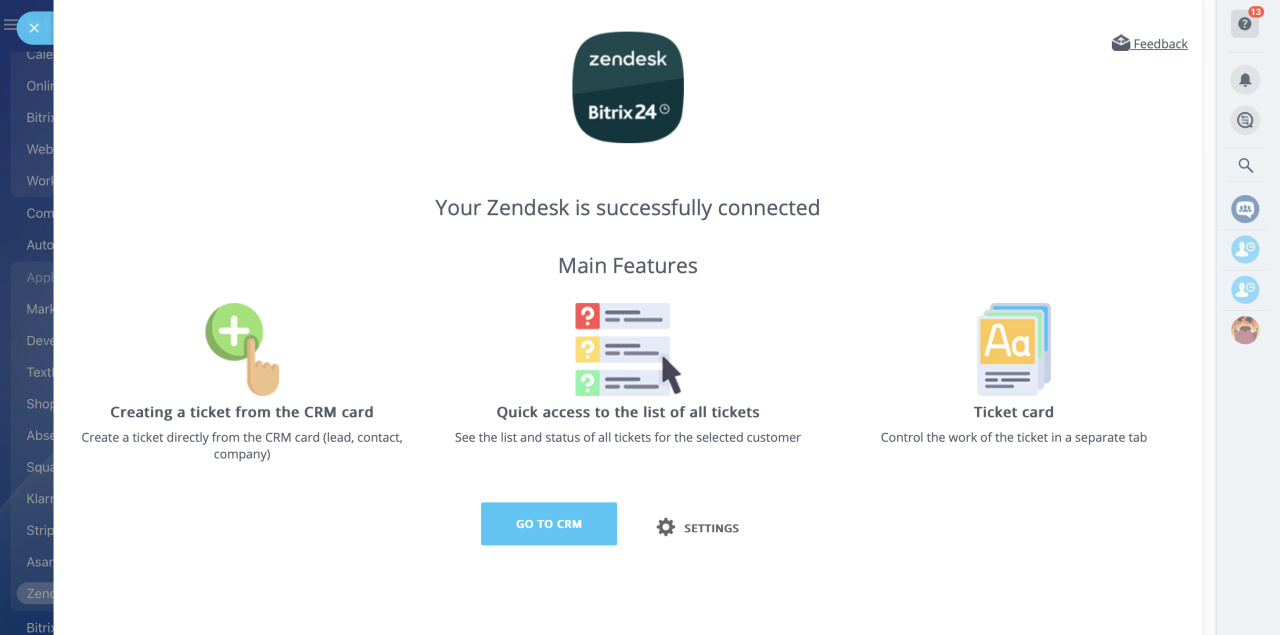
You'll be redirected to the confirmation page right after the connection is established. The connection status will also be updated at the settings page.
Viewing and creating tickets
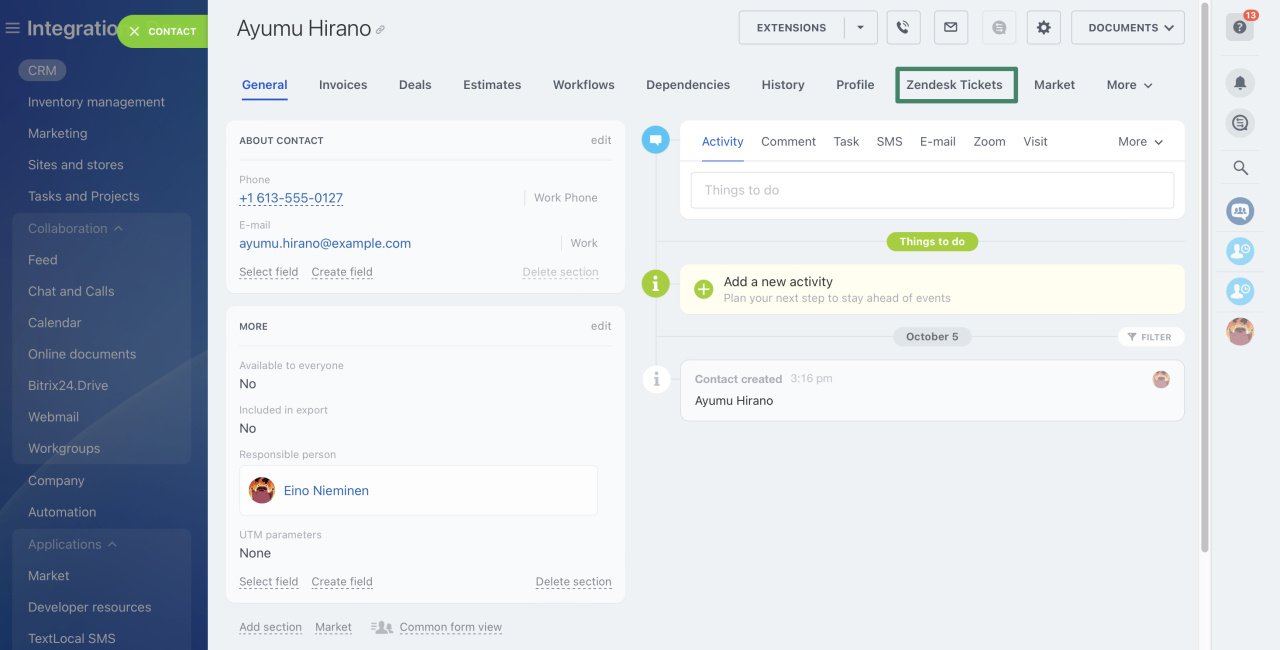
To view tickets list, check the corresponding CRM record, a contact for example.
To access the list, go to Zendesk Tickets tab in the timeline navigation menu. All of the tickets bound to this record will be listed right there.
Let us simulate the scenario. This contact is a sample one and it has not been associated with any tickets before. That is, when opening the tab, we'll only see the navigation panel with no tickets listed.
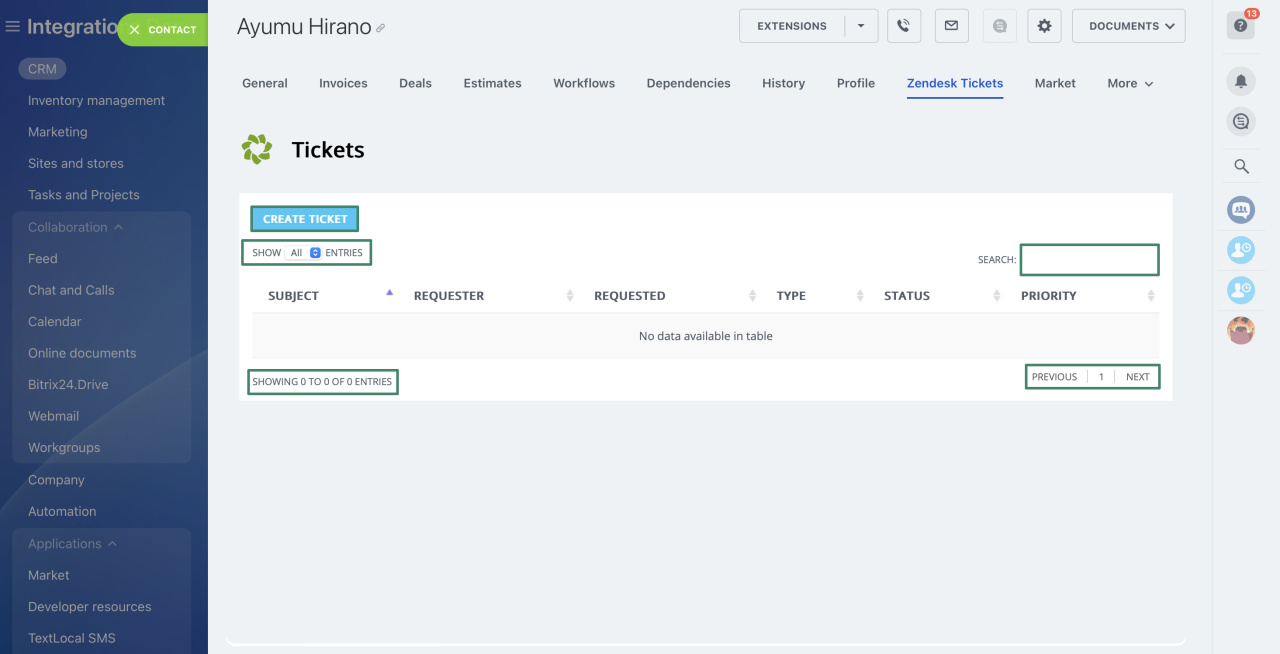
Navigation elements are designed to assist you in sorting and displaying the data, especially if there are lots of tickets in the list. This case is not a rare one, since communication with a long-term client or company may indeed generate a significant amount of tickets — both in progress and historical ones.
- SHOW [...] ENTRIES is a selector that defines how many tickets are displayed at one page. You can choose between 5, 10, 25, 50 tickets per page or let the app display all entries at once.
- SEARCH box with full-text search support for quick navigation among the tickets.
- SHOWING X to X of X ENTRIES: specifies the range of displayed tickets and the total amount.
- PREVIOUS | X | NEXT — for navigation from one page to another, X stands for page's number.
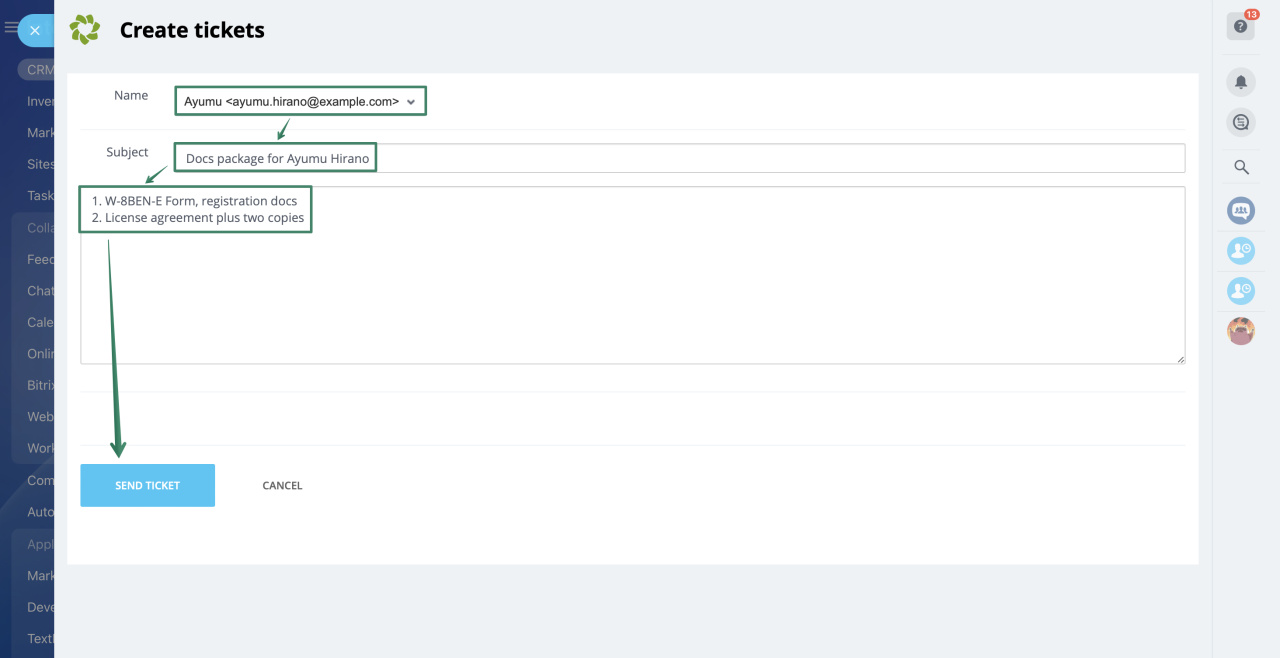
Let's have a look at the ticket creation form.
- Subject // ticket's name with core infos
- Description // a more detailed description, e.g. in TODO format
- Name // filled out automatically with customer's name and mail address
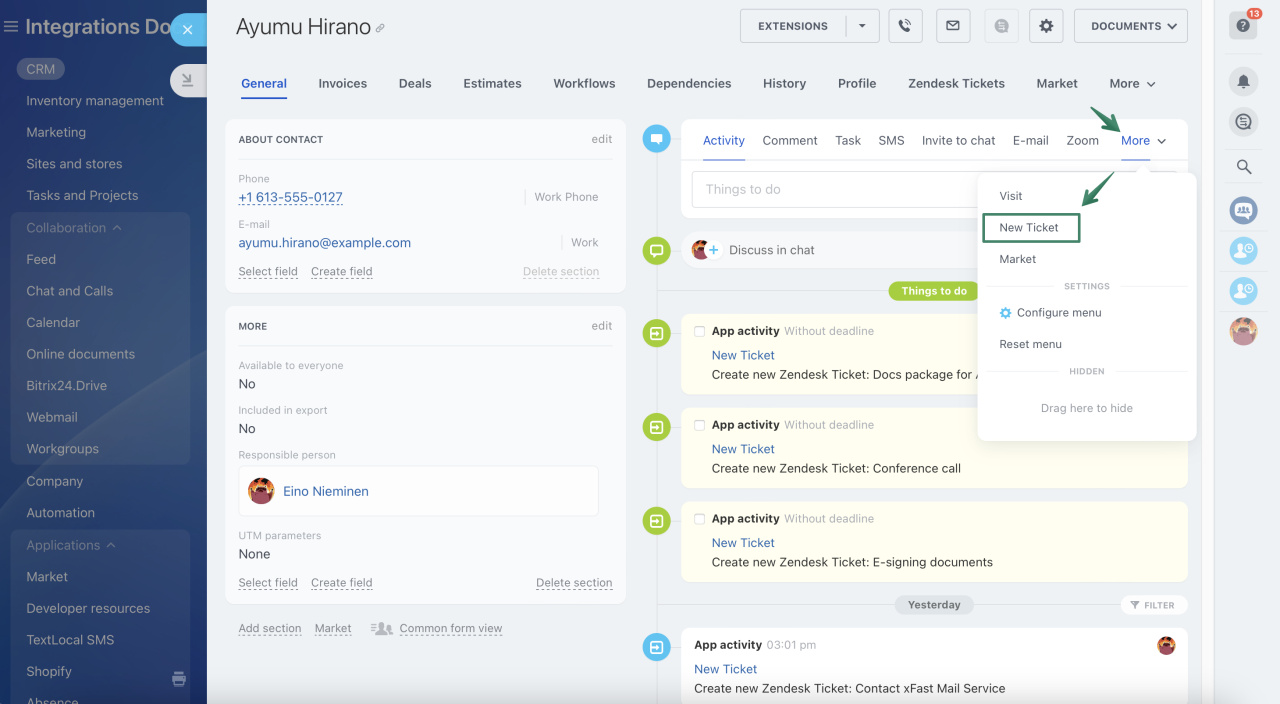
Another way to create a ticket in Bitrix24 is using the New Ticket tab located in the navigation menu above the timeline.
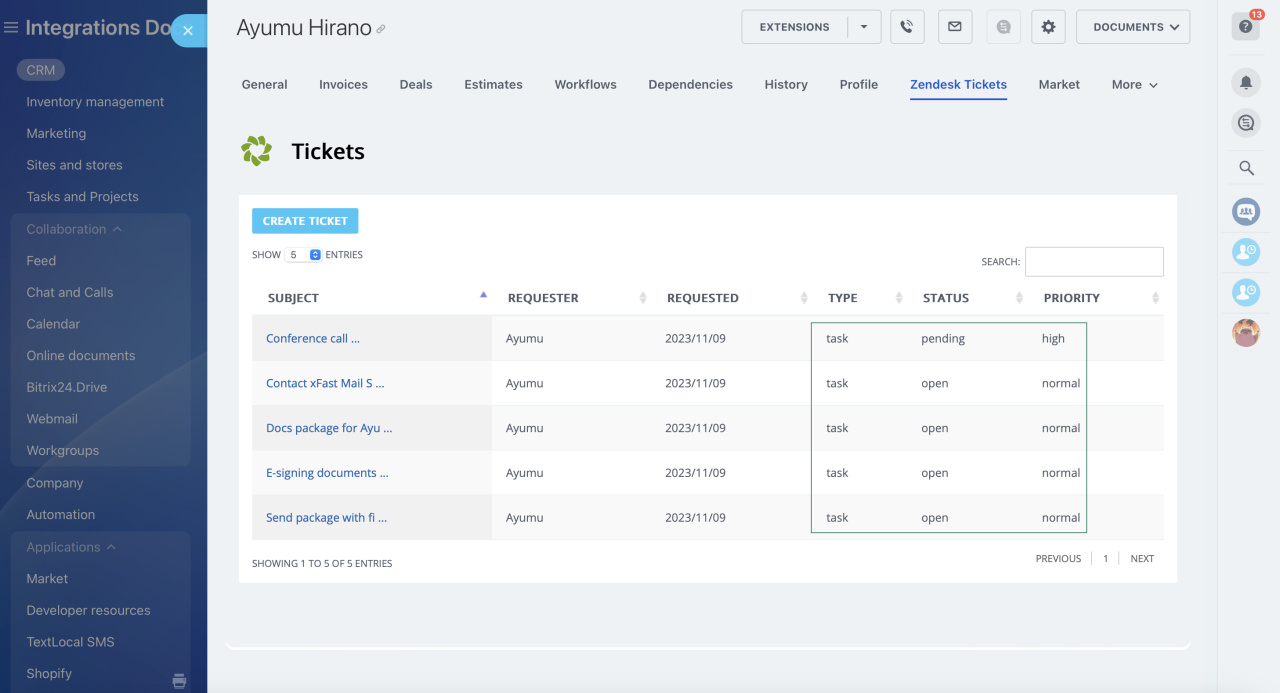
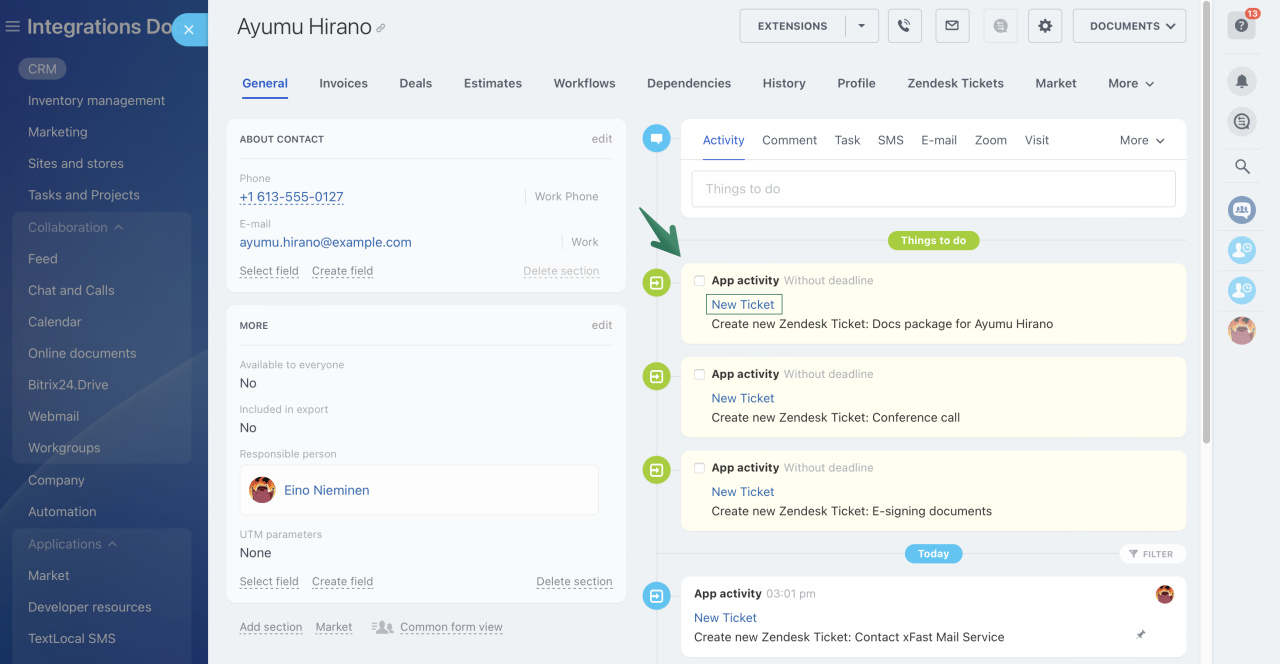
Created tickets will be visible both in the ticket grid in the Zendesk Tickets tab and in CRM record's timeline.
Zendesk Tickets tab
Requester, requested (date) and status parameters are pre-filled by default.
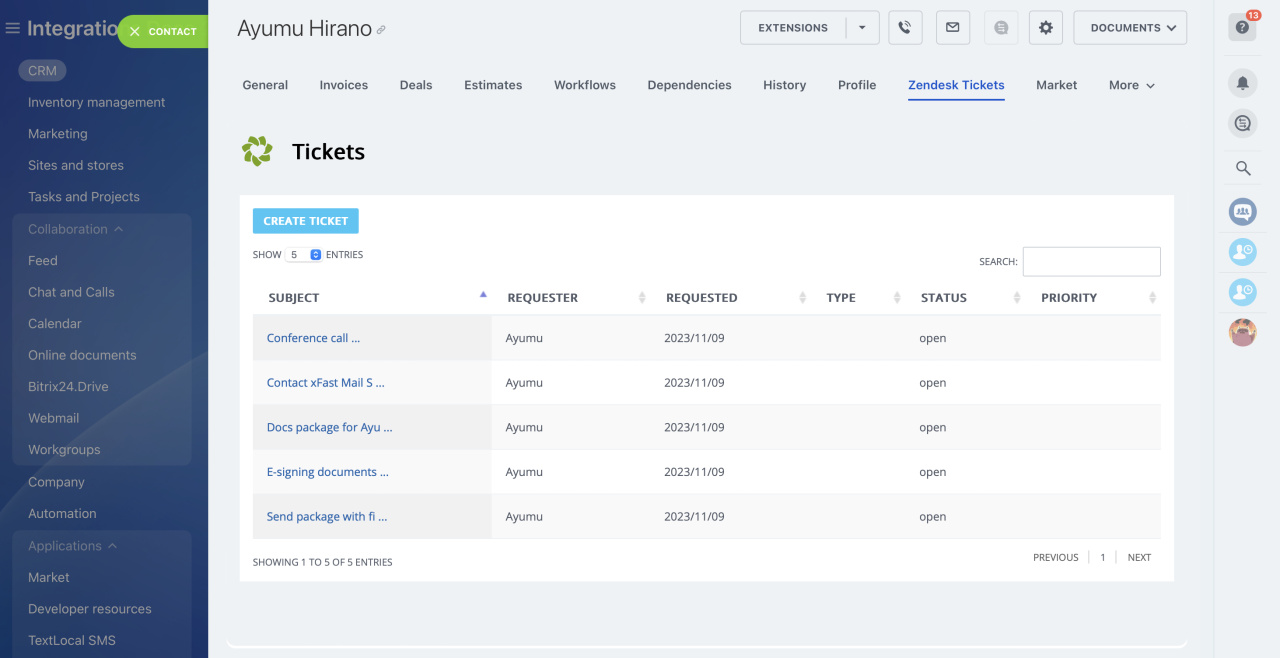
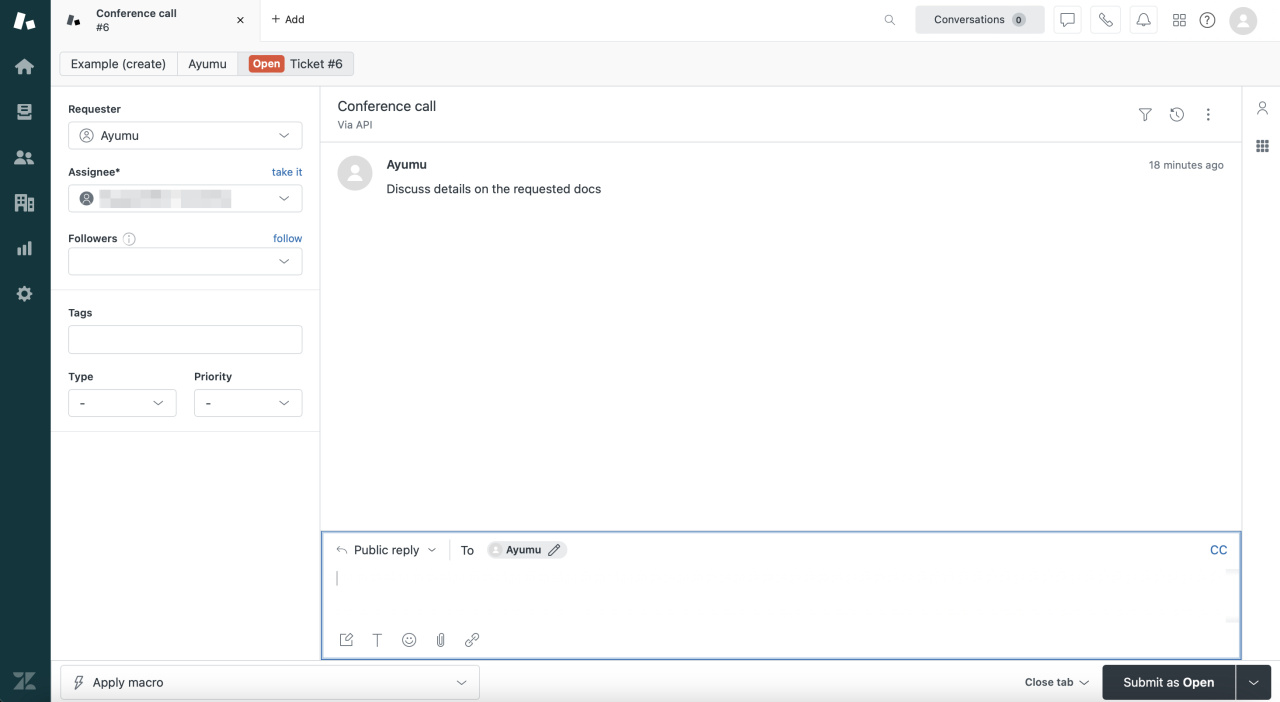
If you click unto ticket's name in this list, you'll be redirected to the ticket form in Zendesk. You'll be able to edit the ticket and collaborate as needed using tools you are familiar with.
Updated ticket infos will also be transferred to Bitrix24, however limited to the main parameters of the grid: subject, requester, requested (date), type, status and priority.
Timeline activities
CRM record's activities work in a similar way, yet they can be more suitable for some people as one can track progress directly in the card with full overview of the contact in question.
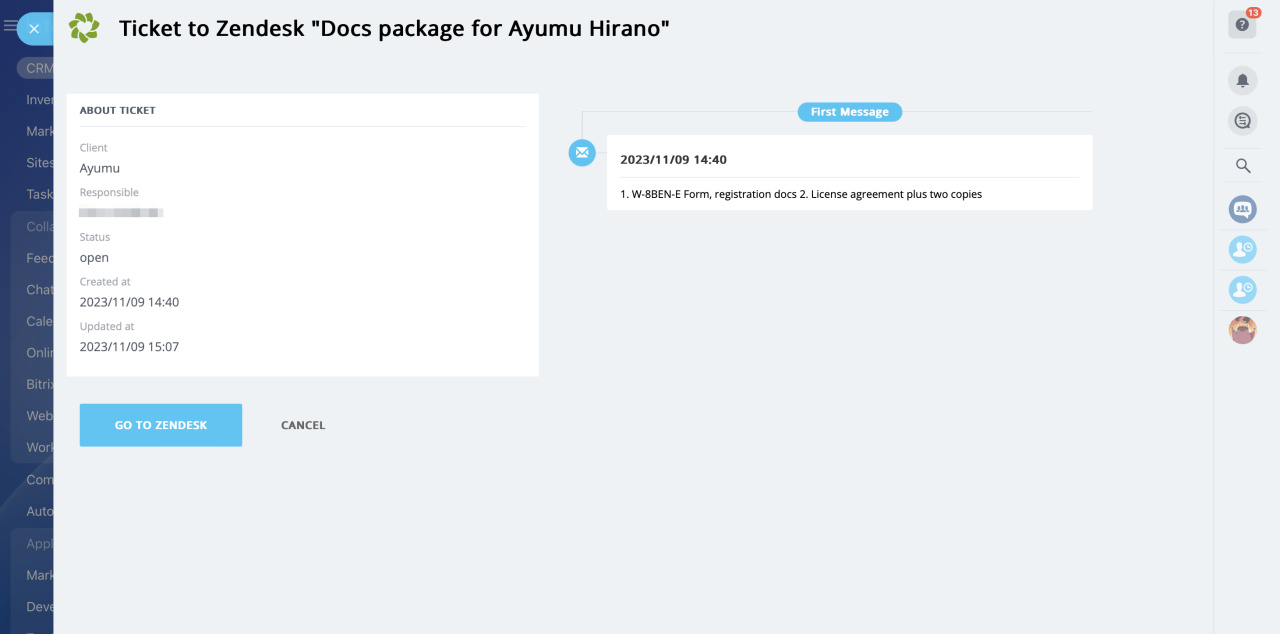
If you click unto New Ticket hyperlink, you'll see an overview card summarizing core infos on the ticket. If necessary, you can easily navigate to Zendesk from there.
You'll also be able to check the first and last reply chain messages in this view.

.jpg)
