Learn how to set up your Facebook page to work with Sales Intelligence.
Configure a Facebook page in Bitrix24
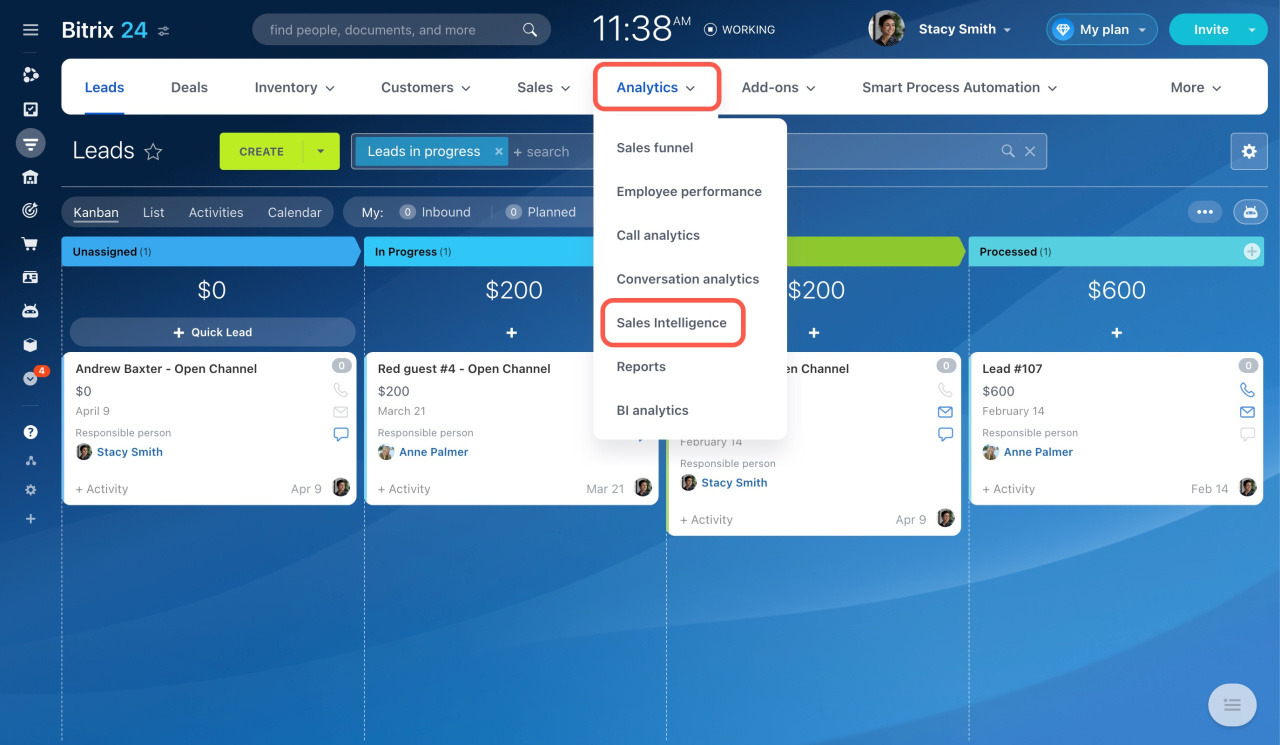
Go to CRM > Analytics > Sales Intelligence.
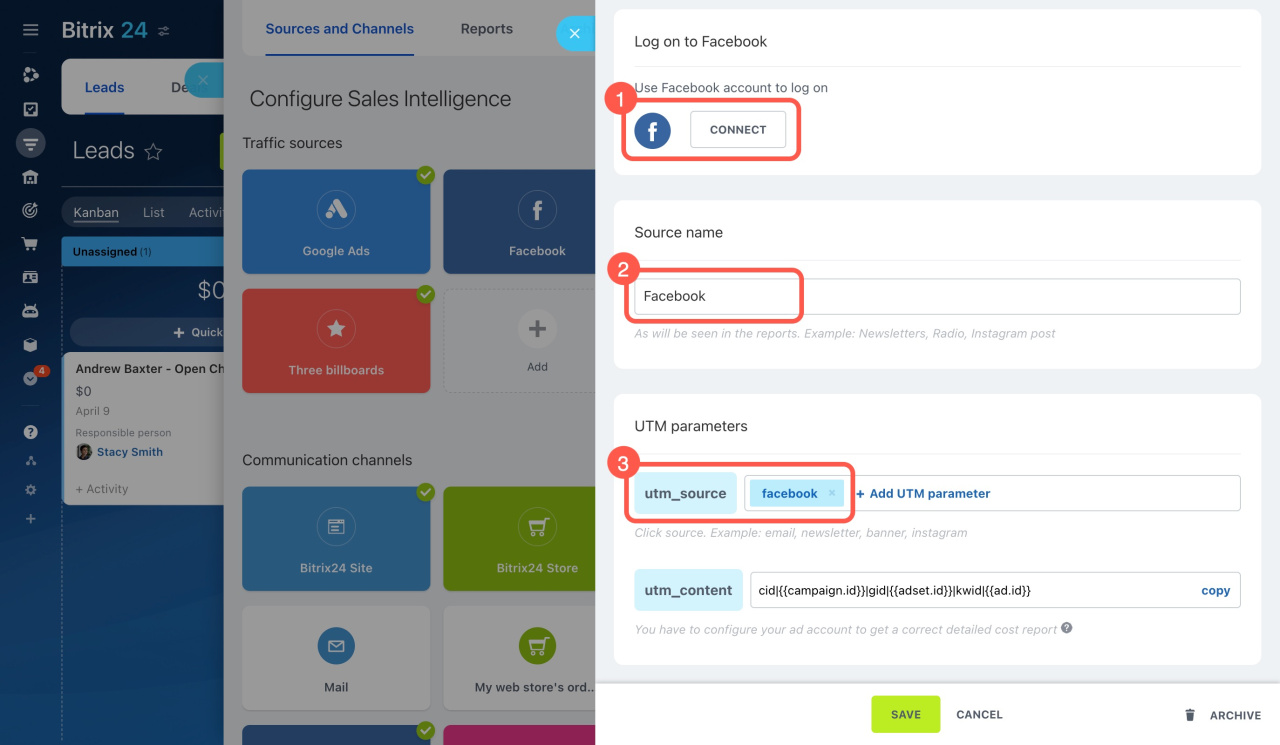
Select Facebook, log in to your account, enter the source name, and specify a UTM parameter.
How to set UTM parameters

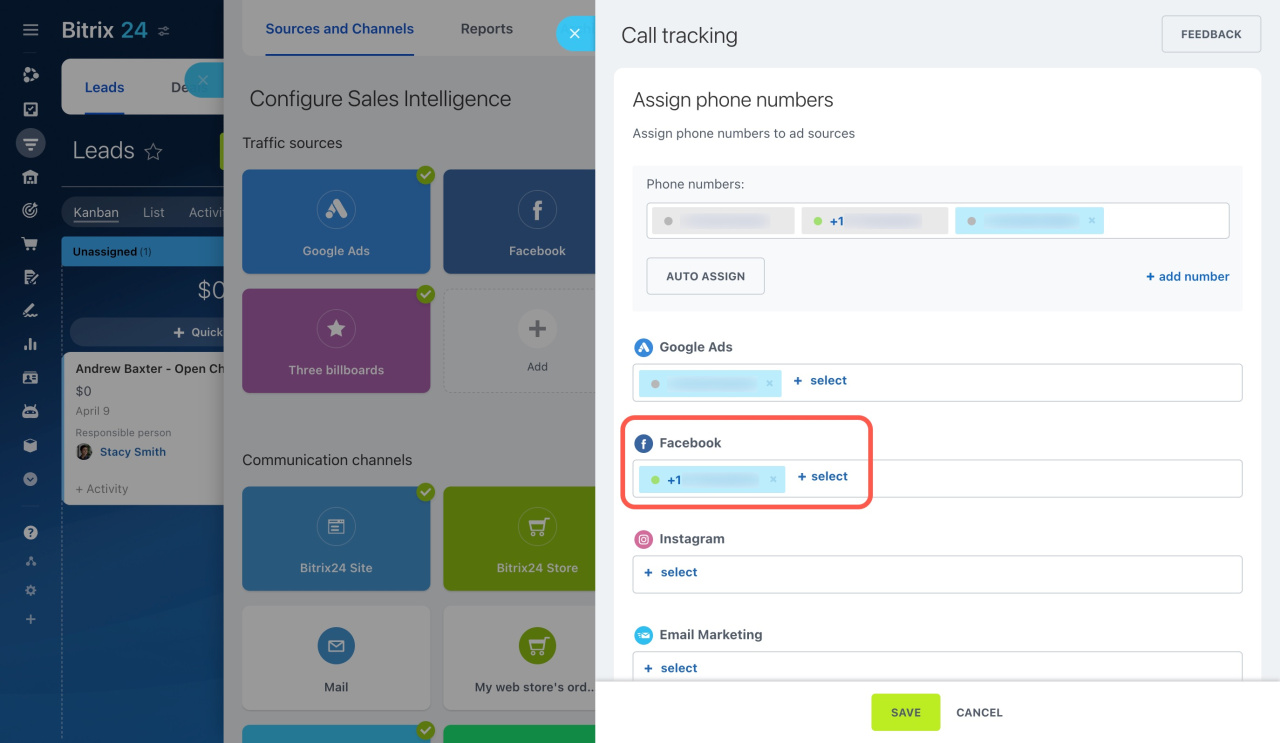
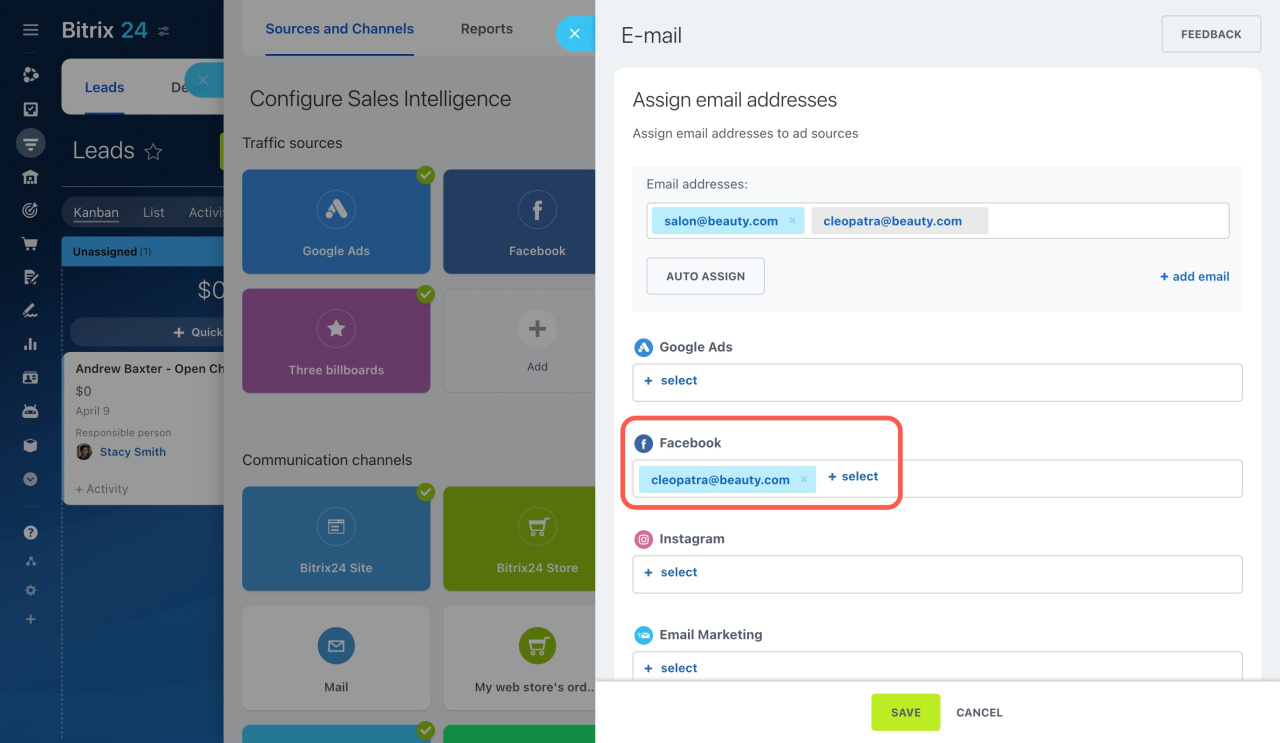
Assign a phone number and email address to the Facebook page.
Assign phone numbers and email addresses to traffic sources
Then configure email addresses and phone numbers swapping on your website.
Swap email addresses or phone numbers on the website
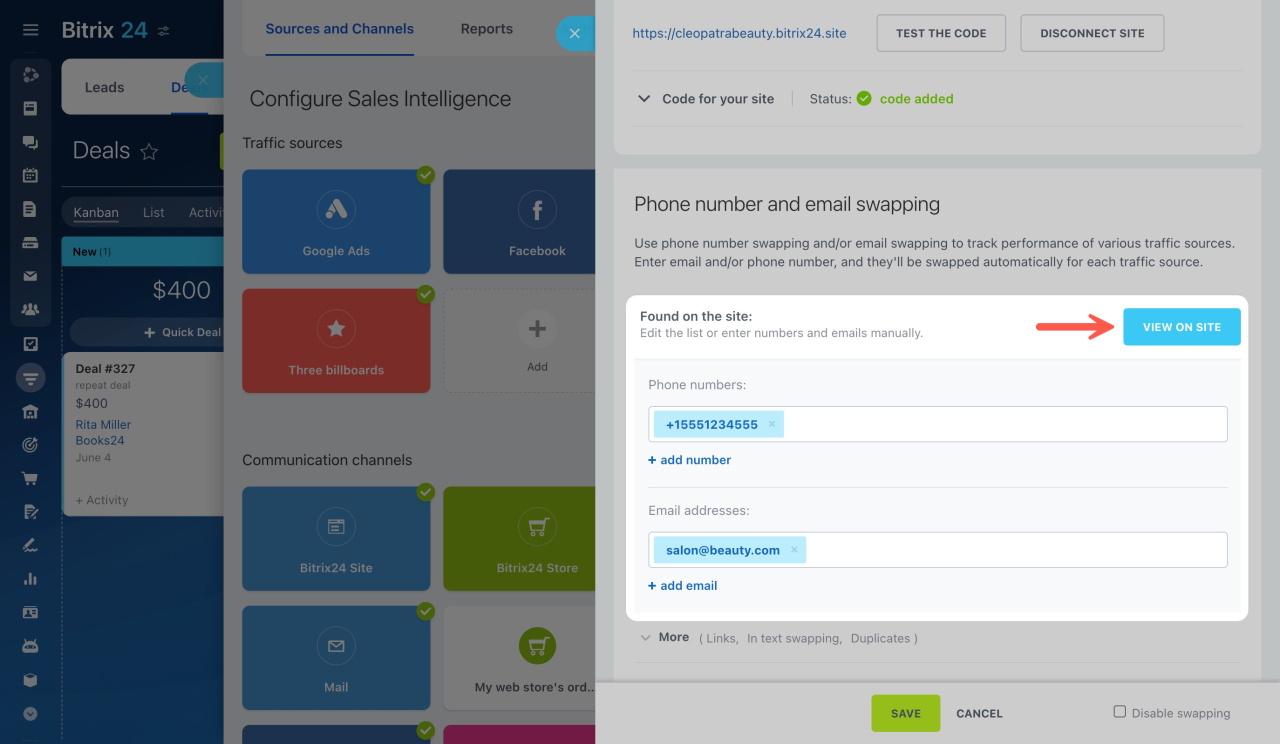
Configure your Facebook page
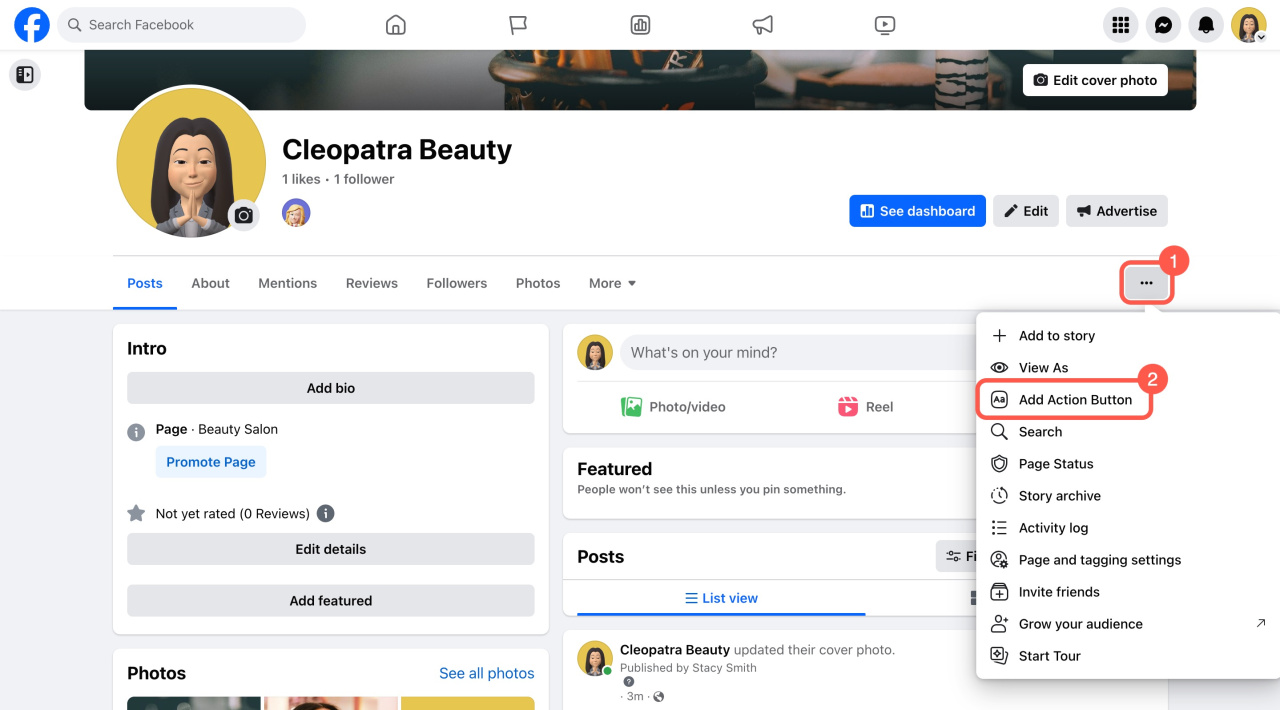
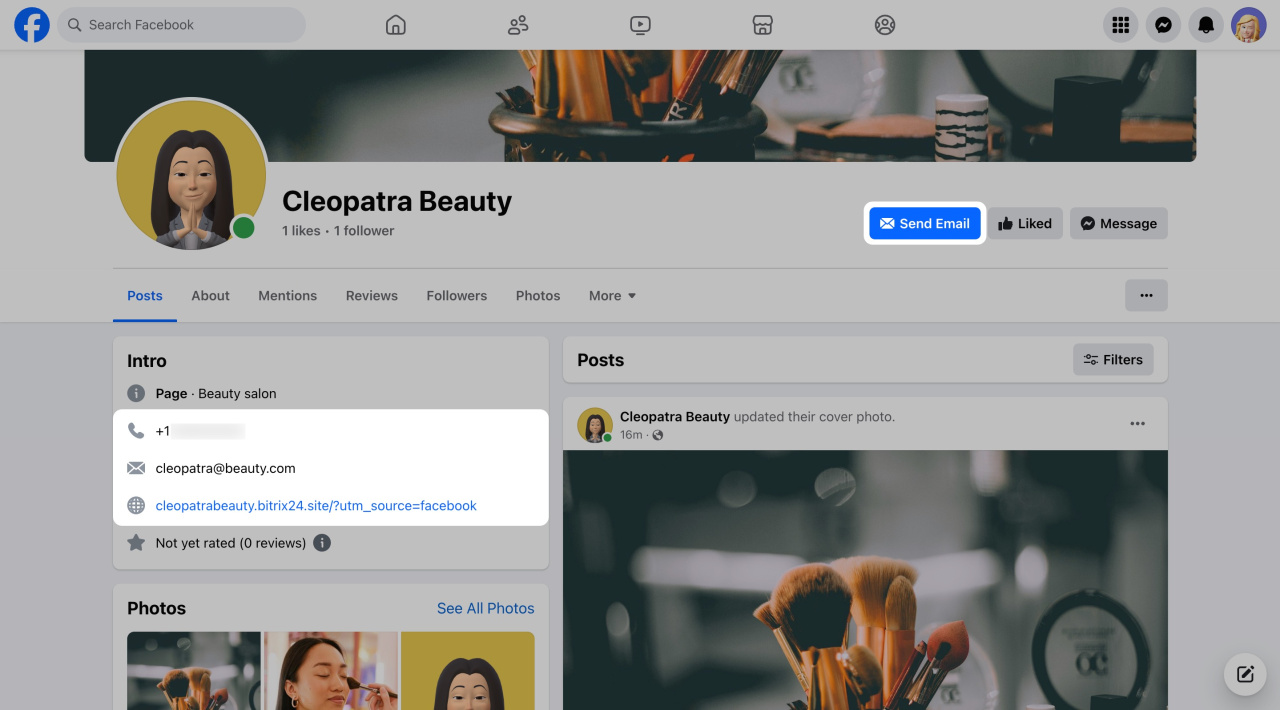
Add the main action button and provide the contact details on your page.
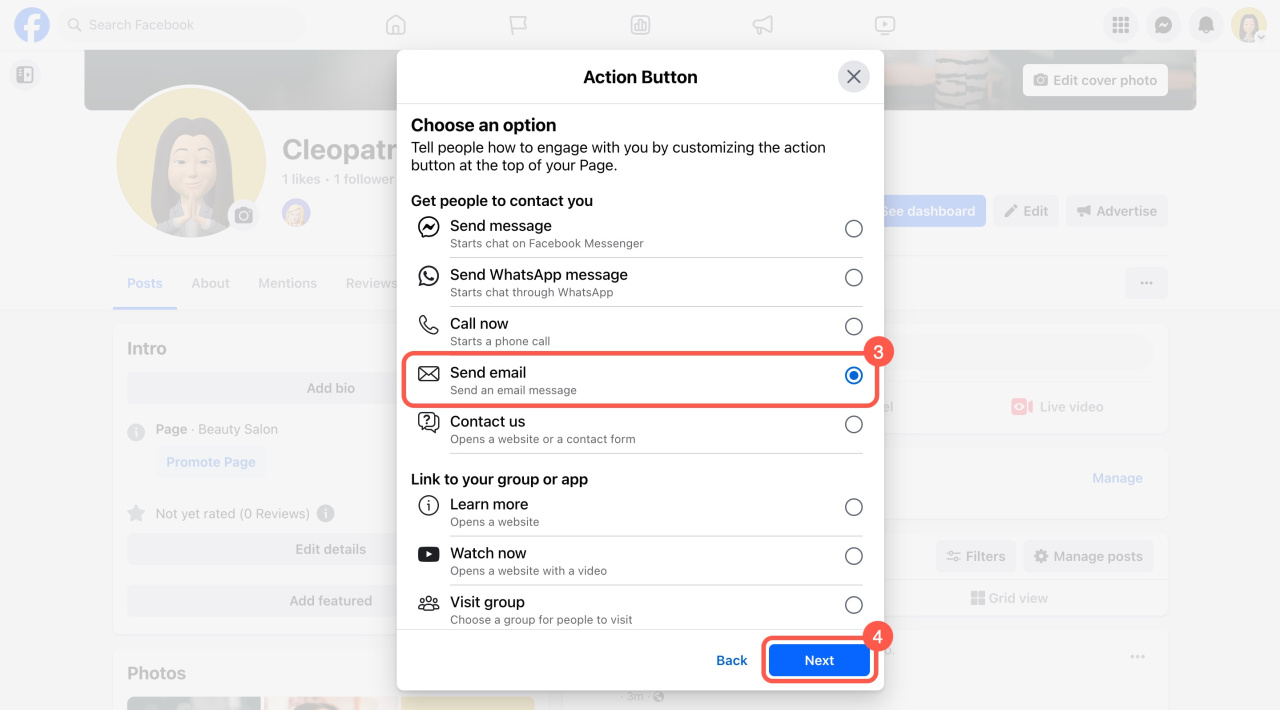
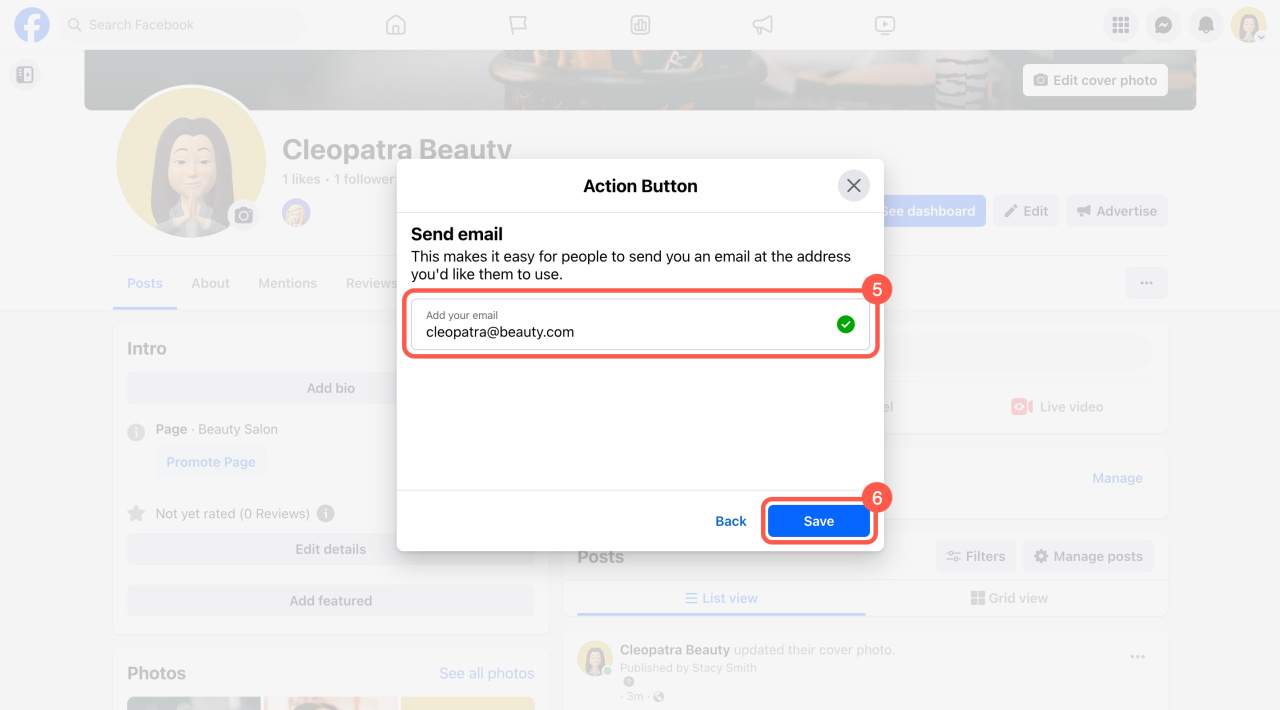
To add an action button:
- Click the three dots (...).
- Select Add Action Button.
- Choose an option, for example Send email.
- Click Next.
- Enter your email address.
- Click Save.
Then, add more contact information. Switch to the About tab (1) and specify your phone number, email address, and website link (2).
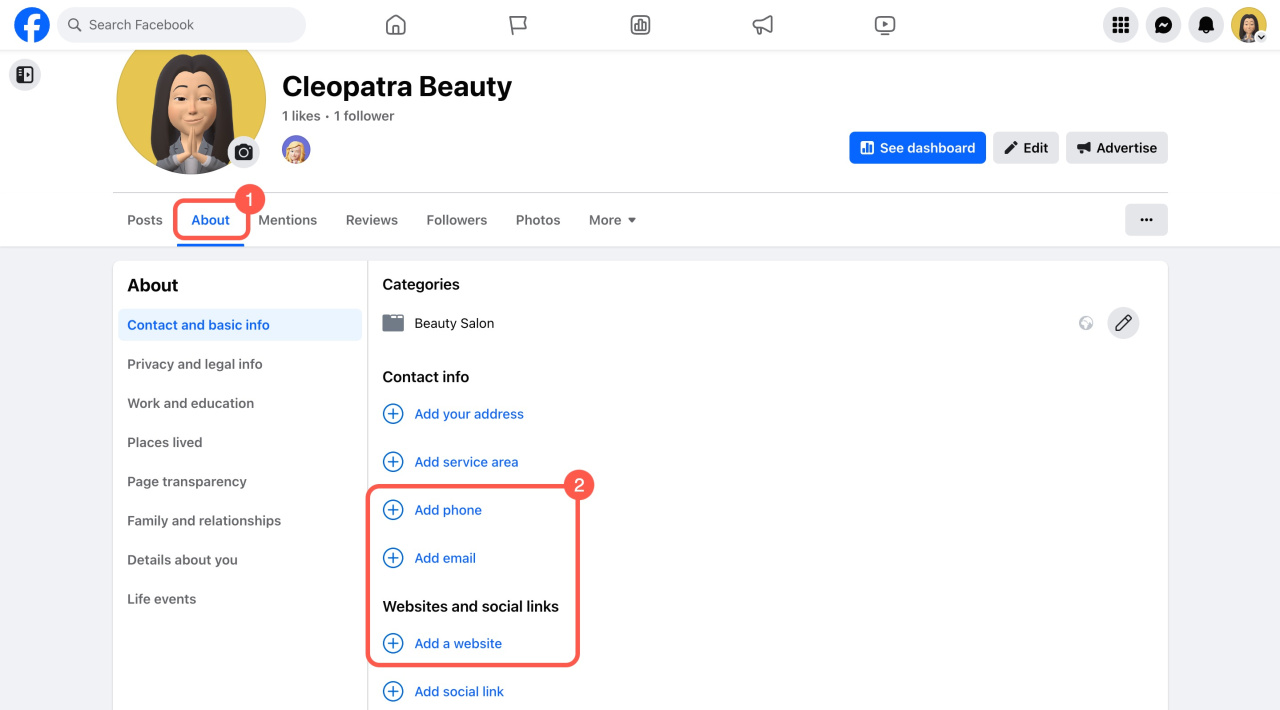
Once this information is on your Facebook page, it's ready to work with Sales Intelligence.
In brief
- Sign in to Facebook and set up the source name and UTM parameters.
- Assign a phone number and email address, and configure them for swapping on your website.
- Add an action button and complete your contact details on the Facebook page.