For the correct ad costs analysis, set up UTM parameters in Bitrix24 and advertising services like Google Ads and Facebook.
In this article:
Set up UTM parameters in Bitrix24
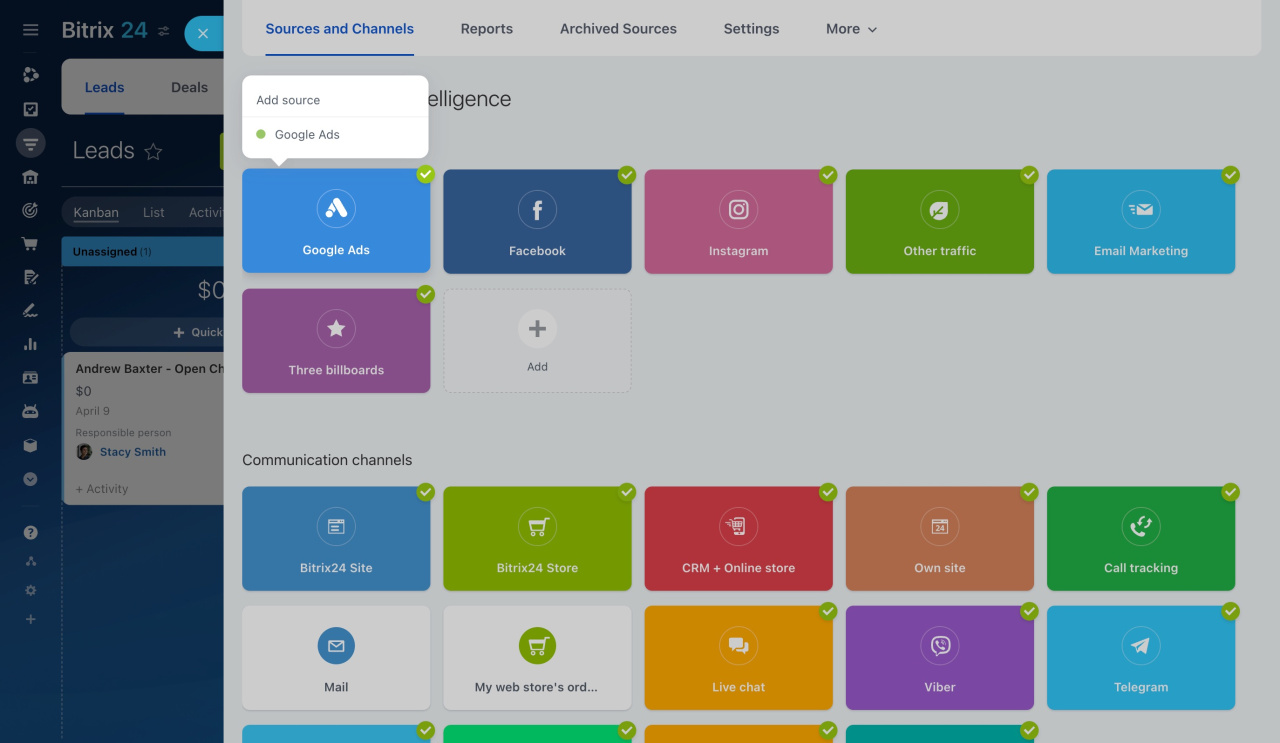
Go to CRM > Analytics > Sales Intelligence.
Click on Google Ads block and select Add source.
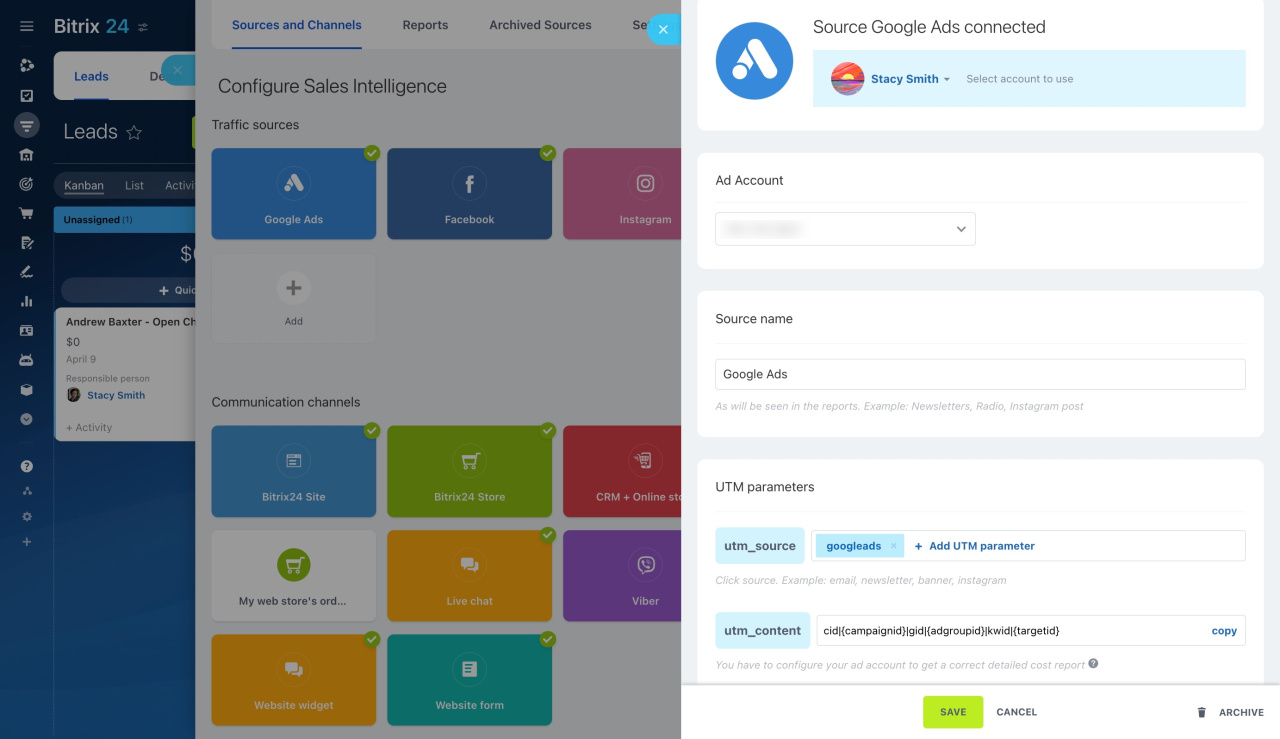
Log in to your Google account and select the ad account. Then, copy the utm_source and utm_content parameters and add them to your website address when creating an ad.
Your site address will look like this: https://your_site/?utm_source=utm_tag_from_bitrix24&utm_content=cid|{campaignid}|gid|{adgroupid}|kwid|{targetid}
UTM parameters and their meanings
-
utm_source: Shows where the visitor came from. For example, mail or advertising service.
-
utm_content: Differentiates similar content or links within the same ad.
-
{campaignid}: Marks the campaign your ad appeared in.
-
{adgroupid}: Shows the ad group your ad was part of.
-
{targetid}: Identifies the keyword.
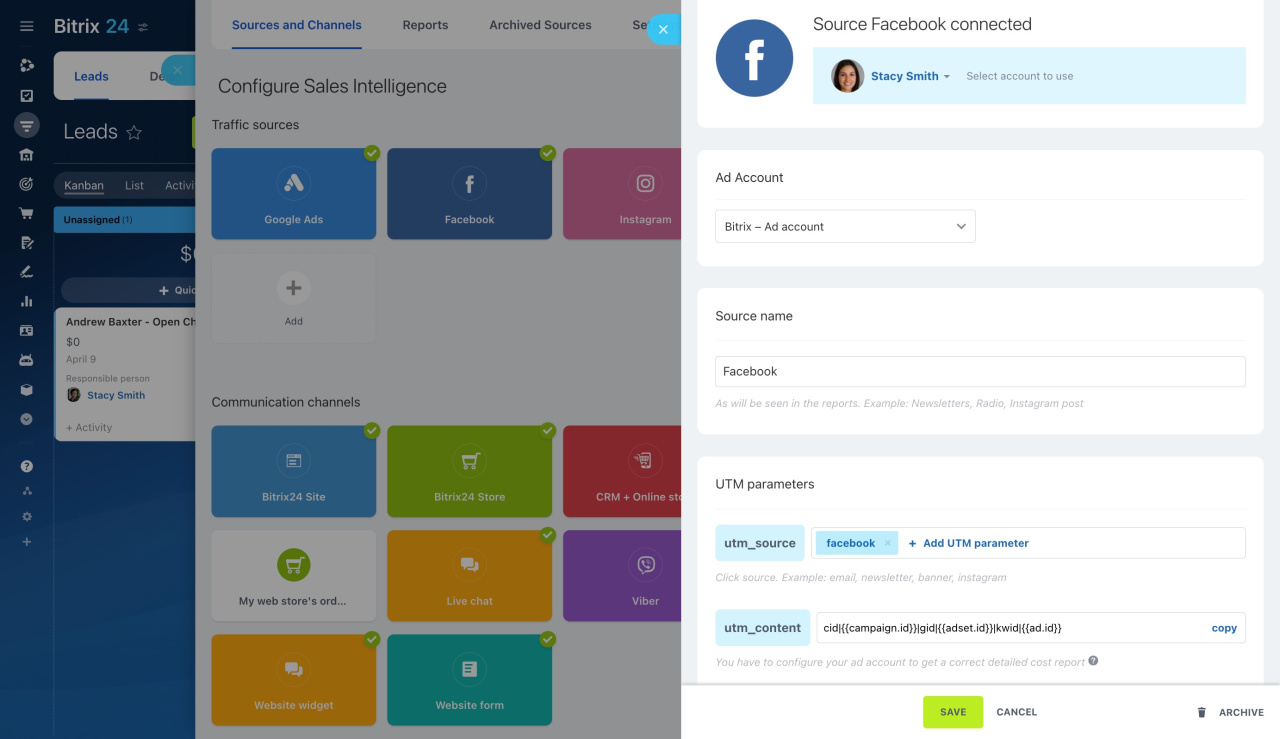
You can set up UTM parameters for Facebook ads in the same way.
Set up UTM parameters in Google Ads
To send campaign data to your account, set up the appropriate UTM parameters.
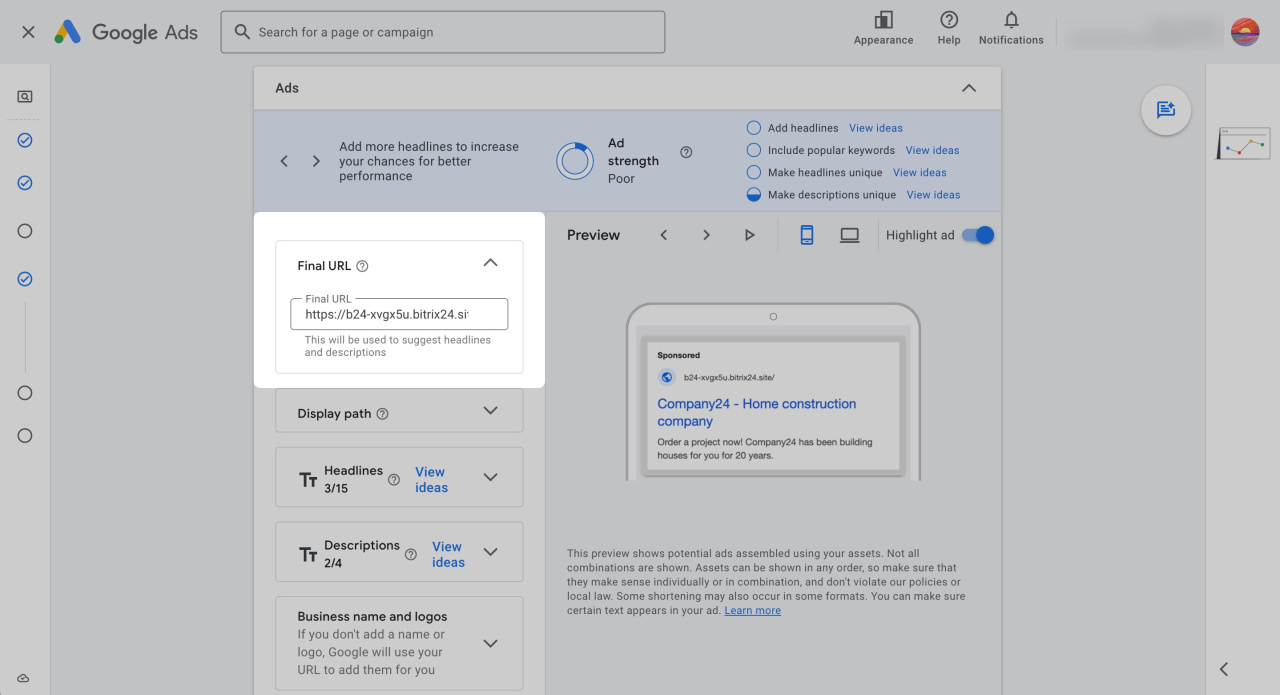
When creating a new ad campaign, enter your website address with the correct UTM parameters in the Final URL field: https://example.com/?utm_source=google&utm_content=cid|{campaignid}|gid|{adgroupid}|kwid|{targetid}
You can also create a tracking template to apply the same final URL with UTM parameters to an ad group, campaign, or account. The template will automatically apply to all ads, depending on its setting.
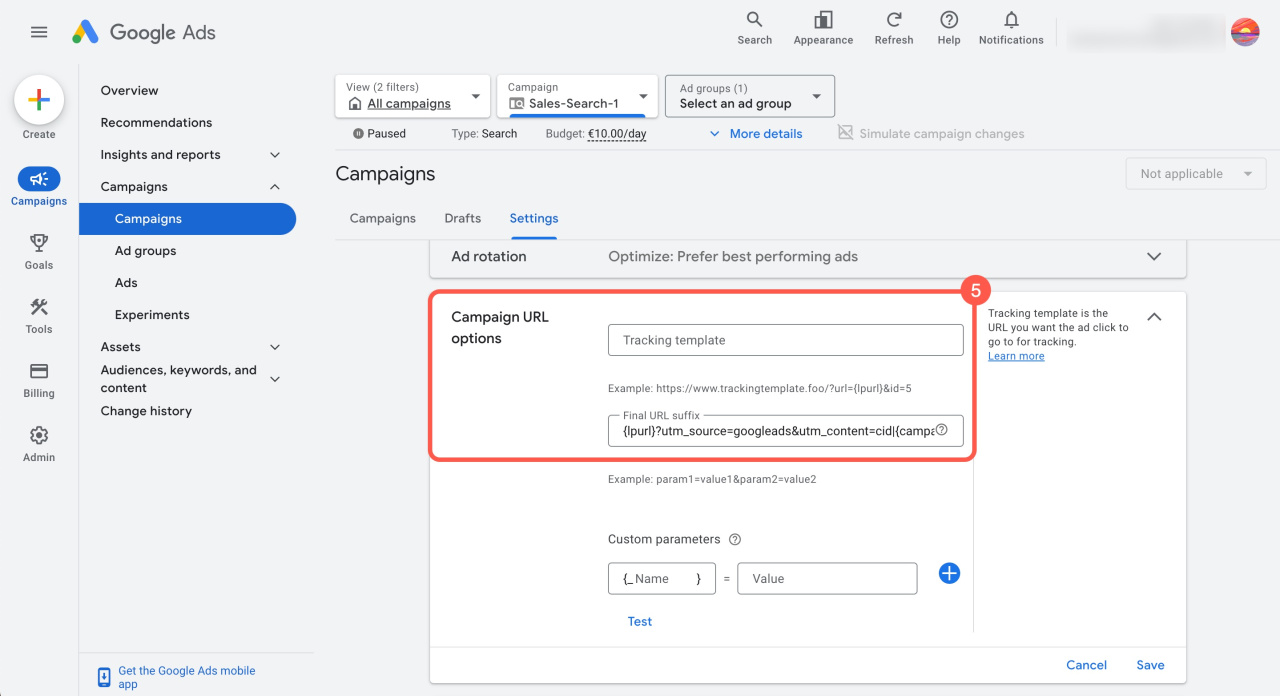
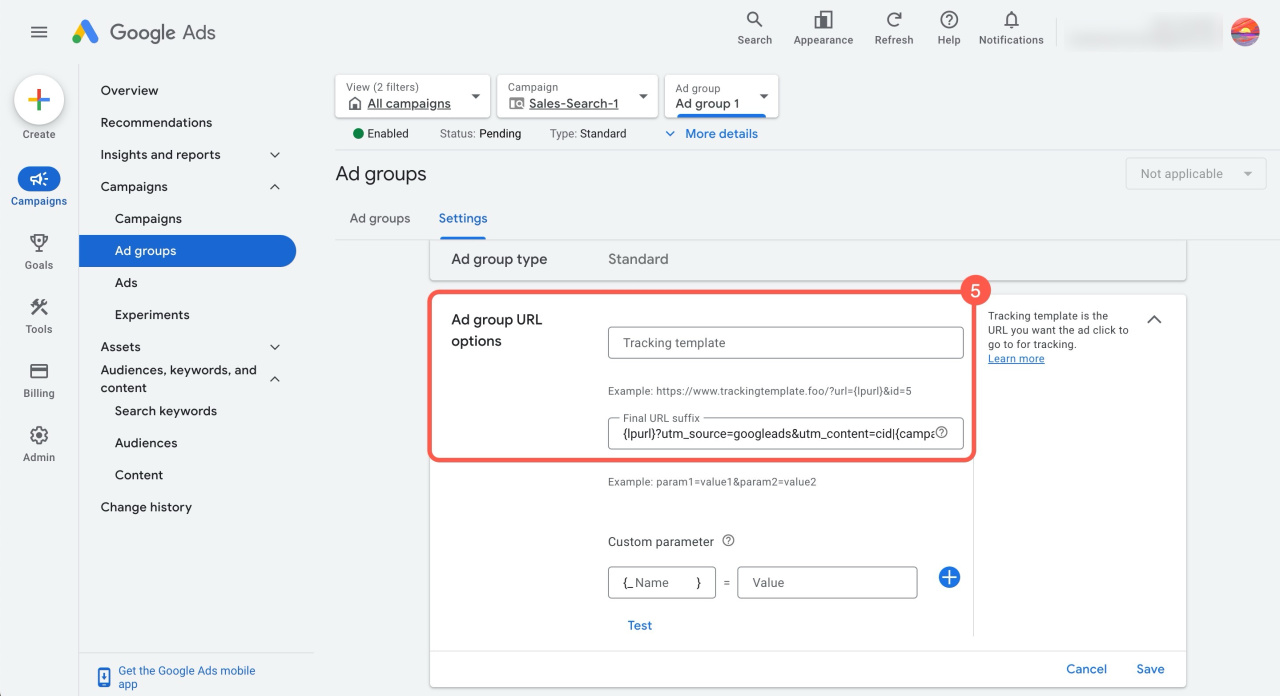
In the tracking template field, specify a link with your UTM parameters: {lpurl}?utm_source=google&utm_content=cid|{campaignid}|gid|{adgroupid}|kwid|{targetid}.
https://example.com/ as the final URL, it will replace {lpurl}.To set up a tracking template for an account,
- Go to Admin (⚙️).
- Open the Account settings tab.
- Under Tracking, specify the options in the field.
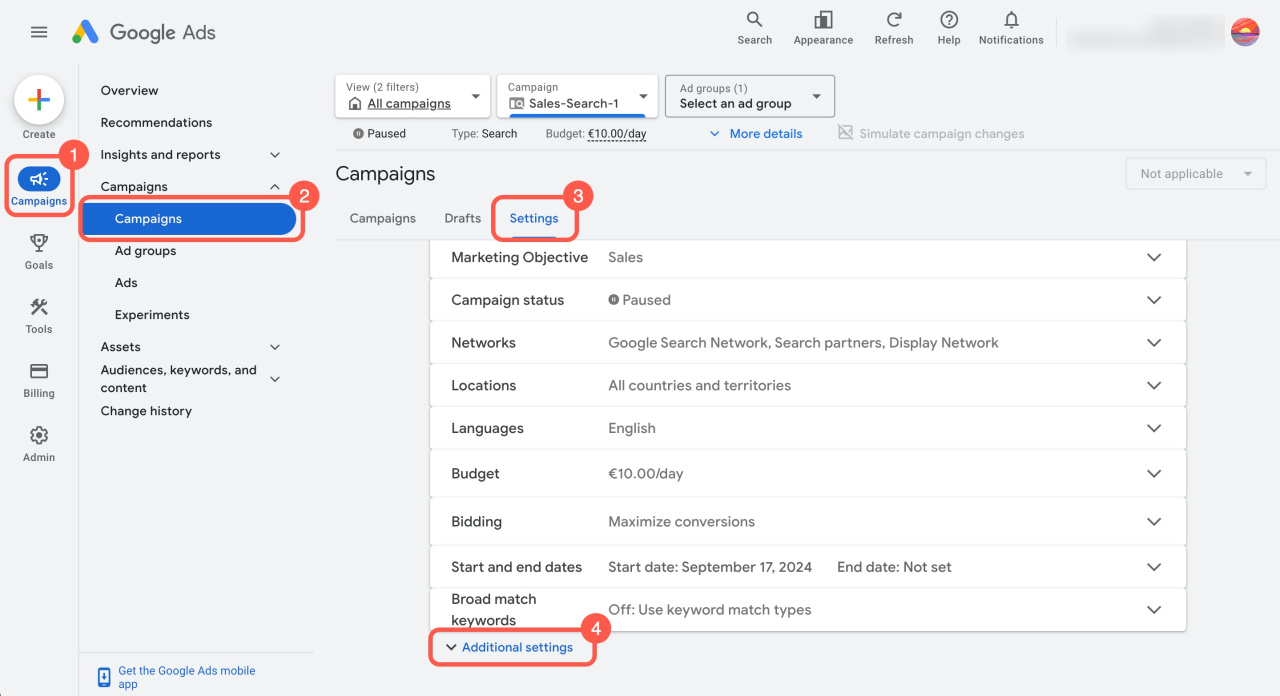
To set up a tracking template for an ad campaign,
- Select the desired ad campaign.
- Open the Settings tab.
- Click Additional settings.
- Under Campaign URL Options, specify options in the field.
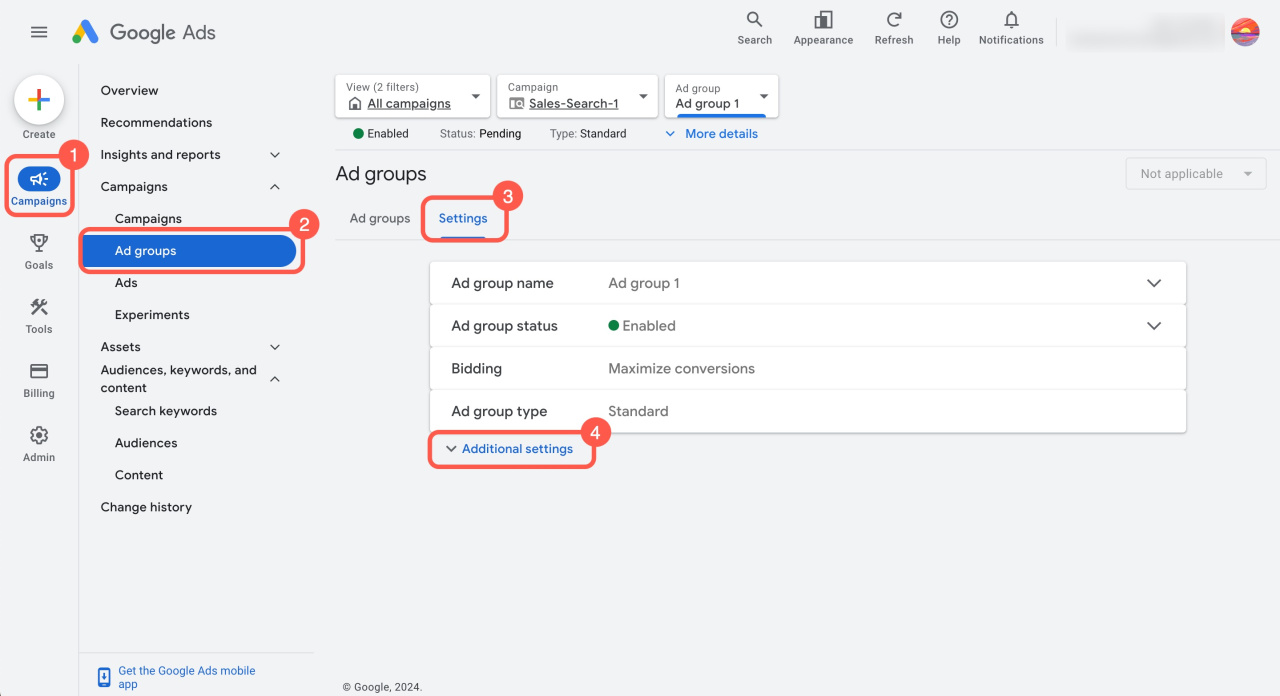
To set up a tracking template for an ad group,
- Select the desired group.
- Open the Settings tab.
- Click Additional settings.
- Under Ad group URL Options, specify the options in the field.
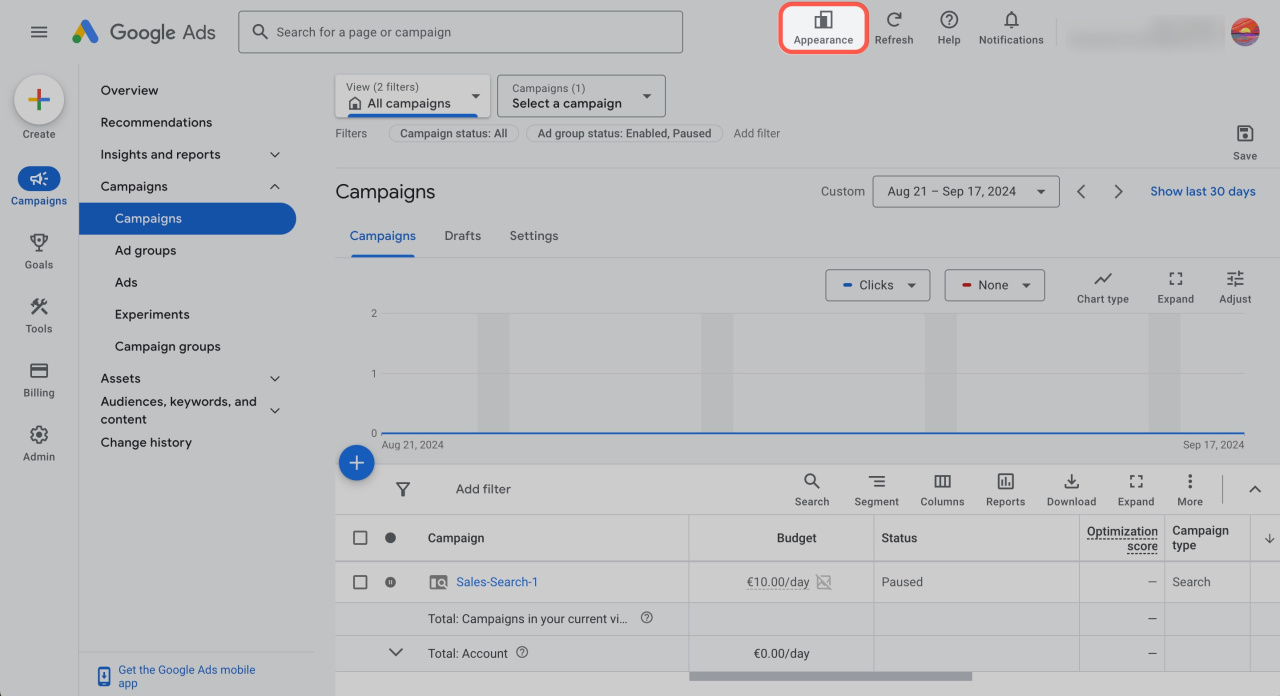
The ad service interface may vary. To customize it, click the Appearance button.
Set up UTM parameters in Facebook
UTM parameters in Facebook ads transmit data to build a detailed ad spend report. Set up UTM parameters during ad creation in Facebook Ads Manager.
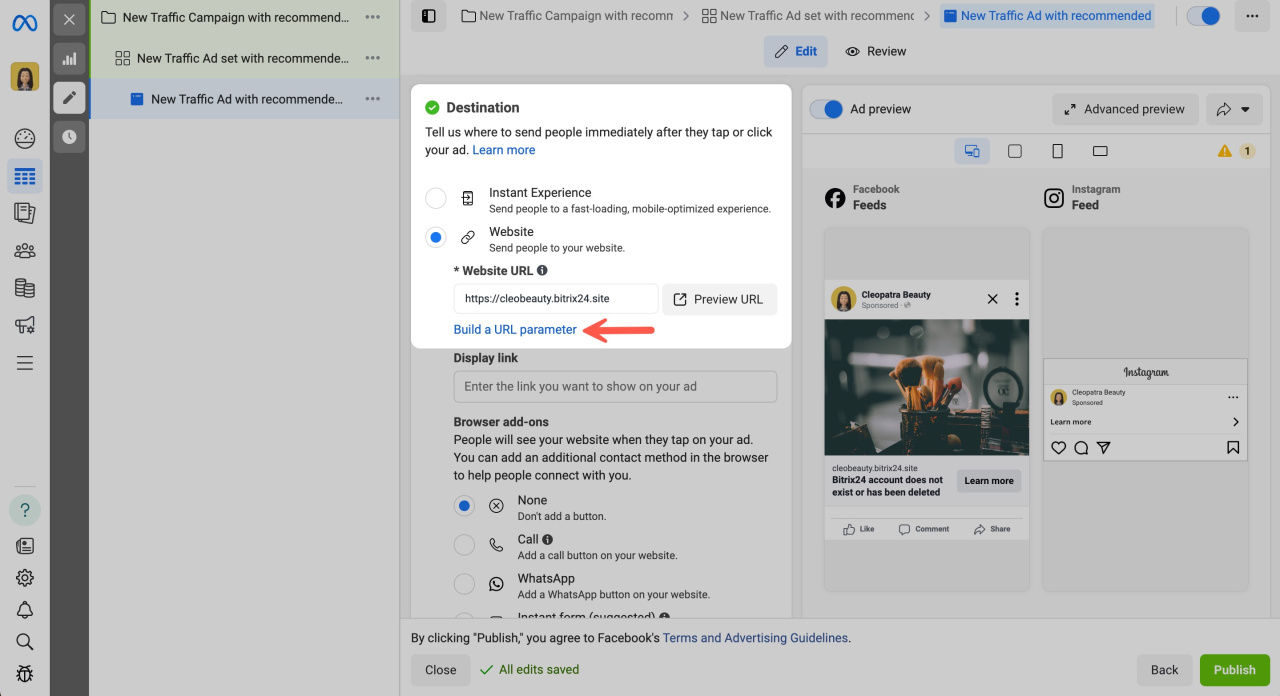
Specify your site address and click Build a URL parameter.
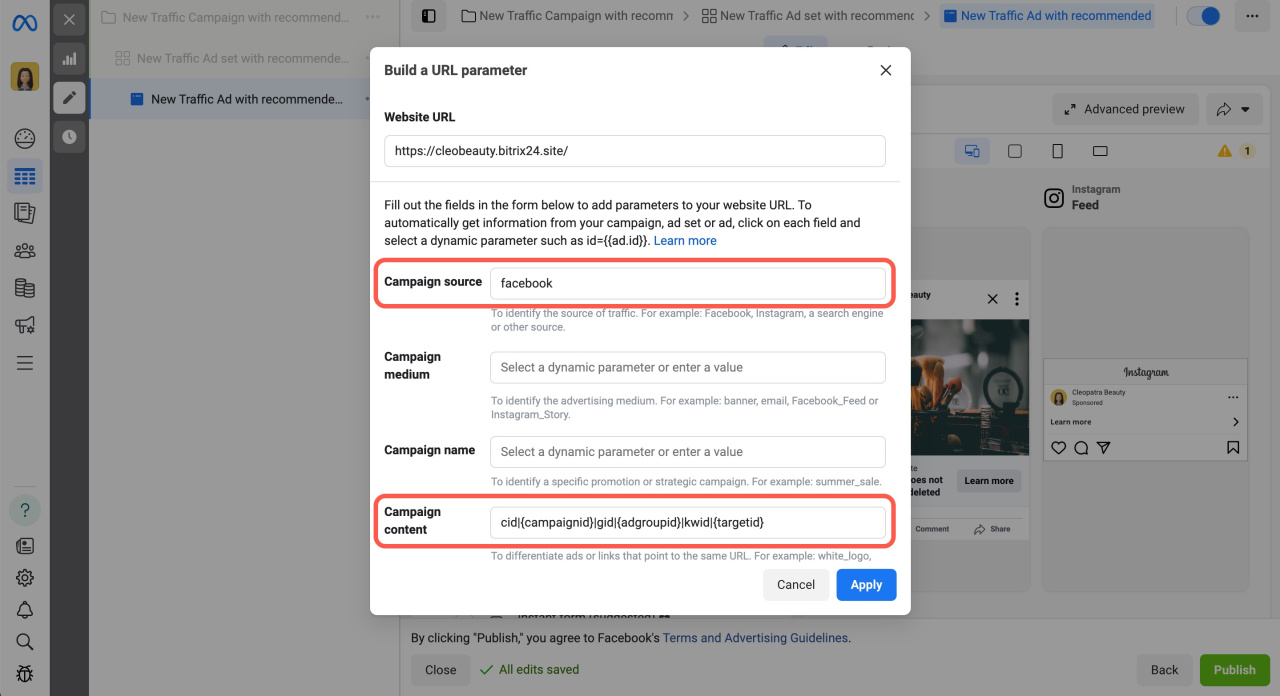
Fill in the following fields:
- Campaign source: Specify the parameter from utm_source.
- Campaign content: Add the utm_content parameter.
Click Apply, and clicks on your ads will include the necessary parameters for detailed advertising cost analysis.
In brief
-
For the correct ad costs analysis, set up UTM parameters in Bitrix24 and advertising services like Google Ads and Facebook.
-
In Bitrix24, connect Google Ads and Facebook as traffic sources, copy UTM parameters, and add them to your website address.
-
For Google Ads, include UTM parameters in the Final URL field or use a tracking template to apply the same final URL with UTM parameters to an ad group, campaign, or account.
-
In Facebook Ads Manager, set up UTM parameters during ad creation to ensure detailed ad spend reporting.


