You can launch an online store in Bitrix24 without programming skills. The ready-made templates include everything you need for sales, like a product catalog, shopping cart, checkout page, and more. You can customize the blocks and design of the store to suit your business needs. The online store is integrated with the CRM—products and inventory are updated automatically, and orders are sent directly to your Bitrix24.
In this article:
Create an online store
- Go to the Sites and Stores section > Online Stores > click Create.
- A template catalog will open where you can choose the one that suits your needs.
- Click Create Online Store.
Standard templates
- CRM + Online Store. Optimized for mobile devices. Suitable for sales through messengers and social networks.
- Classic online store. Clothing. A fully loaded template that can be easily customized for your business. Ideal for stores with a large number of products.
- Classic online store. Handmade items. A minimalist template for stores with a small number of products.
- Products on Sale. Designed for promoting a single product.
Templates from the Bitrix24 Market
- Click Download template from Market.
- Select one of the tags and choose a template from the list.
- Alternatively, search for a template using keywords. Enter them in the search bar and select the desired template from the list.
Install an online store
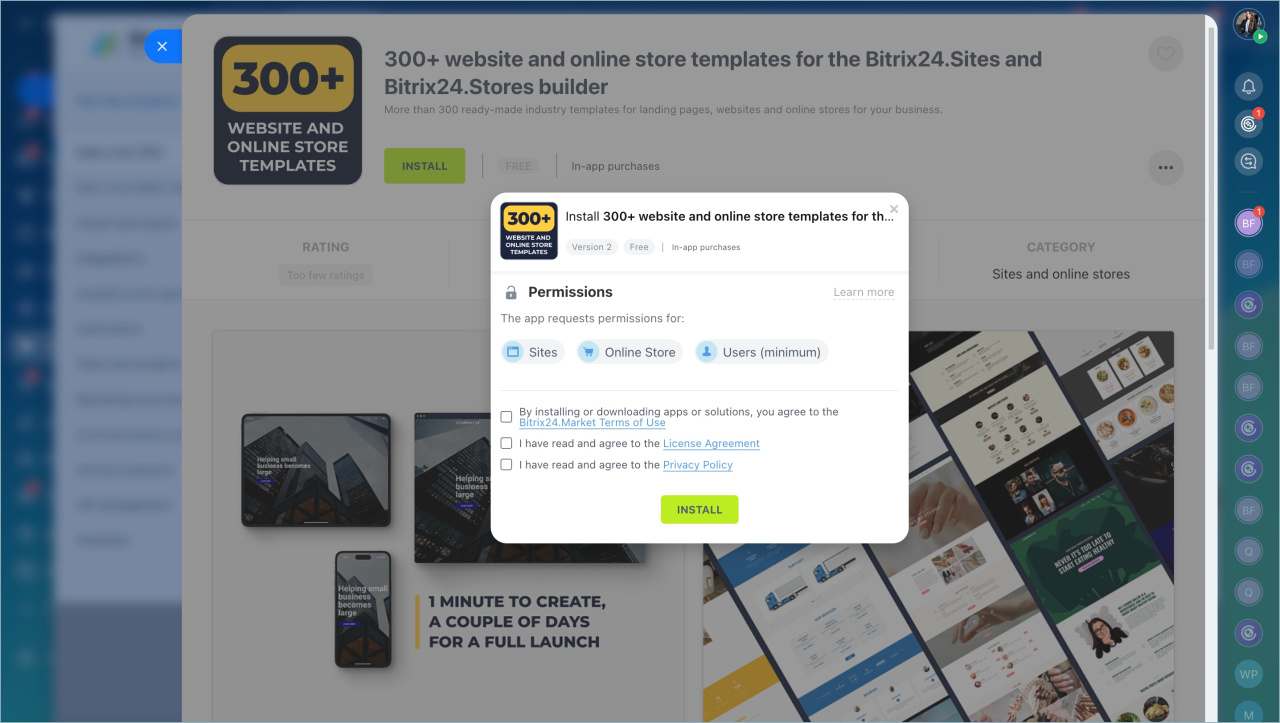
- Read the template description and click Install.
- Review the Bitrix24 Market terms of use and check all required boxes. Click Install.
- Click Open application.
- Click Complete installation.
- To preview the store, click Demo. It will open in a new browser tab.
- Click Install.
- Select the uploaded template and click Create Store.
Customize blocks and design
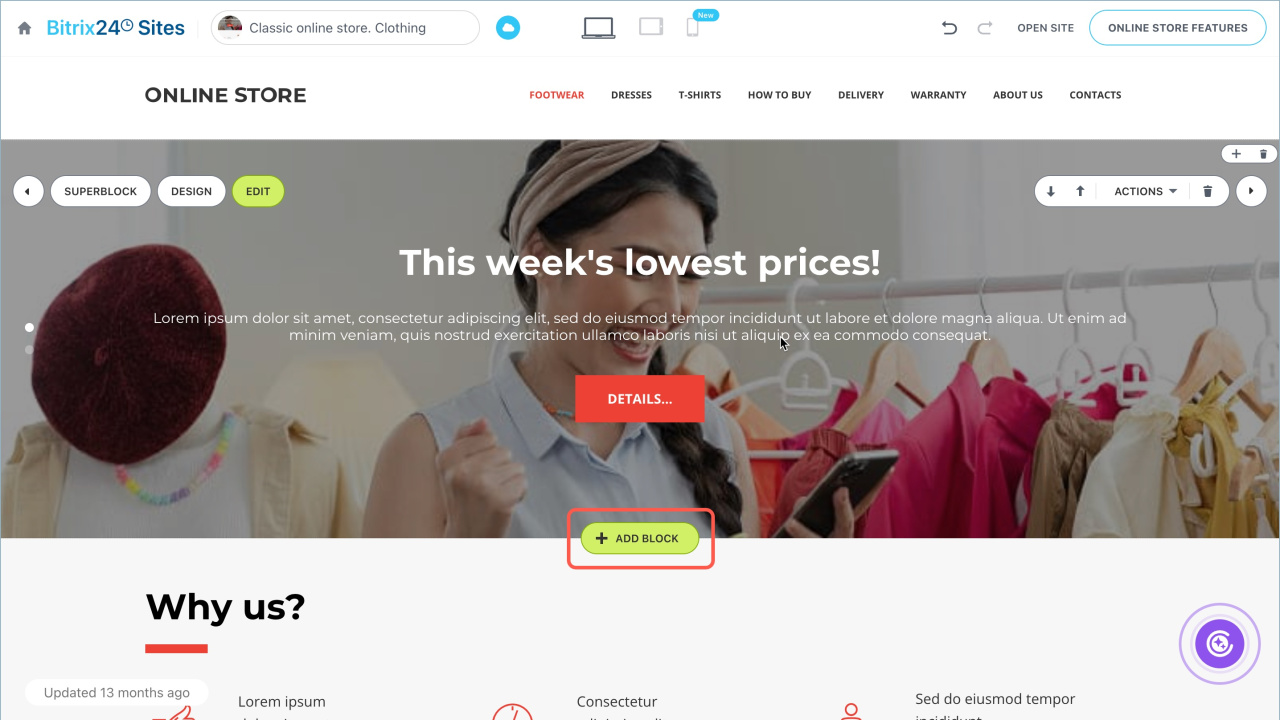
After creating the store, it will open in the editor. Here, you can add and modify blocks, customize the design, adjust the layout, and configure the product catalog.
Add additional blocks
Add the necessary blocks:
- Click the Add block button where you want to place it.
- Select a template from the list.
Customize a block
Hover over the block you want to edit—a list of available actions will appear:
- Edit. Change the block settings and content, like the title and captions for elements.
- Design. Change the block style settings and configure its visibility on desktops, tablets, and smartphones.
- Superblock. Add or remove block elements, like titles, icons, images, videos, and more.
- Additional actions for the block: move, delete, hide, copy, and more.
To undo or redo an action, use the buttons at the top of the screen.
Create and configure your Bitrix24 site
CoPilot: AI assistant to create websites
Add and configure the product catalog
To allow customers to purchase products, link the CRM catalog to the store.
Bitrix24 Inventory Management
Product subscription
Add a product catalog to the Online store
- Click Online store features > Settings (⚙️).
- Open the Catalog settings tab.Click the icon next to the folder name and select the catalog section with all the products you plan to sell in the store. Items inside can be listed together or grouped into subsections. New products should be added to this catalog.
- Fill in the remaining fields and click Save.
Products from the catalog will appear in the Product list block without being divided into subsections.
Customize the product list block
Click Edit to configure the block. Fill in the fields and save the changes.
Go to the Bitrix24 product catalog to manage products—create new ones or edit existing ones.
Set SEO tags and page title. Check the box if you want to apply the catalog's SEO settings to the store.
Setting up SEO parameters for the product catalog
Section ID. Leave the default value to ensure the product catalog displays correctly in the store.
Sorting. Specify the field to sort products by and the order: ascending or descending.
Buttons. Choose the action for the button under the product: add to cart or purchase—proceed to checkout. Edit the button labels and add a message for out-of-stock items.
Configure catalog navigation
If the product catalog has subsections, add links to them in the store menu.
- Open the Header page.
- Click on a menu item to edit it.
- Change the name.
- Configure the click action: select Open product page from the dropdown menu.
- Click the
 icon and choose the desired catalog item or section.
 - Save the changes.
- To manage menu items, hover over an item and click ➕ to duplicate it, or
 to delete it.
Publish the Online store
By default, Auto-publish mode is enabled. Stores are published after the first edit. When you edit the store, changes are applied automatically. If the edit does not appear, click Publish store—the change will appear in the store.
If auto-publish is disabled, click Preview—the store will open in a new tab, and edits will only be visible to you. To check how the store will look on different devices, click the icons at the top of the screen.
Click Publish store to make the changes available to customers.
Auto publish and preview options and site navigation
Bitrix24 plans and pricing
In brief
- Bitrix24 helps you launch an online store using a ready-made template. It includes everything you need for sales, like a product catalog, shopping cart, and checkout page.
- You can customize the blocks and design of the store to suit your business needs.
- The online store is integrated with the CRM—products and inventory are updated automatically, and orders are sent directly to your Bitrix24.
- To create a store, go to the Sites and Stores section > Online Stores > click Create.Choose a standard template or upload one from the Bitrix24 Market.
- Customize the blocks, store design, and product catalog.
- To synchronize product inventory between the CRM and the store, you need to set up Inventory management.
- For sites and stores, Auto-publish mode is enabled by default—changes are applied to the store automatically. If the edit does not appear, click Publish store—the change will appear in the store.
- If auto-publish is disabled, click Preview—the site will open in a new tab, and edits will only be visible to you. Click Publish store to make the changes available to customers.


