To work with Bitrix24 Drive files on your computer, you can connect it as a network drive in Windows. This setup allows you to:
- Keep all your files organized in one place
- Edit documents directly on your computer with automatic syncing to Bitrix24
- Work offline with files, syncing changes once you're back online
Choose one of these methods to connect a network drive:
- Map a network drive via Command Prompt
- Map a network drive using File Explorer
- Map a network drive with the Add Network Location Wizard
Features of connecting a network drive
If you use two-step authentication for logging into Bitrix24, you need to create a special application password to connect a network drive.
Enable two-step authentication for Bitrix24 login
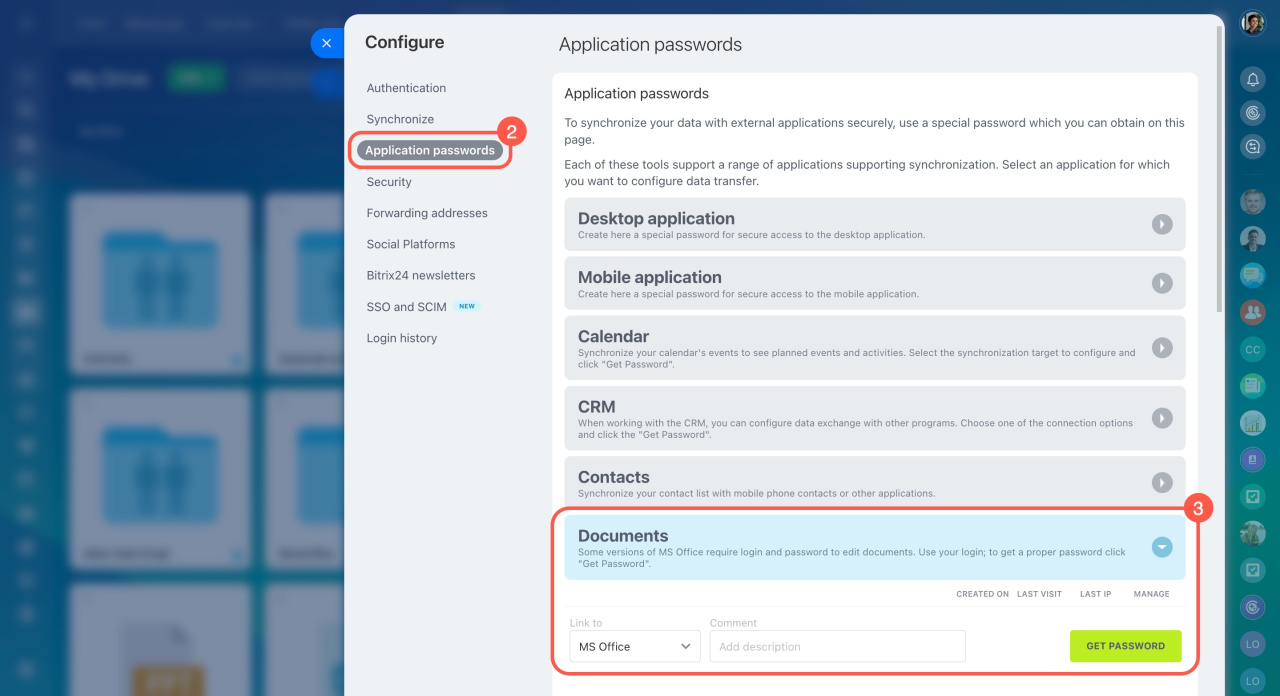
- Go to your profile and click Security in the top right corner.
- Select the Application passwords tab.
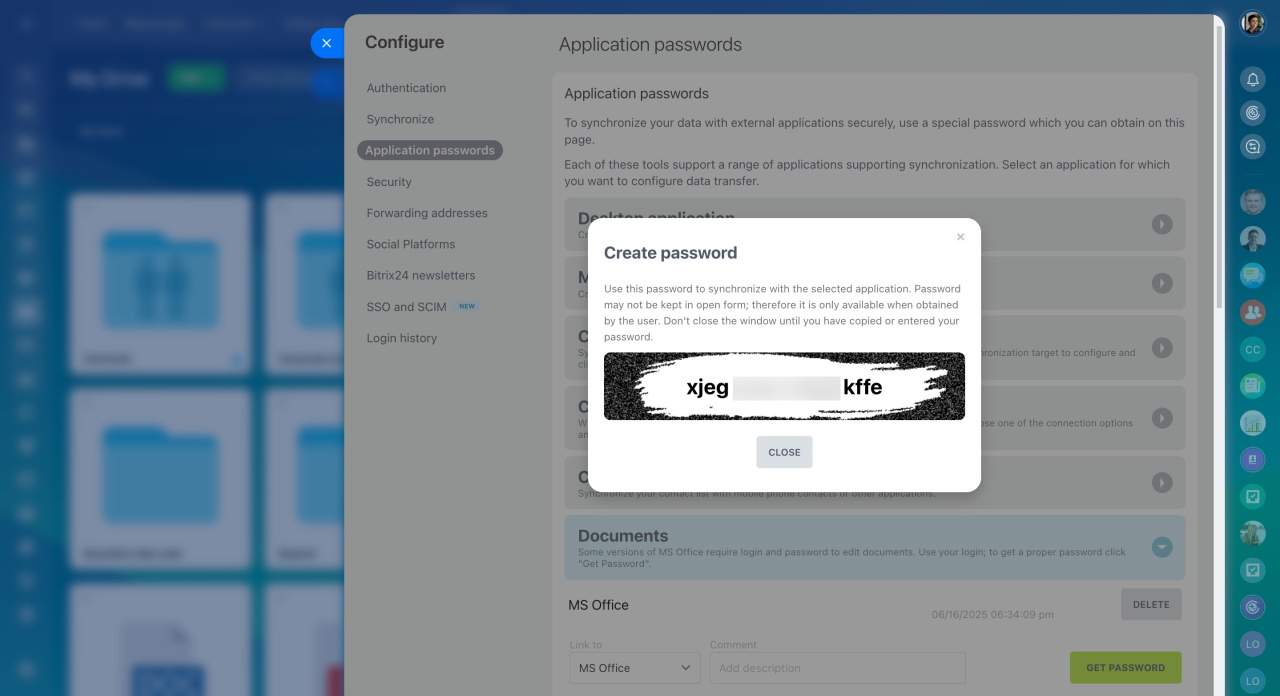
- Expand Documents and click Get password.
Map a network drive via Command Prompt
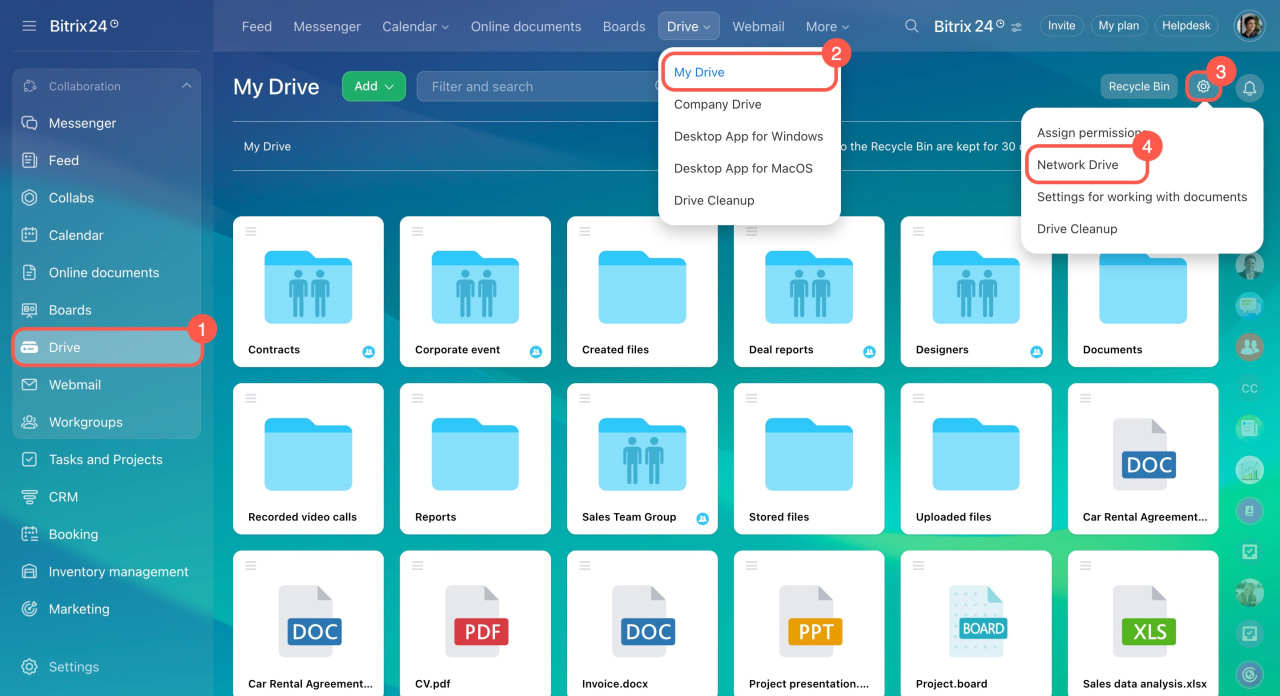
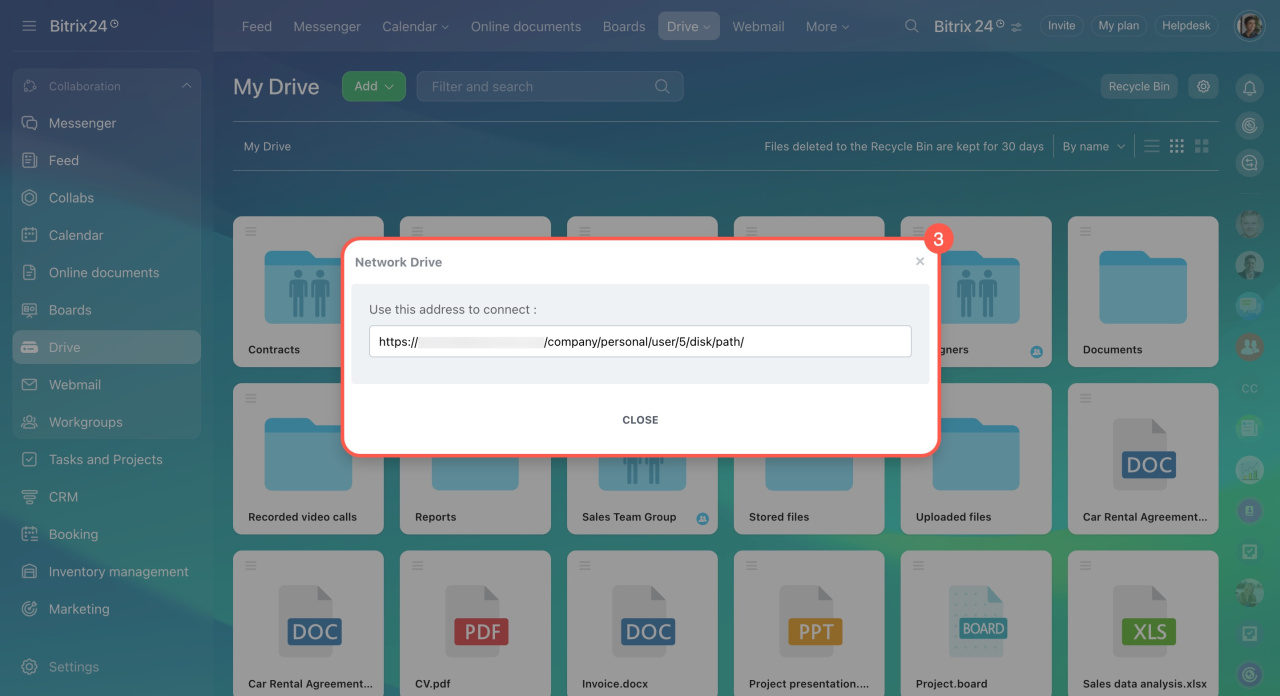
- Go to Drive.
- Select My Drive.
- Click Settings (⚙️).
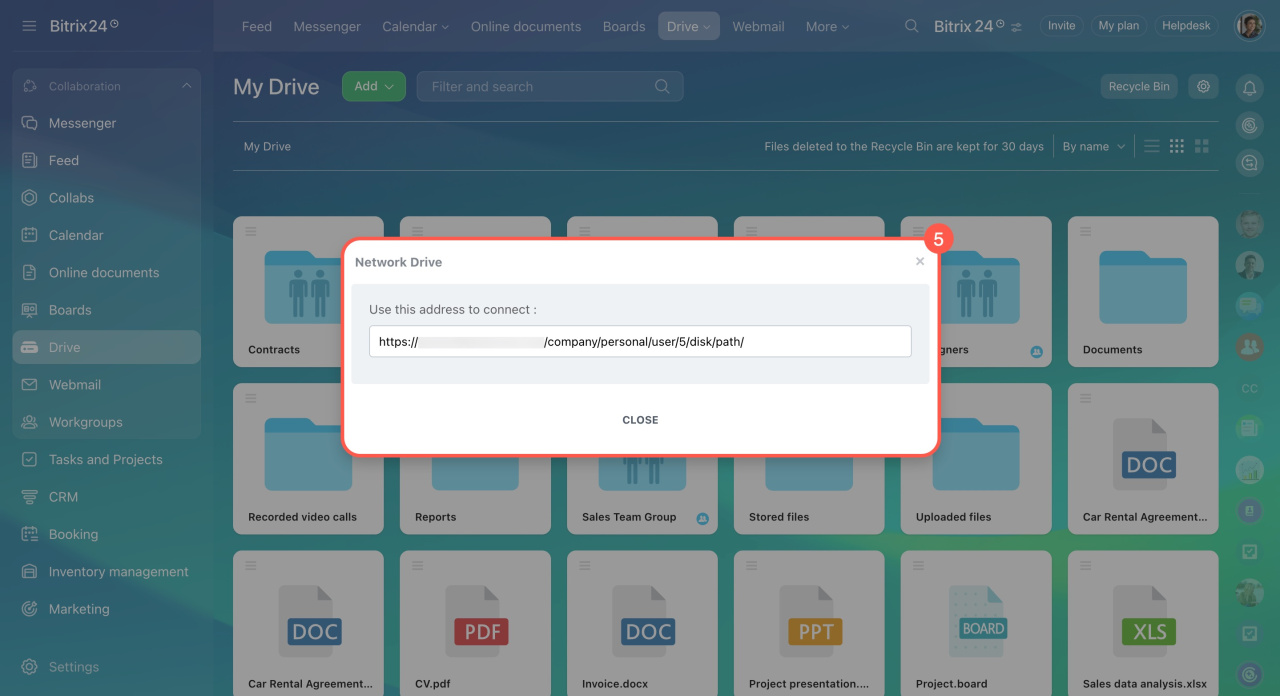
- Select Network Drive.
- Copy the connection address.
- Open Command Prompt in Windows by pressing Win+R and typing cmd in the Open field.
- Click OK.
- Enter the command
net use o: [copied address]. You can replaceowith any letter to name the network drive. Press Enter. - Enter your Bitrix24 login and press Enter.
- Enter your Bitrix24 password. Note that characters won't show as you type. If two-step authentication is enabled, use the application password.
- You'll see a confirmation message once the network drive is connected.
Map a network drive using File Explorer
- Open File Explorer on your computer.
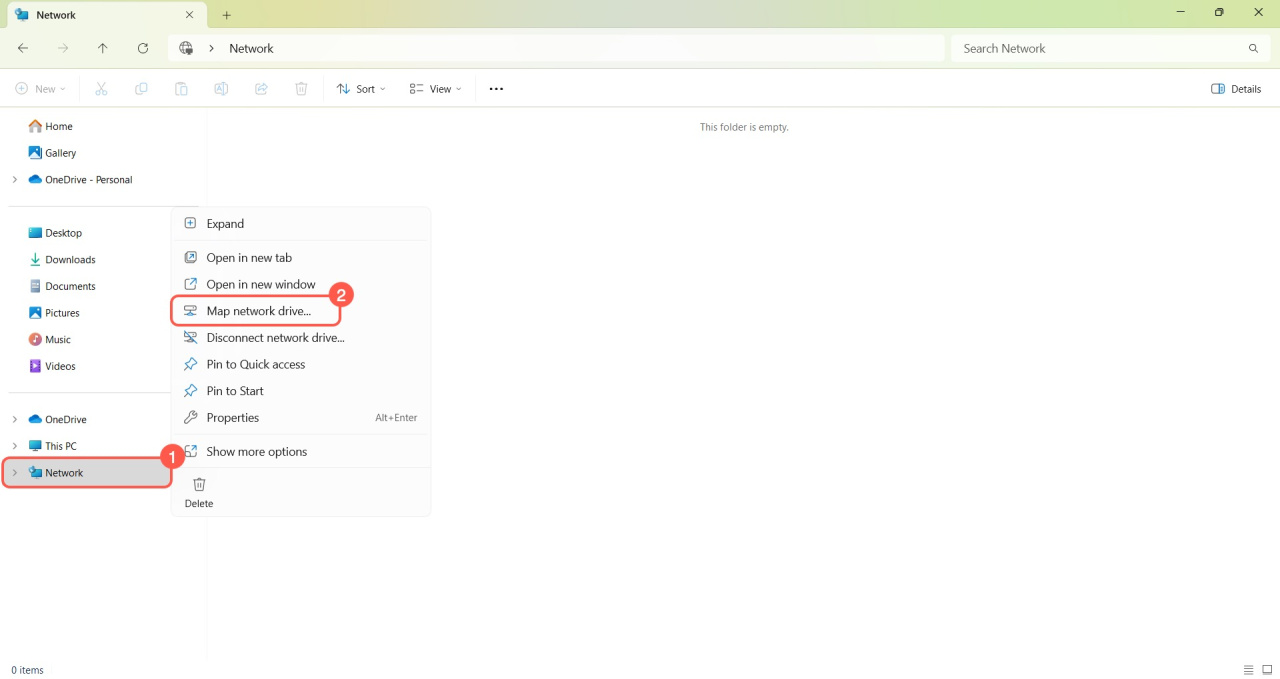
- Right-click Network and select Map network drive.
- Go to Bitrix24 > Drive > My Drive > Settings (⚙️) > Network Drive and copy the connection address.
- Paste the copied address in the Folder field and choose your connection preferences:
: Automatically connect each time you log into Windows.
: Use another Windows account if needed. - Click Finish.
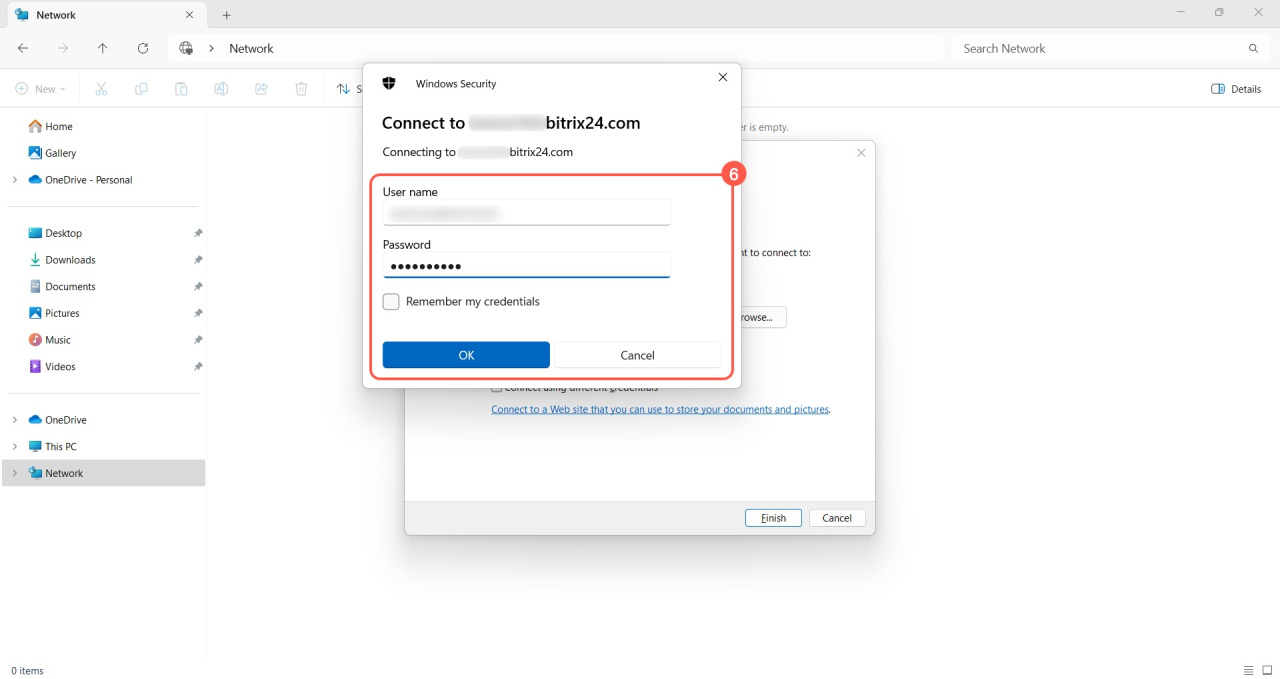
- Enter your Bitrix24 login and password, then click OK.
Map a network drive with the Add Network Location Wizard
- Open File Explorer on your computer.
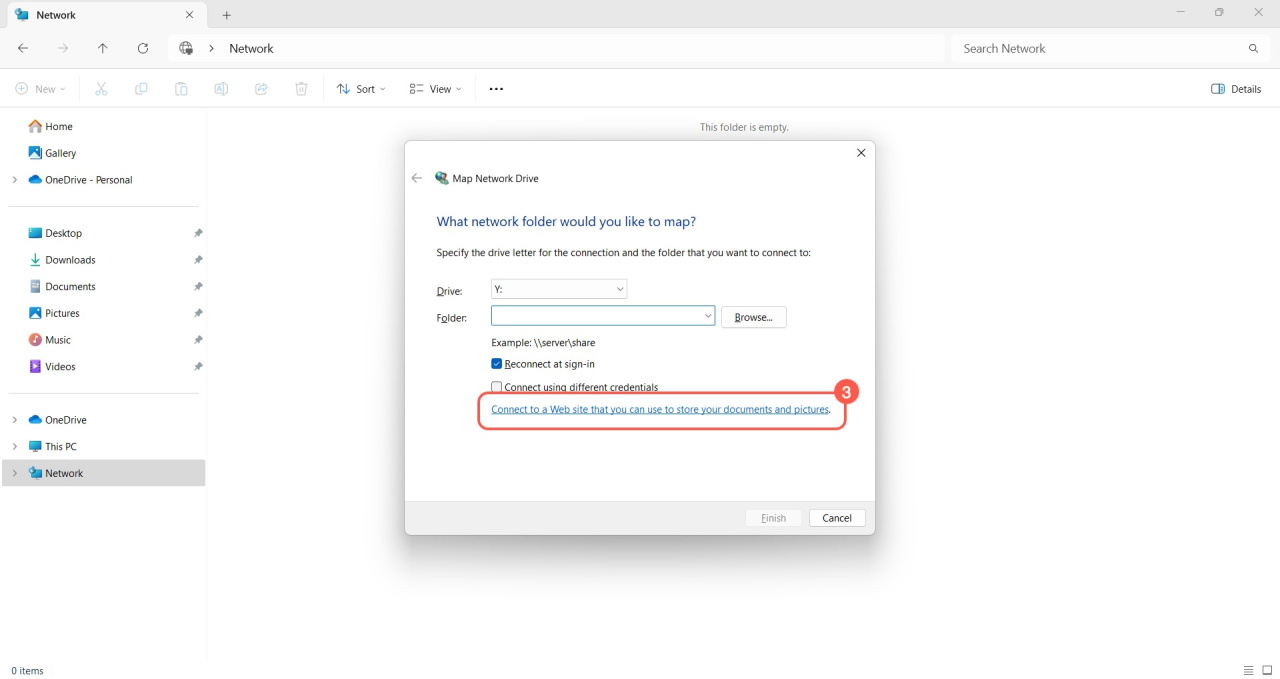
- Right-click Network and select Map network drive.
- Click Connect to a Web site that you can use to store your documents and pictures.
- Click Next.
- Go to Bitrix24 > Drive > My Drive > Settings (⚙️) > Network Drive and copy the connection address.
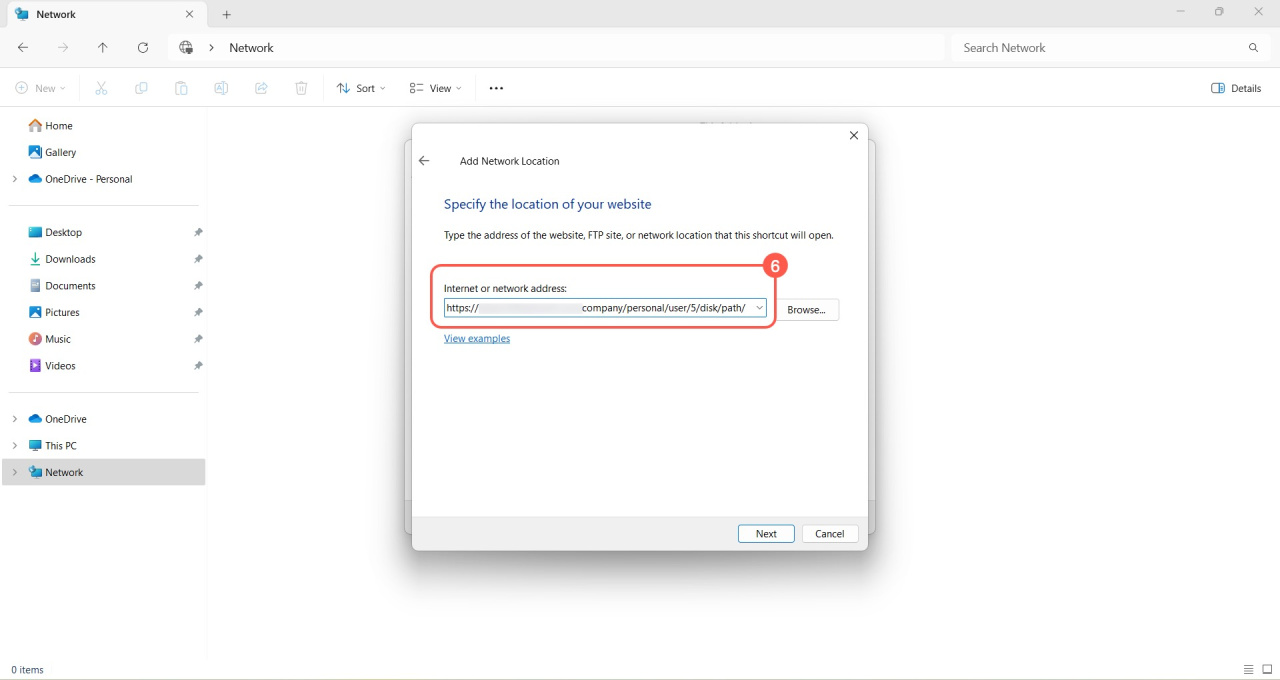
- Paste the copied address under Internet or network address and click Finish.
- Enter your Bitrix24 login and password, then click OK.
- Click Next > Finish.
Disconnect the network drive
You can disconnect the network drive in Windows using Explorer or the Add Network Location Wizard.
File Explorer.
- Open File Explorer on your computer.
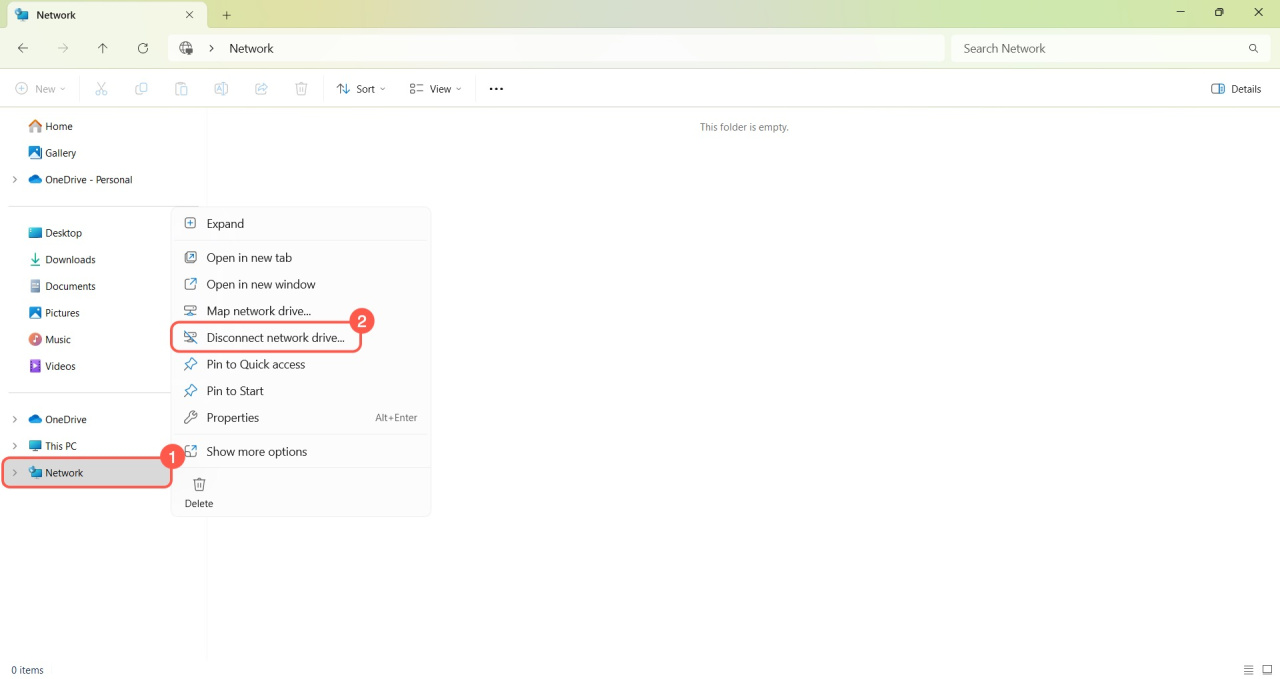
- Right-click Network and select Disconnect network drive.
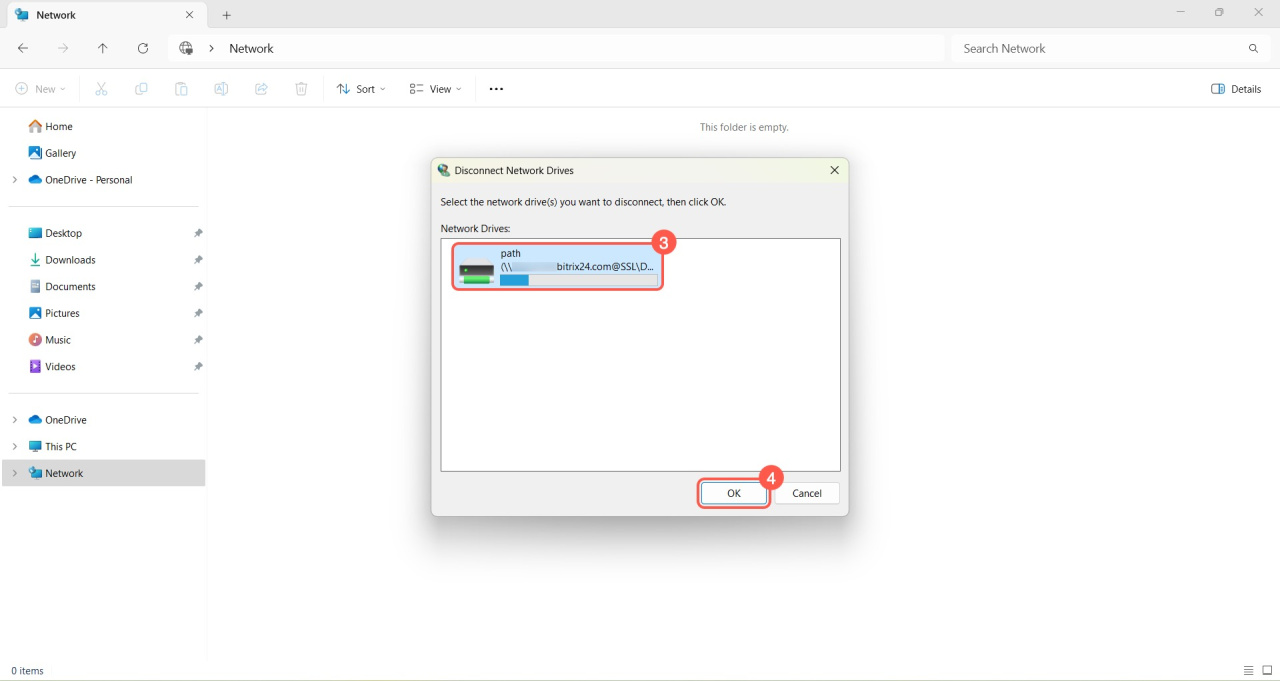
- Select the drive you want to disconnect.
- Click OK.
Add Network Location Wizard.
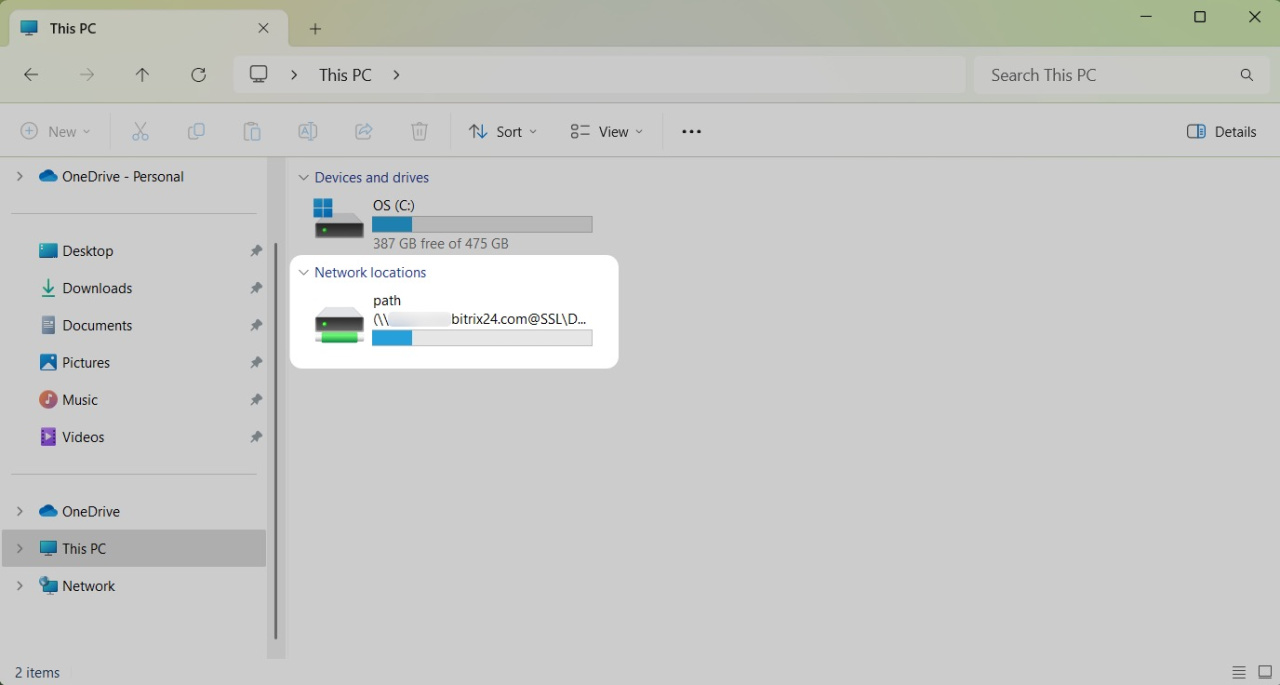
- Open File Explorer > This PC.
- Right-click the network folder you want to disconnect.
- Click Delete.
In brief
- Connect Bitrix24 Drive as a network drive in Windows to manage files on your computer.
- After connecting, you can store files in one location, edit them on your computer and in Bitrix24. Changes sync automatically.
- Use the Command Prompt, File Explorer, or Add Network Location Wizard to map a network drive.
- If you use two-step authentication, you need to create a special application password to connect a network drive.


