Phone call recording is a valuable tool for managing employees and serving customers. After conversations, reviewing recordings helps capture crucial details. Managers can evaluate employee performance and communication results to enhance productivity and satisfaction.
Find out how to activate call recording, transcription, and client assessment of call quality in Bitrix24 telephony.
How to activate call recordings
The option to record your calls is configured for each PBX or rented number separately. Both inbound and outbound calls are recorded.
To start saving recordings of all calls,
-
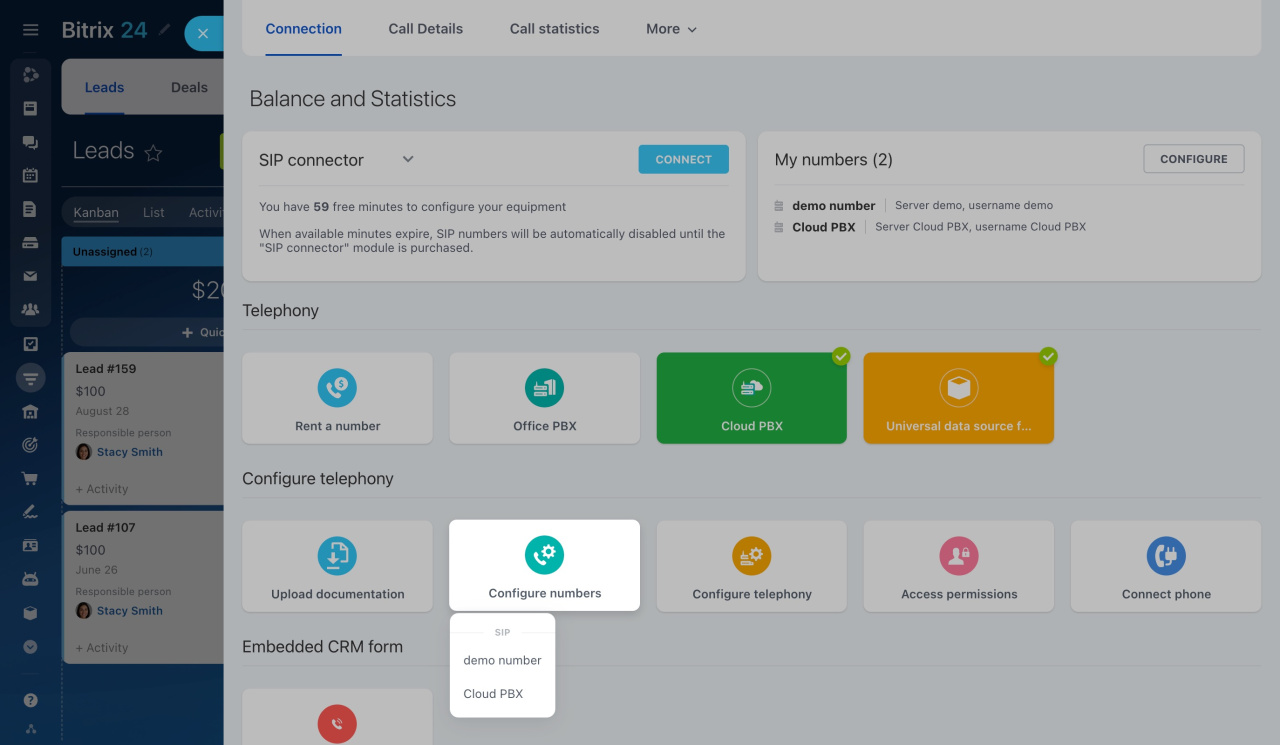
Go to CRM > Add-ons > Telephony.
-
On the Connection page, click Configure numbers and select a rented number or connected SIP PBX.
-
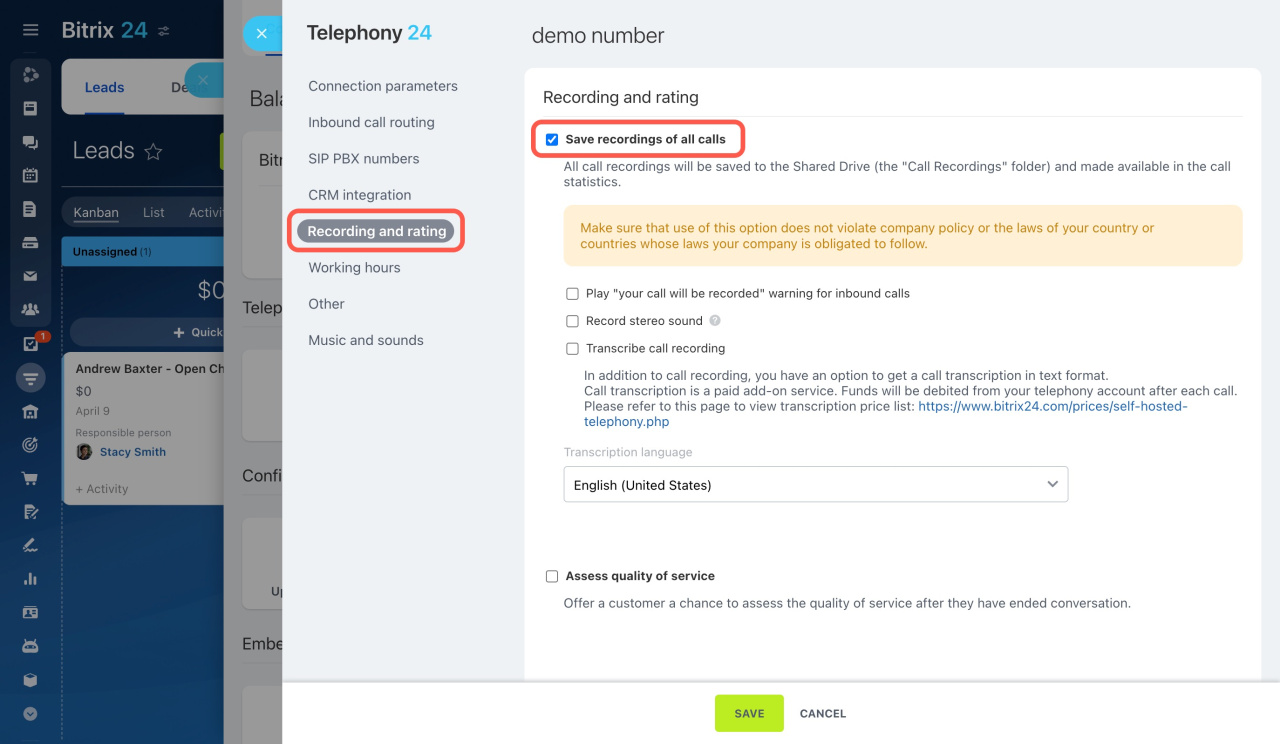
Open the Recordings and ratings tab and turn on the Save recordings of all calls option. Ensure that the use of this option does not violate company policy or the laws of your country or countries whose laws your company is obligated to follow.
To inform your client that the call will be recorded, turn on the option to play a warning about it before the conversation.
The corresponding audio file is stored in the Music and sounds section. Replace it with your custom tune if needed.
Learn how to customize hold music
How to configure call transcription and quality assessment
In the Recordings and ratings section, there are some additional options available.
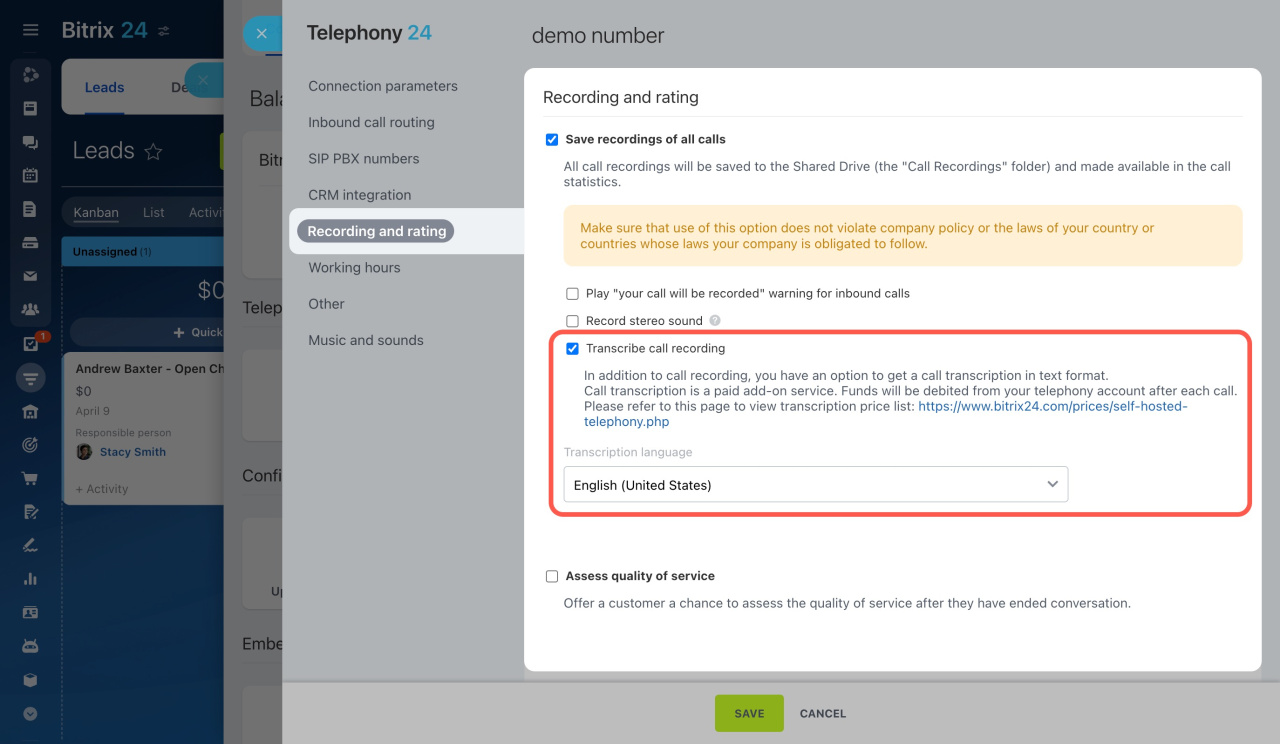
: Enable this option to save a call transcription in text format. Also, choose the default transcription language.
It can take from 20 seconds to a few minutes for the system to convert a phone call to text, depending on its length. Once activated, call transcription will be applied to all new calls.
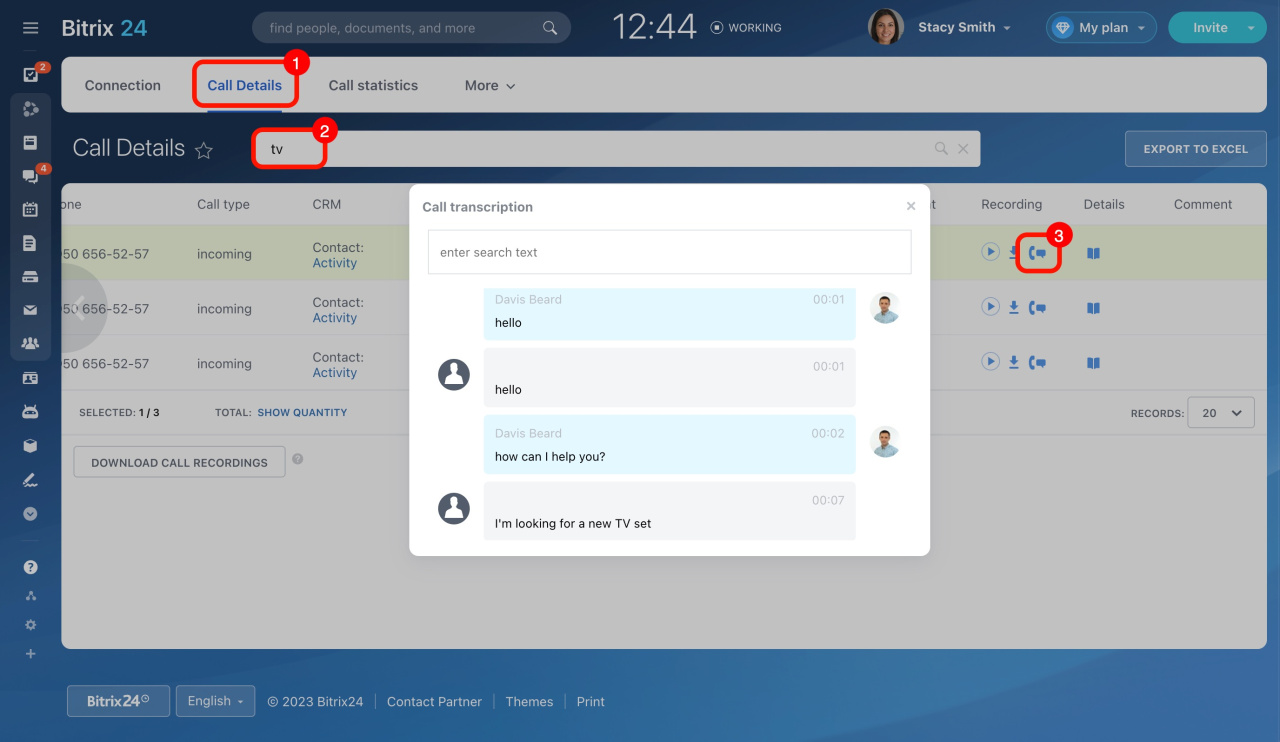
In the Call Details section, you can find a phone icon in the Recording column. Click on it to view the text. The words and sentences of the transcript are divided into speaker sections: customer and agent.
The transcription text is searchable, so you can quickly find information by keywords. Imagine you discussed a TV set purchase with a client. Enter "TV" in the search bar, and the system will find all calls that mention this word.
Note that call transcription is applied to all new calls. There is no option to apply it to selected phone conversations only.
: Turn on this option to save call recordings in stereo format.
: Offer your customer a chance to assess the quality of service after they have ended a conversation. You can check assessments later in the Call details section.
Learn more about the Call details section
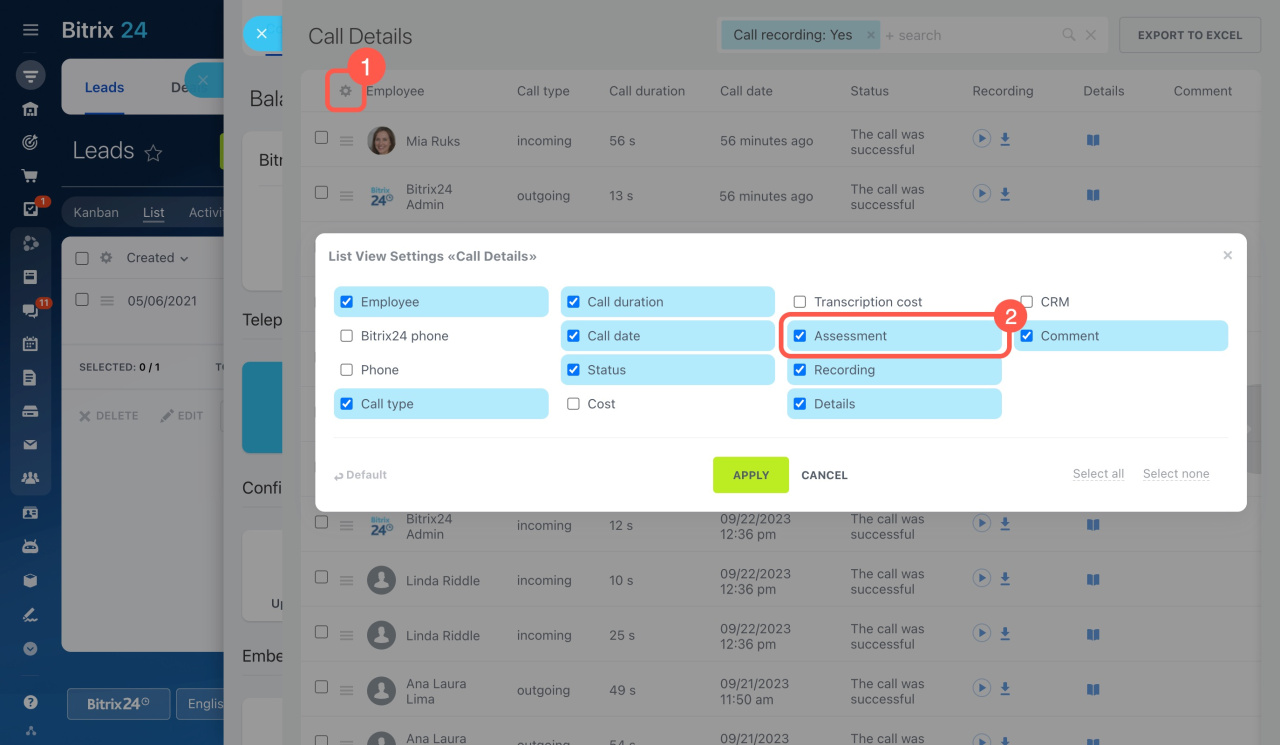
If you don't see the Assessment column, enable it in the list view settings. To do this, click the gear button (⚙️) and select Assessment.
Where to find call recordings
Call recordings are stored in two locations:
-
CRM > Add-ons > Telephony > Call Details.
-
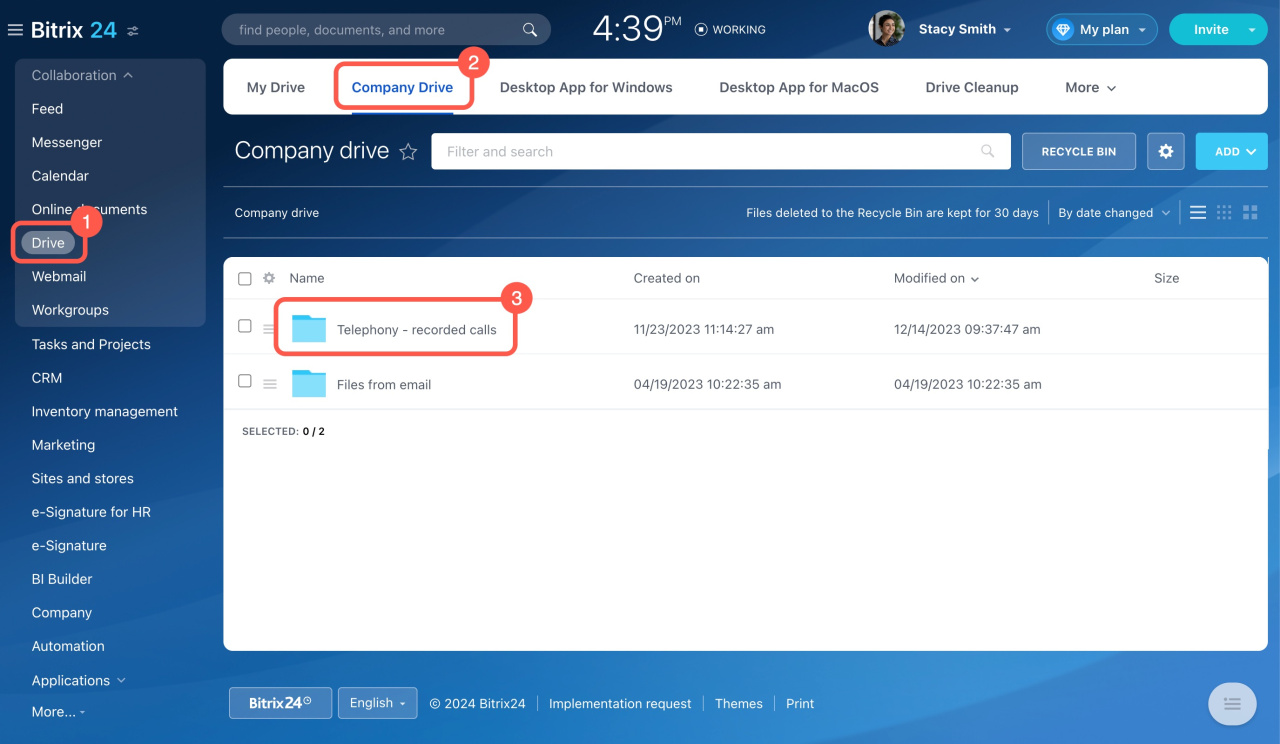
Drive > Company Drive > Telephony – recorded calls. This system folder is automatically created after you enable call recordings and get your first call recorded. Configure permissions for this folder to grant or limit employee access.
Learn how to configure access permissions in Company Drive
How to delete call recordings
There are no time limits for storing call recordings in Bitrix24. They remain until you delete them manually. Note that you need to delete records from both the Company Drive and Call Details separately.
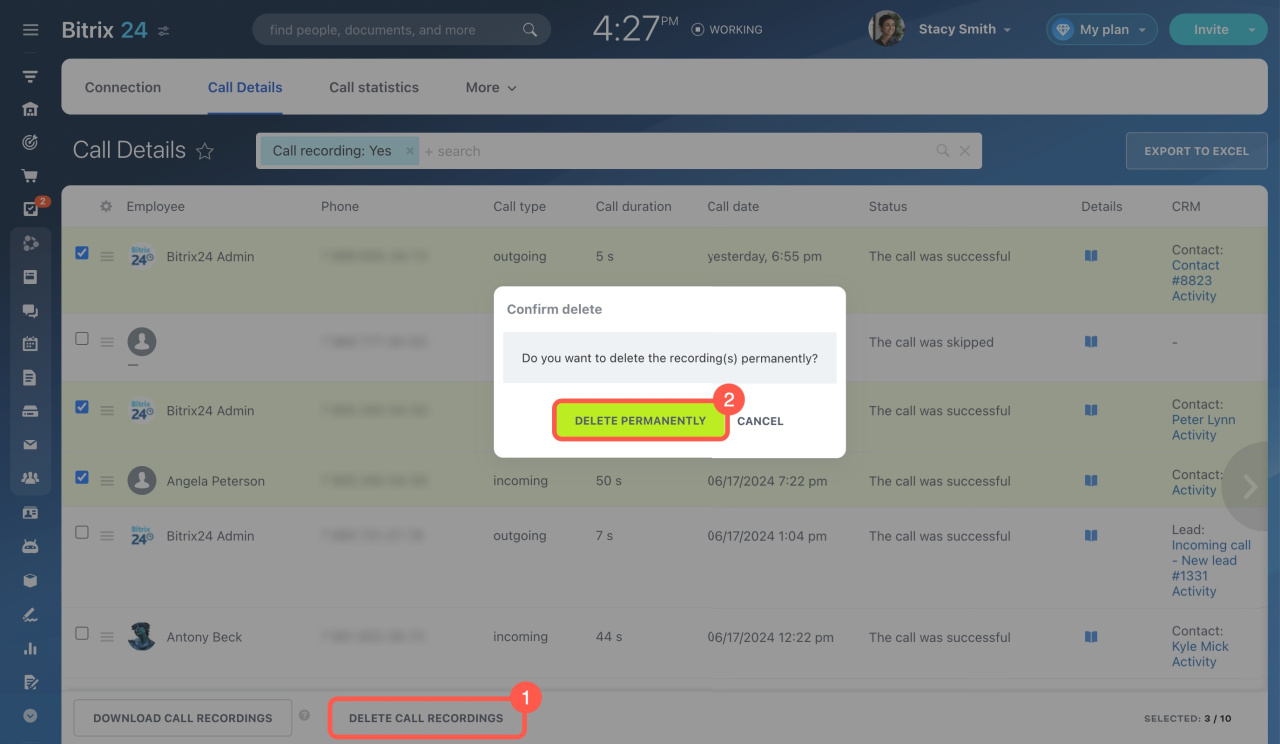
Company Drive. If you move a call recording to the Drive Recycle bin, it will remain available under Call Details and in CRM entity form. If you delete a call recording from the Recycle bin, it will be irreversibly removed from your Bitrix24.
Call Details. Select one or more records and click Delete. Ensure that you have selected the desired entry before deleting, as there is no Recycle bin under Call Details and deleted recordings cannot be restored.
How to listen to call recordings
To listen to call recordings or download them, navigate to Telephony and open the Call Details section.
Account administrators have full access to all call recordings. Regular users can only download their own call recordings and listen to those they have permission to access.
Learn how to configure access permissions to Telephony
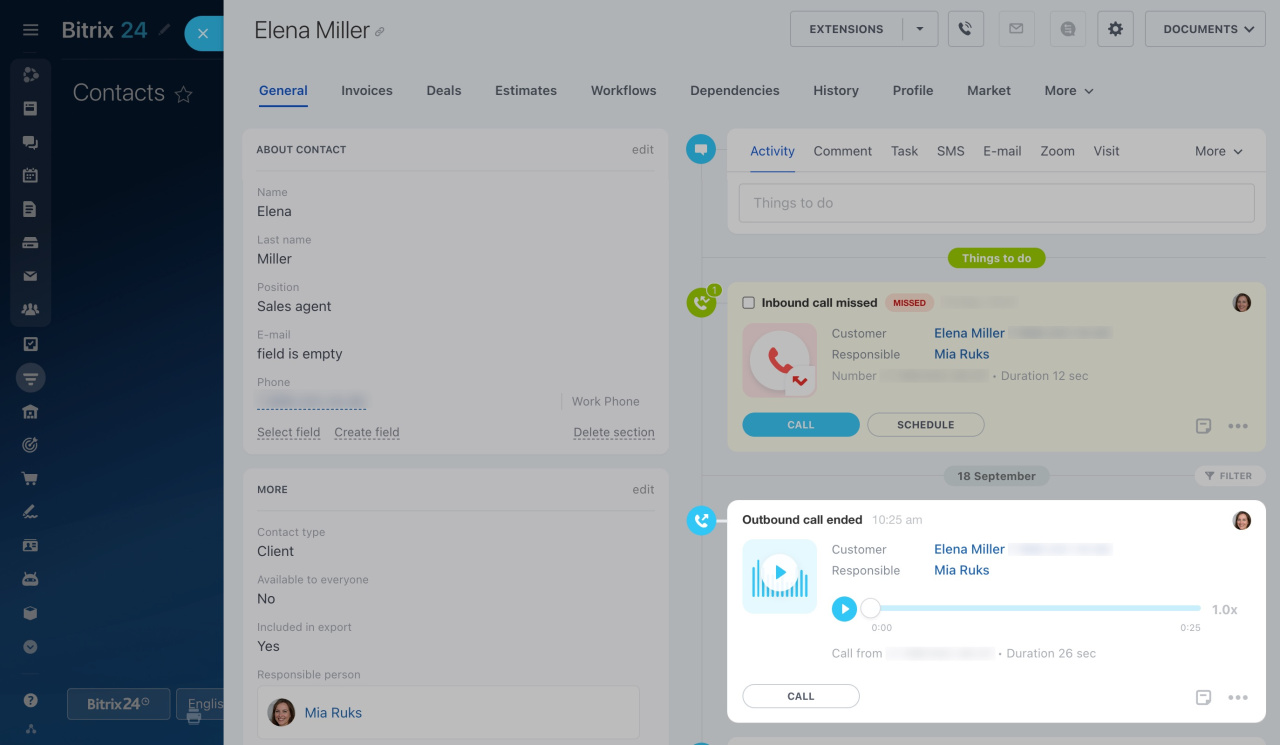
Also, you can listen to call recordings in the CRM entity form if they were saved there as activities. Regular users can listen to them if they have access to view the CRM entity itself.
Learn how to configure access permissions to activities
In brief
-
Save recordings of all calls from your rented numbers and connected SIP PBX. Make sure this option complies with company policy and relevant laws.
-
To inform your client that the call will be recorded, use the option to play a warning about it before the conversation.
-
In addition, you can enable call transcription in text format and offer your customers a chance to assess the quality of service.
-
Listen to call recordings in the Call Details section and in the CRM entity form. Account administrators can access all recordings and set up access permissions for regular users.
-
Call recordings are stored on the Company Drive in a special system folder. There are no time limits for their storage. Delete the files manually, if required.

