CRM forms simplify customer interactions by helping collect contacts, requests, and feedback. In Bitrix24, you can customize form design by changing a form theme, field style, font, background, and more. This allows you to adapt the forms to your company style and increase conversion rates.
In this article:
- Customize form design
- Change element colors
- Select a font
- Adjust form borders
- Change the page background
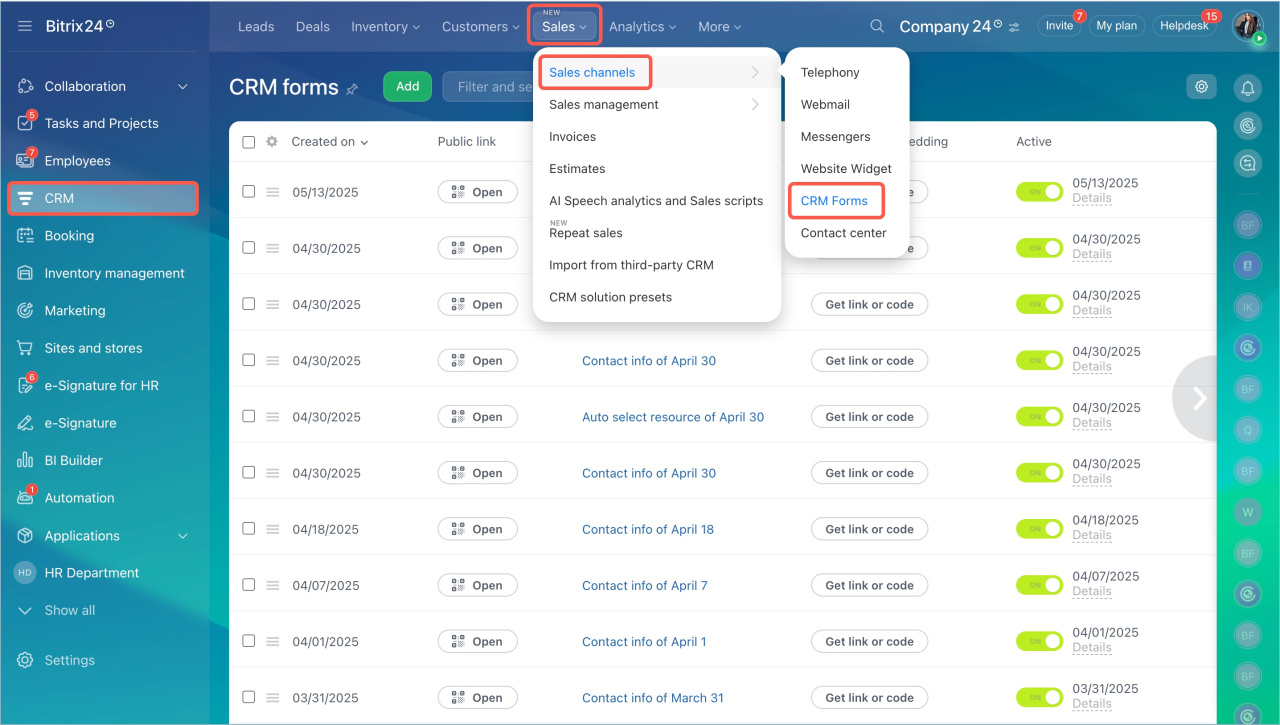
- Go to CRM > Sales > Sales channels > CRM forms.
- Select the form.
- Open the Design tab.
Customize form design
Theme. This setting changes the font, color scheme, and field design of the form. Five options are available:
- Business
- Modern
- Classic
- Funny
- Pixels
Design. Choose a light or a dark interface option.
Field style. There are two options: Standard and Modern.
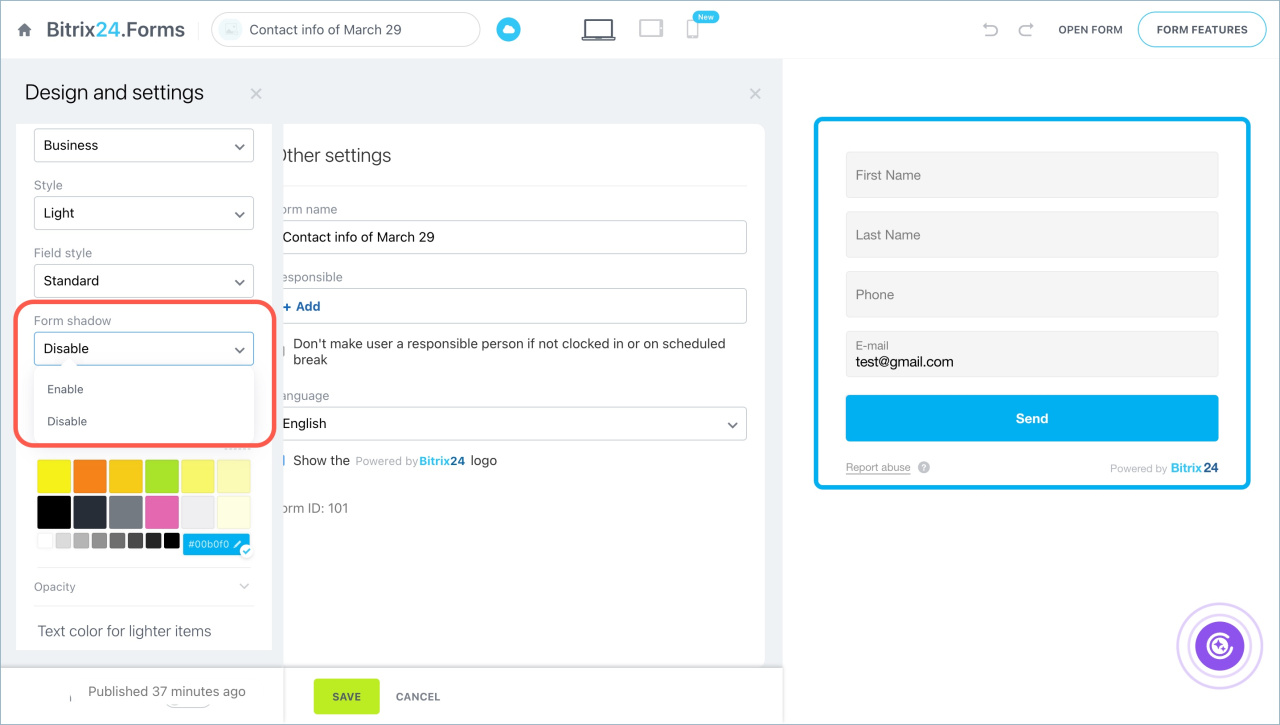
Form shadow can be enabled or disabled.
Change element colors
You can adjust the color and transparency of:
- Bright elements and their text, including form borders, dividers, the "Submit" button background, and its label.
- Form background and text.
- Field background and borders for fields in the standard style.
- Click More to see all color combinations and select a palette.
- Choose the appropriate color.
- Expand the Transparency field to adjust color saturation. For a denser color, set the maximum value using the slider or buttons.
Select a font
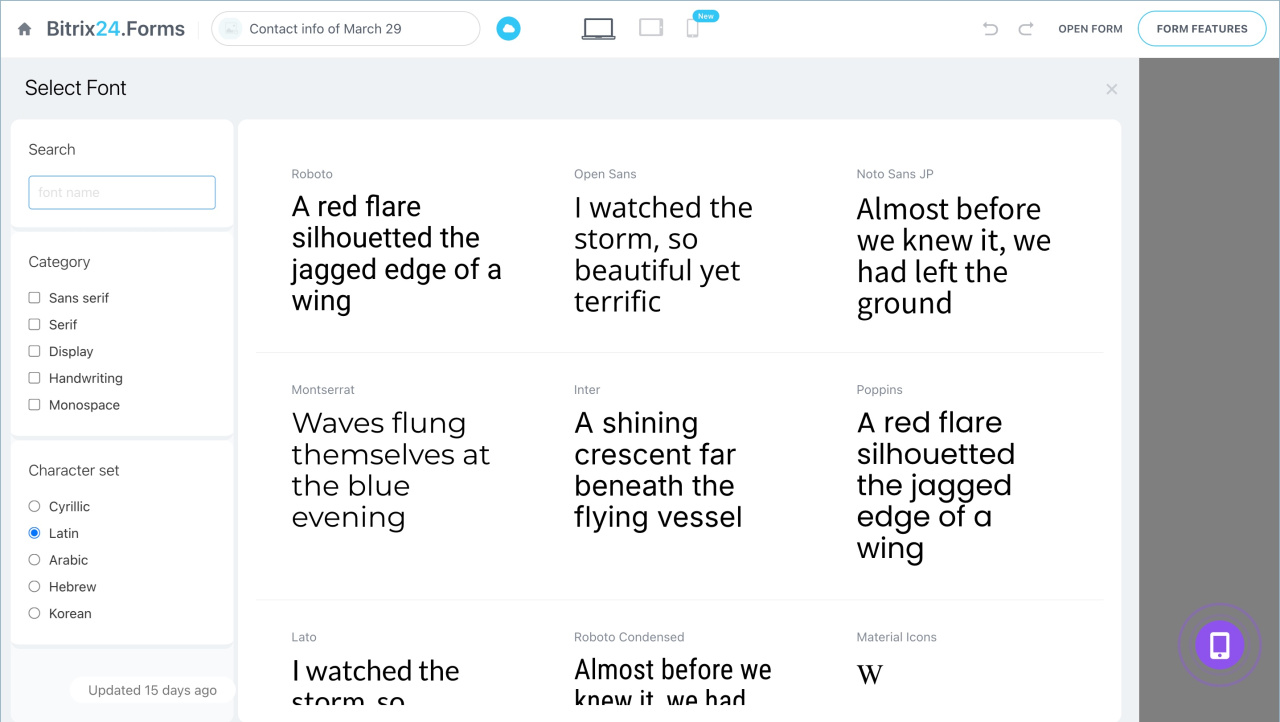
- Go to the Font section. The settings window will open.
- Find the font by name or choose a category.
- Click on the desired font and replace the standard text with your own if you want to see how it looks.
- Click Select.
Adjust form borders
You can choose which side the form borders will be on or remove them entirely.
Change the page background
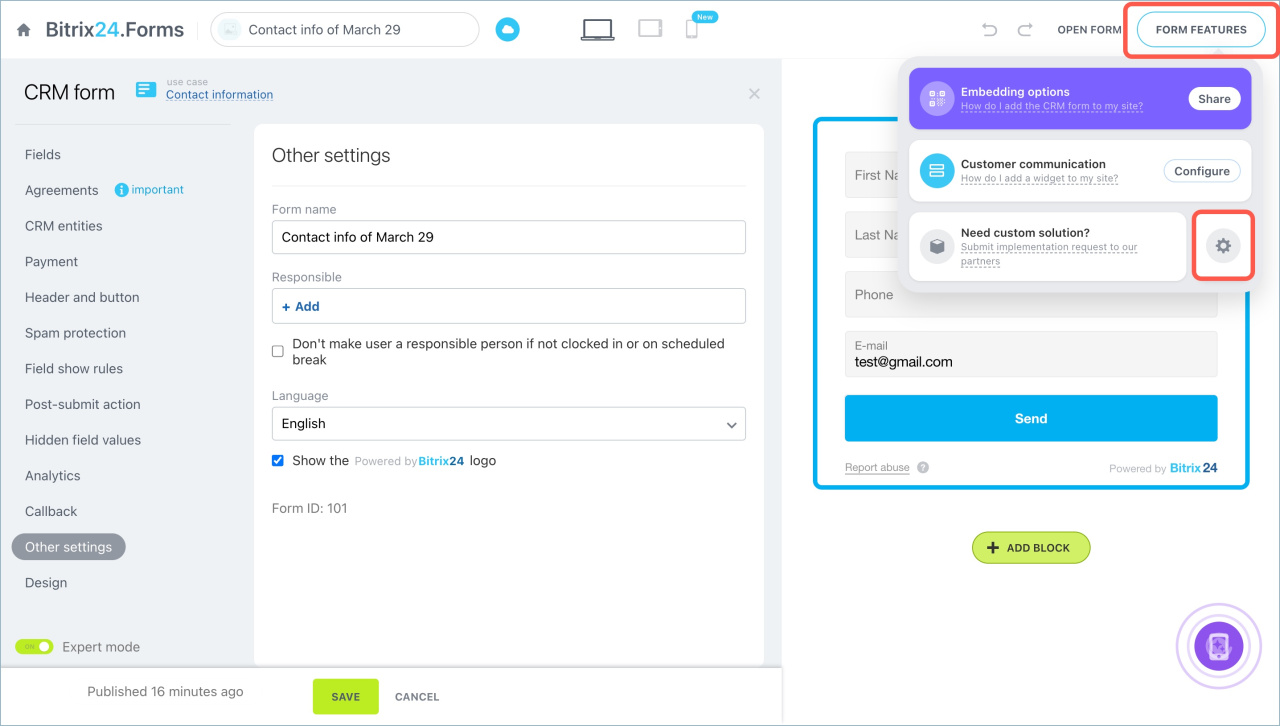
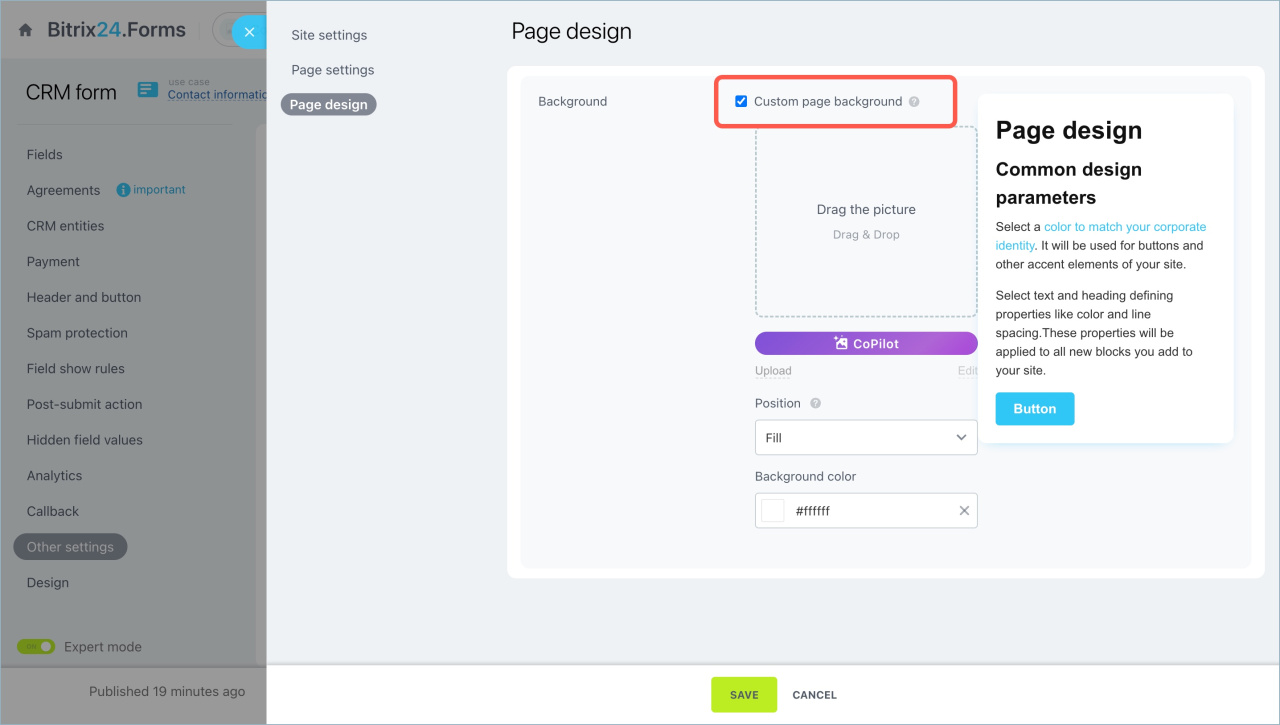
- Click on the Form features button > Settings.
- Open the Page Design tab and enable the Custom page background option.
- Upload an image or create one using CoPilot.
- Choose the position, specify the background color, and save the changes.
In brief:
- Customize CRM form design by changing the theme, background color, field style, etc.
- Enhancing CRM forms using CSS and JavaScript styles is not supported.
- Go to the CRM section > Sales > Sales Channel > CRM Forms and select the form you want to modify. Click Design to open the settings window.
- Select the font and form design: theme, dark or light interface, field style, enable or disable form shadow.
- Adjust form borders and element colors: background, fields, text, and more.
- Change the background of the page with the form: upload an image or generate one using CoPilot.

