Automation rules and triggers in CRM help automate different work scenarios.
Automation rules perform routine actions such as sending emails and chat messages, setting tasks, creating documents.
Triggers track customer actions and changes in CRM, for example, viewing an email, paying an invoice, changing the value of fields in a CRM form. When the specified action occurs, the trigger moves the CRM element to another stage.
Automation rules in CRM
Triggers in CRM
To configure automation rules and triggers, go to the CRM section, select the desired CRM entities and click the Automation button.
Automation rules and triggers are categorized into groups depending on the tasks they perform: communication with clients, inform employees, execute documents, and so on.
We are going to tell you about the Employee monitoring and control automation rules group in this article.
With the help of this group of automation rules, the supervisor can control the work of employees: automatically set tasks and track their fulfillment, receive notifications if an employee has not contacted a client on time.
Let's consider the settings of each automation rule.
Notify supervisor
This automation rule sends the supervisor a notification about overdue tasks and violations. For example, the supervisor will be notified if the employee does not contact the customer and does not move the deal to the next stage on time.
Time. Specify whether the automation rule should perform the action: immediately or after a certain period of time.
Condition. Add data from the CRM form to the notification text, such as responsible person name, deal total amount in order to provide the supervisor with important information.
Recipients. By default, the supervisor of the employee responsible for the CRM item will receive the notification.
Add history entry
The automation rule adds a record to the CRM history so that the supervisor can control the process of working with the client. Any text you specify in the automation rule settings can be written to the history.
Time. Specify the time the automation rule should perform the action: immediately or after a certain period of time.
Condition. The automation rule will record specified text in the history. You can automatically add data from the CRM form: the deal total amount, name of the client or the responsible employee.
Created by. The automation rule will add an entry to the history on behalf of this user.
You can view the record in the History tab in the CRM form or in the History section in CRM.
Create task
When a CRM entity reaches a certain stage, the automation rule assigns the task to the employee: it adds a detailed description, specifies the deadline and participants. For example, create an automation rule at the "Project Preparation" stage. When the deal gets to this stage, the automation rule will assign the task for the designers.
Task name. Add information from the CRM form, such as deal name, customer name, order date, etc. to help employees quickly find the task.
Task description. Specify the information from the CRM form: order details, customer's wishes, etc.
Responsible. Select the employee who will perform the task.
Deadline. Specify the time the task should be completed. Enable the Respect working hours specified in the Bitrix24 settings option or change the time settings if needed.
More. Specify additional task settings: add participants, bind the task to a social network group, enable time tracking, etc.
Create a task
Save all the settings. When the deal moves to the specified stage, the automation rule will set the task.
Watch for task status
The trigger changes the CRM entity stage when the task linked with it moves to the specified status. For example, it will move the deal to the "Project Presentation to Client" stage when an employee completes the task of project preparation.
Trigger name. Change the default name if you are configuring several triggers for different task statuses. This way you can quickly find the desired trigger on the settings page.
Status. When the task gets this status, the trigger will move the CRM entity to another stage.
Task fields. To make the trigger work only for the required tasks, set up a filter. For example, the trigger will only work for tasks that have certain words in their names.
Change stage as. The timeline and CRM form history will contain a record of the stage change on behalf of this user.
Allow moving back to previous status. Enable this option To allow the trigger to move the entity to the previous stage.
End task
This automation rule will automatically complete tasks created by other automation rules.
Let's create an automation rule at the "Successful Deal" stage. When the user completes the deal, the automation rule will close the tasks.
Complete tasks created in pipeline. Select the pipeline if you are configuring the automation rules in deals.
End tasks created while in stage. Select a stage. The automation rule will complete tasks that another automation rule created in this stage.
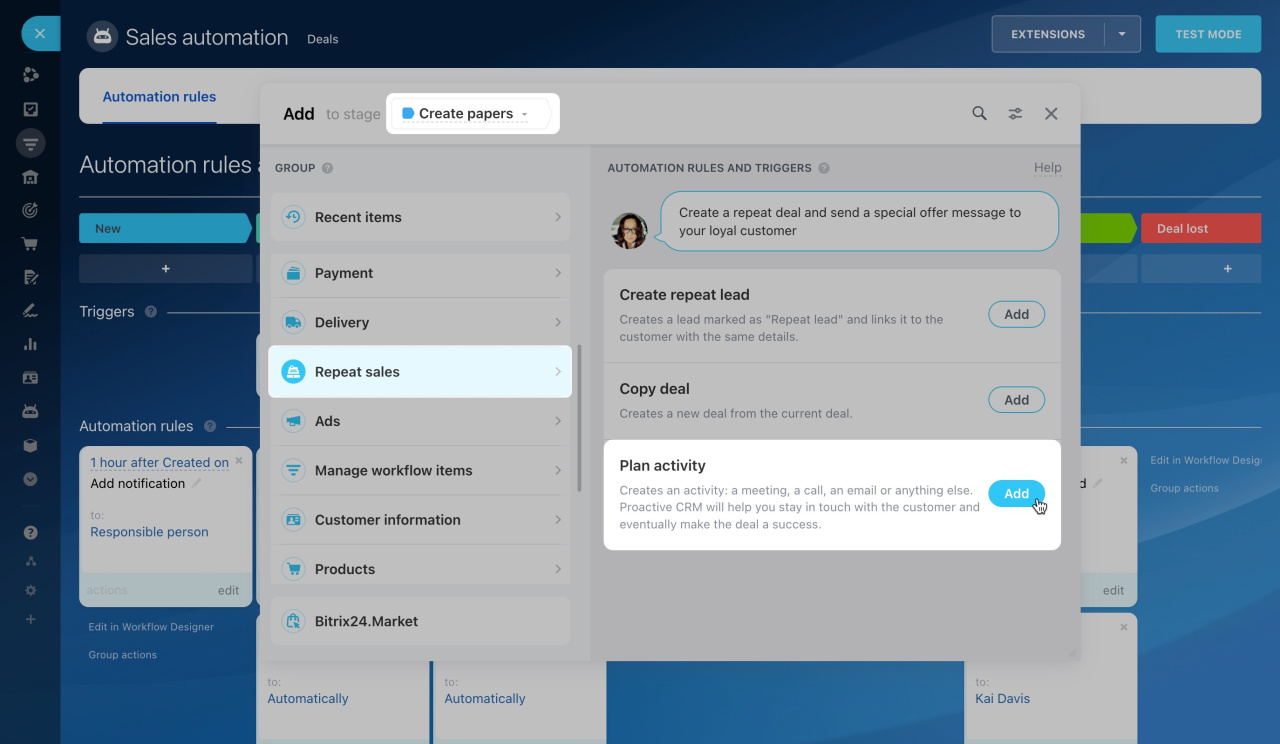
Plan activity
When a CRM item reaches a certain stage, this rule creates an activity like a meeting, call, or document preparation. This can help users remember to contact the client.
Universal activity in CRM
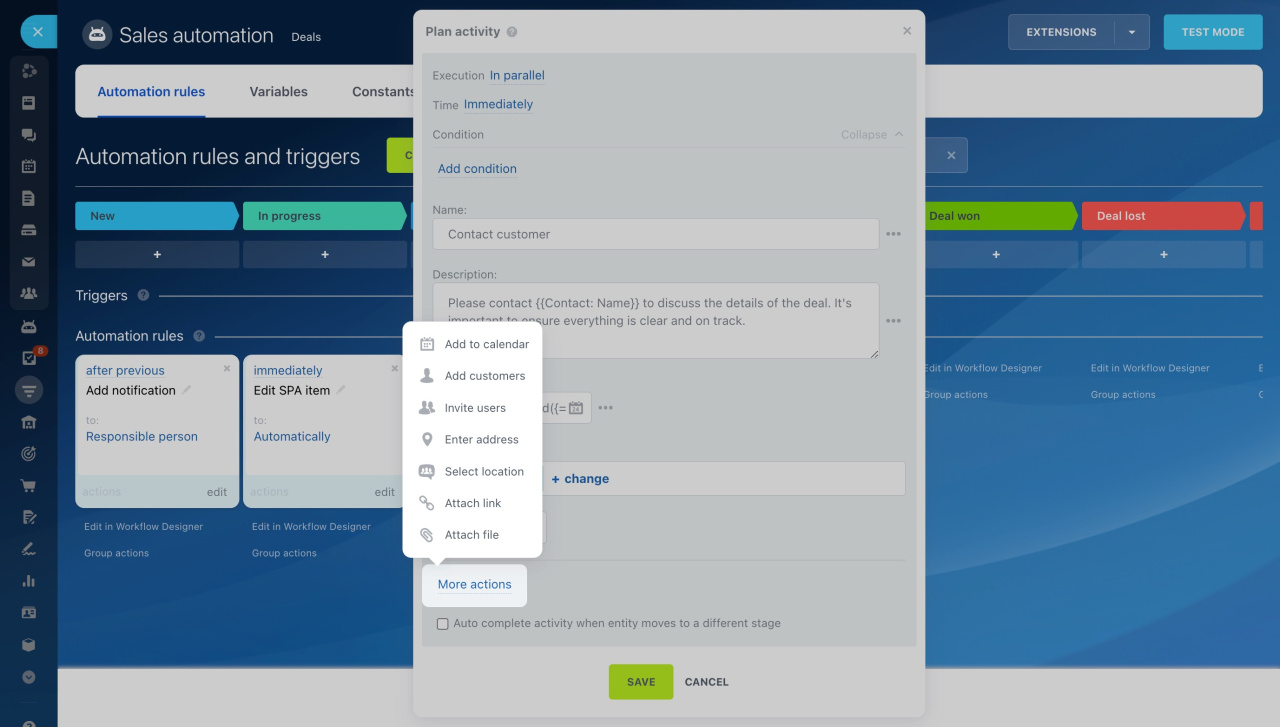
Create a rule for deals at the Create papers stage, and it will plan an activity for the sales manager to contact the client and discuss contract terms.
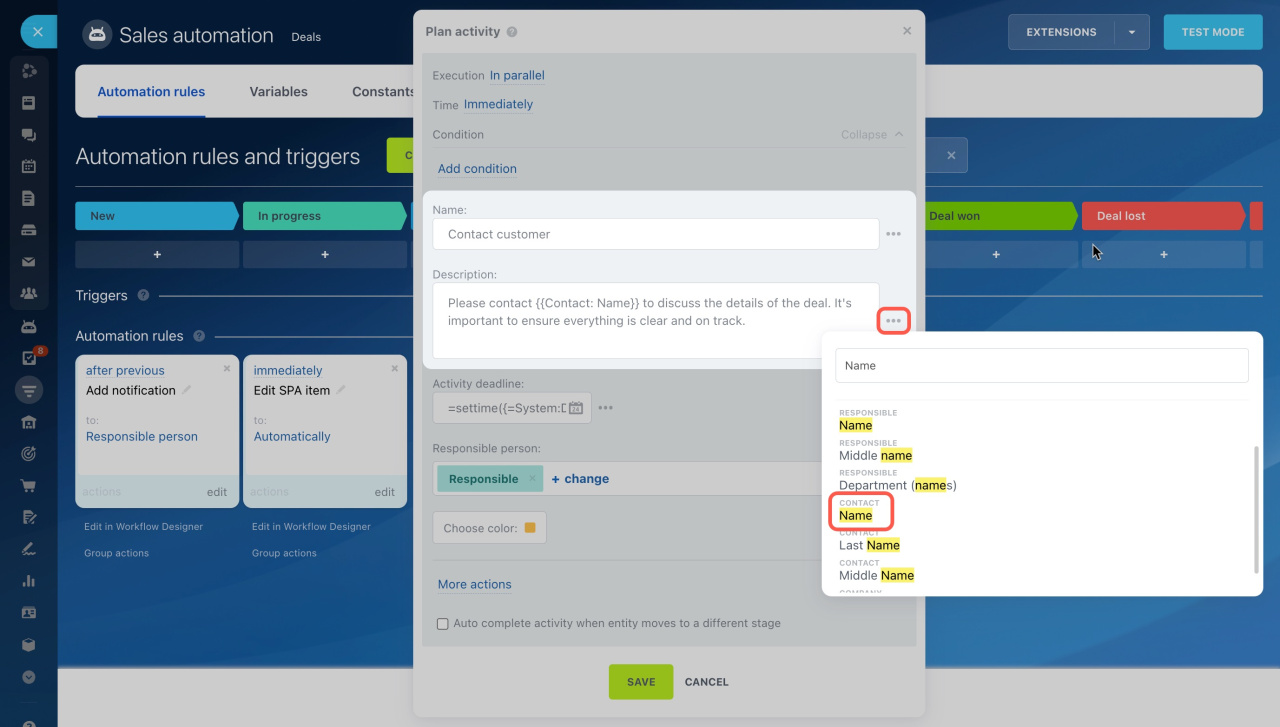
Name. Specify the activity name, like Contact customer.
Description: Specify what the sales manager needs to do. You can insert values from various CRM fields, like the name, client address, or comment. To do this, click the three dots (...) and select the desired field.
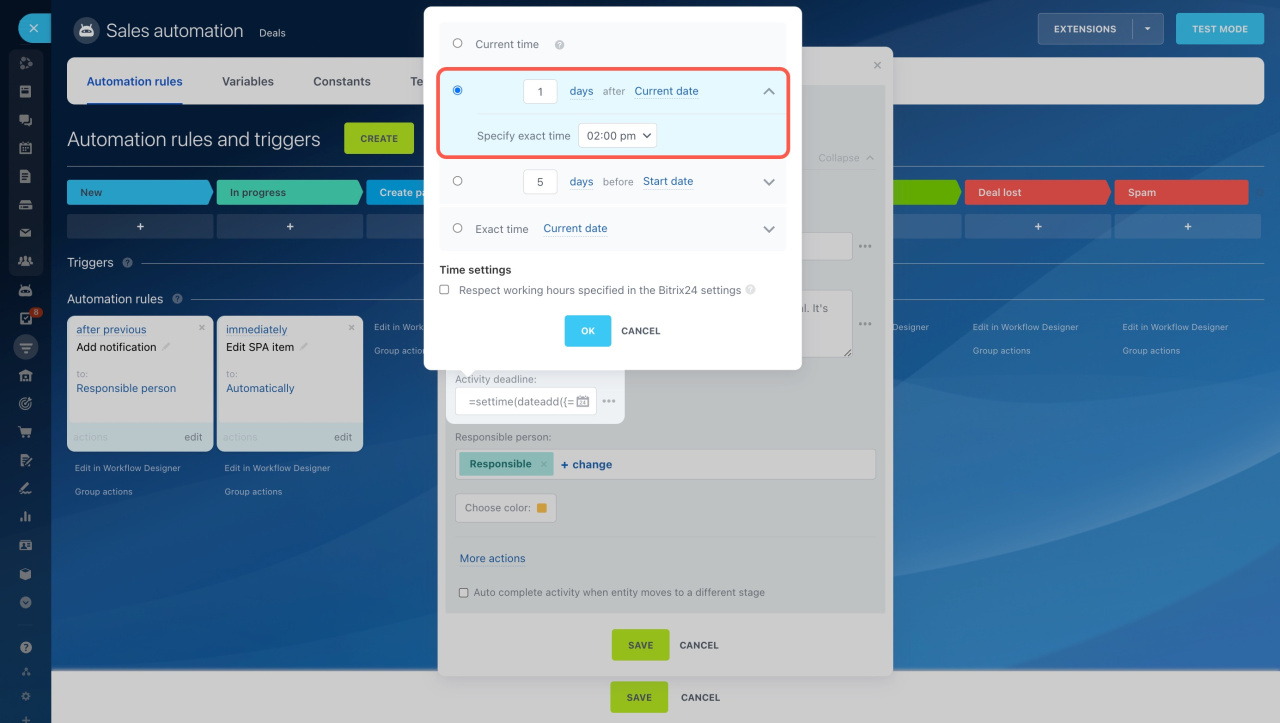
Activity deadline: Choose a date to complete your activity. For example, schedule it for tomorrow at 2:00 pm.
Time settings in automation rules
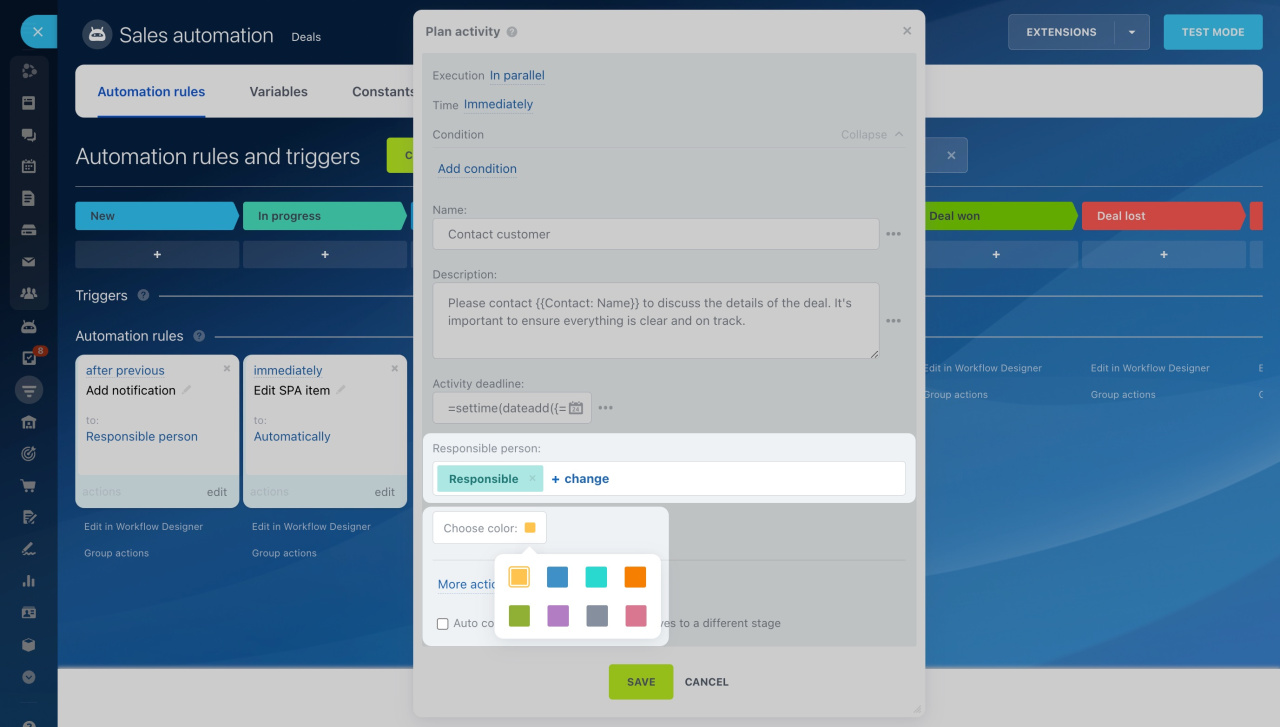
Responsible person: Choose an employee for the activity. By default, this is the deal's responsible person, but you can select another user.
Choose color: Use colors to separate activities by type: yellow for calls and green for meetings. If an activity is scheduled in an employee's calendar, the form's color in the calendar will match the activity's color in CRM.
More actions. You can select one or more actions:
- Add to calendar: The activity will appear in the calendar.
- Select customer: If there are several clients in the item form, you can add one or all of them to the activity. This will help the responsible user to contact the right client.
- Invite users: Add colleagues to the activity if you are working in teams.
- Enter address: Specify an address if the meeting is out of the office.
- Select location: Book a meeting room to hold the meeting in the office.
- Attach link: Attach a link to a Bitrix24 video conference if you have arranged an online meeting. You can insert values from CRM item fields.
- Attach file: Add a document or any other file.
Auto complete activity when entity moves to a different stage: If enabled, the activity will be automatically completed if a deal moves from the Create papers stage to the Final invoice stage. Disable this option if you want the sales manager to complete the activity manually.
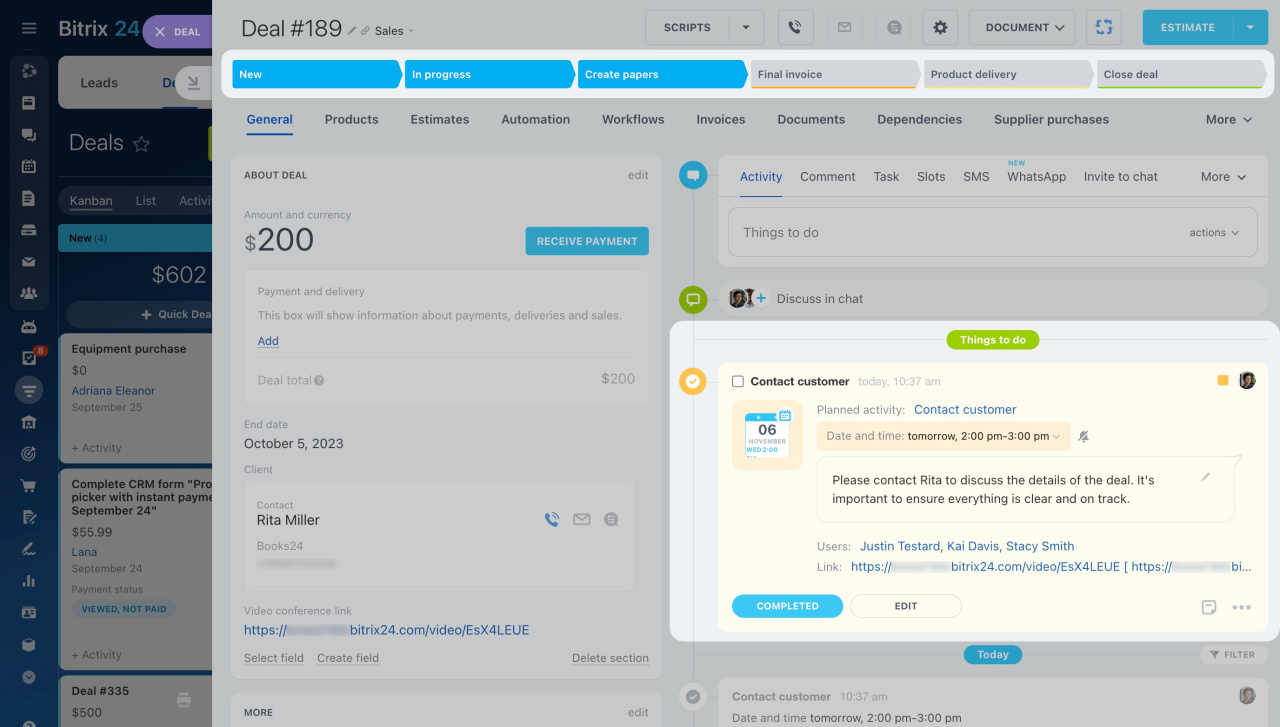
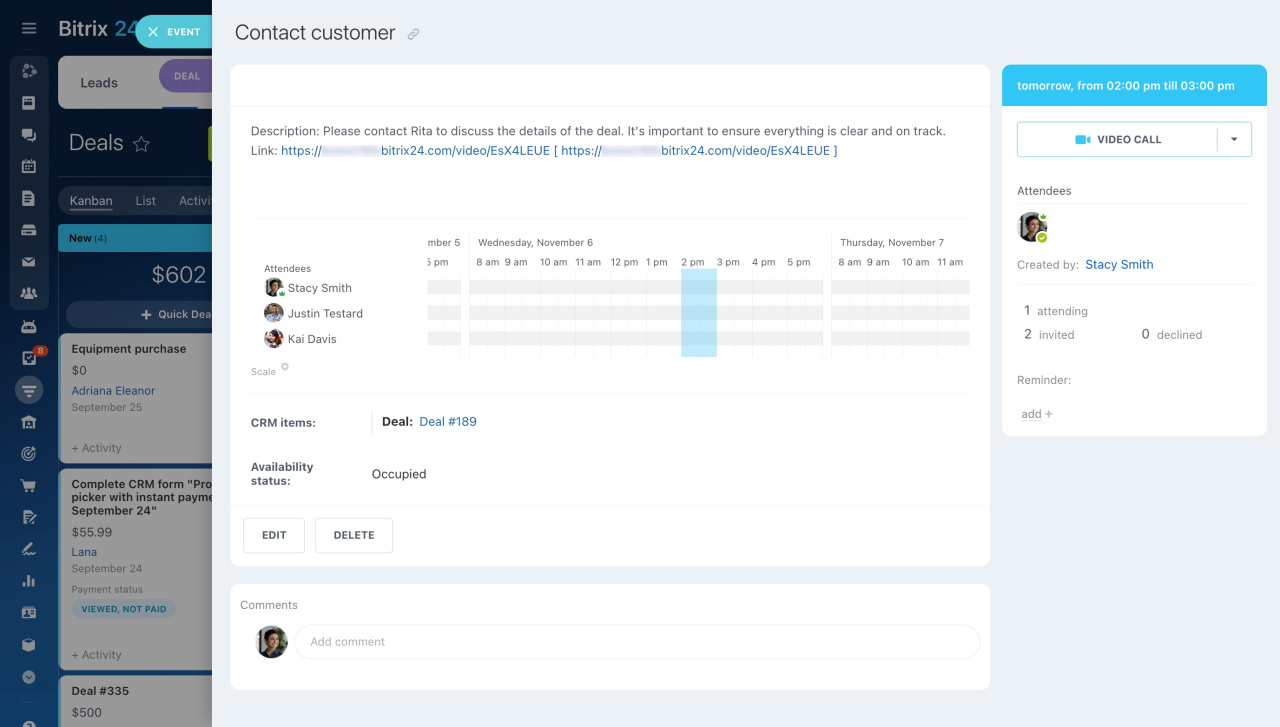
When a deal reaches the Create papers stage, the automation rule adds an activity for the sales manager. It is displayed in the CRM item form and the employee's calendar.
Read also:


