A workflow template is a pre-configured set of actions to quickly start a workflow. To use a template, fill out its parameters.
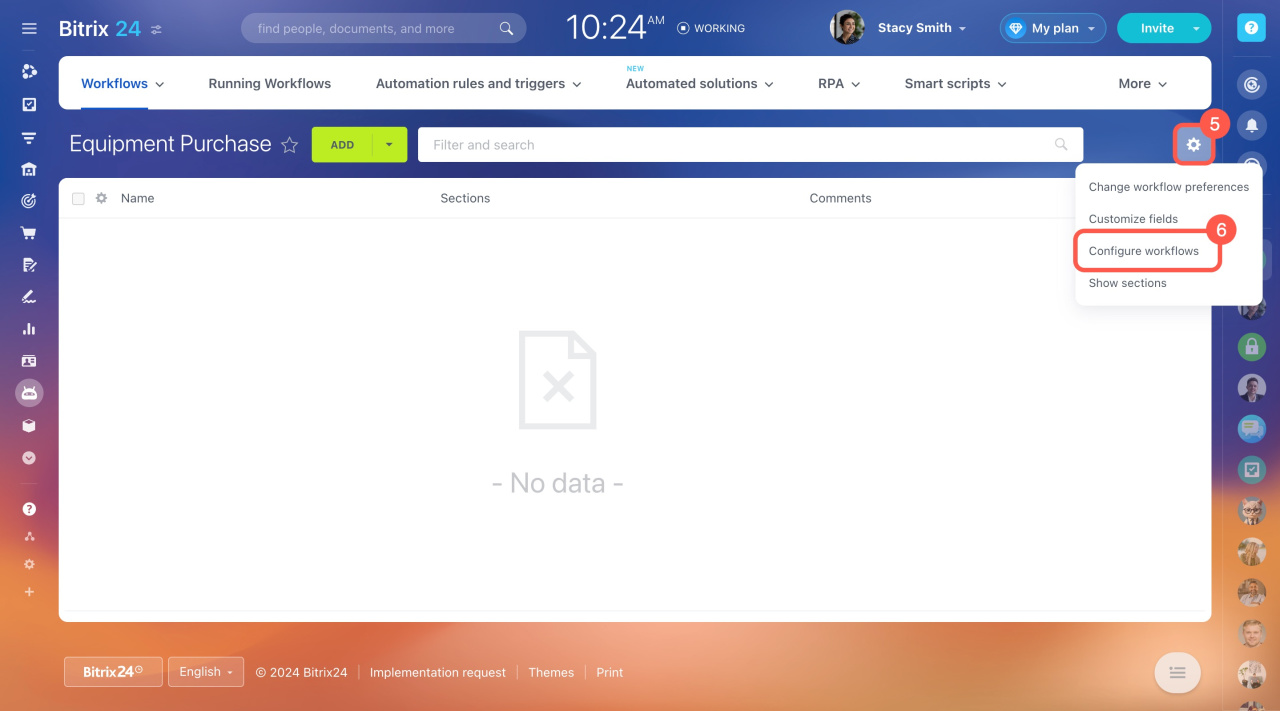
- Go to the Automation section.
- Click Workflows.
- Select Workflows in Feed.
- Open the workflow form.
- Click Settings (⚙️).
- Click Configure workflows.
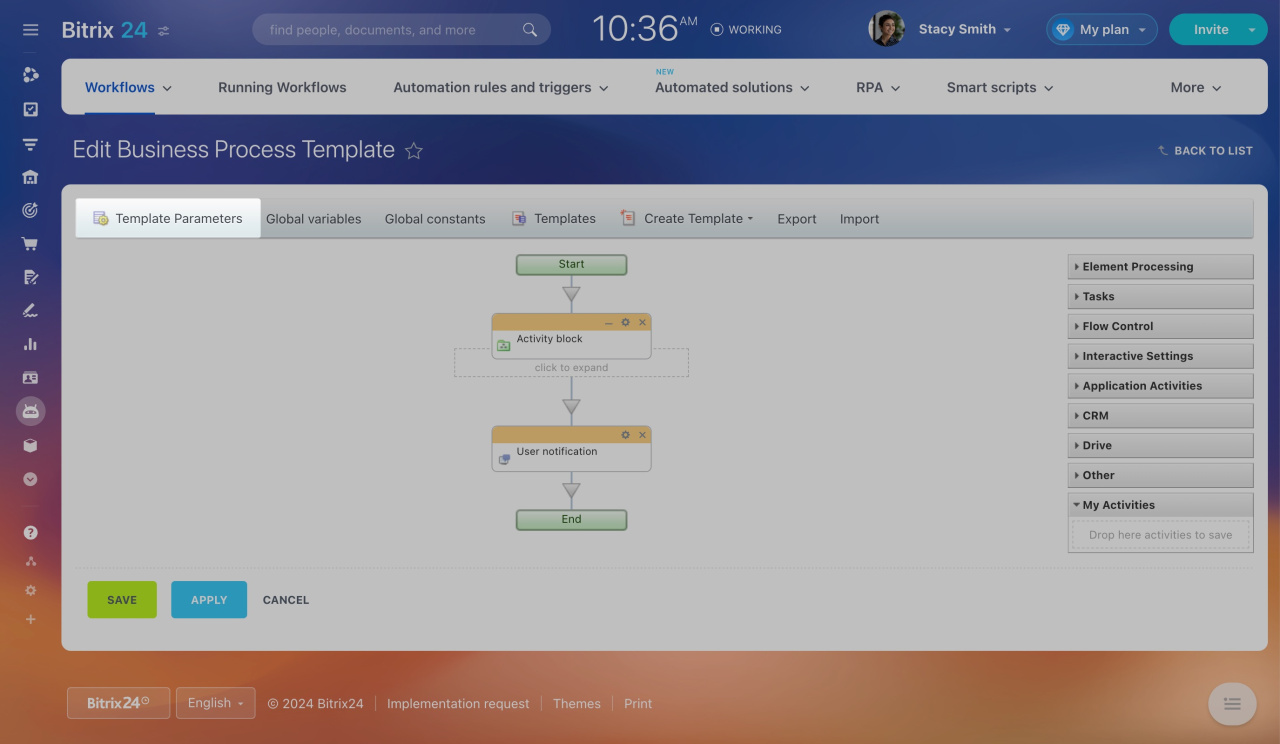
Open an existing template or create a new one. Then click Template Parameters.
Create a sequential workflow template
Create a status-driven workflow template
Specify basic information
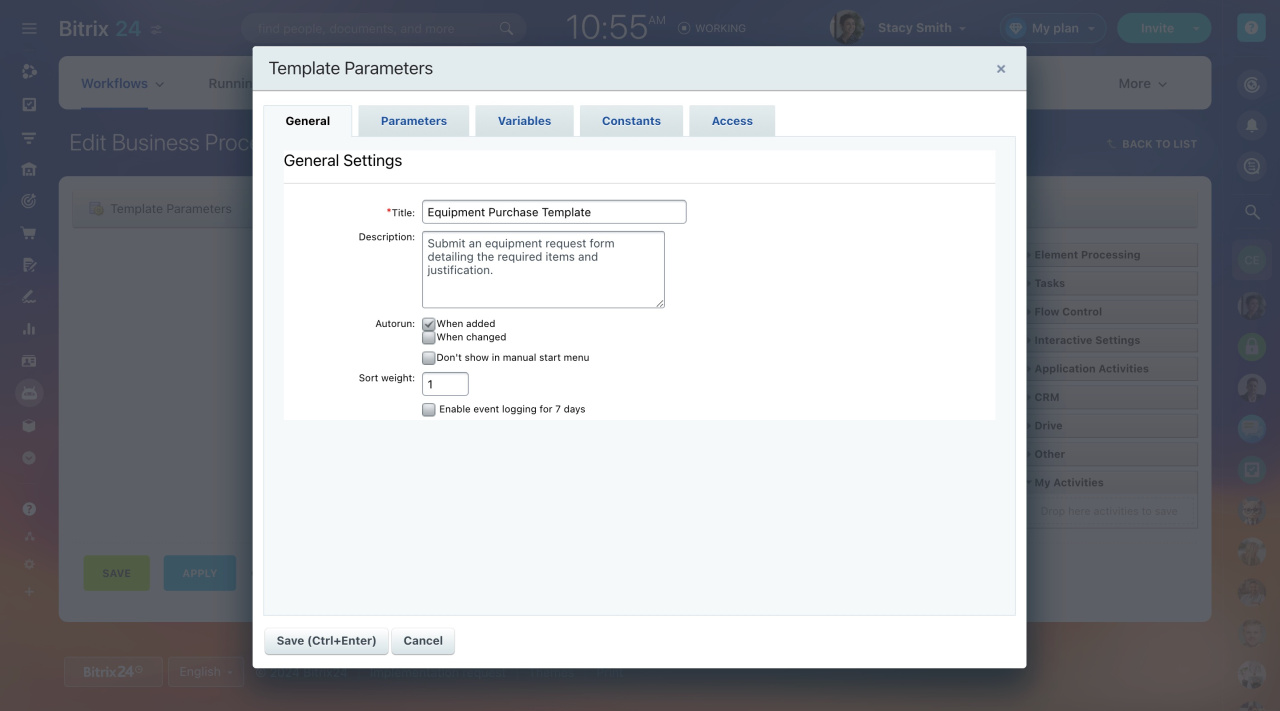
On the General tab, complete the following fields:
-
Title: Enter the name to display in the list of templates.
-
Description: Specify the workflow's purpose.
Choose whether to automatically run the workflow or start it manually.
-
There are two ways to automatically start the workflow:
When added: Starts when a user creates a workflow element.
When changed: Starts when a user changes a workflow element.
-
To start manually, disable the Autorun option.
-
Don't show in the manual start menu: If disabled, the template is shown in the list under the Run Business Process button inside a workflow element. Only users with Edit access can see it and run the workflow.
-
Sort weight: Specify the template's position on the list. Lower numbers appear higher. For example, use 1 for the first template, 2 for the second, and 3 for the third.
Click Save.
Add parameters, variables, and constants
Parameters: Data that can't be changed after a workflow starts. These values are defined by a user before running a workflow. For example, in the Equipment Purchase workflow, this could be the product name or a link to it.
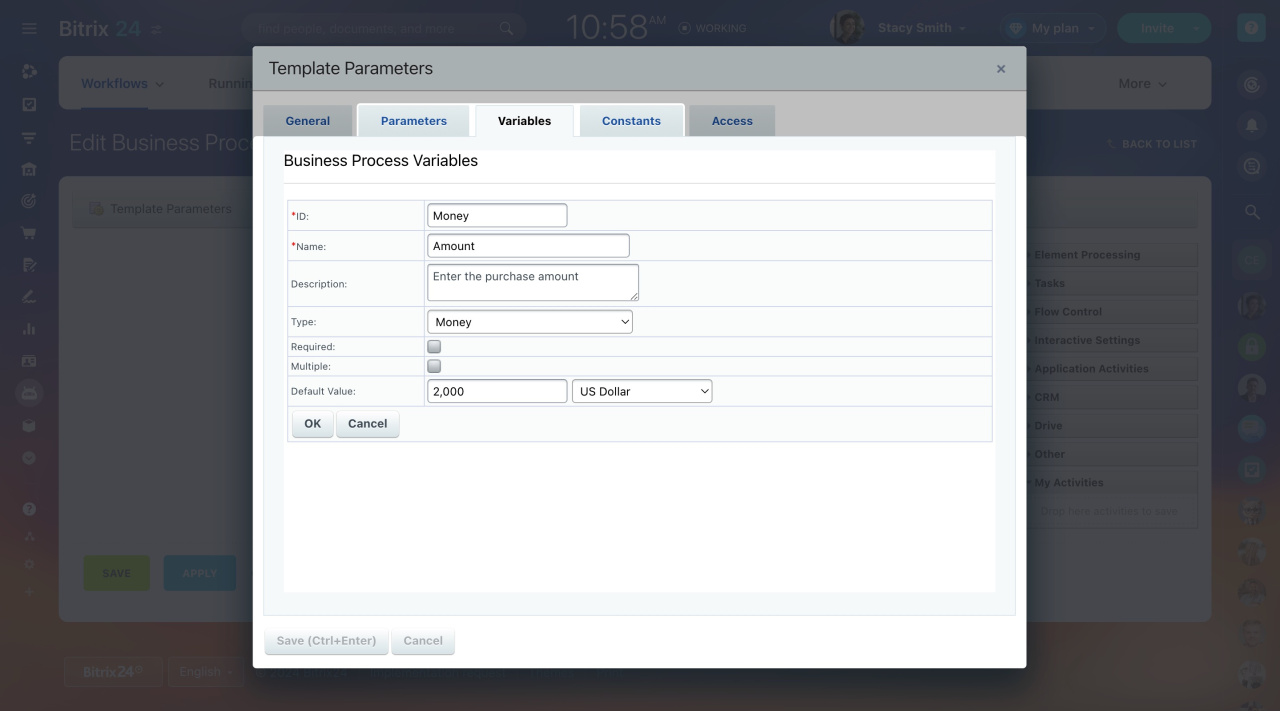
Variables: Temporary values that can be changed after a workflow starts. For example, the purchase amount or the name of the responsible employee.
Constants: Values that can't be changed after a workflow starts. For example, the company name or office address.
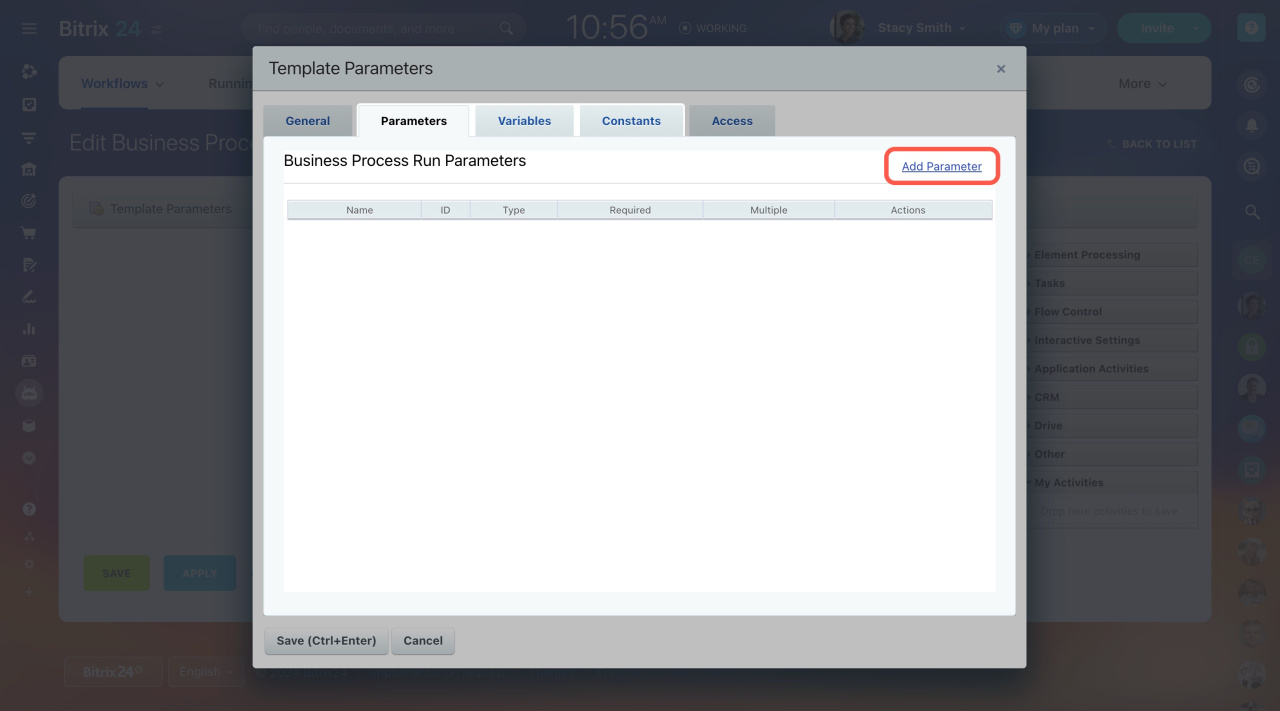
On the Parameters, Variables, and Constants tabs, click Add and fill out the fields. They are the same on each tab.
-
ID: Assign a unique code or number to each parameter, variable, and constant. Enter a custom value or leave the default one. This prevents duplicates and makes it easy to find and change values.
-
Name and Description: Specify these for a parameter, variable, or constant. For example, ask an employee to specify the purchase amount.
-
Type: Select the needed value type from the list. This ensures correct workflow execution when storing and processing data. Depending on the type, you can set additional parameters. For example, specify the currency for the Money type.
-
Required: Users can't start the workflow if they don't specify a value.
-
Multiple: Users can specify multiple values.
-
Default Value: Set this manually or add it using the Insert Value form. The field will be filled in automatically, but users can edit it. For example, for the Money variable, enter a specific amount in USD.
Insert Value Form
Click OK and Save.
Configure access
Set up access permissions for the template to allow your colleagues to use it.
-
Access denied: Users can't see the template in the list.
-
Read: Users can view the template.
-
Add: Users can add values.
-
Edit: Users can add, edit, and delete values.
-
Limited edit: Users can only edit the values. They can't delete or add them.
-
Full access: All actions are allowed.
-
View in Control Panel and Create on Control Panel: You don't need to fill these in.
To set up access permissions for the template,
- Open the Access tab.
- Click the three dots (...) next to a permission field.
- Select users and click Save.
Manage access permissions for workflow items and sections
In brief
A workflow template is a pre-configured set of actions to quickly start a workflow. To use a template, fill out its parameters.
- Go to Automation > Workflows > Workflows in Feed.
- Open the workflow form, click Settings (⚙️), and select Configure workflows.
- Open an existing template or create a new one. Click Template Parameters.
- Complete the Parameters, Variables, and Constants tabs and set up access permissions for the template. Remember, workflow access permissions take priority over template permissions.


