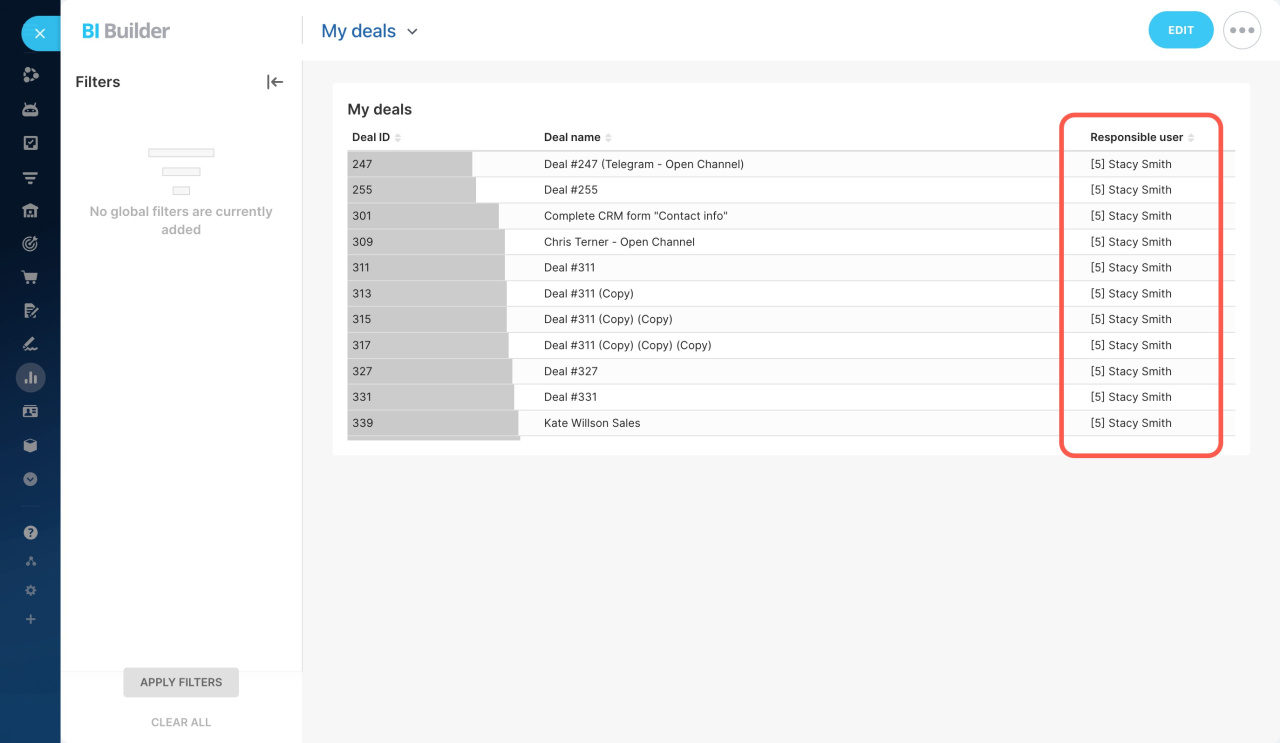
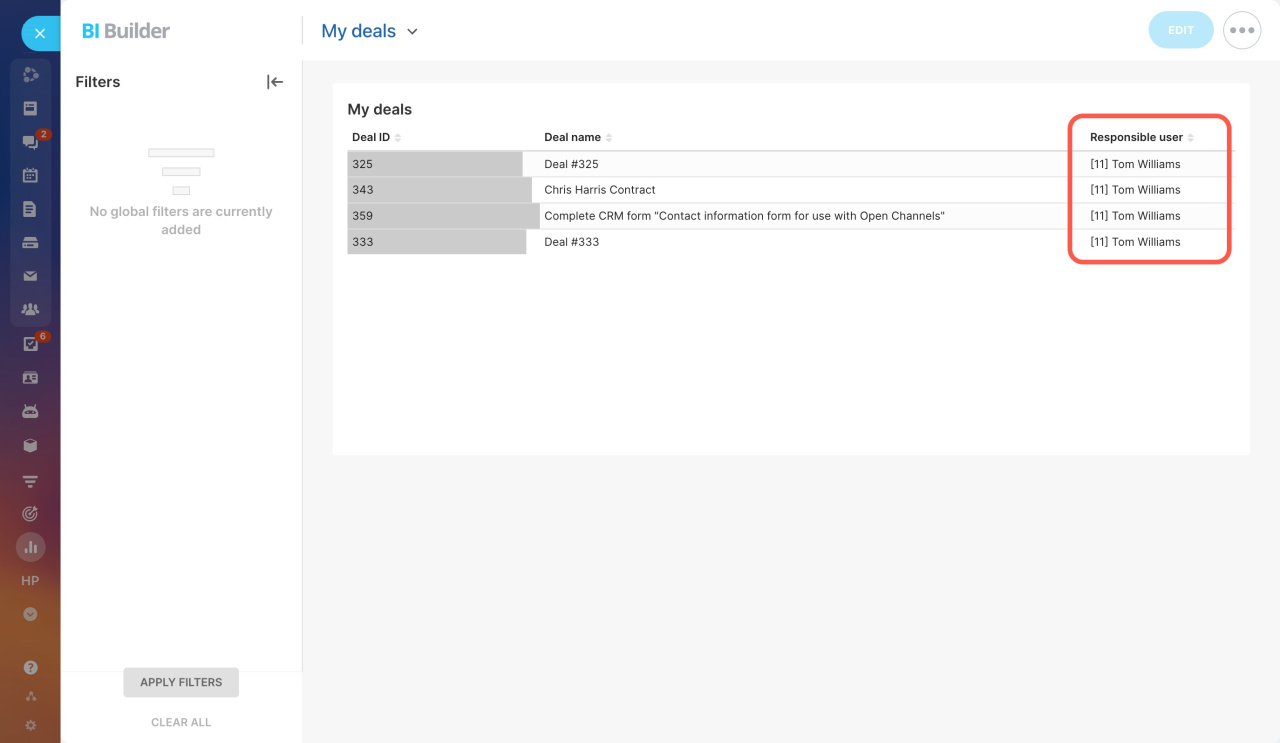
Parameters are variables that let you filter data or display specific values in your dashboards. For example, by adding the User ID parameter to your query, each employee will only see their data in the dashboard. This allows you to filter information without creating new dashboards or separate charts.
In this article:
Set dashboard parameters
Configure parameters and choose where your dashboards will be available in Bitrix24:
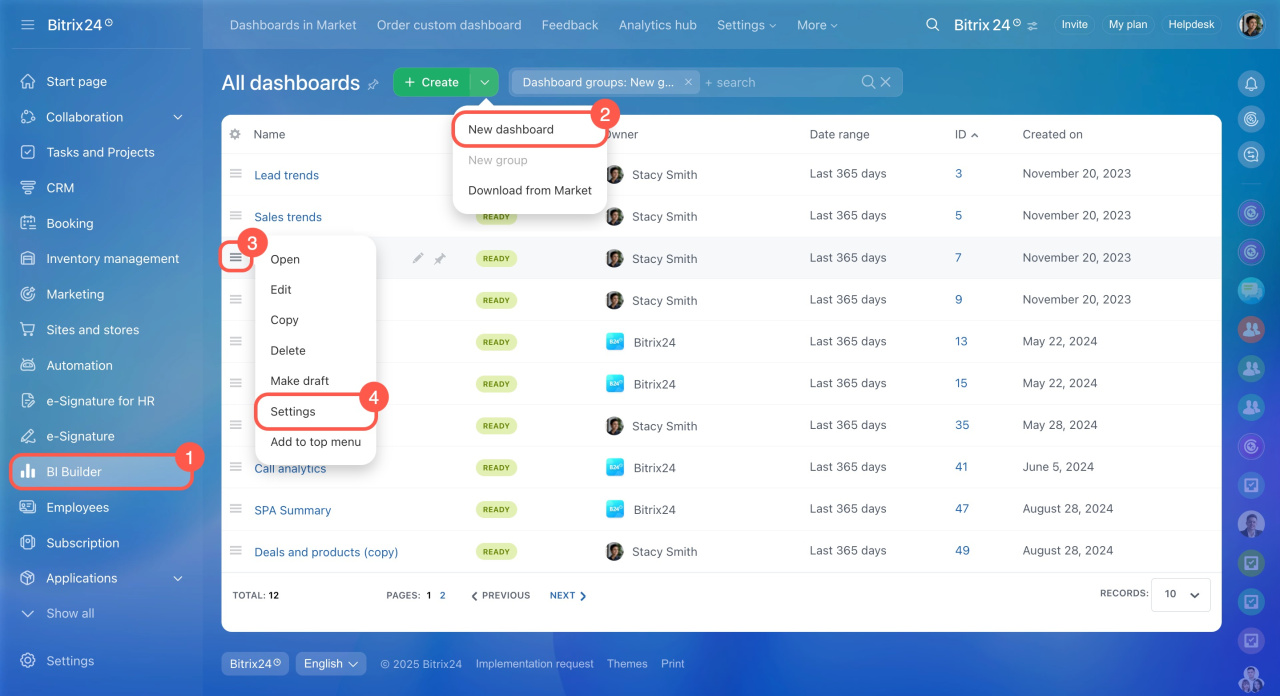
- Go to the BI Builder section.
- To create a dashboard, click New dashboard.
- To edit an existing dashboard, open the Menu (≡) and select Settings.
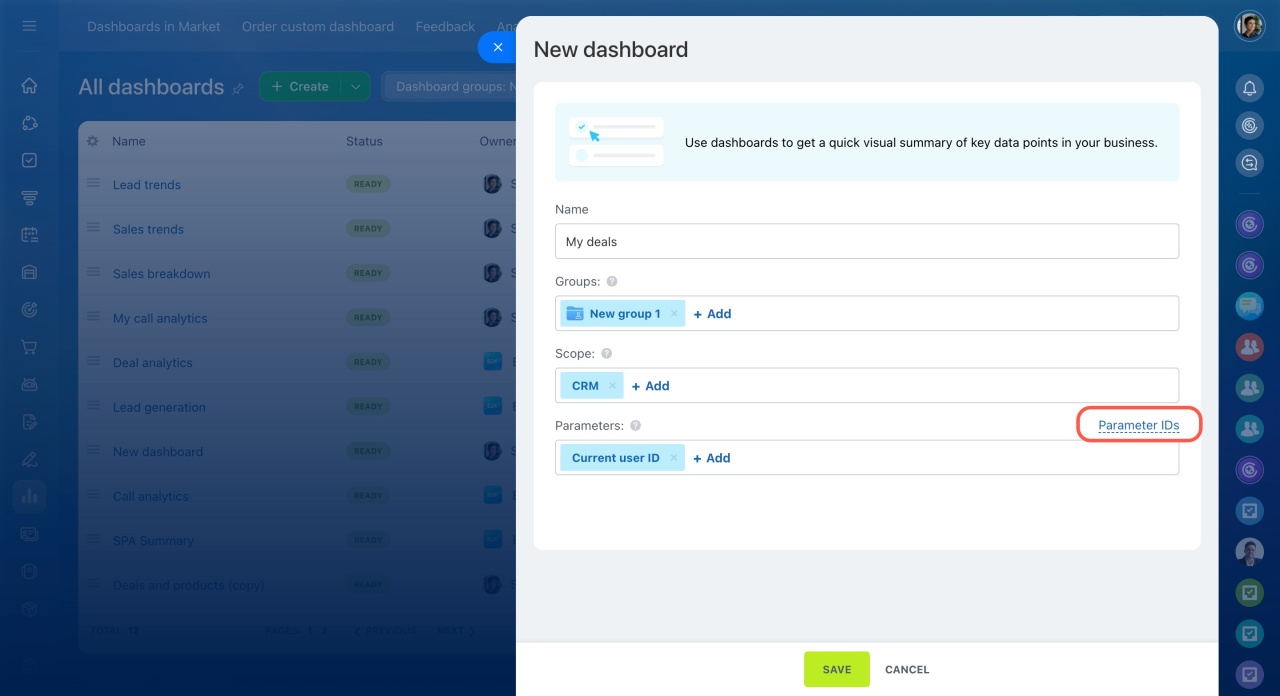
When creating a dashboard, enter a name, select the groups, and specify the required parameters. Groups define where the dashboard will appear and who can access it. If the dashboard isn’t added to any group, only the creator and the administrator will be able to see it.
Configure access permissions for BI Builder
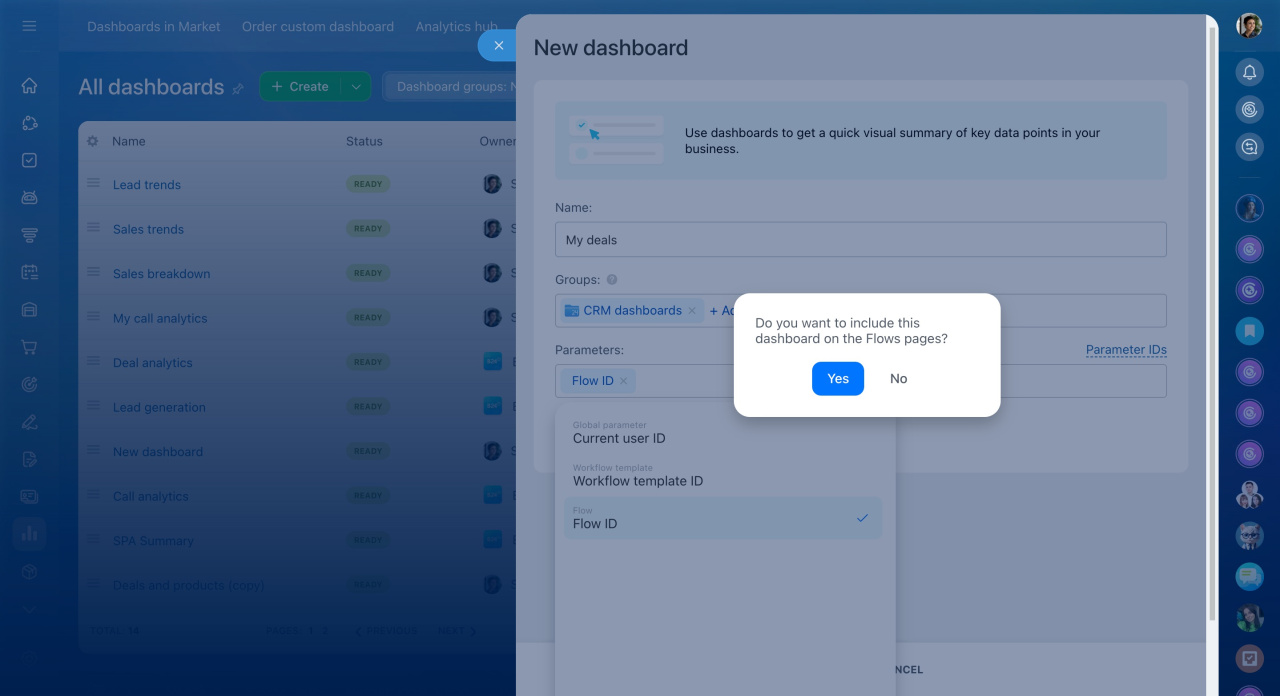
After adding a parameter, the dashboard can be linked to the analytics of the selected tool. For example, if you use the Flow ID parameter, the dashboard will be accessible by clicking on the flow status. If you add the Workflow template ID parameter, the dashboard will appear in the workflow journal form.
How to use flow and workflow template parameters
Next, add the selected parameters to your dataset. Charts are based on the dataset, so you need to include the parameters in your query. Otherwise, they won’t work. Check the Parameter IDs section and note the IDs you need for the dataset.
Create a dataset
After saving the dashboard, it will appear in the list in a draft status, visible only to the creator. You can modify the data or structure of the dashboard, and no one will see the changes until it's published. To open the BI Builder and create a dataset, click Edit.
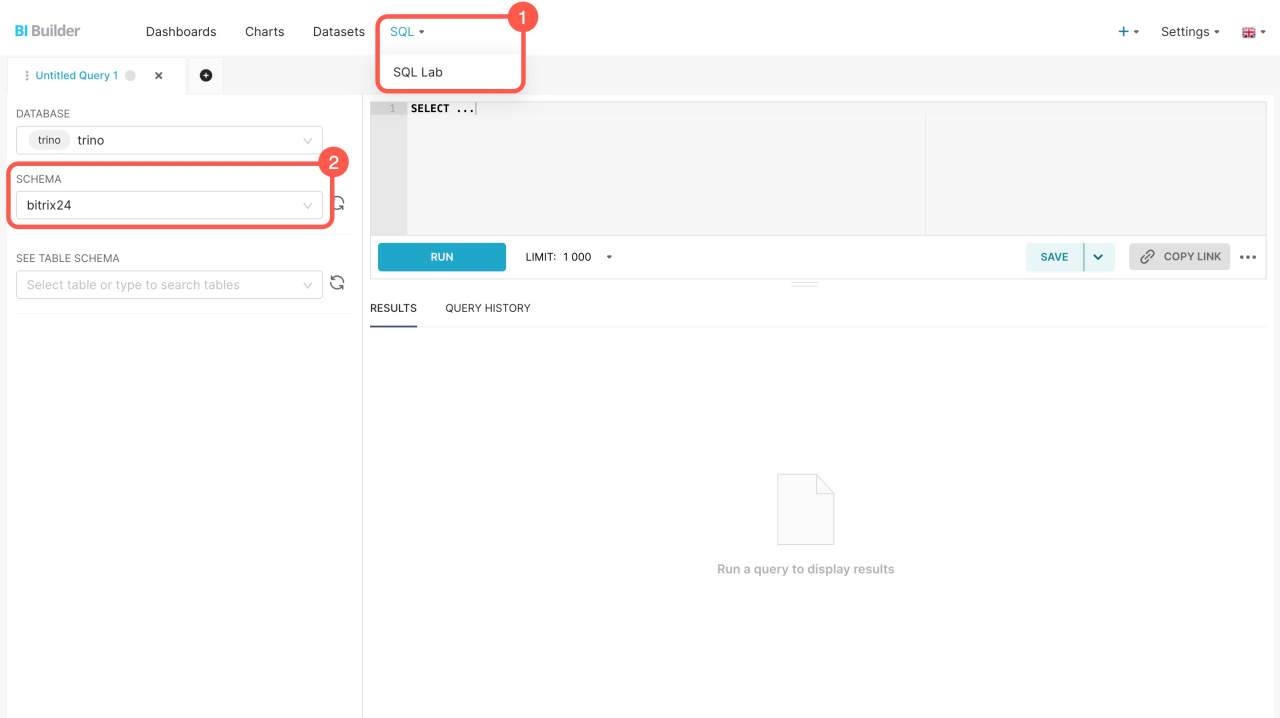
- In the BI Builder, go to SQL > SQL Lab.
- Select the bitrix24 schema.
- Enter your SQL query and click Run.
You can use a Jinja template in your query to change parameters dynamically. For example, set a condition: if the Current user parameter is missing, the query displays all the data. If the link includes the Current user parameter, it will only show data for the employee who opened the dashboard. This allows you to save the dataset immediately and use it in dashboards.
Using Jinja Templates in BI Builder
WHERE
    true
    {% if url_param('current_user') is not none %}
    AND crm_deal.ASSIGNED_BY_ID = {{ url_param('current_user') }}
    {% endif %}
When creating a dataset with specific values in the query, avoid adding parameters initially, as they won't work. Instead, add parameters when editing the completed dataset.
If you're creating a dataset for the first time, refer to the sample query.
Example of an SQL query
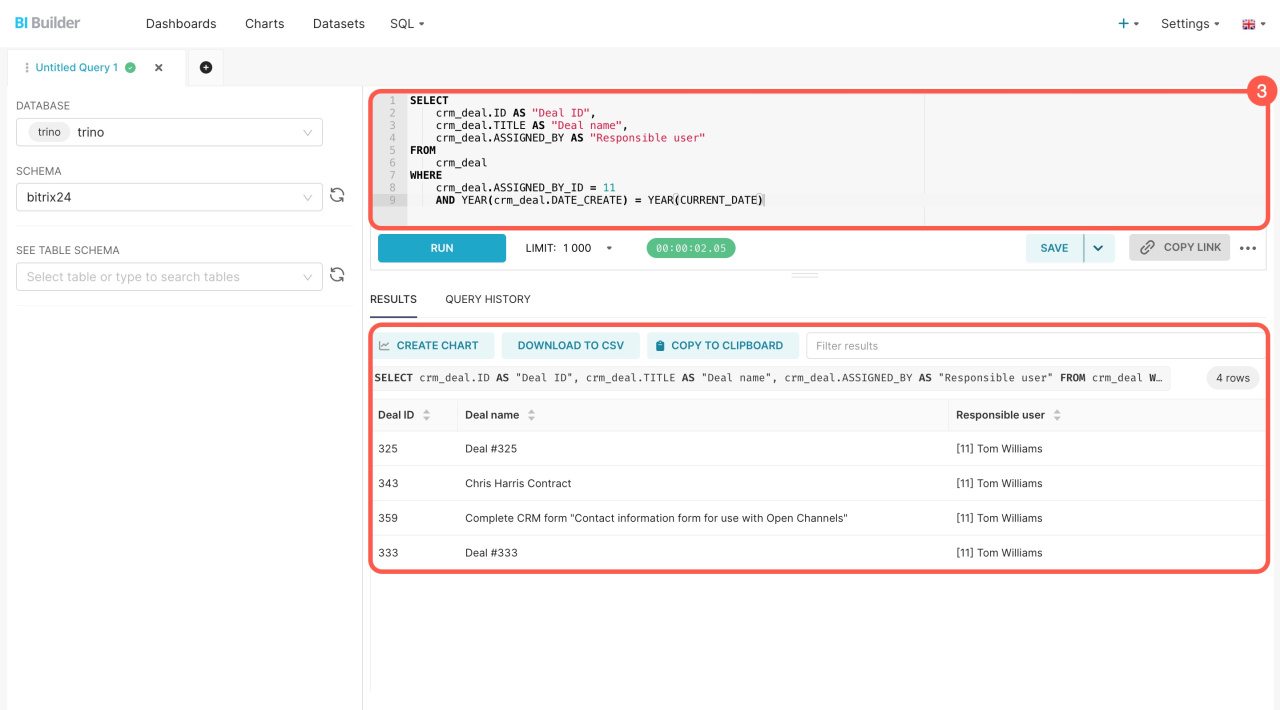
Here's an SQL query to extract data from the deal dataset (crm_deal). You can copy it and see how it works. The query selects deals assigned to a specific employee and created during the current year.
SELECT
    crm_deal.ID AS "Deal ID",
    crm_deal.TITLE AS "Deal name",
    crm_deal.ASSIGNED_BY AS "Responsible user"
FROM
    crm_deal
WHERE
    crm_deal.ASSIGNED_BY_ID = 11
    AND YEAR(crm_deal.DATE_CREATE) = YEAR(CURRENT_DATE)
SELECT: Chooses which data to extract. For example, the SELECT crm_deal.ID AS "Deal ID" part does the following:
- Selects the deal
IDfrom thecrm_dealdataset - Assigns it the name
Deal ID - Displays the result in a separate column
FROM: Specifies the main table for the query, such as the crm_deal table containing information about deals.
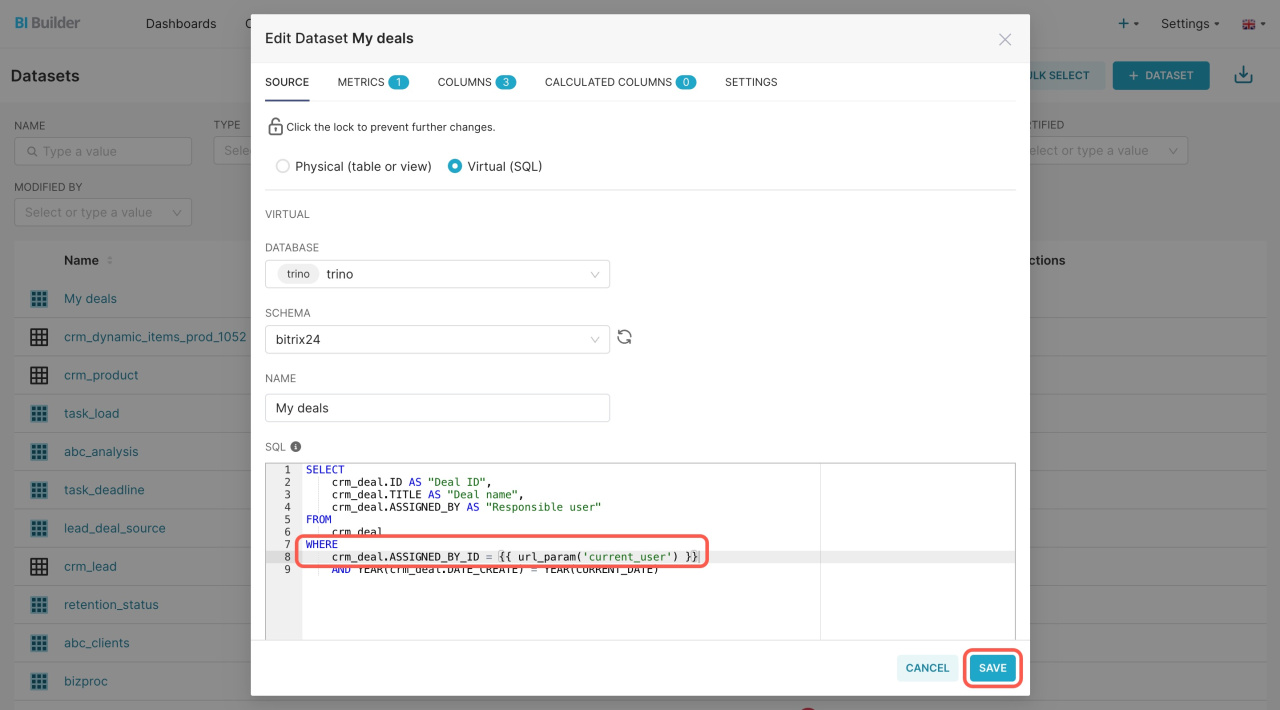
WHERE: Filters the query results to show deals assigned to a specific employee and created during the current year. To check the query, specify an employee's ID. Later, you should replace it with the parameter {{ url_param('current_user') }} to filter the data, so each employee will see only their information in the dashboard.
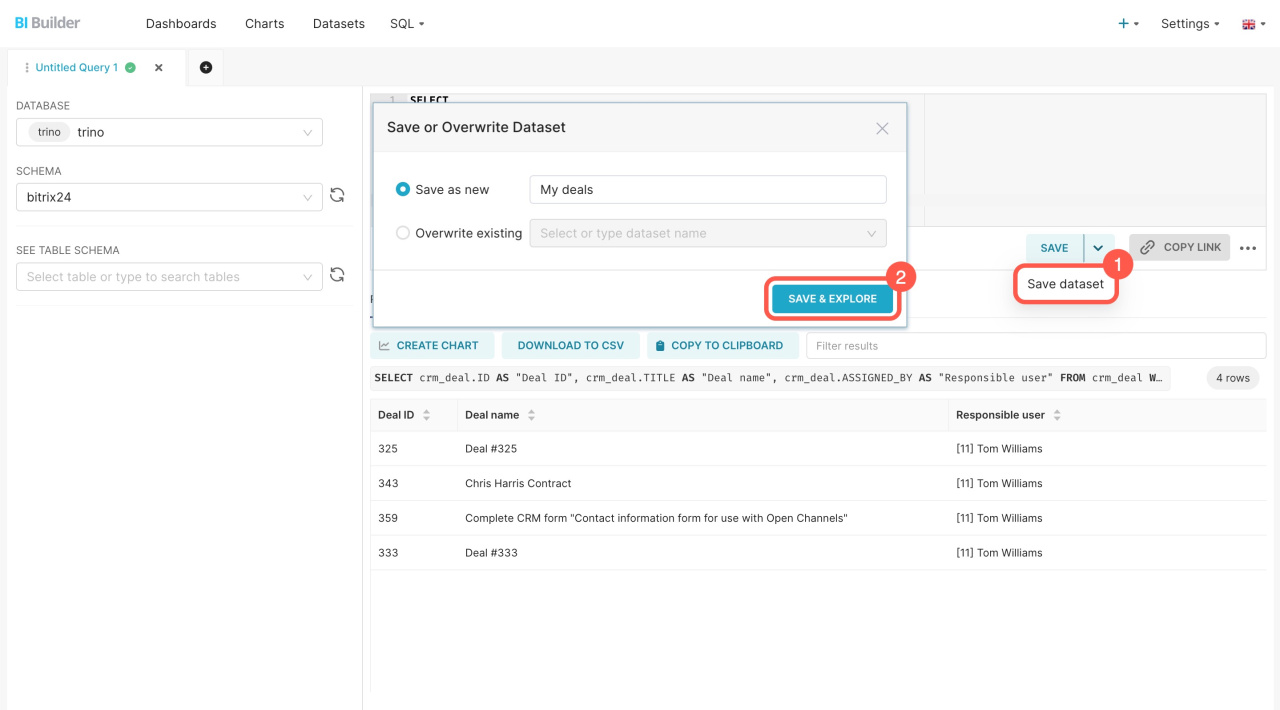
Save the results as a dataset and create a chart for the dashboard.
Create a chart based on a virtual dataset
Edit a dataset
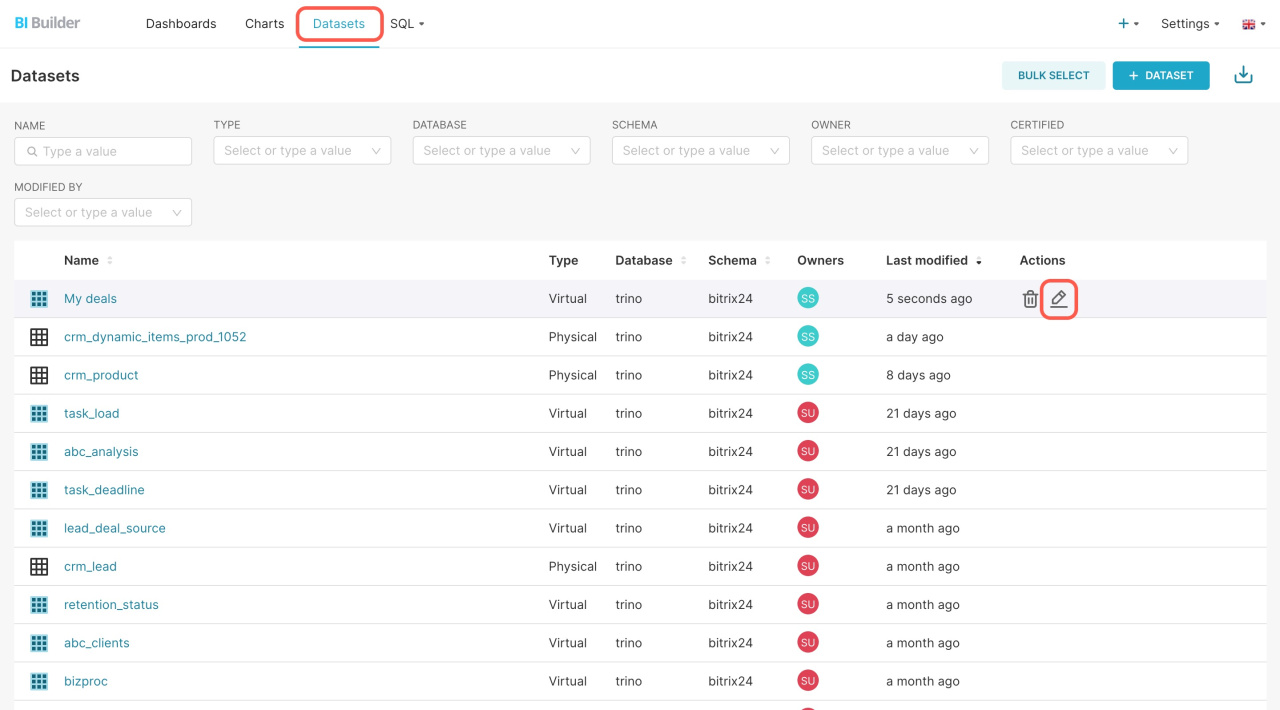
To add a parameter, open the Datasets tab, select the dataset you created, and click Edit.
Modify the SQL query by adding this parameter: WHERE crm_deal.ASSIGNED_BY_ID = {{ url_param('current_user') }}. Then, save the changes. When employees open the dashboard in Bitrix24, the parameter will automatically insert the correct ID, allowing each user to see only their data.
Check how it works
Open the dashboard in Bitrix24 and ensure the charts display the information for each specific user. If the parameter is set up correctly, the dashboard creator will see only their deals.
To make the dashboard available to others, open the Menu (≡) and click Publish.
Once published, ask employees to confirm they see only their information.
In brief
-
Parameters are variables that help you choose the data to display in your dashboards. They allow you to filter information without creating new dashboards or separate charts.
-
Set parameters and groups when creating or editing a dashboard. Specify where the dashboard will be visible and select the required parameters.
-
Add these parameters to the dataset. Include them in the SQL query to build the charts in the dashboard.
-
Check how it works. Open the dashboard in Bitrix24 and ensure the charts display the information correctly. Once verified, publish it for other users.

